1
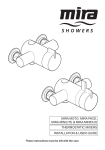
MIRA INFUSE & MIRA MINIBELLE
THERMOSTATIC MIXERS
INSTALLATION & USER GUIDE
These instructions must be left with the user.
1
CONTENTS
INTRODUCTION
Introduction2
Patents
Thank you for purchasing a quality Mira product. To
enjoy the full potential of your new product, please
take time to read this guide thoroughly, having
done so, keep it handy for future reference.
2
Safety Warnings
3
Pack Contents
3
Specifications
4
The Mira Infuse and Mira Minibelle are thermostatic
mixers which have separate flow and temperature
controls. They are supplied complete with Mira
L98B Shower Fittings.
Pressures4
Temperatures4
Thermostatic Shut-down
4
Connections4
The thermostatic mixers incorporate a wax
capsule temperature sensing unit, which provides
an almost immediate response to changes in
pressures or temperature of the incoming water
supplies, to maintain the selected temperature. An
adjustable maximum temperature stop is provided
which limits the temperature to a safe level.
Inlet filters are fitted to protect the thermostatic
cartridge.
Dimensions4
Installation 5
Suitable Plumbing Systems
5
General5
Flow Regulator
5
Installing the Thermostatic Mixer
6
Commissioning9
Maximum Temperature Setting
9
Guarantee
Operation9
Temperature Control
Flow Control
For domestic installations, Mira Showers
guarantee the Mira Infuse and Mira Minibelle
against any defect in materials or workmanship for
a period of three years from the date of purchase
(shower fittings for one year).
9
9
User Maintenance
10
Fault Diagnosis
10
Lubricants10
For terms and conditions refer to the back cover
of this guide.
Cleaning10
Spare Parts
Customer Service
11
Back Page
If you experience any difficulty with the
installation or operation of your new
thermostatic mixer, please refer to ‘Fault
Diagnosis’, before contacting Mira Showers.
Our telephone and fax numbers can be found
on the back cover of this guide.
2
Recommended Usage
Application
SAFETY WARNINGS
Valve with
Fittings
Domestic
ü
Light Commercial
û
Heavy Commercial
û
Healthcare
û
Mira thermostatic mixers are precision engineered
and should give continued safe and controlled
performance, provided:
1. They are installed, commissioned, operated and
maintained in accordance with manufacturers
recommendations.
2. Periodic attention is given, when necessary,
to maintain the product in good functional
order.
Caution!
1. Read all of these instructions.
2. Retain this guide for later use.
3. Pass on this guide in the event of change of
ownership of the installation site.
4. Follow all warnings, cautions and instructions
contained in this guide.
5. Anyone who may have difficulty understanding
or operating the controls of any shower should
be attended whilst showering. Particular
consideration should be given to the young,
the elderly, the infirm or anyone inexperienced
in the correct operation of the controls.
6. Rapid/Excessive movement of the flow and/
or temperature control levers may result in
momentary unstable blend temperatures.
7. Care is required when adjusting flow or
temperature, make sure that the temperature
has stabilised.
8. Do not remove or tighten the body grubscrews.
Patents and Design Registration
Patents:
GB:
2 340 210, 2 392 223, 2 392 224
Patent Applications
Euro:
1 672 257
US:2006-0124758-A1
Design Registration:
000793401-00012-00016
Caution! Do not remove or
tighten these grubscrews.
9. When this product has reached the end of its
serviceable life, it should be disposed of in a
safe manner, in accordance with current local
authority recycling, or waste disposal policy.
3
PACK CONTENTS
SPECIFICATIONS
Tick the appropriate boxes to familiarise yourself
with the part names and to confirm that all of the
parts are included.
Pressures
•
•
•
q 1 x Thermostatic Mixer
(supplied fitted to the backplate)
•
Max Static Pressure: 10 Bar.
Max Maintained Pressure: 5 Bar.
Min Maintained Pressure (Gravity System):
0.1 Bar. (0.1 bar = 1 Metre head from cold
tank base to shower handset outlet).
Note! For gravity fed / other low pressure
systems (0.5 bar or below) remove the outlet
flow regulator. Refer to section: ‘Installation,
Flow Regulator’.
For optimum performance supplies should be
nominally equal.
Temperatures
•
•
•
q 1 x Concealing Plate
q1x
•
•
M4 x 12 mm Grubscrew
q 2 x Olives
Factory Pre-set (Blend) Shower: 43°C.
Optimum Thermostatic Control Range: 35°C
to 43°C (achieved with supplies of 15°C cold,
65°C hot and nominally equal pressures).
Recommended Hot Supply: 60°C to 65°C
Note! The mixing valve can operate at
higher temperatures for short periods without
damage, however this could detrimentally
affect thermostatic performance. For safety
and performance reasons it is recommended
that the maximum hot water temperature is
limited to 65°C.
Cold Water Range: up to 25°C.
Minimum Recommended Differential between
Hot Supply and Outlet Temperature: 12°C.
Thermostatic Shut-down
q 4 x Wall plugs
•
q 4 x Fixing Screws
q 1 x 2 mm Hexagonal Key
For safety and comfort the thermostat will
shut off the mixing valve within 2 Seconds if
either supply fails. (achieved only if the blend
temperature has a minimum differential of
12°C from either supply temperature).
Connections
The thermostatic mixer can only be installed with
rear supply inlets and the supply pipework must
be connected as follows:
Hot: Bottom (side nearest flow control),
15 mm compression.
Documentation
•
q 1 x Guarantee Registration Document
•
•
Cold: Top (side nearest temperature control),
15 mm compression.
Outlet: ½” BSP Male to flexible hose.
Note! This product does not allow for reversed
inlets and will deliver unstable temperatures if
fitted incorrectly.
4
Hot
Cold
INSTALLATION
Suitable Plumbing Systems
Gravity Fed:
The thermostatic mixer must be fed from a cold
water cistern (usually fitted in the loft space) and
a hot water cylinder (usually fitted in the airing
cupboard) providing nominally equal pressures.
Mains Pressurised Instantaneous Hot Water
System (Combination Boiler):
The thermostatic mixer can be installed with
systems of this type with balanced pressures.
(Recommended Minimum Maintained Pressure:
1.0 Bar).
Unvented Mains Pressure System:
The thermostatic mixer can be installed with an
unvented, stored hot water system.
Outlet
Dimensions
Pumped System:
The thermostatic mixer can be installed with an
inlet pump (twin impeller). The pump must be
installed in a suitable location and in accordance
with its instructions.
107
Ø42
Ø47
Installation must be carried out in accordance
with these instructions, and must be conducted by
designated, qualified and competent personnel.
The installation must comply with the “Water
Supply Regulations 1999 (Water Fittings)” or any
particular regulations and practices, specified by
the local water company or water undertakers.
Note! Make sure that all site requirements
correspond to the information given in section:
‘Specifications’.
174
59
General
51
All dimensions in mm
1. The Mixer must not be installed in an area
where it may freeze.
2. For stud partitions alternative fixings may be
required.
3. Isolating valves must be installed close to the
Mixer for ease of maintenance.
4. Pipework must be rigidly supported and avoid
any strain on the connections.
5. Pipework dead-legs should be kept to a
minimum.
5
Installing the Thermostatic Mixer
6. Decide on a suitable position for the Mixer.
The position of the Mixer and the Shower
Fittings must provide a minimum gap of 25 mm
between the spill-over level of the shower
tray/bath and the handset (refer to illustration).
This is to prevent back-siphonage. For further
information on the installation of your Shower
Fittings, refer to the Fittings Installation and
User Guide.
Note! Only use Shower Fittings recommended
by the manufacturer or supplier.
1. The thermostatic mixer must be fitted vertically
as illustrated and can only be installed with
rear supply inlets. The supply pipework must
be connected as follows:
•
Hot to Bottom Inlet
•
Cold to Top Inlet
•
Bottom Outlet.
Important! This product does not allow for
reversed inlets.
2. Determine the route for the hot and cold supply
pipework.
Hot
Cold
25 mm
Spill Over
Level
Flow Regulator
Site conditions will determine the flow regulator
requirements.
For gravity fed / other low pressure systems
(0.5 bar or below) remove the outlet flow
regulator.
Outlet
4. Loosen the 2 backplate grubscrews with
the 2 mm hexagon key (supplied) and pull
the mixer and concealing plate from the
backplate.
5. Unscrew the inlet nuts from the backplate.
Outlet Flow
Regulator
Hose
Washer
6
7. For solid walls drill the fixing holes for the
backplate with a 6 mm drill and insert the
wall plugs (supplied). For other types of wall
structure alternative fixings may be required
(not supplied).
8. Drill the holes for the supply pipes and fit the
supply pipework:
Hot to Bottom Inlet, Cold to Top Inlet
Note! The inlet pipework should extend
between 12 and 18 mm from the finished wall
surface.
Caution! Make sure that the pipework is not
damaged otherwise the olives will not seal.
9. Fit the backplate over the inlet pipes and
secure to the wall using the fixing screws
(supplied).
Note! Make sure that the backplate is the
correct way up (refer to illustration).
10.C aution! It is essential at this point
that the supply pipework is thoroughly
flushed through before connection to the
mixer. Failure to do so may result in product
malfunction and will not be covered under the
guarantee.
11.Fit the olives onto the inlet pipework and tighten
the inlet nuts using a suitable spanner.
Caution! Do not overtighten.
Important! Make sure that the inlet filters are
fitted in the inlet nuts as illustrated.
Backplate
Inlet Nuts
Concealing Plate
6. Using the backplate as a guide, mark the
positions of the fixing holes and the pipe
centres.
Note! Make sure that the backplate is the
correct way up (refer to illustration).
Fixing Screws
Cold Inlet
Inlet Nut
Large boss must be
fitted at the bottom
Hot Inlet
Olive
Large boss must be
fitted at the bottom
7
Filter
12.Make sure that the concealing plate (with
the hole at the bottom) is loosely fitted over
the mixing valve inlets and align the mixer
with the inlet nuts. Push on fully and tighten
the grubscrews to secure the mixer to the
backplate. Make sure that the grubscrews are
engaged fully in the valve body grooves.
14.Fit the shower fittings, refer to your shower
fittings installation and user guide for
instructions.
Important! A 12 litre/minute flow regulator
is fitted inside the outlet nipple. This can be
removed for gravity fed / other low pressure
systems (0.5 bar or below).
Inlet Filters
Concealing Plate
12 L/Min Flow
Regulator
Hose
Washer
15.Turn on the hot and cold water supplies and
check for leaks.
16.Before using the shower, refer to section:
‘Commissioning’.
13.Push the concealing plate onto the backplate,
secure with the M4 x 12 mm grubscrew.
Single grubscrew secures
the top inlet to the backplate
Two grubscrews securing both the
bottom inlet and the concealing
plate to the backplate.
8
COMMISSIONING
OPERATION
Caution! Care is required when adjusting flow
or adjusting temperature. Make sure that the
temperature has stabilised.
Maximum Temperature Setting
Before using the shower the maximum temperature
must be checked to make sure that it is at a
safe level. It has been preset to approximately
43°C at the factory but due to variations in site
conditions the maximum temperature may need
adjustment.
Note! Make sure that the hot water temperature is
at least 55°C and that there is sufficient supply.
1. Turn on the mixer to the maximum temperature
(i.e. fully anticlockwise) and allow the
temperature to stabilise.
2. Test that the temperature of the water from the
shower outlet is hot enough.
If the temperature is too hot or too cold adjust
as follows:
3. Carefully remove the concealing cap using a
suitable tool (i.e. stanley knife / thin blade).
4. Unscrew the securing screw and remove the
temperature lever bearing.
5. Lift the temperature lever and move it back one
serration on the temperature control gear.
6. Return the lever to the maximum temperature
stop and check the temperature, if it is still not
hot enough repeat the procedure.
Stanley Knife /
Thin Blade
The thermostatic mixers have separate control
levers for temperature and flow.
Temperature Control
Turn the temperature control lever clockwise to
decrease the temperature and anticlockwise to
the preset maximum temperature
+
-
Concealing Cap
Off
Rubber Seal
Lift the temperature lever
and move back one serration
On
Securing
Screw
Temperature
Lever
Bearing
Flow Control
Turn the flow lever clockwise to the maximum
flow.
Re-engage with the control
gear and return to the
maximum temperature stop
7. Once the maximum temperature is satisfactory,
refit the temperature control bearing and fit and
tighten the securing screw.
8. Refit the concealing cap, make sure that the
rubber seal is correctly fitted.
9
Lubricants
USER MAINTENANCE
Silicone based lubricants must only be used on
the rubber seals.
Caution! Oil based or other lubricant types may
cause rapid deterioration of seals.
If you require a Mira trained service engineer or
agent, refer to section: ‘Customer Services’.
Fault Diagnosis
Cleaning
Symptom:
Only hot or cold water from the mixer outlet.
•
•
The chrome plated parts should be cleaned using
a mild washing up detergent or soap solution,
rinsed and then wiped dry with a soft cloth.
Warning! Many household cleaners contain
abrasive and chemical substances, and should not
be used for cleaning plated or plastic fittings.
These finishes should be cleaned with a mild
washing up detergent or soap solution, and then
wiped dry using a soft cloth.
Use your thumb or a soft cloth to wipe any
limescale from the soft nozzles and the front
surface of the handset spray plate.
Do not use descalents on this product.
Outlet temperature too hot / too cold.
Cause Rectification:
Inlets reversed (hot supply to cold supply).
Rework inlet pipework.
•
•
•
•
No hot water reaching mixer.
Check the filters for any blockage.
Installation conditions outside operating
parameters, refer to sections: ‘Specifications’
and ‘Commissioning’.
—————————————
Symptom:
Fluctuating or reduced flow rate.
•
Cause Rectification:
Check the shower handset, hose and filters
for any blockage.
•
•
•
•
•
Make sure that the maintained inlet pressures
are nominally balanced and sufficient, refer
to section: ‘Specifications’.
Make sure that the inlet temperature
differentials are sufficient, refer to section:
‘Specifications’.
Flow regulator fitted incorrectly.
Air lock or partial blockage in the pipework.
—————————————
Symptom:
Water leaking from shower handset.
•
Cause Rectification:
Normal for a short period after shut off.
•
•
•
Check that the pressures are not in excess of
the specifications for the product.
Renew the mixer valve assembly.
10
SPARE PARTS
1660.156
Temperature Knob
Pack (Infuse)
1660.155
Temperature Knob
Pack (Minibelle)
1660.150
Backplate
1660.151
Concealing Plate
1660.152
Filter Pack (x2)
1660.158
Flow Knob Pack (Infuse)
(also includes Securing Nut)
1660.153
Inlet Nuts & Olives (x2)
1660.157
Flow Knob Pack (Minibelle)
(also includes Securing Nut)
1660.183
Mixer Valve Assembly (Infuse)
1660.184
Mixer Valve Assembly (Minibelle)
Note! Knobs vary depending on model.
Mixer Valve Assembly also includes
1660.151 - Concealing Plate.
1663.265
12 L/Min Flow Regulator
Not illustrated:
1660.159 Screw Pack
1660.175 Seal Pack
1660.168
Outlet Shroud and
Securing Nut (Minibelle)
11
1660.169
Outlet Shroud and
Securing Nut (Infuse)
CUSTOMER SERVICE
Guarantee
Your product has the benefit of our manufacturer’s
guarantee which starts from the date of purchase.
To activate this guarantee, please return your completed
registration card, visit our website or free phone 0800
0731248 within 30 days of purchase (UK only).
Within the guarantee period we will resolve defects in
materials or workmanship, free of charge, by repairing or
replacing parts or product as we may choose.
This guarantee is in addition to your statutory rights
and is subject to the following conditions:
● The guarantee applies solely to the original installation
under normal use and to the original purchaser only.
The product must be installed and maintained in
accordance with the instructions given in this user
guide.
● Servicing must only be undertaken by us or our
appointed representative. Note! if a service visit
is required the product must be fully installed and
connected to services.
● Repair under this guarantee does not extend the original
expiry date. The guarantee on any replacement parts
or product ends at the original expiry date.
● For shower fittings or consumable items we reserve
the right to supply replacement parts only.
The guarantee does not cover:
● Call out charges for non product faults (such as
damage or performance issues arising from incorrect
installation, improper use, inappropriate cleaning, lack
of maintenance, build up of limescale, frost damage,
corrosion, system debris or blocked filters) or where no
fault has been found with the product.
● Water or electrical supply, waste and isolation issues.
● Compensation for loss of use of the product or
consequential loss of any kind.
● Damage or defects caused if the product is repaired
or modified by persons not authorised by us or our
appointed representative.
● Routine maintenance or replacement parts to comply
with the requirements of the TMV 2 or TMV 3 healthcare
schemes.
● Accidental or wilful damage.
● Products purchased ex-showroom display.
What to do if something goes wrong
If your product does not function correctly when you first
use it, contact your installer to check that it is installed
and commissioned in accordance with the instructions in
this manual.
If this does not resolve the issue, contact our Customer
Services Team who will offer you or your installer help
and advice.
If you experience problems, check in this manual to see if
simple home maintenance is required. If you require further
assistance call our Customer Services Team.
Extended Guarantees
A selection of protection plans are available that
enable you to cover repair bills for the life of your policy
(excludes Eire). Ring 01922 471763 for more details.
Helpdesk Service
Our Customer Services Team is comprehensively trained
and can offer help and advice, spare parts, accessories or
a service visit.
We will need you to have your model name or number,
power rating (if applicable) and date of purchase. As part of
our quality and training programme calls may be recorded
or monitored.
Mira Showers Website (www.mirashowers.co.uk)
From our website you can register your guarantee,
download additional user guides, diagnose faults, purchase
our full range of accessories and popular spares, refer to
our FAQ’s and request a service visit.
Spares and Accessories
We maintain extensive stocks of genuine spares and
accessories and aim to provide support throughout the
product’s expected life.
Payment can be made by phone at time of order using
most major Credit or Debit cards and we aim to despatch
orders within 2 working days. Items purchased from us are
guaranteed for 12 months from date of purchase. For safety
reasons spares exposed to mains voltages should only be
fitted by competent persons.
Returns – items can be returned within one month of date
of purchase, providing that they are in good condition and
the packaging is unopened. If you wish to return any items
please notify us in writing within seven days of receipt.
Service / Repairs
Our nationwide team of Service Technicians can carry out
service or repair work to your product within the guarantee
period and beyond. You have the assurance of a fully trained
Technician, genuine spare parts and a 12 month guarantee
on any chargeable work done.
Payment should be made directly to the Service Technician
who will accept most major Credit or Debit cards.
To Contact Us
UK
Telephone:08445715000
E-mail: [email protected]
Fax: 01242 282595
By Post: Mira Customer Services Dept, Cromwell Road,
Cheltenham, Gloucestershire, GL52 5EP
Eire
Telephone:014591344
E-mail: [email protected]
Fax: Dublin 01 459 2329
By Post: Modern Plant Ltd (Dublin),
Otter House, Naas Road, Clondalkin, Dublin 22
Mira is a registered trade mark of
Kohler Mira Limited.
The company reserves the right to alter
product specifications without notice.
1084102-W2-D (B94E) (1663)
FM 14648
12
© Kohler Mira Limited, June 2011