1
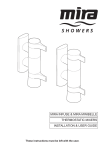
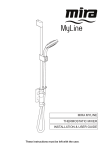
MIRA SHELVES Installation & User Guide These instructions must be left with the user 1 Contents Introduction.............................................................................................. 3 Mira Shelves.......................................................................................... 3 Important Safety Information.................................................................. 3 Guarantee............................................................................................. 3 Design Registration............................................................................... 3 Pack Contents.......................................................................................... 4 Dimensions............................................................................................... 5 Specification............................................................................................. 6 Installation Requirements....................................................................... 6 Installation................................................................................................ 7 General.................................................................................................. 7 Installing the Shelves............................................................................ 8 Maintenance............................................................................................ 10 Cleaning.............................................................................................. 10 Swivel Ball Adjustment and Removal.................................................. 10 Spare parts.............................................................................................. 11 Customer Service................................................................................... 12 2 Introduction Thank you for purchasing a quality Mira product. To enjoy the full potential of your new product, please take time to read this guide thoroughly, having done so, keep it handy for future reference. Mira Shelves A versatile set of shower shelves allowing 3 predetermined handset locations and shower storage, supplied complete with flexible Shower Hose and a Hose Retaining Ring. Available in a White / Chrome finish. Important Safety Information Warning! 1. Products manufactured by us are safe and without risk provided they are installed, used and maintained in good working order in accordance with our instructions and recommendations. Caution! 1. Read all of these instructions. 2. Retain this guide for later use. 3. Pass on this guide in the event of change of ownership of the installation site. 4. Follow all warnings, cautions and instructions contained in this guide. Guarantee For domestic installations, Mira Showers guarantee the products listed in this guide against any defect in materials or workmanship for a period of one year from the date of purchase. For terms and conditions refer to the back cover of this guide. Design Registration Design Application: EU: 001004196 If you experience any difficulty with the installation or operation of your new Mira Shelves, please contact Kohler Mira Ltd. Our telephone and fax numbers can be found on the back cover of this guide. 3 Pack Contents Tick the appropriate boxes to familiarise yourself with the part names and to confirm that the parts are included. 3 x Wall Mountings 1 x 2 mm Hex Wrench 1 x 3 mm Hex Wrench 3 x Swivel Ball Assembly 1 x Hose Retaining Ring 2 x Hose Seals 1 x Shower Hose 1.25m Chrome Documentation 3 x Shelves 1 x Installation and User Guide 4 6 x Wall Plugs 6 x Fixing Screws DIMENSIONS 43 mm 200 200 mm 38 mm 37.4 5 117 mm 100 mm 100 117 Specification Mira Shelves are designed to conveniently store shampoo/gel bottles and other similar items but they are not intended to carry heavy weight. They are designed to work with any shower head however particularly heavy shower heads may require the force of the Swivel Ball Assembly to be increased (see Maintenance section). Installation Requirements Installation must be carried out in accordance with these instructions, and must be conducted by designated, qualified and competent personnel. 1. The hose retaining ring supplied must be used to stop the showerhead from dropping below the spill-over level of the bath or shower tray. Make sure that when the hose retaining ring is placed in the lowest shelf there is a minimum of 25 mm between the showerhead and bath/tray spill-over level. This is necessary to prevent back-siphonage. 2. Installations must comply with UK Water Regulations/ Bye-laws (Scotland), and Building and Plumbing Regulations in force at the time of installation. 3. When installing the shower fittings in a cubicle, position with the spray pointing across rather than toward the opening of the cubicle. 4. When installing the shower fittings over a bath, position with the spray pointing down the centre line of the bath. 5. Avoid layouts where the shower hose will be sharply kinked, this may reduce the life of the shower hose. 6. Do not fit any form of flow control in the shower outlet. 7. Do not use excessive force when making connections. 8. Do not install the fittings in a position where it could become frozen. Hose Retaining Ring Hose Retaining Ring 25 mm Minimum Spill-over level 6 Installation General 1. 2. 3. Make sure that the shower fittings are installed by a competent installer. Before installation carefully inspect the new fixture for any signs of damage. Special consideration should be given to the fixing arrangements when installing onto a dry lined, stud partition, shower cubicle or laminated panel wall structures. Installers may wish to obtain alternative proprietary cavity fixings, or choose other options, however, these methods of fixing are beyond the scope of this guide. The Shelves are packaged pre-assembled but will require some disassembly prior to installation. 1. Remove the Shelf from its packaging and using your finger and thumb remove both of the chrome end plates from the shelf. 2. Using fingers and thumbs as indicated below gently squeeze together until the Shelf is separated from the wall mount. 7 3. Insert a small screwdriver through the rectangular hole and into the gap between the release tab and the swivel ball assembly, gently move the screwdriver from left to right and the swivel ball assembly will be released from the wall mounting. Rectangular hole 4. Slide the chrome end plates back into the shelf. The wall mount is now ready for installation. Installing the Shelves 1. Decide on a suitable position for the shelves avoiding buried cables and pipes. Care should be taken to determine the correct placing of the shelves, ensure there is sufficient room between the shelves to allow full movement of the handset when the swivel ball assembly is adjusted. 2. Using the wall mounting as a guide, mark the position of the fixing holes. Note! Use a spirit level to make sure that the fixing holes are horizontal. 3. Drill the two Ø8 mm fixing holes for the wall brackets and insert the wall plugs. 4. Observe the ‘THIS WAY UP’ marking on one side of the wall mounting and secure to the wall using the screws supplied. 5. If you have fitted the lowest shelf first remember that the hose retaining ring must be fitted to this shelf. 8 6. Slide the load plate into the slot in the rear of the swivel ball assembly as indicated. Load Plate 5 11 Swivel Ball Assembly mm Ø8 mm Fixing Holes Wall Mounting Wall Plug Release Tab Load Plate Hose Retaining Ring Swivel Ball Assembly 7. The shelf can be fitted with the slot for locating the shower hose either on the left side or rotated 180 degrees and fitted on the right. 8. The shelf is located on to the wall mounting by simple guide. Slide the shelf into position then using the screw supplied, attach the hose retaining ring to the underside of the swivel ball assembly. 9. Repeat the fitting process for the other shelves, making sure that the hole used to secure the hose retaining ring is always underneath. 9 Maintenance Cleaning Many household cleaners contain abrasives and chemical substances, and should not be used for cleaning plated or plastic fittings. These finishes should be cleaned with a mild washing up detergent or soap solution, and then wiped dry using a soft cloth. The shelves are easily removed for cleaning, simply pull the shelf firmly until it is released from the wall mounting. Note! To remove the lower shelf always remove the hose retaining ring first Swivel Ball Adjustment and Removal In the case of a heavy showerhead being used it may be necessary to adjust the swivel ball assembly. Release the shelf by pulling firmly until it is released from the wall mounting. Using the 3 mm hexagonal wrench supplied insert through the hole on the left side of the swivel ball assembly and adjust the screw, turning clockwise to tighten and anticlockwise to loosen adjust as required. Rectangular slot If it necessary to remove or reposition the swivel ball assembly from the wall mounting first remove the shelf as described above. On the side of the swivel ball is a rectangular hole, insert a small screwdriver through the rectangular hole and into the gap between the release tab and the swivel ball assembly, gently move the screwdriver from left to right and the swivel ball assembly will be released from the wall mounting. 10 Spare parts 575.09 632.73 1503.925 1603.104 1688.240 1688.241 1688.242 1688.252 1688.331 Hexagonal Wrench - 3 mm (not illustrated) Hose Seal (x2) Hexagonal Wrench - 2 mm (not illustrated) Shower Hose 1.25m (Chrome) Shelf Wall Mount Shelf Swivel Assembly (Chrome) Shelf Sleeve (White/Chrome) Shelf Hose Retaining Ring (Chrome) SPR Shelf Component pack (not illustrated) Wall Mount (1688.240) Swivel Assembly (Chrome) (1688.241) Shelf Sleeve (1688.242) Hose Retaining Ring (1688.252) 11 Customer Service Guarantee of Quality Mira Showers guarantee your product against any defect in materials or workmanship, provided that it is installed and maintained in accordance with the instructions given in this guide. To validate the guarantee, please return your completed registration card within 30 days of product installation. Within the guarantee period we will resolve defects, free of charge, by repairing or replacing parts or modules as we may choose. To be free of charge, service work must only be undertaken by Mira Showers or our approved agents. Service under this guarantee does not affect the expiry date of the guarantee. The guarantee on any exchanged parts or product ends when the normal product guarantee period expires. Not covered by this guarantee: Planned maintenance, or replacement parts required to comply with the servicing requirements of the TMV 2 and TMV 3 healthcare schemes (where applicable). Damage or defects arising from incorrect installation, improper use or lack of maintenance, including build-up of limescale. Damage or defects if the product is taken apart, repaired or modified by any persons not authorised by Mira Showers or our approved agents. This guarantee is in addition to your statutory and other legal rights. What to do if something goes wrong If when you first use your shower, it doesn’t function correctly, first contact your installer to check that installation and commissioning are satisfactory and in accordance with the instructions in this manual. We are on hand to offer you or your installer any advice you may need. Should this not resolve the difficulty, simply contact our Customer Services Team who will give every assistance and, if necessary, arrange for our service engineer to visit. If the performance of your shower declines, consult this manual to see whether simple home maintenance is required. Please call our Customer Services Team to talk the difficulty through, request a service under guarantee if applicable, or take advantage of our comprehensive After-Sales service. As part of our quality and training programme calls may be recorded or monitored. Our Customer Services Team is comprehensively trained to provide every assistance you may need: help and advice, spare parts or a service visit. Spare Parts We maintain an extensive stock of spares and aim to provide support throughout the product’s expected life. Genuine Mira spares can be purchased direct from Customer Services or from approved stockists or merchants (locations on request). Spare parts will normally be despatched within two working days. Payment can be made using most major Credit or Debit cards at the time of ordering. Should payment by cheque be preferred, a pro-forma invoice will be sent. All spares are guaranteed for 12 months from the date of purchase. Spares that have been supplied directly from us can be returned within one month from the date of purchase, providing that they are in good order and the packaging is unopened. Note! Returned spares will be subject to a 15% restocking charge and authorisation must be obtained before return. Please contact our Customer Services Team. Note! In the interests of safety, spares requiring exposure to mains voltages should only be fitted by competent persons. Service / Repairs Our Service Force is available to provide a quality service at a reasonable cost. You will have the assurance of a Mira trained engineer/agent, genuine Mira spare parts and a 12 month guarantee on the repair. Payment should be made directly to the engineer/agent who will accept most major Credit or Debit cards or a cheque supported by a banker’s card. To Contact Us England, Scotland, Wales and Northern Ireland Mira Showers Customer Services Telephone: 0870 241 0888, Mon to Fri 8:00 am - 5:30 pm Sat 8:30 am - 3:30 pm E-mail: [email protected] Fax: 01242 282595 By Post: Cromwell Road, Cheltenham, Gloucestershire, GL52 5EP Eire Modern Plant Ltd (Dublin) Telephone: 01 459 1344, Mon to Fri 9:00 am - 5:00 pm E-mail: [email protected] Fax: Dublin 01 459 2329 Post: Otter House, Naas Road, Clondalkin, Dublin 22 Mira is a registered trade mark of Kohler Mira Limited. The company reserves the right to alter product specifications without notice. www.mirashowers.co.uk 5+!3 1106066-W2-E 12 1 © Kohler Mira Limited, March 2009