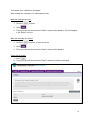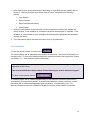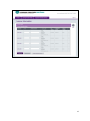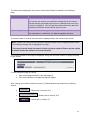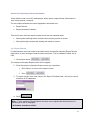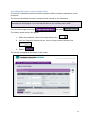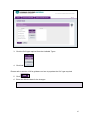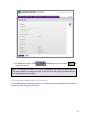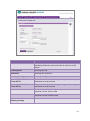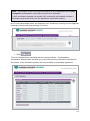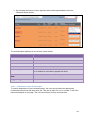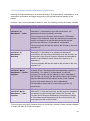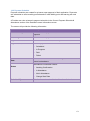
1
Learning Provider Portal User Guide 1 Revision Table Date Version Author Comments 08/02/2013 1.0 Laura Marshall Signed off 26/02/2013 1.1 Laura Marshall Screen shots updated 20/03/2013 1.2 Laura Marshall, Lucy Marwood and Hayley Walker Updated to include Learner Information, Change of Circumstance and Financial functionality 06/06/2013 2.0 Laura Marshall, Hugh Morrison Updated screen shots, Payment Scheduling and Loan Position Report 11/06/2013 2.1 Laura Marshall Updated to expand on Change of Circumstance and payment information 20/06/2013 2.2 Hayley Walker Screen shots and information updated 17/07/2013 2.3 Hugh Morrison Documenting Attendance and Payment functionality 12/08/2013 3.0 Laura Marshall Attendance and Payments signed off 26/08/2013 3.1 Hugh Morrison Updated Remittance Screen 03/09/2013 3.2 Hugh Morrison Updated Remittance Test 05/09/2013 3.3 Laura Marshall, and Hayley Walker Updated Appendix D Payment and Drawdown Calendar 11/09/2013 3.4 Laura Marshall Updated Loan Position Report description 30/09/2013 4.0 Hayley Walker Post Liability CoCs signed off. Bulk ULN Import signed off 06/02/2014 4.1 Laura Marshall Updated Resumption CoC guidance 25/02/2014 4.2 Salwa Clough Removed references to Apprenticeships 11/04/2014 4.3 Salwa Clough and Laura Marshall Reviewed to ensure guidance is aligned to AY14/15. Updated Withdrawal CoC guidance and Loan Position Report. 08/05/2014 4.4 Laura Marshall Updated May 2014 drawdown and payment date in Payment Calendar 11/07/2014 4.5 Hayley Walker and Salwa Clough Updated to include User Access Control Guidance 2 21/08/2014 4.6 Lucy Marwood Updated to include export loan position report and learner information report via csv, and bulk import of ULN, Additional Learner Reference Number, Course Trainer and Location codes via xml and csv. 24/10/2014 4.7 Salwa Clough Updated to include Current Payment Schedule and Attendance export 17/04/2015 4.8 Salwa Clough Updated to include 15/16 payment drawdown calendar 4.9 Salwa Clough Updated to remove reference to A2 and QCF 3 Contents Revision Table ...................................................................................................................... 2 Contents ............................................................................................................................... 4 Section 1 | Purpose of the Learning Provider user guide ..................................................... 11 1.1 What is the Learning Provider Portal? ....................................................................... 11 Section 2 | Learning Provider User Roles............................................................................ 11 Section 3 | How to access the Learning Provider Portal ...................................................... 12 3.1 Sign in ....................................................................................................................... 12 3.2 Incorrect sign in ......................................................................................................... 13 3.3 First-time sign in ........................................................................................................ 14 3.4 Change, unlock or reset password and secret answer ............................................... 15 3.5 Signing out ................................................................................................................ 15 3.6 Security ..................................................................................................................... 15 Section 4 | Using the Learning Provider Portal .................................................................... 16 4.1 Learning Provider Portal Home Page ........................................................................ 16 4.2 Key Messages and Notifications ................................................................................ 16 4.3 Navigate the Learning Provider Portal ....................................................................... 19 Section 5 | Learning Provider Profile ................................................................................... 20 Section 6 | Maintain Learning Provider Contacts ................................................................. 21 6.1 Create Contacts......................................................................................................... 21 6.2 Edit Contacts ............................................................................................................. 22 6.3 Making contacts inactive ............................................................................................ 24 Section 7 | Administering System Users.............................................................................. 26 7.1 Create new users ...................................................................................................... 26 7.2 Administering existing users ...................................................................................... 29 7.3 Expiring user accounts .............................................................................................. 33 Section 8 | Applicant Information Service ............................................................................ 35 4 8.1 Overview ................................................................................................................... 35 8.2 Detailed Learner Information ..................................................................................... 35 8.3 Change of Circumstance Home ................................................................................. 35 8.4 Financials Home ........................................................................................................ 36 Section 9 | Search and View Learner Information ............................................................... 37 9.1 Searching for Learner Information ............................................................................. 37 9.1.1 Learner Search ................................................................................................... 37 9.1.2 Learning Aim Search ........................................................................................... 41 9.2 Performing a search .................................................................................................. 43 9.3 View Results .............................................................................................................. 44 Section 10 | Exporting Learner Information ......................................................................... 47 10.1 Export Results ......................................................................................................... 47 10.2 Export Assessment History ...................................................................................... 50 10.3 Validation when exporting data ................................................................................ 52 Section 11 | View Detailed Learner Information ................................................................... 53 11.1 Learner Information ................................................................................................. 55 11.2 Assessment Information........................................................................................ 55 11.2.1 Current Assessment .......................................................................................... 56 11.2.2 Assessment History .......................................................................................... 58 11.3 Current Payment Schedule ...................................................................................... 60 Section 12 | Field updates ................................................................................................... 64 12.1 Update fields via the Learner Information Results .................................................... 64 12.2 Adding the Unique Learner Number (ULN) .............................................................. 65 12.3 Adding the Additional Learner Reference Number ................................................ 66 12.4 Field Updates via Detailed Learner Information ....................................................... 67 12.4.1 Adding the ULN to individual learner records ................................................. 67 12.4.2 ULN Validation .................................................................................................. 68 12.4.3 Adding Additional Learner Record Number to individual learner records ........... 69 5 12.4.4 Additional Learner Reference number Validation .............................................. 70 12.4.5 Adding Course Trainer and Course Location Codes to individual learner records .................................................................................................................................... 70 12.4.6 Course Trainer and Course Location Code Validation ....................................... 73 12.5 Field Updates via Bulk Import .................................................................................. 73 12.5.1 Adding the ULN via Bulk Import ........................................................................ 73 12.5.2 ULN Bulk Import Validation Rules and Errors .................................................... 77 12.5.3 View ULN Bulk Import Results .......................................................................... 78 12.5.4 Adding the Additional Learner Reference Number, Course Trainer and Course Location Codes via Bulk Import ....................................................................................... 80 Course Trainer ......................................................................................................... 80 Section 13 |Change of Circumstances (CoC) ...................................................................... 83 13.1 User Roles Required to Access the CoC area of the Applicant Information Service 84 13.2 Pre and Post Liability CoCs – Application status...................................................... 84 13.2.1 Pre Liability CoC – Application Status ............................................................... 84 13.2.2 Post Liability CoCs – Application Status ............................................................ 85 13.3 Creating Pre and Post Liability CoCs ....................................................................... 85 13.4 Create Pre Liability CoCs via Detailed Learner Information screen .......................... 85 13.5 Create Pre Liability CoCs via CoC Home................................................................. 90 13.6 Pre Liability CoC types ............................................................................................ 99 13.6.1 Fee Charged ................................................................................................... 100 13.6.2 Decrease Loan Amount................................................................................... 101 13.6.3 Learning Aim ................................................................................................... 102 13.6.4 Learning Provider ............................................................................................ 104 13.6.5 Cancel............................................................................................................. 105 13.6.6 Reinstate ......................................................................................................... 106 13.7 Create Post Liability CoCs via Detailed Learner Information screen ...................... 107 13.8 Create Post Liability CoCs via CoC Home ............................................................. 110 13.9 Post Liability CoC types ......................................................................................... 119 6 13.9.1 Fee Charged ................................................................................................... 120 13.9.2 Decrease Loan Amount................................................................................... 121 13.9.3 Learning Aim ................................................................................................... 122 13.9.4 Early Completion ............................................................................................. 124 13.9.5 Suspension ..................................................................................................... 125 13.9.6 Resumption ..................................................................................................... 126 13.9.6.1 Resuming After Course End Date - Resumption CoC Validation Rule .......... 127 13.9.7 Withdrawal ...................................................................................................... 128 13.10 Create Pre and Post Liability CoCs via CoC Worklist ........................................... 129 13.11 Create CoC via Bulk Import ................................................................................. 133 13.12 CoC Validation Rules and Errors ......................................................................... 135 13.13 View CoC Bulk Import Results ............................................................................. 135 13.14 CoC Search ......................................................................................................... 138 13.15 Request Submissions Report .............................................................................. 143 Section 14| Financial Reports ........................................................................................... 145 14.1 Accessing financial area of the Applicant Information Service ............................... 145 14.2 Loan Position Report ............................................................................................. 145 14.2.1 Generate Loan Position Report ....................................................................... 146 14.2.2 View Loan Position Report .............................................................................. 147 14.2.3 Table One - Loan Position ............................................................................... 149 4.3 Table Two - Applications Not Progressing to Payment ............................................ 151 14.4 Example of a Loan Position Report........................................................................ 152 Section 15| Attendance ..................................................................................................... 153 15.1 User Roles Required to Access the Attendance Functions .................................... 156 15.2 Attendance Worklist ............................................................................................... 156 15.3 Saved Records ...................................................................................................... 158 15.4 More than One Outstanding Confirmation.............................................................. 159 15.5 Worklist Attendance Confirmation .......................................................................... 159 7 15.5.1 – Individual Learner Confirmation .................................................................... 160 15.5.2 – Multiple Learner Confirmation ...................................................................... 161 15.6 Detailed Learner Information Screen Confirmation ................................................ 162 15.7 More than One Outstanding Confirmation.............................................................. 163 15.8 Suspension and Resumption ................................................................................. 164 15.9 Attendance Import File ........................................................................................... 164 15.9.1 Attendance Worklist Export ............................................................................. 164 15.9.2 Attendance Import ........................................................................................... 165 15.9.3 View Import Results ........................................................................................ 166 15.10 Incorrectly Submitted Attendance Confirmations ................................................. 169 Section 16| 24+ Loan Payments ....................................................................................... 170 16.1 Payment ................................................................................................................ 170 16.1.1 Early Completion ............................................................................................. 170 16.1.2 Extending Learning Aim End Date................................................................... 170 16.1.3 Late Loan Application ...................................................................................... 170 16.1.4 Monthly Payment Drawdown Cut Off Point...................................................... 171 16.1.5 National Insurance Number (NINO)................................................................. 171 16.1.6 Unique Learner Reference .............................................................................. 172 16.1.7 Overpayments ................................................................................................. 172 16.1.8 Loan Reduction ............................................................................................... 172 16.2 Payment Schedule ................................................................................................ 173 Section 17| Remittance Report ......................................................................................... 174 17.1 User Roles Required to Access the Payment File .................................................. 175 17.2 Remittance Report ................................................................................................. 176 17.3 Remittance Export ................................................................................................. 179 Section 18 | User Access Controls .................................................................................... 180 18.1 Overview ................................................................................................................... 180 18.2 Creating a User ......................................................................................................... 180 8 18.3 Creating and Maintaining Groups .............................................................................. 181 18.4 Assigning Groups to a User....................................................................................... 181 18.5 Adding learner applications to a Group ..................................................................... 182 18.5.1 Individually .......................................................................................................... 182 18.5.2 More than one application................................................................................... 184 18.6 Removing learner applications from a group ............................................................. 184 18.7 Group Users and Viewing Learner Information .......................................................... 185 18.7.1 View Learner Information .................................................................................... 185 LP Administrator ........................................................................................................ 185 LP Advisor ................................................................................................................. 186 18.7.2 Detailed Information Screen ............................................................................... 186 LP Administrator ........................................................................................................ 186 LP Advisor ................................................................................................................. 186 Other User Roles ....................................................................................................... 187 18.7.3 Importing ULNs................................................................................................... 187 LP Administrator ........................................................................................................ 187 LP Advisor ................................................................................................................. 187 18.7.4 View Import Results ............................................................................................ 187 LP Administrator ........................................................................................................ 187 18.8 Group Users and CoCs ............................................................................................. 187 18.8.1 Performing CoCs ................................................................................................ 187 LP CoC Administrator ................................................................................................ 187 LP CoC Advisor ......................................................................................................... 188 18.8.2 Viewing Submitted CoCs .................................................................................... 188 LP CoC Administrator ................................................................................................ 188 LP CoC Advisor ......................................................................................................... 188 18.8.3 Importing CoCs................................................................................................... 189 LP CoC Administrator ................................................................................................ 189 9 LP CoC Advisor ......................................................................................................... 189 18.8.4 View Import Results ............................................................................................ 189 LP CoC Administrator ................................................................................................ 189 18.9 Group Users and Confirming Attendance .................................................................. 189 18.9.1 Attendance Worklist ............................................................................................ 189 LP Attendance Administrator...................................................................................... 189 18.9.2 Importing Attendance Confirmations ................................................................... 190 LP Attendance Administrator...................................................................................... 190 18.9.3 View Import Results ............................................................................................ 190 LP Attendance Administrator...................................................................................... 190 Section 19 | Further Support ............................................................................................. 190 19.1 Online Help ............................................................................................................ 191 19.2 Operations Services Helpdesk ............................................................................... 191 19.3 Partner Services Management Team .................................................................... 191 Appendix A | Description of Application Statuses .............................................................. 191 Appendix B | Learner Attendance Scenarios ..................................................................... 193 B.1 Learner attendance scenarios – exception handling ................................................ 197 B.2 Attendance Confirmation Triggers Payment ............................................................ 197 Appendix C | End to End Learning Provider 24+ Journey diagram .................................... 198 Appendix D | Payment and Drawdown Calendar ............................................................... 199 Academic Year 13/14 Payment and Drawdown Calendar Error! Bookmark not defined. Academic Year 14/15 Payment and Drawdown Calendar Error! Bookmark not defined. 10 Section 1 | Purpose of the Learning Provider user guide The purpose of the Learning Provider user guide is to introduce learning providers to the Learning Provider Portal (Portal). It outlines basic processes and procedures to follow when using the Portal, the functions available to you, help resources and general best practice rules. 1.1 What is the Learning Provider Portal? The Student Loans Company (SLC) provides administration services to Learning Providers in support of the 24+ Advanced Learning Loan. The Portal is a secure website that has been developed to facilitate the service. Section 2 | Learning Provider User Roles Learning Provider User Access Role Description Learning Provider User Administrator Learning Provider user who will facilitate user maintenance functions within the Learning Provider User Base – this includes adding new users and resetting passwords. (LP User Administrator) Learning Provider Administrator Learning Provider user who will be permitted to view the profile and contact information on the portal. (LP Administrator) Users will be permitted to view learner information, perform searches, view detailed learner information, make field updates and export search results. Learning Provider Advisor Learning Provider user who will be permitted to view the profile and contact information on the portal. (LP Advisor) Users will be permitted to view learner information, perform searches and view detailed learner information. Learning Provider Change of Circumstance Administrator Learning Provider user who will be permitted create CoCs, view CoCs, Import CoCs, View CoC Import Results, Create and View CoC Submissions Report (LP CoC Administrator) Learning Provider Change of Learning Provider user who will be permitted to view CoCs, View CoC Import Result and View CoC Submissions Report 11 Circumstance Advisor (LP CoC Advisor) Learning Provider Financial Administrator Learning Provider user who will be permitted to access the financials section of the portal. (LP Financial Administrator) User will be permitted to create, view and export the loan position. User will also be able to view and export payment remittance files Attendance Administrator (LP Attendance Administrator) Learning Provider user who will be permitted to view attendance confirmation worklist, confirm a learner’s attendance and export attendance worklists Section 3 | How to access the Learning Provider Portal 3.1 Sign in The portal is a web based service and is accessed through an internet browser. The portal is supported on IE8, IE9 and Chrome. Other browsers should allow for access although there may be some look and feel differences in some screens. You access the portal through the Learning Provider Services website via the following link: http://lpservices.slc.co.uk/ then select the last link, Learning Provider Portal from the purple ribbon. Note - You may wish to add this address to your Favourites in your internet browser so that you can find it again easily. Select Favourites / Add to Favourites Your sign in, initial password and secret answer will have been provided to you by your User Administrator within your organisation. Note - It is your responsibility to ensure these login details are known only to yourself. Never disclose these details to anyone else. To sign in, enter the web address and then click on Learning Provider Portal link as described above. The Sign in screen displays. 1. Enter your username in the Username field 12 2. Click 3. Enter your password and the answer to your secret question. For security purposes, your responses will display as dots. Please note that both your password and answer are case sensitive 3.2 Incorrect sign in If you enter your username, password or the answer to the question incorrectly, you will be prompted to re-enter your sign in details. After three unsuccessful attempts you will be locked out of the system. Contact your User Administrator who will be able to reset or change your password for you. 13 3.3 First-time sign in To ensure your security, when you first sign in to the system you will be required to enter a new password and choose a new secret question and answer. 1. After you have entered your username and clicked, will appear: the following screen 2. Enter the password you received by email when your User Administrator created your user access Note - Passwords are case-sensitive, must be between 8 and 16 characters in length and must contain at least one alphanumeric character. They are also blocked from containing easily guessed words and sequences such as your username or password1. 3. Enter your new proposed password and confirm it 4. Click 5. Enter your initial secret answer as per your email confirmation. Then, choose a new secret question by checking the relevant radio button 6. Enter and confirm your new secret answer 14 7. Click on the button to complete your initial sign in 3.4 Change, unlock or reset password and secret answer If you are unable to sign in because your account is locked or you have forgotten your password, contact your User Administrator who will be able to reset or change your password for you. For details on how to unlock a locked account, please refer to section 7.2. 3.5 Signing out You should always sign out of the system when you are finished to prevent unauthorised use of your sign in ID. 1. To close down, click on the top-right of the screen The Sign In screen will appear. For security purposes, you should now close your browser. 3.6 Security To minimise the risk of unauthorised use of the Learning Provider Portal, you will be automatically signed out of the portal after fifteen minutes of inactivity. 15 Learning Providers are required to be vigilant about user access, e.g. usernames and passwords. If someone leaves the organisation, it is essential that the User Administrator expires their user access on the system, to ensure the security of the portal and learner data. To find out more about expiring user access, please see expiring user accounts in section 7. Section 4 | Using the Learning Provider Portal 4.1 Learning Provider Portal Home Page Upon successful sign in to the portal, users will be automatically directed to the Home Page. Users can navigate to all areas of the portal from the Home Page. 4.2 Key Messages and Notifications SLC will communicate key messages and notifications to portal users via the Home Page. System maintenance, news and other information will appear in the message area in the centre of the screen as appropriate. Each message will be displayed in a separate notification. Indicator Description Priority This field shows the importance of the message. This could be Urgent, High, Medium or Low Subject This field gives you a brief overview the content of the message Read? The Read tick box indicated whether or not the massage has been read If there is a tick in this box the message has been read. If the box does not contain a tick then the message is unread. Update The Update button allows you to update the status of the massage to read or unread. 16 To view the pop up notification; 1. Click on the subject hyperlink 17 The details of the notification will appear. After reading the notification, LP Administrators can; Mark the message as read; 1. Click the tick box 2. Click 3. The pop up box will close and the ‘Read?’ status will be updated. A tick will appear in the ‘Read?’ tick box Mark the message as unread; 1. Click the tick box to remove the tick 2. Click 3. The pop up box will close and the ‘Read?’ status will be updated Close with no action; 1. Click 2. The pop up box will close and the ‘Read?’ status will remain unchanged 18 To update the ‘Read?’ status from the Home page, an LP Administrator can Mark the message as read; 4. Click the tick box 5. Click 6. The ‘Read?’ status will be updated Mark the message as unread; 1. Click the tick box to remove the tick 2. Click 3. The pop up box will close and the ‘Read?’ status will be updated Note - Notifications will only be displayed for a set period of time. After this time frame elapses notifications will no longer be visible whether they have been read or not. 4.3 Navigate the Learning Provider Portal Users can navigate to the areas of the portal they have access to from the Home Page by clicking over on the purple tabs. 19 Section 5 | Learning Provider Profile To view the profile for your learning provider, click on Learning Provider Details tab from the Portal Home page. This will provide you with a view of the information held for your organisation to ensure your details are accurate and up to date. If the information displayed in the live system is incorrect, please update your details on the UK Register of Learning Providers website (www.ukrlp.co.uk) these will then be shared with SLC. Upon successful creation of a new Learning Provider Profile an email will be sent to the Contract Manager. Upon successful amendment of the Learning Provider Profile, an email will be sent to contacts with the Primary or Secondary Business Contact role. 20 Section 6 | Maintain Learning Provider Contacts When supplying SLC with approved Learning Provider data, the Agency will provide SLC with the details of the Learning Provider Contract Manager. SLC will request that the Contract Manager nominates a primary and secondary business contact. It is important that these contact details are correct and kept up to date to allow SLC to liaise with your organisation effectively. All users can view these details but to create and edit contact details, you must have been assigned the User Administrator user role. 6.1 Create Contacts 1. To add a new contact, click on Learning Provider Details from the Portal Home page. Then select Contacts tab underneath Profile 2. Click 3. Complete the New Contact details 21 4. Choose the Contact Role from the list. Click the check box to select the roles required, or click again to de-select the role. There is no restriction on the number of roles that can be assigned. Although a contact may have one or many contact roles, they can only be one of the following; Primary Business Contact OR Secondary Business Contact 5. Click 6. If the data is entered incorrectly or fields have been left blank you may see a validation error. All fields are mandatory 6.2 Edit Contacts 1. Select the Contacts tab underneath the Profile tab. The Contact screen will open and display contact details 22 2. Click to edit contact details 3. You can update or add information by over typing the existing details 4. Contact Roles can be added or removed by selecting or deselecting the tick box roles on screen 23 5. Click to save the changes 6.3 Making contacts inactive If it is no longer appropriate for an individual to continue their role as a contact, their record can be deactivated. 1. To make a contact inactive, select Learning Provider Details from the portal home page. Then, select Contacts to open the Contacts view 2. Click on the icon next to the contact you are making inactive 24 3. Uncheck and click 4. The contact is now inactive. The Active indicator has now been updated 25 Section 7 | Administering System Users The Learning Provider Portal includes a facility to create and maintain users within your organisation. This function is only available to users who have been assigned the User Administrator role. 1. To begin administrating users, click on the Administer User tab from the portal home page The Users List displays a list of users within the User Group. From this page you can create new users and edit existing users. 7.1 Create new users 1. Click on Administer User tab from the portal home page, and click located on the bottom-left of the screen, from the page that displays. The Create New User page will display 26 2. Enter the new user’s details. These are all mandatory fields 3. Your organisation will appear in the Group box 4. Select to add the user to your organisation 5. Select Roles for the user from the User Roles box on the bottom of the screen. Tick all roles that apply to the user 27 6. Click to create the user 7. The Preview New User summary screen will appear to check the details entered for the new user 8. Click 28 7.2 Administering existing users If you have a large number of existing users you can arrange to view your existing users alphabetically by their Username, Surname or Forename. 1. Click on the Surname heading to arrange users alphabetically by their surnames 2. On the record returned from your search, select the link 29 3. You can update or add information by over typing the existing details 4. From this screen, you can amend the user’s forename(s), surname, contact phone number and email address by overtyping the data in the fields onscreen. Please note that amending the names will not result in a regenerated username for that user Note - If the Expired checkbox is ticked, you cannot amend any user details. 5. Click The Edit User Authentication details screen displays 6. From this screen you can add or remove the users Role Memberships and re-set or lock their secret answer and password. In this example we will rest the users password 30 7. Check the 8. Select box The Preview or Save Edit User summary will be displayed 31 9. Select 32 7.3 Expiring user accounts This function should be used to expire a user’s account if access is no longer required – for example, if they leave the Learning Provider or their role within the Learning Provider changes. Please note that once a user’s account is expired, their records cannot be amended or reinstated. From the Administer User page search for a user’s account, and select the user to be administered. 1. Select for the user to be administered and the Edit User screen will display 2. Select 33 3. Check the box and select to expire the users account 4. The Expired Indicator has now been updated to ‘X’ 34 Section 8 | Applicant Information Service 8.1 Overview Once a learner has submitted an application for a loan, the details of the learner’s application will be visible via the Applicant Information Service. The Applicant Information Service includes the facility to view, make updates and changes to learners’ application details and view financial reports, access to which will depend on your user role. 8.2 Detailed Learner Information The Learner Information section of the portal provides users with visibility of learner applications. Learner application details can be viewed at both pre and post approval stages and depending on the access role, users will be able undertake the following actions: 1. Search and view details of learners’ application information 2. Use a number of filter options to perform searches for an individual learner or for multiple learners. 3. View individual detailed learner Information. 4. View learner assessment history 5. Export learner information and assessment history information for your own data management purposes 6. Make updates to reference data fields if required For further detail and information on the Learner Info area of the portal, please refer to Section 9 of this guide. For further details of these user roles, please refer to section 2, Learning Provider User Roles. 8.3 Change of Circumstance Home As part of managing learners’ applications via the Applicant Information Service, CoC Users will be able to make changes to learners’ application information if their study plans change. For more information on CoCs, please refer to section 13. For further details of these user roles, please refer to section 2, Learning Provider User Roles. Note - The Learning Provider Portal will prevent a user from creating a CoC unless a CoC contact already exists. Please refer to section 6, Maintain Learning Provider Contacts, for guidance on creating and maintaining contact information. 35 8.4 Financials Home The Financials Home section of the Applicant Information Service provides learning providers with a view of the loan position and statement of all payments made. Financial Administrator users will be able to view this information on screen and export reports. For more information on financial reporting, please refer to section 14. For further details of these user roles, please refer to section 2, Learning Provider User Roles. 36 Section 9 | Search and View Learner Information After signing in you will automatically be directed to the home page where you will be able to access the Applicant Information Service. From here you will be able to access the Learner Information screen. Hover your cursor on the Applicant Information Service tab and select Learner Information. 9.1 Searching for Learner Information A search can be performed by using either the Learner Search tab or the Learning Aim Search tab. The Learner Information screen will always default to the Learner Search tab. Note - If you begin to enter search criteria using one tab and then select another tab, the data initially entered will be cleared and you must start your search again. 9.1.1 Learner Search LP Administrators and Advisors can search for single or multiple learners using the following filters within the Learner Search screen; Search Field Information Tips Academic Year The Academic Year refers to any year that the learner’s application is active. For example if the learner begins a 3 year learning aim in November 2013 and completing in May 2016 their details would be returned for 2013/14, 2014/15 and 2015/16 This is a mandatory field To change the academic year, If other academic years are available, use the drop down menu 37 Forename If entering a Forename, the Surname field must also be populated A wildcard search will find more matches, but at least three characters must be entered e.g. joh% Surname If entering a Surname, the Forename field must also be populated A wildcard search will find more matches, but at least three characters must be entered e.g. smi% Date of Birth Learner’s date of birth The format must be DD/MM/YYYY Unique Learner Number (ULN) As well as searching for a specific ULN, you have the ability to use the tick box ‘Search for Blanks’ to search for learners without a ULN Initially this field will be blank and you should enter a ULN for all of your learners Customer Reference Number (CRN) This is the key identifier SLC give to learners. This number will be used by learners when applying for all SLC products. There is no requirement for providers to validate this number and is for your information only. Learners will use this when they contact the SLC Additional Learner Reference Number As well as searching for a specific reference, you have the ability to use the tick box ‘Search for Blanks’ to search for learners without an additional learner reference number. You can add your own Additional Learner Reference Number for a learner, see how to do this in the ‘Update Information’ section of the guide Verified National Insurance Number (NINO) A dropdown section that lets you select ‘Yes’ or ‘No’ If a learner does not have a verified NINO then this will block loan payments. More information is available in the ‘Financials Home’ section of the Applicant Information Service. Last Assessment Date From If entering a Last Assessment Date From, the Last Assessment Date To field must also be populated Use this in conjunction with the Last Assessment Date To field to search for applications that have been assessed or reassessed within a If you have learners without a ULN the message ’You have Learners who do not currently have a ULN’ will appear on initial entry to the Learner Information screen 38 certain date range. Last Assessment Date To If entering a Last Assessment Date To, the Last Assessment Date From field must also be populated Application Status You can search for applications that You can only see applications that are at the following work stages; have been submitted to SLC. If you have a learner who has applied Approved online and their details are not Applications in Progress showing within the Learner Eligibility incomplete Information section, this may be Missing Evidence because their application is still Suspended waiting to be submitted. Cancelled Withdrawn Ineligible Held Pending Budget Approval Approved Awaiting Signature The number of records displayed per page can be chosen from the drop down menu, with the options of; Number of Records to Display per Page Group Name Use this in conjunction with the Last Assessment Date From field to search for applications that have been assessed or reassessed within a certain date range. This can also be used to search for learners who have had change of circumstances applied to them within a certain date range. 25 50 100 200 You can search for learners that have been assigned to individual groups created. These will be displayed in the drop down menu. CoC Applied? You can search for learners where a change of circumstance has been applied by selecting ‘yes’ or ‘no’ Use this in conjunction with the Last Assessment Date From field to search for applications within a certain date range. CoC typed Applied You can search for learners which have had a change of circumstances performed from the You will need to select ‘Yes’ from the ‘Coc Applied?’ field. 39 following options View all Fee Charged Learning Aim Details Loan Requested Learning Provider Cancel Application 40 9.1.2 Learning Aim Search Using the following filters within the Learning Aim Search you can search for a single learner or multiple learners; Search Field Academic Year Information Tips The Academic Year refers to any year that the learner’s application is active. For example if the learner begins a 3 year learning aim in November 2013 and completing in May 2016 their details would be returned for 2013/14, 2014/15 and 2015/16 This is a mandatory field Learning Aim The name of the learning aim as provided by the Skills Funding Agency as approved for loans A wildcard search will find more matches, but at least three characters must be entered e.g. Mat% Reference The reference of the learning aim as approved by the Skills Funding Agency as approved for loans This reference number is 8 characters long. Learning Aim Type The learning aim type can be chosen from the drop down menu, with the options of; To change the academic year, If other academic years are available, use the drop down menu A Level AS Level QAA Access to HE Certificate Diploma Start Date From If entering a Start Date From, the Start Date To field must also be populated Use this in conjunction with the Start Date To field to search for applications with start dates in a certain date range. Start Date To If entering a Start Date To, the Start Date From field must also be populated Use this in conjunction with the Start Date From field to search for applications with start dates in a certain date range. End Date From If entering a End Date From, the End Date To field must also be populated Use this in conjunction with the End Date To field to search for applications with end dates in a certain date range. 41 End Date To If entering a End Date To, the End Date From field must also be populated Use this in conjunction with the End Date From field to search for applications with end dates in a certain date range. Course Trainer As well as searching for a specific trainer code, you have the ability to use the tick box ‘Search for Blanks’ to search for learners without one. You also have the ability to use the wildcard search, but at least three characters must be entered e.g. A12% You can add your own Course Trainer Code for a learner, see how to do this in section 12, Field Updates Course Location As well as searching for a specific location code, you have the ability to use the tick box ‘Search for Blanks’ to search for learners without one. You also have the ability to use the wildcard search, but at least three characters must be entered e.g. J15% You can add your own Course Location Code for a learner, see how to do this in section 12, Field Updates Number of Records to Display per Page The number of records displayed per page can be chosen from the drop down menu, with the options of; Group Name 25 50 100 200 You can search for learners that have been assigned to individual groups created. These will be displayed in the drop down menu. CoC Applied? You can search for learners where a change of circumstance has been applied by selecting ‘yes’ or ‘no’ CoC typed Applied You can search for learners which have had a change of circumstances performed from the following options You will need to select ‘Yes’ from the ‘Coc Applied?’ field. View all Fee Charged Learning Aim Details Loan Requested Learning Provider Cancel Application 42 9.2 Performing a search The Learner Information screen will automatically default to the Learner Search tab, so if you want to perform a search based on learning aims select the Learning Aim Search tab. 1. Complete the required combination of search parameters Note – Some search parameters are drop down boxes and others require you to type in your information. If using the ‘Application Status’ search parameter on the ‘Learner Search’ tab be aware that you must select the application status you require and then click want to search for all application statuses click or if you . If you want to remove any of the selected options select the application status you wish to remove and click or if you want to remove all the options selected, click 43 2. After entering your search parameters, depending on User Role access (please refer to section 2, Learning Provider User Roles, page 9), users can perform the following actions; View Results Export Results Export Assessment History Clear Search 3. Selecting View Results, Export Results or Export Assessment History will validate the search criteria. If the validation is successful results will be displayed or exported. If the validation is unsuccessful an error message will be displayed highlighting the parameter causing the failure. 4. The Clear Search option will clear the search form of all parameters. 9.3 View Results To view the search results on screen click The search results will be displayed at the bottom of the screen. This shows information at a summary level. To view more detailed information, select the learner name hyperlink. Please see Section 11 – View Detailed Learner Information. Note - Where there are no records which match the filter used, the following message will be displayed on the screen: “No records match the criteria entered. Please amend your criteria and search again” To return to the search, click on The search results will be ordered alphabetically by the learner’s surname but this can be amended by clicking another header. If reordered by Additional Learner reference number the results will be ordered alphabetically then numerically. If reordered by ULN, Fee Amount, Entitlement Amount or Balance Payable the results will be ordered numerically. 44 45 The information displayed in the Learner Information Results is detailed in the following table; Fee Amount Entitlement Amount The fee stated by the learner on their application The amount of loan a learner is eligible for. SLC use the fee amount, the maximum funding rate for the course and the learners requested loan amount to calculate how much loan a learner is eligible to. SLC will pay the lowest of the three amounts stated above and this amount will be shown in here Balance Payable If the fee stated on the application is more than the loan the learner has requested or is entitled to, the balance payable will show. The total number of records retrieved will be displayed below the results of the search Note - Where more than 50,000 records are returned based on the completed search filters the following message will be displayed on screen: “Too many records match the search criteria you have entered. Please use the criteria to further restrict the number of records returned” The current number of the page is displayed, along with the total number of pages returned by the search. To view a different page of results; 1. Click on the page number to view that page or; 2. Click on the arrows to navigate through the pages After viewing your search results on screen, LP Administrators can perform the following actions; – Please refer to section 10.1 – Please refer to section 10.2 - Please refer to section 13 46 Section 10 | Exporting Learner Information Users with the user role of LP Administrator will be able to export learner information for their own purposes if required. The two exports available for learner application information are; Export Results Export Assessment History This can be done from the learner results screen can be exported either; Directly after entering search criteria, before viewing results on screen After performing a search and viewing the results on screen 10.1 Export Results LP Administrator users can export successful search results after selecting Export Results both before or after viewing the search results on screen. This is available in either xml or CSV 1. Click export results The Learner Information Export section will be appear 2. From the Learner Information Export screen you can either; Click Cancel to return to the search screen Click 3. To export results, enter a file name in the Export File Name field, this can be up to a maximum of 50 characters 4. Click Note – If user selects to ‘Export Results’ but have not completed the filename field, the following error will be displayed; “A filename must be provided” 47 5. To select the destination to export and save the file to, follow the on screen prompts specific to your system The system will create an xml or CSV file and the following options will appear; 6. Select Save, Open or Cancel the file. a) If you select ‘Cancel’ the learner Information Export section will be removed, the learner information filter will display the parameters previously captured and the filter parameters will be amendable again. b) Select ‘Save’ to save the file in a location of your choice. c) Select ‘Open’ and the file will open with all the relevant application data populated. 48 49 Please note- When opening a CSV file in Excel, Excel performs certain behaviour such as removing zeroes from the start of numbers. One way in which to prevent this from happening is to import the CSV file as follows: 1) Open a blank excel sheet. 2) Select all cells (CTRL+a) and format them as text (right click->format cells). 3) Open your CSV in notepad (you can do so by dragging the file into an open notepad window). 4) Copy all of the content of the CSV and paste it into the first cell in excel. Notice that a "Paste Options" icon appears somewhere at the bottom. 5) Click on the small arrow on the right of that icon, and select "use text import wizard". This will open a wizard... 6) Make sure "delimited" is selected and click "next" 7) Select "comma" and deselect "space" in the delimiters area (you will see the columns arrange correctly in the sample below), then click "next". 8) In this step you define how to treat each column. Since we don't want excel to change anything, we'll define them all as "text": Click on the first column in the sample (it will be coloured in black); now scroll sideways all the way to the right and shift+click the last column; in "column data format" above, select "text". 9) Click "finish". 10.2 Export Assessment History The assessment history export will contain one entry with the current assessment details and then a separate entry for each historical assessment associated to the learner’s application. The current assessment details record will be displayed at any of the following workstages; Approved Applications in Progress Eligibility incomplete Missing Evidence Suspended Cancelled Withdrawn Ineligible Held Pending Budget Approval Approved Awaiting Signature 50 To Export Assessment History; LP Administrator users can export successful search results by selecting Export Assessment History both before and after viewing the search results on screen. 1. Click export results The Learner Information Export section will be appear 1. From the Learner Information Export screen you can either; Click Click to return to the search screen 2. To export results, complete the file name field, this can be up to a maximum of 50 characters 3. Click , Note - When you select to ‘Export Assessment History’ but have not completed the filename field, the following error will be displayed; “A filename must be provided" 4. To select the destination to export and save the file to, follow the on screen prompts specific to your system The system will create an xml file and the following options will appear; 5. Select Save, Open or Cancel the file. d) Select ‘Cancel’ and the learner Information Export section will be removed, the learner information filter will display the parameters previously captured and the filter parameters will be amendable again e) Select ‘Save’ to save the xml file in a location of your choice f) Select ‘Open’ and the xml file will open with all the relevant application data populated 51 10.3 Validation when exporting data In certain circumstances an error message may be displayed if a file cannot be exported; Error Message If more than 50,000 records are returned, the following message will be displayed on the screen Too many records match the search criteria you have entered. Please use the criteria to further restrict the number of records returned Where there are no records which match the filter parameters entered, the export will not trigger and the following message will be displayed on the screen No records match the criteria entered. Please amend your criteria and search again 52 Section 11 | View Detailed Learner Information After completing a search and viewing summary results on screen, users will be able to drill down into individual learner records and view detailed learner information. The Detailed Learner Information screen provides more in-depth information about a learner’s application and also allows those with the LP Administrator user role to update information such as the ULN and other optional fields. 1. Select to view a learner’s detailed information for the selected application and Academic Year, by selecting the full name hyperlink from the search results 2. After identifying the learner’s application click The Detailed Learner Information screen will appear 53 The Detailed Learner Information screen is split into a number of sections allowing easy navigation and viewing of information. These sections are; Section Description Learner Information Personal learner information Assessment Information Details about the current and historical assessments associated with the learners application Current Payment Schedule Details of learners loan payment schedule (User with the Attendance Administrator role will also be able to confirm a learner’s attendance from this screen – see Section 15) 54 11.1 Learner Information The majority of the information that is displayed in the Learner Information section of the Details Learner Information screen cannot be changed by a learning provider, the exception being the Unique Learner Number (ULN) and the Additional Learner Reference Number (ALRN). Details of how to update these fields can be found in section 12. If the learner wants amend any other personal information such as their address they will need to contact Student Finance England on 0300 100 0619. Hint – The field Verified NINO shows you whether the learner’s National Insurance Number has been received and verified by DWP. This is an important field as SLC cannot make payments on behalf of a learner until we have a verified NINO 11.2 Assessment Information The Assessment Information section of the Detailed Learner Information screen allows providers to see current and historical assessment information. The information is split as follows; Current Assessment Assessment History 55 11.2.1 Current Assessment The Current Assessment information will show details of the current assessment for the Learner and display the following information; Indicator Description Assessment Date The date that the last assessment was performed resulting in the current assessment outcome CoC Types If applicable to the learner’s application, details of any change of circumstances (CoC) that are associated with the current assessment Fee Amount The fee stated by the learner on their application Loan Amount Requested The amount the learner has requested in a loan Entitlement Amount The amount of loan a learner is eligible for SLC use the fee amount, the maximum funding rate for the course and the learners loan amount to calculate how much loan a learner is eligible to. SLC will pay the lowest of these three amounts and this amount will be shown here. Balance Payable If the fee stated on the application is more than the loan the learner has requested or is entitled to, the balance payable will show Submitted By Where a CoC was submitted by a provider to generate the current assessment the username of the person who submitted that CoC will be displayed. If the assessment was generated from another source the text “SLC” or “Learner” will be displayed Learning Aim Details A hyperlink to generate a pop up box containing current Learning Aim Details 56 Clicking the following information; hyperlink will generate a pop up box containing the Indicator Description Learning Aim If any of the Learning Aim Details are incorrect these can be changed by following the Change of Circumstance (CoC) process Reference Learning Aim Type Please see Section 13 of the User Guide for more information on Change of Circumstances Learning Aim Level Start date End date Course Trainer This is optional information and can be edited by LP Administrators, please see the Field Updates section for more information Course Location This is optional information and can be edited by LP Administrators, please see the Field Updates section for more information 57 11.2.2 Assessment History The Assessment History information will show details of historical assessment information for the learner for the application selected Indicator Description Assessment Date The date that the last assessment was performed resulting in the assessment outcome CoC Types If applicable to the learner’s application, details of any change of circumstances (CoC) that are associated with the historical assessment Fee Amount The fee charged by the provider associated with the historical assessment Loan Amount Requested The amount the learner had requested in a loan associated with the historical assessment Entitlement Amount The amount of loan a learner was eligible for associated with the historical assessment SLC use the Fee Amount, the LARA maximum and the learners Loan Amount to calculate how much loan a learner is eligible to. The figure in this field will be the lowest of these three amounts. Balance Payable The difference between the Fee Amount and the Entitlement Amount associated with the historical assessment Submitted By Where a CoC was submitted to generate the historical assessment the username of the person who submitted that CoC will be displayed. On initial assessment, where a CoC was not submitted and the application was made online, the text ‘Learner’ will be displayed On initial assessment, where a CoC was not submitted and the application was made on paper, the text ‘SLC’ will be displayed Learning Aim Details A hyperlink to generate a pop up box containing historical Learning Aim Details 58 1. Click hyperlink A pop up box appear containing the following information; Indicator Description Learning Aim The name of the learning aim as provided by the Skills Funding Agency as approved for loans Reference The reference of the learning aim as approved by the Skills Funding Agency as approved for loans Learning Aim Type A’level Qualification Learning Aim Level Level of qualification Start date Learning Aim start date End date Learning Aim end date Course Trainer In the Assessment History section this field is not editable Course Location In the Assessment History section this field is not editable 59 The User can navigate to either the Learner Information or Current Payment Schedule by clicking the appropriate link. The user can also navigate back to the Learner Information Results by using the back button. Click to exit 11.3 Current Payment Schedule The Current Payment Schedule section of the Detailed Learner Information screen allows providers to see the loan payment schedule for an individual learner. 60 The screen will provide the following details: Indicator Description Scheduled Payment Date The date that the payment instalment has been scheduled for payment Actual Payment Date The date that the payment was made to the Provider Payment Amount The amount that will be paid to the Provider Payment Status Status of payment : Scheduled In Progress Paid Attendance Confirmation Date The date for which attendance should be confirmed. Attendance Confirmation Status Attendance Confirmation Status : Submitted By In Attendance Not In Attendance Change Start Date Details of user who submitted confirmation of attendance Note – Payment cannot be made until: 1. The learner’s National Insurance Number has been verified 2. The provider has entered a ULN for the learner 3. The provider has confirmed the learner’s attendance The User can navigate to either the Learner Information, Assessment Information or Current Payment Schedule and Attendance by clicking the appropriate link. The user can also navigate back to the Learner Information Results by using the back button. Click to exit 61 The Current Payment Schedule and Attendance Reportcan also be exported for a number of learners in either CSV or XML format. Two options appear on the ‘Learner Search’ and ‘Learner Information Results’ screens; Export XML Payment Schedule & Attendance Export CSV Payment Schedule & Attendance 62 To export the results directly from the ‘Learner Search screen’, the relevant search criteria should be entered and then either the XML or CSV option selected. A filename should be entered and then ‘Export Report’ selected. Alternatively, after entering the relevant search criteria on the Learner Search screen, the ‘View Results’ option can be selected to first bring up the required learners on screen. The ‘Export XML Payment Schedule & Attendance’ or ‘Export CSV Payment Schedule & Attendance’ option can then be selected from the bottom of the results screen. Note – There are no restrictions to the search criteria which can be selected for the Payment Schedule and Attendance Export, however, only those applications with a payment schedule will appear on the exported file (for example those Approved, Withdrawn, Suspended). If none of the applications selected have a payment schedule, then an error message will appear on attempt to export to advise that no applications match the search criteria. The CSV Export will comprise of a file containing the following headings: Learner Surname Learner Forename Learner Date Of Birth Unique Learner Reference Number Additional Learner Reference Number Scheduled Payment Date Actual Payment Date Payment Amount Payment Status Payment Pended Reason Attendance Confirmation Date Attendance Confirmation Status Submitted By The CSV file will comprise of one row for each scheduled payment, therefore multiple rows will appear for most learners. The data will be ordered alphabetically by learner surname. Details of the XML export are defined in the Current Payment Schedule and Attendance Export Schema. If you require a copy of this please contact [email protected] 63 Section 12 | Field updates Learning Provider Administrator Users will be able to make field updates on a learner’s application. The updates that can be made are; Field Information Specification Unique Learner Number (ULN) Mandatory information that is required for the learner before attendance can be confirmed Must be numeric Must be 10 characters in length This can be added either on individual learner records, to multiple learners at one time or by bulk import Additional Learner Reference Number An optional field that can be used to add a reference number that your organisation may attribute to individual learners Can be alphanumeric Can be up to 20 characters in length This can be added either on individual learner records or to multiple learners Course Trainer Code An optional field and can be added to a learner’s application to identify learners at different subcontractors Can be alphanumerical Can be up to 8 characters in length This can be added for individual learners Course Location Code An optional field and can be added to a learner’s application to segment learners at different locations / campuses Can be alphanumeric Can be up to 8 characters in length This can be added for individual learners 12.1 Update fields via the Learner Information Results LP Administrators can update the following learner references for single or multiple learners in one submission via the Learner Information Results screen; Unique Learner Number (ULN) Additional Learner Reference Number Please refer to section 12.2 for guidance on how to complete a search and upload data for missing ULNs. Please refer to section 12.3 for guidance on how to complete a search and upload data for missing Additional Learner Reference Numbers. . 64 12.2 Adding the Unique Learner Number (ULN) The ULN is a mandatory field and requires completion before a learners attendance can be confirmed. The ULN can be added to single or multiple learner records in one transaction. Note - If there are learner records at your organisation that require the ULN adding, a message will be displayed ‘You have learners who do not currently have a ULN’ From the home page hover over and select The learner search screen will appear. 1. Select the Academic Year from the drop down menu 2. Click the ’Search for blanks tick box’ next to Unique Learner Number field 3. Select The results will appear at the bottom of the screen. 65 4. Enter ULNs to one or more of the search results 5. Select The updates will be made effective immediately. Note – If you select ‘Clear Changes’ any ULNs which have been captured but not submitted, will be cleared. 12.3 Adding the Additional Learner Reference Number The Additional Learner Reference number is optional and can be used to add a reference number that your organisation attributes to learner. From the Home Page, hover over and select The learner search screen will appear. 1. Select the Academic Year from the drop down menu 2. Click the ’Search for blanks’ tick box next to the Additional Learner Reference Number field 3. Select view results screen and the results will appear at the bottom of the 66 4. Add the Additional Learner Reference numbers to one or more of the search results 5. Select The updates will be made effective immediately Note – Selecting ‘Clear Changes’ will clear any Additional Learner Reference Numbers which have been captured but not submitted. 12.4 Field Updates via Detailed Learner Information A Learning Provider Administrator user can update the Unique Learner Number (ULN), the Additional Learner Reference Number, the Course Trainer Code and the Course Location code from the Detailed Learner Information page within the Learner Information section of the Applicant Information Service after completing a search and selecting an individual learner 12.4.1 Adding the ULN to individual learner records 1. From the Detailed Learner Information screen 2. Enter ULN 3. Select 67 Note - Selecting ‘Cancel’ will remove any changes made and return the original information displayed on the Learning Aim Details pop up 4. Click to exit When accessed from the results page of a search, when navigated back to that page, the results will be shown with the search criteria still populated. 12.4.2 ULN Validation The ULN will be validated by the system as follows; Check the ULN is in the correct format Check the ULN is not held against another learner record If the system validates that the ULN is correct and unique, the updates will then be saved and the screen will refresh and show the updated information. If the system validates that the format of the ULN is incorrect, the updates will not be saved. The ULN will be removed from the screen and the following message will be displayed: ‘The ULN is in the incorrect format please update this and Submit Changes’ If the system validates that the ULN format is correct but that it is not unique the updates will not be saved. The ULN will be removed from the screen and the following message will be displayed: ‘The ULN is not unique please update this and Submit Changes’ If submitting ULNs for multiple learners the system will update all that don’t fail validation. To identify where the updates didn’t take effect because they failed validation, search for records with blank ULNs Note – When adding a ULN for one or many learners from a page of results, the changes can only be added for one page at a time and must be submitted before moving on. If a ULN has been added for one or many learners and then the user selects to move to another page without selecting ‘Submit Changes’ the following error will be displayed: ‘Please submit your changes before continuing.’ 68 12.4.3 Adding Additional Learner Record Number to individual learner records 1. From the Detailed Learner Information screen 2. Enter Additional Learner Record Number 3. Select Note - Selecting ‘Cancel’ will remove any changes made and return the original information displayed on the Learning Aim Details pop up From the Detailed Learner Information screen users can navigate back to the previous screen from which the Detailed Learner was accessed. 4. Click to exit When accessed from the results page of a search, when navigated back to that page, the results will be shown and the search criteria populated. 69 12.4.4 Additional Learner Reference number Validation The Additional Learner Reference Number will be validated by the system as follows; Check the Additional Learner Reference Number does not exceed maximum length If the system validates that the Additional Learner Reference number is in the correct format the updates will be saved and the screen will refresh and show the updated information. If the system validates that the Additional Learner Reference number format is incorrect, the updates will not be saved, the Additional Learner Reference number will be removed from the screen and the following message will be displayed: “The Additional Learner Reference Number is in the incorrect format please update this and Submit Changes” If you submit Additional Learner Reference Numbers for multiple learners the system will update all which don’t fail validation. To identify those where the updates didn’t take effect, search for records with blanks Note – When adding an Additional Learner Reference Number for one or many learners from a page of results, the changes can only be added for one page at a time and must be submitted before moving on. If a ULN has been added for one or many learners and then the user selects to move to another page without selecting ‘Submit Changes’ the following error will be displayed: ‘Please submit your changes before continuing.’ 12.4.5 Adding Course Trainer and Course Location Codes to individual learner records Adding the course trainer code and course location code is optional and may be added to segment learners at different subcontractors and campuses. 1. From the Detailed Learner Information screen 2. Select Assessment Information tab In order to use this import function, the import file requires the ‘Application Id’. This is because the information within this upload is specific to the application rather than the learner. In order to obtain the ‘Application Id’, the ‘Learner Information Report’ should be exported from the Learning Provider Portal either via XML or CSV. Please note- When opening a CSV file in Excel, Excel performs certain behaviour such as removing zeroes from the start of numbers. One way in which to prevent this from happening is to import the CSV file as follows: 1) Open a blank excel sheet. 2) Select all cells (CTRL+a) and format them as text (right click->format cells). 3) Open your CSV in notepad (you can do so by dragging the file into an open notepad 70 window). 4) Copy all of the content of the CSV and paste it into the first cell in excel. Notice that a "Paste Options" icon appears somewhere at the bottom. 5) Click on the small arrow on the right of that icon, and select "use text import wizard". This will open a wizard... 6) Make sure "delimited" is selected and click "next" 7) Select "comma" and deselect "space" in the delimiters area (you will see the columns arrange correctly in the sample below), then click "next". 8) In this step you define how to treat each column. Since we don't want excel to change anything, we'll define them all as "text": Click on the first column in the sample (it will be coloured in black); now scroll sideways all the way to the right and shift+click the last column; in "column data format" above, select "text". 9) Click "finish". If using CSV, the exported report should then be amended (for example additional columns removed) to the following format for the import, and saved to your own system: Header Number Header Name Example Header 1 learnerSurname Smith Header 2 learnerForename John Header 3 learnerDateOfBirth 1984-05-10 Header 4 uniqueLearnerReferenceNumber 5412541444 Header 5 applicationId 1251 Header 6 additionalLearnerReferenceNumber 123 Header 7 courseLocation North Header 8 courseTrainer 53544 Full information on the formats for both the CSV and XML files can be found in the Schema Definition and Technical Specification documents. Please contact [email protected] if you require these to be issued to you. To import the file, click ‘Chose File’ which will allow you to select either the XML or CSV file from your own system. Then click ‘Submit’ 71 The Assessment Information will appear which includes Current Assessment Information 3. Select the Learning Aim Detail hyperlink A pop up box will appear 4. Add the required codes 5. Select The screen will return to Assessment Information 6. Click to exit 72 When accessed from the results page of a search, when navigated back to that page, the results will be shown and the search criteria populated. 12.4.6 Course Trainer and Course Location Code Validation The Course Trainer Code will be validated to ensure the Course Trainer Code does not exceed the maximum length. If the system validates that the Course Trainer is in the correct format the update will be saved and the screen will refresh and show the updated information If the system validates that the Course Trainer format is incorrect, the update will not be saved, the Course Trainer will be removed from the screen and the following message will be displayed: “The Course Trainer is in the incorrect format please update this and Submit Changes’ The Course Location Code will be validated to ensure the Course Location Code does not exceed the maximum length. If the system validates that the Course Location is in the correct format the update will be saved and the screen will refresh and show the updated information If the system validates that the Course Location format is incorrect, the update will not be saved, the Course Location will be removed from the screen and the following message will be displayed: “The Course Location is in the incorrect format please update this and Submit Changes” 12.5 Field Updates via Bulk Import 12.5.1 Adding the ULN via Bulk Import This functionality will allow users with LP Administrator access to import Unique Learner Numbers (ULNs) for multiple learners using an XML or CSV bulk import file, similar to Attendance Confirmation and Change of Circumstance bulk uploads. This feature provides users with an alternative to the current ULN submission process and does not prevent users from continuing to submit ULNs using the Learner Information screens. If using CSV, the report you intend to import should comprise the following format; Header Number Header Name Example Header 1 learnerSurname Smith Header 2 learnerForename John Header 3 learnerDateOfBirth 1984-05-10 Header 4 customerReferenceNumber 12345678912 Header 5 uniqueLearnerReferenceNumber 5412541444 73 In order to obtain the required information/format for this import, the best practice recommendation is to export the CSV ‘Learner Information Report’ from the Learning Provider Portal. The exported report can then be amended (for example additional columns removed), and saved to your own system. Please note- When opening a CSV file in Excel, Excel performs certain behaviour such as removing zeroes from the start of numbers. One way in which to prevent this from happening is to import the CSV file as follows 1) Open a blank excel sheet. 2) Select all cells (CTRL+a) and format them as text (right click->format cells). 3) Open your CSV in notepad (you can do so by dragging the file into an open notepad window). 4) Copy all of the content of the CSV and paste it into the first cell in excel. Notice that a "Paste Options" icon appears somewhere at the bottom. 5) Click on the small arrow on the right of that icon, and select "use text import wizard". This will open a wizard... 6) Make sure "delimited" is selected and click "next" 7) Select "comma" and deselect "space" in the delimiters area (you will see the columns arrange correctly in the sample below), then click "next". 8) In this step you define how to treat each column. Since we don't want excel to change anything, we'll define them all as "text": Click on the first column in the sample (it will be coloured in black); now scroll sideways all the way to the right and shift+click the last column; in "column data format" above, select "text". 9) Click "finish". The import file is in the specified XML or CSV format and the user is given the ability to browse their internal file systems to the location of the saved file. 1. Users can add ULNs in bulk by hovering over the Applicant Information Service tab, then selecting Learner Information Home. 74 2. The Learner Information Home page will appear. Users can navigate to all Import ULN functionality from this home page. 3. Click 4. Click 75 5. To select the ULN file to be imported, follow the on screen prompts specific to your system 6. Click 76 7. Once the required file has been uploaded, selected The system will then prompt that the ULN file has been submitted for processing. Note – On submission of the file, the system performs both file Format and Business Rule validations. Each learner ULN is processed as an individual record. File format validation will ensure that the format of the file is consistent with the format detailed in the schema and that all mandatory fields have been completed. The submitted ULN Bulk Import data file format will be validated, and the results will be displayed to confirm successes and failures (see section 12.5.3 – View ULN Bulk Import Results for more information). Please review the results to ensure they are correct. Details of the file format validation rules are found in the Technical Proposal issued as part of the Technical Specifications for the Learning Provider Portal. If you require a copy of these, please email [email protected] 12.5.2 ULN Bulk Import Validation Rules and Errors The content of imported ULN files will be validated to ensure the data is correct and meets both format and business rules such as; The file contains all fields expected and they are in the correct order 77 The file contains a minimum of one record The ULN is not blank The ULN does not already exist If a single record within a file fails format validation this will not cause the entire file to fail Once a file has been validated successfully a learner’s application will updated with the new ULN information. Details of the file format validation rules are found in the Technical Proposal issued as part of the Technical Specifications for the Learning Provider Portal. If you require a copy of these, please email [email protected] 12.5.3 View ULN Bulk Import Results Imported ULN data will be validated upon submission, before it is applied to learners’ applications. Details of the imported data and the submission results are available to view via the Learning Provider Portal. This enables users to track the number of ULNs submitted for learners, track the progress, view where the original file is stored, view who submitted the file and also view any errors. For details of error messages, please refer to the Technical Specifications LP Administrator users can View Imported Results by hovering over the Applicant Information Service tab, then selecting Learner Information Home. Select View Import Results from the Learner Information Home page 78 1. Enter the start and end date range to search for 2. Select the File Import Status 3. Click The results will appear below the search. 4. Select the hyperlink filename of the desired record to View Import Results 79 5. Any records which have not been processed will appear, by default, arranged by ULN. Users can choose to arrange learners by other filter headings if preferred. 6. For details of error messages, please refer to the Technical Specifications 12.5.4 Adding the Additional Learner Reference Number, Course Trainer and Course Location Codes via Bulk Import Bulk import of the following Learner Details, via either XML or CSV; can be made via the Learner Information Home. Course Trainer Course Location Additional Learner Reference 1. Select the Learner Information home tab 2. Hover over Import and select Learner Details 80 In order to use this import function, the import file requires the ‘Application Id’. This is because the information within this upload is specific to the application rather than the learner. In order to obtain the ‘Application Id’, the ‘Learner Information Report’ should be exported from the Learning Provider Portal either via XML or CSV. Please note- When opening a CSV file in Excel, Excel performs certain behaviour such as removing zeroes from the start of numbers. One way in which to prevent this from happening is to import the CSV file as follows: 1) Open a blank excel sheet. 2) Select all cells (CTRL+a) and format them as text (right click->format cells). 3) Open your CSV in notepad (you can do so by dragging the file into an open notepad window). 4) Copy all of the content of the CSV and paste it into the first cell in excel. Notice that a "Paste Options" icon appears somewhere at the bottom. 5) Click on the small arrow on the right of that icon, and select "use text import wizard". This will open a wizard... 6) Make sure "delimited" is selected and click "next" 7) Select "comma" and deselect "space" in the delimiters area (you will see the columns arrange correctly in the sample below), then click "next". 8) In this step you define how to treat each column. Since we don't want excel to change anything, we'll define them all as "text": Click on the first column in the sample (it will be coloured in black); now scroll sideways all the way to the right and shift+click the last column; in "column data format" above, select "text". 9) Click "finish". 81 If using CSV, the exported report should then be amended (for example additional columns removed) to the following format for the import, and saved to your own system: Header Number Header Name Example Header 1 learnerSurname Smith Header 2 learnerForename John Header 3 learnerDateOfBirth 1984-05-10 Header 4 uniqueLearnerReferenceNumber 5412541444 Header 5 applicationId 1251 Header 6 additionalLearnerReferenceNumber 123 Header 7 courseLocation North Header 8 courseTrainer 53544 Full information on the formats for both the CSV and XML files can be found in the Schema Definition and Technical Specification documents. Please contact [email protected] if you require these to be issued to you. To import the file, click ‘Chose File’ which will allow you to select either the XML or CSV file from your own system. Then click ‘Submit’ A message will then appear to let you know that the file has been submitted for processing. 82 In order to view the import status of the file, return to the ‘Learner Information Home’ section of the Portal and select ‘Learner Details’ from ‘View Import Results’. Please refer to section 12.5.3 for further details. Section 13 |Change of Circumstances (CoC) When a learner’s circumstance changes and the information on their application no longer accurately reflects their study plan, SLC should be notified as soon as possible. This will ensure that payments made to your organisation are correct and will avoid overpayments where possible. SLC will accept change of circumstance (CoC) notifications from the learner directly or from the learning provider on behalf of the learner. Learning Providers can create and submit CoCs using the Learning Provider Portal. While it is best practice to notify SLC of any CoCs immediately, a learner may not notify their learning provider until after the event and so users will be required to state the date the change took effect on the CoC submission. Due to the design of the system, the CoC will be processed automatically once it is submitted to SLC. SLC will update the learner’s information and adjust their 24+ Advanced Learning Loan entitlement if required. SLC will send the learner confirmation of their updated application information. Advisor and Administrator Users will be able to view the learner’s current (and all previous) assessment via the Learning Provider Portal. These users will also be able to search and 83 view learners based on the type of change of circumstance that has been applied. Please refer to section 9 for more detail on how to do this. For more information on validation, please refer to section 13.12 13.1 User Roles Required to Access the CoC area of the Applicant Information Service The Change of Circumstance area of the Learning Provider Portal can only be accessed by users who have been assigned the following user roles; Learning Provider Change of Circumstance Administrator Learning Provider Change of Circumstance Advisor Please refer to section 2, Learning Provider User Roles for further details of these user roles. The Learning Provider Portal will prevent a user from creating a CoC unless a CoC contact already exists. Please refer to section 6, Maintain Learning Provider Contacts for guidance on creating and maintaining contact information. 13.2 Pre and Post Liability CoCs – Application status 13.2.1 Pre Liability CoC – Application Status A learner’s application is considered pre liability until the learning provider has submitted a positive attendance confirmation to SLC. Applications become visible on the Learning Provider Portal as soon as the learner submits their application to SLC, meaning users can see an application while it is at an interim workstage. CoC Administrator Users will not be able to notify SLC of a CoC until the application has been fully assessed and approved. Users can create a pre liability CoC for a learner whose application is at one of the following application statuses; ‘Approved’ ‘Approved Awaiting Signature’ ‘Ineligible’ - A user may also submit a CoC when an application status is ‘Ineligible’ following a CoC previously submitted by a Learning Provider CoC Administrator (i.e. the previously submitted CoC was not submitted by the learner). ‘Cancelled’ – A user can submit a reinstatement CoC when an application status is ‘cancelled’ following a cancellation CoC previously submitted by a Learning Provider CoC Administrator In the scenario where an application is deemed Ineligible due to a LP CoC Admin user previously submitting a CoC, the learner’s loan entitlement will have reduced to zero. The types of CoCs submitted by an LP CoC Administrator which would make a learner’s application Ineligible are; Decrease course fee and/or Decrease loan amount to less than £300 84 Because the loan amount has been reduced to £0, the LP CoC Administrator user will be unable to submit a CoC to increase the loan amount, other changes can be submitted but the learner will remain ineligible until they contact SLC to increase the loan from £0. 13.2.2 Post Liability CoCs – Application Status A learner’s application is considered post liability when the learning provider has submitted a positive attendance confirmation to SLC. The types of CoC that can be done post liability differ to those that can be done at pre liability stage. The system will know when an application is either pre or post liability and will cater the options available automatically. Users can create a post CoC for a learner whose application is at one of the following application statuses; ‘Approved’ ‘Approved Awaiting Signature’ ‘Ineligible’ - A user may also submit a CoC when an application status is ‘Ineligible’ following a CoC previously submitted by a Learning Provider CoC Administrator (i.e. the previously submitted CoC was not submitted by the learner). ‘Suspended’ - A user can submit a resumption CoC when an application status is ‘suspended’ following a suspension CoC previously submitted by a Learning Provider CoC Administrator 13.3 Creating Pre and Post Liability CoCs CoCs can be created for; A single learner with a single change A singe learner with multiple changes Multiple learners with a single change Multiple learners with multiple changes The Create CoC functionality will be disabled to prevent a user from creating a CoC unless a CoC contact already exists. Please refer to section 6, Maintain Learning Provider Contacts for guidance on creating and maintaining contact information. CoCs can be created using different sections of the portal. These are; Detailed Learner Information Screen – After selecting a learner within the Learner Information Home section CoC Search – Within the CoC Home section of the portal CoC Worklist - Within the CoC Home section of the portal Bulk Import - Within the CoC Home section of the portal 13.4 Create Pre Liability CoCs via Detailed Learner Information screen LP CoC Administrator Users can create CoCs for a single learner from the Detailed Learner Information screen. 85 1. Click The Create CoC screen will appear to confirm how many learners the CoC have been selected 2. Click 86 3. Click the CoC type required from the Available Types 4. Click Add Please refer to section 13.6 for guidance on how to populate the CoC type required 5. Click 6. Enter the effective date for the changes Note – Effective date cannot be a date in the future 87 7. Click the appropriate radio button to select a contact for this CoC Note – The Create CoC function will be disabled unless you have an active CoC contact currently assigned to your organisation 8. Click The CoC Summary screen will appear. Please review the details of the CoC to ensure they are correct. 88 9. If details are correct, click amend or cancel. . If details are incorrect, select to Note – The system will check if a learner’s application has been changed since the CoC was created. If a change has been made, the CoC will not be processed and an error message will be displayed 89 13.5 Create Pre Liability CoCs via CoC Home LP CoC Administrator Users can create CoCs by hovering over the Applicant Information Service tab, then selecting CoC Home. The CoC Home page will appear. CoC users can navigate to all CoC functionality from this home page. CoCs can be submitted for single or for multiple learners in one submission if accessed via CoC Home. 1. Click 90 2. Click The Learner Search screen will appear by default 3. To search for a number of learners by common learner information, click 91 Search item Description Academic Year Defaulted to the current academic year. This is the only mandatory field that a user must enter in order to run the search Unique Learner Number Unique learner identifiers Customer Reference Number Additional Reference Number Date of Birth The learner’s date of birth Forename & Surname If one is entered the other must also be completed. Wildcard search can be used Verified NINO Status Indicates if a learner’s National Insurance Number has been verified by the Department for Work and Pensions. Last Assessment Date From & To Users can select to view learners’ applications assessed and reassessed during a particular date range. Both dates must be entered Application status Users may wish to search for learners’ applications at different stages, e.g. to view who has applied but is ineligible Number of Records To Display per Page Number of records to be shown on screen 25/50/100 4. To search for learners by common learning aim information, click The Learning Aim Search screen will appear 92 Search item Description Academic Year Defaulted to the current academic year. This is the only mandatory field that a user must enter in order to run the search Learning Aim Learning Aim title Reference Learning Aim reference Learning Aim Type Learning Aim Type Learning Aim Start Date From and To Users can select to view learning aims by start date range. Both dates must be entered Learning Aim End Date From and To Users can select to view learning aims by end date range. Both dates must be entered Course Trainer Users can search for learning aims by their associated 8 character Course Trainer code Course Location Users can search for learning aims by their associated 8 character Course Location code Number of Records To Display per Page Number of records to be shown on screen 25/50/100 93 5. Click or If View Results selected, the search results will appear 6. Select the appropriate learners by clicking the tick boxes 7. Click The Create CoC page will appear. The total number of learners selected in step 6 will be confirmed on this page, along with the Learner Name ULN Additional Learner Reference Number Learning Aim Detail 8. Click Please refer to section 13.6 for guidance on how to populate the CoC type required. Select the CoC types required to be associated to the learners previously selected 9. Click the CoC type required from the ‘Available’ box 94 10. Click 11. Enter the details of the selected change 95 12. Click 13. Enter the effective date for the changes Note – Effective date cannot be before 8th April 2013 and cannot be a date in the future 96 14. Assign a contact for this CoC by selecting the radio button Note – The Create CoC function will be disabled unless you have an active CoC contact currently assigned to your organisation 15. Click The CoC Summary screen will appear. Please review the details of the CoC to ensure they are correct. 97 16. If details are correct, click amend or cancel. . If details are incorrect, select to Note – The system will check if a learner’s application has been changed since the CoC was created. If a change has been made, the CoC will not be processed and an error message will be displayed 98 13.6 Pre Liability CoC types There are six types of CoCs a LP CoC Administrator can use to notify SLC of a change to a learners application information pre liability. The following subsections detail the data required for each CoC type after learners have been selected. CoC Type Applied with other changes? Applied to multiple learners? Fee Charged Y Y Decrease Loan Amount Learning Aim Y Y N Y What do SLC capture for the change? • Learning Aim Fee • Effective Date • Decrease Loan • Loan Amount required • Effective Date • Learning Aim • Start Date • End Date • Course Trainer • Course Location • Effective Date • Learning Provider • Effective Date Pre-liability/ post liability or both? Both Both Both but with restrictions post-liability Learning Provider N Cancellation N Y • Effective Date Pre-liability Reinstate N Y • Effective Date Pre-liability Y Pre-liability 99 13.6.1 Fee Charged This type of CoC may occur when a learner has changed the learning aim they are undertaking, or if they have entered the incorrect fee on their application form. CoC Type Applied with other changes? Applied to multiple learners? Fee Charged Y Y What do SLC capture for the change? • Learning Aim Fee • Effective Date Pre-liability/ post liability or both? Both To notify SLC of a change to the fee charged for a learner’s learning aim, select the Fee Charged CoC from the Change of Circumstance tab. Note – Decreasing Course Fee will automatically decrease loan amount requested without the need for a CoC 1. Enter the new fee amount. The fee format is £00000.00 with a maximum of 13 digits decimal 2 digits 2. Click to complete the CoC details and submit 100 13.6.2 Decrease Loan Amount This type of CoC may occur if the learner has indicated they wish to decrease the amount of loan needed to fund their course, and make an arrangement to self fund the remainder. CoC Type Applied with other changes? Applied to multiple learners? Decrease Loan Amount Y N What do SLC capture for the change? • Decrease Loan • Loan Amount required • Effective Date Pre-liability/ post liability or both? Both To notify SLC of a decrease to the learner’s loan amount, select the Decrease Loan Amount CoC from the Change of Circumstance tab. Note – Decrease Loan Amount can only be applied to one learner at a time. 1. Click the Yes or No radio button 3. If Yes, enter loan amount required. The fee format required is £00000.00 with a maximum of 13 digits decimal 2 digits The loan amount requested cannot be greater than the entitlement amount currently held for the selected learner 4. If No, CoC cannot be submitted. The loan amount cannot be increased by the Learning Provider Portal 101 5. Click to complete the CoC details and submit 13.6.3 Learning Aim This type of CoC may be required if the learner decides to undertake a different learning aim to the one they have applied for, or the Start Date or End Date needs to be updated. Please note, the Start Date can only be updated when an application is Pre Liability. CoC Type Applied with other changes? Applied to multiple learners? Learning Aim Y Y What do SLC capture for the change? Please note: one or all of the following; • Learning Aim • Start Date • End Date • Course Trainer • Course Location • Effective Date Pre-liability/ post liability or both? Both but with restrictions post-liability To notify SLC of a change to learning aim details, select the Learning Aim Details CoC from the from the Change of Circumstance tab. Note – These CoC fields are optional and can be entered in isolation of each other if not all are changing 102 1. Enter Learning Aim Title. The system will search for possible matches across all learning aims 2. Enter Start Date. The date format is DD/MM/YYYY Start date cannot be before course start year Start date must be before End Date Note – If a learner’s Start Date changes to a date before the 1st August 2013, this should be processed as a Cancellation CoC because the learner will now be ineligible for a 24+ Advanced Learning Loan 3. Enter End Date. The date format is DD/MM/YYYY End Date must be after Start Date Note – Changing the End Date either before the learning aim commences or within the first three months of the learning aim commencing will cause the payment schedule to schedule to re-profile in accordance with the new End Date i.e. if the End Date is now earlier, the payment profile will be shorter or if the End Date is later, the payment profile will extend Note – Changing the End Date after the first three months of the learning aim commencing will not cause the payment schedule to schedule to re-profile as the payment profile is set in line with the original Start and End Dates, as per Policy 103 4. Enter Course Trainer Code. This is an alphanumeric field with a maximum length of 8 characters 5. Enter Course Location Code. This is an alphanumeric field with a maximum length of 8 characters 6. Click to complete the CoC details and submit 13.6.4 Learning Provider This type of CoC may occur if the learner indicates they wish to undertake a learning aim with a different learning provider. Please note, learning provider users are not expected to notify SLC of a learner changing provider in every instance – SLC expect this information should be managed by the learner. CoC Type Applied with other changes? Applied to multiple learners? Learning Provider N Y What do SLC capture for the change? • Learning Provider • Effective Date Pre-liability/ post liability or both? Pre-liability To notify SLC of a change to the learning provider administering a learner’s learning aim, select the Learning Provider CoC from the from the Change of Circumstance tab. Note – This CoC type cannot be submitted in conjunction with any other CoC types 104 1. Enter Learning Provider name. The system will search for possible matches across all learning providers. This is an alphanumeric field with a maximum length of 162 characters 2. Select the learning provider from the records returned. The records returned will be returned in the format of UKPRN (Max 8 characters) and then Name (max 120 characters)’ 3. Click to complete the CoC details and submit 13.6.5 Cancel This type of CoC may occur when a learner indicates they no longer require a loan to fund their course, or they decide not attend the course at all. CoC Type Applied with other changes? Applied to multiple learners? Cancellation N Y What do SLC capture for the change? • Effective Date Pre-liability/ post liability or both? Pre-liability To notify SLC when learners’ applications should be cancelled, select the Cancellation CoC from the from the Change of Circumstance tab. Note – This CoC type cannot be submitted in conjunction with any other CoC types 1. Enter the effective date of the cancellation. The date format is DD/MM/YYYY 2. Click to complete the CoC details and submit 105 13.6.6 Reinstate This type of CoC could occur when a learner, who has previously cancelled, decides utilise their entitlement to fund their course. CoC Type Applied with other changes? Applied to multiple learners? Reinstate N Y What do SLC capture for the change? • Effective Date Pre-liability/ post liability or both? Pre-liability To notify SLC when learners’ cancelled application should be reinstated, select the Reinstate CoC from the from the Change of Circumstance tab. Note – This CoC type cannot be submitted in conjunction with any other CoC types 1. Enter the effective date of the cancellation. The date format is DD/MM/YYYY 2. Click to complete the CoC details and submit 106 13.7 Create Post Liability CoCs via Detailed Learner Information screen LP CoC Administrator Users can create CoCs for a single learner from the Detailed Learner Information screen. 10. Click The Create CoC screen will appear to confirm how many learners the CoC have been selected 11. Click 107 12. Click the CoC type required from the Available Types 13. Click Add 14. Click 15. Enter the effective date for the changes Note – Effective date cannot be before 8th April 2013 and cannot be a date in the future 108 16. Click the appropriate radio button to select a contact for this CoC Note – The Create CoC function will be disabled unless you have an active CoC contact currently assigned to your organisation 17. Click The CoC Summary screen will appear. Please review the details of the CoC to ensure they are correct. 109 18. If details are correct, click amend or cancel. .If details are incorrect, select to Note – The system will check if a learner’s application has been changed since the CoC was created. If a change has been made, the CoC will not be processed and an error message will be displayed 13.8 Create Post Liability CoCs via CoC Home LP CoC Administrator Users can create CoCs by hovering over the Applicant Information Service tab, then selecting CoC Home. 110 The CoC Home page will appear. CoC users can navigate to all CoC functionality from this home page. CoCs can be submitted for single or for multiple learners in one submission if accessed via CoC Home. 17. Click 111 18. Click 19. Click The Create Post Liability CoC screen will appear by default 20. To search for a number of learners by common learner information, click 112 Search item Description Academic Year Defaulted to the current academic year. This is the only mandatory field that a user must enter in order to run the search Unique Learner Number Unique learner identifiers Customer Reference Number Additional Reference Number Date of Birth The learner’s date of birth Forename & Surname If one is entered the other must also be completed. Wildcard search can be used Verified NINO Status Indicates if a learner’s National Insurance Number has been verified by the Department for Work and Pensions. Last Assessment Date From & To Users can select to view learners’ applications assessed and reassessed during a particular date range. Both dates must be entered Application status Users may wish to search for learners’ applications at different stages, e.g. to view who has applied but is ineligible Number of Records To Display per Page Number of records to be shown on screen 25/50/100 21. To search for learners by common learning aim information, click The Learning Aim Search screen will appear 113 Search item Description Academic Year Defaulted to the current academic year. This is the only mandatory field that a user must enter in order to run the search Learning Aim Learning Aim title Reference Learning Aim reference Learning Aim Type Learning Aim Type Learning Aim Start Date From and To Users can select to view learning aims by start date range. Both dates must be entered Learning Aim End Date From and To Users can select to view learning aims by end date range. Both dates must be entered Course Trainer Users can search for learning aims by their associated 8 character Course Trainer code Course Location Users can search for learning aims by their associated 8 character Course Location code Number of Records To Display per Page Number of records to be shown on screen 25/50/100 114 22. Click or If View Results selected, the search results will appear 23. Select the appropriate learners by clicking the tick boxes 24. Click The Create CoC page will appear. The total number of learners selected in step 7 will be confirmed on this page. 25. Click Please refer to section 13.9 for guidance on how to populate the CoC type required. Select the CoC types required to be associated to the learners previously selected 115 26. Click the CoC type required from the ‘Available’ box 27. Click 28. Enter the details of the selected change 116 29. Enter the effective date for the changes 30. Click Note – Effective date cannot be before 8th April 2013 and cannot be a date in the future 31. Assign a contact for this CoC by selecting the radio button Note – The Create CoC function will be disabled unless you have an active CoC contact currently assigned to your organisation 32. Click The CoC Summary screen will appear. Please review the details of the CoC to ensure they are correct. 117 33. If details are correct, click amend or cancel. . If details are incorrect, select to Note – The system will check if a learner’s application has been changed since the CoC was created. If a change has been made, the CoC will not be processed and an error message will be displayed 118 13.9 Post Liability CoC types There are 7 types of CoCs a LP CoC Administrator can use to notify SLC of a change to a learners application information post liability. The following subsections detail the data required for each CoC type after learners have been selected. CoC Type Applied with other changes? Applied What do SLC capture to for the change? multiple learners? Fee Charged Y Y Decrease Loan Amount Learning Aim Y Y N N – Pre liability Only • Learning Aim Fee • Effective Date • Decrease Loan • Loan Amount required • Effective Date • Learning Aim • End Date • Course Trainer • Course Location • Effective Date Pre-liability/ post liability or both? Both Both Both but with restrictions post-liability Please note the restrictions are the course must be the same type and level Early Completion N N • Early Completion Date Post Liability Only Suspension N N • Effective Date Post Liability Only Resumption Y - With the exception of the CoC Types Withdrawal, Suspension or Early Completion N • Effective Date Post Liability Only N • Effective Date Post Liability Only Withdrawal Y – Only with a Loan Amount and/or Fee Charged CoC (Fee Charge CoC should only be used to reduce fee to £0) 119 Note – Loan liability is directly linked to duration of attendance, therefore unless you have decided to charge no fees at all, the Course Fee should not be reduced when a Withdrawal occurs. The LP Portal/Operations Portal will use the Effective Date of the Withdrawal to calculate how much loan is due. If you do wish to reduce the Course Fee to less than the calculated liability, please contact your Relationship Manager. 13.9.1 Fee Charged This type of CoC may occur when a learner has changed the learning aim they are undertaking, or if they have entered the incorrect fee on their application form. CoC Type Applied with other changes? Applied to multiple learners? Fee Charged Y Y What do SLC capture for the change? • Learning Aim Fee • Effective Date Pre-liability/ post liability or both? Both To notify SLC of a change to the fee charged for a learner’s learning aim, select the Fee Charged CoC from the Change of Circumstance tab. 6. Enter the new fee amount. The fee format is £00000.00 with a maximum of 13 digits, decimal, 2 digits 7. Click to complete the CoC details and submit 120 Note – Decreasing Course Fee will automatically decrease loan amount requested without the need for a CoC. Increasing the fee will automatically send a loan request form out to the learner so they can choose to increase their loan in line with the revised fee. 13.9.2 Decrease Loan Amount This type of CoC may occur if the learner has indicated they wish to decrease the amount of loan needed to fund their course, and make an arrangement to self fund the remainder. CoC Type Applied with other changes? Applied to multiple learners? Decrease Loan Amount Y N What do SLC capture for the change? • Decrease Loan • Loan Amount required • Effective Date Pre-liability/ post liability or both? Both To notify SLC of a decrease to the learner’s loan amount, select the Decrease Loan Amount CoC from the Change of Circumstance tab. 2. Click the Yes or No radio button 121 8. If Yes, enter loan amount required. The fee format required is £00000.00 with a maximum of 13 digits decimal 2 digits The loan amount requested cannot be greater than the entitlement amount currently held for the selected learner 9. If No, CoC cannot be submitted. The loan amount cannot be increased by the Learning Provider Portal 10. Click to complete the CoC details and submit Note – Reducing the loan will automatically populate a figure in the Balance Payable field on the Learner Information Screen. This shows how much of the fee is not being paid by SLC in the form of a loan and the learner must pay 13.9.3 Learning Aim This type of CoC may be required if the learner decides to undertake a different learning aim to the one they have applied for, or the Start Date or End Date needs to be updated. CoC Type Applied with other changes? Applied to multiple learners? Learning Aim Y Y What do SLC capture for the change? Please note: one or all of the following; • Learning Aim • End Date • Course Trainer • Course Location • Effective Date Pre-liability/ post liability or both? Both but with restrictions post-liability Please note the restrictions are the course must be the same type and level To notify SLC of a change of learning aim details, select the Learning Aim Details CoC from the from the Change of Circumstance tab. 122 7. Enter Learning Aim Title. The system will search for possible matches across all learning aims 8. Enter End Date. The date format is DD/MM/YYYY End Date must be after Start Date 9. Enter Course Trainer Code. This is an alphanumeric field with a maximum length of 8 characters 10. Enter Course Location Code. This is an alphanumeric field with a maximum length of 8 characters 11. Click to complete the CoC details and submit 123 Notes The Start Date cannot be updated when an application is Post Liability The CoC fields are optional and can be entered in isolation of each other if not all are changing Changing the End within the first three months of the learning aim commencing will cause the payment schedule to schedule to re-profile in accordance with the new End Date i.e. if the End Date is now earlier, the payment profile will be shorter or if the End Date is later, the payment profile will extend Changing the End Date after the first three months of the learning aim commencing will not cause the payment schedule to schedule to re-profile as the payment profile is set in line with the original Start and End Dates, as per Policy Point to Remember If a change of learning aim is occurring post liability, the course eligibility must be checked. If the new course is not eligible the learner should be withdrawn. If the learning aim change still takes place rather than a withdrawal then the learners application will be transferred to the new aim, remain at an approved work stage but no further payments will be made. 13.9.4 Early Completion This type of CoC will occur when a learner has successfully completed their learning aim early. Providers are entitled to the full fee if a learner leaves the learning aim earlier than the expected end date when the learner has completed the aim. CoC Type Applied with other changes? Applied to multiple learners? Early Completion N N What do SLC capture for the change? • Early Completion Date Pre-liability/ post liability or both? Post Liability Only To notify SLC of a learner completing their studies early, select the Early Completion CoC from the Change of Circumstance tab. 124 1. Enter the last day of learning in the early completion date field. 2. Click to complete the CoC details and submit Note – An early completion CoC will trigger all outstanding payments to be made, these will be made the month after the CoC is submitted. Please see Annex B for more information. 13.9.5 Suspension This type of CoC will occur when a learner has to leave the learning aim they are currently undertaking temporarily but are intending to return within 12 months. CoC Type Applied with other changes? Applied to multiple learners? Suspension N N What do SLC capture for the change? • Effective Date Pre-liability/ post liability or both? Post Liability Only To notify SLC of a suspension for a learner, select the Suspension CoC from the Change of Circumstance tab. 125 1. Enter the effective date of the suspension. 2. Click to complete the CoC details and submit Note – As a learning provider will only receive fee payments for a learner when that learner is in attendance, payments will stop after a suspension has taken place but will start again after the learner has resumed their study. Please see Annex B for more information. 13.9.6 Resumption This type of CoC will occur when a learner is returning to learning after a temporary break in study. CoC Type Applied with other changes? Applied to multiple learners? Resumption Y - With the exception of the CoC Types Withdrawal, Suspension or Early Completion N What do SLC capture for the change? • Effective Date Pre-liability/ post liability or both? Post Liability Only To notify SLC when a learner resumes study, select the Resumption CoC from the Change of Circumstance tab. 126 1. Enter the effective date of when the learner resumed their studies. 2. Click to complete the CoC details and submit Note – A learner can only be resumed if their current application status is suspended. After a resumption CoC has taken place, payments will begin for that learner. As liability for the loan is incurred on the 1st of each month, if the learner resumes study after this (i.e. on the 2nd), the provider will not receive a payment for the month they have resumed but will continue receive the remaining installments in the following month. Please see Annex B for more information. The Provider will be asked to confirm the learner’s attendance on the month after they resume their learning aim, even if this is out with the normal quarterly attendance check. The learner will be added to the Attendance Worklist when this confirmation is required 13.9.6.1 Resuming After Course End Date - Resumption CoC Validation Rule Note – If a learners period of suspension results in them resuming their studies after their Course End Date, a CoC Administrator User will be required to submit a Learning Aim Details (to change the Course End Date) with a Resumption CoC. For example; if a learner, who is initially undertaking a course which commences 14th August and due to end on the 30th December, suspends on the 30th October and resumes on the 5th Jan, the portal validation will prevent submission of a Resumption CoC. Users are required to submit a Learning Aim Details (to change the Course End Date) in conjunction with the Resumption CoC 127 13.9.7 Withdrawal This type of CoC will occur when a learner has to leave the learning aim they are currently undertaking either due to transferring to another aim outside of what policy will allow, changing learning provider or leaving learning all together. Note – Loan liability is directly linked to duration of attendance, therefore unless you have decided to charge no fees at all, the Course Fee should not be reduced when a Withdrawal occurs. The LP Portal/Operations Portal will use the Effective Date of the Withdrawal to calculate how much loan is due to the LP. If you do wish to reduce the Course Fee to less than the calculated liability, please contact your Relationship Manager. CoC Type Applied with other changes? Applied to multiple learners? Withdrawal Y – Only with a N Loan Amount and/or Fee Charged CoC (Fee Charge CoC should only be used to reduce fee to £0) What do SLC capture for the change? • Effective Date Pre-liability/ post liability or both? Post Liability Only To notify SLC of a withdrawal for a learner, select the Withdrawal CoC from the Change of Circumstance tab. 128 1. Enter the effective date of the withdrawal. 2. Click to complete the CoC details and submit Note – As a learning provider will only receive fee payments for a learner when that learner is in attendance, payments will stop after a withdrawal has taken place. Please see Appendix B for more information. 13.10 Create Pre and Post Liability CoCs via CoC Worklist Learners will populate the CoC Worklist after attendance has been confirmed. For more information on confirming a learners attendance please review section 15, Attendance. The CoC Worklist is designed to enable a user at your organisation, with CoC Administrator access, to easily view and create required CoCs. Not all learners who have had an attendance confirmation will fall onto the CoC Worklist, it is dependent on what type of attendance confirmation is it (initial or subsequent) as well as what the attendance or none attendance reason is. Initial Attendance Confirmation; Change of Start Date When confirming a learner’s attendance for the first time the reason ‘change of start date’ can be selected. This means that the learner is or will be in attendance but their learning aim start date has changed. These learners will still be classed as pre liability. If this status is submitted, a CoC reminder will automatically be created in the CoC Worklist and the user should create a Change of Learning Aims CoC. The learner then will reappear on the worklist at the appropriate time. Subsequent Attendance Confirmation; Not in Attendance When confirming a learner’s attendance on one of the subsequent quarterly returns, the reason ‘not in attendance can be selected. This means that the learner is no longer in attendance. These learners will be classed as post liability. As SLC will need to know why the learner is not longer in attendance as well as the date that the left the learner aim, a CoC reminder will automatically be created in the CoC Worklist and the user should create the appropriate CoC to either withdraw or suspend the learner. 129 Note – An exception to this rule is that if the learner is not in attendance due to Early Completion an attendance confirmation should not be submitted. A CoC should be completed (via another CoC route) which will update the learner’s information and remove them from the attendance confirmation worklist An LP CoC Administrator Users can access the CoC Worklist by hovering over the Applicant Information Service tab, then selecting CoC Home. 1. Click The CoC Worklist will be populated with any relevant learners. The Attendance Confirmation Status column will allow you to view the previous confirmation submitted for this learner, which will dictate whether this is a pre liability or post liability application. 130 When selecting any learners to create a CoC for, in the CoC Worklist, the system will not allow you to progress if you have selected a mixture of pre liability and post liability applications. Note All learners with an attendance confirmation status of ‘Change Start Date’ will be pre liability. All learners with an attendance confirmation status of ‘Not in Attendance’ will be post liability. 2. Select the appropriate learners by clicking the tick boxes 2. Click Note – Learners can also be deleted from the CoC Worklist by clicking when the appropriate learners have been selected. The Create CoC page will appear. The total number of learners selected in step 2 will be confirmed on this page. 131 3. Click Depending on the liability of the learner, the available changes will be different. If the selected learner had an attendance confirmation of ’Change Start Date’ they are pre liability and therefore require a change of learning aim CoC to change their start date. Please read section 13.6, Pre Liability CoC Types, to see how to perform this change. If the selected learner had an attendance confirmation of ‘Not in Attendance’ they are post liability and therefore require a withdrawal or suspension. Please read section 13.9, Post Liability CoC Types to see how to perform one of these changes. 132 4. Once the CoC type has been chosen, click Add 5. Click 6. Enter the necessary data for the changes required. 7. Click 8. Assign a contact for this CoC by selecting the radio button Note – The Create CoC function will be disabled unless you have an active CoC contact currently assigned to your organisation 9. Click The CoC Summary screen will appear. Please review the details of the CoC to ensure they are correct. 10. If details are correct, click amend or cancel. . If details are incorrect, select to 13.11 Create CoC via Bulk Import LP CoC Administrator Users will have the facility to import and submit CoC data from XML files for up to 500 learners for an AY. The file is in a specified XML format and the user is given the ability to browse their internal file systems to the location of the saved file. Users can create CoCs in bulk by hovering over the Applicant Information Service tab, then selecting CoC Home. 133 Note – Due to the way the learning provider portal processed each record on a bulk import file; this file can have a mixture of pre liability and post liability changes. The CoC Home page will appear. Users can navigate to all CoC functionality from this home page. 1. Click 2. Click 3. To select the CoC file to be imported, follow the on screen prompts specific to your system 4. Select a contact for this CoC by selecting the radio button Note – Once the file to be uploaded and the contact details have been selected the user will select the Submit button. On submission of the file, the system performs both file Format and Business Rule validations. Although up to 500 CoCs can be submitted at any time using the Import functionality, on submission each CoC is processed as an individual record. File format validation will ensure that the format of the file is consistent with the format detailed in the schema and that all mandatory fields have been completed 5. Click The file upload summary will be displayed. 6. Click Back to CoC Home The submitted CoC Bulk Import data file format will be validated, and the results will be displayed to confirm successes and failures. Please review the results to ensure they are 134 correct. Details of the file format validation rules are found in the Technical Proposal issued as part of the Technical Specifications for the Learning Provider Portal. If you require a copy of these, please email [email protected] If any CoC submissions fail, these will be itemised to allow users to view and subsequently amend the XML file if appropriate. 7. Repeat steps 1-6 of ‘Create CoC via Bulk Import’ as appropriate until all CoCs are processed 13.12 CoC Validation Rules and Errors The content of imported CoC files will be validated to ensure the data is correct and meets both format and business rules such as; The file contains all fields expected and they are in the correct order The file contains a minimum of one record If a single record within a file fails format validation this will not cause the entire file to fail Once a file has been validated successfully a learner’s application will be reassessed in accordance with the new information, and SLC will issue the learner with an updated entitlement letter to confirm their current application state. Details of the file format validation rules are found in the Technical Proposal issued as part of the Technical Specifications for the Learning Provider Portal. If you require a copy of these, please email [email protected] 13.13 View CoC Bulk Import Results Imported CoC data will be validated upon submission, before it is applied to learners’ applications. Details of the imported data and the submission results are available to view via the Learning Provider Portal. This enables users to track the number of CoCs submitted for learners, track the progress, view where the original file is stored, view who submitted the file and view any errors. For details of error messages, please refer to the Technical Specifications LP CoC Advisor and Administrator Users can View Imported CoC Results by hovering over the Applicant Information Service tab, then selecting CoC Home. Select View Import Results from the CoC Home page 135 7. Enter the start and end date range to search for 8. Select the File Import Status 9. Click The results will appear below the search. 136 10. Select the hyperlink filename of the desired record to View Import Results Any records which have not been processed will appear, by default, arranged by ULN. Users can choose to arrange learners by other filter headings if preferred. For details of error messages, please refer to the Technical Specifications Failed records can then be corrected and then require another import back in the system. 137 13.14 CoC Search LP CoC Advisor and Administrator Users will have the facility to search previously submitted CoCs by hovering over the Applicant Information Service tab, selecting CoC Home, then View CoCs 1. Enter criteria appropriate to search Search item Description Academic Year Users can search for CoCs submitted in relation to an application active in a particular AY. The search is defaulted to search for CoCs relating to all AYs. The years will be in descending order by year Financial Year Users can search for CoCs submitted in relation to an application active in a particular FY Unique Learner Number Unique learner identifiers Customer Reference Number Additional Reference Number Forename & Surname If one is entered the other must also be completed. Wildcard search can be used Date of Birth The learner’s date of birth Learning Aim Users may wish to view CoCs submitted for learners undertaking a particular learning aim Reference CoC Status Users can view CoCs that are currently Submitted, Failed or Processed. One or multiple statuses can be selected CoC Type Users can search to view submitted CoCs by type. One or multiple types can be selected Learning Aim Start and End Date Users can select to view CoCs submitted in relation to learning aims by date range. CoC Submitted Date From & To Users can select to view applications for learner aims based on start and end dates. Both dates must be entered Number of Records To Display per Page Number of records to be shown on screen 25/50/100 138 2. Click 3. If or selected, the results will appear below the search 139 4. Selecting any of the result headers will reorder the results in the following way: Full Name, Add Learner Ref and Created By will be ordered alphabetically and then numerically. CoC Type and CoC Status will be ordered alphabetically ULN will be ordered numerically Created Date Time will be ordered by Date and then Time 5. The Full Name hyperlink will take the user to the CoC Summary screen 140 If selected, the CoC Results Export will appear below the search 141 6. Click 7. Enter your filename 142 The file should automatically download. Please refer to your own systems download functionality. 13.15 Request Submissions Report Users will have the facility to request a Submissions Report by hovering over the Applicant Information Service tab, selecting CoC Home, Reports, then Submissions Report. Search Item Format Validation CoC Submitted From and To Date format DD/MM/YYYY Both From and To must not be a future date Defaults to today’s date Academic Year Drop down YY/YY in descending order Either AY or FY must be entered, not both Financial Year Drop down YY/YY in descending order Either AY or FY must be entered, not both 1. Enter CoC Date Range 2. Choose an Academic Year or Financial Year 143 3. Click Create Report The CoC Submissions Report pop up will appear 144 The report will detail the number of CoCs raised for each category, the total number raised and the percentage that each category represents of the total raised. Section 14| Financial Reports 14.1 Accessing financial area of the Applicant Information Service The Financial area of the Learning Provider Portal can only be accessed by users who have been assigned the role of LP Financials Administrator. Please refer to section 2, Learning Provider User Roles for further details of these user roles. Financial Reports can be accessed by hovering over the Applicant Information Service tab, then selecting Financials Home. The Financials Home page will appear. Users can navigate to all Financial Reporting functionality from this home page. 14.2 Loan Position Report The Loan Position Report provides Learning Providers with a monthly breakdown of the loans which have been paid, loans which are due to be paid and loans which cannot be paid. LP Financials Administrator can request a Loan Position report on screen or to export. Users will be able to view payments made for both pre and post liability applications. Users can select to view the Loan Position Report as follows; Annually by Financial Year (The report runs from 1st April to 31st March) Annually by Academic Year (The report runs from 1st August to 31st July) 145 14.2.1 Generate Loan Position Report Users can request a Loan Position Report by hovering over the Applicant Information Service tab, selecting Financials Home, then Loan Position Report. 1. Click from Financial Home 2. Select appropriate AY or FY Note –Either the Academic Year or Financial Year must be selected so the report can be generated 3. Click or If Display Report is selected, the results will appear in a new window If Export Results is selected, the Loan Position Report Export will appear below the search 4. Enter your filename this can be up to a maximum of 50 characters 5. Click Note – If user selects to ‘Export’ but have not completed the filename field, the following error will be displayed; “A filename must be provided” The system will create an xml or CSV file and the following options will appear; 6. Select Save, Open or Cancel the file. a. If you select ‘Cancel’ the learner Information Export section will be removed, the learner information filter will display the parameters previously captured and the filter parameters will be amendable again. b. Select ‘Save’ to save the xml or CSV file in a location of your choice. 146 c. Select ‘Open’ and the xml or CSV file will open with all the relevant application data populated. Please note- When opening a CSV file in Excel, Excel performs certain behaviour such as removing zeroes from the start of numbers. One way in which to prevent this from happening is to import the CSV file as follows: 1) Open a blank excel sheet. 2) Select all cells (CTRL+a) and format them as text (right click->format cells). 3) Open your CSV in notepad (you can do so by dragging the file into an open notepad window). 4) Copy all of the content of the CSV and paste it into the first cell in excel. Notice that a "Paste Options" icon appears somewhere at the bottom. 5) Click on the small arrow on the right of that icon, and select "use text import wizard". This will open a wizard... 6) Make sure "delimited" is selected and click "next" 7) Select "comma" and deselect "space" in the delimiters area (you will see the columns arrange correctly in the sample below), then click "next". 8) In this step you define how to treat each column. Since we don't want excel to change anything, we'll define them all as "text": Click on the first column in the sample (it will be coloured in black); now scroll sideways all the way to the right and shift+click the last column; in "column data format" above, select "text". 9) Click "finish". 14.2.2 View Loan Position Report The Loan Position Report will be displayed as two separate tables: ‘Loan Position’ and ‘Applications Not Progressing to Payment’. The details returned on the report will be correct as at the close of business the previous night. 147 The order of the months on the loan position report will depend on whether the Academic Year or the Financial Year has been selected. Where the user has selected to view the information by Academic Year the order of the months will be August to July and where Financial Year has been selected the order of the months will be April to March. A full 12 month period will be displayed. For the application count, the report will detail any learner with a learning aim start date within the Academic Year or Financial Year selected. For the monetary value, the report will detail a sum of the payment amounts for each month. Note – In the scenario where a learner’s course spans more than one academic year, the report will show a difference between the monetary value and number of applications. This is due to the fact that the learners start date would be in the previous academic year, and they would therefore not be displayed in the application count, however, as they still had ongoing payments, the monetary values would be displayed. 148 14.2.3 Table One - Loan Position Table one within the report details payments for the following applications Application Status Submitted Applications Applications Progressing Instalments Approved Description Applications that are still in progress, i.e. at a pre-approval workstage The Monthly Breakdown and Year to Date will not be populated for Submitted Applications Applications that are ready for payment once attendance is confirmed o The Learning Aim start date is for the selected year o The learner has a ULN o The learner has a verified NINO o The Learners application state is Approved Withdrawn The To Date, Monthly Breakdown and Year to Date will not be populated for Applications Progressing Approved instalments will include payments for learners where; o The learner has a ULN o The learner has a verified NINO 149 o Instalments Awaiting Confirmation Instalments Where Attendance Confirmed Paid / In Progress The learners application state is Approved, Withdrawn or Suspended o The learner is not liable for the instalment o The attendance has not been confirmed Instalments Awaiting Confirmation will include payments for learners where; o The learner has a ULN o The learner has a verified NINO o The Learners application state is Approved, Withdrawn or Suspended o The learner is liable for the instalment o The attendance has not been confirmed Instalments Where Attendance Confirmed will include payments for learners where; o The learner has a ULN o The learner has a verified NINO o The Learners application state is Approved, Withdrawn or Suspended o The learner is liable for the instalment o The attendance has been confirmed Paid / In Progress instalments will include payments for learners where; o The learner has a ULN o The learner has a verified NINO o The Learners application state is Approved, Withdrawn or Suspended o The learner is liable for the instalment o The attendance has been confirmed o The payment has been paid o Payments made in respect of attendance confirmations 150 submitted in a previous month after payment drawdown date* (matching financial statement) Offset To Date: This will display the offset amount held against the learning provider Total The sum of the values held *Drawdown for payment is the process where SLC calculate the number of positive attendance confirmations received in order to determine the total payments due to the learning provider for a month. 4.3 Table Two - Applications Not Progressing to Payment Table two within the report details payments for the following applications: Application workstage Approved Awaiting Signature Missing ULN Data Comprises Approved Awaiting Signature instalments will include payments for learners where; o The Learning Aim start date is for the selected year o The learner has a ULN o The learner has a verified NINO o The Learners application state is Approved Awaiting Signature Missing ULN instalments will include payments for learners where; o The Learning Aim start date is for the selected year o The learner has does not have a ULN 151 Approved Awaiting Signature and Missing ULN NINO Not Verified Applications Currently Suspended Total o The learner has a verified NINO o The Learners application state is Approved Approved Awaiting Signature instalments and Missing ULN instalments will include payments for learners where; o The Learning Aim start date is for the selected year) o The learner has does not have a ULN o The learner has a verified NINO o The Learners application state is Approved Awaiting Signature NINO Not Verified instalments will include payments for learners where; o The Learning Aim start date is for the selected year o The learner does not have a verified NINO o The Learners application state is Approved or Approved Awaiting Signature Applications Currently Suspended instalments will include payments for learners where; o The Learning Aim start date is for the selected year o The Learners application state is Suspended o Attendance is not confirmed The sum of the values held 14.4 Example of a Loan Position Report In the below example, the Loan Position Report is populated for one learner’s application, reflecting the payment schedule in respect to the application and payment statuses. It is important to remember that while a positive attendance confirmation is assumed to apply for three months, payments are released monthly. For the purposes of this example, the report is only showing 5 months worth of payment information, the learner and report information used to generate these figures is as below; Report Created Learner Start Date Initial Liability Point Learning Aim Length Loan Amount Confirmed Initial Attendance Next Quarter to Confirm 1st October 2014 10th August 2014 24th August 2014 10 Months £1000 Yes November 152 Note – This example is for illustrative purposes only, and the Loan Position Report on the Learning Provider Portal will display cumulative payment information Aug 2014 Sep 2014 Oct 2014 Nov 2014 Dec 2014 Instalments Approved £0 £0 £0 £100 £100 Instalments Awaiting Confirmation £0 £0 £0 £0 £0 Instalments Where Attendance Confirmed £0 £0 £100 £0 £0 Paid / In Progress £0 £200 £0 £0 £0 This row is for information purposes and will not be in the Loan Position Report Attendance confirmed after drawdown date so payment in Sep Attendance assumed and payment made along with August payment Attendance assumed and payment to be paid Attendance not yet confirmed for this quarter, no payments released Attendance not yet confirmed for this quarter, no payments released Section 15| Attendance Attendance confirmation is the process for a Learning Provider to confirm to the Student Loan Company that a learner is engaged on their learning aim. The Provider is initially required to do this two weeks after the start of the learning aim. This is called the initial liability point and will be the first point for attendance confirmation. The Provider is then required to confirm the learner’s ongoing attendance quarterly, for the 1st of the month, for the duration of the learning aim. The quarterly attendance confirmation points will be fixed as 1st August, 1st November, 1st February and 1st May. Attendance (and therefore loan liability) will be assumed for the 1st of the month on the months between these fixed points and payment will be made to the Provider. 153 Note – If the learner withdraws from their learning aim, the Provider should submit a withdrawal or Suspension Change of Circumstance as soon as possible to avoid overpayments occurring. The learner’s loan application should be at a status of approved. The Provider will not be able to confirm attendance for a learner before their 24 + loan application has been approved. Attendance Type Initial Description Two weeks after the start of the learning aim Subsequent (Quarterly) On a quarterly basis. Attendance confirmation points will be fixed as 1st August, 1st November, 1st February and 1st May As an example, if a learner starts a ten month learning aim on 1st August 2014, the attendance points will be: Initial confirmation two weeks after learning aim start – 15th August Second quarterly attendance check – 1st November Third quarterly attendance check – 1st February Fourth quarterly attendance check – 1st May Aug Sept Oct Initial Provide r Confirm ation Require d Assum ed Attend ance Assum ed Attend ance Nov Provid er Quarte rly Attend ance Requir ed Dec Jan Assum ed Attend ance Assum ed Attend ance Feb Provid er Quarte rly Attend ance Requir ed March April Assum ed Attend ance Assum ed Attend ance May Provid er Quarte rly Attend ance Requir ed The same process will apply to learning aims which start in any month of the year. As an example, if a learner starts a ten month learning aim on 2nd January 2015, the attendance points will be: Initial confirmation two weeks after learning aim start – 16th January Second quarterly attendance check – 1st February Third quarterly attendance check – 1st May 154 Fourth quarterly attendance check – 1st August Jan Feb March April May June Provid Provid Initial er er Provide Quarte Assum Assum Quarte Assum r rly ed ed rly ed Confirm Attend Attend Attend Attend Attend ation ance ance ance ance ance Require Requir Requir d ed ed July Assum ed Attend ance Aug Provid er Quarte rly Attend ance Requir ed Sept Oct Assum ed Attend ance Assum ed Attend ance If a learning aim does not cover these four quarterly attendance check points, attendance confirmation will only be required for the period that falls within these four points. As an example, if a learner starts a six month learning aim on 1st August 2014, only the initial attendance and second quarterly attendance confirmation will be required. The attendance points will be: Initial confirmation two weeks after learning aim start – 15th Aug Second quarterly attendance check – 1st November Aug Sept Oct Nov Dec Jan Fe b Provider Initial Assume Assume Quarterl Assume Assume Confirmati d d y d d N/ on Attendan Attendan Attendan Attendan Attendan A Required ce ce ce ce ce Required Marc h Apr il Ma y N/A N/A N/ A It is this attendance confirmation that will trigger payment of the 24+ fee loan to the Provider and payment can not be made without this attendance confirmation. There are three ways in which a Provider can confirm attendance for their learners: 1. Using the Attendance Worklist screen within the Learn Provider Portal 2. For an individual learner using the Detailed Learner Information screen within the Learn Provider Portal 3. By importing a bulk xml attendance confirmation file The Provider can also combine these methods for different learners or different attendance confirmations through the year. Note – The ULN is a mandatory field and the Provider needs to enter this before being able to confirm a learner’s attendance. If he ULN has not been entered, the learner will not appear on the Attendance Worklist and the attendance drop down will not be available on the Detailed Learner Information screen – see Section 12 155 15.1 User Roles Required to Access the Attendance Functions Users with the LP Attendance Administrator role will have permission to access the Attendance Home page, view the attendance confirmation worklist and confirm a learner’s attendance. 15.2 Attendance Worklist The Attendance Worklist can be accessed via the Applicant Information Service menu. The Attendance Home link will take the user into the attendance functions. A message will be displayed on the Attendance Home screen if the Provider has any outstanding learners awaiting an attendance confirmation. By selecting the Attendance Worklist link, a user can search and view records, confirm attendance for both individual and multiple learners and export an xml file of the worklist. If SLC require an attendance confirmation for a learner, the learner will automatically be added to the worklist. Therefore there is no need for the Provider to manually keep track of when confirmations are required. 156 The search screen will allow the user to search for all outstanding attendance confirmations or a subset. Search Field Information Attendance Status This field allows the user to search by attendance status. The statuses are: Learning Aims All – this will return all learners with an outstanding attendance confirmation Unconfirmed – this will return learners where a attendance status has not yet been submitted Saved – this will return learners where an attendance status has been added to the record and saved, but not yet submitted This field allows the user to search for learners on a particular learning aim Start Date From Use this in conjunction with the Start Date To field to search for learners with start dates in a certain date range. Start Date To Use this in conjunction with the Start Date From field to search for learners with start dates in a certain date range. End Date From Use this in conjunction with the End Date To field to search for learners with end dates in a certain date range. End Date To Use this in conjunction with the End Date From field to search for learners with end dates in a certain date range. Course Location If you have added your own Course Location Code (see Section 12) for a learner, you can search for all outstanding attendance confirmations relating to that code Course Trainer If you have added your own Course Trainer Code (see Section 12) for a learner, you can search for all outstanding attendance confirmations relating to that code Number of Records to Display per Page The number of records displayed per page can be chosen from the drop down menu, with the options of; 25 50 100 200 157 After selecting the appropriate search criteria, the user should either click the View Results or Export Results button. If the user has selected the View Results button, they will be presented with the results of their search. The records will be displayed in one of three colours – Grey– learners for which no attendance status has yet been entered Blue – learners who have had an attendance status assigned to them, however the record has been saved rather than submitted Orange – learners where more than one attendance confirmation is outstanding – for example, the initial attendance confirmation and the next quarterly ongoing attendance confirmation 15.3 Saved Records A user can select an attendance confirmation status for an individual or for multiple learners and submit this from the worklist. However there may be times where the user will want to save the attendance confirmation, without actually submitting it. For example this may be appropriate if you want to confirm details with a sub contractor before finally submitting. In this case, the user can click the Save button and the relevant attendance code will be saved against the learner but remain on the worklist (if the Attendance Status search criteria of “All” or “Saved” has been selected) and payment will not be released. The record will now be highlighted in blue. 158 15.4 More than One Outstanding Confirmation It would be expected that a Provider will confirm attendance at the start of the learner’s learning aim and at the point that the learner appears on the attendance worklist. However there may be scenarios where this does not happen, for example if the learner applies for their 24+ loan after they have started their learning aim or if a Provider is awaiting attendance information from a sub contractor. If there is more than one confirmation outstanding, the learner will be highlighted in orange on the worklist. From the worklist search results, the Provider will only be able to confirm and submit the earliest outstanding confirmation. To confirm later outstanding confirmations, the Provider will need to perform another attendance worklist search. This subsequent search will the show the next outstanding confirmation on the worklist search results. Note – Although there may be scenarios where more than one confirmation of attendance is outstanding, if SLC has not receive any confirmation of attendance from the Provider 3 months from the learners start date, the learners loan application will be cancelled. 15.5 Worklist Attendance Confirmation From the worklist, a user can confirm attendance in three ways 1. By selecting the appropriate drop down value under the Apply Change column for an individual learner 2. By selecting the appropriate drop down value from the Apply to All box on the top right hand side of the screen 159 3. By selecting the learner’s name hyperlink and confirming attendance form the Detailed Learner screen The worklist fields displayed on the screen are as follows: Work List Field Description Full Name Learner’s Full Name ULN Learner’s ULN Fee Amount Learner’s Fee Amount Entitlement Amount The amount of loan to be paid in Balance Payable If the course fee is more than the loan the learner has requested or is entitled to, the balance payable will show Attendance Confirmation Date Date of attendance confirmation request Apply Change Drop down list of attendance statuses 15.5.1 – Individual Learner Confirmation To confirm attendance for an individual learner, the user should select the appropriate confirmation status from the drop down list. This can be done for one, a number, or all of the learners displayed on the page. The user should then click the submit button. 160 The drop down list gives the user the option to select one of the following values: Attendance Status Description Awaiting Confirmation No attendance status has entered for this learner In Attendance The learner is in attendance and engaged on their learning aim Not in Attendance The learner is not in attendance and no longer engaged in their learning aim If this status is submitted at initial attendance confirmation, the application will automatically be cancelled. If this status is used on a subsequent quarterly attendance confirmation, a CoC reminder will automatically be created in the CoC Worklist and the user should create the appropriate CoC: Withdrawal Suspension If the learner is not in attendance due to Early Completion an attendance confirmation should not be submitted. A CoC should be completed which will update the learner and remove them from the attendance confirmation worklist. Change Start Date The learner is or will be in attendance but their learning aim start date has changed. This status is only available and can be used for the initial confirmation. If this status is submitted, a CoC reminder will automatically be created in the CoC Worklist and the user should create a Change of Learning Aims CoC. The learner then will reappear on the worklist at the appropriate time. 15.5.2 – Multiple Learner Confirmation As well as using the drop down menu to select an attendance status for an individual learner, a provider can use the “Apply to All” drop down menu on the top right of the worklist. This will apply the selected attendance status to all learners currently displayed on the page. This option provides a quick way of adding a status, if all or the majority of learners on the screen, have the same attendance status. If, for example, 49 of the 50 learners displayed are in attendance, the Apply to All “In Attendance” status can be used and the one exception can be manually changed to a different value by using the drop down next to the individual record. This action will only apply to the learners displayed on the current page. The ‘Clear Changes’ button at the bottom left hand corner of the page will clear these changes if they are done in error. 161 15.6 Detailed Learner Information Screen Confirmation Attendance can also be confirmed in the Current Payment Schedule and Attendance section of the Detailed Learner Information screen. This can be accessed by either clicking on the learner’s name on the Attendance Worklist or by accessing the learner’s record from the Learner Information screen. The values displayed on this screen are: Value Description Scheduled Payment Date The date that the payment instalment has been scheduled for payment Actual Payment Date The date that the payment was made to the Provider Payment Amount The amount that will be paid to the Provider Payment Status Status of payment : Scheduled – the payment is due to be paid In Progress – the payment has been triggered and is in the banking system Paid – the payment has been paid Failed – the payment has failed (please contact helpdesk on 0300 100 0643 for further information) Attendance Confirmation Date The date for which the Provider is being asked to confirm learner’s attendance Attendance Confirmation Attendance Confirmation Status : 162 Status Submitted By In Attendance Not In Attendance Change Start Date Details of user who submitted confirmation of attendance (please note that before an attendance confirmation has been submitted, this field will show the user who lasted updated the record) After the learner’s loan application has been approved, the full list of payment will be displayed, along with the attendance confirmation status of each. If a confirmation is required, a drop down list will be displayed. To confirm attendance, the user should select the appropriate attendance confirmation status from the drop down list. The drop down list will only become editable for future quarterly confirmations when confirmation is required. The drop down list will only be available at the point in the year when attendance is required. For a ten month learning aim with a start date of 1st August, this would be two weeks after the learning aim start date, 1st November, 1st February and 1st May. On the months of assumed attendance, between the four confirmations of attendance points, the user will not be able to confirm a positive or negative attendance. The learner is assumed to be in attendance unless the Provider submits a withdrawal Change of Circumstance. If a withdrawal Change of Circumstance is submitted, all future payment instalments will be deleted from this screen. 15.7 More than One Outstanding Confirmation As noted previously, it would be expected that a Provider will confirm attendance at the start of the learning aim and at the point that the learner appears on the attendance worklist, thus not delaying loan payment. However there may be scenarios where this does not happen, for example if the learner applies for their 24+ loan after they have started their learning aim or if a Provider is awaiting attendance information from a sub contractor. If there is more than one confirmation outstanding, all can be confirmed from the Detailed Learner Information screen. However each should be submitted individually, starting with the earliest. Therefore if the initial and November confirmations are outstanding, the user should select the appropriate value for the initial confirmation from the drop down list and click the submit button. When the page refreshes, the user will now be able to access the drop down list for the November confirmation. 163 15.8 Suspension and Resumption If a learner suspends from their learning aim, the Provider should submit a suspension Change of Circumstance. When the learner resumes their learning aim the Provider should submit resumption Change of Circumstance. The Provider will be asked to confirm the learner’s attendance on the month after they resume their learning aim, even if this is out with the normal quarterly attendance check. The learner will be added to the Attendance Worklist when this confirmation is required. 15.9 Attendance Import File Attendance can also be confirmed by importing an xml Attendance Confirmation Import file into the Learning Provider Portal. The user can export the Attendance Worklist and import this into their local system and create an Attendance Confirmation file for import into the Portal. 15.9.1 Attendance Worklist Export To export the Attendance Worklist, from the search results screen, the user should complete the following steps: 1. Click export results The Export section will be appear below the worklist. 2. From the screen you can either; Click Cancel to return to the search screen 3. To export results, enter a file name in the Export File Name field, this can be up to a maximum of 50 characters 4. Click Note – If user selects to ‘Export Results’ but has not completed the filename field, the following error will be displayed; “A filename must be provided” 164 5. To select the destination to export and save the file to, follow the on screen prompts specific to your system The system will create an xml file and the following options will appear; 6. Select Save, Open or Cancel the file. g) If you select ‘Cancel’ Export section will be removed and the filter parameters will be amendable again. h) Select ‘Save’ to save the xml file in a location of your choice. i) Select ‘Open’ and the xml file will open with all the relevant application data populated. For full details of the format of this file, please refer to “Schema Definition - 24+ Attendance Worklist Export Schema” 15.9.2 Attendance Import Users can confirm their learner’s attendance by importing Attendance Import xml files. The user is given the ability to browse their internal file systems to the location of the saved file and then select and submit the appropriate attendance file. To do this, the user should select the Import Attendance Confirmation link from the Attendance Home page. The user will then be asked to select the appropriate file from their local systems. The user should select the Choose File button and then browse their system. When they locate the file, they user should select it and then click the submit button. 165 The Attendance Import file should contain the appropriate attendance code. Three confirmations can be sent: – ‘Y’ - learner is in attendance –approve payment for release – ‘N’ - learner is confirmed as being not in attendance – ‘C’ - learner is not in attendance by virtue of moving their start date to a later date For full details of the format of this file, please refer to Schema Definition - 24+ Attendance Confirmation Import Schema 15.9.3 View Import Results When the file has loaded, the user should select the View Import Results link and confirm that the file has loaded successfully. The View Import Results link can be accessed from the Attendance Home page. From the search screen, the user can search for files within a particular date range or with a particular status. 166 The file import statuses that can be searched on are: File Import Status Description Awaiting Processing The file is queued, waiting to be processed Being Processed The file is currently being processed Processed with Error(s) The file has been processed, but contains errors Successfully Processed The file has successfully processed and attendance confirmations have been loaded System Error – File Not Processed A system error has resulted in the file not being processed and it should be re-submitted After completing the search, the user will be presented with a list of files that meet their search criteria. Validation will let you know if there are any errors in the imported file, both at an xml file level and individual record level. File format validation will check the file is in the expected format and field format and business rule validation will be run to check individual records within the file. 167 To view details of the file, including the specific reasons for validation failure, the user should click on the file name hyperlink. This will bring up a pop up box detailing the number of records on the file, the number that have successfully processed and the number that have failed processing. Details of the records that have failed, and the reason for failure, will also be listed. Note – Learning Providers can confirm attendance using the Attendance Worklist screen, Attendance Import files, the Detailed Learner Information screen or a combination of all of these. 168 15.10 Incorrectly Submitted Attendance Confirmations Learning Providers should strive to ensure accuracy in their attendance confirmations, as an attendance confirmation will trigger a payment to the provider and loan liability for the learner. However if an incorrect attendance status is used, the following process should be followed: Incorrect Status Learning Provider Action “Not in Attendance” instead of “In Attendance” - Initial Initial Attendance Confirmation – If a status of “Not in Attendance” is submitted for the initial confirmation, the application will be automatically cancelled. If this is incorrect, the Provider should submit a “Reinstate” Change of Circumstance. When this has been processed, the learner will reappear on the Attendance Worklist and the provider can submit an “In Attendance” confirmation. The loan payment will then be made to the Provider in the next payment run. “Not in Attendance” instead of “In Attendance” Quarterly Quarterly Attendance Confirmation – If a status of “Not in Attendance” is submitted for a subsequent attendance confirmation (not the initial confirmation), then the Provider can change this in the Current Payment Schedule and Attendance section of the Detailed Learner Information Screen to “In Attendance”. The loan payment will then be made to the provider in the next payment run. “In Attendance” instead of “Not in Attendance” – Before Payment Before Payment Run Starts (payment run will start close of business on the Thursday before the Wednesday payment is scheduled) – If a status of “In Attendance” is returned incorrectly, the status can be updated to “Not in Attendance”. The Provider can change the attendance status in the Current Payment Schedule and Attendance section of the Detailed Learner Information Screen to “Not in Attendance”. The attendance status will be locked when payment run commences. “In Attendance” instead of “Not in Attendance” – After Payment After Payment Has Been Made to Provider - If a status of “In Attendance” is returned incorrectly and the payment drawdown has started or payment has been made to the Provider, the Provider should submit a Withdrawal or Suspensions Change of Circumstance and the payment will be recovered from the next payment made to the provider. If you encounter any other scenarios that you would like to discuss, please contact helpdesk on 0300 100 0643 for further information. 169 Section 16| 24+ Loan Payments 16.1 Payment Loan payments will begin being made to Providers, on behalf of their learners, for approved 24+ loan applications, following submission of the initial attendance confirmation. Payment can not be made without a confirmation of attendance. Payments are made on a monthly basis throughout the length of the learner’s learning aim. These will be made in equal instalments where possible (last payment may be slightly different depending on loan amount). The payment schedule starts from initial liability point which will be learning aim start date plus two weeks. As an example, for a learner who starts a ten month learning aim on the 1st August with a learning aim fee of £1000, the attendance and payment schedule will be as follows: Attend ance Payme nt Aug Sept Oct Nov Dec Jan Feb April May Confir med Marc h Assu med Confir med Assu med Assu med Confir med Assu med Assu med Assu med Confir med £100 £100 £100 £100 £100 £100 £100 £100 £100 £100 Payment will be made monthly, on the third Wednesday of the month. 16.1.1 Early Completion If a learner completes their learning aim early, and the Provider submits an Early Completion change of circumstance, full payment of the outstanding loan will be pay the month after the early completion date. 16.1.2 Extending Learning Aim End Date If a Provider submits a change of learning aim change of circumstance, which extends the end date of the learner’s learning aim within the first three months of the start of the learning aim, the payment schedule will be updated to reflect the new end date. However if the change of circumstance is submitted after the three month point, the payment schedule will not be updated and payments will be paid in accordance with the original payment schedule. 16.1.3 Late Loan Application A learner can apply for a 24+ loan at any point up until the end of their learning aim. This allows for changes in the learner’s personal circumstances. In this case, the loan will still be scheduled across the entire length of the learning aim but the first payment will include the payments that would have been paid, if the application had been in place from the start of the learning aim. 170 As an example, for a learner who starts a ten month learning aim on the 1st August with a tuition fee of £1000, but who does not apply for their 24+ loan until October, the attendance and payment schedule will be as follows: Au g Attenda nce Payme nt Se pt Oct Nov Dec Jan Feb Marc h April May Confir med Assu med Assu med Confir med Assu med Assu med Confir med £100 £100 £100 £100 £100 £100 £100 N/ A N/ A Confir med from Aim start N/ A N/ A £300 Please note, for the learner, interest will not be backdated to learning aim start date, interest will accrue from the point payment is paid to the Provider. 16.1.4 Monthly Payment Drawdown Cut Off Point Payment will be made to Providers monthly, on the third Wednesday of the month, following the initial attendance confirmation. To allow SLC to calculate payments due in respect of attendance confirmations and submit a BACS payment to the Provider, the Provider will need to confirm their learner’s attendance by close of business on the Thursday before the Wednesday payment. This will be the payment drawdown point. Any learners confirmed after that cut off point will be included in the following month’s payment run. A calendar detailing monthly drawdown and payment dates can be found in Appendix D 16.1.5 National Insurance Number (NINO) SLC can not make payment of a 24+ loan to a Provider if we do not have a verified National Insurance Number for the learner. This should be provided by the learner during the application process however SLC will also try to get this number form the Department of Working and Pensions. A Provider can check whether they have any learners without a verified NINO by using the filter on the Learning Information search page. Providers may wish to encourage any learner in this position to provide their NINO to SLC. It should be noted that a Provider can confirm the attendance of a learner who has not submitted a NINO, however the payment will be blocked. The provision of a NINO is not mandatory for EU learners. 171 16.1.6 Unique Learner Reference Unique Learner Reference number (ULN) is a mandatory field and a Provider must enter this number for each of their learners. Without this number, the learner will not be added to the Attendance Worklist and the Provider will not be able to confirm attendance. This will prevent payments being made for the learners 24+ loan. 16.1.7 Overpayments In some cases, an overpayment may be made to a Learning Provider. One example would be where a Provider does not submit a withdrawal or suspension Change of Circumstance until after payment has been made. If an overpayment occurs, SLC will offset this overpayment against the next payment made to the Provider. Therefore the Provider will receive their monthly payment minus any overpayment. 16.1.8 Loan Reduction A learner will not be able to reduce their loan to less than that which has already been paid to the Provider. However a Provider will have discretion to do this by raising a Change of Circumstance. Any overpayment will be offset against the Providers next payment. However a Provider can reduce a learner’s fee and loan if appropriate by submitting a change of circumstance. Please refer to Section 13 for further details. 172 16.2 Payment Schedule Payment schedules are created for a learner upon approval of their application. Payments are scheduled on a flat monthly profile based on initial liability point and learning aim end date. A Provider can view a learner’s payment schedule in the Current Payment Schedule & Attendance section of the Detailed Learner Information screen. The screen will provide the following information: Indicator Description Scheduled Payment Date The date that the payment instalment has been scheduled for payment Actual Payment Date The date that the payment was made to the Provider Payment Amount The instalment amount that will be paid to the Provider Payment Status Status of payment : Scheduled In Progress Paid Failed Attendance Confirmation Date The date for which the Provider is being asked to confirm learner’s attendance Attendance Confirmation Status Attendance Confirmation Status : Submitted By Awaiting Confirmation In Attendance Not In Attendance Change Start Date Details of user who submitted confirmation of attendance 173 Section 17| Remittance Report 174 The Remittance Report allows a user with Financials Administrator access to view and export Remittance Reports. The report can be accessed via the Applicant Information Service, from the Financials Home menu. The Remittance Report is accessed from the Financial Reports Home by clicking on the Remittance Report link. The user will then be prompted to use the filter to define the exact report that they wish to view. 17.1 User Roles Required to Access the Payment File Users with the following role will have permission to view and export payment remittance reports: LP Financial Administrator 175 17.2 Remittance Report The Remittance Report will provide information on payments that are in progress, payments that have been paid to the Provider and any payments that have been recovered. The file can either be viewed on screen or exported as an xml file. The screen will provide the following information: Indicator Description Scheduled Payment Date The date that the payment instalment has been scheduled for payment Actual Payment Date The date that the payment was made to the Provider Payment Status Status of payment : Payment Amount Scheduled In Progress - payment is being processed but has yet to reach your account Paid - payment has been paid Failed - payment has failed The total of the individual payment and recoveries on the remittance file for that month. Please note that this will not necessarily be the amount deposited in your bank account. The payment you receive will be impacted by any outstanding recovery amounts shown on previous remittance files. (please see table below for further details) Recovery Amount The amount that will be recovered due to an outstanding offset recovery amount (caused by reassessments which occurred in previous months) This amount will have been documented in a previous remittance file. Payment to Bank The total amount that will be paid to the Provider in that payment run Export Tick box which also user to select the file to be exported 176 Payment Amount – further details Payment Scenario Payment Amount Recovery Amount Actual Payment to Provider’s Bank Account £0 £100 £0 £500 £0 £400 £400 (payment amount is sum of positive payments and recoveries for that month) £100 £400 Month X: Provider has no positive payments Provider has a £100 recovery amount Bank payment amount will be £0 Month Y: Provider has £500 positive payment Provider has a £0 recovery amount Bank payment amount will be £400. This will be made up of £500 Month Y payment minus recovery outstanding from month X Month Z: Provider has £500 positive payment Provider has a £100 recovery amount Bank payment amount will be £400. This will be made up of £500 month Z payment minus £100 month Z recovery amount Information on most recent payments will appear first and you can navigate through the pages of payments by using the numbers under the list of payments. Here you can also select how many records per page you would like to display by selecting the number from the dropdown menu. 177 To view details of the individual learners who make up the payment file, the user should click on the Actual Payment Date hyperlink. This will open a window showing the Remittance Report detail. This window will display a summary of the payment selected and give the user a learner level breakdown for each payment. The Remittance Report Detail will also show any recoveries made as the result of any CoCs. These recovery amounts will show as a minus on the payment amount for the individual learner, as well as a total beside the Recovery Amount at the top of the Remittance Report Detail. The Instalment Date field will show the date associated with the individual learner payment. For example if you are receiving more than one months payment for a learner on one payment date this field will show each instalment as a separate record with each instalment date shown for each month. You can select to export this information by selecting the Export button on screen. 178 17.3 Remittance Export Remittance files can be exported as xml files. To export Remittance Reports the user should select the tick boxes next to the files that they wish to export. The export file contains the following information: Value Description Payment identifier The unique identifier for a payment Payment date The date the payment was made Payment Amount The total of the individual payment and recoveries on the remittance file. Recovery Amount The amount of previous overpayments that have been recovered from this payment Payment Status The Status of the payment. This will be either In Progress, Paid or Failed Learner Surname The surname of the learner. Learner Forename The forename of the learner. Date of Birth Learners date of birth ULN The Learners Unique Learner Number Identifier Additional Learner Reference Number (if used) The Learners Additional Learner Number Identifier (Provider internal reference if added to the portal by them) Payment Amount The total paid to the provider on behalf of this learner Application ID The ID associated with appropriate application 179 Instalment Date The date the instalment was due to be paid Instalment Amount The amount that was paid or recovered for this instalment date For full details of the format of this file, please refer to Schema Definition - 24+ Payments Export Schema. Section 18 | User Access Controls 18.1 Overview The Student Loans Company was asked by Learning Providers to consider developing the Learning Provider Portal so that designated groups of learners could be assigned to certain users. This enhancement to the portal means that Sub Contractors can gain access to the portal, and either view or administer the learners at their organization. This functionality can also be used by primary providers to give access to members of staff throughout the organisation at varying levels. For the purposes of this section of the user guide, a Learning Provider Portal user from a Primary Learning Provider will be classed as a “Primary Learning Provider user”. Users who have a group assigned to them will be classed as a “Learning Provider Group user”. Groups can be created and have learners assigned to them. These groups can then be linked to a user. This means that a group user can log into the portal and only have access to the learners within a particular group. The user rights for that group user can be dictated and managed by the prime provider meaning each user can have bespoke portal access determined by their role or organisation. 18.2 Creating a User As with all user administration within the Learning Provider Portal, any user with User Administration access rights can create and maintain users. For the purposes of Learning Provider Group users, a user must be created before they can be assigned to a group. There are two points to remember when creating a user; As any user with user administration access can create and maintain users for their learning provider, if a Group user is given the user administration role they too will be able to administer all users for the primary learning provider. This is not restricted. A user created will have access to all learners assigned to the learning provider until it is assigned to at least 1 group. This should be taken into account when creating users for groups and providers should consider creating users without any access rights initially. This can then be updated after the user is assigned to a group. Newly created User No group Primary Learning Provider User Once assigned to a group Learning Provider Group User 180 18.3 Creating and Maintaining Groups There is a new tab within the Learning Provider Portal called “Maintain Groups”. section will be the part of the portal where groups can be created and maintained. This Primary Learning Provider users, with a LP User Administrator user role, will be able to manage Learning Provider Groups via the Learning Provider Portal, this includes; Creating groups Maintaining groups Making groups inactive When “Maintain Groups” is selected, the user will be taken to the relevant section of the portal where all existing groups will be displayed. The user will also see a “create group” button. To create a group the “create group” button should be selected, this will cause a pop up to appear. The user will then be asked to complete group details, including name of the group (which must be unique), and also assign existing users to the group. This pop up will also contain an active checkbox, which will automatically by ticked when creating a group. Within the “Maintain Groups” screen all existing groups are visible. If a group name, or users assigned to the group, needs to be updated the user can select the group and a pop up box will appear. All necessary details should be changed and saved. To make a group inactive, a group should be selected and the checkbox should be updated so that the tick is removed. Once this tick is removed the user should select save to make the group inactive. 18.4 Assigning Groups to a User Once a group is created users can be added to the group. Users can also be added or removed from existing groups. Primary Learning Provider users, with the LP User Administrator user role, will be able to add and remove users from the selected Learning Provider’s Learning Provider Groups. The same process is followed for adding users to a group, whether the group has been newly created or is an existing group. To add a user to a group the ‘Edit’ button next to the desired group must be selected; this will result in a pop up being displayed on screen. Within this pop up all active users for the learning provider will be displayed in alphabetical order in the group users sub section. To add a user to the group the ‘Add’ link next to the desired user must be selected, the user will then appear in the “users assigned to group” section and disappear from the group users sub section. The save button on the pop up should then be selected to ensure any updates to the group are saved. To remove a user from a group, when in the desired group pop up the user will have the option “remove” next to each assigned user. Once the remove button is selected the user will be unassigned from the group. The user will not automatically appear in the list of all 181 users in the group users sub section but this can be refreshed by saving changes, closing the pop up and then reopening the pop up. Note – When a user is removed from all of their LP Groups then they will automatically become a primary LP user. In these circumstances the system will display a warning message Newly created User No group Primary Learning Provider User Learning Provider Group User Once assigned to a group Primary Learning Provider User User removed from all groups 18.5 Adding learner applications to a Group Any application can be assigned to any active group. A learner’s application can only be assigned to one group at a time. As applications are assigned to groups rather than the learner, if a learner has more than one application each much be assigned separately. Assigning learners to a group can be done in two ways; Individually – From the detailed learner information screen For more than one application – By using the learner information search results screen A Primary Learning Provider user with a LP Administrator role will be able to assign learner applications to an active learning provider group. 18.5.1 Individually Assigning a learner to a group can be done within the detailed learner information page. Once the desired learner’s application is selected the ‘learner information’ section of the detailed learner information screen must be selected. The Learner Information section of the Detailed Learner Information screen will include a new field, ‘Group Name’, which will display the name of the group associated to the application or be blank if no group is associated with the application. Where an application does belong to a group but that group has become inactive, then a message will be displayed above the Group Name. The Group Name field will have two actions available Assign Group and Remove Group. If the Learning Provider does not have any associated Groups then the Assign Group button will not be enabled. 182 Selecting Assign Group will display the Assign Group pop up which will display a list of all active Learning Provider Groups associated to the selected Learning Provider and a radio button next to each Learning Provider Group so a single group can be selected. If the application is assigned to a group, that group will be the first on the list with the radio button selected. Where the application is not assigned to an active group, the records will be in alphabetic ascending order by Learning Provider Group name. 183 A Learning Provider Group can be set by selecting the appropriate radio button next to the Learning Provider Group Name and then selecting the ‘Select Group’ button. As an application can only be assigned to one group at a time, only one group can be selected. Selecting the Select Group button will result in the pop up closing and the Learner Information section being displayed with the new group populated in the Group Name field. 18.5.2 More than one application A Primary Learning Provider user with a LP Administrator role will be able to assign multiple learner applications to an active learning provider group via the Learner Information screen. This function will allow providers to assign multiple applications to one group. This can be done on the learner information screen, using the search results from any relevant search. When the Learner Information Search Results are returned a valid user will see the action Assign Group. From the results returned the user can assign multiple applications to a Learning Provider Group by selecting at least one application from the results displayed and selecting the Assign Group button. Selecting Assign Group will display the Assign Group pop up which will display a list of all active Learning Provider Groups associated to the selected Learning Provider and a radio button next to each Learning Provider Group so a single group can be selected. 18.6 Removing learner applications from a group Removing a learner’s application from a group can only be done within the detailed learner information page. Once the desired learner’s application is selected the ‘learner information’ section of the detailed learner information screen must be selected. 184 The Group Name field will have two actions available: ‘Assign Group’ and ‘Remove Group’ To remove the learner’s application from the assigned group the ‘Remove Group’ button must be selected. 18.7 Group Users and Viewing Learner Information A learning provider group user with the LP Administrator role or the LP Advisor role will have access to the Learner Information Home section of the portal. For the purposes of this document the Learner Information Home section has been split into 4 parts. Under each heading there will be an explanation of what the LP Administrator and the LP Advisor can do. In summary, group users with the appropriate role can: Import ULNs, but only for learners assigned to the same group as the user; Administer CoCs just as a Primary User can; Group Users will only have access to perform and submit CoCs for any learners assigned to their group or groups; View CoC reports just as a Primary User can; Group Users will only have access to view CoCs for any learners assigned to their group or groups; Import CoCs via an XML file upload just as a Primary User can; that validation will only allow the system to process CoCs for learners assigned to the same group as the Group User; View and administer attendance confirmations just as a Primary User can; Group Users will only have access to view, amend and submit attendance confirmation for any learners assigned to their group or groups; Import attendance confirmations via an XML file upload just as a Primary User can; validation will only allow the system to process attendance confirmations for learners assigned to the same group as the user; Please note, a Group User with the appropriate role will have access to the Finance Home section of the portal. Unlike other areas of the portal, the financial area is not restricted to Group Users. This means that Group user Finance Administrators will be able to see the same data as Primary User Finance Administrators and data will not be limited to learners in the groups, but for all learners under that Learning Provider 18.7.1 View Learner Information LP Administrator When a learning provider group user is assigned the LP Administrator role they will have the ability to administer learners just as a primary learning provider user can. The only 185 difference being that group users will only have access to any learners assigned to their group or groups. This means that on the learner information screen they can do the following for their learners; Search for a subset of learners and view results Add ULN to learner applications Add the Additional Learner Reference Number to learner applications Export Results Export Assessment History Access the Detailed Learner Information Screen LP Advisor When a learning provider group user is assigned the LP Advisor role they will have the ability to view learners just as a primary learning provider user can. The only difference being that group users will only have access to any learners assigned to their group or groups. This means that on the learner information screen they can do the following for their learners; Search for a subset of learners and view results Access the Detailed Learner Information Screen 18.7.2 Detailed Information Screen LP Administrator When a learning provider group user is assigned the LP Administrator role they will have the ability to administer learners just as a primary learning provider user can. The only difference being that group users will only have access to any learners assigned to their group or groups. This means that on the detailed learner information screen they can do the following for their learners; View Learner Information Section Add ULN to the learner’s application Add Additional Learner Reference Number to the learner’s application View Assessment Information View Current Payment Schedule & Attendance Add course trainer and course location? LP Advisor When a learning provider group user is assigned the LP Advisor role they will have the ability to view learners just as a primary learning provider user can. The only difference being that group users will only have access to any learners assigned to their group or groups. This means that on the detailed learner information screen they can do the following for their learners; View Learner Information Section View Assessment Information View Current Payment Schedule & Attendance 186 Other User Roles There are certain activities that can be performed from the detailed learner information screen that require additional user access. These are; LP Attendance Administrator A learning provider group user with the LP attendance administrator role will be able to update and submit the attendance confirmation status via the Current Payment Schedule & Attendance section of the detailed learner information screen. LP CoC Administrator A learning provider group user with the LP CoC administrator role will have the option to create a CoC from the detailed learner information screen. 18.7.3 Importing ULNs LP Administrator When a learning provider group user is assigned the LP Administrator role they will have the ability to import ULNs via an XML or CSV file upload just as a primary learning provider user can. The only difference being that validation will only allow the system to process ULNs for learners assigned to the same group as the user. LP Advisor An LP Advisor cannot import ULNs via an XML or CSV file upload. 18.7.4 View Import Results LP Administrator When a learning provider group user is assigned the LP Administrator role they will have the ability to view ULN import results just as a primary learning provider user can. Unlike other responsibilities, this function cannot be split between primary and group users. Therefore any group user will be to see all imported ULN result files. Even if the files contain learner details of learners that are not assigned to their group. 18.8 Group Users and CoCs A learning provider group user with the LP CoC Administrator role or the LP CoC Advisor role will have access to the CoC Home section of the portal. For the purposes of this document the CoC Home section has been split into 4 parts. Under each heading there will be an explanation of what the LP CoC Administrator and the LP CoC Advisor can do. 18.8.1 Performing CoCs LP CoC Administrator When a learning provider group user is assigned the LP CoC Administrator role they will have the ability to administer CoCs just as a primary learning provider user can. The only difference being that group users will only have access to perform and submit CoCs for any learners assigned to their group or groups. This means that on the create CoC screen they can do the following for their learners; 187 Create Pre Liability CoCs including; o Fee Charged o Decrease Loan Amount o Learning Aim o Learning Provider o Cancel o Reinstate Create Post Liability CoCs including; o Fee charged o Decrease Loan Amount o Learning Aim o Early Completion o Suspension o Resumption o Withdrawal As CoCs can change the application details significantly, a CoC may affect the group the learner’s application is assigned to. The one CoC that will remove any groups from a learner’s application is the Pre Liability, Learning Provider CoC. Once a transfer learning provider CoC is performed the learning provider group associated to the application will be removed. In turn any users assigned to that learning provider group will no longer have access to the application information. LP CoC Advisor A CoC Advisor cannot create or submit CoCs 18.8.2 Viewing Submitted CoCs LP CoC Administrator When a learning provider group user is assigned the LP CoC Administrator role they will have the ability to view CoC reports just as a primary learning provider user can. The only difference being that group users will only have access to view CoCs for any learners assigned to their group or groups. There are two sections on which historical CoCs are captured; the View CoC screen and the CoC submissions report. Group users with the CoC Administrator role can; Use the View CoC screen to search for CoCs submitted for applications assigned to their groups View the results of a CoC search and drill down into the individual CoCs submitted Export the CoC search results Set parameters and create a submissions report showing the overall types of CoCs submitted for their organisation LP CoC Advisor When a learning provider group user is assigned the LP CoC Advisor role they will have the ability to view CoC reports just as a primary learning provider user can. The only difference 188 being that group users will only have access to view CoCs for any learners assigned to their group or groups. There are two sections on which historical CoCs are captured; the View CoC screen and the CoC submissions report. Group users with the CoC Advisor role can; Use the View CoC screen to search for CoCs submitted for applications assigned to their groups View the results of a CoC search and drill down into the individual CoCs submitted Set parameters and create a submissions report showing the overall types of CoCs submitted for their organisation 18.8.3 Importing CoCs LP CoC Administrator When a learning provider group user is assigned the LP CoC Administrator role they will have the ability to import CoCs via an XML file upload just as a primary learning provider user can. The only difference being that validation will only allow the system to process CoCs for learners assigned to the same group as the user. LP CoC Advisor An LP CoC Advisor cannot import ULNs via an XML file upload. 18.8.4 View Import Results LP CoC Administrator When a learning provider group user is assigned the LP CoC Administrator role they will have the ability to view CoC import results just as a primary learning provider user can. Unlike other responsibilities, this function cannot be split between primary and group users. Therefore any group user will be to see all imported CoC result files. Even if the files contain learner details of learners that are not assigned to their group. 18.9 Group Users and Confirming Attendance A learning provider group user with the LP Attendance Administrator role will have access to the Attendance Home section of the portal. For the purposes of this document the Attendance Home section has been split into 3 parts. Under each heading there will be an explanation of what the LP Attendance Administrator can do. 18.9.1 Attendance Worklist LP Attendance Administrator When a learning provider group user is assigned the LP Attendance Administrator role they will have the ability to view and administer attendance confirmations just as a primary learning provider user can. The only difference being that group users will only have access to view, amend and submit attendance confirmation for any learners assigned to their group 189 or groups. This means that in the attendance home section, with the attendance work list they can do the following for their learners; Search learners who require an attendance confirmation and appear on the attendance work list View search results, where applicable, and drill down into the individual outstanding attendance confirmations Confirm learner’s attendance as in attendance, not in attendance or start date change Save attendance confirmation Export attendance work list 18.9.2 Importing Attendance Confirmations LP Attendance Administrator When a learning provider group user is assigned the LP Attendance Administrator role they will have the ability to import attendance confirmations via an XML file upload just as a primary learning provider user can. The only difference being that validation will only allow the system to process attendance confirmations for learners assigned to the same group as the user. 18.9.3 View Import Results LP Attendance Administrator When a learning provider group user is assigned the LP Attendance Administrator role they will have the ability to view attendance confirmation file import results just as a primary learning provider user can. Unlike other responsibilities, this function cannot be split between primary and group users. Therefore any group user will be to see all imported attendance result files. Even if the files contain learner details of learners that are not assigned to their group. 18.10 Group Users and Finances A learning provider group user with the LP Finance Administrator role will have access to the Finance Home section of the portal. Unlike other areas of the portal, the financial area is not restricted to group users. This means that Group user finance administrators will be able to see the same data as primary user finance administrators and data will not be limited to learners in the groups, but for all learners under that learning provider. Primary providers can manage this by not allocating the financial administrator role to group users. Section 19 | Further Support 190 19.1 Online Help The system includes an online help facility. Click on to open help for the current screen in a separate browser window. Use the scroll bar to move through the help text. You can resize the window if you wish. Click on to close help. 19.2 Operations Services Helpdesk For help on system or operational issues or queries please contact the Operations Services Helpdesk on Tel: 0300 100 0643 Email: [email protected] The Helpdesk is available from 9am – 5.30pm, Monday to Friday. Please note: The helpdesk is available once you have access to the system. If your query relates to initial system set up, please use the contact details below. 19.3 Partner Services Management Team For initial set up queries or for general ongoing support, advice and guidance please contact the Partner Management Team mailbox [email protected] Appendix A | Description of Application Statuses Application Search Values Application State Values Description Application in Progress In Data Entry The loan application is currently being processed Awaiting Validation The application is being review to confirm that all evidence has been provided 191 Awaiting Investigation The learner has been notified that further information is required to complete assessment of their eligibility. This information has been provided by the learner and it will be processed in due course. Once the evidence has been reviewed and if there is still information missing, this will be requested and the application will move back to 'Missing Evidence'. If the relevant information has been received, the application will either move to “Approved”/ “Approved Awaiting Signature” or Ineligible Awaiting Rejection The application has been processed and deemed to be ineligible and is awaiting rejection Awaiting Approval The application has been processed and is waiting to be approved Missing Evidence Missing Evidence The application has been put on hold until the learner provides further evidence Eligibility Incomplete Eligibility Incomplete The learner’s eligibility for a 24+loan has not yet been established Approved Awaiting Signature Approved Awaiting Signature The learner’s loan application has been approved, however SLC are still waiting for their signed loan declaration form Approved Approved The learner’s loan application has been approved Held Pending Budget Approval Held Pending Budget Approval The loan application has been put on hold, awaiting confirmation on whether the Provider’s budget will be increased Ineligible Ineligible The learner has been deemed ineligible for a +24 loan Cancelled Cancelled The loan application has been cancelled Withdrawn Withdrawn The learner has withdrawn from their learning aim Suspended Suspended The learner has suspended their studies If a learner is having difficulty with the application process or is unsure of how to respond to our communications, please encourage them to call our contact centre number on 0300 100 0619. 192 Appendix B | Learner Attendance Scenarios Learner A commences Learning Aim in August and completes course as intended in March. LP Attendance Administrator confirms Learner A in attendance when required and receives 100% of 24+ loan over the duration of the course. Month August November February March Action Initial Attendance – In attendance Subsequent Attendance - In attendance Subsequent Attendance - In attendance No Action Paymen t 3 instalments paid in Aug, Sept, Oct 3 instalments paid in Nov, Dec, Jan 2 instalments paid in Feb, Mar Course Ended Learner B is due to commence Learning Aim in August but is not in attendance for the initial liability point. LP Attendance Administrator confirms Learner B in attendance on the Attendance worklist and the learner moves to the CoC worklist for the CoC Administrator to submit a Change of Start Date CoC. Learner B’s application is re-presented on the attendance worklist in September once the new initial liability point occurs. Month August September November onwards Action Initial Attendance Change of start date Initial Attendance - In attendance Subsequent Attendance In attendance Payment No Payments but reprofile of payment schedule 2 instalments paid in Sept, Oct Payment continues through learning Learner C is due to commence Learning Aim in September but does not enrol and is not in attendance when the initial liability point occurs. LP Attendance Administrator confirms Learner C as not in attendance, and Learner C is removed from the attendance worklist. Since the learner is not in attendance for the beginning of the course, their application is cancelled. Month September Action Initial Attendance – Not in Attendance No further action to be taken or payments made 193 Payment No Payments and application cancelled 194 Learner D commences Learning Aim in September and LP Attendance Administrator confirms Learner D in attendance for the initial liability point. LP Attendance Administrator confirms attendance on the 1st day of the next quarter, November. In January, Learner D notifies his provider that he is withdrawing from the course. The CoC Administrator submits a Withdrawal CoC and the learners application status is updated to Withdrawn. Learner D’s payment profile is updated and he does not appear on the Attendance worklist at the start of the next quarter, in February. Month September November Action Initial Attendance – In attendance Subsequent Attendance - In attendance Payment 2 instalments paid in Sept, Oct 3 instalments paid in Nov, Dec, Jan No further action to be taken or payments made Learner E commences Learning Aim in September and LP Attendance Administrator confirms Learner E in attendance for the initial liability point. LP Attendance Administrator confirms attendance on the 1st day of the next quarters, November and February. In April, Learner E notifies his provider that he withdrew from the course at the end of January. The CoC Administrator submits a Withdrawal CoC with an effective date of 30th January and the learner’s application status is updated to Withdrawn. Learner D’s payment profile is recalculated and the instalments paid for the months he was not in attendance are recovered in the next payment. Month September November February April Action Initial Attendance – In attendance Subsequent Attendance - In attendance Subsequent Attendance - In attendance Retrospective Withdrawal Submitted for January 2 instalments paid in Sept, Oct 3 instalments paid in Nov, Dec, Jan 3 instalments paid in Feb, Mar, Apr No payments. Overpayment recovery- Feb, Mar, Apr Payme nt No further action to be taken or payments made 195 Learner F commences a 10 month Learning Aim in September and LP Attendance Administrator confirms Learner F in attendance for the initial liability point. LP Attendance Administrator confirms attendance on the 1st day of the next quarter, November. In December, Learner F notifies of his intention to take a break from learning and the CoC Administrator submits a Suspension CoC. Learner F’s application status is updated to Suspended and the payment profile is frozen until they return to study. Learner F returns to his studies in March and CoC Administrator submits a Resumption CoC on the same day. An attendance confirmation code is required for Learner F in the next month, April, to ensure payment continues. Learner F will appear on the Attendance Worklist on the first of April and again on the first of the next quarter, May. The payment profile will be updated to reflect Learner F’s learning end date being extended by the number of months his learning was suspended. Month September November Decembe r March May Onwards Action Initial Attendance – In attendance Subsequent Attendance In attendance Suspensio n Submitted Resumption Submitted Subsequent Attendance - In attendance Paymen t 2 instalments paid in Sept, Oct 3 instalments paid in Nov, Dec, Jan Payments frozen 1 instalment paid in Apr as not in attendance on 1st Mar Payment continues through learning Learner G commences a 10 month Learning Aim in January and LP Attendance Administrator confirms attendance for the initial liability point. LP Attendance Administrator confirms attendance on the 1st day of the next quarters, February and May. Learner G completes his studies in June and the CoC Administrator submits am Early Completion CoC. Learner F’s application Learning Aim End Date is updated and their payment profile is recalculated. All outstanding instalments are scheduled to be paid in the next payment run. Month January February May June Action Initial Attendance –In attendance Subsequent Attendance - In attendance Subsequent Attendance - In attendance Early Completion CoC Submitted Paymen t 1 instalment paid in Jan 3 instalments paid in Feb, Mar, Apr 3 instalments paid in May, Jun, Jul End date updated and lump sum of remaining balance paid 196 B.1 Learner attendance scenarios – exception handling LP Attendance Administrator confirms a positive attendance code for Learner H’s initial liability point and Learner H is removed from the attendance worklist. The LP Attendance Administrator immediately realises this was an error and Learner H is not in attendance. LP Attendance Administrator adjusts Learner H’s attendance confirmation status by changing the code from a Y to an N via the Detailed Learner Information screen. LP Attendance Administrator confirms a negative attendance code for Learner I’s initial liability point and their application is cancelled. The LP Attendance Administrator realises this was an error and Learner I has been in attendance since his start date. CoC Administrator notifies SLC via a Reinstate CoC. Learner I’s application is reassessed and returns to the previous workstage of Approved. Learner I is re-presented on the Attendance Worklist in accordance with his initial liability date. Learner J is due to commence Learning Aim in September but does not enrol and is not in attendance when the initial liability point occurs. LP Attendance Administrator submits a negative attendance confirmation code and Learner J is removed from the attendance worklist. Since Learner J is not in attendance for the beginning of the course, their application is cancelled. Learner J later gets in touch to advise he wishes to undertake the course, and the CoC Administrator notifies SLC via a Reinstate CoC. After checking Detailed Learner Information screen to ensure that the CoC has been processed, the CoC Administrator submits a Change of Start Date CoC. Learner C’s application is re-presented on the attendance worklist once the new initial liability point occurs. B.2 Attendance Confirmation Triggers Payment Initial Liability Attendance Confirmation In Attendance Not In Attendance Subsequent Liability Attendance Confirmation - Pay Change of Circumstance Yes No No Cancel (Automatic = no action required) Change Start Date - No Change Start Date CoC - In Attendance Not In Attendance Yes No No CoC required 197 Appendix C | End to End Learning Provider 24+ Journey diagram Learner End to end Learning Provider 24+ Journey Submit application Entitlement letter Complete checks to facilitate payment Check application status and details - submit necessary CoCs, automatically processed Check NINO verified flag Learning Provider Application Information Service Attendance, Financials and Post Liability CoCs View Learner/Learning Aim Information Confirm attendance via worklist Export/Import learner data Export/import attendance data Export/import Pre Liability CoC data Export/import Assessment History Export/import Assessment History View Payment Schedule Add ULN (mandatory before confirming attendance Create Post Liability CoC Add optional refs (Additional Learner Ref No, Course Trainer/Course Location) View/Export Loan Position Report View/Export Remittance Report View Payment Schedule View/Export Loan Position Report SLC Pay Process application AND 198 Appendix D | Payment and Drawdown Calendar The Payment and Drawdown Calendars shows the key dates in each month in respect to attendance and payment. Each month has a specific payment date and drawdown date. The payment date is always the 3rd Wednesday of the month. As SLC do not make interim or catch up payments there will be no other payment dates throughout the month. The drawdown date is the date by which, if a positive attendance confirmation is received by the end of that day, the payment in respect to the attendance confirmation will be made in the next payment date. The drawdown date for purposes of a 24+ Advanced Learning Loan is the Thursday prior to the payment date (which is the 3rd Wednesday in the month). If a positive attendance confirmation is made after the drawdown date, payment will not be made that month, but will be made the following month. The calendar also shows fixed quarterly attendance return dates. These are the dates that, when reached after their initial attendance confirmation, learners will populate the attendance confirmation worklist. By using the three highlighted dates in month it is clear to see when SLC will ask for attendance confirmation, when it should be confirmed by to receive a payment in that month and when payments will be made that month. Furthermore, in the calendar, drawdown dates have been populated for months that do not require a quarterly attendance return. This is because throughout the year learners with varying start dates will still require an initial attendance confirmation, 2 weeks after their start date, outside of the set quarters. Explanations of the dates can be found in the accompanying key; FQ Fixed Quarter for Attendance Return Drawdown Date Payment Date AA Assumed Attendance The months in the year where SLC need quarterly attendance confirmations Learners will automatically populate the attendance confirmation worklist The date each month that, if attendance is confirmed by, SLC can make a payment to providers for all learners who have a positive attendance confirmation. If the drawdown date is missed, payment will be made the following month. The date each month SLC will make a payment for all learners who have a positive attendance confirmation Where the month shaded grey, attendance is assumed and no subsequent attendance confirmation is required. You may still confirm initial attendance confirmations in these months if you have learners reaching their initial liability point. Learning Provider Portal User Guide Student Loans Company Ltd 2013 Academic Year 13/14 Payment and Drawdown Calendar 13/14 AY - August to July M T W F Q T F S S M T A A August 2013 1 2 3 4 W T F S S M T A A September 2013 1 W T F S S October 2013 1 2 3 4 5 6 5 6 7 8 9 10 11 2 3 4 5 6 7 8 7 8 9 10 11 12 13 12 13 14 15 16 17 18 9 10 11 12 13 14 15 14 15 16 17 18 19 20 19 20 21 22 23 24 25 16 17 18 19 20 21 22 21 22 23 24 25 26 27 26 27 28 29 30 31 23 24 25 26 27 28 29 28 29 30 31 30 F Q A A November 2013 1 2 3 A A December 2013 January 2014 1 1 2 3 4 5 4 5 6 7 8 9 10 2 3 4 5 6 7 8 6 7 8 9 10 11 12 11 12 13 14 15 16 17 9 10 11 12 13 14 15 13 14 15 16 17 18 19 18 19 20 21 22 23 24 16 17 18 19 20 21 22 20 21 22 23 24 25 26 25 26 27 28 29 30 23 24 25 26 27 28 29 27 28 29 30 31 30 31 F Q A A February 2014 1 2 A A March 2014 1 2 April 2014 1 2 3 4 5 6 3 4 5 6 7 8 9 3 4 5 6 7 8 9 7 8 9 10 11 12 13 10 11 12 13 14 15 16 10 11 12 13 14 15 16 14 15 16 17 18 19 20 17 18 19 20 21 22 23 17 18 19 20 21 22 23 21 22 23 24 25 26 27 24 25 26 27 28 29 30 24 25 26 27 28 29 30 28 29 30 31 31 F Q A A May 2014 1 2 3 4 A A June 2014 1 July 2014 1 2 3 4 5 6 5 6 7 8 9 10 11 2 3 4 5 6 7 8 7 8 9 10 11 12 13 12 13 14 15 16 17 18 9 10 11 12 13 14 15 14 15 16 17 18 19 20 19 20 21 22 23 24 25 16 17 18 19 20 21 22 21 22 23 24 25 26 27 26 27 28 29 30 31 23 24 25 26 27 28 29 28 29 30 31 30 200 of 149 Learning Provider Portal User Guide Student Loans Company Ltd 2013 Academic Year 14/15 Payment and Drawdown Calendar 14/15 AY - August to July M T W F Q T F S S M T A A August 2014 W T F S S M T A A September 2014 1 2 3 1 2 3 4 5 6 7 W T F S S October 2014 1 2 3 4 5 4 5 6 7 8 9 10 8 9 10 11 12 13 14 6 7 8 9 10 11 12 11 12 13 14 15 16 17 15 16 17 18 19 20 21 13 14 15 16 17 18 19 18 19 20 21 22 23 24 22 23 24 25 26 27 29 20 21 22 23 24 25 26 25 26 27 28 29 30 29 30 27 28 29 30 31 November 2014 A A F Q A A December 2014 1 2 1 2 3 4 5 6 7 January 2015 1 2 3 4 3 4 5 6 7 8 9 8 9 10 11 12 13 14 5 6 7 8 9 10 11 10 11 12 13 14 15 16 15 16 17 18 19 20 21 12 13 14 15 16 17 18 17 18 19 20 21 22 23 22 23 24 25 26 27 29 19 20 21 22 23 24 25 24 25 26 27 28 29 30 29 30 31 26 27 28 29 30 31 F Q A A February 2015 A A March 2015 1 April 2015 1 1 2 3 4 5 2 3 4 5 6 7 8 2 3 4 5 6 7 8 6 7 8 9 10 11 12 9 10 11 12 13 14 15 9 10 11 12 13 14 15 13 14 15 16 17 18 19 16 17 18 19 20 21 22 16 17 18 19 20 21 22 20 21 22 23 24 25 26 23 24 25 26 27 28 23 24 25 26 27 28 29 27 28 29 30 30 31 F Q A A May 2015 A A June 2015 1 2 3 1 2 3 4 5 6 7 July 2015 1 2 3 4 5 4 5 6 7 8 9 10 8 9 10 11 12 13 14 6 7 8 9 10 11 12 11 12 13 14 15 16 17 15 16 17 18 19 20 21 13 14 15 16 17 18 19 18 19 20 21 22 23 24 22 23 24 25 26 27 29 20 21 22 23 24 25 26 25 26 27 28 29 30 31 29 30 27 28 29 30 31 201 of 149 Learning Provider Portal User Guide Student Loans Company Ltd 2013 Academic Year 15/16 Payment and Drawdown Calendar 15/16 AY - August to July M T W F Q T F S S M T A A August 2015 1 2 W T F S S M T A A September 2015 1 2 3 4 5 6 W T F S S October 2015 1 2 3 4 3 4 5 6 7 8 9 7 8 9 10 11 12 13 5 6 7 8 9 10 11 10 11 12 13 14 15 16 14 15 16 17 18 19 20 12 13 14 15 16 17 18 17 18 19 20 21 22 23 21 22 23 24 25 26 27 19 20 21 22 23 24 25 24 25 26 27 28 29 30 28 29 30 26 27 28 29 30 31 December 2015 A A 31 F Q A A November 2015 1 1 2 3 4 5 6 January 2016 1 2 3 2 3 4 5 6 7 8 7 8 9 10 11 12 13 4 5 6 7 8 9 10 9 10 11 12 13 14 15 14 15 16 17 18 19 20 11 12 13 14 15 16 17 16 17 18 19 20 21 22 21 22 23 24 25 26 27 18 19 20 21 22 23 24 23 24 25 26 27 28 29 28 29 30 31 25 26 27 28 29 30 31 1 2 3 30 F Q A A February 2016 1 2 3 4 5 6 7 8 9 10 11 12 13 14 15 16 17 18 19 20 22 23 24 25 26 27 April 2016 1 2 3 4 5 6 7 8 9 10 11 12 13 4 5 6 7 8 9 10 21 14 15 16 17 18 19 20 11 12 13 14 15 16 17 28 21 22 23 24 25 26 27 18 19 20 21 22 23 24 28 29 30 31 25 26 27 28 29 30 29 F Q A A March 2016 A A May 2016 A A June 2016 1 1 2 3 4 5 July 2016 1 2 3 2 3 4 5 6 7 8 6 7 8 9 10 11 12 4 5 6 7 8 9 10 9 10 11 12 13 14 15 13 14 15 16 17 18 19 11 12 13 14 15 16 17 16 17 18 19 20 21 22 20 21 22 23 24 25 26 18 19 20 21 22 23 24 23 24 25 26 27 28 29 27 28 29 30 25 26 27 28 29 30 31 30 31 202 of 149