1
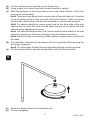
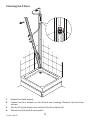
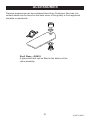
(a) Put the wall channel in position on the shower tray.
(b) Using a spirit level make sure that the wall channel is upright.
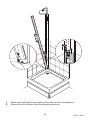
(c) Mark the positions for the fixing holes on one side of the channel (3 off), then
remove the wall channel.
Note! There are three fixing holes on each side of the wall channel. It is better
to use the fixing holes on only one side of the wall channel. This is to ensure
that the wall channel does not become distorted on uneven wall surfaces.
Note! For added stability the centre screw hole on the other side of the wall
channel can be used, but care must be taken that you do not distort the wall
channel when tightening the screw.
Note! The optional fixing screws (3 off) can be used for extra stability if the wall
channel is against an aluminium extrusion from the shower enclosure.
Note! Make sure that you avoid any hidden cables or pipes when you drill into
the walls.
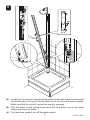
(d) For solid walls, drill with a 6 mm masonry bit (not supplied) and plug using the
wall plugs (supplied).
Note! For other types of wall structure alternative fixings may be required.
(e) Put the wall channel in position and partially install the fixing screws.
5
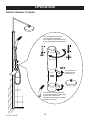
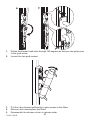
(a) Screw the drench head onto the drench arm.
(b) Do not overtighten.
7
1114271-W2-D