1
Tectite Installation Instructions
Demounting
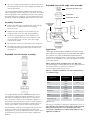
Always cut the tube square, using a rotary tube cutter
whenever possible. Ensure the cutter wheel is appropriate
for the material being cut.
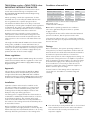
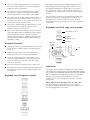
Place the forks of the disconnecting tool around the
fitting assembly. The fork side carrying the Tectite brand
logo should be positioned around the tube/pipe with the
opposite side around the neck of the fitting.
If you are using PEX or PB pipe cut the pipe using pipe
shears.
Deburr the tube end, both internally and externally to
create a 1mm chamfer on the outside of the tube.
Squeeze the disconnecting tool with one hand until the
release collar in the fitting is compressed. With the other
hand, twist out the tube/pipe using the thumb as a lever
against the tool to assist disconnection.
Check the fitting and tube/pipe for damage before
remaking the joint.
The plastic disconnecting clip may be used where only an
occasional disconnecting facility is needed.
Check the tube ends are free from damage and clean,
wiping away any swarf to avoid damaging the ‘0’ ring on
tube insertion. Tube end must also be free from stickers,
tape and adhesive residues.
Where using PEX or PB you must use always insert a
support liner ensuring it is the correct liner as specified
by the pipe manufacturer. If the pipe has been used
on previous installations you will need to cut it back to
behind the teeth or score marks.
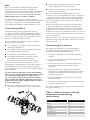
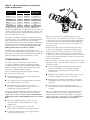
Mark the socket depth with a marker.
Fitting socket depths for Tectite:
Size
Classic, PRO & 316
15mm
23mm
22mm
27mm
For chrome plated copper tube you must scribe the tube
using the correct Tectite Scribing tool.
Select the correct type and size of fitting for pipework.
The fitting should be kept in its bag until point of use to
protect the ‘0’ ring.
Check the fitting ensuring the grab rings/’O’rings have
not been contaminated with grit or debris.
Remove any protective caps fitted to the socket.
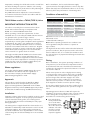
Insert the tube/pipe firmly with a slight twisting action
until it reaches the tube stop with a positive “click”.
Ensure the depth insertion mark corresponds with the
mouth of the fitting, then pull firmly on the tube/pipe to
ensure the fitting is secure.