1
Mounting EK 1
Access hole
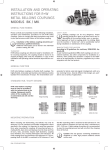
Slide a coupling half onto the shaft to the correct axial position. Tighten the set screw(s) to the appropriate torque using a torque wrench. Insert the elastomer ring and press the two coupling halves
together. Make sure that the fit length (A) is maintained. (See table 1) Mount the assembled coupling onto the second shaft and tighten the set screw(s).
Spindle
Dismounting:
Loosen the set screws and remove the coupling. Use an appropriate tool that will not damage the
coupling to pry the coupling halves apart.
Set screws DIN 916
Mounting EKL / EK 2
Access hole
Access hole
m)
m)
(N
(m
)
2.9
2/1
the
of
ue w
r
q
r
o e ete
c
d
g t scr
g s enin ing diamhea ce
n
i
r
n
t
n
h te
te w
an
ste
Tig fas Ou scre Dist
Fa
IN
(E) Screws
DIN 912
rew
Spindle
s
rie
Se
E
(E) Screws DIN 912
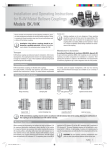
Slide a coupling half onto the shaft to the correct axial position. Using a torque wrench, tighten the clamp
screw (E) to the appropriate torque indicated in Table
2. Insert the elastomer ring and press the two coupling
halves together. Ensure that the fit length (A) is maintained. (See table 1). Mount the assembled coupling
onto the second shaft and tighten the clamp screw (E).
Access hole
Spindle
Dismounting:
Simply loosen the clamp screw (E) and remove the coupling. Use an appropriate tool that will not damage the
coupling to pry the coupling halves apart.
(E) Screws DIN 912
91
(D
BS
F
10
M4
4
32
9,5
20
M5
8
44,5
15
60
M6
15
57
21
150
M8
40
68
24
300
M10
60
85
29
450
M12
120
105
38
Table 2
Mounting EK 6
(E) Screws DIN 912
m)
(E) Screws DIN 912
)
2
.9
/12
91
s
rie
Se
Spindle
Spindle
(E) Screws
DIN 912
Positive stop
4
he
ft
(N
m)
(m
IN
eo
(D
r
qu w
rew g tor scre meted
n
i ing dia hea
n
n
i
n
hte ten ter w
ste
Tig fas Ou scre
Fa
c
gs
E
20
6 x M4
3
M4
60
4 xM5
6
M5
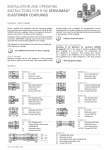
The EK6 uses a clamping ring with axial fastening screws
M5
150 8 x M5 6
(E). Slide the coupling hub onto the first shaft, using a
torque wrench, uniformly tighten the clamping screws (E)
300 8 x M6 12 M6
using a cross-wise tightening pattern until all the clamping screws are evenly tightened to the correct tightening
450 8 x M8 35 M8
Table 3
torque as given in table 3. The clamping ring will come to
a positive stop (1). This avoids excessive loading of the clamping ring and improves the TIR (Total
Indicator Run-out) of the coupling on the shaft. Insert the elastomer ring. The other coupling hub is
mounted onto the second shaft end using the same procedure. Press the two coupling halves together and ensure that the fit length (A) is maintained (See Table 1).
Dismounting:
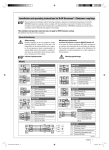
Pull the coupling halves apart and remove the axial fastening screws (E). Threaded holes have been
machined into the hub to accept the fastening screws which will now be used to push off the tapered
ring (figure 4). CAUTION: Prior to re-assembly make sure the fastening screws are in the proper
holes to draw in the taper ring.
m)
(m