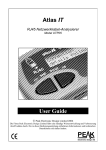
1
GB05-6
Peak Atlas IT
RJ45 Network Cable Analyser
Model UTP05
Designed and manufactured with pride in the UK
User Guide
© Peak Electronic Design Limited 2001/2012
In the interests of development, information in this guide is subject to change without notice - E&OE
Atlas IT User Guide
October 2012 – Rev 6
PLEASE NOTE
This instrument is ONLY suitable
for RJ45 plugs. This is confirmed
on the front panel of your
instrument.
Under no circumstances must
any other type of connector be
used, even if it seems to fit.
In particular, use of telephone style RJ11 connectors WILL
damage the instrument socket and the terminator socket
permanently, leading to intermittent faulty readings that you can’t
rely on.
We are unable to provide warranty cover for misuse (by using
connectors other than RJ45 connectors). The damage to the socket
is easy for us to identify and cannot be caused in any other way.
We want you to have trouble-free use of your instrument, please
ensure you only test RJ45 connectors.
For your protection, please also read the important notices on
Page 4 of this user guide.
Page 1
Atlas IT User Guide
October 2012 – Rev 6
Want to use it now?
We understand that you want to use your Atlas IT right now. The unit
is ready to go and you should have little need to refer to this user
guide, but please make sure that you do at least read page 4!
Contents
Page
Introduction .........................................................................3
Important Notice..................................................................4
Background Information......................................................5
Straight Through Cables
Crossover Cables
Other Cable Configurations
Using Your Atlas IT ............................................................7
Analysis Results...................................................................9
Good Cables
Faulty Cables
Optional Identified Terminators ........................................11
Display Cable-Making Instructions ...................................12
Taking care of your Atlas IT .............................................13
Appendix A - Accessories .................................................14
Appendix B - Technical Specifications .............................15
Appendix C - Error/Warning Messages.............................16
Appendix D - Warranty Information .................................17
Appendix E - Disposal Information...................................18
Page 2
Atlas IT User Guide
October 2012 – Rev 6
Introduction
The Atlas IT will quickly analyse your RJ45 network cables, sockets and patch
panels.
Summary Features:
•
Automatic identification of cable type, such as straightthrough patch cables, crossover cables, token-ring cables
and many more.
•
Cable type can usually be identified even if it is faulty.
•
Fault type identification for all supported cable types,
such as: swapped connections, broken connections, and
shorted lines.
•
Displays the full connection pattern of the cable being
analysed.
•
Compatible with optional Identified Terminators, allowing
multiple cable runs to be uniquely identified and analysed.
•
Supplied with patch cables for easy testing of network
sockets and patch panels.
•
Displays cable-making instructions when not testing cables.
•
Supports cable lengths of up to 150m (500ft).
•
Terminators are very small, ideal for use in tight spaces.
•
Clear and user-friendly display.
•
Auto power-on and power-off.
The Atlas
IT verifies the continuity pattern between the
two ends of a network cable. It does not verify that the cable is
suitable for the data speeds used on the network.
Page 3
Atlas IT User Guide
October 2012 – Rev 6
Important Notice
WARNING:
This instrument must NEVER be connected to cables or
equipment that carries voltages that may exceed 80V, even
for a short period. Failure to comply with this warning may
result in personal injury, damage to the equipment under
test, damage to the Atlas IT and invalidation of the
manufacturer's warranty.
Additionally, the absolute voltage limit of 80V (between any
pair of wires) is stated for a maximum duration of 15
seconds.
It is strongly advised to avoid testing cables that may carry
“Power Over Ethernet” (POE).
“To prevent undesired operation, analysis of non-live systems
is recommended.”
Please also note: This instrument and the terminators must
NOT be used with connectors other than RJ45 connectors.
Page 4
Atlas IT User Guide
October 2012 – Rev 6
Background Information
Cat 5 (short for Category 5) network cables are typically used for 10 Base-T
Networks and 100 Base-T Networks operating at 10Mbps and 100Mbps
respectively. Many new networks are now being specified to operate at even
higher data rates, these are sometimes referred to as Cat 5e (e for enhanced)
and Cat 6 networks.
The cables themselves usually consist of 4 twisted pairs, a total of 8 lines. The
actual connection pattern from one end of the cable to the other end depends on
the network type and also the equipment type. Often, only 2 twisted pairs (4
wires) are actually used for data communication for many networks, however,
for universal compatibility all 8 connections are normally wired.
Straight-Through Patch Cables
12345678
1
2
3
4
5
6
7
8
The simplest network cables are
simply called Patch Cables or
Straight-Through Cables. These are
normally wired with each of the 8
wires connected to the same
corresponding contact at each end of
the cable, 1 to 1, 2 to 2 and so on.
PC
Straight-Through
Patch Cable
PC
Straight-Through
Patch Cable
Straight-Through
Patch Cable
Straight-Through
Patch Cable
Hub/Router
12345678
Server
Printer
Typical Use for Straight-Through Patch Cables
Page 5
1
2
3
4
5
6
7
8
1. Orange/White
2. Orange
3. Green/White
4. Blue
5. Blue/White
6. Green
7. Brown/White
8. Brown
These are generally used for
connecting computers to
hubs (routers or switches) or
simply between a PC and a
wall
socket
(which
eventually connects to a
hub).
Atlas IT User Guide
October 2012 – Rev 6
12345678
Crossover Cables
Another common cable type is the crossover
cable. The connection pattern for these cables is
less intuitive than the straight-through type as can
be seen here.
123456 78
1
2
3
4
5
6
7
8
3
6
1
4
5
2
7
8
These cables are often used when connecting two
computers directly together or for connecting an
Ethernet enabled printer directly to a computer.
They can also be used for expanding a hub or
switch with another hub or switch.
PC
Hub/Router
Crossover
Cable
Server
Printer
PC
Crossover
Cable
Crossover
Cable
PC
Hub/Router
Typical Uses for Crossover Cables
Please note, there are
actually a number of wiring
configurations that can be
used to produce a crossover
cable. The cable connection
pattern shown above is the
most common.
However, the Atlas IT will
recognise all variations.
Other Cable Configurations
There are many different connection patterns that are used for various
applications, most of which are automatically recognised by the Atlas IT.
Please refer to the Ethernet Connection Chart in the middle of this booklet for
further details.
Page 6
Atlas IT User Guide
October 2012 – Rev 6
Using your Atlas IT
Network Cable
Upto 150m (500 feet)
The Atlas IT can be used for
many
types
of
network
installation or simply for testing
a length of network cable.
The diagram (shown right)
illustrates the simplest case, the
Atlas IT Terminator is connected
at one end of a cable and the
Atlas IT instrument at the other.
Terminator
Atlas IT
The Atlas IT is supplied with two short patch cables to allow for the testing of
network cabling that is accessible only by sockets (or a patch panel). This is
illustrated here:
Wall Socket
Ideally, the total cable
length should not exceed
150 metres (500 feet).
Longer lengths may be
analysed without problem
but the overall supported
length is dependant on
factors such as cable
quality, connector quality
and external interference
sources.
Atlas IT Patch Lead
Network Cable
Upto 150m (500 feet)
Patch Panel
Atlas IT
Terminator
Atlas IT Patch Lead
Page 7
Atlas IT User Guide
October 2012 – Rev 6
The Atlas IT can only provide useful information if the cabling being tested is
not connected to other active equipment (such as computers, hubs and routers).
Only the Atlas IT and the Atlas IT Terminator should be connected to the
cabling.
Please note that some combined Voice and Data installations can
carry high “ringer” voltages. The Atlas IT can cope with
short durations of 80V, but no higher.
When the distant end of the cabling has been connected to the Atlas IT
Terminator and the local end has been connected to the Atlas IT instrument,
you are ready to perform a test.
Simply press the on-test button.
The Atlas IT will first perform a short search procedure to determine if it can
detect an Atlas IT Terminator. When this has been detected, it will then
proceed to a full analysis of the cable.
After a few seconds, the unit will display the analysis results.
Results are display a page at a time, simply press the scroll-off button briefly
to proceed to the next page when you’re ready. Pressing the button repeatedly
will eventually get you back to the first page again.
To turn off the Atlas IT, you can hold down the scroll-off button, or simply
wait for it to switch off automatically.
Page 8
Atlas IT User Guide
October 2012 – Rev 6
Analysis Results
Good Cables
If the cable being tested is good, the Atlas IT will display a message similar to
this:
The first page to be displayed tells you the
type of connection configuration for the
cable you’re testing, in this case a simple 8wire patch cable (straight-through).
The arrow on the bottom-right of the display reminds you that more
information is available on the next page, briefly press scroll-off when you’re
ready.
The next information to be displayed is the confirmation of the full connection
pattern between the terminator “Term” and the Atlas IT “Atlas”:
As can be seen from the display here, the
connections are verified as being those
relating to a normal straight through patch
cable. The connections between the Atlas
IT Terminator end of the cable are shown
together
with
the
corresponding
connections on the Atlas IT end of the network cable.
The displayed cable type and connection
pattern depends on the type of cable being
analysed of course, as a further example
the following would be displayed for a
good 8-wire crossover cable:
Page 9
Atlas IT User Guide
October 2012 – Rev 6
Faulty Cables
If the cable connection pattern does not match any of the standard cable types
in the Atlas IT library, the unit will attempt to find the closest match.
The cable may be faulty for a number of different reasons: broken lines,
shorted lines, swapped or incorrectly wired lines. All these fault types will be
clearly displayed on the Atlas IT.
Missing connection(s):
In this example, the closest cable type
match is an 8-wire crossover cable.
Pressing the scroll-off button to view the
next pages reveals the nature of the fault.
Here, a flashing cross symbol indicates a
missing connection.
Shorted connection(s):
This message means the Atlas IT has
detected a short circuit between the two
lines, 7 & 8. These line numbers are as
“seen” at the Atlas IT end of the cable. If more than 2 wires are shorted, just
the first shorted pair are shown.
Swapped Lines:
Incorrectly wired lines will be flashed on
the connection details display. In this
case, lines 6 and 3 are swapped.
Page 10
flashing
Atlas IT User Guide
October 2012 – Rev 6
Optional Identified Terminators
The Atlas IT (from firmware version 2.0 and later) supports the use of
Identified Terminators.
Wall Socket
Atlas IT Patch Lead
2
ID: 2
Patch Panel
Atlas IT
22
23
24
ID Terminators
These special terminators can be used in exactly the same way as the standard
(non-identified) terminators. They are automatically recognised by the Atlas IT
and the identity number is displayed along
with the cable analysis results.
Up to 24 Identified Terminators are
available, allowing for the rapid testing,
and identification of large numbers of
network cables or sockets.
The number of the Identified Terminator
may not be displayed if there are cable faults or if some of the connections
between the Atlas IT and the terminator are missing (e.g. 4-wire economy
patch cables).
Page 11
Atlas IT User Guide
October 2012 – Rev 6
Display Cable-Making Instructions
If the Atlas IT is started without a network cable and terminator connected,
brief instructions on the connections for common network cables are displayed.
The displayed instructions are only to serve as a reminder of course, please
seek guidance from a qualified person if you are unsure how to implement this
information:
First the unit confirms the connection
patterns for the two most common cable
configurations (Straight-Through Patch
cables and Crossover cables).
The colours of all 8 wires are then
displayed.
It is important to note that lines 1&2, 3&6, 4&5 and 7&8 are twisted pairs.
Refer to the Ethernet Connection Chart for more cable connection details.
Page 12
Atlas IT User Guide
October 2012 – Rev 6
Taking care of your Atlas IT
Battery Replacement
The Atlas IT requires no special maintenance, although the battery should be
replaced every 12 months to prevent leak damage.
If this message is displayed, the battery
should be replaced as soon as possible to
prevent malfunction or leak damage.
The unit may continue to operate following a low battery warning,
performance however, may be adversely affected.
To replace the battery, unscrew the three screws to remove the rear panel.
Remove the old battery and insert a new one, taking care to observe the correct
polarity.
The battery should be replaced with a high quality battery identical to, or
equivalent to an Alkaline 23A, V23A, GP23A, MN21 12V (10mm diameter x
28mm length). Carefully replace the rear panel, do not over-tighten the screws.
Page 13
Atlas IT User Guide
October 2012 – Rev 6
Appendix A – Accessories
A range of useful additions is available from Peak or an authorised distributor
to enhance your Atlas IT.
Identified Terminators
Sets of 8 Identified Terminators are available with the following range of ID
numbers: 1-8, 9-16 and 17-24. The terminators are automatically recognised by
your Atlas IT and will help you identify, analyse and number many cable runs
in quick succession.
Mini-Patch Cables
If you wish to test many sockets at a time you may benefit from purchasing
extra patch cables. These mini patch cables are made from extra-flexible
stranded cores that offer ease-of-use and durability.
RJ45 Breakout Adapter
A unique adapter has been designed to enhance your Atlas IT for the analysis
of un-terminated cabling. This is a professional assembly complete with strainrelief, robust RJ45 plug and 8 flexible wires which are brought out to
numbered gold-plated crocodile clips. Ideal for the rapid connection and
analysis of cables or for prototyping special configurations.
Non-Identified Terminators
Replacement terminators are available if you have lost or damaged the supplied
terminators.
Page 14
Atlas IT User Guide
October 2012 – Rev 6
Appendix B – Technical Specifications
Parameter
Network Cable Category
Connection Type
Maximum Cable Length
Test Voltage
Test Current
Protection Rating
Operating Temperature Range
Battery Voltage Range
Battery Type
Atlas IT Dimensions
Terminator Dimensions
Notes:
1.
2.
3.
4.
5.
Cat 5, 5e, 6 (UTP)
RJ45, 8 pin.
150 metres (500 feet)
±5V
±2.5mA
±15V
±80V
10°C to 50°C
7.0V to 13.0V
GP23A 12V Alkaline
103 x 70 x 20 mm
18 x 15 x 14 mm
Notes
5
1
2
3
4
Dependant on quality of cable, connections and influence of
external interference.
Specified for durations no longer than 60 seconds.
Specified for durations no longer than 15 seconds.
Subject to acceptable LCD visibility.
Shield connection is not tested.
Every effort has been made to ensure that this product will reliably and
accurately analyse all supported network cable types. It is possible however
that under extreme conditions of cable length, electrical environment and
installed hardware that the Atlas IT will generate inaccurate readings. Please
contact us if you have any doubts.
Page 15
Atlas IT User Guide
October 2012 – Rev 6
Appendix C – Error/Warning Messages
The Atlas IT cannot detect the terminator. It
is possible that the cable has too many
broken connections or the terminator itself is
damaged.
It is not possible to display a full connection
pattern if only 2 wires are connected
between the Atlas IT and the Terminator.
This will be displayed if the cable being
analysed is not similar to any of the types
stored in the Atlas IT. The connection
pattern will still be displayed however.
The unit is designed for testing non-live
network cables, if excessive voltages are
detected or an internal fault has occurred
then this message may be displayed.
This may be displayed if Atlas IT has been
connected to a live network connection
rather than an Atlas IT Terminator.
Page 16
Atlas IT User Guide
October 2012 – Rev 6
Appendix D - Warranty Information
Peak Satisfaction Guarantee
If for any reason you are not completely satisfied with the Peak Atlas IT within
14 days of purchase you may return the unit to your distributor. You will
receive a refund covering the full purchase price if the unit is returned in
perfect condition.
Peak Warranty
The warranty is valid for 24 months from date of purchase. This warranty
covers the cost of repair or replacement due to defects in materials and/or
manufacturing faults.
The warranty does not cover malfunction or defects caused by:
a) Operation outside the scope of the user guide.
b) Damage caused by connection to voice/ringer voltages.
c) Damage caused by connection to Power-over-Ethernet.
d) Unauthorised access or modification of the unit (except for battery
replacement).
e) Accidental physical damage or abuse.
f)
Normal wear and tear.
The customer’s statutory rights are not affected by any of the above.
All claims must be accompanied by a proof of purchase.
Page 17
Atlas IT User Guide
October 2012 – Rev 6
Appendix E – Disposal Information
WEEE (Waste of Electrical and Electronic Equipment),
Recycling of Electrical and Electronic Products
United Kingdom
In 2006 the European Union introduced regulations (WEEE) for the collection
and recycling of all waste electrical and electronic equipment. It is no longer
permissible to simply throw away electrical and electronic equipment. Instead,
these products must enter the recycling process.
Each individual EU member state has implemented the WEEE regulations into
national law in slightly different ways. Please follow your national law when
you want to dispose of any electrical or electronic products.
More details can be obtained from your national WEEE recycling agency.
If in doubt, you may send your Peak Product to us for safe and environmentally
responsible disposal.
At Peak Electronic Design Ltd we are committed to continual product development and improvement.
The specifications of our products are therefore subject to change without notice.
© 2001-2012 Peak Electronic Design Limited - E&OE
Designed and manufactured in the UK
www.peakelec.co.uk Tel. +44 (0) 1298 70012 Fax. +44 (0) 1298 70046
Page 18