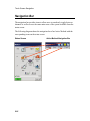
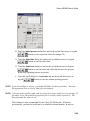
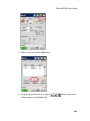
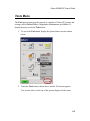
1
GAS CHROMATOGRAPHY CLARUS 600/680 GC User’s Guide Clarus 600/680 GC User’s Guide Release History Part Number Release Publication Date 09936780 C February 2010 Any comments about the documentation for this product should be addressed to: User Assistance PerkinElmer, Inc. 710 Bridgeport Avenue Shelton, Connecticut 06484-4794 U.S.A. Or emailed to: [email protected] Notices The information contained in this document is subject to change without notice. Except as specifically set forth in its terms and conditions of sale, PerkinElmer makes no warranty of any kind with regard to this document, including, but not limited to, the implied warranties of merchantability and fitness for a particular purpose. PerkinElmer shall not be liable for errors contained herein for incidental consequential damages in connection with furnishing, performance or use of this material. Copyright Information This document contains proprietary information that is protected by copyright. All rights are reserved. No part of this publication may be reproduced in any form whatsoever or translated into any language without the prior, written permission of PerkinElmer, Inc. Copyright © 2010 PerkinElmer, Inc. Trademarks Registered names, trademarks, etc. used in this document, even when not specifically marked as such, are protected by law. PerkinElmer is a registered trademark of PerkinElmer, Inc. ii 2 Table of Contents Introduction .................................................................................................................... 1-1 About This Manual .......................................................................................................... 1-3 Conventions Used in this Manual .................................................................................... 1-4 Notes, cautions and warnings ................................................................................... 1-4 Warning Signs on the Instrument..................................................................................... 1-5 Screen Abbreviations ....................................................................................................... 1-6 Glossary of Clarus GC Terms .......................................................................................... 1-7 Autosampler Terms .......................................................................................................... 1-7 Instrument-Specific Terms............................................................................................... 1-8 Glossary of Chromatographic Terms ............................................................................. 1-10 Touch Screen Navigation .............................................................................................. 2-1 Chapter Overview ............................................................................................................ 2-3 Touch Screen ................................................................................................................... 2-4 Tabs........................................................................................................................... 2-6 Non-Configured Devices .......................................................................................... 2-6 Non-installed Devices ............................................................................................... 2-7 Run Button ................................................................................................................ 2-8 Stop Menu............................................................................................................... 2-11 Signal Button .......................................................................................................... 2-11 Heated Zones .......................................................................................................... 2-13 Navigation Bar ............................................................................................................... 2-16 Injectors ......................................................................................................................... 2-17 Program Buttons ..................................................................................................... 2-18 Display Text............................................................................................................ 2-18 PSS.......................................................................................................................... 2-18 Packed (Pkd) ........................................................................................................... 2-24 POC......................................................................................................................... 2-28 Capillary (Cap) Injector .......................................................................................... 2-29 Oven ............................................................................................................................... 2-30 Aux Zone ....................................................................................................................... 2-31 Detectors ........................................................................................................................ 2-32 FID .......................................................................................................................... 2-32 TCD ........................................................................................................................ 2-36 ECD ........................................................................................................................ 2-37 PID .......................................................................................................................... 2-39 NPD ........................................................................................................................ 2-40 FPD ......................................................................................................................... 2-41 Timed Events ................................................................................................................. 2-42 iii Events Tab .............................................................................................................. 2-42 Timed Events Table ................................................................................................ 2-43 Using the Active Method ............................................................................................... 3-1 Overview .......................................................................................................................... 3-3 Editing the Active Method ............................................................................................... 3-4 Getting Ready to Edit the Active Method........................................................................ 3-5 Setting Up Oven and Inlet Temperature Programs .......................................................... 3-6 Configuring the Equilibration Time (Init) ................................................................ 3-7 Setting a Coolant Timeout Value.............................................................................. 3-7 Setting a Coolant Cut-In Temperature ...................................................................... 3-8 Setting Up an Isothermal Program............................................................................ 3-8 Setting Up a One-Ramp Temperature Program ...................................................... 3-10 Holding an Oven Temperature ............................................................................... 3-11 Setting Injector Temperatures ........................................................................................ 3-14 Displaying Injector Temperature Screens............................................................... 3-14 Turning Injector Heaters On or Off ........................................................................ 3-16 Changing Injector Temperatures ............................................................................ 3-16 Oven Temperature Programming Mode ................................................................. 3-17 Inlet Temperature Programming Mode .................................................................. 3-18 Setting Up a One-Ramp Injector Program .............................................................. 3-19 Viewing/Setting Carrier Gas Pressure/Flow/Velocity ................................................... 3-21 Setting Carrier Gas Pressure ................................................................................... 3-23 Setting Carrier Gas Flow using PPC....................................................................... 3-25 Viewing/Setting Carrier Gas Velocity .................................................................... 3-27 Setting the Septum Purge Mode and Offset ................................................................... 3-29 Setting Up Valves .......................................................................................................... 3-37 Setting the Split Mode Using PPC .......................................................................... 3-37 Set up the Splitless Mode for a CAP or PSS Injector .................................................... 3-41 Splitless Injection with Pressure Pulse (Flow Pulse, Velocity Pulse) Technique ... 3-41 Contolling the Autosampler ........................................................................................... 3-51 Autosampler Trays and Carousel............................................................................ 3-51 Autosampler Touch Screen..................................................................................... 3-53 Start Button ............................................................................................................. 3-54 Stop Button ............................................................................................................. 3-55 About Waste and Wash Vials ................................................................................. 3-62 Multi-Program Mode .............................................................................................. 3-62 About Sample Vials ................................................................................................ 3-63 Using a TCD with the Autosampler ....................................................................... 3-63 Available Syringes .................................................................................................. 3-64 Setting Up the Detectors ................................................................................................ 4-1 Overview .......................................................................................................................... 4-3 iv 2 FID Overview .................................................................................................................. 4-5 Setting Up an FID ..................................................................................................... 4-6 Automatically Ignite the Flame .............................................................................. 4-11 Manually Ignite the Flame ...................................................................................... 4-13 Using the FID in Corrosive Environments ............................................................. 4-15 Setting up an ECD ......................................................................................................... 4-17 United States Government Regulations for ECDs .................................................. 4-17 Special Instructions for ECD Cell Purchasers ........................................................ 4-18 United Kingdom Regulations ................................................................................. 4-20 ECD Overview........................................................................................................ 4-20 ECD Set Up ............................................................................................................ 4-22 Setting up a TCD ........................................................................................................... 4-28 TCD Setup .............................................................................................................. 4-29 TCD Setup Summary .............................................................................................. 4-29 Using a TCD with the Autosampler or GSV .......................................................... 4-35 Setting up a PID ............................................................................................................. 4-36 PID Overview ......................................................................................................... 4-36 PID Setup ................................................................................................................ 4-37 Setting Up a NPD........................................................................................................... 4-43 NPD Overview........................................................................................................ 4-44 Setting Up a NPD ................................................................................................... 4-45 NPD Bead Activation Procedure ............................................................................ 4-48 Setting up an FPD .......................................................................................................... 4-55 FPD Overview ........................................................................................................ 4-55 Setting Up the FPD ................................................................................................. 4-57 FPD Setup Summary .............................................................................................. 4-57 Configure the Linearizer and Signal Filter ............................................................. 4-57 Set the FPD Temperature........................................................................................ 4-61 Detector Temperatures ................................................................................................... 4-72 Setting the Range ........................................................................................................... 4-74 Setting the FID, PID, or NPD Range ...................................................................... 4-74 Changing the FID, PID, or NPD Range During a Run .................................................. 4-75 Setting the TCD Current (Filament Current) ................................................................. 4-78 Changing TCD Polarity During a Run........................................................................... 4-80 Routing Detector Output ................................................................................................ 4-83 Rerouting Output .................................................................................................... 4-83 Attenuating Detector Signals Going to a Recorder ........................................................ 4-87 Optimizing a Detector Signal to an Integrator for Maximum Sample Dynamic Range 4-89 Matching Detector Signals with Your Integrator ........................................................... 4-90 Autozeroing a Detector .................................................................................................. 4-93 Using the Method Editor ............................................................................................... 5-1 v Method Editor .................................................................................................................. 5-3 Method Edit Mode ........................................................................................................... 5-5 Oven Settings ............................................................................................................ 5-7 Managing Methods .......................................................................................................... 5-9 File Menu .................................................................................................................. 5-9 Using the Tools Menu .................................................................................................... 6-1 Tools Menu ...................................................................................................................... 6-3 Method Editor .................................................................................................................. 6-4 Event Log ......................................................................................................................... 6-5 Maintenance ..................................................................................................................... 6-6 Configuration ................................................................................................................. 6-10 Injectors (Deconfiguring and Configuring Injectors) ............................................. 6-10 Oven ............................................................................................................................... 6-18 Detectors ........................................................................................................................ 6-20 Run/AutoSampler ................................................................................................... 6-26 Setup ....................................................................................................................... 6-28 Pneumatics .............................................................................................................. 6-33 Connecting the PPC Modules ........................................................................................ 6-35 Reference Settings .................................................................................................. 6-48 Relays ..................................................................................................................... 6-48 Zeroing and Calibrating the PPC Modules ............................................................. 6-49 Zeroing the PPC Gas Modules................................................................................ 6-49 Setting the Reference Temperature and Pressure ................................................... 6-53 Calibrating the Carrier Gas Modules ...................................................................... 6-54 Calibrating the Detector Gas Modules.................................................................... 6-57 Calibrating the Oven Temperature................................................................................. 6-60 Calibrate the Reference Thermometer .................................................................... 6-60 Place the Thermometer Probe in the Oven ............................................................. 6-61 Equilibrate the Oven Temperature .......................................................................... 6-62 Enter the Required Offset Value ............................................................................. 6-65 Remove the Thermometer Probe ............................................................................ 6-65 Utilities........................................................................................................................... 6-66 Column Flow Calculator......................................................................................... 6-67 Split Flow Calculations Screen ............................................................................... 6-71 Column Length Calculator...................................................................................... 6-73 Background Compensation ..................................................................................... 6-74 Stopwatch ............................................................................................................... 6-76 Program (Max Oven Program Rates)............................................................................. 6-77 Release… ....................................................................................................................... 6-78 Logout… ........................................................................................................................ 6-79 About ............................................................................................................................. 6-80 vi 2 Setting up a Typical Analysis ........................................................................................ 7-1 System Status Screen ....................................................................................................... 7-4 Injector Settings ............................................................................................................... 7-6 Packed Column (PKD) Injector ................................................................................ 7-6 Programmed Split/Splitless (PSS) Injector ............................................................... 7-8 Detector Settings ............................................................................................................ 7-11 Flame Ionization Detector (FID) ............................................................................ 7-11 Detector .......................................................................................................................... 7-16 Thermal Conductivity Detector (TCD)................................................................... 7-16 Autosampler ................................................................................................................... 7-22 Index vii viii Introduction 1 Introduction 1-2 Clarus 600/680 GC User’s Guide About This Manual This guide is divided into following chapters: Chapter 1 Introduction This chapter contains a brief introduction to the Clarus GC, the conventions and warnings used in the manual. Chapter 2 Touch Screen Navigation This chapter contains information that introduces you to the look and feel of the touch screen. It shows you how to turn on the GC, check the status, and perform fundamental operations such as changing parameters, selecting options, using the tools menus, etc. Chapter 3 Active Method This chapter contains step by step explanation of the active method. Detailed information on setting up the autosampler is contained in this chapter. Chapter 4 Setting Up the Detectors This chapter contains detailed information on setting up the detectors. Chapter 5 Using the Method Editor This chapter describes how to modify, save and use the method editor. Chapter 6 Using the Tools Menu The chapter contains detailed information on the tools menu section of the touch screen. Chapter 7 Setting Up a Typical Analysis This chapter describes how to run a typical analysis on the Clarus GC using the most common configuration. 1-3 Introduction Conventions Used in this Manual Normal text is used to provide information and instructions. Bold text refers to text that is displayed on the screen. All eight-digit numbers are PerkinElmer part numbers unless stated otherwise. Notes, cautions and warnings Three terms, in the following standard formats, are also used to highlight special circumstances and warnings. NOTE: A note indicates additional, significant information that is provided with some procedures. CAUTION We use the term CAUTION to inform you about situations that could result in serious damage to the instrument or other equipment. Details about these circumstances are in a box like this one. We use the term WARNING to inform you about situations that could result in personal injury to yourself or other persons. Details about these circumstances are in a box like this one. WARNING 1-4 Clarus 600/680 GC User’s Guide Warning Signs on the Instrument For detailed safety information see the Safety Practices chapter in the Clarus 600/680 GC Customer Hardware and Service Guide (P/N 09936781). Caution, hot surface. Caution, risk of electric shock. Caution, laser radiation hazard. Caution (refer to accompanying documents). 1-5 Introduction Screen Abbreviations AUX – Auxiliary zone Cap – capillary split/splitless injector Cmptr – computer Ctrl – syringe control parameters ECD – Electron Capture Detector FID – Flame Ionization Detector FPD – Flame Photometric Detector Gen – generate Inj/Vial – injections per vial Int – integrator kPa – kilopascals NPD – Nitrogen Phosphorus Detector PID – Photoionization Detector Pkd – packed injector POC – Programmed On-Column Injector PPC – programmed pneumatic control Pre – # of preinjection syringe washes Psi or psig – pounds per square inch (gauge) PSS – Programmed Split/Splitless Capillary Injector TCD – Thermal Conductivity Detector 1-6 Clarus 600/680 GC User’s Guide Glossary of Clarus GC Terms The glossary of Clarus GC terms are divided into two types: • Autosampler Terms • Instrument-Specific Terms Autosampler Terms Term Description Washes Washing the syringe. Pre-Wash The number of prewashes of sample to prime the syringe (no pumping). Pre-Inject The number of pre-injection syringe washes with a solvent. Post-Inject The number of post injection syringe washes with a solvent. Pumps The number of times the syringe draws up sample and evacuates it before acquiring the volume. This is done to eliminate bubbles. Mode The style of injection. Fast Fast speed of the syringe during sample injection. This is used to eliminate discrimination in the needle. Normal Normal speed of the syringe during sample injection. Slow Slow speed of the syringe during sample injection in order to inject directly into a wide-bore capillary column, in hot injection port. 1-7 Introduction Instrument-Specific Terms 1-8 Term Description Attenuation The amplification of the detector output signal. Background compensation A routine that automatically subtracts a stored calibrated baseline profile from the signal generated during a GC run. Ballistically Changing the oven temperature as quickly as possible to reach a set point. Soft Cooling Soft-cooling is a technique whereby, the cooling rate of the GC oven is initially limited by controlling (throttling) the intake of the ambient (cold) air used to cool the oven. Detector background The detector output signal when no components are being eluted. Equilibration The delay time after the method set points have been reached before the system becomes READY. Flameout Detects if the flame is on to prevent injection into a nonfunctioning system and subsequent loss of sample. Isothermal method A method in which the oven temperature remains constant throughout a GC run. Method A collection of parameters that control the GC. Negative-time event A timed event that you set to occur before the instrument becomes READY. Clarus 600/680 GC User’s Guide Term Description Parameter An independent variable used to specify a condition to be met. PPC Programmable Pneumatic Control Pre-run The time after equilibration during which negative-time events are executed. PreVent PPC version only. Sample management system. Range For a Flame Ionization Detector, range means sensitivity of the detector output signal. Ready Indicates that all method parameters have reached their set points and that you can start your analysis. Run The time from sample injection to the end of the oven temperature program. Sleep mode The GC can be set to a predefined method for gas savings. Temperature program PPC version only. A program that specifies the rate of oven temperature increase from one plateau to the next, and the time the oven temperature is held constant at a plateau. Timed Events Events that take place before or during a GC run as specified in a timed events table. Zone A heated area in the GC oven, injector, or detector. 1-9 Introduction Glossary of Chromatographic Terms* Adsorption – A process that occurs at the surface of a liquid or solid as a result of the attractive forces between the adsorbent and the solute. These forces may be physical or weakly chemical. Analysis – The complete investigation of a sample by gas chromatographic separation including identification of the sample components and quantitative measurements. Anode – The positively charged electrode in any electrical circuit to which charged particles and ions are attracted. Band Broadening – A process that occurs in the GC whereby the peak width for a component increases the longer the component travels through the column. Baseline – The detector signal to a recorder or integrator when only the carrier gas is passing through the detector. Baseline drift – Any regular change occurring in the baseline signal from the detector, usually resulting from column temperature and/or gas flow changes. Blank run – A run without the sample being injected. Bleed – The evaporation of the stationary phase from a column. Capillary column (wall coated open tubular column) – A small-internal-diameter column whose inside wall is coated with a liquid phase. Carrier gas – The mobile phase of the separation system. An inert gas which transports the sample from the injector through the column to the detector. This gas is usually helium, hydrogen, or nitrogen. Column conditioning – A process for producing a stable column by heating the column with carrier gas flowing to remove volatile impurities from the stationary phase. Detectors – Hardware that responds to sample components producing an electrical signal that can be measured to quantitate the amount of each component present. Flow programming – The stored PPC program is interpreted as real column mass flow settings or capillary column flow settings from which the inlet * Reference: Denney, R.C. A Dictionary of Chromatography. 1-10 Clarus 600/680 GC User’s Guide pressure is calculated. This is dependent on the capillary control mode and installed pressure or split control option. Flow rate – The mass flow of carrier gas or detector gas in milliliters per minute. Ghost peaks – Peaks that are not due to sample components, for example, peaks produced by carrier gas impurities, septum, or components from previous analyses. Injection port – The hardware through which the sample is introduced to the column by injection. Linearity – Quantitatively all detectors will produce a linear response with respect to solute concentration over a defined range, for example, the Linear Range. Liquid phase – The material in the column that causes the components to separate because of partitioning of the components between the mobile phase (carrier gas) and the stationary phase (liquid phase). Lowest limit of detection – The smallest amount of sample that can be detected by the detector being used. Usually defined as any signal that is as great as two times the noise level. Also referred to as Minimal Detectable Quantity (MDQ). Mobile phase – The gas which carries the solute (sample) along and over the column material. This carrier gas is inert and usually helium, nitrogen, or hydrogen. Noise – Background signal fluctuations arising from a detector response. This response is the result of the column installed, carrier gas purity, electronic components, etc. The response of any detector is defined by the signal-to-noise ratio. Partition Coefficient – The differential solubility of a substance in two different phases. In the case of gas–liquid chromatography, the sample components reach an equilibrium between the gas phase (mobile) and the liquid phase (stationary). Each component has a different partition coefficient thus causing separation in the column. Pressure programming – Pressure control through an independent four-step, three-ramp program for each carrier gas channel. Resolution – The degree of separation between two peaks. Retention time – The time interval from the point of injection to the appearance of the peak maximum, of a component’s signal. 1-11 Introduction Septum – Silicone rubber material placed in the injection port through which the injection is made. When the needle is withdrawn, the silicone rubber reseals, thus not allowing any sample or carrier gas to escape. Stationary phase – The liquid or solid adsorbent portion of the column that retains components passing through the GC column. Subambient – Below ambient temperature. The oven cools down below ambient temperature with the use of either liquid nitrogen or liquid carbon dioxide. Syringes – Precision dispensing devices used to deliver sample to the GC. Liquid and gas syringes are available. Tailing – When a peak is not symmetrical or Gaussian shaped but the back end is broadened, it is said to be tailing. Temperature programming – A technique commonly used to increase the rate of elution of the components. After the sample is injected into the oven at a specific temperature, the temperature program increases the oven temperature to the prescribed temperature at a defined rate (in °C/min). Unretained peak – A component that is not retained by the column. The time taken for an unretained sample to pass through the column is the same time as the time taken for the carrier gas to pass through. Velocity programming – Programmed linear velocity where the PPC controller interprets stored PPC programs as the average capillary column linear velocity settings. 1-12 Touch Screen Navigation 2 Touch Screen Navigation 2-2 Clarus 600/680 GC User’s Guide Chapter Overview You operate the Clarus GC using the touch screen on the front of the GC. The touch screen is the interface between you and the instrument, enabling you to control the Clarus GC in order for you to perform your analyses easily and conveniently. The touch screen contains active areas that you touch to perform the required action. You may find it more convenient to use a stylus or you may like to touch the active areas of the touch screen. Do not use sharp, pointed objects. A light touch is all that is needed. You do not need to press forcefully on an active area. Please note that when you touch an active area, various processes are started in the instrument. Some of these processes may take several seconds. Be patient and wait for the process to complete before touching another active area on the touch screen. This chapter gives a brief overview on touch screen definitions and navigation. For details on using the active method, method editor and tools menu see chapters 3, 4 and 5. 2-3 Touch Screen Navigation Touch Screen The main display area on the touch screen is referred to as screens. You use various screens to set up your Clarus GC to perform the analyses. These screens contain: • Entry fields which allow you to make entries, • Buttons that you touch to start or stop actions or to display a dialog, • Option Buttons that you select drop down menu options from a list, • Boxes that you use to switch functions on or off and • Radio Buttons that allow you to choose one of two or more options. The Clarus GC is controlled by a collection of operating parameters called the Active Method. You can prepare and save up to five methods and make any one of them the Active Method. However, the fifth method is reserved for TotalChrom and may be overwritten. 2-4 Clarus 600/680 GC User’s Guide The following Status Screen shows the different sections of the user interface. The Status Screen displays icons that provide quick access to major areas of the system. The injector and detector buttons show graphic representations of the devices for each channel. If a heated auxiliary zone is configured, the Aux button with a thermometer appears active on the bottom of the screen. The Aux zone button with the carrier gas icon indicates that the PPC carrier gas zone is active. The icon buttons that represent the heated zones (injectors, detectors, oven, and Aux if configured) include a light to indicate the ready/not ready status. A red blinking light indicates not ready and a steady green light indicates ready status. The Title bar displays the name of the active method. The Run button provides access to the Autosampler and Manual Inject settings. Channel B appears above Channel A to emulate the order on top of the GC. Click here to view the Signal. If a method is not running the screen will display a baseline. The Icon buttons provide quick access to all configured areas of the instrument. An indicator light shows the ready/not ready status of each heated zone. The Start button appears so you can start or stop a run. The status bar displays the overall ready/not ready status as well as text messages and the real time clock/date The bottom bar displays the Tools pop up menu. When the system is running the Stop button also appears. 2-5 Touch Screen Navigation Tabs Some of the active method screens include tabs to allow you to switch views associated with a specific channel. Non-Configured Devices If a device is installed but not configured, or configured as None, both the graphic and light are grayed out. Touching the button prompts the following dialog box. 2-6 Clarus 600/680 GC User’s Guide The following screen capture shows the drop down list on the injector Configuration screen used to set a device to None. Non-installed Devices If a device is not installed, a grayed out deactivated button with no indicator light appears in the designated position. Touching the button prompts the following dialog box: 2-7 Touch Screen Navigation Run Button The Run button displays the Manual injection and Autosampler settings if the device is enabled. The bottom bar on these screens includes the Start button. When the system is running, the Start button changes to the Stop button. Since the Start button is only available on the Autosampler and Manual inject screens, you must initiate a run from these screens. However, when the system is running, the Stop button appears on all screens allowing you to Stop the run from anywhere in the application. If the system is Paused, the Resume button appears on all screens. Autosampler Enabled When an Autosampler is enabled, the Run button defaults to that screen. The following screens show the enable check box on the configuration screen and the associated Autosampler screen in the Active Method. 2-8 Clarus 600/680 GC User’s Guide When the GC is ready, touch the Start button to begin the run. If you touch Start before the system is ready, the run will start when the system reaches the ready status. When the Autosampler is disabled, touching the Run button displays the Manual inject screen. When the instrument is ready, touch the Start button to begin the analysis. The countdown enable check box is selected by default. You can stop the countdown by pressing the Cancel button. Manual Injection If no Autosampler is installed or configured, the Run button displays the Manual injection screen. The enable check box is selected by default. Touching the start button initiates the countdown starting from 5 seconds. When the countdown reaches 0, an audible beep prompts you to inject the sample. The GC will then start to program the oven and collect data. If the enable check box is deselected, the timer and tone are disabled. The system starts as soon as the Start Button is pressed and you make an injection simultaneously. 2-9 Touch Screen Navigation Enabled Disabled When the Stop button is pressed, an abbreviated Stop Menu appears. 2-10 Clarus 600/680 GC User’s Guide Stop Menu Stop Immediately – Touching this button immediately stops the Active Method and closes the Stop Menu dialog.. Go to a temp, program step – Displays the Go to Temp dialog for you to select the step you wish to go to at this time. Then press OK to activate the selected step. Cancel – Cancels this Stop Menu dialog and returns you to the Active Method. Signal Button The Signal icon displays the graphic signal for the active method. If the system is not running, a baseline appears on the graph. Raw signal Processed signal The Signal screen displays the selected detector signal over a fixed time period (2 minutes) with you selecting the scaling factor using the up and down arrow buttons. The raw signal is unprocessed and can appear slightly larger than the processed signal. The processed signal has gone through attenuation and offset filters. 2-11 Touch Screen Navigation The name of the channel appears on the top left of the screen. Detector controls include Ignite and Autozero. Display controls include scaling and zeroing. Ignite Button Pressing the Ignite button starts the ignition sequence for a PPC-enabled FID. During ignition the plot and signal level are active. For information on setting up manual pneumatics for the different detectors see the various detector sections in chapter 4 “Setting Up the Detectors” and sections in Chapter 3 on “Using the Active Method” and Viewing or Adjusting Carrier Gas Pressure Using Manual Pneumatics. AutoZero Button Autozeroes the selected detector. Signal Plot The plot graph displays the signal from the selected detector in “real time.” The window is 2 minutes wide. The signal commences at the y-axis and is plotted out to start + 1.75 minutes. The signal then scrolls back so the start is now +1 minute, the last 0.75 minutes are displayed from there, and the signal then scrolls out again. The signal is plotted continually before, during and after a run. Signal Display and Scaling The signal display at the top of the screen displays the signal level of the detector in mV. The default signal scale is 0-1024mV. The up/down arrows will adjust the display between 1 and 1024mV by halving or doubling the current factor 2-12 Clarus 600/680 GC User’s Guide Zero Display Button The Zero Display button offsets the current signal level to 5% f.s.d. on the display. Heated Zones The Status screen displays graphic icons to represent the devices installed in the system. Each type of injector and detector is represented with a customized graphic as well as a text label. Heated zone buttons display a status light indicator in the lower right corner. The indicator lights for individual zones follow the same convention as the system status light that appears in the Status bar. Steady green indicates that the zone is ready. A red blinking light indicates that the zone is not ready. Injector and Detector Buttons The screen is organized with Channel B devices above Channel A to reflect the position of the channels on top of the GC. Injector and detector buttons display 2-13 Touch Screen Navigation the active method settings for each device. Touching a device icon displays the selected screen as well as a row of tabs to allow easy access to the injector, oven, detector, and events for that channel. Touching the alternate channel icon on the top navigation bar displays the active screen and associated tabs for the other channel if it is installed and configured. The active method screens include navigation icons on the title bar that allow you to access the same elements available from the Status screen. 2-14 Clarus 600/680 GC User’s Guide Oven Button Clicking the oven button provides access to the oven program settings and graph. You can set 1 to 10 program steps and up to 9 ramp rates. Use the up and down scroll buttons to the right of the oven entries to view program steps 5 – 10. If both channels are running and the Oven is accessed from the Status screen, it defaults to Channel A. The oven program screen displays the same tabs and navigation icons as the injector and detector active method screens. Aux Zone Buttons If a heated Aux Zone is configured, pressing the Aux button displays a screen that follows the same format as the injector screens and shows the current temperature. 2-15 Touch Screen Navigation Navigation Bar The navigation bar provides icons to allow users to seamlessly toggle between channels as well as access the same main areas of the system available from the status screen. The following diagram shows the navigation bar of an Active Method with the corresponding icons on the status screen. Status Screen 2-16 Active Method Navigation Bar Clarus 600/680 GC User’s Guide Injectors The injector elements that appear on a particular injector screen depend on injector types as well as selected configuration options. Some injector types offer a variety of options while others are more limited. The labels in the following screen capture identify the main components of an Active Method injector screen. This example shows a screen for a PSS injector with PPC. Injector Tab for Channel A-PSSI selected Temp Ready/Not Ready Light Carrier Gas Ready/NotReady Light Carrier gas pressure, flow, or velocity Split Flow Ready/Not Ready Split Flow actual value Active Method Name Channel B Parameters Temp Ready/Not Ready Light Temp program button Temp Set Point Carrier Gas program button Split flow set value Time/Date Display System Status – Oven Program Step 2-17 Touch Screen Navigation Program Buttons The program button appears next to the temperature and Carrier Gas fields for a programmable PSS or POC injector. If the program button associated with a value is active, the entry field is grayed-out. You must go to the program screen to modify the settings. If the programmable injector is not configured to program the setting, the program button is grayed out. In most cases, fields with a deactivated program button are editable, allowing you to modify the setting directly. Display Text The text displayed next to the set point entry fields show the current values. If the injector configuration allows you to display the value in other units, such as velocity or flow, the display text shows the actual values for all of the available options. PSS This section describes the main components of the PSS active method screen and the relationship between program and configuration options. 2-18 Clarus 600/680 GC User’s Guide Configuration Options The following screens show the configuration choices and how they correspond to the entry fields in the active method. Configuration Screen Active Method Temperature Program You can set injector (inlet) temperature programs by selecting, the program button on the active method screen is active. Mode Description Inlet In the inlet programmed mode, the injector is first heated to the injector temperature that is entered in the method. The injector then follows the injector temperature program that you defined. Oven The oven programmed mode is the default mode of operation. In this mode, the injector setpoint equals the oven setpoint plus 5 °C. 2-19 Touch Screen Navigation The temperature graph displays the set point value. The label below the graph displays the current step. The text to the left of the graph displays the actual temperature. To modify the temperature program during a run, touch the program button. You can modify the temperature, time, or rate. However, if the program is currently in that step, the changes will be ignored. Isothermal Program If the program is isothermal, the program button is grayed out and the top-level field is active. Changes entered in the field take effect immediately. 2-20 Clarus 600/680 GC User’s Guide Carrier Gas Program The Carrier Gas options for PSS include flow, velocity, or pressure. If the option for Capillary Control is selected, you can program the carrier gas according to one of the three values. The following example shows that Pressure was selected as shown in the following Configuration screen: The corresponding actual values for the other units appear as read-only text on the screen as shown in the following Active Method screen. 2-21 Touch Screen Navigation . Touching the Program button next to the field displays the associated Carrier Pressure Program screen for the entry field value. 2-22 Clarus 600/680 GC User’s Guide Capillary Control Off The following screens are examples when Capillary Control is off Split Flow The PPC system adds the split flow offset to the method's split flow rate setpoint to obtain the Total split flow rate delivered to the inlet system. The total value is equal to the setpoint flow rate (the flow at the column entrance) plus the offset flow rate. The inlet system flow controller delivers the Total flow rate, not the setpoint flow rate. 2-23 Touch Screen Navigation Packed (Pkd) The packed column injector has a fixed (non-programmable) temperature field. The carrier gas can be programmed by Pressure or flow. The following procedure shows how to navigate through the screens to configure PPC for a packed column injector. 1. Select Configuration from the Tools menu . 2-24 2. Touch the Pneumatics button. Clarus 600/680 GC User’s Guide 3. Touch the PPC Connect button. 5. Touch Carrier B to Configure your Packed column injector for PPC. 4. Touch the OK button. 2-25 Touch Screen Navigation 6. Select Pres Read from the dropdown menu. Then touch the OK button. 7. Touch Close to close the Connect PPC Device screen. 8. Touch OK on the Configuration PPC screen. 2-26 9. Touch the B Injector button on the Configuration screen. Clarus 600/680 GC User’s Guide 10. The Configure Injector B screen appears. 11. Select Pressure or Flow from the drop-down menu. 12. To exit out of Configuration, touch the OK button then touch the Close button. 13. Display the active method and view the B-Pkd injector parameters as shown on the right. 2-27 Touch Screen Navigation POC The packed on co lumn injector can be programmed by Inlet (POCI) or Oven (POCO). The POC injector is configured and controlled according to the same parameters as the PSS injector. Packed On Column Inlet 2-28 Packed On Column Oven Clarus 600/680 GC User’s Guide Capillary (Cap) Injector 1. From the Configuration menu, select Cap from the drop-down list. 2. Exit from Configuration and display the active method screen. 2-29 Touch Screen Navigation Oven The Oven Temperature Program provides fields and a graph that reflect the current temperature program as shown in the screen on the left below. Pressing the Go to button invokes a dialog box that allows users to raise the temperature to a value associated with another step. The last step of the current program is selected by default. Radio buttons for steps that exceed the number of steps in the current program are deactivated. In the example below, step 2 is selected. As soon as the user touches the OK button the change is implemented. The graph in the capture on the right shows the immediate temperature rise and the departure from the program. Graph and status bar show the oven is ready to run a program. 2-30 Touching the Go to button displays the Go to Temp dialog box to select a step to go to. In this example step 2 is selected. Press the OK button to immediately raise the oven temperature to the value specified in step 4. The blue line in the graph reflects the departure from the program. Clarus 600/680 GC User’s Guide Aux Zone If the GC is configured with an auxiliary zone, the button appears on the status screen. Touching the Aux button displays a dialog box with the setpoint and actual temperature. 2-31 Touch Screen Navigation Detectors Detector screens provide you with a way to set and control a number of parameters during a run, such as temperature, range, and attenuation. Other active elements include a Heater Off button to turn off the detector and an AutoZero check box. Selecting the AutoZero check box prompts the system to zero the signal before the run and also activates the Signal button on the Signal screen. The mV value next to the small signal icon that displays the current signal. The read-only text displays details about configuration settings. The following screen shows the major components that apply to all detector screens. The subsections that describe each detector type includes details about settings that are unique to that particular detector. FID Temperature setpoint. Selecting this checkbox turns the detector heater Dynamic text displays the current signal Actual temperature Selecting the AutoZero checkbox zeros the signal before the run Indicator lights show the gas flow status Touch the Ignite button to light the FID flame The FID (Flame Ionization Detector) uses a hydrogen and air flame to generate ions from the combustion of an organic compound. The detector collects and measures the concentration of these ions to determine the amount of compound 2-32 Clarus 600/680 GC User’s Guide in the sample. The FID active method screen varies depending on whether the detector is configured with manual or programmable pneumatics. This section describes the screen components for each type of configuration. Touching the Ignite button allows you to light the FID flame. Auto-Ignition The PPC controlled FID has flameout detection and an auto-ignite feature. Flameout detection occurs 0.5 minutes into the PRE-RUN time and it measures the user-entered baseline threshold level in mV. If the threshold level is exceeded, the flame is considered lit, otherwise the Clarus GC detects that the flame is out and auto-ignite automatically lights the flame before the start of a run. With the FID temperature set, the air and hydrogen flows set, and auto-ignition activated by setting a positive mV value for the flame offset, the FID attempts auto-ignition at -0.5 min. before the system becomes ready. At this Pre-run time the status bar flashes “Flame Ignition” as the air flow is shut off, hydrogen purges the FID for about 10 seconds, and the ignitor energizes for ignition followed by a return of the air flow to the detector to sustain the flame. 2-33 Touch Screen Navigation After the flame ignites, the FID output level is monitored to confirm ignition before producing a READY signal. If ignition is not confirmed, the ignition process repeats up to two more times if needed. If ignition is not achieved after three attempts, the flame gases are set to off and a dialog box appears displays the following message: “Flame 1 or 2 failed to ignite.” Touch the OK button. The status is made NOT READY and “FID 1 or 2 flameout” appears. If auto-ignition is attempted with the FID gases set to zero flow, the message “No ignition. Flame gases are off” appears on the screen. To proceed, go the PPC screen and touch Reset to the Configuration screen and reset the air and hydrogen to their 450 and 45 mL/min flow rates. Auto-Ignite The auto-ignition process only occurs before the start of each run just prior to the instrument becoming READY. However, the manual flame ignition process, performed by touching the Ignite button, can be initiated at any time. Auto-ignite proceeds in the following sequence: 1. When auto-ignite begins the Clarus GC equilibrates. 2. Once the two minutes of equilibration expire, PRE-RUN begins and the AutoSystem detects that the flame is not lit and indicates this by alternately flashing Flame? and Method 5 in the status bar. 3. After determining that the flame is not lit, the AutoSystem switches to a not ready state and attempts to automatically ignite the flame. Flame Ignition 1 appears in the status bar. 4. The air flow is shut-off and hydrogen is purged through the FID for 10 seconds. 5. The ignitor energizes, the flame ignites (indicated by a pop sound), and air flow is returned to sustain the flame. The FID output level is monitored to confirm that the flame is lit. If a lighted flame is not confirmed, the AutoSystem repeats the ignition process up to two more times. 2-34 Clarus 600/680 GC User’s Guide Configuration Settings The following screens show the Active Method screen and the corresponding settings in the Configuration screen. Active Method Configuration Screen 2-35 Touch Screen Navigation TCD The Thermal Conductivity Detector (TCD) is a dual-channel detector which measures the difference in thermal conductivity between carrier gas flowing through a reference channel and carrier gas plus sample flowing through an analytical channel. Four tungsten-rhenium filaments are connected in a bridge circuit, two in each channel. The TCD is set up with the same amount of carrier gas flowing through both channels. The presence of a sample component in the carrier gas flowing through the analytical channel changes the resistance of the filaments in that channel. This unbalances the bridge and produces a signal proportional to the amount of sample. The following screens show the Active Method screen and the corresponding settings in the Configuration screen. Active Method 2-36 Configuration Screen Clarus 600/680 GC User’s Guide ECD The Electron Capture Detector (ECD) is the most sensitive detector available for the analysis of electrophilic compounds such as chlorinated hydrocarbons found in pesticide residues. It is concentration-sensitive and nondestructive. The ECD cell contains a nickel foil in a cylinder through which the carrier gas flows. The coating of the foil's inner surface contains the radioactive isotope Nickel-63 and has a nominal sensitivity of 15 mCi. To optimize detector response, make-up gas is combined with column effluent. Beta particles emitted from the isotope ionize the carrier gas. The resultant ions and electrons travel to the collector anode assembly under the influence of a pulsed polarizing voltage applied between the source and the collector. The pulse frequency is varied to maintain a constant average current. The presence of an electron absorbing species in the detector decreases the current as the absorbed electrons form ions, which travel more slowly than electrons. The pulse frequency of the polarizing supply is automatically controlled to maintain a constant current and is used to form the detector output signal. The ECD works with nitrogen carrier or makeup gas or a carrier or makeup gas mixture of 95% argon/5% methane. When using capillary columns at low flows (5 mL/min or less), helium or hydrogen may be used as the carrier gas provided nitrogen or argon/methane is used as the make-up gas. A cross section view of an ECD is shown below. The 63 Ni radioactive foil coating and requires careful handling to ensure that it does not create a safety hazard. In order to prevent a Thermal Runaway risk, the GC shuts down if any heated zone exceeds 470º C. If this occurs, the following message appears: Warning Instrument Shutdown Thermal Runaway xxxxxx zone Call your PerkinElmer service representative 2-37 Touch Screen Navigation Instrument shutdown also occurs if there is a PRT (Platinum Resistance Thermometer) or MPU (Micro Processor Unit) failure. In this case, the following message appears: Instrument Shutdown xxxx zone PRT error Call your PerkinElmer service representative The ECD works with nitrogen carrier or makeup gas or a carrier or makeup gas mixture of 95% argon/5% methane. When using capillary columns at low flows (5 mL/min or less), helium or hydrogen may be used as the carrier gas provided nitrogen or argon/methane is used as the make-up gas. The following screens show the Active Method screen and the corresponding settings in the Configuration screen. Active Method 2-38 Configuration Screen Clarus 600/680 GC User’s Guide PID The Photoionization Detector (PID) is designed to allow the effluent from a chromatographic column to be ionized by ultraviolet light (provided the ionization potential of the effluent is less than that of the UV source). The current produced by the ion flow is measured by the detector and is proportional to the concentration of the ionized material. The following screens show the Active Method screen and the corresponding settings in the Configuration screen. Active Method Configuration Screen 2-39 Touch Screen Navigation NPD The nitrogen phosphorus detector (NPD) is a highly specific thermionic detector for organically bound nitrogen and phosphorus. The detector operates by electrically heating a glass bead, that contains an alkali metal, to the point where it emits electrons. A mixture of hydrogen gas and air flows around the bead to produce a hydrogen plasma. Stable intermediates are formed in the hydrogen plasma which then capture the electrons emitted from the bead to produce ions. A polarizing field directs these ions to the collector electrode, thereby creating a current which is amplified. Sensitivity is affected primarily by the air flow, and selectivity is affected primarily by the hydrogen flow. The following screens show the Active Method screen and the corresponding settings in the Configuration screen. Active Method 2-40 Configuration Screen Clarus 600/680 GC User’s Guide FPD In the Flame Photometric Detector (FPD), the column effluent is mixed with hydrogen and then burned in air. Light emitted from the flame passes through a lens, a filter, and to a photomultiplier tube, which generates an electrical signal. The Flame Photometric Detector is used for detecting sulfur, phosphorus, or tin compounds, which produce chemiluminescent reactions with emissions at wavelengths characteristic of the S2, Sn, and HPO species. The following screens show the Active Method screen and the corresponding settings in the Configuration screen. Active Method Configuration Screen 2-41 Touch Screen Navigation Timed Events Events Tab The Events tab displays the timed events table and buttons, valves, and Aux gas controls. Element Enabling Timed events table Always Aux gas button PPC configuration Relays Always (see below for details) Insert button Always Edit button Always Delete button Always Clear button Always 2-42 Clarus 600/680 GC User’s Guide Timed Events Table The timed events table displays the time, name, and value of each event. Timed events may be added and removed while the GC is running. The next event to be executed is automatically selected. Up to 32 events can be specified. The configured hardware determines which events are available. Events that are not applicable should not be available. The following table lists the available events. The time range is -99 to 999 minutes. Events occurring after the temperature program is complete are ignored. Add The Add button displays settings that allow you to specify an event to add to the table. 2-43 Touch Screen Navigation Error Messages Edit Touching this button displays the active method page for editing timed events. If the GC is running, then edited events at times before the run time at which the edited list is accepted do not occur until the next run. 2-44 Clarus 600/680 GC User’s Guide Delete Clear Touching the Clear button deletes the contents of the entire event table. A dialog box confirms the action. Pressing Yes clears the table. Touching the No button closes the dialog box and retains the contents of the Events table. If the table is empty, the following Error message appears: 2-45 Touch Screen Navigation Value The value box function depends on the event. For some events, such as Carrier X, a numeric value is required. For others, such as TCD polarity, a choice between two options is required. 2-46 Clarus 600/680 GC User’s Guide The PreVent/ProTect/MS Vent valves are never operated during a run and are not required in the Timed Events list. • No timed event should have the same time as another timed event. • Time resolution is 0.01 minutes. • Timed Events may be entered and removed in any sequence. • Pressing the Clear button prompts a dialog box: ”This action will clear the entire table. Do you want to continue? “Yes” “No” • Timed Events are re-ordered chronologically after each entry. The capacity is 32 entries. 2-47 Touch Screen Navigation Relays They appear as set in the configuration screen. User can turn on the initial and/or current settings by touching the check box. If GC is Ready, changing the initial setting will change the current setting. The initial settings are stored in the method and are only changed if the user modifies them. The current settings are changed via Timed Events. Any settings may be changed during a run. 2-48 Clarus 600/680 GC User’s Guide Aux Zones Heated Aux Zone If the GC is configured with an auxiliary zone, the activated button appears on the status screen. Touching the Aux button displays a dialog box with the setpoint and actual temperature. To modify the temperature, press the minus or plus button. Touch OK to implement the value and close the dialog box. Pneumatic Auxiliary Zones Up to four pneumatic zones can be set for PPC carrier gas control. When one or more of the aux zones is configured, the following button appears on the status screen. The same button also appears on the Events screen. Touching the button displays the following screen: 2-49 Touch Screen Navigation Aux Zones that have been set in PPC configuration display the configured unit type and include a status indicator light. The initial values can be modified via timed events. The current value is shown next to the initial value field. 2-50 Using the Active Method 3 Using the Active Method 3-2 Clarus 600/680 User’s Guide Overview The Clarus GC is controlled by a collection of operating parameters called the Active Method. You can prepare and save up to five methods and make any one of them the Active Method. However, the fifth method is reserved for TotalChrom (external computer controlled software) and may be overwritten. The operating parameters include the an oven temperature program; injector temperature or injector temperature program; detector temperature or detector temperature program; carrier gas pressure set for pressure flow or velocity; valve settings (for example, the operation of a gas sampling valve or split/splitless operation of capillary column); a timed events table, and a variety of parameters for controlling data output. Active Method parameters are always saved when you turn the Clarus GC off, and automatically reloaded when you turn it back on. 3-3 Using the Active Method Editing the Active Method If you have read and used the chapters in this manual sequentially, as recommended, by now you have probably installed and conditioned one or two columns, and set up one or two detectors. Also, you were probably not aware at the time that you modified certain Active Method parameters. Since the conditions used then were not necessarily those required by the analyses you want to perform, you should now edit the Active Method to set your operating parameters. Examples of how to perform the tasks listed below are described in the sections which follow. You should, of course, substitute your values for ours. 3-4 • Setting up oven temperature programs • Setting injector temperatures/programs (PSS and POC) • Setting detector temperatures • Viewing/setting carrier-gas pressure/programs (PPC) • Viewing/setting carrier-gas flow/programs (PPC) • Setting up valves • Setting FID, PID, NPD, or FPD range • Setting TCD filament current • Routing detector output • Attenuating detector signals • Autozeroing a detector • Building a timed events table Clarus 600/680 User’s Guide Getting Ready to Edit the Active Method Close the oven door. NOTE: If a column has been installed, make sure you have carrier gas flow through the column before closing the oven door and elevating the oven temperature. The Status screen icon buttons provide access to the active method parameters. NOTE: When you change an Active Method parameter, the change goes into effect immediately. For example, if the system is READY and you change an injector temperature setpoint, the status screen displays NOT READY until the new setpoint is reached. 3-5 Using the Active Method Setting Up Oven and Inlet Temperature Programs You can set up ramp programs (they are Init (1), 2, 3, through 10) using the Clarus GC software. 1. From the System Status screen touch the oven button to display the oven program screen. 2. Once the Oven program screen appears. 3. Select a field by touching it and use the up and down arrow or keypad buttons to enter a temperature, equilibration time and rate. Enter a value of 0 in the Rate field to make that the last step. You will then see the word END appear in the Rate field all the fields that follow are deactivated. You must touch END and then touch the up arrow button to activate the next row. The following figure shows a typical temperature step program. 3-6 Clarus 600/680 User’s Guide Figure 3-1. Typical temperature program steps. Before you actually set up an oven temperature program, you should decide on the Equilibration Time you need and change the default value if necessary (see below). Configuring the Equilibration Time (Init) When you change the oven temperature setpoint, the system heats or cools the oven to the new setpoint, then equilibrates the column(s) for the specified Equilibration Time before the instrument becomes READY. NOTE: A minimum Equilibration Time of < 1 minute is recommended for temperature programs. Longer equilibration times are recommended for initial oven temperatures of < 50°C. An equilibration time of 0.0 minutes can be used for isothermal methods. Setting a Coolant Timeout Value The purpose of the coolant timeout value is to conserve coolant. If you select a coolant timeout value when you configure the Clarus GC, the coolant solenoid shuts off if a GC run is not started within this time period after the oven reaches the initial set temperature. Once the coolant shuts off, the GC remains not ready and the following message will appear, Coolant Timed Out: Touch OK to Continue. NOTE: The coolant timeout must be greater than the equilibration time. When you press OK, the coolant solenoid will then operate again and the oven will cool to the initial temperature. 3-7 Using the Active Method NOTE: When using a POC or PSS injector with the subambient accessory, the injector temperature must not be set below the oven temperature. You can minimize coolant consumption if using the oven subambient with the PSS or POC installed but not being used, by deconfiguring the PSS or POC. Setting a Coolant Cut-In Temperature The coolant cut-in temperature is the temperature at which the coolant starts to cool the oven. The default cut-in temperature is 60 °C. The allowable cut-in temperature range is 30 °C - 110 °C. We recommend that YOU NOTE THE AMBIENT TEMPERARTURE AND SET the cut-in temperature 20 °C above your current ambient temperature. For example: A room temperature of 20 °C uses a default temperature of 40 °C, whereas a room temperature of 25 °C uses a 45 °C cut-in temperature. Examples for setting up isothermal, 1, and 2 ramp programs follow. NOTE: Higher cut-in temperatures cause more coolant to be consumed. Setting Up an Isothermal Program Setting up an isothermal program requires entering the following information in the sequence shown: • Initial oven temperature (Temp 1) • The total run time for the initial temperature (Time 1) • A temperature rate increase of 0 (Rate 1). 3-8 Clarus 600/680 User’s Guide To set up an isothermal program: 1. From the Oven tab set the initial temperature 1 to 75 ºC using the up and down arrow or keypad buttons. 2. Enter a temperature setpoint appropriate for your analysis, for example, 100 °C. NOTE: The oven status changes to Not Ready. The changing oven temperature is displayed under the oven icon as the oven heats up to the new setpoint. When the oven reaches the new setpoint, the system equilibrates for the Equilibration time (Init) specified in Oven Configuration screen and then becomes Ready. For an isothermal run, Init. (TIME 1) is equivalent to the total run time. At the end of the time (TIME 1), the system changes to Not Ready, it equilibrates, and then goes Ready. To change the hold time: Go to the Oven tab and enter a Time appropriate for your analysis, for example, 25 min. NOTE: Since a constant oven temperature is maintained for isothermal operation, the rate of temperature increase must be set to. If the Active Method you are editing is already isothermal, the RATE parameter will have been properly set at 0 and is indicated on the screen by the word "End”. 3-9 Using the Active Method NOTE: You can set the rate to 0 but whenever a RATE is set to “0,” any subsequent program steps, if present, are deleted from the Active Method. Setting Up a One-Ramp Temperature Program Setting up a one-ramp program requires entering the following information in the sequence shown: • Initial oven temperature (Init 1) • Hold Time for the initial temperature (Init 1) • Rate of temperature increase from the initial to the final oven temperature (Init Rate 1) • Final oven temperature (Init 2) • Isothermal time for the final temperature (Init 2) • Temperature increase of 0 °C/min which signifies the end of the RATE 2 step. The following example shows how to convert an isothermal program into a one-ramp program using the previous isothermal method oven temperature parameter as a starting point. Parameter Value Init Temp 50 °C Init Time 5 min Init Rate 2 °C/min Temp 2 70 °C Time 2 10 min Rate 2 End (0 °C/min) To set up a one-ramp program: 1. From the Oven tab, for the initial temp enter 50. 2. Enter 5 for initial time. 3-10 Clarus 600/680 User’s Guide 3. Enter a ramp initial rate 1 of 2 °C/min. 4. For Temp 2, enter a temperature of 70 °C. 5. Enter a time of 10 min. Setting Up a Multiramp Temperature Program The following example shows how to expand the above one-ramp program to a two-ramp program. The parameter values used in the example are shown below: Parameter Value Rate 2 4 °C/min Temp 3 100 °C Time 3 5 min Rate 3 0 °C/min 1. From the oven tab enter a rate of 4. 2. Enter a temperature of 100. 3. Enter a time of 5. NOTE: You can enter RATE 3, TEMP 4, and TIME 4 to set up a third ramp. Holding an Oven Temperature While running a temperature program, you can hold the oven temperature by setting it to the temperature of the unexecuted steps. To hold an oven temperature during a temperature program: 1. In the System Status screen touch the oven button . 3-11 Using the Active Method 2. After you touch oven button the Oven tab screen appears. Next, touch the go to to display the Go To Temp (temperature) screen. temp button 2. From this window touch the button for the temperature level that you want to hold. Touch OK. Modify the temperature on the Oven tab screen using the up and down arrow or keypad buttons. When completed return to the system status screen. 3-12 Clarus 600/680 User’s Guide The oven heats ballistically to the temperature value for oven Temp 2 and holds, instead of executing the time associated with oven Temp 2. Figure 3-2. Oven Temperature Program for Rate 1. To hold the oven program at a specific time during or before a run, use an oven HOLD timed event. See the section on Timed Events. 3-13 Using the Active Method Setting Injector Temperatures Packed, Capillary (Split/Splitless), Programmed On-Column, and Programmed Split/Splitless The examples in this section were derived by editing the Active Method with a capillary injector installed and configured in position A (front), and a packed injector installed and configured in position B (rear). This section contains examples of how to: Display injector temperature screens Change injector temperatures Turn injector heaters off Turn injector heaters on Set oven programming mode Set inlet programming mode Displaying Injector Temperature Screens From the System Status screen touch the injector button display the injector tab page. 3-14 this will Clarus 600/680 User’s Guide The injector information displays: 3-15 Using the Active Method Turning Injector Heaters On or Off To turn the Heater Off touch the check box. As the injector cools off, the injector temperature is displayed on the above screen. Changing Injector Temperatures 1. To turn the heaters on and modify temperatures, make sure the Heater Off check box does not display a check mark. 2. Touch the Temp field and using the up and down arrow or keypad buttons increase the value to 255 ºC . 3-16 Clarus 600/680 User’s Guide Oven Temperature Programming Mode In this mode the POC or PSS injector is configured as Oven. The injector temperature is set to the oven temperature plus 5 °C. This is the default mode and the easiest mode to operate in. For example, if the oven program is as follows: Parameter Value Temp 1 50 °C Time 1 2 min Rate 1 5 °C/min Temp 2 240 °C Time 2 10 min The initial injector temperature will be 55 °C. When the GC run begins, the injector will hold this temperature for 2 minutes, then it will ramp up to 245 °C at 5 °C/min and hold for 10 min. Figure 3-3. PSS oven mode temperature program. NOTE: Opening the oven door turns off the oven and the injector heater. Also, if you reset the oven temperature during the run to the next level, the injector temperature will follow. 3-17 Using the Active Method Inlet Temperature Programming Mode The inlet temperature programming mode is used when the POC or PSS injector is configured as Inlet. In this mode, the injector follows the injector temperature program that you entered in the method. The initial default values are: Initial (Temp 1) is 50 °C, Injection Time is 999 min, and Inj Rate is 0. With nonprogrammed injectors, an entry of 0 turns the heated zone off. With programmed injectors, a temperature of 0 is possible. Therefore, when 0 is entered for the initial injector setpoint, the following screen appears: 1. From the selected injector tab screen make sure that the injector heater is off. 2. Set the initial temperature to 50 °C. 3-18 Clarus 600/680 User’s Guide Setting Up a One-Ramp Injector Program To set up a one-ramp injector program, enter the following parameters: • Initial injector temperature (Init Temp) • Isothermal time for the initial temperature (Init Time) • Rate of temperature increase from the initial to the final injector temperature (Init Rate) • Final injector temperature (Temp 2) • Isothermal time for the final temperature (Time 2) • Temperature increase of 0 °C/min, which signifies the end of the Rate 2 step. The following example shows how to build a one-ramp temperature program for your POC or PSS injector. The parameter values used in the example are shown below: Parameter Value Init Temp 60 °C Init Time 0 min Init Rate 100 °C/min Inj Temp 2 250 °C Inj Time 2 15 min Inj Rate 2 End (0°C/min) To set up a one-ramp injector program: 1. From injector tab screen touch the temp program button . 3-19 Using the Active Method 3. The temp program screen appears for the selected injector. Use the up and down arrow buttons or numeric keypad button to program the temperature, time and rate. Refer to the table on the previous page for some examples for values to set up a one ramp injector program. 4. When you have completed setting up the program touch Close button then the system icon on the navigation bar to return to the System Status screen. NOTE: You can enter Rate 2, Temp 3, and Time 3 to set up a second ramp. An entry of 999 for Rate 1 or 2 will cause the injector to ballistically heat up. NOTE: If the Injector Time is set with the default value of 999, the injector temperature will hold at the current temperature until the end of the oven program. Otherwise, the injector temperature will hold for the time you have entered, or until the run ends. NOTE: If you have the subambient option, the POC and PSS injectors are linked to the oven subambient option; therefore, you cannot operate the injectors below the oven subambient temperature. 3-20 Clarus 600/680 User’s Guide Viewing/Setting Carrier Gas Pressure/Flow/Velocity NOTE: For a description of programmable pneumatics control (PPC), refer to “PPC Fundamentals” In the Hardware Guide. PPC enables you to select and set the carrier gas Pressure, Flow, or Velocity. In all three modes, you can operate at a constant pressure, flow, or velocity or at a programmed pressure, flow, or velocity. You can also make a pressure pulse, flow pulse, or velocity pulse injection. In this case the initial pressure, flow, or velocity is quite high at the time of injection. This minimizes the expansion in the injector liner as the liquid sample is vaporized and increases the transfer time onto the column. This is recommended for splitless operation of wide boiling point samples. In this case, you would actually program the pressure, flow, or velocity down to the normal column pressure, flow, or velocity for the remainder of the chromatographic run. The following terms are used in PPC analysis: Zero─ removes the flow controller from the GC method and sets the flow to 0. Flow ─ enables the flow controller in the GC method and sets its initial flow to 30% of the nominal maximum flow rate (according to the installed flow-range element and carrier gas type). The operator has the option to enter a different flow rate and enter a flow program. When in the flow mode, the PPC system also monitors the column inlet pressure. If the inlet pressure falls outside a selectable range, a leak-check fault occurs. Pressure ─ controls the column inlet pressure and reads the flow rate from the flow sensor in the flow controller. The initial pressure in the method defaults to 5 psig. The operator has the option to enter a different initial pressure and optionally enter a pressure program. Carrier Gas Mass-Flow Controller Operation Once the carrier gas operation mode has been selected (see the next section “Setting Carrier Gas Pressure”), you can also modify the default setpoints in the active GC method, edit the carrier-gas setpoints in stored methods, or generate a new method and enter carrier-gas setpoints. The following parameters control the carrier gas. 3-21 Using the Active Method Initial Carrier-Gas Setpoint The carrier gas mass-flow controller receives set points of flow or pressure depending on the configured carrier gas mode. The program calculates the initial set point from the active GC method. The initial set point is established upon setting up a method, ending a run, or resetting the GC. The flow rate is held constant at the initial value if no additional carrier-flow entries are made in the GC method. The controller receives pressure set points when operating in the pressure control mode. Carrier-Gas Program The GC method accommodates up to three additional carrier-gas program steps each consisting of a hold time, ramp rate, and plateau set point. Sequential set points may be greater than or less than the preceding set point. The PPC system programs the carriergas controller with a positive or negative ramp as required. At the end of the GC oven program, the carrier gas resets to the initial set point value in the method even if a carrier-gas program is in progress. The carrier gas also resets if the end of the carrier-gas program occurs before the end of the oven program. Carrier-Gas Timed Events You can also use timed events to produce step changes in the set point. Carrier-gas events can occur before or after a run starts. A carrier-gas event supersedes the method set point value at the time the event occurs. However, if the carrier-gas program in the method advances to a new step after a carrier-gas event, the new program step or ramp takes control. Leak Checking The Clarus GC monitors the inlet pressure with a carrier gas mass-flow controller in use. After selecting the carrier-gas Flow mode in configuration, you can enter the maximum inlet pressure value. If the inlet pressure drops below or rises above the set limit for more than one minute, a warning message appears. 3-22 Clarus 600/680 User’s Guide Setting Carrier Gas Pressure To view or set the carrier pressure: 1. From the System Status screen touch the corresponding Injector button (A or B) for which you want to set the carrier pressure. The injector screen appears. In this example, the Clarus GC is configured with the PSS capillary mode on for pressure (psi). If the option for capillary control has been selected during configuration, you can program the carrier gas according to one of three values: pressure, velocity, or flow. The carrier gas field on the injector tab screen displays the set point value. The label below the field displays the current step. The actual values for all the available configuration options are displayed to the left as read only text on the screen. 2. Touch the program button for Carrier Gas. The Carrier Pressure Program window appears: 3-23 Using the Active Method 3. Touch the field, ranging from the Initial field to the step 4 field, and use up and down arrow or keypad buttons to enter a pressure, hold time and rate. NOTE: The rate for the range is 0 (end) to 99. A rate of 999 is a ballistic setting (maximum). CAUTION The ballistic mode of programming is not recommended. Setting a program rate will be more reproducible. 4. Touch Close to return to the injector screen. 3-24 Clarus 600/680 User’s Guide Setting Carrier Gas Flow using PPC To view or set the carrier flow: 1. From the System Status screen touch the Injector button (for example, Pkd or Cap) corresponding to the injector you wish to set the carrier gas flow. The tab for the selected injector appears: In this example, the Clarus GC is configured with the PSS capillary mode on for flow. If the option for capillary control has been selected during configuration, you can program the carrier gas according to one of three values: pressure, velocity, or flow. The carrier gas field on the injector tab screen displays the set point value. The label below the field displays the current step. The actual values for all the available configuration options are displayed to the left as read only text on the screen. 2. Touch the program button for Carrier Gas. 3-25 Using the Active Method The Carrier Pressure Program window appears: 3. Touch to highlight each individual field, ranging from the Initial field to the step 4 field, and use up and down arrow or keypad buttons to enter a pressure, HOLD time and HOLD rate. NOTE: The rate for the range is 0 (end) to 99. A rate of 999 is a go to setting. CAUTION 4. Touch Close. 3-26 The go to mode of programming is not recommended. Setting a program rate will be more reproducible. Clarus 600/680 User’s Guide Viewing/Setting Carrier Gas Velocity You can view/set carrier gas velocity using PPC. To view or set the carrier gas velocity: 1. From the System Status screen touch corresponding Injector button for which you wish to set the carrier gas velocity. The page for the selected injector appears: In this example, the Clarus GC is configured with the capillary mode on for velocity (as shown by vel.-init displayed under the carrier gas field). If the option for capillary control has been selected during configuration, you can program the carrier gas according to one of three values: pressure, velocity, or flow. The Carrier Gas field on the injector tab screen displays the set point value. The label below the field displays the current step. The actual values for all the available configuration options is displayed to the left as read only text on the screen. 2. Touch the program button for Carrier Gas. 3-27 Using the Active Method The Carrier Velocity Program window appears: 3. Touch each individual field, ranging from the Initial field to the step 4 field, and use up and down arrow or keypad buttons to enter a velocity, equilibration time and rate. NOTE: The rate for the range is 0 (end) to 99. A rate of 999 is a go to setting CAUTION 4. Touch Close. 3-28 The go to mode of programming is not recommended. Setting a program rate will be more reproducible. Clarus 600/680 User’s Guide Setting the Septum Purge Mode and Offset To set the septum purge and offset: 1. Touch Tools button and select Configuration from the drop down menu. The Configuration screen appears: 2. Touch the button corresponding to the injector you want to modify (A-Injector or B-Injector). The Configure Injector screen appears: 3-29 Using the Active Method 3. From the Capillary Control drop down menu select Pressure. Now you can only pressure program your capillary injector. If you wish to program the Capillary control for more than just pressure skip to step 9. 4. Under Flow Offset, select either the Auto or Fixed . The Auto mode is the preferred mode of operation. If you want to shorten the overall run time at the expense of some area precision, then use the Fixed mode. 3-30 Clarus 600/680 User’s Guide We recommend that if you are operating with a split vent flow of 50 mL/min or less, select the Auto mode. Before each injection in the Auto mode, the system briefly closes the split vent and measures the total flow. With the split vent off this flow is the column flow plus the septum purge flow. The septum purge flow is maintained due to a mechanical restrictor and the split vent flow and split ratio are maintained for each injection. In the Fixed mode, you enter an offset value which is equal to the septum purge flow plus the column flow at the time of injection. Since the system controls the total flow (equal to the split vent plus septum purge plus column flow), the septum purge is fixed, and the column flow is controlled, the difference between these two flows and the offset entered will go out the vent flow. This will be consistent for each run. 5. If Fixed is selected use the up and down arrow or keypad to enter an offset value in mL/min. buttons 6. Press OK. Skip steps 9-16 if you are only programming the capillary control for pressure. 7. If you wish to program the Capillary Control for more than just pressure, check the Capillary Control check box from the Injector tab. 3-31 Using the Active Method From the Carrier Control drop-down menu select from the following options: Off, Pressure, Flow, or Velocity. 8. Select either Program or Oventrack. The following screen shows Program selected: However, if you select the Oventrack mode you do not need to enter column dimensions, and you can skip to step 12. After selecting Program, you must enter your column dimensions as described in the following steps. 9. Use the up and down arrow or keypad Length, which is measured in meters. buttons to enter a Column 10. Use the up and down arrow or keypad buttons to enter an Internal Diameter which is measured in micrometers (not millimeters). 11. Then view the calculated linear gas velocity by selecting Utilities from the Tools menu and selecting the Column Flow Calc. . 3-32 Clarus 600/680 User’s Guide The Column Carrier Gas Calculator screen appears: NOTE: If you incorrectly enter a column length or internal diameter, the resulting flow and pressure may be incorrect. For example, a 0.25 mm column may actually be 0.22 mm. To verify that you have entered the correct values, you can measure the linear gas velocity by injecting methane and calculating the linear gas velocity: 3-33 Using the Active Method column length (cm) . Retention Time of Methane (sec) 12. Return back to the Configure Injector screen and select either a Flow or Ratio Split Mode. If you select Flow, you will enter a split flow in your method. The software controls and calculates the split ratio. If you select Ratio, you enter the split ratio in your method. The software controls the ratio and calculates the split flow. 13. Select a Flow Offset of either Auto or Fixed: 3-34 Clarus 600/680 User’s Guide In the Auto mode, the system performs a PreRun for one minute before it becomes READY, the split vent is closed, and the system measures the septum purge flow plus the column flow. This is referred to as the “offset.” The septum purge flow is controlled but not user selectable; it is factory set to 3 mL/min. The split vent flow is restored to the value set in the method and the system stabilizes for 30 seconds. This entire procedure takes one minute. In the Fixed mode, enter the “offset” value. This value should be equal to the septum purge flow plus the column flow. If the wrong value is entered, then the difference is added to or subtracted from the split vent flow, so your actual split vent flow may be slightly higher or lower than the value entered in the method. In both cases the split ratio is maintained for every injection. If you want to save time from run to run, select Fixed mode. The Auto mode is recommended to improve area precision and is required for vent flows less than 50 mL/min. 14. If Auto is selected, the Leak Limit appears. Using the up and down arrow or keypad buttons, enter a value slightly higher than your operating flow. If the system detects flows higher than this value, it considers it a leak. OR 3-35 Using the Active Method If Fixed is selected use the up and down arrow or keypad to enter an offset value in mL/min. buttons 15. Press OK. NOTE: The Clarus PPC split pneumatics adds the septum purge offset to the split vent setpoint to obtain the total split system flow rate. See Chapter 7 for more details. 3-36 Clarus 600/680 User’s Guide Setting Up Valves The Clarus GC operates six internal solenoid valves. You can initially configure valves from the Configuration screen by selecting the Relays button. To change valve settings for your current method use the Timed Events screen and touch the Relays button. Setting the Split Mode Using PPC To set the split mode: 1. Press Tools menu button and select Configuration. The Configuration screen appears: 3-37 Using the Active Method 2. Touch the Injector button for the corresponding injector which to configure the split mode. The Configure Injector screen appears. 3. Touch the Capillary Control check box. Select either a Flow or Ratio Split mode. 3-38 Clarus 600/680 User’s Guide 4. Touch OK. The Configuration screen appears. 5. Touch Close. 6. On the System Status screen, touch the corresponding Injector button. The active method screen appears: The screen above displays the Split mode configured for Ratio. 7. Touch the ratio field to modify the value. OR If you configured the split mode for Flow, the following screen appears: 3-39 Using the Active Method The Total Flow (split vent + septum purge + column) is displayed as a noneditable text field. The septum purge flow is factory preset to ~3.0 mL/min. It is not user adjustable. If you set the split flow to zero, the flow display shows column flow plus septum purge. Common places for leaks would be the septum cap, the O-ring seal, column connector, etc. See the Clarus Hardware Guide, Chapter 8 for further information. NOTE: Please note that if the displayed value is much greater than the total flow (defined as: split flow and septum purge + column flow), this indicates a leak in the pneumatics. 3-40 Clarus 600/680 User’s Guide Set up the Splitless Mode for a CAP or PSS Injector The Splitless Mode is used for trace analyses. Most of the sample is transferred onto the column, then the split vent is opened, thereby venting any sample remaining in the injector liner. This step describes how to set the split mode for PPC modules. . NOTE: In the Splitless Mode, the split vent must be opened after the sample has transferred to the head of the column (i.e., 0.5 - 2.0 minutes after the run has started). The procedure which follows assumes that the carrier gas pressure has been set (see Step C in this chapter). NOTE: The injector is shipped with a wide-bore injector liner. You may want to install a narrowbore liner. Both liners must be packed with quartz wool before running your analysis. Refer to Step B, Connect the Column to the Injector in this chapter, for procedural details. Splitless Injection with Pressure Pulse (Flow Pulse, Velocity Pulse) Technique Pressure (flow or velocity) pulse injection is recommended for splitless operation, especially when analyzing wide boiling-point mixtures and/or large volume injections. This technique increases the pressure (flow, velocity) in the system at the time of injection to minimize the gas expansion in the injector liner and maximize the gas sample transfer onto the column. Therefore, you should use the highest pressure that your application will allow. This provides better peak shapes, better recovery, and no discrimination for both low boiling and high boiling compounds. This technique can be incorporated in your GC method. The initial pressure (flow, velocity) is high (for example, 70 psig) and held at this high pressure for enough time (for example, 0.25 to 2.0 min) to transfer your sample onto the column. This time needs to be experimentally determined for your sample, injector temperature, and injector liner used. You want a time that will allow most of your sample to transfer onto the column as well as maintain good solvent and analyte peak shape. If the time is too short, you will lose sample; if the time is too long, the solvent will tail and possibly obscure or affect peak shape of early analytes. The split vent is off at injection (Split Flow = zero). The pressure (flow, velocity) is then programmed at a controlled rate, down to the normal column operating pressure (flow, velocity). At the same time, the split vent is set back to normal flow to clean out any remaining sample in the liner and to release the pressure in 3-41 Using the Active Method the injector. It is important not to program the pressure (flow, velocity) down too quickly or ballistically, since this can cause backflush of the column. This means that the sample can flow back into the injector and either be lost out the split vent or cause peak broadening. Creating a Pressure, Flow, or Velocity Pulse Method 1. From the System Status screen touch the Injector button for which you wish to create a pressure, flow, or velocity pulse method. The status screen, similar to the one below, for the selected injector appears: 2. Touch the Events tab. 3-42 Clarus 600/680 User’s Guide 3. Touch the Add button. The Add Timed Event screen appears: 4. Select Split A from the Event drop-down menu. 3-43 Using the Active Method 5. Touch the Time dialog box and use the up and down arrow or keypad buttons to enter a time of .25 minutes. 6. Touch the Value dialog box and use the up and down arrow or keypad buttons to enter a flow value. NOTE: Values of 20 mL/min and higher provide greater accuracy than values below 20 mL/min. 7. Touch OK. You have now created a timed event set to turn on the split flow at 0.25 min. 8. Touch the A-Cap Injector tab. The Injector status screen appears: 9. Touch the Program button for the Carrier Gas field. The Carrier Gas Pressure Program screen appears: 3-44 Clarus 600/680 User’s Guide 10. Touch the Initial pressure dialog box and use the up and down arrow or keypad buttons to enter a pressure value (for example 70). 11. Touch the Initial time dialog box and use the up and down arrow or keypad buttons to enter an initial time. 12. Touch the Initial rate dialog box and use the up and down arrow or keypad buttons to enter an initial rate value that decreases the pressure down to the operating pressure in psi/min. 13. Touch the step 2 dialog box for pressure and use the up and down arrow or keypad buttons to enter the column operating pressure. NOTE: If you selected flow or velocity, you should still follow the above procedure. Just enter the appropriate flow or velocity values for your analysis. NOTE: If you are in the capillary mode, and you set up the pressure mode first, you can enter 70 psi and/or 10 psi, then read the appropriate flow or velocity values respectively. This helps determine the values to use. This technique is also recommended for the Clarus GC/MS detector. With mass spectrometers, you must be careful not to overload the vacuum chamber. In order to 3-45 Using the Active Method avoid this, the setup procedure is slightly different than the above procedure. When using a mass spectrometer, you would not want the initial pressure to be too high, because at the end of the GC run all parameters are set back to their initial values, and the higher pressure could cause damage to the vacuum system. For the Clarus GC/MS the initial value is set to the normal operating pressure (flow or velocity) and a negative timed event with a high pressure (flow or velocity) will be added to the method. This causes the pressure (flow or velocity) to increase prior to Ready (for example, prior to the injection). At injection, the GC method holds this pressure (flow or velocity) for the time necessary to transfer the sample onto the column. The experimentally determined pressure (flow or velocity) is then programmed at a controlled rate down to the initial (or normal) column operating pressure (flow or velocity). If you are using the autosampler, at the end of the last sample in the sequence, the Clarus MS will go “Not Ready,” thereby sending a signal to the GC keeping it from coming Ready. (The External Ready must be connected. See the Clarus 600/680 GC Installation Instructions, 09936779.) This keeps the GC from executing the negative timed event and holds the pressure at the lower setting. Setting the Split Flow for Splitless Injection To make a splitless injection, initially turn Off the appropriate split flow that is associated with your injector with a timed event. Then with another timed event, turn it On from 0.25 to 2 minutes into the GC run and leave it on. When the GC run is complete, the GC returns the split flow to its initial setting. To set up for splitless operation: From the Injector status screen touch the dialog box for Split flow and use the up and down arrow or keypad buttons to enter a split flow in mL/min. 3-46 Clarus 600/680 User’s Guide Setting the Timed Events 1. Touch the Events tab. 3-47 Using the Active Method 2. Touch Add. The Add Timed Event screen appears. 3. From the Event drop down menu select Split A (if the injector is installed in position A) or Split B (if the injector is installed in position B). 4. Touch the Time dialog box and use the up and down arrow or keypad buttons to enter a negative Time (for example, −1.00 min) for the event to occur prior to the GC coming ready. Then press [Enter]. The cursor moves to Event. 5. Touch the Value dialog box and use the up and down arrow or keypad buttons to enter a value of 0. 6. Touch OK. The split flow will now turn off before the GC becomes ready so that at the time of injection the split flow is off. 7. Touch Add. The Add Timed Events screen appears. 3-48 Clarus 600/680 User’s Guide 8. From the Event drop down menu select Split A (if you have the injector configured for position A) or Split B (if you have the injector configured for position B). 9. Touch the Time dialog box and use the up and down arrow or keypad buttons to enter a positive time for the event (for example, 2.00). NOTE: The "Time" refers to the time (in minutes) into the GC run that you want to automatically turn the valve on. The time depends on your sample, solvent, column, etc. Typical time values are between 0.25 and 2.0 minutes. An optimum "Time" is the time that provides maximum area counts (indicated by your data handling device) with minimum solvent effect (tailing). 10. Touch the Value dialog box and use the up and down arrow or keypad buttons to enter a value of 50 mL/min. At the end of a run, the split flow resets to the original setting. Setting a Value of 50 mL/min minimizes contamination by keeping the splitter on during cooldown. NOTE: If you wish to conserve carrier gas, set the initial flow to 0. 3-49 Using the Active Method CAUTION If you are using pressure pulse injection, you must set the split flow on just prior to when the inlet pressure begins to drop to the operating setpoint. For example, if the inlet pressure is programmed to start decreasing one minute after injection, use a split flow event time of 0.98 minutes. At the end of a run, the split flow resets to the original setting. Setting a Value of 50 mL/min minimizes contamination by keeping the splitter on during cooldown. NOTE: The timed event that you set up, or valve settings that you make, become part of the method. The timed event is automatically saved if you are editing the Active Method. NOTE: When operating in the splitless mode, the recommended measured flow out of the vent is 30 - 50 mL/min. when the split vent is ON. 3-50 Clarus 600/680 User’s Guide Contolling the Autosampler NOTE: The autosampler will not respond to commands if the autosampler door is opened. Only sample vials and syringes distributed by PerkinElmer should be used with the Clarus GCs. Plungers are not interchangeable from syringe to syringe. The autosampler contains three basic parts: an autosampler tower, a carousel, and a sample tray (see the following two figures). The autosampler tower can contain either a 0.5-, 5.0-, or 50.0-µL syringe. Figure 3-9. View of the Clarus GC with autosampler tower. Autosampler Trays and Carousel The Clarus 600 GC can use only the 82-vial standard tray or the 82-vial tall tray. The Clarus 680 GC is designed to use the large capacity 108-vial tray for standard vials or the 108-vial tray for tall vials. There is also an 82-vial Thermostatting Tray Kit available for use with the Clarus 600 GC and Clarus 680 GC. The Standard vials are recommended and supplied by PerkinElmer. The Tall vials refer to those vials not purchased from PerkinElmer which are slightly taller than the Standard vials. 3-51 Using the Active Method Figure 3-10. Sample Tray and Carousel. 82-Vial Standard Tray 3-52 108-Vial Standard Tray 108-Vial Tall Tray and Carousel (for non-PerkinElmer vials) Clarus 600/680 User’s Guide Clarus GC Model Tray Capacity of 2 mL Sample Vials Vial Height Number of 4 mL Wash Vials Number of 4 mL Waste Vials Number of 2 mL Priority Vials 680 only 108 Standard 4 4 1 680 only 108 Tall 4 4 1 600 only 82 Standard 4 4 1 600 only 82 Tall 4 4 1 4 4 1 With the Tray Thermostatting Accessory Kit 600/680 82 Standard Autosampler Touch Screen 1. You can access the Autosampler by selecting the Run button Status Screen. See screens below. from the System 3-53 Using the Active Method 2. In the next screen touch the Autosampler radio button to the right of the Type heading. The Autosampler screen contains three tabs. The first two tabs display identical screens for setting Program 1 and 2, allowing you to sequence two methods. The Tasks tab displays buttons to perform tasks such as Park, Clean, and specify a priority injection. All of the screens provide status information. The method field allows the user to run the GC under the control of a method other than the current active method. Start Button Touch the Start button to start a run. The Start button is active whether or not the system is ready. Issuing the start command before the system is ready gives users the flexibility to set up and run a method without having to wait for the system to attain ready status. As soon as you touch OK, the Start button changes to Stop whether or not the system is ready. This enables you to cancel the run before it starts. • • If the system is under external control (e.g. from TotalChrom) and a method has not yet been set up, the Start Button is inactive. In all other instances, even though the GC is not Ready, the Start Button will start a run. 3-54 Clarus 600/680 User’s Guide • • When the GC oven starts to program, the Start Out signal will be asserted for 1 second. The Ready Out signal will be asserted only when the GC is fully equilibrated and the GC has reached full Ready status. Stop Button As soon as the Start button is touched, the Stop button appears on all top level screens. Touching the Stop button before the system is running prompts the following dialog box: Touch OK to cancel the run. The status bar reflects that the system is running and the Start button changes to Stop. 3-55 Using the Active Method Touching the Stop button displays the following start menu dialog box: Stop Immediately – The Autosampler stops and the stop buttons turns to Start. Stop at the end of this run – The user can allow the current run to complete and then stop the Autosampler sequence. 3-56 Clarus 600/680 User’s Guide Pause after this run - The system may be paused to stop any further injections until resumed by the user. When the system is paused, the Stop button turns to Resume on all top level screens. Go to a temp, program step – Displays radio buttons that allow the user to ballistically raise the oven temperature to the value specified for a particular step. The last step in the current program is selected by default. The buttons for steps beyond the current program are deactivated. To change the temperature touch the radio button and press OK. Touching cancel retains the current setting and closes the dialog box. Element Enabling by mode Enabling by state A./S Program tabs Multi mode Always Method Always Not running (auto or gc) Start vial Multi Not running auto Stop vial Multi Always Injection Size Multi Not running auto Injector Multi Not running auto Repeats Multi Not running auto Priority button Multi Running auto User instructions Manual only Always Countdown timer Manual only Enabled by default 3-57 Using the Active Method Autosampler Buttons Run options include selecting the run type, method, autosampler parameters, and run start/stop/program controls. The various controls, contents and enabling are configuration and mode dependent. Multi-Program Mode – In this mode, the autosampler runs two programs consecutively. Each program specifies: the method to be used (each program can use a different method if desired), which injector to use, the size of the injection, the number of injections per vial, and the starting and ending vial numbers. As each program is run, the system sets up the specified method as the Active Method. While running in this mode, the autosampler attempts at least one injection from each vial in the specified ranges. NOTE: The autosampler tray is keyed to fit correctly only in one direction. When installed properly, the tray is recessed slightly around the entire Clarus GC top. If installed 180° out of position, the tray will be angled (not lying flat) across the top of the instrument and will not allow the tower to pass over it. Program 1 and Program 2 Tabs 1. These two tabs allow for multi-program mode. 2. Select the method from the drop down menu. 3-58 Clarus 600/680 User’s Guide 3. Highlight the Vials, Vol and Injections/Vail fields and use the plus minus buttons to input the correct amount. 4. Select either Injector A or B. 5. Touch Start when you are ready to begin the autosampler run. Autosampler Tasks Tab The Autosampler Tasks tab includes buttons to execute tasks such as Park and Clean. Touch the Park button to park the autosampler tower. NOTE: If the syringe is directly over the injector, you should move it by selecting Park. Touch the Clean button to clean the syringe plunger with the solvent wash. NOTE: The Clean option is only available when the autosampler has stopped. 3-59 Using the Active Method Cleaning the 5-µL and 50-µL Syringe Plungers The 5-µL and 50-µL syringe plungers should be cleaned regularly, after approximately 500 injections, since insolubles can build up and cause friction. To clean the syringe plunger: 1. Remove the syringe using the procedure in the preceding section. 2. Remove the plunger from the syringe barrel. 3. Wipe the plunger with a tissue soaked in an appropriate solvent. Replace the plunger. 4. Pull and expel the same solvent through the barrel several times. 5. Replace the syringe using the procedure in the preceding section. NOTE: Only syringes distributed by PerkinElmer should be used with the Clarus GC. Plungers are not interchangeable from syringe to syringe. Config(uration) Button From the Tasks tab touch the Config button. The Config button provides a quick link to the configuration settings. 3-60 Clarus 600/680 User’s Guide Auto Resume Check the Auto Resume checkbox to allow the autosampler program to automatically resume where it left off should a power failure occur. Running Viscous Samples The Clarus GC allows you to vary the length of time the plunger pauses at the top-ofstroke when acquiring samples. In addition, the plunger speed also slows down during injection. The more viscous the sample, the higher you should set this value. To optimize reproducibility you should experiment with different values. The plunger speed during sample acquisition and injection will vary with the viscosity of the sample. To find the optimum setting for the sample being analyzed, you should experiment with various syringe settings. Highlighting the Viscosity Control Field use the up and down arrow or keypad buttons to enter a value between 1 and 15. This value is the number of seconds the plunger pauses at the top-of-stroke during sample acquisition. NOTE: You can obtain improved precision with viscous samples by using the 0.5-mL syringe and septa in the waste/wash vials in place of the diffusion caps. Using Solvent Pre-Washes Pre-washes refers to the number of solvent washes you want the system to perform prior to the pre-injection sample washes. Highlight the Solvent Pre-Wash field and using the up and down arrow or keypad buttons type in a value. Acceptable values are 0, 1 or 2. Pre-washes occur only at the beginning of an autosampler program. NOTE: Auto Resume should not be used if you have an FID or FPD configured with PPC, since the flame will have been extinguished during a power failure. Priority Injection Press the Initiate button to inject a priority sample during a run. 1. Touch the Initiate button in the Tasks tab. 2. In the Number of Injections field use the up and down arrow or keypad buttons to input the number of priority injections. Touch Start. 3-61 Using the Active Method This option instructs the autosampler to interrupt the vial injection sequence and inject a "Priority" vial that has been placed in the "Priority" position of the turntable. The priority vial will be injected after completion of the current run. After the priority vial has been injected (in accordance with the current program parameters), and the priority run completed, the program continues with the next injection in sequence. NOTE: Priority can only be selected when with the above screen is visible. About Waste and Wash Vials The Autosampler software has been optimized to use waste vials and solvent wash vials to minimize contamination of the syringe needle. Septa are available for the waste vials and solvent wash vials by ordering P/N N9302780. We recommend using these septa in place of the diffuser caps when you are using: • Very viscous samples (to wipe the sample off the outside of the syringe needle). • Toxic solvents and samples. • Very volatile solvents. Multi-Program Mode Waste Vials When operating in the Multi-Program Mode, the sample pre-washes are emptied into waste vial #1 for program 1 and waste vial #3 for program 2. The solvent post-washes are emptied into waste vial #2 for program 1 and #4 for program 2. Wash vials Program 1 splits between solvent wash vials #1 and #2. For example, if four washes are required, two will be taken from vial #1, and two will be taken from vial #2. Program 2 splits between solvent wash vials #3 and #4. For example, if five washes are required, three will be taken from vial #3, and two will be taken from vial #4. 3-62 Clarus 600/680 User’s Guide About Sample Vials Use 2-mL vials with the autosampler (P/N N9301385, 144 per box). These are crimp-top vials. The vials and crimp caps with septa (P/N 00092205, 1000 per box) are available through PerkinElmer’s catalog service (in the U.S., call: 1-800-762-4000) or online at www. perkinelmer.com. The minimum volume of sample required in the 2-mL vial is 0.35 mL or 350 µL. You should fill the vial when running multiple injections per vial. A mini-vial insert is available for laboratories with small sample volume requirements. This insert fits into the standard 2-mL vial and requires a minimum volume of 5 µL of sample. These inserts are available through PerkinElmer’s Catalog service or visit us online at www. perkinelmer.com. NOTE: When using mini-vials, it is not recommended to use pumps to acquire samples. This assures that the sample will not be diluted by residual solvent in the syringe. Only PerkinElmer vials should be used with the Clarus GC. Adjust the crimper so that it does not deform the vial cap and septum, but crimps the vial cap tight enough so that you cannot turn the cap. An improper adjusted crimper can cause the autosampler to malfunction. Using a TCD with the Autosampler When using a TCD at high sensitivity with a GSV or the autosampler, a minor baseline upset may occur at the time of injection. If the signal goes below zero, incorporate a timed event Autozero to bring the signal back to zero before the peaks of interest elute. Observe the initial chromatogram to determine the proper time for the timed event. 3-63 Using the Active Method Available Syringes The following syringes are available for the Clarus GC: Syringe Part Number 5-µL (0.63 mm O.D.) Teflon-tipped plunger (Std) N6101390 0.5-µL (0.63 mm O.D.) N6101252 0.5-µL (0.47 mm O.D.) N6101253 5-µL (0.63 mm O.D.) N6101251 5-µL (0.47 mm O.D.) N6101380 50-µL (0.63 mm O.D.) N6101760 NOTE: A 0.47-mm needle is required for use with the POC injector and 530-µm columns in the on-column injection mode only. You can achieve better precision in the on-column injection mode when you use sample volumes of 1.0 µL or greater. 3-64 Setting Up the Detectors 4 Setting Up the Detectors 4-2 Clarus 600/680 User’s Guide Overview This section contains procedures for setting up the following detectors: FID (flame ionization) PID (photoionization) ECD (electron capture) NPD (nitrogen phosphorus) TCD (thermal conductivity) FPD (flame photometric) The instructions provided in this chapter describe how to set detector gases that are controlled by PPC modules. CAUTION The Clarus GC PPC modules are calibrated at the factory with their corresponding gas; however, there are exceptions. The PPC module that controls the: • • • ECD is calibrated with nitrogen. TCD is calibrated with helium. PID is calibrated with helium. If you intend to use a gas that is different from the gas used to calibrate the PPC module, you must recalibrate the PPC module with the gas. The instructional procedures in this chapter are written with the assumption that: • You know how to measure gas flows using a flowmeter or with the Clarus GC’s built-in stopwatch and a soap-bubble flowmeter. If you are not familiar, prior to continuing, please read "Using the Built-in Stopwatch" in Chapter 4, "Before You Install a Column." • All heaters are turned OFF and cool to the touch. 4-3 Setting Up the Detectors WARNING 4-4 The instant the Clarus GC is turned on, the oven, injector(s), and detector(s) begin to heat up rapidly. To avoid injury, turn off all heaters and allow their respective zones to become cool to the touch before you touch detectors, injectors, and their corresponding fittings. Detailed procedures for turning heaters off and on are in the Hardware Guide, "Before you Install a Column." If you have not read this chapter, please do so before proceeding. • A column has been installed, carrier gas flow or pressure has been set, and all connections have been leak tested. • The PPC modules have been calibrated at the factory. Clarus 600/680 User’s Guide FID Overview Flame Ionization Detectors (FID) are mass sensitive and used for the destructive analysis of organic compounds. As the sample enters the detector, it is mixed with hydrogen and then burned in air, generating ions. The ions are collected and measured by the detector, with their concentration proportional to the amount of compound present. Ion collection is enhanced by a polarized electric field that is created by applying a negative voltage (−200 V) to the jet tip. The detector sensitivity is affected primarily by the hydrogen flow. The detector linearity is affected by the air flow. The FID has flameout detection and an auto-ignite feature. Flameout detection occurs 0.5 minutes into the PRE-RUN time and it measures the user-entered baseline threshold level in mV. If the threshold level is exceeded, the flame is considered lit, otherwise the Clarus GC detects that the flame is out and auto-ignite automatically lights the flame before the start of a run. You can also manually light the flame at any time by pressing the Ignite button A cross section view of a FID is shown below. . Amplifier Connector Ignitor Polarizing Pin Collector Flam e Jet Air In Hydrogen In Flam e Jet Extension Detector Fitting Figure 4-1 Flame Ionization Detector (FID) cutaway view. 4-5 Setting Up the Detectors Setting Up an FID To set up an FID that uses PPC modules, first read the FID Setup Summary, then follow these procedures. To avoid injury, Do Not turn on the hydrogen gas unless a column is connected to the FID and all fitting connections have been leak tested. WARNING WARNING Flame Ionization Detectors (FID) use hydrogen gas. Before you turn on the hydrogen gas to the FID, ensure that a column is connected to the FID fitting inside the oven. Turning on the hydrogen gas without first connecting a column to the FID could create the possibility of an explosion in the oven. Turn off the hydrogen gas before disconnecting a column from the FID. When two FIDs are installed, but only one FID has a column connected to it, plug the inlet of the FID without a column with a 1/8-inch stainless steel plug (P/N N9300061) to prevent hydrogen from back-diffusing into the oven. Since in the manual pneumatics version, the hydrogen pressure regulator and the air needle valve have been turned off prior to shipment, first set the hydrogen and air inlet pressures to 30 psig. Then measure and set the gas flows as described in this chapter. NOTE: The detector gas modules have been set to OFF at the factory for both manual and PPC pneumatics. 4-6 Clarus 600/680 User’s Guide FID Setup Summary To set up the PPC FID: • • Set the air and hydrogen flows. Automatically ignite the flame. or Manually ignite the flame. Set the Air and Hydrogen Flows The FID pneumatics utilizes two PPC modules: one to control the air and the other to control the hydrogen. You set the PPC controlled air and hydrogen flow from the Clarus GC touch screen. Each PPC module is calibrated at the factory with the gas (air and hydrogen) that it controls; therefore, to set the gas flow, simply follow this procedure. Turn on the air at the source and adjust the line pressure to 70 - 90 psig. 1. Turn on the hydrogen at the source and adjust the line pressure to 70 - 90 psig. 2. Press the Tools button and select Configuration. The Configuration screen, similar to the one to the right, appears: 3. Touch the button labeled as an FID detector. The configuration screen for the A - FID detector appears: 4-7 Setting Up the Detectors NOTE: The screen above shows that an FID is installed in Channel A. 4. Select a filter value from the Filter drop-down menu. 4-8 Clarus 600/680 User’s Guide The default setting is 200 milliseconds. To improve the signal-to-noise, change the setting to 800 milliseconds. This improves the noise but broadens the peak shapes. If you want a faster detector response, change the setting to 50 milliseconds; however, the noise level may increase. 5. Touch the Set Point dialog box for the FID Flameout; and then use the up and down arrow or keypad buttons to enter a flameout detection level in mV (for example 0.3 mV). NOTE: You must set a Flameout value in millivolts (mV) for the FID auto-ignition feature to work. For example, 0.3 mV. Flameout detection occurs 0.5 minutes into the PRE-RUN time and measures the user-entered baseline threshold level in mV. In this example 0.3 mV is used. If the 0.3 mV threshold level is exceeded, the flame is considered lit; otherwise, the auto-ignite sequence begins to automatically ignite the flame. 6. Touch the Set Point dialog box for the Air flow and use the plus and minus buttons to set the FID Air flow to 450 mL/min. 4-9 Setting Up the Detectors CAUTION A column must be installed on the base of the detector and capped with a stainless steel Swagelok Plug before attempting to ignite the flame. 7. Touch the Set Point dialog box for the H2 flow and use the numeric keypad or the up and down arrow buttons to set the Hydrogen flow to 45 mL/min. 4-10 Clarus 600/680 User’s Guide 8. Press OK. Automatically Ignite the Flame How Auto-Ignition Works CAUTION To ensure proper auto-ignite FID operation, make sure your column is positioned in the FID 2.75 inches (70 mm) from the back of the column nut. The flame may not auto-ignite if your carrier gas flow is 60 mL/min or higher. The PPC version of the FID has flameout detection and an auto-ignite feature. Flameout detection occurs 0.5 minutes into the PRE-RUN time and it measures the user-entered baseline threshold level in mV. If the threshold level is exceeded, the flame is considered lit, otherwise the Clarus GC detects that the flame is out and autoignite automatically lights the flame before the start of a run. 4-11 Setting Up the Detectors With the FID temperature set, the air and hydrogen flows set, and auto-ignition activated by setting a positive mV value for the flame offset, the FID attempts autoignition at -0.5 min. before the system becomes ready. At this Pre-run time the status bar flashes “Flame Ignition” as the air flow is shut off, hydrogen purges the FID for about 10 seconds, and the ignitor energizes for ignition followed by a return of the air flow to the detector to sustain the flame. After the flame ignites, the FID output level is monitored to confirm ignition before producing a READY signal. If ignition is not confirmed, the ignition process repeats up to two more times if needed. If ignition is not achieved after three attempts, the flame gases are set to off and a dialog box appears displays the following message: “Flame 1 or 2 failed to ignite.” Touch the OK button. The status is made NOT READY and “FID 1 or 2 flameout” appears. If auto-ignition is attempted with the FID gases set to zero flow, the message “No ignition. Flame gases are off” appears on the screen. To proceed, go to the Configuration screen and reset the air and hydrogen to their 450 and 45 mL/min flowrates. To Auto-Ignite The auto-ignition process only occurs before the start of each run just prior to the instrument becoming READY. However, the manual flame ignition process can be initiated at any time by touching the Ignite button . 1. The auto-ignite begins with equilibrating the Clarus GC. 2. Once the equilibration expires, Pre-run begins and the GC detects that the flame is not lit and indicates this by alternately flashing Flame and the method name in the status bar. 3. After determining that the flame is not lit, the GC switches to a not ready state and attempts to automatically ignite the flame. Flame Ignition 1 appears in the status bar. 4. The air flow is shut-off and hydrogen is purged through the FID for 10 seconds. 5. The ignitor energizes, the flame ignites (indicated by a popping sound), and the air flow is returned to sustain the flame. The FID output level is monitored to 4-12 Clarus 600/680 User’s Guide confirm that the flame is lit. If a lighted flame is not confirmed, the Clarus GC repeats the ignition process up to two more times. Manually Ignite the Flame You can manually ignite the flame at any time by following this procedure. Before trying to ignite the flame, make sure that you have sufficient combustion gases and they are turned on at the source, and make sure that the flows are set as described earlier in this section. CAUTION To ensure proper auto-ignite FID operation, make sure your column is positioned in the FID 2.75 inches (70 mm) from the back of the column nut. Flame ignition may not occur if your carrier gas flow is 60 mL/min or higher. 1. Touch the FID button on the System Status screen. The FID tab page appears: 4-13 Setting Up the Detectors NOTE: For proper ignition to occur, the FID must be heated to at least 100 °C. 2. Touch the temp field and use the up and down arrow or keypad buttons to enter a setpoint of at least 100 °C, or enter a value 50 °C higher than the highest temperature of your oven program. 3. Wait for the FID temperature to become READY. When the temperature is ready a green light appears next to the temperature display . 4. Touch the Ignite button . (Note the signal level in mV before the flame ignites.) 5. Upon pressing the Ignite button, the air flow turns off for 15 seconds, Flame Ignition 1 appears in the status bar, and the glow plug begins to glow. Glow Plug Ignitor Figure 4-2 Location of the FID glow plug ignitor. 6. When you hear a "POP,” observe the Signal level in mV as it increases on the screen and remains greater than the previously noted value. After the flame is lit, a screen will appear that shows the signal level at the range that you set. If you have set a range of 20, the signal will be 20 times smaller. 4-14 Clarus 600/680 User’s Guide You can also confirm that the flame is lit by holding a shiny object (such as a mirror or small wrench) over the FID outlet. Condensation forms on the object if flame ignition has occurred. The FID outlet is hot! To prevent injury, never place your hand over the FID outlet. WARNING If the Flame Goes Out During a Run If the flame goes out during a run, the run continues until completion however the data collected is invalid. When the Clarus GC prepares for the next run, it checks for a flame by running the Flameout test. If the GC detects that the flame is out, it will automatically attempt to ignite it! If you have the manual pneumatics version you must manually ignite the flame. NOTE: To prevent condensation from forming on the FID, always turn off the flame (both the hydrogen and air) before cooling the detector or turning off the Clarus GC. Using the FID in Corrosive Environments If you are analyzing samples (such as chloroform, methylene chloride, etc.), that produce corrosive by-products, we recommend installing the piece of vent tubing (P/N 0250-6490) supplied in the Clarus GC Shipping Kit (P/N N610-0348) and setting the FID temperature greater than 250° C to minimize condensation. Corrosive by-products will attack the top of the FID collector assembly, including the ignitor, we strongly recommend venting the FID into a vent hood. NOTE: The flame will not ignite with this vent tubing installed. To ignite the flame, you must first remove the vent tubing, ignite the flame, and then replace the vent tubing. To install the vent tubing: 1. Ignite the FID flame. 4-15 Setting Up the Detectors The FID outlet is hot! To prevent injury, never place your hand over the FID outlet. WARNING 2. Lift open the detector cover. 3. Cut the piece of tubing (P/N 0250-6490) to a length of 4-inches and firmly insert one end of the tubing into the top of the FID. 4. Route the end of the tubing through the hole in the detector cover as you close the detector cover. 5. Connect one end of a length of vent tubing to this piece of tubing and place the other end in a vent hood. 4-16 Clarus 600/680 User’s Guide Setting up an ECD To assure that removable radioactive contamination on the external parts of the ECD remain at a safe level, the United States Nuclear Regulatory Commission requires that: WARNING • the ECD is Wipe Tested at least once every six months and • a record of the results are maintained for NRC inspection. Please refer to the Hardware Guide, Maintenance chapter, for the Wipe Test procedure. NOTE: THERMAL RUNAWAY PROTECTION: The Clarus GC software shuts down the GC if any heated zone exceeds 470 °C. Should this occur, the following error message is displayed: INSTRUMENT SHUTDOWN xxxxx THERM RUNAWAY ....where xxxxx is the heated zone. Call your PerkinElmer Representative. Instrument shutdown also occurs if there is a PRT (Platinum Resistance Thermometer) or MPU (Micro Processor Unit) failure. In these cases the following error message is displayed: INSTRUMENT SHUTDOWN xxxxx PRT ERROR ....where xxxxx is the failed zone. Call your PerkinElmer Representative NOTE: The detector gas modules have been set to OFF at the factory for both manual and PPC pneumatics. United States Government Regulations for ECDs NOTE: Repairing an Electron Capture Detector cell requires a specific license by the U.S. Nuclear Regulatory Commission (NRC) and/or in some states by the equivalent state agency. For further information on obtaining a license, contact PerkinElmer, Shelton, Connecticut Customer Service department or the NRC Material Branch Office of Nuclear Materials, Safety and Safeguards, Washington, DC 20555. 4-17 Setting Up the Detectors Special Instructions for ECD Cell Purchasers (Who are not Specifically Licensed to Handle Radioactive Materials) The PerkinElmer Electron Capture Detector (P/N N610-0063, 120 V or N610-0134, 230 V) contains 15 mCi of Nickel-63 (Ni 63), a radioactive material. Your possession and use of this detector is governed by 10 C.F.R. Section 31.5, which is reproduced in Appendix I. Under the provisions of that regulation you are deemed a "General Licensee." Your possession and use of the Detector Cell may also be regulated by the state where you are located. The requirements of state regulatory agencies are substantially similar to those contained in NRC regulation 10 C.F.R. Section 31.5, but they may differ in some respects. It is suggested that you procure a copy of the regulations of your particular state. (Supplement 2 in Appendix I contains a list of the "Agreement States" which have been granted authority by the U.S. Nuclear Regulatory Commission to regulate the possession and use of radioactive material.) It is required that you are familiar with regulation 10 C.F.R. Section 31.5 (Supplement 1). Following are summaries of its requirements. Labels Do not remove any of the labels attached to the ECD cell or any of the labels attached to your Clarus GC that refer to the ECD cell. Follow all instructions and abide by all precautions provided by the labels and in user instruction manuals referred to by the labels. Leak Testing You are obligated under federal and state regulations to make certain that the ECD cell is wipe tested for leakage of radioactive materials at intervals of no longer than six months, and that the analysis of these wipe tests is conducted by a person specifically licensed to do so, either by the U.S. Nuclear Regulatory Commission or by an Agreement State. The analyses can be performed by the firm listed below: National Leak Test Center P.O. Box 486 North Tonawanda, New York 14120 4-18 Clarus 600/680 User’s Guide Cell Failure or Damage If a leak test detects more than 0.005 mCi of removable radioactive material on the surface of an ECD cell, or if the cell itself is damaged in such a way as to indicate that it may no longer adequately shield the radioactive material inside, you must immediately suspend operation of your chromatograph until the cell has been repaired or disposed of by a person specifically licensed to do so. Any such incident must be reported by you to the Regional Office, Inspection and Enforcement, U.S. Nuclear Regulatory Commission. Reporting Radiation Incidents, Theft or Loss Please read NRC Regulation 10 C.F.R. Section 20.402 and 20.403 (Appendix I). These describe your duties should the radioactive material (Ni 63) in the ECD cell be lost, stolen, or released, or should any person be exposed to radiation. Other Requirements Regulation 10 C.F.R. Section 31.5 (see Appendix I) does not permit you to abandon the ECD cell or export it. It may not be transferred except to a person specifically licensed to receive it. Within thirty days of such a transfer, you must report to the Director of Nuclear Material Safety and Safeguards, U.S. Nuclear Regulatory Commission, Washington, D.C. 20555, the name and address of the transferee. However, no report is needed to transfer a used or defective ECD cell to PerkinElmer in order to obtain a replacement. You may transfer the ECD cell to another general licensee, like yourself, only when it remains at the same location to which it was shipped by PerkinElmer. Give the transferee a copy of these instructions and the regulations in Appendix I, and report to the commission as required in Regulation C.F.R. Section 31.5. WARNING The ECD cell may only be removed for repair from the chromatograph if a specific license has been obtained, THE CELL SHOULD NEVER BE DISMANTLED. 4-19 Setting Up the Detectors United Kingdom Regulations In the U.K., registration is required under the Radioactive Substances Act of 1960, for anyone keeping or using radioactive materials. Application should be made to any one of the following governing bodies: ENGLAND Department of the Environment Queen Anne's Chambers Tothill Street London, SW1H 9J4 SCOTLAND Scottish Development Department 21 Hill Street Edinburgh, EH2 3J4 WALES Welsh Office Cathay's Park Cardiff, CF1 3NG NORTHERN IRELAND Ministry of Development Parliament Building Storemont Belfast, Northern Ireland ECD Overview The Electron Capture Detector (ECD) is the most sensitive detector available for the analysis of electrophilic compounds such as chlorinated hydrocarbons and pesticide residues. It is concentration-sensitive and nondestructive. The ECD cell contains a foil in a cylinder through which the carrier gas flows. The coating of the foil's inner surface contains the radioactive isotope Nickel-63 and has a nominal sensitivity of 15 mCi. To optimize detector response, make-up gas is combined with column effluent. Beta particles emitted from the isotope ionize the carrier gas. The resultant ions and electrons travel to the collector anode assembly under the influence of a pulsed polarizing voltage applied between the source and the collector. The pulse frequency is varied to maintain a constant average current. The presence of an electron absorbing species in the detector decreases the current as the absorbed electrons form ions, which travel more slowly than electrons. The pulse frequency of the 4-20 Clarus 600/680 User’s Guide polarizing supply is automatically controlled to maintain a constant current and is used to form the detector output signal. The ECD works with nitrogen carrier or makeup gas or a carrier or makeup gas mixture of 95% argon/5% methane. When using capillary columns at low flows (5 mL/min or less), helium or hydrogen may be used as the carrier gas provided nitrogen or argon/methane is used as the make-up gas. A cross section view of an ECD is shown below. Figure 4-6. Electron Capture Detector (ECD). If you are using the ECD with a packed column, check to see whether the optional Flow Readout was calibrated with nitrogen or argon/methane carrier gas. If not, select the appropriate carrier gas. To function properly, the total carrier gas flow through the detector should be 30 mL/min or more. Where required, the total carrier gas flow is adjusted to this value with make-up gas using the make-up gas control valve located on the pneumatics control panel. The appearance and location of the make-up gas control valve is shown in Figure 4-9. 4-21 Setting Up the Detectors NOTE: If you want to switch between an FID and an ECD, when using the same packed column injector, use nitrogen as the carrier gas for both detectors. Argon/methane is not recommended for use with an FID because it produces a high background, more noise, and a wandering baseline NOTE: To minimize detector contamination, run the ECD hot, at a temperature of at least 375 ºC. NOTE: You may experience high background readings when working with capillary columns. The high background may be caused by liquid phase bleeding off the detector end of the column (at a typical temperature of 375 °C or higher). In some cases the polyimide coating of the column may also cause a high background reading when using the ECD. You can correct this situation by installing a glass-lined receiver (P/N N6000968). The glass-lined receiver terminates in a 1/16-inch fitting so that it can accept capillary columns with an i.d. of 530 microns or less. If you suspect that the background is caused by column liquid phase bleeding, install the glass-lined receiver in the detector base. Then insert the column end just beyond the ferrule and connect it to the receiver. If you suspect that the background is caused by the polyimide, insert the column through the glass-lined receiver until it is flush with the end of the receiver. Then insert the receiver into the detector base. This shields the column from the make-up gas flow. ECD Set Up To set up an ECD, read the ECD setup summary, then follow the steps. ECD Setup Summary To set up an ECD: • Vent the ECD outlet. • Adjust the make-up gas flow (PPC and manual pneumatics). • Make sure a column is installed 4-22 Clarus 600/680 User’s Guide NOTE: Because an ECD is extremely sensitive, contamination from any part of the system can add to the background and noise. To help assure a clean system the injector and detector should be baked-out and both packed and capillary columns thoroughly conditioned before use. When conditioning columns for use with an ECD, DO NOT attach the column to the ECD. Clean tubing and pure filtered gases should be used. Whenever a column is disconnected from an ECD, the ECD should first be cooled to avoid oxidation of the Nickel foil. Vent the ECD Outlet NOTE: If venting the ECD effluent is required, attach an additional piece of tubing to the tubing that is connected to the ECD outlet. This does not affect the performance of the ECD. 1. Open the detector cover (see the following figure) to expose the top of the ECD. Figure 4-7. Top view of an ECD. 2. Remove the two screws that secure the insulating cover to the Clarus GC. 3. Remove the insulating cover and detector cap. This exposes the ECD outlet (see the following figure). 4-23 Setting Up the Detectors 4. Attach the outer metal sleeve of the vent tubing (P/N N610-0161) to the ECD Outlet. Figure 4-8. Connecting vent tubing to the ECD outlet. 5. Press down and turn the metal sleeve on the end of the vent tubing to secure it to the ECD. 6. Thread the vent tubing through the detector cap and insulating cover as you position them over the ECD. 7. Secure the insulating cover to the Clarus GC with the two screws previously removed. 8. Thread the tubing through the hole in the detector cover then close the detector cover. This hole is either directly above the ECD or at the rear of the detector cover, depending on the detector configuration. 9. Attach a flowmeter to the vent tubing. 4-24 Clarus 600/680 User’s Guide Adjust the Make-up Gas Flow CAUTION The ECD flow module for make-up gas is calibrated with nitrogen gas at the factory. You must recalibrate the ECD flow module if you are using a make-up gas other than nitrogen. The following procedures describe how to set the make-up gas. With PPC pneumatics, the make-up gas is set from the Clarus GC keyboard. The PPC modules are calibrated at the factory; therefore, to set the flows for an analysis, simply follow this procedure. To set the make-up gas: 1. Set the make-up line pressure to 60 - 90 psig. 2. In the System Status screen touch the ECD button. 3. In the ECD Tab change the Make Up field touch the Tools button and touch Configuration from the drop down menu. The following screen appears: 4-25 Setting Up the Detectors 4. In this Configuration screen touch the A-ECD button. The following screen appears: The Filter default setting is 200 milliseconds. If you want to improve the signalto-noise, change the setting to 800 milliseconds; however, the noise improves 4-26 Clarus 600/680 User’s Guide but the peak shapes broaden. If you want a faster detector response, change the setting to 50 milliseconds; however, the noise level may increase. 5. To change the Make Up gas flow in this Configuration screen, use the up and buttons. down arrow or keypad 6. Touch OK when finished. 4-27 Setting Up the Detectors Setting up a TCD NOTE: The PPC pneumatics detector gas modules have been set to OFF at the factory. TCD Overview The Thermal Conductivity Detector (TCD) is a dual-channel detector that measures the difference in thermal conductivity between carrier gas flowing through a reference channel and carrier gas plus sample flowing through an analytical channel (see the following figure). Four tungsten-rhenium filaments are connected in a bridge circuit, two in each channel. The TCD is set up with the same amount of carrier gas flowing through both channels. The presence of a sample component in the carrier gas flowing through the analytical channel changes the resistance of the filaments in that channel. This unbalances the bridge and produces a signal proportional to the amount of sample. Figure 4-10. Thermal Conductivity Detector (TCD). 4-28 Clarus 600/680 User’s Guide TCD Setup Setting up a TCD requires that you equalize carrier gas flows through both channels, followed by balancing the current through the two filaments. The TCD is nondestructive and can be used in series with other detectors. The TCD is a universal detector that is concentration sensitive. The TCD sensitivity depends on the filament current, component concentrations, and the difference in thermal conductivity between the carrier gas and the component. NOTE: To prevent TCD filament damage, shut off the filament current before disconnecting columns or turning off gas flows. To set up a TCD, read the TCD setup summary, then follow the steps. TCD Setup Summary To set up a TCD: • Ensure that a column is installed. • Turn on the oven and detector heaters. • Equalize the makeup and reference gas flows. • Enter the TCD bridge current. • Balance the bridge Turn on the Oven and Detector Heaters 1. Close the oven door. This turns on the oven heater. 2. From the System Status screen touch the TCD button . 4-29 Setting Up the Detectors 2. In the TCD tab page touch the temp field and use the up and down arrow buttons or the numeric keypad to enter a TCD temperature appropriate for the analysis to be run. 3. The detector heater can be turned on or off by touching the Heater On/Off button. 4-30 Clarus 600/680 User’s Guide Equalize the Makeup and Reference Gas Flows The following procedures describe how to adjust the makeup and reference gas using PPC pneumatics in the Clarus GC. CAUTION The TCD flow module for reference gas is calibrated with helium at the factory. You must recalibrate the TCD flow module if you are using a reference gas other than helium. For optimum performance, apply a minimum flow of 5 mL/min to each of the two detector channels. Set the Makeup and Reference Gas With PPC pneumatics the reference gas is set from the Clarus GC touch screen. Also, PPC pneumatics provide you with TCD filament protection by monitoring the carrier gas leak tests or monitoring the gas through the alarm feature and shutting down the TCD current if a gas leak or no gas at all is detected. The PPC modules are calibrated at the factory; therefore, to set the flows for an analysis, simply follow this procedure. 1. To set the make-up and reference gases touch the Tools button and touch Configuration from the drop down menu. 4-31 Setting Up the Detectors This displays the Configuration screen page. 2. Touch the TCD button to display the TCD configuration screen. The following example shows the TCD configuration settings and how they correspond to the TCD active method screen. TCD Active Method 4-32 TCD Configuration Screen Clarus 600/680 User’s Guide 3. In the TCD Configuration screen set the Make-up gas and Reference gas line flows to 30 mL/min using the up and down arrow buttons or the numeric keypad. 4. As shown in the example above, use the up and down buttons or the numeric keypad to set the filter to 200 and the Output to 5.When all the settings are appropriate for your analysis touch OK. The TCD screen will now show the changes you made in the configuration settings for the TCD detector. The default setting for the filter is 200 milliseconds. If you want to improve the signal-to-noise, change the setting to 800 milliseconds; however, the noise improves but the peak shapes broaden. If you want a faster detector response, change the setting to 50 milliseconds; however, the noise level may increase. NOTE: To protect the TCD filaments from errors associated with the sample and reference gas channels, you must select the necessary detector gas sources. As shipped from the factory, the sample channel is Carrier 2 and the reference gas channel is the detector Reference Gas. In some cases, with Arnel configurations, for example, the TCD could be sourced with both a Carrier gas as well as an Aux gas (in GSV applications half the run could look at the Carrier and half could look at an Aux source). In other cases, the reference gas could be replaced by a second channel of carrier gas (in a dual column TCD setup). Enter the TCD Bridge Current Range Select a bridge current range using the criteria in the following table. NOTE: Operating at too high a temperature can have an adverse effect on filament life. Table 4-1. Bridge Current Range vs. Max. Detector Operating Temperature Bridge Current Range Recommended Operating Temperatures for the Following Detectors He or H2 N2 Argon ±4 Up to 100 °C Do not Use 4 Do not Use 4 ±3 Up to 300 °C Do not Use 3 Do not Use 3 ±2 Up to 350 °C Up to 110°C Do not Use 2 ±1 Up to 350 °C Up to 350 °C Up to 350 °C 4-33 Setting Up the Detectors The correlation between bridge current and range is in Table 4-2: Table 4-2. Correlation Between Bridge Current and Range Bridge Current (mA) Range Entry Off ±0 40 ±1 80 ±2 120 ±3 160 ±4 NOTE: Entering a negative number reverses the detector polarity. For examples of reversing the polarity, see the Clarus 600/680 GC Customer Hardware and Service Guide, Maintenance Chapter, section “Practical Hints.” Balance the Bridge 1. In the System Status Screen touch the Signal button to display the Signal screen. This will allow you to observe the signal as you adjust the potentiometer. 4-34 Clarus 600/680 User’s Guide 2. Allow the system to stabilize for about 20 min, then open the detector cover. 3. Locate the TCD Balancing Potentiometer (see Figure 4-11). Adjust the potentiometer until the Autozero display reads between 0.0 and 20.0 mV. 4. Wait for drifting to stop as indicated by a constant reading on the display. 5. Reset the potentiometer to produce a reading between 0.0 and 20.0 mV. Using a TCD with the Autosampler or GSV When using a TCD with an autosampler or a GSV (Gas Sampling Valve) at high sensitivity, a minor baseline upset may occur at the time of injection. If the signal goes below zero, create an Autozero timed event to re-zero the detector back before peaks of interest elute. Initiate a test run to determine the timed event setting. 4-35 Setting Up the Detectors Setting up a PID NOTE: The detector gas modules have been set to OFF at the factory for both manual and PPC pneumatics. PID Overview The PerkinElmer Photoionization Detector (PID) is designed to allow the effluent from a chromatographic column to be ionized by ultraviolet light (provided the ionization potential of the effluent is less than that of the UV source). The current produced by the ion flow is measured by the detector and is proportional to the concentration of the ionized material. Figure 4-13. Cross section view of a PID. 4-36 Clarus 600/680 User’s Guide A cross section view of a PID is shown in the above figure. Figure 4-14 is an illustration of an installed PID. NOTE: The optimum operating temperature for a photoionization detector is 250 ºC. PIDs may be operated at 350°C for short periods of time with a subsequent loss in lamp life. The PID is equipped with a glass-lined inlet and exhaust that permits series operation with another detector. Figure 4-14. PID installed in the Detector 2 position. PID Setup To set up a PID, read the PID setup summary, then follow the steps. PID Setup Summary To set up a PID: • Turn on the oven and the detector heaters. • Adjust the make-up gas. 4-37 Setting Up the Detectors Adjust the make-up gas flow if using a capillary column at flows of ≤10 mL/min. • Turn on the UV lamp. • Optimize the lamp intensity. Turn On the Oven and the Detector Heaters NOTE: A PID can only be installed in the Detector 2 position (rear). 1. Close the oven door. This turns on the oven heater. 2. From the System Status screen touch the PID button . and use the up and down arrow 3. In the PID page touch the temp field or keypad buttons to add a PID temperature appropriate for the analysis to be run. 4-38 Clarus 600/680 User’s Guide 4. If you require the heater on for your analysis just touch the heater button and it will toggle to heater on. Adjust the Make-up Gas Make-up gas is required when using capillary columns at low flows (10 mL/min or less). Since a PID is concentration sensitive, make-up gas flow should be kept to a minimum to obtain the best peak shapes and sensitivity. NOTE: Use make-up gas only if you are using a capillary column at flows of ≤10 mL/min. The following procedures describe how to adjust the make-up gas using PPC pneumatics. 4-39 Setting Up the Detectors CAUTION The PID flow module for make-up gas is calibrated with helium gas at the factory. You must recalibrate the PID flow module if you are using a reference gas other than helium. 1. With the make-up gas is set from the Clarus GC touch screen. The PPC modules are calibrated at the factory; therefore, to set the flows for an analysis, simply follow this procedure. 2. To set the Make-up and Reference gases touch the Tools button PID screen and then touch Configuration from the drop down menu. 4-40 in Clarus 600/680 User’s Guide This displays the PID Configuration screen: . 3. In the PID Configuration screen set the Make-Up gas line pressures to 60 90 psig by using the up and down arrow or keypad buttons. 4. As shown in the example above, use the up and down arrows Filter to 200. to set the The default setting for the Filter is 200 milliseconds. If you want to improve the signal-to-noise, change the setting to 800 milliseconds; however, the noise improves but the peak shapes broaden. If you want a faster detector response, change the setting to 50 milliseconds; however, the noise level may increase. 5. Use the up and down arrow or keypad Offset to 5. buttons to set the 6. When all the settings are appropriate for your analysis touch OK. The PID screen will now display the changes you made in the Configuration screen. Turn on the UV lamp 1. Lift the detector cover to expose the PID (see Figure 4-14). 4-41 Setting Up the Detectors 2. Turn the lamp intensity control knob fully counterclockwise. 3. Turn the UV lamp switch ON. 4. From the PID Tab make sure that AutoZero is off (the box is not checked). If it is On, touch the field to remove the check mark. 5. Allow the system to stabilize until the background signal is steady. Optimize the Lamp Intensity 1. As shown in the screen above, go to the Atten (Attenuation) field. Touch the downward arrow and select an attenuation value of 32. 2. Make sure AutoZero is off. 3. Locate the lamp intensity control knob (see Figure 4-14) and slowly turn it clockwise (increasing the signal) until the background signal on your integrator or recorder (whichever is configured) suddenly decreases. 4-42 Clarus 600/680 User’s Guide Figure 4-17. A typical intensity signal. 4. Repeat steps 2 through 4 at different attenuations using the highest lamp intensity that corresponds to the lowest background signal. NOTE: If optimizing the lamp intensity cannot be done easily using the above procedure, increase the lamp intensity until the noise is between 1% and 1.5% of full scale at an attenuation of x8. Setting Up a NPD To avoid injury, Do Not turn on the hydrogen gas unless a column is connected to the NPD and all fitting connections have been leak tested. WARNING Nitrogen Phosphorus Detectors (NPD) use hydrogen gas. Before you turn on the hydrogen gas to the NPD, ensure that a column is connected to the NPD fitting inside the oven. Turning on the hydrogen gas without first connecting a column to the NPD could create the possibility of an explosion in the oven. 4-43 Setting Up the Detectors Turn off the hydrogen gas before disconnecting a column from the NPD. WARNING When two NPDs are installed, but only one NPD has a column connected to it, plug the inlet of the NPD without a column with a 1/8-inch stainless steel plug (P/N N9300061) to prevent hydrogen from back-diffusing into the oven. NOTE: The detector gas modules have been set to OFF at the factory for both manual and PPC pneumatics. NPD Overview The nitrogen phosphorus detector (NPD) is a highly specific thermionic detector for organically bound nitrogen and phosphorus. NOTE: When using capillary columns with the NPD, Hydrogen is NOT a recommended carrier gas. The additive effect of the hydrogen carrier gas and the hydrogen detector gas affects the sensitivity and selectivity because it produces an overall higher hydrogen gas flow. If you are temperature programming, column flow changes may produce a negative baseline drift. The detector operates by electrically heating a glass bead, that contains an alkali metal, to the point where it emits electrons. A mixture of hydrogen gas and air flows around the bead to produce a hydrogen plasma. Stable intermediates are formed in the hydrogen plasma which then capture the electrons emitted from the bead to produce ions. A polarizing field directs these ions to the collector electrode, thereby creating a current which is amplified. Sensitivity is affected primarily by the air flow, and selectivity is affected primarily by the hydrogen flow. A cross-sectional view of a NPD is shown in the following figure. NOTE: CHLORINATED SOLVENTS MUST NOT BE USED WITH THIS DETECTOR. The life and performance of the alkali bead will be severely impaired by contact with chlorinated compounds. In general, any halogenated compounds will degrade bead performance; therefore, avoid using stationary phases containing these compounds whenever possible. The use of solvents such as water, methanol or ethanol will also 4-44 Clarus 600/680 User’s Guide reduce bead performance and life. Although these solvents may still be used, they should be avoided whenever possible. Figure 4-26. Nitrogen Phosphorus Detector (NPD). Setting Up a NPD To set up a NPD using PPC modules, set the hydrogen and air flow as described below, then condition the bead. Set the Hydrogen Flow and Air Flow for PPC The pneumatics consists of PPC modules where the plasma gases are adjusted and set from the Clarus GC keyboard. The PPC modules are calibrated at the factory, to set the flows for an analysis follow the procedure below. 1. Turn on the hydrogen at the tank and adjust the line pressure to 60 - 90 psig. 2. Turn on the air at the source and adjust the pressure to 70 - 90 psig. 4-45 Setting Up the Detectors 3. In the System Status screen touch the NPD button. The following screen appears: 4. To set the air and hydrogen touch the Tools button in NPD screen and touch Configuration from the displayed menu. The Configuration displays: 4-46 Clarus 600/680 User’s Guide This displays the NPD Configuration screen: 5. In the NPD Configuration screen, set the Air to 450 mL/min and the Hydrogen flow to 45 mL/min by touching the field and using the up and down arrow or keypad buttons. 4-47 Setting Up the Detectors 6. Set the Filter to 200. The default setting for the filter is 200 milliseconds. If you want to improve the signal-to-noise, change the setting to 800 milliseconds; however, the noise improves but the peak shapes broaden. If you want a faster detector response, change the setting to 50 milliseconds; however, the noise level may increase. 7. When all the settings are appropriate for your analysis touch OK. The NPD tab screen will be now displayed with the changes you made in the configuration screen. NOTE: The flows listed in the above procedures for hydrogen and air are optimum for both capillary and packed column flow rates. The optimum flow provides the best sensitivity (signal to noise), selectivity, and bead life. Any changes to these flows will affect all of these parameters. Also when using capillary columns, makeup gas is not required. NPD Bead Activation Procedure Packed Column Setup: Disconnect column and cap the oven end of the detector. The recommended Detector Cap Nut is in the 1/8-in. Plug Kit (P/N N9300061). Capillary Column Setup: With a capillary column connected, adjust Carrier flow to 0.5 mL/min or less (but not 0 ), or (preferred) disconnect the column and cap the oven end of the detector. Reactivating a Used NPD Bead Preparing to Activate the NPD Bead To activate a NPD bead: NOTE: Never activate a NPD bead with a column connected to the detector fitting. To properly activate the NPD bead, the column must be removed from the detector fitting and the detector fitting must be capped. 4-48 Clarus 600/680 User’s Guide 1. Obtain a stopwatch or use the stopwatch function in the GC Utilities screen. 2. Open the oven door and allow the oven to cool. 3. Using a 7/16-inch wrench, loosen and remove the column nut from the detector fitting. Remove the column from the detector fitting. 4. Install a 1/8-inch Swagelok plug (P/N N9300061) on the detector fitting. Provide a leak-free seal by tightening the plug with a 7/16-inch wrench. 5. Close the oven door. Maintain a carrier gas flow through the column. 6. Install the bead in the conventional manner according to the installation procedure in the GC Hardware Guide. Make sure that the bead does not contact any other surfaces. 7. Set the following conditions in the following order: WARNING: Set the Detector temperature to 150 deg. C. or greater. Wait for the detector temperature to stabilize. If a capillary column is used and is not disconnected from the detector, a high detector temperature can cause bleed at the detector junction with the column. Make certain the detector temperature is lower than the maximum temperature recommended for the capillary column of your application. - Set the hydrogen and air flow as follows: • Air to 100 mL/min • Hydrogen to 2.0 mL/min NOTE: Hydrogen flow accuracy is critical to proper NPD bead activation. Make certain that the H2 flow is within 0.5 mL/min, or closer, to the H2 set point of 2.0 mL/min. Check with a calibrated flow meter at the detector bulkhead that the flow is accurate if activation problems occur. NOTE: Ensure that the hydrogen line is well purged of entrained air before you make the final setting of hydrogen flow. Failure to purge the gas line from the hydrogen supply (tank or generator) will result in an incorrect flow setting for operation and can lead to poor operating performance and reduce bead life. 10. Set the detector range to x1. 4-49 Setting Up the Detectors 11. From the system status screen touch the signal icon background. to display the detector When the bead is off, the background value should be 0 ±0.25 mV. Write down the background value that occurs with the bead off. 12. Open the detector cover (see Figure 4-28) and locate the bead potentiometer dial see (the following figure). If the NPD is detector 1 (front position), the potentiometer is located on the left side of the panel. If the NPD is detector 2 (rear position) the potentiometer is located on the right side of the panel. Figure 4-30. Location of the Potentiometer Dial. 4-50 Clarus 600/680 User’s Guide Activating the NPD Bead The bead requires an activation step prior to use. Do not inject a sample during Activation. To Activate the bead, carefully follow this procedure in sequential steps below: 1. Turn the bead potentiometer dial clockwise to apply current to the bead. 2. Slowly increase the NPD control voltage potentiometer to a setting of 700. Note: The bead will gradually acquire an orange glow at this point. 3. Wait for 5 minutes then increase the potentiometer to 750. 4. After 1 minute move the potentiometer to 800. 5. After 1 minute move the potentiometer to 850. 6. After 1 minute move the potentiometer to 900. 7. After 1 minute reduce the potentiometer to 850. 8. After 1 minute reduce the potentiometer to 800. 9. After 1 minute reduce the potentiometer to 750. 10. After 1 minute reduce the potentiometer down to 700 11. For Capillary columns: Wait 10 minutes, go to the NPD detector screen, then adjust the potentiometer so that the NPD baseline response reads around 0.5 mV on Range 1. Then set the desired column flow for the application to be run. For Packed Columns: Wait 10 minutes, go to the NPD detector screen, then adjust the potentiometer down to 500 or below to drop the bead below the active level. Remove the Detector Cap Nut (P/N N9300061) and reconnect the column to the detector. Set the desired column flow for the application to be run, then again increase the bead current potentiometer to give a reading around 0.5 mV on Range 1. 12. Allow the baseline to stabilize for 30 minutes. 13. Using the potentiometer, adjust the baseline between 0.4 and 0.6 mV at Range 1 and the bead ready to use. 14. After conditioning the bead remove the Swagelok plug from the detector fitting and reconnect the column. 4-51 Setting Up the Detectors 15. Make sure the column flow is properly set. Touch the signal icon to display the detector background produced by carrier gas flow. The bead background will be less due to cooling effects. 16. Turn the bead potentiometer dial clockwise until you achieve a reading of 0.25 mV above the "off" reading with the detector range set to x1. 17. Once the system has stabilized, it is ready for operation. If you are unable to achieve adequate sensitivity for your standard, increase the background of the NPD. Increasing intervals of 0.25 mV are recommended. Adjust the background setting to achieve the sensitivity required for your samples. For example, if you have a concentrated sample, such as drugs, it can be analyzed with a background of 0.25 – 0.50 mV. If you have a lowlevel sample, such as pesticides, it may require a setting as high as 1 – 2 mV. To get the maximum life from your NPD bead, operate at the lowest setting to achieve your required sensitivity. 4-52 Clarus 600/680 User’s Guide NOTE: (1) The bead will be stable after operating for several hours, but it will drift in time. At the start of each day, adjust the background reading to the setting you are using and allow a few minutes for it to stabilize. (2) Due to the loss of alkali metal with use, the nature of the bead is to drift over time. We strongly recommend using an internal standard for quantitative analysis. (3) The bead can operate at higher background settings. The higher the setting, the greater the signal and noise. Therefore, the signal to noise ratio will not increase dramatically. Operate at the lowest possible setting to achieve the required sensitivity; this will also prolong the life of the bead. NOTE: The bead should be turned off by turning the bead potentiometer dial fully counterclockwise before you turn off the Clarus GC. Remember that the bead has a finite life. You can extend the bead life by turning the bead off when it is not in use for long periods of time (for example, over the weekend). Reactivate a Used NPD Bead To increase the bead life, turn off the bead if the NPD is not continually in use. When you turn off the bead, keep the detector temperature, hydrogen flow, and air flow set to operating conditions. If the column remains connected to the injector and detector in the oven, make sure the carrier gas is flowing through the column. If the column is disconnected from the detector, make sure the Swagelok cap is installed on the NPD fitting. Prior to using the NPD, adjust the bead background to the same millivolt setting that you were using. Run your standards to determine if the NPD bead is responding at a level of sensitivity equal to the previous run. If not, then reactivate the NPD bead. To reactivate a NPD bead follow the activation procedure above. Operating Notes The bead is operated as a conventional NPD bead; following these instructions will increase the bead lifetime. Baseline: Set the baseline to a level of between 0.4 – 0.5. A lower baseline will help to extend bead lifetime. Studies have shown that the signal-to-noise will not be adversely affected by the lower baseline. 4-53 Setting Up the Detectors Column bleed: Material from the column can effect bead lifetime. Keep the maximum oven temperature as low as possible for each application. Between run operation: If the NPD bead is not in use for a few days it is best to simply lower the potentiometer setting to 600 and maintain the detector temperature at 200 deg. C. or greater. If the NPD detector will not be in use for an extended period, simply turn the potentiometer to zero. To reuse the bead follow the activation procedure. Loss in sensitivity – the NPD bead is a consumable and will experience a loss in sensitivity over time. Often, adequate sensitivity can be restored by repeating the activation process. 4-54 Clarus 600/680 User’s Guide Setting up an FPD WARNING Flame Photometric Detectors (FPD) use hydrogen as fuel. If the hydrogen is turned on without a column attached to the detector fittings inside the oven, hydrogen could diffuse into the oven creating the possibility of an explosion. To avoid possible injury, DO NOT TURN ON THE HYDROGEN unless a column is attached to the detector fittings inside the oven and all fittings have been leak tested. Before disconnecting a column, make certain that the HYDROGEN HAS BEEN TURNED OFF. If two FPDs are installed and only one FPD has a column connected to it, make certain that you plug the unused detector inlet fitting with a 1/8-inch stainless steel plug (P/N N930-0061). NOTE: To prevent potential damage to the FPD in the manual pneumatics version, the hydrogen needle valve has been factory-set to a very low setting. Set both the hydrogen and air inlet pressures to 30 psig, then measure and set the flows as stated in this chapter. NOTE: The PPC pneumatics detector gas modules have been set to OFF at the factory. FPD Overview In the Flame Photometric Detector (FPD), the column effluent is mixed with hydrogen and then burned in air. Light emitted from the flame passes through a lens, filter, and to a photomultiplier tube, which generates an electrical signal. The Flame Photometric Detector is used for detecting sulfur, phosphorus, or tin compounds, which produce chemiluminescent reactions with emissions at wavelengths characteristic of the S2, Sn, and HPO species. A filter that isolates sulfur emissions (P/N N6000637) is supplied with the detector. Another filter that isolates phosphorus emissions (P/N N6000981) and a filter that isolates tin emissions (P/N L4145472) are available from PerkinElmer at www.perkinelmer.com. 4-55 Setting Up the Detectors A cross section view of an FPD is shown below. Figure 4-31. Flame Photometric Detector (FPD). 4-56 Clarus 600/680 User’s Guide Setting Up the FPD To set up a FPD using PPC modules, follow the steps below. FPD Setup Summary To set up a FPD: • Configure the linearizer and signal filter. • Set the FPD temperature. • Set the hydrogen flow and air flow for PPC • Turn on the photomultiplier tube. • Ignite the flame Configure the Linearizer and Signal Filter The signal for sulfur is a function of the square of the sample quantity injected. That is, if twice as much sample is injected, the response is quadrupled. When the linearizer is turned on, the software calculates the square root of the signal and sends that value to the integrator or recorder. NOTE: If Linearization is set to "ON," the Autozero function must be checked off on the FPD tab screen. NOTE: If Linearization is set to "ON," set the Clarus GC integrator attenuation to x64. If Linearization is set to "OFF," set the Clarus GC integrator attenuation to x8. 1. From the System Status screen touch the FPD button. 4-57 Setting Up the Detectors 2. The FPD page is now visible. 4-58 Clarus 600/680 User’s Guide 3. For Linearizer the default value is Off. To change the value to On touch the Tools button in FPD tab screen and touch Configuration from the displayed menu. 4. This will bring you to the Configuration screen page. 4-59 Setting Up the Detectors 5. Touch the FPD button to display the NPD configuration screen. 6. In this screen touch the Linearize check box to turn it On. This is indicated by a check in the box. 7. Set the Filter to 200. The default setting is 200 msec. If you want to improve the signal-to-noise, change the setting to 800 msec. Then run your standard and observe that the signal remains the same and the noise improves. 4-60 Clarus 600/680 User’s Guide 8. When all the settings are appropriate for your analysis touch OK. The FPD tab screen will be now visible and the changes you made in the configuration screen will be shown. Set the FPD Temperature NOTE: When using the FPD with Turbochrom Version 3.1 or earlier, OMEGA, or the Model 1020/1022 (software Version 7.10 for the SX or Version 6.5 for GC Plus), the FPD temperature values must be entered between 250 °C and 450 °C only. Do not enter any value less than 250 °C. 1. From the System Status screen touch the FPD button. 2. The FPD tab page is now visible. 4-61 Setting Up the Detectors NOTE: For proper ignition to occur, the FPD must be heated to at least 250 °C. 3. Touch the temp field and use the up and down arrow or keypad buttons to enter a setpoint of at least 250 °C (this is the minimum entry for a , or enter a temperature that is 50 °C FPD) in the temp field higher than the highest temperature of your oven program. Set the Hydrogen Flow and Air Flow for PPC The PPC pneumatics consists of PPC modules to set the hydrogen and air gases from the Clarus GC touch screen. The PPC modules are calibrated at the factory, therefore to set the flows for an analysis, simply follow this procedure. 1. Turn on the air at the source and adjust the pressure to 70 - 90 psig. 2. Turn on the hydrogen at the source and adjust the pressure to 60 - 90 psig. 3. From the System Status screen touch the FPD button. 4-62 Clarus 600/680 User’s Guide 4. The FPD tab page is now displayed. 4-63 Setting Up the Detectors 5. To change the gas flow values touch the Tools button in FPD tab screen and touch Configuration from the displayed menu. This displays the Configuration screen. This displays the FPD Configuration screen. 4-64 Clarus 600/680 User’s Guide 6. On this page touch the FPD button screen. to get to the FPD Configuration 6. Touch the Hydrogen field and use the up and down arrow or keypad buttons to change the value to 75 (to 75 mL/min). 7. Touch the Air field and use the up and down arrow or keypad buttons to change the value to (90 mL/min). 8. To change the filter value touch the Filter field and use the up and down buttons to set the value appropriate for your arrow or keypad analysis. The default setting is 200 milliseconds. If you want to improve the signal-tonoise, change the setting to 800 milliseconds; however, the noise improves but the peak shapes broaden. If you want a faster detector response, change the setting to 50 milliseconds; however, the noise level may increase. 4-65 Setting Up the Detectors 7. Touch OK when completed. Turn On the Photomultiplier Tube 1. From the System Status screen touch the FPD button. 4-66 Clarus 600/680 User’s Guide 2. The FPD tab page is now visible. 3. To turn on the photomultiplier tube touch the Tools button in FPD tab screen and touch Configuration from the displayed menu. This will bring you to the Configuration screen page. 4-67 Setting Up the Detectors 4. On this page touch the FPD button page. to display the FPD Configuration 5. In the PMT Voltage field set the percentage (see note below) by using the up and down arrow or keypad buttons. This will turn on the photomultiplier tube. NOTE: The voltage to the photomultiplier tube has been set in the factory to approximately 70%. You can change this setting from the Clarus GC touch screen. You may want to change this setting as the photomultiplier tube ages and the signal diminishes. The signal-to-noise ratio may vary with each photomultiplier tube; therefore, increasing the voltage may not increase the signal-to-noise ratio. After installing a replacement photomultiplier tube, the noise should be about 2% when the Clarus GC integrator output is set to attenuation 8 (x8) and the Linearizer off. See the Clarus 600/680 GC Customer Hardware and Service Guide "Maintenance” chapter, for this procedure. NOTE: The photomultiplier tube can be damaged if it is exposed to light while voltage is ON. Never remove the detector cap or Photomultiplier tube WITH the voltage on. 4-68 Clarus 600/680 User’s Guide Ignite the Flame 1. Open the electronics cover to access the ignitor assembly. Figure 4-32. Ignitor assembly. 2. From the system status screen touch the FPD button. 3. The FPD tab page is now visible. NOTE: For proper ignition to occur, the FPD must be heated to at least 250 °C. 4. Use the up and down arrow or keypad buttons to enter a setpoint of at least 100 °C (this is the minimum entry for a FPD)in the temp field 4-69 Setting Up the Detectors , or enter a temperature that is 50 °C higher than the highest temperature of your oven program. 5. Close the oven door. Wait for the FPD 1 temperature to become READY. 6. Position the ignitor assembly on the FPD outlet (see the following figure). 7. You may hear a slight "POP.” This indicates that the flame is lit. NOTE: If you find it difficult to light the flame, rotate the FPD cap so that the FPD outlet faces the front or left side of the instrument. Figure 4-33. Ignitor assembly positioned on the FPD outlet. 8. Remove the ignitor assembly from the FPD outlet. If the flame is lit, the signal on the Autozero screen should increase and remain greater than the noted amount. Confirm that the flame is lit by holding a shiny object (such as a mirror or small wrench) over the FPD outlet. Condensation will appear on the object if ignition has occurred. 4-70 Clarus 600/680 User’s Guide The FPD outlet is hot! To prevent injury, never place your hand over the FPD outlet. WARNING NOTE: To prevent condensation on the FPD, always turn off the flame (hydrogen and air gases) before cooling the detector or turning off the Clarus GC. 4-71 Setting Up the Detectors Detector Temperatures To display or change detector temperatures and turn the detector heaters on or off can be done from one screen in the Clarus GC. The example shown below assumes that the Clarus GC has an ECD detector. 1. In the System Status screen touch the ECD button. 2. In the ECD screen you will see the Make Up field to change the setting touch Tools and touch Configuration from the drop down menu. 4-72 Clarus 600/680 User’s Guide and use the up and down arrow 3. In the ECD page touch the temp field or keypad buttons to set an ECD temperature appropriate for the analysis to be run. . The 4. To turn the heater on or off just touch the Heater button message on the button will toggle to either on or off and will be visible on the screen. 4-73 Setting Up the Detectors Setting the Range Setting the FID, PID, or NPD Range The initial FID, PID, or NPD range is set from the FID, PID, or NPD Range screen. The example below uses FID but the following procedure can also be used for PID or NPD. 1. From the System Status screen touch the FID button the FID tab screen page. this will bring you to . Select a range from 2. To change the range touch the Range field the drop down menu for the detector. FID, PID, and NPD range options are 1 or 20, where 1 is the most sensitive setting and 20 is 20 times less sensitive. The value that you enter will always be used unless you change it on the Event page. For certain analyses such as those for trace or concentrated components, you may wish to change the Range during a GC with a Timed Event run. The following example illustrates this. 4-74 Clarus 600/680 User’s Guide Changing the FID, PID, or NPD Range During a Run To automatically change the range from 1 to 20 after 1 minutes into the run. The example below uses FID but the following procedure can also be used for PID or NPD. 1. Touch the Event tab to view and change a range during a run. 2. Touch the Add button to show the following screen. 4-75 Setting Up the Detectors 3. In the Add Timed Event screen enter an Event by touching the down arrow in the Event field to view the other ranges. Select the one you need by touching it. 4-76 Clarus 600/680 User’s Guide 4. Enter a time by touching the Time field and using the up and down arrow or buttons, enter the time required for your analysis. This will keypad change the time for AutoZero A as shown. 5. Enter a value for the AutoZero A by touching the Value field. Then using the up and down arrow buttons enter On or Off. 6. When completed touch OK to close the screen. 7. When a run is started, the system uses the initial range of 1 for 2 minutes, then switches to a range of 20 for the duration of the run. When the run completes, the system switches back to the initial value of 1. When completed touch OK to close the screen. 4-77 Setting Up the Detectors Setting the TCD Current (Filament Current) CAUTION When the detector is not in use the temperature and current must be off. 1. From the System Status screen touch the TCD button . and use 2. In the TCD tab page touch the Current field the drop down menu to change the value. TCD range options are Off, +40, +80, +120, and +160 (maximum sensitivity) and −40, –80, –120, or −160. A negative value reverses the polarity. 4-78 Clarus 600/680 User’s Guide The TCD range values corresponding to bridge current are shown below: Table 4-3. Correlation Between Bridge Current and Range Bridge Current (mA) Range Entry Off 40 80 120 160 0 ±1 ±2 ±3 ±4 The initial setting is the range that is used at all times unless the polarity is changed with a timed event during a GC run. 4-79 Setting Up the Detectors Changing TCD Polarity During a Run TCD Range timed events are restricted to changing TCD polarity. For example, if an initial range is four, then an event can only be entered for +4 or −4. Examples for using polarity changes are given in Clarus 600/680 GC Customer Hardware and Service Guide, “Maintenance” chapter, Practical Hints section. To automatically change the range from 2 to –2 after 3 minutes into the run: 1. From the System Status screen touch the TCD button 2. In the TCD tab page touch the Events tab. 4-80 . Clarus 600/680 User’s Guide 3. In the Events tab touch the Add button. 4. Using the up and down arrow or keypad of three minutes into the Time field. buttons enter a time 4-81 Setting Up the Detectors 5. Using the drop down menu in the Value field select a value of -2. 6. When completed touch OK to close this screen. When a run is started, the system uses the initial range of 2 for 3 minutes, then reverses the polarity for the duration of the run. When the run is completed, the system switches back to the initial value, in this case 2. 4-82 Clarus 600/680 User’s Guide Routing Detector Output The Clarus GC contains one analog data output channel for each installed detector amplifier board. You can attach an integrator or recorder to either output channel Normally the detector output would go to the device configured for that channel. However, if you are running complex analyses, such as those requiring detector switching, you may wish to route the signal to either channel. Rerouting Output Assume that: • Detector 1 is an FID whose output is going to an integrator (in this example the integrator is output A). • Detector 2 is a TCD whose output is going to a recorder (in this example the recorder is output). To reroute the FID output A to the integrator: 1. From the System Status touch the button for the FID Detector . 2. The FID tab page will appear. Touch the Events tab. 4-83 Setting Up the Detectors 3. In the Events screen touch the Add button. The Timed Events screen will appear. In the drop down menu for Events and touch Output A. 4-84 Clarus 600/680 User’s Guide 4. Touch the Time field and use the up and down arrow or keypad buttons to input a time that the FID’s output will go to the integrator. 5. Touch the value field and use the drop down to select a negative value (detector A is negative, detector B is positive). 6. Touch OK to return to the Events tab page. 7. Once in the FID page touch the System button Status screen. to return to the System 8. In the System Status screen touch the TCD button. The TCD page will appear. Touch the Events tab. 9. In the Events screen touch the A button. The Timed Events screen will appear. In the drop down menu for Events and touch Output B. 10. Touch the Time field and use the plus and minus buttons to input a time that TCD output will go to the recorder. 4-85 Setting Up the Detectors 11. Touch the value field and use the drop down to select a positive value (detector 1 is negative, detector 2 is positive). 12. Touch OK to return to the TCD page. 13. Once in the TCD page touch the System button Status screen. to return to the System NOTE: Detector routing remains in effect until changed. If two detectors are installed but only one configured, then the output of the configured detector is sent to both output channels. 4-86 Clarus 600/680 User’s Guide Attenuating Detector Signals Going to a Recorder The purpose of attenuation when a recorder is attached and configured is to bring a peak on scale by amplifying a weak signal or reducing an overly strong signal. Attenuation in this case affects only the presentation of the signal. Acceptable attenuation values are of the 2nd power, for example, 1, 2, 4, 8, 16, etc., up to a maximum of 64. The system rounds off values to the next highest power of 2. For example, if you go to the Atten field and select 1 then an attenuation of 32 appears on the screen. The range of attenuation values that may be used is 1 – 65,536. Raising the attenuation decreases the signal to the recorder. Lowering the attenuation amplifies the signal to the recorder. To change an attenuation value (an FID detector is used as an example): 1. From the System Status screen touch the FID button tab screen page. to display the FID 2. To change the attenuation touch the Atten field. Use the drop down menu to select an attenuation range for the detector that is appropriate for your analysis. 4-87 Setting Up the Detectors 3. After this is done you may continue with another tab page or touch the System button to return to the System Status screen. A table listing attenuation vs. the maximum detector signal producing 100% deflection on a 1 mV-recorder is provided in the Clarus 600/680 GC Customer Hardware and Service Guide, Maintenance chapter, section “Practical Hints.” 4-88 Clarus 600/680 User’s Guide Optimizing a Detector Signal to an Integrator for Maximum Sample Dynamic Range The Clarus GC contains improved electronics which significantly reduce amplifier noise. This allows you to amplify the detector signal without getting a large increase in the noise level. Therefore, it provides excellent minimal detection (signal to noise) for all Clarus GC detectors. Amplification is set on the detector page in the Atten field, the attenuation button, and entering an attenuation value from x1 (most signal) to x64 (least signal). The maximum signal produced by the Clarus GC amplifier is 1 V. To achieve the best sensitivity and widest dynamic range, the sample with the highest concentration must not exceed the 1-V signal. When using a flame ionization detector (FID), if you operate at range x1 and attenuation x64, and the signal saturates (exceeds 1 V), then use range x20 and determine the appropriate attenuation value (from x64 to x1) that produces a reasonable size peak. When using a nitrogen phosphorus detector (NPD), the same will apply. When using an electron capture detector (ECD), the only range setting is x1. To ensure that the signal does not exceed 1 V, you should run your most concentrated sample at attenuation x64, then change the attenuation to produce a reasonable size peak. When using a thermal conductivity detector (TCD) the range or current setting also affects the output signal. Therefore, start at attenuation x64. As long as the signal does not exceed 1 V, you can amplify the signal by changing the attenuation. 4-89 Setting Up the Detectors Matching Detector Signals with Your Integrator The following procedure should be followed if you are operating your detector near the minimal detectable quantity level. This will ensure that the integrator is not filtering the signal coming from the Clarus GC. The purpose of attenuation when an integrator is attached and configured is to assure that the GC output is above the noise level of the integrator. Normally, attenuation for an integrator need only be performed once. To obtain the most satisfactory results, it is recommended that attenuation be carried out under actual operating conditions prior to running your first sample. Valid attenuation values when an integrator is configured are 1, 2, 4, 8, 16, 32, and 64. The greater the attenuation, the smaller the degree of detector signal amplification. Attenuation of an integrator can be thought of as a two-step process: 1. Observe the integrator noise at an attenuation of 64: Figure 4-39. An example of integrator noise. 2. Gradually decrease the attenuation (for example, to 16 or until the noise level increases): 4-90 Clarus 600/680 User’s Guide Figure 4-40. An example of detector noise. A table listing attenuation vs. the maximum detector signal producing a 1-V output to an integrator is provided in the Clarus 600/680 GC Customer Hardware and Service Guide, Maintenance chapter, section “Practical Hints.” To change an attenuation value: 1. From the System Status screen touch the TCD button. 2. In the TCD tab page touch the Atten field menu to change the value. and use drop down 4-91 Setting Up the Detectors NOTE: Attenuation of detector signals may be changed during a GC run with a timed event. At the end of the GC run, the initial attenuation value is automatically restored. 4-92 Clarus 600/680 User’s Guide Autozeroing a Detector Each configured detector is equipped with digital autozeroing capability. As long as Autozero is On (indicated by a check mark in the box), the system will autozero the detector to the offset specified during configuration whenever the system becomes READY or when a run is started. The example below uses the ECD detector but the following procedure can also all the detectors. 1. In the System Status screen touch the ECD button. 2. In the ECD Tab you will see the AutoZero field AutoZero touch the field and a check mark will appear. . To turn on the 4-93 Setting Up the Detectors NOTE: When Autozero is Off, the output signal is never autozeroed. 4-94 Using the Method Editor 5 Using the Method Editor 5-2 Clarus 600/680 GC User’s Guide Method Editor To access the Method Editor display the System Status screen: From this screen touch the Tools button (as shown above). This displays the following options: . 5-3 Using the Method Editor To access Method Editor, touch Tools menu and touch the first option, Method Editor. The Method Editor screens are similar to the Active Method screens. The differences are noted in this section. You can access and edit the first five methods. The fifth method is reserved for TotalChrom and may be overwritten. If you attempt to overwrite the method, it will retain the name External to remind you that this is a possibility. You cannot access the Default method. This method is used by the system to populate a method with default values when the “New Method” menu option is selected. The default settings are the same as the current (or active) method. 5-4 Clarus 600/680 GC User’s Guide Method Edit Mode When you touch Method Editor from the Tools menu, a screen similar to the status screen appears. 5-5 Using the Method Editor The buttons with icons provide access to the injector, detector, oven, and aux settings associated with the Active Method in the method mode. If an Aux temperature is configured, an Aux button appears on the method edit screen. The Method Edit screens are similar to the Active Method screens with the following differences: 5-6 • The run and signal icons on the top navigation bar are absent. • No configuration information appears. • No ignite button on the FID screen. • No status bar or current information. • The Start and Tools menu button in the bottom bar are replaced with the File menu button. Clarus 600/680 GC User’s Guide The following screens show the differences between the two modes( Active Method and Method Editor). The first screen below shows the PSS active method screen. The second screen, that follows, shows the screen in Method Edit mode. Active Method Screen Method Edit Mode Oven Settings Touching the Oven button displays the oven screen in Method Edit mode. 5-7 Using the Method Editor You can program up to 10 oven steps by touching the field and using the up and down arrow or keypad buttons to enter a value. After entering all of your settings, touch the File button. This displays a pop-up File menu with options to create, modify, and save methods. The Method Name field is not active until you select an option from the File menu. 5-8 Clarus 600/680 GC User’s Guide Managing Methods The name of the active method is grayed-out in the file name list that appears for Delete, Open, Activate, and Save As. If you enter the same name as the active method, the following message appears: File Menu The pop up File menu includes options to create, modify, store, and delete methods. The Exit Editor option closes the Method Edit screen and displays the view that appeared when the user invoked the Method Editor Tools option. During a run, the Activate menu option is grayed-out since you cannot activate a different method during a run. New Method When you need to develop a new method select New Method from the pop up File menu. If your current method has not been saved, touching New Method displays the following dialog box: If you select Yes, the Save As dialog box appears. 5-9 Using the Method Editor You can either assign a Name to the current method by touching the Name field and use the displayed Data Entry keypad. When done typing a name, in this example I typed name, then touch the OK button. The Save As dialog reappears 5-10 Clarus 600/680 GC User’s Guide To save it, touch OK or touch Cancel to close the Save As dialog box When the dialog box closes, the GC is in the New Method mode and the fields are populated with default values. The Method Name field is activated and displays the name “untitled.” After defining the values for the new method, touch the Method Name field to display the Save As dialog box. Assign a name to the new method and save the changes. Open Method Touching the Open Method option prompts the following warning box only if changes have been made since the last save. If you touch Yes, the Save As.. dialog appears. When the Open option is selected, the Open dialog appears for you to select a method. 5-11 Using the Method Editor Touch the method name and OK to populate the method edit screens with the values from the selected method. If you choose Cancel, or touch the OK button without selecting a method, the dialog box will close and the operation will be ignored. Save The Save command saves the previously opened and optionally modified method under the same name. No dialog box appears if a name appears in the Method Name field. If the Method Name field is empty, either from generating a New Method or from entry into the Method Editor, the “Save As” dialog box appears. 5-12 Clarus 600/680 GC User’s Guide Save As.. The Save As command saves the current method under a new or existing name. Touching this option displays the Save As dialog box. The Name field displays the name of the current method. The list of method names always displays “External” in the last position. If you do not change the name or select another method from the list, clicking OK prompts the dialog box to confirm that the existing method will be overwritten. Clicking Yes overwrites the stored method with the new method pneumatics with the same name. To assign a new method name, touch the name field to invoke the alpha numeric keypad: 5-13 Using the Method Editor Although a new method name field displays the name “untitled,” the field to enter the new name is blank. The Method Name field displays each character as it is touched starting from the center of the field. The name can be comprised of any combination of letters and numbers and is limited to 13 characters. Touching OK closes the keypad and displays the Save As dialog box with the name entered in the name field. Touching Cancel closes the keypad and displays the Save As screen. The name field is not modified. The External method is always the last entry in the list. The External method cannot be renamed but it may be overwritten. Touching OK saves the edited method under the assigned name. The name is added to the list and the Save As box closes. The new name appears in the Method Name field. If you press the OK button before entering a method name, the following error message appears: 5-14 Clarus 600/680 GC User’s Guide Pressing Continue returns control to the previous screen. You can select a name or cancel out of the process. If five methods are already stored, entering a new name will prompt the following dialog box: If you press Yes, the method list appears. When you select a method and press OK, the Save As screen appears with the new method name in the field. You can now press OK to save the method in the available position. 5-15 Using the Method Editor If you press No, the Save As… dialog box displays the same fully populated list of methods. The new method name is still in the Name field. You can press Cancel to return to Method Edit mode and access the File button, or OK to prompt the memory full error again. Activate This command is deactivated while the system is running. When the command is available, the Activate option applies the currently edited method conditions and name to the active method. The method editor mode retains control. If the method is not named, the Save As dialog box opens for you to select a method from the list. Delete Touching the delete option prompts the Delete dialog box. 5-16 Clarus 600/680 GC User’s Guide Select a name from the list. The selected name appears in the Method Name field. Touch the OK button to delete the selected method and close the dialog box. Exit Editor The Exit Editor option closes the Method Edit screens and restores the Active Method. Touching Exit Editor invokes the following dialog box: Pressing the Yes button closes the dialog box and displays the active method screens. Pressing the No button closes the dialog box and retains the Method Editor mode. 5-17 Using the Method Editor 5-18 Using the Tools Menu 6 Using the Tools Menu 6-2 Clarus 600/680 GC User’s Guide Tools Menu The Tools pop-up menu provides options to a number of Clarus GC features and settings, such as Method Editor, Configuration, Maintenance, and Utilities. To display the menu, touch the Tools button: 1. To access the Tools menu, display the System Status screen as shown below: 2. Touch the Tools button (shown above) and the Tools menu appears. You are now able to select any of the options displayed in the menu. 6-3 Using the Tools Menu Method Editor To access Method Editor, touch the Tools button and then touch the first option, Method Editor. For detailed Method Editor information see Chapter 4, Using the Method Editor in this guide. 6-4 Clarus 600/680 GC User’s Guide Event Log To access Event Log, from the System Status screen, touch the Tools button and touch the second option in the list, Event Log. In the Event Log screen you can select either the Autosampler or current Run log. The list box displays the contents of the selected log. The logs are not editable. 6-5 Using the Tools Menu Maintenance To access the Maintenance screen, from the System Status screen, touch the Tools button and then touch Maintenance. The maintenance feature provides you with the ability to set up to eight task reminders. For each item, you can enter the name of the task and specify the condition that prompts the reminder. When the criteria are met, a dialog box displays the message. The last item accessed is automatically selected. The tasks are listed in the order they were entered. Use the scroll bar to display additional entries. Each entry includes the name of the task and the Count at which it is set to prompt a reminder message. The buttons below the list allow the user to add, edit, and delete tasks. The current count field displays the value and type of interval associated with the selected item. 6-6 Clarus 600/680 GC User’s Guide 1. To add an entry, touch the New button. The New Maintenance Task screen appears. The interval options are: Injections, Hours, and Days: 2. Touch the Count (interval) field and then enter a value using up and down arrow or keypad buttons. 3. Enter a message by touching the Message field. This displays the alphanumeric keypad for you to enter a message. 6-7 Using the Tools Menu Type the message. For example, Change Septum 4. Click OK to save the message. 5. If a maintenance task has already been assigned to the selected number, a dialog box will ask if you want to overwrite it. 6-8 Clarus 600/680 GC User’s Guide 6. When done, touch the Close button. 7. When the Count value equals the number assigned to the task, a dialog box displays the reminder. 8. Touch OK to close the reminder. 6-9 Using the Tools Menu Configuration To access Configuration, from the System Status screen, touch the Tools menu and select Configuration. The Configuration screen appears. This section describes how to configure and then shows the various GC configuration screens. Injectors (Deconfiguring and Configuring Injectors) Occasions may arise when you may not be using one of the injectors for an extended period of time. Instead of turning off the injector heater, you may find it more convenient to "deconfigure" the unused injector. When you do this, the injector temperature screen for the deconfigured injector will not appear in the method. Every Clarus GC has been configured at the factory for the specific injector(s) that have been installed. You can check the injector configuration of your Clarus GC from the Configuration Mode. If one of the detectors has been deconfigured, analog data from the remaining detector will be routed to both output channels. Both detectors should not be deconfigured at the same time. 6-10 Clarus 600/680 GC User’s Guide Deconfiguring the detectors also deconfigures the detector’s PPC control. You must reconfigure the PPC control when restoring the detector configuration. 1. Touch the A-Injector button. The Configure Injector A appears. 2. Select the Injector Type from the drop-down list: The Type options are: None, Packed, Cap, GSV, PSSI, and POC. The example below shows None selected. 6-11 Using the Tools Menu PSS - Programmed Split/Splitless Injector The PSSI injector includes a Capillary Control option If the Capillary Control mode is selected the following additional parameters are displayed (shown below in the bordered area) and the Capillary Control can be configured for pressure, flow, and velocity. . When set for inlet programming, the injector is first heated to the injector temperature entered in the method and then follows the injector temperature program. The temp field does include a program settings button in this case. If the Capillary Control mode is set for flow or velocity, the radio buttons for Program and Oventrack are deactivated. If the mode is set for pressure and the Oventrack radio button is selected, the column dimension fields are deactivated. In this case, the pressure is entered in the method and the software maintains the column flow based on the initial oven temperature and pressure. When the Oventrack mode is selected you cannot view the flow or velocity. If Capillary Control is not selected, the split pneumatics only controls the inlet pressure and split flow. The options in the field include None and Pressure. The Column Length and ID fields, and Split Mode radio buttons are deactivated when capillary control is off. 6-12 Clarus 600/680 GC User’s Guide The Flow Offset radio buttons are active with or without capillary control. The options include Auto, which is the default setting, and Fixed. When Auto is selected, enter the value for the Leak Limit. The Fixed option allows you to enter the split flow offset directly. The field label changes from Leak Limit to Offset. Program Mode Configuring the injector for the Program mode, displays the following. 6-13 Using the Tools Menu Oventrack Mode Configuring the injector for Oventrack mode, means that the injector set point equals the oven set point plus 5 and the Column Length and Split Mode fields are not used. Also on the Active Method screen, the Program button next to the temperature field is deactivated as shown below. When using a mass spectrometer, select the Vacuum Compensation checkbox. 6-14 Clarus 600/680 GC User’s Guide Packed Injector 1. This example, shows that Pkd (a packed column injector) is selected as the Type on the Configuration screen. 2. Make your settings then touch the OK button. Then touch the Close button to exit configuration. POC- Programmable On Column Injector 1. This example, shows that POCO (a programmable on column injector) is selected as the Type on the Configuration screen. 6-15 Using the Tools Menu 2. Make your settings then touch the OK button. Then touch the Close button to exit configuration. Capillary – Split/Splitless Injector 1. This example, shows that Cap (a Capillary Split/Splitless injector) is selected as the Type on the Configuration screen. 2. Make your settings then touch the OK button. Then touch the Close button to exit configuration. 6-16 Clarus 600/680 GC User’s Guide GSV – Gas Valve 1. This example, shows that GSV (a gas sampling valve) is selected as the Type on the Configuration screen. 2. Make your settings then touch the OK button. Then touch the Close button to exit configuration. 6-17 Using the Tools Menu Oven Use the oven configuration screen to set up oven parameters. This example shows a temperature limit of 300 °C and an Equilibration rate of 1.0 mL/min. Calibration When the Calibration Offset field is selected it turns black. The default value is 0. The Offset range is -10 to + 10 C. Enter the Offset temperature and allow the oven temperature to equilibrate for at least 30 minutes. The displayed temperature will approach 100.00 °C, or the oven temperature you entered, and the thermometer readout will approach a value close to 100.00 °C. Coolant If you have an optional coolant select the type installed, its target temperature and a timeout time. 6-18 Clarus 600/680 GC User’s Guide Soft Cooling Soft-cooling is a technique whereby, the cooling rate of the GC oven is initially limited by throttling the intake of the ambient (cold) air used to cool the oven. This is done by limiting the rate of cooling. Press the Soft Cooling button to display the Soft Cooling screen. Enable Soft-Cooling Selecting this check-box allows you to enable or disable the Soft-Cooling function. Checking or un-checking this check-box will not lose the previous settings. Rate This user-entered value limits the cool-down rate. Note that this is not a negative temperature program rate but just a means of ensuring that the rate does not exceed the entered value once cooling is initiated. Limit This user- entered value sets the range over which the soft-cooling is applied. Once the oven temperature cools to this value, normal (fast) cooling is applied. 6-19 Using the Tools Menu Detectors FID FID Disabled When you touch the OK button, the system launches a status query to the PPC connect module to ascertain whether a PPC flow module has been assigned to the FID. If no flow module has been assigned, a dialog box appears. If No is selected, the dialog box closes. If Yes is selected, the Define Gas Sources screen appears and you configure an available flow module. In this example you will define a detector. 6-20 Clarus 600/680 GC User’s Guide When the PPC gas source is defined, touch the OK button to validate the settings and the FID detector configuration screen appears. Touch the OK button to close this screen then touch the pneumatics button 6-21 Using the Tools Menu Touch the PPC Connect button, touch OK to clear the caution screen, then touch the button for the PPC device you want to connect. In this example the FID. Select the Det Flow or None for Air and Hydrogen and touch OK. 6-22 Clarus 600/680 GC User’s Guide The following series of screens show the configuration screen for each detector. TCD ECD 6-23 Using the Tools Menu PID NPD 6-24 Clarus 600/680 GC User’s Guide FPD Output Configured 6-25 Using the Tools Menu External Configuration If an external amplifier is installed a screen similar to the following appears: Run/AutoSampler 6-26 Clarus 600/680 GC User’s Guide Pre-wash is number of times the syringe is filled with the sample and emptied to a waste vial before a sample is acquired for injection. The default is 2. Permissible entries are 0 to 15. Pump is the number of times the syringe is filled with the sample before it is acquired for injection. The default is 6. Permissible entries are 0 to 15. Post-inject is the number of times the syringe if filled with solvent and emptied to waste after sample injection. The first half of these washes is taken from solvent vial 1 or 3. The second half from solvent vial 2 or 4.The default is 2. Permissible entries are 0 to 15. Injection Mode Fast – 30 milliseconds. Not available when a 50.0 syringe is installed. Normal injection takes about 1 second. Slow takes about 7.5 second. Auto resume provides option for autosamplers program to automatically resume where it left off should a power failure occur. Autos resume should not be used if you have FID or FPD configured with PPC since flame is extinguished during a power failure. 6-27 Using the Tools Menu Setup The Key Clicks check box is selected by default. The Enable Password check box is deselected by default. If the check box is enabled, the default password is “Clarus.” Touch the Set button to display the password dialog box. 6-28 Clarus 600/680 GC User’s Guide Touch the New field. The alphanumeric keypad appears for you to enter the password. Passwords are limited to eight characters and are case sensitive. Enter the password and touch OK, or touch the x (close symbol) or Cancel to close the keypad and continue setup. Language drop-down menu. Touch the language option. The list box closes and the selected language is immediately displayed throughout the application. Brightness field. The field is selected. 6-29 Using the Tools Menu Use the up and down arrow or keypad buttons to increment the brightness values up or down. The settings take effect immediately. Date/Time Set 1. Touch the Date/Time button to display the Time and Date screen. 2. To set the Date and Time, highlight the field, then use the up and down arrow or keypad buttons to enter the values. 6-30 Clarus 600/680 GC User’s Guide Startup 1. Touch the Startup button to display the Startup screen. 2. Select the Method field, then using the arrow button desired method. select your 3. To set the Date and Time, highlight the field, then use the up and down arrow or keypad buttons to enter the values. 4. Select whether you want these start-up settings to Repeat Once or Always. 6-31 Using the Tools Menu Sleep 1. Touch the Sleep button to display the Sleep screen. 2. Select the Method field then using the arrow button desired method. This now enables the displayed fields for edit. select your Value range is 6-999. 3. Select the After field then set the time after which sleep will by using the up and down arrow or keypad buttons. 6-32 Clarus 600/680 GC User’s Guide Pneumatics The parameter tables show the connection between the values shown on the screen and the underlying parameter interface that communicates to the GC. The dependency column summarizes major issues such as if a parameter is not available or hidden when PPC is not fitted. To access the PPC Settings, press the pneumatics icon button on the Configuration screen. The pneumatic configuration screen appears and displays a number of buttons to represent different types of settings. 6-33 Using the Tools Menu PPC Configure ] 6-34 Clarus 600/680 GC User’s Guide Connecting the PPC Modules The Clarus GC PPC modules have been properly installed and configured at the factory for your specific combination of injectors and detectors. The configuration information is stored in a reserved area of the battery-backed memory; however, if the memory lost the PPC module connect configuration or if you installed a new PPC module by purchasing an add-on kit, you must follow the procedure(s) listed in this section. By connecting a PCC module, you actually set the Clarus GC controlling software to recognize a specific PPC module that is installed at a specific location. This is necessary so that the software can control the installed hardware. The PPC board has 12 sockets to which various injector and detector modules are connected. The socket locations and descriptions are listed in the following table and shown in the following figure: Table 6-1. Injector and Detector Socket Descriptions Injector 1 1 (J10) Detector 1 Air or TCD Ref 3 (J12) Detector 2 Air or TCD Ref Injector 2 Injectors (Carriers) 2 (J11) Detector 1 HYD or Make Up Detector 1 4 (J13) Detector 2 HYD or Make Up 5 (J14) 6 (J15) 7 (J16) 8 (J17) 9 (J18) 10 (J19) 11 (J20) 12 (J21) Detector 2 Aux Split Vent for CAP & PSS injectors or Pressure Readout for PKD & POC injectors 6-35 Using the Tools Menu A flow or pressure module can be connected to positions 1 – 8. Split vent modules or pressure modules can only connect to positions 9 – 12. The PPC modules for injectors 1 and 2 carrier gas connections are connected to sockets 1 (J10) and 2 (J11), respectively, on the PPC board. The PPC modules for the split/splitless capillary (Cap) injector or PSS injector split vent connections that correspond to injectors 1 and 2, or the pressure readout that corresponds to a packed column injector (Pkd) or POC injector installed in socket 1 and 2 are connected to sockets 11 (J20) and 12 (J21), respectively, on the PPC board. The PPC modules for detectors 1 and 2 are connected to sockets 3 (J12) through 6 (J15) on the board. Detector 1 uses sockets 3 and 4. 6-36 Clarus 600/680 GC User’s Guide PPC Control Board PPC Control Board J10 J11 J12 J13 J14 J15 J16 J17 J18 J19 J20 J21 (Note: Disconnect the grounding wire inside panel to remove this right-side panel.) Phillips Screws (3) Right-Side Panel Figure 6-1 The PPC board installed in the Clarus GC. Your Clarus GC has been properly configured (connected) at the factory. However, you can check the configuration to become familiar with the procedure in the event that you need to reconfigure (reconnect). 6-37 Using the Tools Menu For example, if a capillary injector is installed (split/splitless (CAP) or programmed split/splitless (PSS)), then Split is configured to notify the Clarus GC software that a capillary PPC module is installed. If a packed injector (Pkd) or programmed on-column (POC) injector is installed, Flow is configured to notify the software that a PPC flow module is installed. PPC Connect Press the PPC Connect button. The following message appears to caution users that modifying the settings can have a negative impact on the operation of the PPC system. Press OK and the main Connect PPC Devices screen appears. 6-38 Clarus 600/680 GC User’s Guide The screen includes icon buttons to identify the logical PPC devices. The displayed carrier icons are taken from the currently configured injector for the corresponding channel. The detector icons are taken from the currently configured detectors. In the above screen Carrier A and B buttons show the PSS injector icon and the packed column injector icon respectively. Also, the Detector A and B buttons show PID and ECD icons respectively. Touching a Carrier, Detector, or Aux icon button displays a dialog that allows this device to be defined. 6-39 Using the Tools Menu Touching the Carrier A icon displays the following dialog box: Since the PPC has yet to be configured the primary module is undefined and the secondary module entry is disabled. 6-40 Clarus 600/680 GC User’s Guide The primary entry is expected to be the module function. The following screen shows the full potential range available for the primary module function. The available range of functions is calculated by combining the set of potential functions from each of the uncommitted positions with the valid set of functions for this logical position. This is explained in more detail in a later section. For a Carrier a Detector flow module is invalid and is not offered. Note that at this point the only available position for the primary module is 0, the undefined state. Once a function is selected for the primary module, in this case Carrier flow, the position list is updated to offer only those positions consistent with choice and not already assigned to another logical position. In this case only position 1 is valid and the screen appears as shown below. 6-41 Using the Tools Menu The secondary module is now enabled. This will only be the case if the primary module is set to Carrier Flow or Split Control. The following screen shows that the second module can be configured as either Pressure readout or Split control under these conditions. 6-42 Clarus 600/680 GC User’s Guide In this case the secondary module is left unconfigured (None). Touch OK to close the dialog box and implement the settings. Touch the Carrier B button on the Connect PPC Device screen to display the associated settings. . Select Split Ctrl (control). The secondary module for Carrier B is now enabled but inspection shows that there are no suitable modules available for assignment. 6-43 Using the Tools Menu Press OK to close the dialog box and implement the changes. The Connect PPC Device screen appears. Dialog: Define Detector If Detector A is selected on the Connect PPC Device the dialog shown below pops up. Since the PPC has yet to be configured the primary module is undefined and the secondary module entry is disabled. 6-44 Clarus 600/680 GC User’s Guide Note that the dialog title bar contains the detector name and that the primary and secondary function boxes are now labeled with the default gases for this type of detector. For a detector that only requires a single gas – ECD, PID, and External - the secondary module line is hidden. The only valid option for a detector is a Detector flow module. The following screen shows that once Detector flow has been selected the position combo box is recalculated and offers positions 3 and 4. Once Position 3 is assigned to the primary module, however, this location is no longer available for use with the secondary module. Press OK to implement the changes and return to the connect screen. In the example shown in the following screen, press Detector B and connect Detector flow modules for the TCD module. Note the changes to the window title bar and the labels on the left hand combo boxes. 6-45 Using the Tools Menu Press OK to apply these changes. Define Aux Touch Aux 1 to display the dialog box. In the example shown, in the following screen capture on the left, since all of the available modules have been assigned no options are available. If Aux 1 is pressed before setting up the carriers and detectors, a more complete list is offered as shown in the screen on the right. 6-46 Clarus 600/680 GC User’s Guide For each function, position pair the same basic calculation is used to identify what modules are available and what locations are available once the module type has been selected. To identify the types of module available, first identify the set of available locations that contain one of the acceptable set of modules for this logical position. For a carrier this means scanning through all of the locations looking for ones that the hardware test has shown to contain CARR or PRES modules and that have not been assigned to another logical location. 6-47 Using the Tools Menu Reference Settings Relays The Relay settings are accessed from the Tools Menu System option screen. Use the drop down screen to set the type of valve. 6-48 Clarus 600/680 GC User’s Guide Zeroing and Calibrating the PPC Modules The Clarus GC gas modules have been calibrated at the factory and are ready to use. For good laboratory practices and your own internal validation protocol, you may wish to recalibrate at installation with your own flow measuring device. All carrier gas modules have been calibrated at the factory with helium. If you are using a different gas, you must enter the appropriate gas and recalibrate. Detector gas modules must be recalibrated if you are using a different gas in your laboratory. In the factory, the TCD reference gas and the PID make-up gas have been calibrated with helium and the ECD make-up gas with nitrogen. Zeroing and calibrating PPC modules consists of the following steps: • Zeroing the PPC gas modules (Gas turned off) • Setting the reference temperature and pressure • Calibrating the PPC carrier gas modules and/or PPC detector gas modules (Gas turned on) The calibration information is stored in a reserved area of the battery-backed memory. Zeroing the PPC Gas Modules Before zeroing the PPC gas modules: • Make sure that the Clarus GC has been properly installed and all gases are connected. • Turn on the Clarus GC power and allow the GC to warm up for approximately 15 minutes before calibrating any gas. 6-49 Using the Tools Menu Table 6-2. Injector/Detector and Corresponding PPC Module Gas Function Injector/Detector PPC Module Gas Function Packed Column and POC Injector Capillary and PSS Injector FID, NPD, FPD ECD TCD PID Carrier Gas Carrier Gas and split flow Both air and hydrogen gases Makeup Gas Reference Gas Makeup Gas • Make sure that the gas supply to the Clarus GC is turned off at this time. • Ensure that the pressure in the lines has completely bled down by loosening the restrictor on the rear of the PPC module that you are calibrating (see the following) with a 1/2-inch socket wrench or open-end wrench. Refer to above table for a listing of the injectors and detectors with the corresponding PPC gas module functions. Restrictor PPC Modules Chimney vent Figure 6-2. Location of a restrictor on the PPC module. 6-50 Clarus 600/680 GC User’s Guide To zero the carrier and detector gases: 1. From the PPC screen touch the PPC Configure button. To proceed, touch OK on the Caution message. 2. Select the channel you need (in this example Channel A tab is selected). Touch the Zero button. Select any of the other tabs to Zero another Channel, carrier gas, detector or Aux. 6-51 Using the Tools Menu CAUTION If the value shown on the top line of the display is outside the range of ±3 psi, first verify that the supply gas pressure has bled to 0. If the supply gas pressure has bled to 0 and the value is still outside the range of ±3 psi, contact your local PerkinElmer Service Engineer. CAUTION The module identifier 1A is defined as follows: The number (1 – 12) indicates the specific PPC module. The letter A or B indicates the pressure transducer within that module. The flow controller has two pressure transducers per module, whereas the other modules only have one. In the carrier flow module, pressure transducer A reads the differential pressure across the flow-measuring device (restrictor) and transducer B reads the input line pressure. 3. Retighten all septum caps and restrictors on the rear of the instrument. 4. Turn on the gases connected to the Clarus GC. 6-52 Clarus 600/680 GC User’s Guide CAUTION Turn on the carrier gas and allow at least one minute for the line pressure to stabilize and purge the lines before selecting Calibrate from the display. Setting the Reference Temperature and Pressure The reference temperature and pressure values are set at the factory. We recommend leaving these parameters set to the factory (default) values (Temp = 25 °C and Press = 14.7 psi). If you wish to use your own flow measuring device and know the temperature and pressure at which your flow-measuring device was calibrated, then enter the values as described in this procedure. To set the reference temperature and pressure: 1. From the Configuration PPC screen touch the Reference Settings button. Touch OK on the Caution message. 6-53 Using the Tools Menu 2. In PPC Reference Conditions screen add the reference temperature and pressure using the plus minus buttons. Touch OK when completed. Calibrating the Carrier Gas Modules CAUTION If you are performing this calibration procedure and you do not have a column connected to the detector, you must plug the detector fitting in the oven with an Swagelok 1/8-inch cap before proceeding. This will ensure that all the gas flows up through the detector and not into the oven. If you are using a packed injector or programmed on-column injector, you can disconnect the column and measure the flow at the exit of the injector. If you are using a capillary injector or programmed split/splitless injector, you must remove the column. Cap the injector exit in the oven and measure flows at the split vent exit. To cap the injector exit in the oven, locate the Capillary Column Shipping Kit (P/N N6100160) and insert the solid ferrule (P/N 09920511) into the 1/16-inch nut (P/N 09903392) and connect the nut to the exit of the injector. 6-54 Clarus 600/680 GC User’s Guide CAUTION To obtain the correct results, before you begin to calibrate you must first Zero the Gas Modules. 1. From the PPC screen touch the PPC Configure button. Touch OK on the Caution message. 2. Select the channel you need (in this example Channel A tab is selected). Touch the Calibrate button. Select OK. 6-55 Using the Tools Menu 3. In the Calibrate screen use drop down menu to select the proper carrier gas and use the plus minus buttons to input the other values needed. In this example, the injector is a capillary split/splitless and the restrictor installed is a number 6. The restrictor/frit number has been entered in the software at the factory. Do not change this number unless you have replaced the restrictor with a different one. The number is stamped into the restrictor. CAUTION CAUTION 6-56 If you are performing this calibration procedure and you do not have a column connected to the detector, you must plug the detector fitting in the oven with an Swagelok 1/8-inch cap before proceeding. This will ensure that all the gas flows up through the detector and not into the oven. All carrier gas modules are calibrated with helium gas at the factory. If you are using a gas other than helium, you must select the correct gas for your application. We also recommend recalibrating the carrier gas module. Clarus 600/680 GC User’s Guide The Set value displayed on the screen is 60% of the flow range available at the current gas supply pressure. The value displayed is from a lookup table based on the restrictor installed, the type of carrier gas, the ambient temperature, and the gas supply pressure. The measured flow will be different from this value. The Actual measured flow should be within ±20% of the setpoint value without calibration. If the inlet gas pressure from the tank is less than 60 psig or if the restrictor installed is not the same as the restrictor number entered, then the actual measured flow will not match ±20% of the setpoint value. This indicates that there is a problem. The number displayed next to Hi on the screen is the value that the software interprets as the actual flow. This number will always equal the setpoint if control is possible. If you set the flow higher than what is possible for a particular restrictor/frit, then the numbers will not agree. 4. Touch OK to complete. Calibrating the Detector Gas Modules CAUTION CAUTION Before you begin to calibrate, you must first Zero the Gas. This calibration procedure is specific to the gas used. If you change the gas, you should recalibrate. 6-57 Using the Tools Menu CAUTION The TCD and PID flow module for reference gas is calibrated with helium at the factory. You must recalibrate the TCD and PID flow module if you are using a reference gas other than helium. CAUTION The ECD flow module for make-up gas is calibrated with nitrogen at the factory. You must recalibrate the ECD flow module if you are using a make-up gas other than nitrogen. To calibrate a detector gas module: 1. Ensure that the gases connected to the Clarus GC have been turned on and stabilized for at least 15 minutes before you begin calibration. Ensure that no detector flame is lit before calibrating! 2. To eliminate the column flow from the detector gas calibration, disconnect the column from the detector and cap the detector fitting. This is very important when you are using packed columns at high flow rates. 3. From the PPC screen touch the PPC Configure button. Touch OK on the Caution message. 6-58 Clarus 600/680 GC User’s Guide 4. Select Detector tab. Touch the Calibrate button. Select OK. 5. In the Calibrate screen use drop down menu to select the proper carrier gas and use the plus minus buttons to input the other values needed. Remember only touch the fields that need to be changed. If you do not touch the field the original value will remain and not change. 6. Enter Zero (0) for the detector gas setpoints. If you are using a FID, NPD, or FPD, enter “0” for both air and hydrogen detector gas setpoint. 7. When you have added all the appropriate values touch OK. If you have an ionization detector (for example, FID, NPD, or FPD), you must repeat this process for the hydrogen gas also. The other detector types that have only one detector gas (for example, TCD, ECD, and PID) will be complete at this Time. 6-59 Using the Tools Menu Calibrating the Oven Temperature The Clarus GC oven temperature is controlled by a sophisticated software routine that permits adjustment of the actual oven temperature inside the oven up or down within a ±10 °C window. This calibration utility is intended for applications which require precisely matching oven temperatures across several Clarus GCs, such as the determination of retention indices. The calibration information is stored in a reserved area of the battery-backed memory. Required Equipment: A calibrated precision platinum resistance thermometer with 0.01 °C readout and a probe capable of insertion into the GC oven. The following steps summarize how to calibrate the oven temperature: 1. Calibrate the reference thermometer 2. Place the thermometer probe in the oven 3. Equilibrate the oven temperature 4. Enter the required offset value 5. Remove the thermometer probe Calibrate the Reference Thermometer Calibrate your reference thermometer according to its instructions. If the thermometer has been calibrated by an outside service, there is no reason to recalibrate it yourself. 6-60 Clarus 600/680 GC User’s Guide Place the Thermometer Probe in the Oven CAUTION The thermometer probe must be placed as close as possible to the same position in each GC oven to be calibrated. Access to the oven is provided on the left-side oven wall. 1. Turn off the power and allow the oven to cool. 2. Remove the left-side instrument cover. Note the location of three approximately 1-inch diameter holes that correspond to the holes on the left side of the oven. One or more of these holes may be occupied by gas sampling valves. Figure 6-5 Left panel removed to reveal left side of the oven exterior. 3. Insert the temperature probe through the exposed white insulation covering one of the holes so that the probe tip is positioned in the center of the oven cavity. 6-61 Using the Tools Menu Note which hole you used and measure the length of the probe that protrudes into the oven. Use the same position for subsequent oven calibrations. Figure 6-6 Holes on the left side of the oven exterior. Equilibrate the Oven Temperature 1. Close the oven door, then turn the GC and thermometer on. From the System Status screen press the oven button. 6-62 Clarus 600/680 GC User’s Guide 2. Touch the Tools button and select Configuration in the drop down menu. 3. Press on the Oven button on the Configuration screen. 6-63 Using the Tools Menu 4. From the window, shown below, set the oven temperature of 100 °C or use another temperature if desired by using the plus and minus buttons. 5. Single Point is the default setting. When the Single Point Calibration radio button is selected, the Offset field is active and the GC Tune drop 6-64 Clarus 600/680 GC User’s Guide down field is inactive. (GC Tune is only available if it is downloaded. A successful tune must be performed in order for GC tune to be enabled. Only those channels for which a valid tune exists will be available on the drop down list. The selection will be made from the external GC Tune software, but the user may override this.) The actual temperature under the single point radio button is the timeaveraged actual oven temperature. 6. Allow the oven temperature to equilibrate for at least 30 minutes by setting the time in the Equilibrate field. Press OK. The displayed temperature will approach 100.00 °C (or the oven temperature you entered in step 4), and the thermometer readout will approach a value close to 100.00 °C. Enter the Required Offset Value 1. After the temperature has stabilized, subtract the thermometer reading from the actual oven temperature shown on the previous screen. 2. Using the plus and minus keys enter a value into the above screen, then press OK. For example, if the thermometer reads 101.55 °C, and the oven temperature reads 100.10 °C, type a value of -1.45 °C. Remove the Thermometer Probe After temperature calibration is satisfactory: 1. Open the oven door and allow the oven to cool until the fan stops. 2. Remove the temperature probe. 3. Fill in any hole left by the probe in the oven insulation. 4. Replace the left-side instrument cover. 6-65 Using the Tools Menu Utilities 1. To reach the Utilities screen of the Tools Menu go to the System Status screen and select Utilities from the tools menu. 2. Touch the following icon on the Utilities screen to access the Column Flow Calculator, the Column Length Calculator, the Background Compensation, Stopwatch, or Program (Max Oven Program Rates). 6-66 Clarus 600/680 GC User’s Guide Column Flow Calculator The capillary column gas flow rate “calculator” allows you to automatically calculate the correct gas flow rate. 1. Touch the Column Flow Calc icon button . 2. The following screen appears. 6-67 Using the Tools Menu 3. Input the column length, column diameter, column temperature, carrier gas name, and outlet pressure. 4. One of the following is selected: Inlet Pressure, Flow Rate, and Velocity/t0. A value is entered into the selected field and results are calculated and inserted into the two unselected fields. For example, the example in the above screen will allow you to enter an inlet pressure and calculate the flow rate and velocity from this and the other entries. Use the up and down arrow or keypad buttons to add the flow rates. 5. Press the Split button and the next screen appears. This screen allows you to calculate the split flow settings may. The Close button on this second screen brings you back to the above screen. 6-68 Clarus 600/680 GC User’s Guide Column Flow Calc Main Screen Length This field is normally entered in meters (1 to 1000 in 1m increments). The calculator should also support techniques such as PreVent and heart-cutting etc. and so shorter columns/tubes should be supported. If the value scrolls below 1m, then the units should change to mm (1 to 1000 in 1mm increments). The default value will be 30m. For the calculation this value should be converted to cm. Diameter Column diameter should be entered in µm (1 to 1000µm in 1µm increments). The default will be 320µm. Value converted to cm for calculations. Temp Normal GC oven temperature range in °C (-99 to 450°C in 1°C increments). The default will be 50°C. Value converted to °K for calculations. 6-69 Using the Tools Menu Name The name of the carrier gas is selected in order to apply the correct viscosity coefficients and suggested column carrier gas velocities as shown in the Table. Gas Screen Name Helium He 0.000018662 0.646 Suggested Velocity, cm/s 20 to 40 Hydrogen H2 0.000008399 0.725 30 to 55 Nitrogen N2 0.000016736 0.680 8 to 16 η ref ,Pa.s x The default will be “He”. Outlet Press The column outlet pressure is set to Ambient or Vacuum (0) or to a user entered Other value. Units will be in absolute units (psi abs or kPa abs) and will be set according to the units chosen in the Configuration screens for the rest of the user interaction. The range for this field will be 0 to 100 psi abs in 0.1psi increments or 0 to 689 kPa abs in 1kPa increments. The default will be Ambient (14.7psi abs or 101kPa abs). Suggested Velocity A display-only field that shows the recommended carrier gas velocity range from the selected carrier gas name. Inlet Press This is a selectable field (this is the default selection) and, if selected, the Flow and Velocity/t0 fields are deselected and are display only. The carrier gas input pressure is in units of psig (1 to 100psig in 0.1psi increments) or kPa (1to 689kPa in 1kPa increments). The default is 5.0psig or 34kPa. Flow Rate This is a selectable field and, if selected, the Inlet Press and Velocity/t0 fields are deselected and are display only. 6-70 Clarus 600/680 GC User’s Guide The carrier gas flow rate is in units of mL/min (1 to 100mL/min in 0.1mL/min increments). There is no default as this field will be already filled by a previous calculation result. Velocity This is a selectable field and, if selected, the t0 field is also enabled for input. The Inlet Press and Flow fields are deselected and are display only. The carrier gas velocity is in units of cm/s (1 to 500cm/s in 0.1 cm/s increments). There is no default as this field will be already filled by a previous calculation result. Split Flow Calculations Screen Column flow rate This field will take its initial value from the Main Screen Flow field. The same range and units will apply. If the value is changed in this field, the entry in the Main Screen will also be updated and the input pressure, velocity and t0 will be recalculated. Split flow rate This field will use mL/min units (0 to 500mL/min range in 1ml/min increments). The default will be 50mL/min. Column i.d. This field will take its initial value from the Main Screen Diameter field. The same range and units will apply. If the value is changed in this field, the entry in the Main Screen will also be updated and the active input pressure, flow or velocity and t0 will be recalculated. Liner i.d. This is the internal diameter of the injector liner. The input range will be 0.1 to 6.0mm in 0.1mm increments. 6-71 Using the Tools Menu Split flow ratio Value displayed to nearest integer. Dimensionless units. Split velocity ratio Note that the split dynamics occur at an elevated pressure, pI and elevated temperature (injector temperature). The flow rates, Fa and Fs are at ambient pressure and temperature. The same factors would be applied to each to convert these flows to the true values inside the injector and so they would be cancelled out in this equation. 6-72 Clarus 600/680 GC User’s Guide Column Length Calculator 1. The Column Length Calculator displays the correct Length of tubing that should be inserted into an injector or detector as measured from the back of the nut. Touch the Column Length Calc icon button 2. The following screen appears. 6-73 Using the Tools Menu Background Compensation Background compensation is a routine that automatically subtracts a stored baseline profile from the signal generated during a GC run. 1. Touch the Background Compensation icon button . 2. The following screen appears. Background compensation is a routine that automatically subtracts a stored baseline profile from the signal generated during a GC run. The Background/Bakeout tool is always enabled. Detector A and Detector B need to be labeled with the installed detector names. The Calibration checkboxes are enabled if a detector is installed in that position. 6-74 Clarus 600/680 GC User’s Guide Type, Method, and Start are always enabled, so that a bakeout can be performed with a mass spec or other system with zero detectors. Before background compensation can be applied to a detector output signal, the baseline profile must be calibrated. The background function controls both calibration and compensation. Calibration involves running a blank using the temperature program. Once run, the background profile is stored. This profile is overwritten if calibration is rerun, thus only the most recent profile is used for compensation. One background profile is stored for each detector. Calibration and compensation can be applied independently to each detector output signal. Note: Calibration run time must be greater than 2 minutes. Calibration Menu Options Once – The background profile will be calibrated once and stored. This profile is applied automatically to all manual or autosampler runs when you subsequently turn the background compensation On. Multi – The system runs the calibration method over and over again until you turn off calibration in the Calibration Menu. You may wish to use this option, for example, to condition a column overnight. Off – Select this option to turn calibration off. 6-75 Using the Tools Menu Stopwatch The Stopwatch computes the flow rate that corresponds to the entered volume flowing during the timed interval. The start button resets the timer to zero and starts timing. While timing, the start button caption changes to Stop. 3. Touch the Stopwatch icon button 4. The following screen appears. 6-76 . Clarus 600/680 GC User’s Guide Program (Max Oven Program Rates) 1. Touch the Program icon button . 2. The following screen appears. 6-77 Using the Tools Menu Release… To access Release, from the System Status screen, touch Tools menu and press the Release. The following screen will appear select either Yes or No. If you select Yes the instrument will be released from its external control. If you select No the screen will close. 6-78 Clarus 600/680 GC User’s Guide Logout… To access Logout, from the System Status screen, touch Tools menu and press the Logout. Touching Logout displays the splash screen for the Clarus 600 or Clarus 680. 6-79 Using the Tools Menu About Touch About to display version information. To access About, from the System Status screen, touch Tools menu and then touch About. 6-80 Setting up a Typical Analysis 7 Setting up a Typical Analysis 7-2 Clarus 600/680 GC User’s Guide This chapter gives you a brief overview on how to run a typical analysis on your Clarus GC. For more detailed information on the different screens and parameters discussed in this chapter see the earlier chapters in this guide on the Active Method, Method Editor and Tools Menu. The Clarus GC can have many configurations. For the purpose of this chapter we are assuming the following configuration: • Injector B is packed (Pkd) • Injector A is programmed split/splitless capillary injector (PSS) • One detector is a thermal conductivity detector (TCD) • The other detector is a flame ionization detector (FID) • An autosampler is used 7-3 Setting up a Typical Analysis System Status Screen Everything starts from the system status screen. 1. Touch the Oven button to display the oven information. 2. The oven information is now visible. To program the oven temperatures touch the temperature field and it will turn black (highlighted). Then use the up and down arrow or keypad buttons to set to the required temperature for your application. Repeat the same procedure for the time and rate. As shown in the example below this analysis has been set to have an initial temperature of 75 ºC and it is held at this temperature for 1 minute then goes up 10 degrees/minute. 7-4 Clarus 600/680 GC User’s Guide 7-5 Setting up a Typical Analysis Injector Settings Packed Column (PKD) Injector 1. After entering the oven settings, touch Injector B then touch the Temp field. (the Pkd tab) and The field is highlighted to indicate that it is selected. Use the up and down arrow or keypad buttons to enter the proper initial temperature for your application. 2. Next, set the carrier gas by touching the Program button to display the Carrier Pressure Program screen. 7-6 Clarus 600/680 GC User’s Guide 3. Touch the Initial psi field to select it. Next use the up and down arrow or keypad buttons to enter the proper carrier gas pressure for your application. 4. When done touch the Close button and the following screen appears: 7-7 Setting up a Typical Analysis Programmed Split/Splitless (PSS) Injector 1. To select Injector A touch the PSS button icon in the active method screen or the on the System Status screen. Once you touch the button the following screen appears. 7-8 Clarus 600/680 GC User’s Guide 3. Touch the Temperature Program button (to the right of the temperature field. This displays the Injector Temperature Program screen. Here you can set an injector temperature program for your analysis. The following example shows an analysis that uses the same injector temperature (250 °C) throughout the analysis. 4. When done touch the Close button. 5. Touch the Carrier Gas Program button. This displays the Carrier Pressure Program screen. 7-9 Setting up a Typical Analysis 6. Select the Initial psi field. Use the up and down arrow or keypad buttons to set the carrier gas pressure to the required pressure for your application. 7. Repeat the same procedure for the time and rate. As shown in the example, this analysis has been set to have an initial temperature of 255 ºC and it is held at this temperature for 60 minutes then going up 2 degrees. 8. Touch Close when you have entered all the parameters. 7-10 Clarus 600/680 GC User’s Guide Detector Settings Flame Ionization Detector (FID) 1. Touch the FID button on the Status Screen. 2. To program the temperature in the FID tab touch the Temperature field and it will turn black. Then use the up and down arrow or keypad buttons to set to the required temperature for your application. 3. Set the Atten (attenuation) and Range by touching the arrow button and selecting a value from the drop-down list as shown in the example below. This example also shows that the Heater is off. 4. If you require the heater on for your analysis just touch the Heater button and it will toggle to heater on. 7-11 Setting up a Typical Analysis 5. To autozero the detector baseline touch the AutoZero field for the check off to appear (in this example AutoZero is used). 6. The Gas flows, Output, Offset, Filter, and Flameout are shown above as reference fields and they cannot be changed in this screen. 7. If the Gas flows, Output, Offset, Filter, and Flameout have to be changed touch the Tools button and then touch Configuration on the displayed menu. 7-12 Clarus 600/680 GC User’s Guide The Configuration screen appears: 8. As shown in the screens below the Configuration screen allows you to modify the Filter, Flameout, Gas Flows and Output fields as your application requires. Once you have modified the Configuration screen touch OK and the new values will now be visible on the FID screen. 7-13 Setting up a Typical Analysis 8. If timed events have to be added or modified in the Active Method touch the Events tab to get to this screen. The Events tab accesses the timed events table and buttons, valves, and Aux gas controls. Timed events may be added and removed while the GC is running. 7-14 Clarus 600/680 GC User’s Guide 9. Touch the Add button to add a timed event to the run. In the Event field select the type of event from the drop down menu. Use the up down arrows to input the amount of time for this event in the time field. In the value field use the drop down menu to insert the correct value. When completed touch OK to return to the Event tab. Repeat this procedure until you have added all the timed events for your procedure. 10. Once all the fields have been set as required by your application, touch the ignite button on the FID tab screen to ignite the FID. 7-15 Setting up a Typical Analysis Detector Thermal Conductivity Detector (TCD) 1. Touch the TCD button on the Status Screen to display the TCD tab. 2. To program the temperature in the TCD tab touch the Temperature field and it will go black. Then use the up and down arrow or keypad buttons to get to the required temperature for your application. 3. Repeat the same procedure for the Attn (attenuation) and Current. As shown in the example below, this analysis has the heater off. 7-16 Clarus 600/680 GC User’s Guide 4. If you require the heater on for your analysis just touch the Heater button and it will toggle to heater on. 5. To have the detector autozero the baseline to a fixed amount touch the AutoZero field for the check off to appear (in this example AutoZero will not be used, it is not checked off). 6. The gas flows, output, offset and filter are shown above as reference fields and they cannot be changed in this screen. 7-17 Setting up a Typical Analysis 7. If the gas flows, output, offset and filter have to be changed touch the Tools button and touch Configuration from the drop down menu. The Configuration screen appears: 7-18 Clarus 600/680 GC User’s Guide 8. Touch the TCD button and as shown in the screens below the Configuration screen will allow you to modify the gas flows, output, offset and filter fields as your application requires. 9. Once you have modified the Configuration screen touch OK and the new values will now be visible on the TCD tab screen. 10. If timed events have to be added or modified in the Active Method touch the Events tab to get to this screen. The Events tab accesses the timed events table and buttons, valves, and Aux gas controls. Timed events may be added and removed while the GC is running. 7-19 Setting up a Typical Analysis 11. Touch the Add button to add a timed event to the run. In the Event field select the type of event from the drop down menu. Use the up down arrows to input the amount of time for this event in the time field. In the value field use the drop down menu to insert the correct value. 12. When completed touch OK to return to the Event tab. Repeat this procedure until you have added all the timed events for your procedure. 7-20 Clarus 600/680 GC User’s Guide 13. Once all the fields have been set as required by your application for the TCD, touch the Clarus GC icon on the screen. 7-21 Setting up a Typical Analysis Autosampler 1. Touch the Run button to display the Autosampler setting screen. 2. The Autsosampler screen allows you to select the method from the drop down window. Once you select the method you want to use for your application, the injection count down will begin. When the count down goes to zero the analysis will begin. If you need to stop the autosampler run touch the Stop button. 7-22 Clarus 600/680 GC User’s Guide 3. If you need to modify the method for running the autosampler or enable the autosampler touch the Tools button and from the drop down menu touch Configuration. 4. Touch the Run button screen displays. on the Configuration screen. The following 7-23 Setting up a Typical Analysis 5. In the Autosampler Configuration screen check off the Enable Autosampler field by touching it. If your application requires Recycling and/or Auto Resume touch the field to check off. Use the drop down window to set the volume and mode type. For the Syringe wash use the plus/minus buttons to modify the fields of Viscosity Control, Solvent Prewash, Pre-Inject, Post-Inject and Pump. 6. After you touch OK on the Autosampler Configuration screen, the main autosampler screen will appear again. Touch Start to begin the run. Touch the Signal icon 7-24 to get to the Signal screen. Clarus 600/680 GC User’s Guide 7. On the Signal screen you will be able to observe the peaks as they are coming out during the analysis. If at any time you need to stop the analysis touch the Stop button. 7-25 Setting up a Typical Analysis 7-26 Index I-2 Clarus 600/680 GC User’s Guide A Abbreviations, screen, 1-6 About This Manual, 1-3 Active Method editing, 3-4 parameters editing, 3-4 Attenuating detector signal, 4-87, 4-90 Auto-ignition, FID, 4-9 Autosampler, 7-22 using with TCD, 3-63, 4-35 vials, waste & wash, 3-62 AutoSystem controlling, 3-3 glossary, 1-8 Aux Zone, 2-31 B Background calibration options multi, 6-75 off, 6-75 once, 6-75 Background compensation overview, 6-75 Background Compensation, 6-74 Balancing TCD bridge current, 4-34 Bridge current range, 4-33 Bridge current vs. range, 4-34 Cmptr, abbreviation, 1-6 Column Flow Calculator, 6-67 Column Length Calculator, 6-73 Configuration, 6-10 Configuring injectors, 6-10 Connect, PPC module socket descriptions, 6-35 Conventions Notes, cautions and warnings, 1-4 text, 1-4 Coolant cut-in temperature setting, 3-8 Ctrl, abbreviation, 1-6 D Deconfiguring injectors, 6-10 Detector attenuating signal to a recorder, 4-87 signal to an integrator, 4-90 autozeroing, 4-93 output rerouting, 4-83 Detector Gas Modules calibrating, 6-57 Detectors, 2-32, 7-11, 7-16 Displaying injector temperature, 3-14 C Calibrating oven temperature, 6-60, 6-65 reference thermometer, 6-60 Calibrating, PPC module carrier gas, 6-54 detector gas, 6-58 CAP, abbreviation, 1-6 Carrier Gas (PPC) velocity, viewing/setting, 3-27 Changing TCD polarity, 4-80 Chromatographic terms, glossary, 1-10 E ECD abbreviation, 1-6 outlet, 4-23 overview, 2-37, 4-20 setting up, 4-22 setting up PPC, 4-25 setup summary, 4-22 Event Log, 6-5 F FID I-3 Index abbreviation, 1-6 auto-ignition, 4-9 overview, 4-5 setting up PPC, 4-6 File Menu, 5-9 Flow Programming, 1-11 Flowmeter attaching to an ECD, 4-24 FPD abbreviation, 1-6 cross-sectional view, 4-56 igniting the flame, 4-69 overview, 4-56 setting up PPC, 4-57 G Gen, abbreviation, 1-6 Ghost Peaks, 1-11 Glossary autosampler terms, 1-7 AutoSystem specific, 1-8 chromatographic terms, 1-10 I Inj/vial, abbreviation, 1-6 Injector temperature displaying, 3-14 setting, 3-14 Injectors, 2-17, 7-6, 7-8 carrier gas program, 2-21 configuration options, 2-19 configuring, 6-10 isothermal program, 2-20 packed, 2-24 program buttons, 2-18 program display text, 2-18 PSS, 2-18 split flow, 2-23 temperature program, 2-19 Inlet temperature program setting up, 3-6 Int, abbreviation, 1-6 Integrator noise, 4-90 Isothermal temperature program setting up, 3-8 K kPa, abbreviation, 1-6 L Labels Warning Signs, 1-5 Logout, 6-79 M Maintenance, 6-6 Method Editor, 6-4 file menu, 5-9 mode, 5-5 overwriting the active method, 5-9 Multiprogram mode, 3-58 Multi-ramp temperature program setting up, 3-11 N Navigation Bar, 2-16 NPD bead activation, 4-48 reactivating a used bead, 4-53 cross-sectional view, 4-44 overview, 4-44 setting up PPC, 4-45 NPD, abbreviation, 1-6 O One-ramp temperature program setting up, 3-10, 3-19 Oven, 2-30, 6-18 calibrating the temperature, 6-65 calibrating the temperature,, 6-60 equilibrate temperature, 6-62 thermometer probe, 6-61 turning on, 4-29, 4-38 Oven Temperature holding, 3-11 I-4 Clarus 600/680 GC User’s Guide Oven temperature program setting up, 3-6 setting up a multi-ramp, 3-11 setting up a one-ramp, 3-10, 3-19 setting up isothermal, 3-8 Overview ECD, 2-37, 4-20 FID, 4-5 FPD, 4-56 NPD, 4-44 PID, 4-36 P PID abbreviation, 1-6 optimizing UV lamp intensity, 4-42 overview, 4-36 setting up, 4-38 setting up PPC, 4-40 setup summary, 4-38 Pkd, abbreviation, 1-6 POC abbreviation, 1-6 PPC abbreviation, 1-6 calibrating carrier gas, 6-54 calibrating detector gas, 6-58 zeroing the module, 6-49 PPC Modules connecting, 6-35 Pre, abbreviation, 1-6 Pressure Programming, 1-11 Pressure Pulse, Splitless Injection, 3-41 Priority sample, inserting, 3-62 Psi, abbreviation, 1-6 psig, abbreviation, 1-6 PSS abbreviation, 1-6 R Reference Pressure setting, 6-53 Reference Temperature setting, 6-53 Release, 6-78 Rerouting detector output, 4-83 S Screen abbreviations, 1-6 Septum Purge Mode (PPC) viewing/setting, 3-29 Setting injector temperature, 3-14 Setting up isothermal temperature program, 3-8 multi-ramp temperature program, 3-11 one-ramp temperature program, 3-10, 319 split mode, 3-41 splitless mode, 3-41 Setup summary ECD, 4-22 FID with PPC, 4-6 FPD with PPC, 4-57 PID, 4-38 TCD, 4-29 Split mode setting up, 3-41 Splitless mode setting up, 3-41 stopwatch, 6-76 Syringe cleaning, 3-60 System Status Screen, 7-4 T TCD abbreviation, 1-6 balancing the bridge, 4-34 polarity changing, 4-80 range vs. bridge current, 4-78 I-5 Index setting up PPC, 4-31 using with autosampler, 3-63, 4-35 Temperature program isothermal setting up, 3-8 setting up a multi-ramp, 3-11 setting up a one-ramp, 3-10, 3-19 Temperature Programming, 1-12 Timed Events, 2-42 Timed Events Table, 2-43 Tools Menu, 6-3 configuration, 6-10 detector gas modules, calibrating, 6-57 event log, 6-5 maintenance, 6-6 method editor, 6-4 oven, 6-18 PPC modules, connecting, 6-35 reference temperature and pressure, setting, 6-53 utilities, 6-66 Touch Screen, 0-3, 2-4 autozero button, 2-12 aux zone button, 2-15 heated zones, 2-13 ignite button, 2-12 injector and detector buttons, 2-13 manual injection, 2-9 oven button, 2-15 run button, 2-8 signal button, 2-11 signal display and scaling, 2-12 signal plot, 2-12 zero display button, 2-13 Typical Analysis autosampler, 7-22 detectors, 7-11, 7-16 injectors, 7-6, 7-8 U Utilities, 6-66 background compensation, 6-74 column flow calculator, 6-67 column length calculator, 6-73 logout, 6-79 release, 6-78 stopwatch, 6-76 UV lamp, PID optimizing intensity, 4-42 Z Zeroing, PPC module, 6-49 I-6 PerkinElmer Life and Analytical Sciences 710 Bridgeport Avenue Shelton, CT 06484-4794, U.S.A. Internet: http://www.perkinelmer.com email: [email protected] PerkinElmer is a registered trademark of PerkinElmer, Inc.