1
PELLET STOVE ARITERM MYSINGE
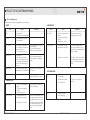
5 Warranty
4.5 Hot air fan
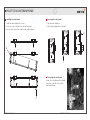
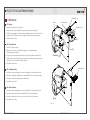
Work is best carried out with both side hatches removed, but they can also be accessed
from one side or the other.
For warranty issues Ariterm Sweden AB refers to our local Distributor.
1. Remove the plug from the wall socket.
2. Open the top and slacken off the two panel screws on the upper edge of the side hatch.
3. Pull the upper section of the hatch straight out and then lift up the panel so that it is free.
4. Disconnect the cables from the fan by pulling the plastic covered flat pin sleeves from
the motor.
5. Remove the screws that hold the fan brackets to the stove body (2 x).
6. Reinstall in reverse order.
4.6 Control circuit board
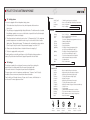
1. Remove the plug from the wall socket.
2. Remove one of the side hatches according to the Hot air fan section.
3. Remove the edge connectors on the long sides of the control circuit board by pulling
them straight out from the circuit board.
4. Disconnect the cable for the control panel located in a connector on one edge of the
control circuit board. Press in the hook on the underside of the connector and pull the
cable straight out to the side.
5. Release the three panel screws on the rear of the stove and remove the control
circuit board.
4.7 Fuses
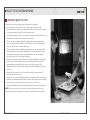
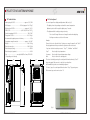
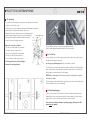
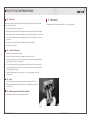
1. There are two fuses on the stove’s input connector. Both are 3.15A slow.
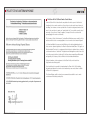
2. When replacing the fuses pull the connector cover straight out to access the
fuses (Fig. 11).
4.8 Overheat protection and safety switches
This work must be carried out by an authorised engineer.
Fig. 11
ARITERM-SP-PX26868-B.1
ARITERM SWEDEN AB
Installation Instructions - 2013.10.10 - 18/20