1
Problem Solving:
1. Leaking:
• If moisture is getting into the indicator,
the first thing is to determine if there is
actually a leak or if it’s just condensation (see under general for an explanation of condensation).
• The indicator should be removed from
the car and the bulbholder taken off.
• To test the indicator for leakage, you
have two options: Either fill it with
water and hold it bulbholder side up to
see if any escapes; or place your lips
over the bulbholder - clean it thoroughly
first – and sealing the holder off with
• Always remember - excessive force
your mouth, blow into the indicator
should not be required. If you’re
applying lots of pressure and nothing’s while checking around the edges where
happening, stop and make sure you’re the lens meets the housing to see if air
pushing in the right direction before you comes out anywhere.
break something!
• If either of the above tests prove
negative, the indicator itself is not faulty,
and the problem is either just condensation or a problem with the seal/o-ring
between the bulbholder and the socket.
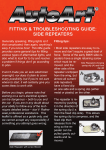
Transferring over an
indicator bulbholder
Indicator bulbholder
with o-ring
• Check the bulbholder and ensure that
it is not damaged in any way, that it fits
into the socket securely (and has been
fitted correctly and turned all the way
until it locks - but don’t overtighten as
damage can result) and that the o-ring/
seal is not damaged or missing.
• Some indicator units have vents on
the back to allow condensation to
evaporate. They often have a Ushaped rubber pipe on them. If they
are present, check that the open end of