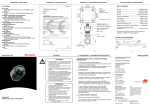
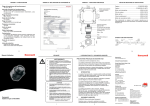
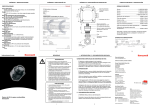
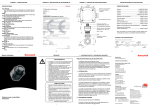
1
4. OPERATIONS 3. SAFETY 4.1 3.1 WARNINGS This apparatus is not suitable for use in oxygen enriched atmospheres (>21%V/V). Oxygen deficient atmospheres (<6%V/V) may suppress the sensor output. Refer to local or national regulations relative to installation at the site. The operator should be fully aware of the action to be taken if the gas concentration exceeds an alarm level. The ECC (electrochemical cell) contains a small quantity of acid. SensePoint should be protected from mechanical impact. Installation should consider not only the best placing for gas detection related to potential leak points, gas characteristics and ventilation, but also where the potential of mechanical damage is minimized or avoided. 3.2 CAUTIONS Exposures to gas above the design range of the sensor may require the sensor to be re-calibrated. The Unit should be fitted to a junction box certified Exd or Exe, and fitted with an approved cable gland and connector block. The sensors should be fitted to a tapped hole within the enclosure and locked in place with a locknut if the parallel thread version is being used. Cabling should be multicore, two wires plus screen, conductor size 2.5mm2 max. Sensors are supplied pre-calibrated. See the technical handbook for details of installation in forced air conditions. RED - SCREEN EARTH BLUE SENSOR SCREEN Fit a flow housing and connect a cylinder of either air, for a zero, or a known concentration of gas (approximately 50% FSD) to the flow housing using nylon or PTFE tubing. Tubing lengths should be kept to a minimum to avoid extending the speed of response. Connect the outlet of the flow housing to a safe exhaust area. Pass the gas through the flow housing at a flow rate of approximately 1 l to 1.5 l per minute. Allow the sensor to stabilise. When gassing with air, adjust the control card to indicate zero. For span, the control card should be adjusted to indicate the concentration of the target gas being applied. Remove the flow housing and the gas supply. SENSOR The unit requires a nominal 18 to 30V, 30mA current‑loop‑powered supply. 4.2 CALIBRATION SensePoint for toxic gas detection is supplied pre‑calibrated, however, for increased accuracy in specific applications, on‑site calibration is recommended. junction box, connectors and glanding. Note: for oxygen, the span gas is normally air at 20.8%V/V O2. The control card should be adjusted to indicate this when the sensor is in either clean ambient air, or in a flow of 20.8%V/V O2 in nitrogen from a cylinder. A zero adjustment is not normally required, however it is recommended that the alarm levels are tested using a cylinder of a lower concentration of oxygen in nitrogen. See Table 1 for details of concentrations and times to be used. If the controller cannot be spanned, consult the technical handbook. Re‑calibration should only be attempted by qualified service personnel. Calibration should only be attempted after the sensor has been installed and powered for a time exceeding the warm up time (Table 1). disposal regulations. Materials Fortron® (PPS-polyphenylene sulphide), PPO (modified polyphenylene oxide). For calibration in high flow applications refer to the technical handbook. 3 4 5 6 4. OPERATIONS 4. OPERATIONS 5. MAINTENANCE 5. MAINTENANCE Table 1: 4.3 Gas Range Recommended Warm Test up Concentration Time H2S 0 to 20 ppm 10 ppm 3mins 3 mins -20°C +50°C H2S 0 to 50 ppm 20 ppm 3mins 3 mins -20°C +50°C H2S 0 to 100 ppm 50 ppm 3mins 3 mins -20°C +50°C CO 50 ppm 3mins 3 mins -20°C +50°C CO 0 to 200 ppm 100 ppm 3mins 3 mins -20°C +50°C CO 0 to 500 ppm 250 ppm 3mins 3 mins -20°C +50°C Cl2 0 to 5 ppm 3 ppm 5mins 10 mins -20°C +50°C Cl2 0 to 15 ppm 10 ppm 5mins 10 mins -20°C +50°C O2 0 to 25% V/V 19% v/v 5mins 1 mins -15°C +40°C 25 ppm 3mins 10 mins -20°C +40°C NH3 0 to 1000 ppm 500 ppm 3mins 10 mins -20°C +40°C H2 0 to 1000 ppm 500 ppm 3mins 3 mins -5°C +40°C H2 0 to 10000 ppm3000 ppm 3mins 3 mins -5°C +40°C NH3 0 to 50 ppm 4-20mA SPARE For oxygen versions, remove the neoprene stopper and snap the RFI screen and internal hydrophobic assembly (supplied separately) into place (page 10). Sensors should be disposed of in accordance 0 to 100 ppm + Installation is to be performed by a qualified installation engineer, with the power to the unit disconnected. Install SensePoint using certified Exe or Exd First zero the control system with no gas present on the sensor. If target gas is suspected to be in the vicinity of SensePoint, flow clean air over the sensor using a flow housing (see below). Wiring connections are:- The apparatus should be installed in a location free from dusts and direct heat sources. as essential safety requirements may be invalidated. 4. OPERATIONS INSTALLATION Do not modify or alter the sensor construction with local used: Sensor: Cell: 4. OPERATIONS Application Operating Temp. Time MIN. MAX. SO2 0 to 15 ppm 10 ppm 3mins 5 mins -15°C +40°C SO2 0 to 50 ppm 20 ppm 3mins 5 mins -15°C +40°C NO 0 to 100 ppm 50 ppm 12hrs 5 mins -5°C +40°C NO2 0 to 10 ppm 5 ppm 1hr -15°C +40°C 7 5 mins FAULT FINDING Sensor reads non‑zero all the time: - Gas could be present, ensure that there is no target gas in the atmosphere. Background or other volatile organic gases, eg. solvents, can interfere with the operation of the sensor. 5.1 Changing electrochemical cell and internal filter 1. Unscrew and remove the grey plastic retainer (or accessory if fitted) from the sensor. 2. Remove the old internal hydrophobic assembly by pushing against the snap fit, through one of the retaining slots, with a small flat bladed screwdriver. The assembly will pop out. Do not attempt to lever the assembly out as this may damage the housing. Sensor reads non‑zero when no gas is present: - adjust the zero on the control card. 11. Replace the grey plastic retainer or accessory. 12. In the event of an apparatus failure, return unit to Honeywell Analytics Ltd. 5.2changing the external filters Remove the grey plastic retainer (or accessory). Remove the old external hydrophobic barrier and replace with the new one. Replace the grey plastic retainer. Sensor reads low when gas is applied: - adjust the span on the control card. - for oxygen versions, check that the neoprene plug has been removed from under the plastic retainer. 3. Remove the internal metal gauze insert. 4. Open the enclosure by unscrewing the sensor cap assembly from the sensor main body, ensuring that the electrochemical cell does not rotate with the cap. Sensor reads high when gas is applied: - adjust the span on the control card. 5a. Toxic Gently pull the old electrochemical cell from the pcb. (Dispose of this in accordance with the local regulations). 5b. Oxygen For oxygen SensePoint, unscrew the old cell connections. Toxic electrochemical cell 6. Remove the new cell from its packaging and remove the shorting link across the base of cell. Sensor cap 7a. Plug the new cell into the pcb. (toxic cell) 7b. Screw in the new cell via the metal tabs. (oxygen cell) RFI screen / metal gauze 8. Screw the sensor cap assembly back onto the sensor main body. 9. Fit the new internal metal gauze assembly. 10. Fit the new internal hydrophobic assembly. Sensor reads zero when gas is applied: - check the wiring. - check the dust protection cap has been removed. - check that the sensor is not obstructed. - replace the sensor if failure is suspected. - for oxygen versions, check that the neoprene plug has been removed from under the plastic retainer. Cannot adjust span or zero at control card: - refer to the technical handbook. 8 Note: The sensor should now be calibrated. See Section 4.2 9 Main body of sensor Internal hydrophobic assembly Oxygen cell External hydrophobic barrier Grey plastic retainer 10