1
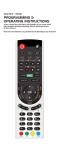
URC6D
PROGRAMMING &
OPERATING INSTRUCTIONS
To have clearer idea of the features and capabilities of your remote control, take a
moment to read these instructions. Please do not discard and save for future
reference.
Please note: Not all functions are guaranteed to work depending on your
brand of TV.
NEW URC6D INSTRUCTIONS2.indd 1
10/01/2012 10:00
INTRODUCTION
The URC6D is already programmed to control various devices in your home.
The remote control is simple to program, easy to use and can operate up to six
electronic devices, which include:
TV TV (including HDTV, Plasma and LCD), TV/DVD Combo, TV/VCR Combo
DVD/VCR DVDs (include DVD player, DVD-R, DVD combo, HDD and DVD Home Cinema) VCR, DVD, DVD/R, HTIB, DVD/VCR
CBL Cable, Cable/PVR/DVR, Video Accessories (Including Media Center PCs)
SAT Satellite, Satellite/PVR/DVR, Video Accessories (Including Media
Center PCs)
CD CD, Home Automation, CD/R (Recorders)
AUDIO Tuner, Amplifier, Misc. Audio, HTIB (Home Theatre In A Box)
URC6D transmits to each of the above electronic devices using an infrared (IR) signal.
Before you use this remote control to operate your devices listed above it must first be
programmed (set up).
Some
of the
specialUP
features and buttons on the remote control are as follows:
BEFORE
SETTING
LEARN
You can copy any of the button functions of the original remote control to this remote
control.
ALL OFF
The remote will transmit to all programmed devices’ [POWER] to turn on/off your
devices.
MACRO BUTTON
You can re-program the MACRO buttons on this remote control to carry out a
sequence of individual commands with only 1 key press.
DEVICE CODE CHECKING
You can use this feature to check the four-digit code for your device if you have
forgotten it.
VOLUME PUNCH THROUGH
Volume control keys include VOL+, VOL-, MUTE keys. You can use these keys direct to
control your VCR, DVD, VCD, CD, AMP etc multi devices through your TV, SAT, CBL
operation state do not switch remote control mode.
TRANSPORT KEY PUNCH THROUGH
Transport keys include PLAY, REW, FF, REC, STOP, PAUSE keys, you can use these keys
directly to control your VCR, DVD, VCD, CD, AMP etc, even when the device mode you
have selected is TV, SAT, CBL, without switching device modes.
Before you use the universal remote control with the device that you would like to
control, it must first be programmed (set-up). Please read this guide carefully to make
sure the setup is carried out correctly and please make sure you have read the
information below:
• Point your universal remote control directly at the infrared part of your device.
• Ensure there is nothing blocking the infrared receiver on your device.
• Do not leave flat batteries in your universal remote control, as they could leak and
void your warranty.
• Always replace all batteries at the same time, do not mix old and new batteries or mix different battery types.
• Take care when disposing of exhausted batteries, please consult your local council
or recycle department, for nearest collection point.
• Do not drop or throw your universal remote control, as you may damage the unit and the circuitry inside.
• Do not let the remote control come into contact with any liquids.
• Use a dry cloth to clean your universal remote control.
INSTALLING REPLACING BATTERIES
Install two new “AAA” batteries as indicated by the diagram in the battery
compartment. When the batteries become low and need to be replaced, please
replace the batteries by following these steps as below:
a) Push the catch on the battery cover upwards and pull the back cover off the main
part.
b) Carefully remove the old batteries then insert the new batteries, matching the +
and – signs.
c) Once the batteries are in, put the cover back on, making sure the catch clicks into
place.
NEW URC6D INSTRUCTIONS2.indd 2
2
10/01/2012 10:00
PROGRAMMING THE REMOTE CONTROL TO CONTROL ADDITIONAL DEVICES
1. MANUAL - CODE ENTRY PROGRAMMING
mbo
PCs)
gnal.
rst be
Find your brand and model of TV in the separate Device Brand Code List booklet and
note the 3 digit code.
1. Turn on all devices (such as TV, DVD, VCR, SAT…) you would like to program the
remote to operate
2. Press and hold the device button for about 3 seconds until the device’s LED
indicator blink once, then release the device button, and LED will light up again.
3. Press the [POWER] button then follow the sequence to enter the 3 digit code that
you noted from the Device Brand Code List.
4. If the code is correct, the LED indicator will blink four times and turn off. You can
now use the remote to operate your device.
5. If the code number is not on the list, the LED indicator will flash four times then
stay lit, so please go back to the step 3 and program the remote again.
mote
ur
NOTE:
1. During the set up state, you can press the [Exit] button to exit this mode and the
LED indicator will blink four times then turn off.
2. If you have not pressed any button during 20 seconds, the device button will blink
twice and turn off.
2. AUTOMATIC - CODE PROGRAMMING
If you are not able to control your device after code-entry or you are not able to find
the brand and code in the Device Brand Code List, please use this function to source
the code that you need.
1. Turn on all devices (such as TV, DVD, VCR, SAT…) you would like to program the
remote to operate.
ect to
BL
keys
e you
to
make
e.
k and
es or ouncil
unit 2. Press and hold the device button for about 3 seconds until the device’s LED
indicator blink once, then release the device button, and LED will light up again.
3. Press the [PLAY] button to enter Automatic Code Programming and the
led will blink continually. Every 1.5 seconds, the remote will transmit a code
of [POWER], or[PLAY], [CH+] or [MUTE] automatically. When the device to be
programmed responds to a [POWER][PLAY][CH+] or [MUTE] press the device
button to save and the LED will blink four times then turn off.
NOTE:
1. In this feature. You can press [PAUSE] button to pause automatic code search, and
press again to continue searching.
2. After you have paused the search you can press [FF] to forward search ten codes
and press [REW] to rewind search ten codes of the library to find out a better
device code.
3. After pause searching. You can press [CH+] to forward search to the next code and
press [CH-] to rewind search to the previous code one by one.
4. During the code search feature, you can press [EXIT] button to stop the search and
exit, but the searched code will not be saved, and then the led will blink four times
and turn off.
5. When the remote has finished cycling through all the codes the led will blink four
times, you can then either go through the process again or press the [EXIT] button
to finish searching.
6. The remote control will exit without saving, if any keys are pressed
after paused search or searched a cycle through the full database.
main
+
nto
NEW URC6D INSTRUCTIONS2.indd 3
3
10/01/2012 10:00
3. BRAND SEARCH - CODE PROGRAMMING
You can use this feature to set up the device code quickly. Please find your device
brand on the below Brand Search Code List, then follow these steps below to set up
you device code on the remote control.
1. Turn on all devices (such as TV, DVD, VCR, SAT…) that you want to program the
remote to operate.
2. Press and hold the device button for about 3 seconds until the device’s LED
indicator blink once, then release the device button, the LED will light up again.
3. Type in the Brand code that you found in the list to enter the Brand Search
function, the led will light up.
4. Once every 1.5 seconds, this remote will transmit a code of [POWER] or [PLAY] or
[CH+] or [MUTE] automatically and the led will blink continually. When the device
to be power off or play (DVD, CD, VCR) or displays operate indication (such as CH+
for TV, SAT CBL and MUTE for AUDIO), press the device button to save and exit
and the LED will blink four times then turn off.
NOTE:
1. The remote will continue to search unless you press the device button to save the
setup or press the [EXIT] button to stop the search and exit without saving.
BRAND CODE SEARCH LIST
TV Brand
00
01
02
03
04
05
06
07
08
09
10
Philips
Thomson 11
12
Sony
13
LG
14
JVC
Samsung 15
Panasonic 16
17
Akai
Hitachi 18
Toshiba 19
Brand
SAT Brand
Daewoo
Vestel
Sanyo
Bush
Clatronic
Audioaonic
Orion
Firstline
Mitsubishi
Pioneer
0
1
2
3
4
5
6
7
8
9
Philips
Thomson
Strong
Skymaster
Technisat
Nokia
Tevion
Pace
Grundig
Finlux
VCR Brand
0
1
2
3
4
5
6
7
8
9
Philips
Thomson
Sony
LG
JVC
Samsung
Panasonic
Goodmans
Hitachi
Toshiba
DVDBrand
0
1
2
3
4
5
6
7
8
9
Philips
Thomson
Sony
LG
JVC
Bush
Teac
Akai
Daewoo
Grundig
4. LEARN FUNCTION OPERATION GUIDE
If you are unable to use any of the program device codes and your original remote can
still be used, you can use the learning function to copy the codes from your original
remote to the URC6D remote. Please follow the step set out below to use this feature.
LEARN THE CODE TO YOUR REMOTE CONTROL
1. Press and hold the device button down for about 3 seconds then release it the led
will be light up.
2. Press the [REC] button to enter the learn state, the led will blink once.
3. Place the original remote control and your URC6D on a flat surface with the
infrared windows facing each other, making sure you keep them within 5cm of
each other. Press the button that you would like to learn on your URC6D.
4. Press the button that you want to learn on the original remote control, the device
button led will blink four times slowly, then the will stay lit to show learning was
successful.
NOTE:
The LED will blink quickly if the learning function fails. This is usually due to poor
alignment of the remote controls.
5. Repeat steps 3 to 4 above and learn all buttons of the current device you wish to
learn in your remote control. If the LED blinks four times and leaves the learning
mode automatically, it means the memory in the remote is full. You will need to
delete some of the learnt keys then try the learning process again.
6. After you have finished learning all the keys that you want, press the [EXIT] button
to exit.
NEW URC6D INSTRUCTIONS2.indd 4
4
10/01/2012 10:00
e
up
e
DELETE A LEARNT KEY
1. Press and hold the device button for about 3 seconds then release it; the LED
indicator will light up.
2. Press the [Exit] button to enter this feature.
3. Then press the key that you want to delete and the Led indicator will blink 4 times.
4. Repeat above steps to delete other learnt keys that you want.
n.
] or
vice
CH+
t
5. Press any device button to exit out of this feature and the LED indicator
will blink 4 times.
DELETE ALL LEARNED KEYS OF A DEVICE
1. Press and hold the [REC] button for about 3 seconds then release it; the LED
indicator will light up.
2. Press the device button that you want to delete the learnt keys of.
3. After successful deletion, the Led indicator will blink 4 times and go out.
the
d
ps
mson
4. In this feature, you can press the [EXIT] button to stop the operation and exit.
DELETE ALL LEARNED KEYS
1. Press and hold the [REC] button for about 3 seconds then release it; the LED
indicator will light up.
2. Enter the operation code [000] to enter this feature.
3. After successful deletion, the Led indicator will blink 4 times and go out
NOTE:
Please notice that some buttons cannot support this feature, which include: All
device keys, all operation keys (include ALL OFF, EXIT, MACRO, FAV CH), BASS,
TREBLE, NIGHT, buttons for TEXT (REPEAT, PREVIOUS, NEXT, SHU) and TTX OFF
MACRO BUTTONS PROGRAMMING
woo
dig
te can
nal
ture.
led
f
ice
as
r
to
ng
o
tton
You can re-program the MACRO buttons on this remote control to carry out a
sequence of individual commands with only 1 key press.
MACRO BUTTON PROGRAMMING
Good example of a Macro function: TV turn on, switch TV to AV mode, DVD turn on,
“Play” DVD player.
1. Press and hold the [MACRO] button for about 3 seconds then release it to enter
this feature and the LED indicator will light up.
2. Then press TV button, POWER button, AV button, DVD button, POWER button, and
PLAY button, last press the [MACRO] button to save and exit.
3. Now, if you press the MACRO button, the remote control will auto turn on your TV
and switch the TV to AV input source, then turn on your DVD player and play your
DVD.
NOTE:
1. You can only programs a maximum of 16 buttons with this feature. If you use more
than 16 the device button will blink twice and go out automatically.
2. In this feature, you must press the device button first when you program the
MACRO button.
DELETE THE MACRO BUTTON PROGRAMMED
1. Press and hold the [MACRO] button for about 3 seconds then release it to enter
this feature and the LED indicator will light up to enter this feature.
2. Press the device button twice.
3. The led will blink 4 times and go out to show that the delete has been successful.
NOTE:
1. You can only programs a maximum of 16 buttons with this feature. If you use more
than 16 the device button will blink twice and go out automatically.
2. In this feature, you must press the device button first when you program the
MACRO button.
3. If you need to program the MACRO button again, you must delete the
programmed first.
4. In this feature, you can press the EXIT button to exit without saving.
5
NEW URC6D INSTRUCTIONS2.indd 5
10/01/2012 10:00
FAV-CH BUTTON PROGRAMMING
This feature is only for TV, SAT and CBL device. You can program this button to work
as you setup. A setup example for the FAV-CH button: 2, 5, 6, 8.
1. Press and hold the [FAV-CH] button for about 3 seconds then release it to enter
this feature and the LED indicator will light up.
2. Then press 1 button, 5 button, 6 button, 8 button, last press the device button to
save the FAV-CH button programmed and then press [EXIT] button to go out.
3. Now, if you press the [FAV-CH] button, the remote control will auto switch your
TV’s channel step by step as you have programmed.
DELETE THE FAV-CH BUTTON PROGRAMMED
1. Press and hold the [FAV-CH] button for about 3 seconds then release it to enter
this feature and the LED indicator will light up.
2. Press the device button twice.
3. The led will blink 4 times and go out to show that the delete has been successful.
NOTE:
1. You can programs maximum 6 buttons on this feature. If more then the device
button will blink twice and go out automatically.
2. In this feature, you can press the EXIT button to not save and go out.
TRANSPORT PUNCH THROUGH FUNCTION
In this feature, if your remote control previous working device is DVD, VCR, CD, in
the TV, SAT, CBL working mode, you do not need to switch the working mode, you
can under the working mode direct control the Transport buttons (include FF, REW,
PAUSE, PLAY, STOP, REC button) for you DVD, VCR, or CD device. But if the Transport
buttons can be control the device self, this feature will be disabled.
VOLUME PUNCH THROUGH FUNCTION
In this feature, if the last device the remote was used with was either TV or AUDIO,
when in DVD, VCR or CD, mode, you will not need to switch back to the previous
device. You will have direct control of the DVD, or VCR, or CD mode control with the
addition of the Volume buttons (include Volume+, Volume – and Mute button) for
the TV. You can follow these steps as below to enable this feature.
1. Press and hold the device button that you want to setup about 3 seconds then
release it to enter this feature and the LED indicator will light up.
2. Then press the [VOL-] button and the led blink twice and go out.
TTX SHIFT FUNCTION
In this feature, you can switch the number buttons to control the Tele Text Mode of
the TV. In the standard state, the number buttons will be used to control the channel
change of the TV, if you press the [TTX ON] button first, the number buttons will
then be controlling the Tele Text Mode of TV. The list below shows the keypads
text equivalent. You can press the [TTX OFF] button to switch back to the channel
number function.
Number Keys Function
TTX Function
NUMER_1
NUMER_2
NUMER_3
NUMER_4
NUMER_5
NUMER_6
NUMER_7
NUMER_8
NUMER_9
NUMER_0
REPEAT
REW
FF
SHUFFLE
TTX PAGE +
TTX PAGE TTX REVEAL
TTX INDEX
TTX HOLD
TTX EXPAND
TTX CANCEL
TTX SUBPAGE
MIX
NEW URC6D INSTRUCTIONS2.indd 6
RED
GREEN
YELLOW
BLUE
6
10/01/2012 10:00
PIP (PICTURE IN PICTURE) SHIFT FUNCTION
In this feature, you can switch the navigation buttons to control the PIP function of
the TV. If you press the [PIP] button first, the navigation buttons will then control
the PIP function of TV, press the [PIP] button again to exit this feature. The list below
shows the keypads PIP equivalent functions. If the remote control is using the PIP
function, you can press the [SWAP] button to switch between both PIP and the
navigation function.
Number Keys Function
TTX Function
Arrow_Right
Arrow_Left
MENU
INFO
Arrow_Up
Arrow_Down
PIP +
PIP PIP - SIZE
PIP - POS
PIP - SOURCE
PIP - FREEZE
QUICK VIEW CHANNEL FUNCTION
With this feature, you will be able to quickly view the channel on the TV, SAT or CBL
device stepping quickly through the channels without the need to press any buttons.
Please follow the steps below to use this feature:
1. Press and hold the [CH+] or [CH-] button down and keep pressed for about 3
seconds then release it, the device LED will light up to show it has entered this
function. Every 1.5 seconds, the remote control will step through the channels by
itself.
2. Press the [CH+] or [CH-] buttons again to exit this feature.
CHECKING THE CODE NUMBER
You can use this feature to check the three-digit code for your programmed device;
follow these steps using the remote control keypad:
1. Press and hold the device button that you would like to check such as TV, keep the
button pressed for about 3 seconds then release it and the device led will light up.
2. Press the [INFO] button and the device led will blink once.
3. The device button will then blink a number of times in three groups to indicate the
original code number. You will need to make a note of this number.
NOTE:
1. If the digit code number is “0”, the device led will fast blink once.
2. After the led has blinked the first number of the three-digit code there will
be a gap of 1.5 seconds, the led will blink again for the following numbers.
For example: for three-digit code is “095”, then:
0 The led will fast blink 1 time, the led turn off 1.5 seconds.
9 The led will blink 9 times, the led turn off 1.5 seconds.
5 The led will blink 5 times, the led turn off and go out
NEW URC6D INSTRUCTIONS2.indd 7
7
10/01/2012 10:00
URC6DINS Iss 1
NEW URC6D INSTRUCTIONS2.indd 8
8
10/01/2012 10:00