1
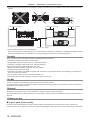
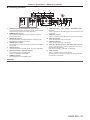
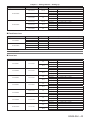
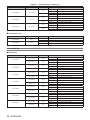
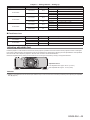
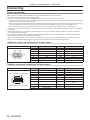
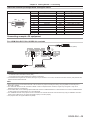
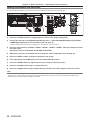
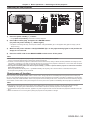
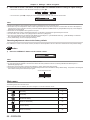
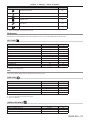
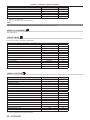
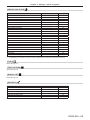
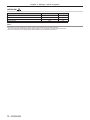
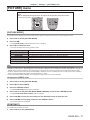
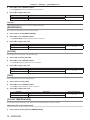
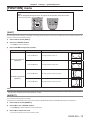
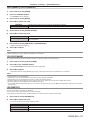
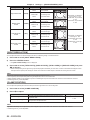
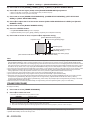
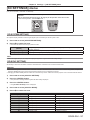
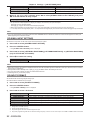
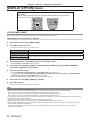
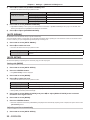
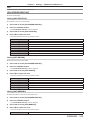
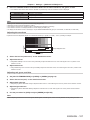
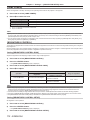
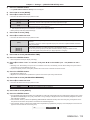
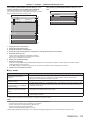
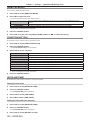
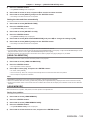
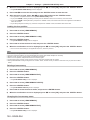
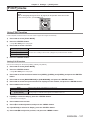
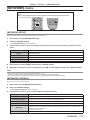
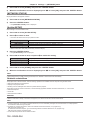
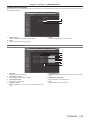
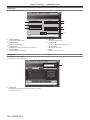
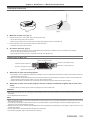
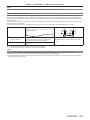
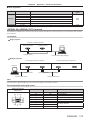
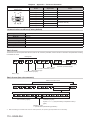
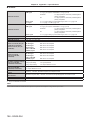
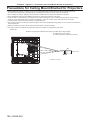
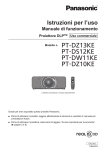
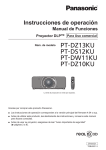
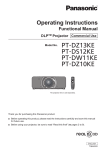
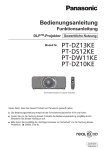
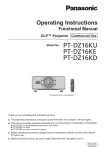
Chapter 2 Getting Started — Connecting
<DVI-D IN> terminal pin assignments and signal names
Outside view
(24)
(17)
(16)
(9)
(8)
(1)
Pin No.
Signal name
Pin No.
Signal name
(1)
T.M.D.S data 2-
(13)
—
(2)
T.M.D.S data 2+
(14)
+5 V
(3)
T.M.D.S data 2/4 shield
(15)
GND
(4)
—
(16)
Hot plug detection
(5)
—
(17)
T.M.D.S data 0-
(6)
DDC clock
(18)
T.M.D.S data 0+
(7)
DDC data
(19)
T.M.D.S data 0/5 shield
(8)
—
(20)
—
(9)
T.M.D.S data 1-
(21)
—
(10)
T.M.D.S clock1+
(22)
T.M.D.S clock shield
(11)
T.M.D.S data 1/3 shield
(23)
T.M.D.S clock+
(12)
—
(24)
T.M.D.S clock-
Connecting example: AV equipment
For <HDMI IN>/<DVI-D IN>/<VIDEO IN> terminals
DVD player with HDMI terminal (HDCP)
Blu-ray disc player
VCR (with built-in TBC)
Attention
ff Always use one of the following when connecting a VCR.
gg A VCR with built-in time base corrector (TBC)
gg A time base corrector (TBC) between the projector and the VCR
ff If nonstandard burst signals are connected, the image may be distorted. In such case, connect the time base corrector (TBC) between the
projector and the external devices.
Note
ff When entering DVI‑D, some external devices to be connected may require switching the setting using the [DISPLAY OPTION] menu →
[DVI-D IN] → [EDID].
ff The <DVI-D IN> terminal can be connected to HDMI- or DVI‑D-compliant devices. However, images may not appear or may not be
displayed properly on some devices.
ff For an HDMI cable, use an HDMI High Speed cable that conforms to HDMI standards. If a cable that does not conform to HDMI standards
is used, images may be interrupted or may not be displayed.
ff The <HDMI IN> terminal of the projector can be connected to an external device with a DVI‑D terminal by using an HDMI/DVI conversion
cable, but some devices may not project the image properly or function properly.
ff The projector does not support VIERA Link (HDMI).
ENGLISH - 49