1
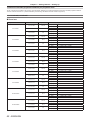
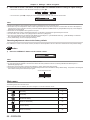
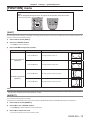
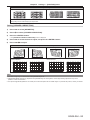
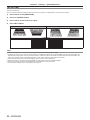
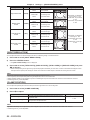
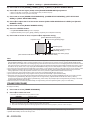
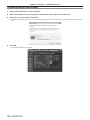
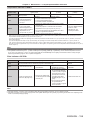
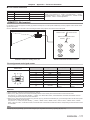
Chapter 4 Settings — [DISPLAY OPTION] menu
3) Press qw to switch the [SCREEN FORMAT] item.
ff The items will switch each time you press the button.
Model No.
[SCREEN FORMAT]
[16:10]
PT‑DZ13KE, PT‑DZ10KE
PT‑DS12KE
Range when [SCREEN POSITION] is selected
Cannot be adjusted.
[4:3]
Adjusts the horizontal position between ‑160 and 160.
[16:9]
Adjusts the vertical position between ‑60 and 60.
[4:3]
Cannot be adjusted.
[16:9]
Adjusts the vertical position between ‑132 and 131.
4) Press as to select [SCREEN POSITION].
ff If [SCREEN FORMAT] is set to [16:10] in PT‑DZ13KE and PT‑DZ10KE, or [SCREEN FORMAT] is set to [4:3] in PT‑DS12KE, then
selection and adjustment of [SCREEN POSITION] are not available.
5) Press qw to adjust [SCREEN POSITION].
[AUTO SIGNAL]
Set whether to execute automatic setup of signals automatically.
The screen display position or signal level can be adjusted automatically without pressing the <AUTO SETUP> button on the remote control
on each occasion if you input unregistered signals frequently at meetings, etc.
1) Press as to select [AUTO SIGNAL].
2) Press qw to switch the item.
ff The items will switch each time you press the button.
[OFF]
Sets the auto signal function to off.
[ON]
Executes automatic setup automatically when images are changed to unregistered signals during
projection.
[AUTO SETUP]
Set this when adjusting a special signal or horizontally long (such as 16:9) signal.
Setting with [MODE]
1) Press as to select [AUTO SETUP].
2) Press the <ENTER> button.
ff The [AUTO SETUP] screen is displayed.
3) Press as to select [MODE].
4) Press qw to switch the item.
ff The items will switch each time you press the button.
[DEFAULT]
Standard setting.
[WIDE]
Select when an image aspect is a wide-screen signal, which does not meet the [DEFAULT] settings.
[USER]
Select when receiving a signal with a special horizontal resolution (number of display dots).
ff When [DEFAULT] or [WIDE] is selected, proceed to Step 7).
ff When [USER] is selected, proceed to Step 5).
5) Press as to select [DISPLAY DOTS], and press qw to adjust [DISPLAY DOTS] to the horizontal
resolution of the signal source.
6) Press as to select [MODE].
7) Press the <ENTER> button.
ff Automatic adjustment is executed. [PROGRESS] is displayed while automatically adjusting. When complete, the system returns to the
[AUTO SETUP] screen.
Adjusting position automatically
1) Press as to select [AUTO SETUP].
98 - ENGLISH