Download Propex 1800 - Club 80-90
Transcript
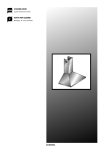
HeatSource
HS1800
Heater
Vehical Installation
& Operating Instructions
Propex Heatsource Ltd
Unit 5, Second Avenue Buisness Park, Milbrook,
Southampton, SO15 OLP
Tel: 023 8052 8555
Fax: 023 8052 8800
Website: www.propexheatsource.co.uk
Email: [email protected]
SAFETY WARNINGS & GENERAL INFORMATION
The heater must be installed by a corgi registered person or inspected by a corgi registered
person in accordance with the relevant regulatory and safety requirements.
Heater installations must comply with the current British standards for motorhomes /
Caravans and BS5482 Part 3 for Boats.
The Heatsource HS1800 heater is not suitable for installation on the outside of the
vehicle.
The heater must not be operated when refueling or when the vehicle is in a confined space,
such as a garage.
The exhaust gas outlet must not be fitted on the entry door nor in any position where
combustion products may enter the interior.
The Heatsource HS1800 heater is designed to operate on Propane gas 'mbar or Butane
at 28 or 30mbar. The HS1800 may also be used on mbar propane but the heat output
will be reduced. A 50mbar Propane model is also available. Under no circumstances
should an adjustable regulator be used.
Do not allow materials to come in to direct contact with the heater. Under circumstances
must the intake grill be covered or obstructed at any time.
The Heatsource HS1800 heater has been tested and passed the relevant sections of the
following standards:
EN5008-1
EN55014-1
EN60945
EN50082-1
EN50014-2
EN50165
IS07637-1
ISO7637-2
PREN624
EN298
The data label is situated adjacent to the gas inlet.
The gas supply line should be checked regularly for damage or leaks and tested
under pressure with a proprietary leak tester. NEVER TEST FOR GAS LEAKS
WITH NAKED FLAME. If a gas leak is detected or smelt, turn off gas at the bottle
immediately and ventilate the area. Contact a corgi registered installer to rectify the
problem.
The heater is suitable for use while the vehicle is in motion subject to gas
regulations.
Heatsource is suitable for boats when supplied with the correct marine installation
kit
VEHICLE INSTALLATION
a) Find a suitable location, usually in a bedbox, locker or base of a cupboard. The
Heatsource HS1800 should be fitted in an area allowing a minimum distance of
25mm from adjacent walls, ceiling or shelves from the main body of the heater.
Check that there are no chassis members underneath the location of the exhaust
and combustion air spigots.
b) Using the template provided, drill a 3mm pilot hole through the exhaust and
combustion air spigot centres. Examine underneath the vehicle to check that there
is adequate clearance for a 30mm hole saw. Cut away any carpet or matting
around the exhaust and open out the holes to 30mm.
c) Loosen the 4 x M4 screws on the base of the heater and slot the mounting
brackets into position, then re-tighten the screws. Mount the heater in position and
mark the 4 mounting holes on the floor of the vehicle for screwing the heater down.
Remove the heater and drill 4 x 3.5mm holes in the marked positions, then screw
the heater in place with the 3/4 x NO.8 self tapping screws provided.
d) Find suitable locations for the hot air outlet and re-circulation air inlet vent and
drill a 5mm pilot hole through each centre. Using a 95mm hole saw, drill out the
holes and fix the vents in position using the black 1/2 x No.8 counter sunk self
tapping screws provided.
e) Fix the 60mm reducer (push fit) into the back of the hot air outlet. Cut the 60mm
thermoplastic ducting to length and fix to the heater and the outlet using the 5070mm hose clips provided.
NOTE: There is no reducing spigot provided for the air inlet vent, as it is not
necessary to put ducting on it.
A metre length of 22mm flexible stainless steel tubing with a special end is supplied
for ducting the products of combustion away to the edge of the vehicle. The tube
may be cut to length and fixed to the heater using the clip provided.
A clip is provided for fixing the end of the pipe to the underside of the with the end
cap slightly protruding under the sill or bumper and pointing towards the rear of the
vehicle. If it not possible to exhaust the heater to the sill then it is permissible to
terminate the flue underneath the vehicle but it if it exists in an under-floor box
section then at least one side must be open to the atmosphere.
The maximum overall length of the flue and inlet pipe combined can be up metres if
required. However, the flue pipe should never be shorter than the combustion air
inlet pipe.
0mm length of combustion air pipe is provided, which is also fitted with an end cap.
This should be attached to the heater with the hose clip and pointed in the same
direction as the flue pipe.
The combustion air pipe can be terminated underneath the vehicle making sure the
end of it is at least 0.5 metres away from the end of the exhaust. Take care to
ensure that both pipes have a slight downward slope to prevent any possibility of
water traps. Make sure that the flue is not terminated in an under-floor box section.
GAS CONNECTION
The heater uses an 8mm (5/16") gas connection which also incorporates a point .
The gas supply should be connected with copper gas pipe with an isolating valve
and all connections made with brass compression fittings, fitted with proper olives.
When the gas line is complete all joints should be tested for leaks using leak
detection solution - NEVER WITH A NAKED FLAME.
Gas pressure should be verified at the test point using a low pressure gauge or "U"
tube, any tests or connections should only be undertaken by a corgi registered
person.
WIRING INSTRUCTIONS
a) The Heatsource HST800 heater is supplied with 2 wring looms, a 2 core (red ad
black) ad a 5 core (red, black, orange, white ad green), both are fitted with
terminals ad housings to plug into the main PCB inside the heater and are supplied
already connected.
b) Find a suitable location for the thermostat between waist ad shoulder height.
Make sure that it is not mounted in an area with poor air circulation or in an area
with above average heat, such as above a cooker, refrigerator or in direct sunlight.
c) When you have chosen the location, drill a pilot hole in the area you expect to
retrieve the 5 core cable. If the clearance is OK, open the pilot hole out to 10mm.
d) Run the 5 core cable from the heater to the thermostat location and remove
approximately 60mm of the outer insulation.
e) Remove the thermostat knob by gently prizing it off and undo screws "A" to
remove the cover.
f) Fix the backplate with the PCB to the wall making sure the 5 core cable is pulled
through the hole in the centre.
g) Connect the cable to the terminal blocks as in the diagram and refit the lid.
h) Replace the thermostat knob ad push the finishing caps into the lid to cover the
screw heads
i) Run the 2 core cable to a convenient supply (usually at the battery) ad connect
using the fuse holder supplied.
j) Insert the 5 amp fuse and test.
OPERATION
Usage: Pay particular attention to the exhaust and combustion air inlets that neither
have been blocked or damaged. Ensure that any snow or clear from the part of the
vehicle where the heater exhaust is mounted.
Check the gas supply is turned on and that the battery voltage is correct (see
specifications).
Rotate the thermostat dial fully anti-clockwise and push the 3 position switch to the
left. The red power light should illuminate.
Rotate the thermostat dial until the green light illuminates. After 3 seconds the
heater motor will start and ignition should occur after a 30 second pre-cycle.
Select the desired temperature setting by adjusting the dial on the thermostat. The
heater will then cycle on and off to maintain that temperature.
When the set temperature is reached the green light will go out and the heater will
start its post purge cycle. When the motor switches off, the red heater light will dim
indicating that the heater is on standby.
The 3 position switch is depressed on the right, the green LED will illuminate and
the fan will blow cold air continuously.
sequence of operation:
Switch on
Heater motor starts
30 second pre-purge to clear gases from heat exchanger
Gas valve opens
Spark generator operates
Heater lights and runs
Temperature reaches thermostat setting
Heater switches off
First Purge - approx. 2mins depending on heat exchanger temperature
Temperature drops
Cycle repeated
MAINTENANCE
Installation should be inspected annually by a corgi registered person and servicing
and cleaning identified carried out.
The heater should not be left for long periods without use. It is advisable to run it for
short periods throughout the summer.
The outlet grill on the heater should be inspected periodically for excess foreign
objects and cleaned if necessary.
FAULT FINDING
The Heatsource HS1800 is equipped with an electronic diagnostic system for fault
finding. In the Event of a failure the red light on the thermostat will flash a certain
amount of times, then pause and it will repeat this until switched off.
Manual (Overheat Cut-Out. The H S 1900 is equipped with a manual) resetting
thermal cut-out in addition to the electronic cut-out This is designed to disengage
the gas solenoid valve if the electronic cut-out toils and can operate if the heater is
switched off at the battery isolating switch without allowing it to purge. It can be
found by removing the inlet grill and following the two purple wires from the main
PCB. Press the red button, the fault code would be 2 flashes
FAULT FINDING TABLE
No. Of Flashes
Symptons
Possible Causes
1
Failed to ignite
2
Flame Sensing
3
Low Voltage
5
Combustion air flow low
6
8
Gas solenoid valve
High voltage
9
Heat exchange temperature high
No Gas left in bottle
Bottle or gas tap turned off
Incorrect gas pressure
Igniter in heater failed
Run out of gas whilst operating
Gas switched off
Ingestion of gas through combution air
intake
Low gas pressure
Battery voltage low
Bad connection in supply
Cut out 12v Model=10v – 24v
Model=18v
Blocked/Partially blocked
exhaust/combustion air inlet
Water trapped in exhaust pipe
Damaged/crushed exhaust
Fan motor running slow
Faulty valve in heater
Voltage too high
12Vmodel = 15.5V - 24V model =
30V
Blocked inlet grill or obstructed hot air
outlet
Fan speed low
Faulty thermistor


