1
INSTALLATION
1.
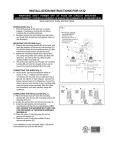
Remove the diffuser from the body by removing the two screws.
2.
Release gear tray by removing the two retaining screws.
3.
Fix base to the ceiling. Use the bezel & fitting to ensure the ‘cutout’ is the correct size.
4.
ISOLATE THE A.C. SUPPLY and connect unit. An unswitched 240V A.C. supply must be connected to the
live (L). Earth and neutral (N) terminals on the PCB block. On Maintained circuits continuous illumination can
be achieved by connecting a link between L and Lsw either locally or through a remote switch.
5.
Plug battery lead into connector on the PCB.
6.
Resecure the gear tray into the base of the unit making sure that the mains cable is not trapped by the
PCB etc.
7.
Refit the diffuser using the two screws.
8.
Operational Check – Restore the A.C. Supply for 30 minutes and then remove. The LEDs should illuminate for at least 10 seconds.
9.
Restore the A.C. supply and check that the indicator LED is ‘on’.
ENSURE FITTING IS CHARGED FOR A MINIMUM OF 24 HOURS PRIOR TO TESTING