1
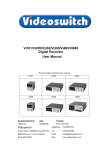
Vi-R4000 Series Net Recorder
User Manual
Products covered by this manual
Vi-R4005, Vi-R4105, Vi-R4205
Document Reference
Date
Firmware
Mdr602a.doc
18/03/2013
From V2.2.2 Build 121220, Interface:174
Videoswitch
Telephone
01252-851510
Ocean House, Redfields Industrial Park
Fax
01252-851296
Redfields Lane, Church Crookham
Email
[email protected]
Hants GU52 0RD
Web
www.videoswitch.co.uk
Videoswitch
Mdr602a.doc
Videoswitch
Mdr602a.doc
Vi-R4000 Series
Contents
1 Getting Started.......................................1
1.1
Monitors .................................................................................................................................2
1.1.1
VGA Monitor ......................................................................................................................2
1.1.2
HDMI / DVI Monitor............................................................................................................2
1.1.3
1.2
BNC Monitors.....................................................................................................................2
Control....................................................................................................................................3
1.2.1
Keyboard Control ...............................................................................................................3
1.2.2
Mouse Control....................................................................................................................5
1.2.3
Mouse Emulator Control ....................................................................................................5
1.2.4
1.3
External Keyboards............................................................................................................5
Cascading ..............................................................................................................................6
2 Installation..............................................7
2.1
Preventive and Cautionary Tips .............................................................................................8
2.2
Rear Panel Connections ........................................................................................................9
2.2.1
Essential Connections .......................................................................................................9
2.2.2
Optional Connections.........................................................................................................9
2.2.3
2.3
Connecting for Cascade Operation..................................................................................10
Replacing a Hard Drive ........................................................................................................11
3 Commissioning....................................12
3.1
Password Access.................................................................................................................13
3.1.1
Keyboard Mode................................................................................................................13
3.1.2
Mouse ..............................................................................................................................13
3.1.3
Mouse Emulator Mode.....................................................................................................13
3.1.4
3.2
Default Passwords ...........................................................................................................13
Default Configuration ...........................................................................................................15
3.2.1
System Configuration.......................................................................................................15
3.2.2
Interface Configuration.....................................................................................................15
3.2.2.1
Unlock Interface Settings............................................................................................15
3.2.2.2
Lock Interface Settings ...............................................................................................15
3.2.2.3
Display Interface Firmware Revision ..........................................................................15
3.2.2.4
Default all Interface Settings.......................................................................................15
3.2.2.5
Summary of commands..............................................................................................16
3.3
Record Settings ...................................................................................................................18
3.3.1
Schedule ..........................................................................................................................18
3.3.2
Resolution ........................................................................................................................18
3.3.3
Quality..............................................................................................................................19
3.3.4
Frame Rate ......................................................................................................................19
3.3.5
Max Bitrate .......................................................................................................................19
3.3.6
Copy settings to all other Cameras..................................................................................19
3.3.7
Retention Period ..............................................................................................................21
3.3.8
Retention Period Tables ..................................................................................................21
3.3.8.1
16 Camera Systems ...................................................................................................22
3.3.8.1.1
Retention Period for 1Tbyte, 16 cameras
22
3.3.8.1.2
Retention Period for 2Tbyte, 16 cameras
22
3.3.8.1.3
Retention Period for 4Tbyte, 16 cameras
23
3.3.8.1.4
Retention Period for 8Tbyte, 16 cameras
23
3.3.8.2
12 Camera Systems ...................................................................................................24
3.3.8.2.1
Videoswitch
Retention Period for 1Tbyte, 12 cameras
24
Mdr602a.doc
Vi-R4000 Series
3.3.8.2.2
Retention Period for 2Tbyte, 12 cameras
24
3.3.8.2.3
Retention Period for 4Tbyte, 12 cameras
25
3.3.8.2.4
Retention Period for 8Tbyte, 12 cameras
25
3.3.8.3
Retention Period for 1Tbyte, 8 cameras
26
3.3.8.3.2
Retention Period for 2Tbyte, 8 cameras
26
3.3.8.3.3
Retention Period for 4Tbyte, 8 cameras
27
3.3.8.3.4
Retention Period for 8Tbyte, 8 cameras
27
3.3.8.4
4 Camera Systems .....................................................................................................28
3.3.8.4.1
Retention Period for 1Tbyte, 4 cameras
28
3.3.8.4.2
Retention Period for 2Tbyte, 4 cameras
28
3.3.8.4.3
Retention Period for 4Tbyte, 4 cameras
29
3.3.8.4.4
Retention Period for 8Tbyte, 4 cameras
29
3.3.9
3.4
8 Camera Systems .....................................................................................................26
3.3.8.3.1
Retention Period Calculator .............................................................................................30
Casacading ..........................................................................................................................31
3.4.1
Vi-R4000 Recorders (address range 2) ...........................................................................31
3.4.2
Vi-R4000 Recorders (address range 1) ...........................................................................32
3.4.3
Vi405 and Vi-R4000 Recorders (address range 1)..........................................................33
3.4.3.1
Manually Set DVR Address ........................................................................................34
3.4.3.2
Manually Set Address Range .....................................................................................34
3.4.4
3.5
Sharing a VGA Monitor ....................................................................................................34
Termination ..........................................................................................................................35
3.5.1
Turn Camera Termination ON .........................................................................................35
3.5.2
3.6
Turn Camera Termination OFF........................................................................................35
Covert Cameras ...................................................................................................................36
3.6.1
Main Monitor (Monitor 1)..................................................................................................36
3.6.1.1
Set Covert...................................................................................................................36
3.6.1.2
Clear Covert................................................................................................................36
3.6.2
Monitor 2 ..........................................................................................................................36
3.6.2.1
Set Covert...................................................................................................................36
3.6.2.2
Clear Covert................................................................................................................36
3.6.3
Monitor 3 ..........................................................................................................................37
3.6.3.1
Set Covert Camera .....................................................................................................37
3.6.3.2
Clear Covert Camera..................................................................................................37
3.6.4
Monitor 4 ..........................................................................................................................37
3.6.4.1
Set Covert Camera .....................................................................................................37
3.6.4.2
Clear Covert Camera..................................................................................................37
3.6.5
3.7
Video export and Remote View .......................................................................................37
PTZ Control..........................................................................................................................38
3.7.1
Up-the-coax .....................................................................................................................38
3.7.1.1
Disable PTZ Control ...................................................................................................38
3.7.1.2
Enable Coax Control...................................................................................................38
3.7.1.3
Set Coax Transmission Timeout.................................................................................38
3.7.2
Connecting up Domes for RS485 Control........................................................................39
3.7.3
Connection for dome control via ethernet ........................................................................39
3.7.4
RS485 Local Control using DVR Protocols......................................................................40
3.7.4.1
Enable RS485 Control on outputs 1 & 2.....................................................................40
3.7.4.2
Enable RS485 Control on outputs 3 & 4.....................................................................40
3.7.4.3
Set RS485 Protocol for Outputs 1 & 2 ........................................................................40
3.7.4.4
Set RS485 Protocol for Outputs 3 & 4 ........................................................................40
Videoswitch
Mdr602a.doc
Vi-R4000 Series
3.7.5
RS485 Protocols ..............................................................................................................41
3.7.6
RS485 Local Control using Keyboard Protocols..............................................................41
3.7.7
RS485 Dome Control via Ethernet...................................................................................42
4 User .......................................................43
4.1
Live Viewing .........................................................................................................................44
4.1.1
Full screen .......................................................................................................................44
4.1.2
Multi-Screen.....................................................................................................................44
4.1.3
Auto-Sequencing .............................................................................................................44
4.1.4
Main or Aux Monitor Selection .........................................................................................44
4.1.5
Screen Warning Symbols ................................................................................................44
4.1.5.1
Yellow Triangle ...........................................................................................................44
4.1.5.2
Red Cross...................................................................................................................45
4.1.6
4.2
Quick setting Toolbar .......................................................................................................45
Spot Monitors .......................................................................................................................46
4.2.1
Using Vi-K1(A) remote keyboard .....................................................................................46
4.2.2
Using Vi-K1 to control other monitors ..............................................................................46
4.2.3
Using Vi-K2(A) remote keyboard .....................................................................................46
4.2.4
Auto-Sequencing .............................................................................................................46
4.3
Play and Video Export .........................................................................................................47
4.4
Remote Viewing ...................................................................................................................48
4.4.1
Browser ............................................................................................................................48
4.4.2
Vi-Viewer4000 Camera Management System.................................................................48
5 Reference .............................................49
5.1
Menu ....................................................................................................................................50
5.1.1
Playback ..........................................................................................................................50
5.1.2
Recording Configuration ..................................................................................................50
5.1.2.1
Quick Schedule...........................................................................................................50
5.1.2.2
Advanced Schedule Configuration .............................................................................50
5.1.2.3
Record Quality Settings ..............................................................................................50
5.1.2.4
Motion Detection Settings...........................................................................................50
5.1.2.5
Trigger Settings ..........................................................................................................50
5.1.3
Cameras Setup ................................................................................................................50
5.1.3.1
Privacy Zones .............................................................................................................50
5.1.3.2
Video Tampering Detection ........................................................................................50
5.1.3.3
Video Loss Detection..................................................................................................50
5.1.3.4
OSD Configuration......................................................................................................50
5.1.4
Status ...............................................................................................................................50
5.1.4.1
Drive Information ........................................................................................................50
5.1.4.2
Chan Status ................................................................................................................50
5.1.4.3
Record Status .............................................................................................................50
5.1.4.4
Alarm Status ...............................................................................................................50
5.1.4.5
Network Status ...........................................................................................................50
5.1.4.6
HD Status ...................................................................................................................50
5.1.5
System Configuration.......................................................................................................50
5.1.5.1
Time/Date ...................................................................................................................50
5.1.5.2
Network.......................................................................................................................50
5.1.5.3
PTZ .............................................................................................................................51
5.1.5.4
Serial Settings.............................................................................................................51
5.1.5.5
On Camera Settings ...................................................................................................51
5.1.5.6
Exception ....................................................................................................................51
Videoswitch
Mdr602a.doc
Vi-R4000 Series
5.1.5.7
Display ........................................................................................................................51
5.1.5.8
Disk Management.......................................................................................................51
5.1.5.9
Email...........................................................................................................................51
5.1.6
File Management .............................................................................................................51
5.1.7
Maintenance ....................................................................................................................51
5.1.7.1
Firmware Upgrade ......................................................................................................51
5.1.7.2
Factory Default ...........................................................................................................51
5.1.7.3
Shutdown....................................................................................................................51
5.1.7.4
Configuration Export/Import........................................................................................51
5.1.7.5
System Logs ...............................................................................................................51
5.2
Connector Pin-outs ..............................................................................................................52
5.2.1
Domes..............................................................................................................................52
5.2.2
Control .............................................................................................................................52
5.2.3
Keyboards ........................................................................................................................53
5.2.4
Cascade...........................................................................................................................53
5.2.5
53
5.2.6
VGA .................................................................................................................................54
5.2.7
5.3
Audio................................................................................................................................55
Specifications .......................................................................................................................56
5.3.1
Video................................................................................................................................56
5.3.2
Audio................................................................................................................................56
5.3.3
Recording.........................................................................................................................56
5.3.4
Playback ..........................................................................................................................56
5.3.5
Storage ............................................................................................................................56
5.3.6
Network ............................................................................................................................57
5.3.7
Interface ...........................................................................................................................57
5.3.8
Power ...............................................................................................................................57
5.3.9
Environmental ..................................................................................................................57
5.3.10
Dimensions & Weight.......................................................................................................57
Videoswitch
Mdr602a.doc
Vi-R4000 Series
1 Getting Started
Videoswitch
Page 1
Mdr602a.doc
Vi-R4000 Series
1.1 Monitors
The DVR can provide the follow output screens:
•
Main
This is used for full-screen or multi-screen live, play and configuration
•
Aux
This is used for full-screen or multi-screen live and play
•
Spot
Spot monitors are used for live full-screen viewing
These output screens are displayed on the monitors with a priority depending on what types of monitor
are connected:
HDMI
VGA
BNC x4
Main
Aux
Spot
-
Connected
Optional
VGA
BNC
BNC x3
Connected
-
Optional
HDMI
BNC
BNC x3
Connected
Connected
Optional
HDMI
BNC
BNC x4
-
-
Yes
BNC
n/a
BNC x3
Note that the HDMI and VGA monitors VGA Monitor must be connected prior to power-up so that they
are detected and given the correct usage.
1.1.1 VGA Monitor
A VGA monitor is recommended for most application for ease of interface and to benefit from high
resolution images. Supported resolutions are: 1920×1080, 1600×1200, 1280×1024, 1280×720 and
1024×768. The Vi-R4000 series allows units to be cascaded and to share a common VGA monitor
(and mouse). Refer to section 0.
1.1.2 HDMI / DVI Monitor
A HDMI or DVI Monitor may also be connected and is especially useful when used in conjunction with
a VGA monitor to provide dual independent high-resolution displays. Supported resolutions are:
1920×1080, 1600×1200, 1280×1024, 1280×720 and 1024×768.Note that a HDMI to DVI cable is
required to use a monitor with a DVI port.
1.1.3 BNC Monitors
Four BNC monitor outputs are provided which may be used for Main, Aux and Spot displays.
Videoswitch
Page 2
Mdr602a.doc
Vi-R4000 Series
1.2 Control
The R-series Recorders offer various methods of control. A single method or a mixture of methods can
be employed according to personal preference:
•
Control by keys in keyboard mode - arrow keys step from field to field in the menus.
•
Control by external mouse – a mouse moves pointer smoothly around the screen.
•
Control by mouse emulator – the Up/Down/Left/Right, OK and TAG keys perform the
functions of a mouse, moving the pointer smoothly around the screen. Turn mouse emulator
ON or OFF by pressing ESC and TAG together.
1.2.1 Keyboard Control
Key
Live or Play Modes
Menu/Password Modes
1, 2, 3, 4, 5, 6, 7, 8, 9, 0
0 - 9 Select full screen cameras.
When entering multiple digits,
enter them within ½ second of
each other.
Press EDIT key until “123” appear in
edit box. Hold ESC down while using
0-9 for data entry
Up, Down, Left, Right
Select cameras 1-4 or 5-8 in
quad mode, or 1-9 or 10-16 in
Multi-screen x9 mode
Move from field to field or move mouse
pointer around screen in mouse
emulator mode. Hold ESC to move
faster.
OK
Start/stop auto sequence
Select menu option
Press and hold ESC then press OK
key for double click in mouse emulator
mode.
Videoswitch
Page 3
Mdr602a.doc
Vi-R4000 Series
FN/PTZ
Press to enter PTZ dome mode
EDIT
Enter edit mode when a numeric entry
is required in for password or menu.
Also used to delete character when in
edit mode.
A
Select numeric, alphabetic or symbols
FWD/REV/LIST/LAMP
Control LAMP in PTZ mode. Set
Play in Forward or Reverse
Step through tabbed pages
TAB
SCREEN
Step through multi-screens.
FIND/PLAY MODE
Enter play mode
BURN
Enter Export Mode
MENU
Controls wiper in PTZ mode.
Enter MENU mode.
HELP
View firmware revision, go to system maintenance menu.
LIVE
Return to LIVE mode from any other mode. Shift key for programming
functions.
MON/ESC/ALT
TAG
Shift key for alternate functions.
Escape one level in menu.
Right mouse click in mouse emulator mode.
To turn mouse emulator on or off: press and hold ESC key and also press
the TAG key When mouse emulator is ON the arrow pointer appears on
screen. Note that pointer will also be present if a mouse in connected.
SLOWER
Makes replay speed slower
DAY-
Steps back to prior day. Hold
ESC while pressing to step back
by 10 minutes (programmable)
PAUSE/SELECT
Switch between play and pause
DAY+
Steps forward next day. Hold
ESC while pressing to step back
by 10 minutes (programmable)
FASTER
Makes replay speed faster
Select menu items or acknowledge
pop-up boxes
Note: some key functions require you to log on. If so, log on and press the key again.
Videoswitch
Page 4
Mdr602a.doc
Vi-R4000 Series
1.2.2 Mouse Control
The DVR can be fully controlled by a mouse and this is recommended especially for ease of system
configuration.
•
Move mouse to move pointer around screen
•
Right click to bring up menu
•
Left click to select items pointed to by the on-screen mouse pointer
Note: The mouse would normally plug into the USB MOUSE port on the rear of the DVR. If you enable
the mouse emulator (i.e. use keys top simulate mouse), the mouse will be disabled.
1.2.3 Mouse Emulator Control
The mouse emulator provides all the control of a mouse but using the front panel keys. The mouse
emulator function may also be used via a remote keyboard,
•
Press Left, Right, Up Down keys to move pointer around screen
•
Press TAG key to bring up menu when in live mode.
•
Press OK key to select items pointed to by the on-screen mouse pointer.
To enable/disable the mouse emulator, press ESC key and at same time, press the TAG key.
1.2.4 External Keyboards
The external keyboard ports support Vi-K1 and Vi-K2 series keyboards and allow remote control of the
DVR. The DVR sends video over CAT5 to the BNC output connectors on each keyboard for
connection to a monitor. When DVRs are cascaded, the keyboard monitor outputs can display images
from any of the DVRs.
Videoswitch
Page 5
Mdr602a.doc
Vi-R4000 Series
1.3 Cascading
Cascading is a feature that allows multiple recorders to be linked together.
•
Cameras can be called up simply by entering 1-256 on one or more connected keyboards
(e.g. Vi-K1 or Vi-K2).
•
All functions including live view, playback and menus from any unit can be accessed via a
single keyboard
•
A single VGA or BNC main monitor can be used
•
A single BNC spot monitor can be used on each of the three spot outputs
•
A single mouse can be used to control all units.
Videoswitch
Page 6
Mdr602a.doc
Vi-R4000 Series
2 Installation
Videoswitch
Page 7
Mdr602a.doc
Vi-R4000 Series
2.1 Preventive and Cautionary Tips
Before connecting and operating your device, please be advised of the following tips:
•
Ensure unit is installed in a well-ventilated, dust-free environment.
•
Unit is designed for indoor use only.
•
Keep all liquids away from the device.
•
Ensure environmental conditions meet factory specifications.
•
Ensure unit is properly secured to a rack or shelf. Major shocks or jolts to the unit as a result
of dropping it may cause damage to the sensitive electronics within the unit.
•
Use the device in conjunction with an UPS if possible.
•
Power down the unit before connecting and disconnecting accessories and peripherals.
•
A factory recommended HDD should be used for this device.
•
Improper use or replacement of the battery may result in hazard of explosion. Replace with
the same or equivalent type only. Dispose of used batteries according to the instructions
provided by the battery manufacturer.
Videoswitch
Page 8
Mdr602a.doc
Vi-R4000 Series
2.2 Rear Panel Connections
2.2.1 Essential Connections
•
Connect Cameras to camera inputs 1-8
•
Connect VGA monitor to VGA port and/or connect a BNC monitor to MONITOR (CVBS) port.
The two monitors can display different full screen and multi-screens. Note that the VGA
monitor must be connected prior to switching on the DVR as it is auto-detected on boot-up
unless specified as main monitor in the menu.
•
Connect mains supply to IEC mains input connector on using IEC cable (included).
2.2.2 Optional Connections
•
Connect an HDMI monitor or a DVI monitor (via adaptor cable) to the HDMI port. This will be
the main monitor. Note that the HDMI/DVI monitor must be connected prior to switching on
the DVR as it is auto-detected on boot-up.
•
Connect mouse to the rear MOUSE port. Note that while the mouse emulator is enabled, the
mouse is disabled
•
Connect Ethernet network to ETHERNET port using CAT5 cable (included)
•
Connect Videoswitch remote keyboards to KBD1, KBD2, KBD3, KBD4 ports (Vi-K1 or Vi-K2
range). A BNC video monitor may be connected to the BNC connector on the keyboards.
•
Connect dome(s) to outputs 1, 2, 3 and 4 of RS485 Dome port
•
Connect alarm device and alarm sensor contacts to ALARMS port
•
Connect a USB memory stick to the USB port on the front of the unit (beside the DVD drive)
for exporting video, importing/exporting configuration and for importing firmware updates.
•
Connect line level audio input and output equipment. 16 channels of audio are supported. An
audio breakout module is available that provides RCA phono connectors for all channels.
•
Cascading – see next section
Videoswitch
Page 9
Mdr602a.doc
Vi-R4000 Series
2.2.3 Connecting for Cascade Operation
DOMES
KBD CASCADE
CASC 1
1
2
CAM 2
3
CAM 2
4
CAM 2
5
CAM 2
6
CAM 2
7
CAM 2
8
CAM 2
9
CAM 2
10
CAM 2
11
CAM 2
12
CAM 2
CAM 2
VGA CASCADE IN
13
14
CAM 2
CAM 2
VGA IN
CASC 2
CASC 3
CASC 4
USB CASCADE
1 3
2 4
15
16
MONITORS
CONTROL
KBD 1
KBD 2
KBD 3
KBD 4
USB MOUSE
KEYBOARDS
RELAYS
T+ T-
G G R+ R-
1 G 2 G 3 G 4 G
ETHERNET
eSATA
1 2 3 4 5 6 7 8 9 10 11 12 13 14 15 16
ALARMS
AC POWER INPUT
100-240VAC 50-60HZ 1A
INPUTS
VGA
CABLES
USB
CABLES
CAT5
CABLES
DOMES
KBD CASCADE
CASC 1
1
2
CAM 2
3
CAM 2
4
CAM 2
5
CAM 2
6
CAM 2
7
CAM 2
8
CAM 2
9
CAM 2
10
CAM 2
11
CAM 2
12
CAM 2
CAM 2
VGA CASCADE IN
13
14
CAM 2
CAM 2
VGA IN
15
16
CASC 2
CASC 3
CASC 4
USB CASCADE
1 3
2 4
MONITORS
CONTROL
KBD 1
KBD 2
KBD 3
KBD 4
USB MOUSE
KEYBOARDS
RELAYS
T+ T-
G G R+ R-
1 G 2 G 3 G 4 G
ETHERNET
eSATA
1 2 3 4 5 6 7 8 9 10 11 12 13 14 15 16
ALARMS
DOMES
KBD CASCADE
CASC 1
1
CAM 2
3
CAM 2
5
CAM 2
7
CAM 2
2
CAM 2
4
CAM 2
6
CAM 2
8
CAM 2
9
CAM 2
11
CAM 2
10 CAM 2 12 CAM 2
VGA CASCADE IN
13
14
CAM 2
CAM 2
VGA IN
15
16
CASC 2
CASC 3
CASC 4
USB CASCADE
1 3
2 4
MONITORS
AC POWER INPUT
100-240VAC 50-60HZ 1A
INPUTS
CONTROL
KBD 1
KBD 2
KBD 3
KBD 4
USB MOUSE
KEYBOARDS
RELAYS
T+ T-
G G R+ R-
1 G 2 G 3 G 4 G
ETHERNET
eSATA
1 2 3 4 5 6 7 8 9 10 11 12 13 14 15 16
ALARMS
INPUTS
AC POWER INPUT
100-240VAC 50-60HZ 1A
MOUSE
VGA
MONITOR
Vi-K
KEYBOARD
Vi-K1 or Vi-K2
KEYBOARD
BNC
MONITOR
BNC
CABLES
BNC
MONITOR
Videoswitch
Vi-K
KEYBOARD
Vi-K
KEYBOARD
BNC
MONITOR
Page 10
BNC
MONITOR
Mdr602a.doc
Vi-R4000 Series
2.3 Replacing a Hard Drive
If a hard drive needs replacing, the DVR will product an audible warning.
The status of all drives fitted can be checked in this menu:
Menu>HDD>General
Status for each drive should be: Normal
If you need to replace a drive:
•
Turn off power to the DVR
•
Open the door of drive bay using the key provided
•
Pull out the drive plate with the drive to be replaced (Drive 1: bottom, Drive 2: top)
•
Replace the drive on the metal plate using a small screwdriver
•
Push in the drive plate with the new drive back into the bay
•
Close the door and lock it
•
Power up the DVR and wait until boot has completed. The audible alarm will be sounding.
•
Go into this menu: Menu>HDD>General
•
Tick the box relating to new drive
•
Click on Init to format the drive
•
Wait until complete.
Videoswitch
Page 11
Mdr602a.doc
Vi-R4000 Series
3 Commissioning
Videoswitch
Page 12
Mdr602a.doc
Vi-R4000 Series
3.1 Password Access
If password protection is enabled, a password will need to be selected to gain access to protected
functions such as the menu. When the password box appears, enter the password using one of these
methods:
3.1.1 Keyboard Mode
•
If you want to select a different User Name press arrow keys to highlight User Name field,
press OK, press down arrow, press OK again.
•
Press arrow keys to select Password field
•
Press EDIT key to enter edit mode
•
Enter the password using 0-9 keys
•
Press OK
•
Press arrow keys to select OK on screen
•
Press OK
3.1.2 Mouse
•
Click on user name if you wish to change it and select another use
•
Click on password field, enter password numbers and click on ENTER.
•
Click on OK
3.1.3 Mouse Emulator Mode
This is the same as using a mouse, except the up, down, left, right keys are used to move the mouse
pointer and the OK keys act s as a left mouse click.
•
Click on user name if you wish to change it and select another use
•
Click on password field, enter password numbers and press OK while on ENTER.
•
Click on OK
3.1.4 Default Passwords
The Vi-R4000 series DVR is shipped with default users and passwords pre-configured as shown in
this table. Access rights may be changed and other users may be added when logged in as admin. All
default settings may be restored by importing the default configuration from a USB memory stick. If
you change the admin password take care that it is not forgotten.
Username
Default Password
Access Rights
admin
12345
Access to everything for system configuration
user1
111111
Full local and remote access and configuration
user2
222222
Local and remote viewing, playback and export.
user3
333333
Local viewing, playback and export
user4
444444
Local manual operation of cameras
Videoswitch
Page 13
Mdr602a.doc
Vi-R4000 Series
Videoswitch
Page 14
Mdr602a.doc
Vi-R4000 Series
3.2 Default Configuration
3.2.1 System Configuration
The DVR is delivered with the system configuration already defaulted.
These settings ensure that it will record and play cameras once correctly connected up. The
configuration settings may be adjusted in the menu to suit the particular installation.
To revert to the default Videoswitch configuration, go to this menu:
Menu >System Maintenance > Import/Export
You can now import the default configuration from the supplied memory stick (using the USB port in
the front panel beside the DVD drive).
The default configuration file is also available on our website:
www.videoswitch.co.uk
Firmware Updates
Note: The firmware must match that of the configuration file. If you upgrade the DVR firmware you will
need to export the configuration again if you wish to retain a copy of the settings for future use.
3.2.2 Interface Configuration
The DVR is delivered with the Interface configuration already defaulted.
There are a number of settings relating to the cameras and multi-unit operation that are set by means
of simple 4 digit codes. To prevent accidental operation, the LIVE key must be pressed and held while
these codes are entered. Further protection is provided by a locking facility, using a command to lock
and another command to unlock access to the other functions:
3.2.2.1 Unlock Interface Settings
The interface system is locked on power up. It must be unlocked before any other settings can be
changed. When unlocked, the power LED on the front panel will be OFF.
Press and hold LIVE key, enter 9001, release LIVE key
3.2.2.2 Lock Interface Settings
If you have made changes and wish to lock the Interface settings, apply this command:
Press and hold LIVE key, enter 9000, release LIVE key
Note: if no commands are issued for a minute, the interface will automatically lock. When locked, the
power LED on the front panel will be ON.
3.2.2.3 Display Interface Firmware Revision
The revision of the Interface Controller can be displayed on the power LED by entering this command:
Press and hold LIVE key, enter 9002, release LIVE key
The LED stays on for a few seconds then displays three groups of flashes, encoding a 3-digit revision
number. The sequence is repeated until cancelled.
3.2.2.4 Default all Interface Settings
All Interface setting scan be defaulted by issuing this command:
Press and hold LIVE key, enter 9999, release LIVE key
Videoswitch
Page 15
Mdr602a.doc
Vi-R4000 Series
3.2.2.5 Summary of commands
For all commands, press and hold the LIVE key while entering the four command digits, then release
the LIVE key.
Command Description
Command
code
Comments
Lock access to settings
9000
Front panel power LED goes ON
Unlock access to settings
9001
Front panel power LED goes OFF
Display interface firmware revision
9002
Front panel power LED flashes long flash
then 3-digit firmware revision*
Default all settings
9999
Set all interface settings to default values
Turn 75 Ohm camera termination ON
11XX
XX is camera 01 to 16, or 00 for all cameras
Turn 75 Ohm camera termination OFF
12XX
XX is camera 01 to 16, or 00 for all cameras
Set unit address
13XX
XX is unit address 01 to 16
Set unit range
14XX
XX is range of unit address 1 or 2
Set monitor 2 to covert
22XX
XX is camera 01 to 16, or 00 for all
cameras.
Set monitor 3 to covert
23XX
XX is camera 01 to 16, or 00 for all
cameras.
Set monitor 4 to covert
24XX
XX is camera 01 to 16, or 00 for all
cameras.
Set monitor 2 to normal
32XX
XX is camera 01 to 16, or 00 for all
cameras.
Set monitor 3 to normal
33XX
XX is camera 01 to 16, or 00 for all
cameras.
Set monitor 4 to normal
34XX
XX is camera 01 to 16, or 00 for all
cameras.
Allocate up-the-coax PTZ cameras
41XX
XX is camera 01 to 16, or 00 for all
cameras.
Allocate PTZ cameras to RS485 ouputs
1&2
42XX
XX is camera 01 to 16, or 00 for all
cameras.
Allocate PTZ cameras to RS485 ouputs
3&4
43XX
XX is camera 01 to 16, or 00 for all
cameras.
Set protcol for up-the-coax
44XX
Not used – always BBV
Set protcol for RS485 ouputs 1 & 2
45XX
XX is protocol 00 – 99 (see
Set protcol for RS485 ouputs 3 & 4
46XX
XX is protocol 00 - 99
Coax telemetry timeout
49XX
XX = 00 to always transmit, else 01 to 99
seconds (default = 10 seconds)
Auto sequencing dwell time for monitor 1
51XX
XX is dwell time in seconds, 01 to 99,or 00
for default of 5 seconds
Auto sequencing dwell time for monitor 2
52XX
XX is dwell time in seconds, 01 to 99,or 00
for default of 5 seconds
Videoswitch
Page 16
Mdr602a.doc
Vi-R4000 Series
Auto sequencing dwell time for monitor 3
53XX
XX is dwell time in seconds, 01 to 99,or 00
for default of 5 seconds
Auto sequencing dwell time for monitor 4
54XX
XX is dwell time in seconds, 01 to 99,or 00
for default of 5 seconds
Enable cameras to auto-sequence on
monitor 1
61XXAA
XX is camera 01 to 16, or 00 for all
cameras. AA is unit number 01-16 or 00 for
unit being programmed
Enable cameras to auto-sequence on
monitor 2
62XXAA
XX is camera 01 to 16, or 00 for all
cameras. AA is unit number 01-16 or 00 for
unit being programmed
Enable cameras to auto-sequence on
monitor 3
63XXAA
XX is camera 01 to 16, or 00 for all
cameras. AA is unit number 01-16 or 00 for
unit being programmed
Enable cameras to auto-sequence on
monitor 4
64XXAA
XX is camera 01 to 16, or 00 for all
cameras. AA is unit number 01-16 or 00 for
unit being programmed
Disable cameras to auto-sequence on
monitor 1
71XXAA
XX is camera 01 to 16, or 00 for all
cameras. AA is unit number 01-16 or 00 for
unit being programmed
Disable cameras to auto-sequence on
monitor 2
72XXAA
XX is camera 01 to 16, or 00 for all
cameras. AA is unit number 01-16 or 00 for
unit being programmed
Disable cameras to auto-sequence on
monitor 3
73XXAA
XX is camera 01 to 16, or 00 for all
cameras. AA is unit number 01-16 or 00 for
unit being programmed
Disable cameras to auto-sequence on
monitor 4
74XXAA
XX is camera 01 to 16, or 00 for all
cameras. AA is unit number 01-16 or 00 for
unit being programmed
Videoswitch
Page 17
Mdr602a.doc
Vi-R4000 Series
3.3 Record Settings
If you use the default configuration supplied (which may be reloaded at any time from a USB memory
stick), recording will be enabled for all cameras at Medium quality at a default frame rate.
To adjust record setting to suit your application, enter the Record menu by pressing MENU key and
selecting the Record menu. The most important things that need to be set are outlined in the following
sections.
3.3.1 Schedule
For most applications, make sure the schedule is enabled for all connected cameras and for all times
of each day. This is indicated by all blocks being BLUE. If you need to set the whole schedule:
•
Select Enable Schedule
•
Click Edit
•
Select All Day
•
Select Copy
•
Select All
•
Click OK
•
Click on Apply
•
Click on OK
•
Click on Apply
Note: If some of the 16 camera inputs are not used, make sure the schedule for those inputs are
disabled so disc space is not wasted.
3.3.2 Resolution
Resolution determines the number pixels recorded. For analogue (BNC) cameras the recommended
setting to use is either 2CIF or 4CIF.
Resolution
Usage
704x288 (2CIF)
Recommended when smaller capacity hard drives are fitted (2Tbytes or less)
704x576 (4CIF)
Recommended for best quality when larger capacity hard drives are fitted (4Tbytes
or more) or if event triggered recording is used.
Set the resolution for both Normal and Event recording. Event recording applies when Activity
detection or external alarm inputs are used.
Note: 4CIF resolution is equivalent to D1 resolution (720x576). Higher resolutions are available for IP
cameras.
Videoswitch
Page 18
Mdr602a.doc
Vi-R4000 Series
3.3.3 Quality
Medium quality is appropriate for most applications but this can be adjusted to achieve required
playback quality. Setting this higher will use disc space up more quickly.
When you change the quality, make sure you also change the Max Bitrate (Kbps) accordingly.
3.3.4 Frame Rate
The frame rate has the next greatest impact on disc space usage. Refer to the tables in section Error!
Reference source not found. to choose highest record rates whilst achieving sufficient retention of
recordings. Set this for Normal and Event recording. Typically, normal recording would have a lower
frame rate to conserve disc space and achieve the required retention period whereas activity recording
would use the maximum rate to maximise evidence during periods of particular interest.
When you change the quality, make sure you also change the Max Bitrate (Kbps) accordingly. It
should be within the range indicated by Max Bitrate Range Recommended which is displayed on the
screen.
3.3.5 Max Bitrate
This should be set once the Resolution, Quality and Frame Rate have been selected. Set Max Bitrate
within the range indicated by Max Bitrate Range Recommended, somewhere near the higher figure
is recommended.
Note:
If Max Bitrate Mode is set to General you can chose Max Bitrate from a list of options
If Max Bitrate Mode is set to Customer you can enter any value for Max Bitrate.
Recommended max bit-rates are shown in this table:
Frames
per
second
2CIF
4CIF
Lowest
Lower
Low
Medium
Higher
Highest
Lowest
Lower
Low
Medium
Higher
Highest
1
147
221
258
295
370
518
295
370
445
518
592
890
2
167
252
295
336
421
590
336
421
506
590
675
1012
4
208
313
366
418
523
733
418
523
626
733
838
1258
6
250
375
438
500
626
877
500
626
751
877
1002
1503
8
291
436
510
582
728
1020
582
728
875
1020
1166
1750
10
331
497
581
663
831
1163
663
831
997
1163
1330
1996
12
372
558
653
746
933
1307
746
933
1120
1307
1493
2241
15
433
651
761
868
1087
1522
868
1087
1305
1522
1740
2610
16
455
682
796
910
1138
1593
910
1138
1366
1593
1821
2732
18
495
743
868
991
1241
1737
991
1241
1488
1737
1985
2978
20
536
803
940
1073
1343
1880
1073
1343
1612
1880
2148
3225
22
577
866
1011
1155
1446
2023
1155
1446
1735
2023
2312
3470
25
640
960
1120
1280
1600
2240
1280
1600
1920
2240
2560
3840
3.3.6 Copy settings to all other Cameras
Once you have set everything for one camera, you can copy its settings to all other cameras:
Videoswitch
Page 19
Mdr602a.doc
Vi-R4000 Series
1. Click on Copy
2. Click on Analog to select all cameras
3. Click on OK
1.
Videoswitch
Click on Apply
Page 20
Mdr602a.doc
Vi-R4000 Series
3.3.7 Retention Period
The displayed retention period is very much the worst case and assumes the maximum bit-rate on all
cameras at all times and also assumes that event recording is occurring all the time.
3.3.8 Retention Period Tables
The time period for which video recording is retained for before being over-written depends on these
factors:
• Hard drive capacity (1 to 8 Tbyte)
•
Frame rate (1 to 25)
•
Quality setting (Highest, higher, medium, low, lower, lowest)
•
Resolution (4CIF, 2CIF)
•
Number of cameras (1 to 16)
•
Complexity and movement in each camera view
The tables below give a guide to how many days retention to expect, assuming recommended max bit
rates, continuous recording and the same settings on all cameras. The exact retention period achieved
may differ according to how complex the images are that the cameras are looking at and how much
movement there is.
Depending on how many cameras you have and what hard drive capacity is available, you can see the
trade off between resolution, quality, frame-rate and retention period.
Videoswitch
Page 21
Mdr602a.doc
Vi-R4000 Series
3.3.8.1 16 Camera Systems
3.3.8.1.1 Retention Period for 1Tbyte, 16 cameras
Frames
per
second
per
camera
2CIF
4CIF
Lowest
Lower
Low
Medium
Higher
Highest
Lowest
Lower
Low
Medium
Higher
Highest
1
42
28
24
21
17
12
21
17
14
12
10
7
2
37
25
21
18
15
11
18
15
12
11
9
6
4
30
20
17
15
12
8
15
12
10
8
7
5
6
25
17
14
12
10
7
12
10
8
7
6
4
8
21
14
12
11
9
6
11
9
7
6
5
4
10
19
13
11
9
7
5
9
7
6
5
5
3
12
17
11
10
8
7
5
8
7
6
5
4
3
15
14
10
8
7
6
4
7
6
5
4
4
2
16
14
9
8
7
5
4
7
5
5
4
3
2
18
13
8
7
6
5
4
6
5
4
4
3
2
20
12
8
7
6
5
3
6
5
4
3
3
2
22
11
7
6
5
4
3
5
4
4
3
3
2
25
10
6
6
5
4
3
5
4
3
3
2
2
3.3.8.1.2 Retention Period for 2Tbyte, 16 cameras
Frames
per
second
per
camera
2CIF
4CIF
Lowest
Lower
Low
Medium
Higher
Highest
Lowest
Lower
Low
Medium
Higher
Highest
1
85
56
48
42
34
24
42
34
28
24
21
14
2
74
49
42
37
30
21
37
30
25
21
18
12
4
60
40
34
30
24
17
30
24
20
17
15
10
6
50
33
28
25
20
14
25
20
17
14
12
8
8
43
29
24
21
17
12
21
17
14
12
11
7
10
38
25
21
19
15
11
19
15
12
11
9
6
12
33
22
19
17
13
10
17
13
11
10
8
6
15
29
19
16
14
11
8
14
11
10
8
7
5
16
27
18
16
14
11
8
14
11
9
8
7
5
18
25
17
14
13
10
7
13
10
8
7
6
4
20
23
15
13
12
9
7
12
9
8
7
6
4
22
22
14
12
11
9
6
11
9
7
6
5
4
25
19
13
11
10
8
6
10
8
6
6
5
3
Videoswitch
Page 22
Mdr602a.doc
Vi-R4000 Series
3.3.8.1.3 Retention Period for 4Tbyte, 16 cameras
Frames
per
second
per
camera
2CIF
4CIF
Lowest
Lower
Low
Medium
Higher
Highest
Lowest
Lower
Low
Medium
Higher
Highest
1
169
112
96
84
67
48
84
67
56
48
42
28
2
149
99
84
74
59
42
74
59
49
42
37
25
4
119
79
68
59
48
34
59
48
40
34
30
20
6
99
66
57
50
40
28
50
40
33
28
25
17
8
85
57
49
43
34
24
43
34
28
24
21
14
10
75
50
43
37
30
21
37
30
25
21
19
12
12
67
45
38
33
27
19
33
27
22
19
17
11
15
57
38
33
29
23
16
29
23
19
16
14
10
16
55
36
31
27
22
16
27
22
18
16
14
9
18
50
33
29
25
20
14
25
20
17
14
13
8
20
46
31
26
23
19
13
23
19
15
13
12
8
22
43
29
25
22
17
12
22
17
14
12
11
7
25
39
26
22
19
16
11
19
16
13
11
10
6
3.3.8.1.4 Retention Period for 8Tbyte, 16 cameras
Frames
per
second
per
camera
2CIF
4CIF
Lowest
Lower
Low
Medium
Higher
Highest
Lowest
Lower
Low
Medium
Higher
Highest
1
338
225
193
169
134
96
169
134
112
96
84
56
2
298
197
169
148
118
84
148
118
98
84
74
49
4
239
159
136
119
95
68
119
95
79
68
59
40
6
199
133
113
99
79
57
99
79
66
57
50
33
8
171
114
97
85
68
49
85
68
57
49
43
28
10
150
100
86
75
60
43
75
60
50
43
37
25
12
134
89
76
67
53
38
67
53
44
38
33
22
15
115
76
65
57
46
33
57
46
38
33
29
19
16
109
73
62
55
44
31
55
44
36
31
27
18
18
100
67
57
50
40
29
50
40
33
29
25
17
20
93
62
53
46
37
26
46
37
31
26
23
15
22
86
57
49
43
34
25
43
34
29
25
22
14
25
78
52
44
39
31
22
39
31
26
22
19
13
Videoswitch
Page 23
Mdr602a.doc
Vi-R4000 Series
3.3.8.2
12 Camera Systems
3.3.8.2.1 Retention Period for 1Tbyte, 12 cameras
Frames
per
second
per
camera
2CIF
4CIF
Lowest
Lower
Low
Medium
Higher
Highest
Lowest
Lower
Low
Medium
Higher
Highest
1
56
37
32
28
22
16
28
22
19
16
14
9
2
50
33
28
25
20
14
25
20
16
14
12
8
4
40
26
23
20
16
11
20
16
13
11
10
7
6
33
22
19
17
13
9
17
13
11
9
8
6
8
28
19
16
14
11
8
14
11
9
8
7
5
10
25
17
14
12
10
7
12
10
8
7
6
4
12
22
15
13
11
9
6
11
9
7
6
6
4
15
19
13
11
10
8
5
10
8
6
5
5
3
16
18
12
10
9
7
5
9
7
6
5
5
3
18
17
11
10
8
7
5
8
7
6
5
4
3
20
15
10
9
8
6
4
8
6
5
4
4
3
22
14
10
8
7
6
4
7
6
5
4
4
2
25
13
9
7
6
5
4
6
5
4
4
3
2
3.3.8.2.2 Retention Period for 2Tbyte, 12 cameras
Frames
per
second
per
camera
2CIF
4CIF
Lowest
Lower
Low
Medium
Higher
Highest
Lowest
Lower
Low
Medium
Higher
Highest
1
113
75
64
56
45
32
56
45
37
32
28
19
2
99
66
56
49
39
28
49
39
33
28
25
16
4
80
53
45
40
32
23
40
32
26
23
20
13
6
66
44
38
33
26
19
33
26
22
19
17
11
8
57
38
32
28
23
16
28
23
19
16
14
9
10
50
33
29
25
20
14
25
20
17
14
12
8
12
45
30
25
22
18
13
22
18
15
13
11
7
15
38
25
22
19
15
11
19
15
13
11
10
6
16
36
24
21
18
15
10
18
15
12
10
9
6
18
33
22
19
17
13
10
17
13
11
10
8
6
20
31
21
18
15
12
9
15
12
10
9
8
5
22
29
19
16
14
11
8
14
11
10
8
7
5
25
26
17
15
13
10
7
13
10
9
7
6
4
Videoswitch
Page 24
Mdr602a.doc
Vi-R4000 Series
3.3.8.2.3 Retention Period for 4Tbyte, 12 cameras
Frames
per
second
per
camera
2CIF
4CIF
Lowest
Lower
Low
Medium
Higher
Highest
Lowest
Lower
Low
Medium
Higher
Highest
1
225
150
128
112
90
64
112
90
74
64
56
37
2
198
132
112
99
79
56
99
79
65
56
49
33
4
159
106
91
79
63
45
79
63
53
45
40
26
6
133
88
76
66
53
38
66
53
44
38
33
22
8
114
76
65
57
46
32
57
46
38
32
28
19
10
100
67
57
50
40
28
50
40
33
28
25
17
12
89
59
51
44
36
25
44
36
30
25
22
15
15
77
51
44
38
30
22
38
30
25
22
19
13
16
73
49
42
36
29
21
36
29
24
21
18
12
18
67
45
38
33
27
19
33
27
22
19
17
11
20
62
41
35
31
25
18
31
25
21
18
15
10
22
57
38
33
29
23
16
29
23
19
16
14
10
25
52
35
30
26
21
15
26
21
17
15
13
9
3.3.8.2.4 Retention Period for 8Tbyte, 12 cameras
Frames
per
second
per
camera
2CIF
4CIF
Lowest
Lower
Low
Medium
Higher
Highest
Lowest
Lower
Low
Medium
Higher
Highest
1
451
300
257
225
179
128
225
179
149
128
112
74
2
397
263
225
197
157
112
197
157
131
112
98
65
4
319
212
181
159
127
90
159
127
106
90
79
53
6
265
177
151
133
106
76
133
106
88
76
66
44
8
228
152
130
114
91
65
114
91
76
65
57
38
10
200
133
114
100
80
57
100
80
66
57
50
33
12
178
119
102
89
71
51
89
71
59
51
44
30
15
153
102
87
76
61
44
76
61
51
44
38
25
16
146
97
83
73
58
42
73
58
49
42
36
24
18
134
89
76
67
53
38
67
53
45
38
33
22
20
124
83
71
62
49
35
62
49
41
35
31
21
22
115
77
66
57
46
33
57
46
38
33
29
19
25
104
69
59
52
41
30
52
41
35
30
26
17
Videoswitch
Page 25
Mdr602a.doc
Vi-R4000 Series
3.3.8.3
8 Camera Systems
3.3.8.3.1 Retention Period for 1Tbyte, 8 cameras
Frames
per
second
per
camera
2CIF
4CIF
Lowest
Lower
Low
Medium
Higher
Highest
Lowest
Lower
Low
Medium
Higher
Highest
1
85
56
48
42
34
24
42
34
28
24
21
14
2
74
49
42
37
30
21
37
30
25
21
18
12
4
60
40
34
30
24
17
30
24
20
17
15
10
6
50
33
28
25
20
14
25
20
17
14
12
8
8
43
29
24
21
17
12
21
17
14
12
11
7
10
38
25
21
19
15
11
19
15
12
11
9
6
12
33
22
19
17
13
10
17
13
11
10
8
6
15
29
19
16
14
11
8
14
11
10
8
7
5
16
27
18
16
14
11
8
14
11
9
8
7
5
18
25
17
14
13
10
7
13
10
8
7
6
4
20
23
15
13
12
9
7
12
9
8
7
6
4
22
22
14
12
11
9
6
11
9
7
6
5
4
25
19
13
11
10
8
6
10
8
6
6
5
3
3.3.8.3.2 Retention Period for 2Tbyte, 8 cameras
Frames
per
second
per
camera
2CIF
4CIF
Lowest
Lower
Low
Medium
Higher
Highest
Lowest
Lower
Low
Medium
Higher
Highest
1
169
112
96
84
67
48
84
67
56
48
42
28
2
149
99
84
74
59
42
74
59
49
42
37
25
4
119
79
68
59
48
34
59
48
40
34
30
20
6
99
66
57
50
40
28
50
40
33
28
25
17
8
85
57
49
43
34
24
43
34
28
24
21
14
10
75
50
43
37
30
21
37
30
25
21
19
12
12
67
45
38
33
27
19
33
27
22
19
17
11
15
57
38
33
29
23
16
29
23
19
16
14
10
16
55
36
31
27
22
16
27
22
18
16
14
9
18
50
33
29
25
20
14
25
20
17
14
13
8
20
46
31
26
23
19
13
23
19
15
13
12
8
22
43
29
25
22
17
12
22
17
14
12
11
7
25
39
26
22
19
16
11
19
16
13
11
10
6
Videoswitch
Page 26
Mdr602a.doc
Vi-R4000 Series
3.3.8.3.3 Retention Period for 4Tbyte, 8 cameras
Frames
per
second
per
camera
2CIF
4CIF
Lowest
Lower
Low
Medium
Higher
Highest
Lowest
Lower
Low
Medium
Higher
Highest
1
338
225
193
169
134
96
169
134
112
96
84
56
2
298
197
169
148
118
84
148
118
98
84
74
49
4
239
159
136
119
95
68
119
95
79
68
59
40
6
199
133
113
99
79
57
99
79
66
57
50
33
8
171
114
97
85
68
49
85
68
57
49
43
28
10
150
100
86
75
60
43
75
60
50
43
37
25
12
134
89
76
67
53
38
67
53
44
38
33
22
15
115
76
65
57
46
33
57
46
38
33
29
19
16
109
73
62
55
44
31
55
44
36
31
27
18
18
100
67
57
50
40
29
50
40
33
29
25
17
20
93
62
53
46
37
26
46
37
31
26
23
15
22
86
57
49
43
34
25
43
34
29
25
22
14
25
78
52
44
39
31
22
39
31
26
22
19
13
3.3.8.3.4 Retention Period for 8Tbyte, 8 cameras
Frames
per
second
per
camera
2CIF
4CIF
Lowest
Lower
Low
Medium
Higher
Highest
Lowest
Lower
Low
Medium
Higher
Highest
1
676
450
385
337
269
192
337
269
223
192
168
112
2
595
395
337
296
236
169
296
236
196
169
147
98
4
478
318
272
238
190
136
238
190
159
136
119
79
6
398
265
227
199
159
113
199
159
132
113
99
66
8
342
228
195
171
137
97
171
137
114
97
85
57
10
300
200
171
150
120
85
150
120
100
85
75
50
12
267
178
152
133
107
76
133
107
89
76
67
44
15
230
153
131
115
91
65
115
91
76
65
57
38
16
219
146
125
109
87
62
109
87
73
62
55
36
18
201
134
115
100
80
57
100
80
67
57
50
33
20
185
124
106
93
74
53
93
74
62
53
46
31
22
172
115
98
86
69
49
86
69
57
49
43
29
25
155
104
89
78
62
44
78
62
52
44
39
26
Videoswitch
Page 27
Mdr602a.doc
Vi-R4000 Series
3.3.8.4 4 Camera Systems
3.3.8.4.1 Retention Period for 1Tbyte, 4 cameras
Frames
per
second
per
camera
2CIF
4CIF
Lowest
Lower
Low
Medium
Higher
Highest
Lowest
Lower
Low
Medium
Higher
Highest
1
169
112
96
84
67
48
84
67
56
48
42
28
2
149
99
84
74
59
42
74
59
49
42
37
25
4
119
79
68
59
48
34
59
48
40
34
30
20
6
99
66
57
50
40
28
50
40
33
28
25
17
8
85
57
49
43
34
24
43
34
28
24
21
14
10
75
50
43
37
30
21
37
30
25
21
19
12
12
67
45
38
33
27
19
33
27
22
19
17
11
15
57
38
33
29
23
16
29
23
19
16
14
10
16
55
36
31
27
22
16
27
22
18
16
14
9
18
50
33
29
25
20
14
25
20
17
14
13
8
20
46
31
26
23
19
13
23
19
15
13
12
8
22
43
29
25
22
17
12
22
17
14
12
11
7
25
39
26
22
19
16
11
19
16
13
11
10
6
3.3.8.4.2 Retention Period for 2Tbyte, 4 cameras
Frames
per
second
per
camera
2CIF
4CIF
Lowest
Lower
Low
Medium
Higher
Highest
Lowest
Lower
Low
Medium
Higher
Highest
1
338
225
193
169
134
96
169
134
112
96
84
56
2
298
197
169
148
118
84
148
118
98
84
74
49
4
239
159
136
119
95
68
119
95
79
68
59
40
6
199
133
113
99
79
57
99
79
66
57
50
33
8
171
114
97
85
68
49
85
68
57
49
43
28
10
150
100
86
75
60
43
75
60
50
43
37
25
12
134
89
76
67
53
38
67
53
44
38
33
22
15
115
76
65
57
46
33
57
46
38
33
29
19
16
109
73
62
55
44
31
55
44
36
31
27
18
18
100
67
57
50
40
29
50
40
33
29
25
17
20
93
62
53
46
37
26
46
37
31
26
23
15
22
86
57
49
43
34
25
43
34
29
25
22
14
25
78
52
44
39
31
22
39
31
26
22
19
13
Videoswitch
Page 28
Mdr602a.doc
Vi-R4000 Series
3.3.8.4.3 Retention Period for 4Tbyte, 4 cameras
Frames
per
second
per
camera
2CIF
4CIF
Lowest
Lower
Low
Medium
Higher
Highest
Lowest
Lower
Low
Medium
Higher
Highest
1
676
450
385
337
269
192
337
269
223
192
168
112
2
595
395
337
296
236
169
296
236
196
169
147
98
4
478
318
272
238
190
136
238
190
159
136
119
79
6
398
265
227
199
159
113
199
159
132
113
99
66
8
342
228
195
171
137
97
171
137
114
97
85
57
10
300
200
171
150
120
85
150
120
100
85
75
50
12
267
178
152
133
107
76
133
107
89
76
67
44
15
230
153
131
115
91
65
115
91
76
65
57
38
16
219
146
125
109
87
62
109
87
73
62
55
36
18
201
134
115
100
80
57
100
80
67
57
50
33
20
185
124
106
93
74
53
93
74
62
53
46
31
22
172
115
98
86
69
49
86
69
57
49
43
29
25
155
104
89
78
62
44
78
62
52
44
39
26
3.3.8.4.4 Retention Period for 8Tbyte, 4 cameras
Frames
per
second
per
camera
2CIF
4CIF
Lowest
Lower
Low
Medium
Higher
Highest
Lowest
Lower
Low
Medium
Higher
Highest
1
1353
900
771
674
537
384
674
537
447
384
336
223
2
1191
789
674
592
472
337
592
472
393
337
295
196
4
956
635
543
476
380
271
476
380
318
271
237
158
6
795
530
454
398
318
227
398
318
265
227
198
132
8
683
456
390
342
273
195
342
273
227
195
171
114
10
601
400
342
300
239
171
300
239
199
171
150
100
12
535
356
305
267
213
152
267
213
178
152
133
89
15
459
305
261
229
183
131
229
183
152
131
114
76
16
437
292
250
219
175
125
219
175
146
125
109
73
18
402
268
229
201
160
114
201
160
134
114
100
67
20
371
248
212
185
148
106
185
148
123
106
93
62
22
345
230
197
172
138
98
172
138
115
98
86
57
25
311
207
178
155
124
89
155
124
104
89
78
52
Videoswitch
Page 29
Mdr602a.doc
Vi-R4000 Series
3.3.9 Retention Period Calculator
A PC application is also available to calculate update rates and disc capacity requirements. This
application caters for configurations with different setting for each camera.
Program name:
DiskCalculator.exe
Download from:
www.videoswitch.co.uk
Videoswitch
Page 30
located in Free Software
Mdr602a.doc
Vi-R4000 Series
3.4 Casacading
3.4.1 Vi-R4000 Recorders (address range 2)
If multiple Vi-R4000 series Recorders are cascaded (see connection details in section 2.2.3) no
address configuration is required. The DVRs by default have an an address range of 2 so addresses
will be assigned automatically as follows:
DVR
Unit Address
Analogue
Cameras
Network Cameras
1
1&2
1 - 16
17 - 32
2
3&4
33 - 48
49 - 64
3
5&6
65 – 80
81 – 96
4
7&8
97 – 112
113 – 128
5
9 & 10
129 – 144
145 – 160
6
11 & 12
161 – 176
177 – 192
7
13 & 14
193 – 208
209 - 224
8
15 & 16
225 – 240
241 - 256
Videoswitch
Page 31
Mdr602a.doc
Vi-R4000 Series
3.4.2 Vi-R4000 Recorders (address range 1)
If you have only analogue cameras and you want consequitive camera numbering without gaps, set
each unit address range to 1. The addresses will then be automatically assigned as follows:
DVR
Unit Address
Analogue
Cameras
1
1
1 - 16
2
2
17 – 32
3
3
33 – 48
4
4
49 - 64
5
5
65 – 80
6
6
81 – 96
7
7
97 – 112
8
8
113 – 128
9
9
129 - 144
10
10
145 – 160
11
11
161 – 176
12
12
177 – 192
13
13
193 – 208
14
14
209 – 224
15
15
225 – 240
16
16
241 - 256
Videoswitch
Page 32
Mdr602a.doc
Vi-R4000 Series
3.4.3 Vi405 and Vi-R4000 Recorders (address range 1)
If Vi-R4000 Series Recorders are being cascaded with existing Vi405 DVRs, follow the following
guidelines:
•
Make sure the Vi405 DVRs are first in the cascading chain i.e. the including. master unit
•
Add Vi-R4000 series units at the end of the chain
•
Manually allocate Vi405 and Vi-R4005 addresses in the order the units are physically
connected (see below)
•
Manually set each Vi-R40905 address range to 1 (see below)
•
Note that Vi405’s do not have VGA or mouse control so cascading of these features is not
possible.
When DVRs each haver and address range of 1 (which Vi405’s always do), the cameras are allocated
as follows:
DVR
Unit Address
Analogue
Cameras
1
1
1 - 16
2
2
17 – 32
3
3
33 – 48
4
4
49 - 64
5
5
65 – 80
6
6
81 – 96
7
7
97 – 112
8
8
113 – 128
9
9
129 - 144
10
10
145 – 160
11
11
161 – 176
12
12
177 – 192
13
13
193 – 208
14
14
209 – 224
15
15
225 – 240
16
16
241 - 256
Videoswitch
Page 33
Mdr602a.doc
Vi-R4000 Series
3.4.3.1 Manually Set DVR Address
If the DVR is being cascaded with Vi405 DVRs, you will need to manually set its address. Set the
address as follows:
Press and hold LIVE key, enter 13xx, release LIVE key
Where XX is the unit number 01 to 16.
3.4.3.2 Manually Set Address Range
If you are not using network cameras, you may wish to set the address range to 1. Set the address
range as follows:
Press and hold LIVE key, enter 14xx, release LIVE key
Where XX is the unit address range 01 or 02.
3.4.4 Sharing a VGA Monitor
If you wish to share a VGA monitor, you will need to set the monitor output on each unit to VGA as
they will not all be able to automatically detect the monitor on power-up.
To set the main monitor to VGA on each unit, navigate to this menu option:
Menu>configuration>General>More Settings->Menu Output Mode
Videoswitch
Page 34
set to: VGA
Mdr602a.doc
Vi-R4000 Series
3.5 Termination
3.5.1 Turn Camera Termination ON
To turn the 75 Ohm camera termination ON (default) enter this command:
Press and hold LIVE key, enter 11XX, release LIVE key
Where XX is the camera number 01 to 16, or 00 for all cameras off at once:
3.5.2 Turn Camera Termination OFF
To turn the 75 Ohm camera termination ON (default) enter this command:
Press and hold LIVE key, enter 12XX, release LIVE key
Where XX is the camera number 01 to 16, or 00 for all cameras off at once:
Videoswitch
Page 35
Mdr602a.doc
Vi-R4000 Series
3.6 Covert Cameras
Covert cameras are camera that are hidden from view by are nvertheless recording. They are hiiden
from view for all users, but can be made available for playback on selected user login-ins.
3.6.1 Main Monitor (Monitor 1)
3.6.1.1 Set Covert
Make sure that covert cameras are removed from view by clicking on the “x” next to the camera
number displayed on the screen. For example, if you wish to make camera 16 covert, click on the “x”
wherever “A16 x” is displayed. It will now display “X x”. This indicates that this camera will not be
displayed.
This will prevent cameras from being viewed in live mode. To prevent them being viewed remotely or
in playback, you must also make sure the user logins resrict viewing of any coverted cameras:
• Go into this menu (must be admin login): Menu>Configuration>User
• Click on green tick icon
• Select this tab: Camera Configuration
• Select this drop down option: Local Playback
• Disable any cameras that you wish this user to be unable to replay.
• Select this tab: Local Configuration
• Disable Local Camera Management
• Click Apply
3.6.1.2 Clear Covert
To restore cameras to view (or re-arrange the displays), selected one of the screen areas and click on
the camera symbol to the left of the camera reference A1, S2 A3 etc. This will allocate the
corresponding camera to the selected screen zone.
Make sure the user login allows local playback of thay camera again (see previous section).
3.6.2 Monitor 2
3.6.2.1 Set Covert
To set a camera to covert enter this command:
Press and hold LIVE key, enter 22XX, release LIVE key
Where XX is the camera number 01 to 16, or 00 for all cameras off at once.
3.6.2.2 Clear Covert
To set a camera to normal enter this command:
Press and hold LIVE key, enter 22XX, release LIVE key
Where XX is the camera number 01 to 16, or 00 for all cameras off at once.
Videoswitch
Page 36
Mdr602a.doc
Vi-R4000 Series
3.6.3 Monitor 3
3.6.3.1 Set Covert Camera
To set a camera to covert enter this command:
Press and hold LIVE key, enter 23XX, release LIVE key
Where XX is the camera number 01 to 16, or 00 for all cameras off at once.
3.6.3.2 Clear Covert Camera
To set a camera to normal enter this command:
Press and hold LIVE key, enter 23XX, release LIVE key
Where XX is the camera number 01 to 16, or 00 for all cameras off at once.
3.6.4 Monitor 4
3.6.4.1 Set Covert Camera
To set a camera to covert enter this command:
Press and hold LIVE key, enter 24XX, release LIVE key
Where XX is the camera number 01 to 16, or 00 for all cameras off at once.
3.6.4.2 Clear Covert Camera
To set a camera to normal enter this command:
Press and hold LIVE key, enter 24XX, release LIVE key
Where XX is the camera number 01 to 16, or 00 for all cameras off at once.
3.6.5 Video export and Remote View
User rights can be set to restrict exporting or viewing of particular cameras in this menu:
Menu>Configuration>User
Click on green tick symbol to edit user viewing rights (you need to be logged in as admin)
Videoswitch
Page 37
Mdr602a.doc
Vi-R4000 Series
3.7 PTZ Control
There are several methods of PTZ control:
3.7.1 Up-the-coax
PTZ domes that support BBV up-the-coax telemetry can be controlled from the Vi-R4000 series DVR
when connected to a Videoswitch joystick keyboard (Vi-K2, Vi-K3 , Vi-K2A, Vi-K2000). The domes are
simply connected to the BNC inputs and control occurs back up the coax cable.
Interface commands are required to configure cameras for up-the-coax control.
Before issuing the commands, issue an un-lock command as follows:
Press and hold LIVE key, enter 9001, release LIVE key
These commands may then be issued to congigure one or more cameras for up-the-coax control:
3.7.1.1 Disable PTZ Control
To set a camera have no PTZ local control enter this command:
Press and hold LIVE key, enter 40XX, release LIVE key
Where XX is the camera number 01 to 16, or 00 for all cameras off at once.
3.7.1.2 Enable Coax Control
To set a camera to have up-the-coax PTZ control, enter this command:
Press and hold LIVE key, enter41XX, release LIVE key
Where XX is the camera number 01 to 16, or 00 for all cameras off at once.
3.7.1.3 Set Coax Transmission Timeout
To set a up-the-coax PTZ timeout, enter this command:
Press and hold LIVE key, enter49XX, release LIVE key
Where XX is the timeout in seconds 01 to 99, or 00 for continuous transmission. If you see telemetry
interference on the display the timeout can be used to minimise this.
Note: Interface commands are summarised in section 3.2.2
Videoswitch
Page 38
Mdr602a.doc
Vi-R4000 Series
3.7.2 Connecting up Domes for RS485 Control
The Vi-R4000 series DVR has four RS485 dome outputs. These may be used directly to control
domes or may be fed via RS485 port expanders where more than four domes are to be conneced in
star configuration.
Daisy-chaining of domes is also possible from each of the four ouputs, in which case the RS485
receiver of the furthest dome on each daisy-chain should be terminated and the others un-terminated.
Using a Vi-X18 break-out module, connect the domes to the DOMES connector on the rear of the
DVR. Four RS485 output are provided identified as 1, 2, 3 and 4.
3.7.3 Connection for dome control via ethernet
In order to remotely control domes via ethernet, a connection is required on the back of the DVR
between the green terminal block and the D-type connector marked “Control” as follows:
Terminal Block
CONTROL port
Tx+
Pin 1
Tx-
Pin 2
Domes can be connected to the DOMES connector using the Vi-X18 breakout module as above.
Videoswitch
Page 39
Mdr602a.doc
Vi-R4000 Series
3.7.4 RS485 Local Control using DVR Protocols
A Vi-K2, Vi-K2A or Vi-K2000 joystick keyboard can be used to control PTZ domes connected to the ViR4000. Connect the keyboard to a KBD port on the DVR and set up the keyboard menu such that
control is “via” DVR”.
Program the DVR for PTZ control as follows:
Before issuing the commands, issue an un-lock command as follows:
Press and hold LIVE key, enter 9001, release LIVE key
3.7.4.1 Enable RS485 Control on outputs 1 & 2
To configure a camera for PTZ control on RS485 outputs 1 & 2, enter this command:
Press and hold LIVE key, enter42XX, release LIVE key
Where XX is the camera number 01 to 16, or 00 for all cameras..
3.7.4.2 Enable RS485 Control on outputs 3 & 4
T To configure a camera for PTZ control on RS485 outputs 3 & 4 , enter this command:
Press and hold LIVE key, enter43XX, release LIVE key
Where XX is the camera number 01 to 16, or 00 for all cameras.
3.7.4.3 Set RS485 Protocol for Outputs 1 & 2
To set the PTZ protocol for RS485 outputs 1 & 2 , enter this command:
Press and hold LIVE key, enter45XX, release LIVE key
Where XX is the protocol number (see section 3.7.5).
3.7.4.4 Set RS485 Protocol for Outputs 3 & 4
To set the PTZ protocol for RS485 outputs 1 & 2 , enter this command:
Press and hold LIVE key, enter 46XX, release LIVE key
Where XX is the protocol number (see section 3.7.5).
Videoswitch
Page 40
Mdr602a.doc
Vi-R4000 Series
3.7.5 RS485 Protocols
Protocol
Protocol
Number
JVC
02
MOLYNX
03
DENNARD
04
VCL
05
SANYO
06
FORWARD VISION (VCL)
09
MERCER
10
LILIN MLP1
11
PELCO-D 2400
14
VIDEOSWITCH VXP4
15
VCL for SPEED DOME
16
FORWARD VISION
17
BBV RS485
18
PELCO-D2400 for VISTA
19
LILIN MLP2
20
PELCO-D 9600
21
PELCO-P 4800
22
PELCO-P 9600
23
Note: Interface commands are summarised in section 3.2.2
3.7.6 RS485 Local Control using Keyboard Protocols
The protocols built into a Vi-K2A joystick keyboard can be used to control PTZ domes connected to
the Vi-R4000. Connect the keyboard to the KBD1 port on the DVR and set up the keyboard menu
such that each PTZ camera is assigend to Domes-1 or Domes-2 output and that each of these outputs
is assigned the required RS485 protocol. Set the Dome o/p to “DVR” to tell the keyboard that the
domes are to be connected to the DVR (rather than the keyboard). Note that Domes-1 output on the
keyboard relates to RS485 outputs 1 &2 on the DVR and Domes-2 output on the keyboard relates to
RS485 outputs 3 & 4 on the DVR.
Videoswitch
Page 41
Mdr602a.doc
Vi-R4000 Series
3.7.7 RS485 Dome Control via Ethernet
If you want to control PTZ domes via a network, whether locally or via broadband, this is achieved
using mouse control.
Protocol and baud rate is set in the menu to suit the dome(s).
Menu>Camera>PTZ
Select PTZ mode either using pressing the PTZ key or right-clicking the mouse on a live camera
image and pressing the PTZ icon.The dome may now be controlled by the mouse.
Videoswitch
Page 42
Mdr602a.doc
Vi-R4000 Series
4 User
Videoswitch
Page 43
Mdr602a.doc
Vi-R4000 Series
4.1 Live Viewing
4.1.1 Full screen
To select full screen camera images:
•
Enter the camera number using the number keys: 1,2,3,4,5,6,7,8,9,0
•
Pressing the à and Ä keys to step through cameras
•
Right click on mouse and select Main or Aux monitor and required camera.
4.1.2 Multi-Screen
To select multi-screen camera images:
•
Press the SCREEN key to get the format you require. Use à and Ä for different camera
groups in multi-screens.
•
Right click on mouse and select Main or Aux monitor and required screen format
4.1.3 Auto-Sequencing
If a dwell time has been set in the Configuration>Live View menu, pressing SEL will start
sequencing.
4.1.4 Main or Aux Monitor Selection
Press the MAIN/AUX key then SELECT to switch between main and aux monitors so that camera can
be selected.
Note: Take care if the other monitor isn’t attached or visible to you, as you will lose sight of your
cursor. If this happens, just press MAIN/AUX key then SELECT again and control will return to your
monitor.
4.1.5 Screen Warning Symbols
The following symbols may appear on the screen for each camera.
To find what has caused the alert:
•
Press HELP key to go to menu path: Menu>Maintenance->System Info
•
Look at Camera, Record, Alarm, Network and HDD tabs and check for errors
•
Select Log Information
Click on Search (change date and Major Type and Minor Type to narrow down the events as
required)
4.1.5.1 Yellow Triangle
The yellow triangle is an alert cause by either:
•
An alarm such as movement detection or external alarm input
•
An exception such as a hard drive failure.
Videoswitch
Page 44
Mdr602a.doc
Vi-R4000 Series
4.1.5.2 Red Cross
A red cross indicates that recording has stopped on that camera. This may be due to a variety of
reasons, including:
•
Time is outside programmed schedule
•
Recording has been manually stopped
•
Camera is faulty
•
Hard drive is faulty
•
Network problem (if IP camera)
4.1.6 Quick setting Toolbar
If you right-click on the mouse (or mouse emulator) in Live mode, you will see this toolbar.
This provides these functions (in order):
Enable manual record
If schedule is inactive, record may be manually enabled or disabled
Instant playback
Instant Playback only shows the last five minutes recorded
Mute audio
Mute/Enable audio
Capture an image
Take a snapshot of the current image
PTZ control
Control dome via keyboard
Digital Zoom
Left-click and draw to select the area for zooming
Image settings
Adjust image appearance
Close toolbar
Close this toolbar
Videoswitch
Page 45
Mdr602a.doc
Vi-R4000 Series
4.2 Spot Monitors
4.2.1 Using Vi-K1(A) remote keyboard
If you plug a Vi-K1(A) keyboard into KBD2 it will control monitor 2. If you plug a Vi-K1(A) keyboard into
KBD3 it will control monitor 3. If you plug a Vi-K1(A) keyboard into KBD4 it will control monitor 4.
•
Enter numbers to select cameras.
•
Press OK to start auto-sequencing (cameras and dwell time can be specified by interface
commands)
•
Press LIVE or select a camera to stop auto-sequencing
4.2.2 Using Vi-K1 to control other monitors
A Vi-K1(A) keyboard plugged into any of the four KBD ports can be made to behave as if it is plugged
into any of the other KBD ports as follows:
Press and hold ESC key, press 1, 2, 3 or 4 release ESC key.
The keyboard will now control the DVR as if it were plugged into the KBD port 1, 2, 3 or 4 respectively.
To make the keyboard revert to it’s normal control port:
Press and hold ESC key, press 0 release ESC key.
4.2.3 Using Vi-K2(A) remote keyboard
A Vi-K2 keyboard is capable of controlling any monitor when plugged into any keyboard port by
selecting the display monitor 1 to 4 on the keyboard, then entering the camera number (use may be
restricted in the keyboard if required).
You can also route cameras 1-16 to the various monitors from the DVR’s front panel keypad as
follows:
•
BNC Monitor 1
-
enter 1 to 16
•
BNC Monitor 2
-
enter 101 to 116
•
BNC Monitor 3
-
enter 201 to 216
•
BNC Monitor 4
-
enter 301 to 316
4.2.4 Auto-Sequencing
The master unit (DVR) can be programmed to auto-sequence cameras across multiple cascaded
DVRs. For each monitor that you want to have auto-sequencing on, specify which cameras and which
units you want to be included in the sequence (See interface commands section 16).
Videoswitch
Page 46
Mdr602a.doc
Vi-R4000 Series
4.3 Play and Video Export
Video clips may be exported to a USB stick or to CDs or DVDs using the the built-in DVD drive.
Follow these steps to backup video:
•
Press The PLAY key to enter playback mode
•
Using the mouse or mouse emulator, select which cameras you wish to view and backup
(move mouse pointer to right of the screen to bring up list of cameras and calendar)
•
Double click on the calendar to select a day (highlighted if recording is available). You can
hold MON/ESC/ALT and press OK for a double click.
•
Click on the slider bar across the bottom playback select different times of the selected day
•
Use mouse or playback buttons to control play/pause, speed and direction.
•
Using the slider, select the start of the video that you wish to export. Press EDIT. Alternatively,
click on the clip (scissor symbol) button near bottom left of screen.
•
Move slider to end of video section to be exported. Press EDIT to mark end of clip.
Alternatively, click on the clip (scissor symbol) button near bottom left of screen.
•
Repeat 6 and 7 if there are other clips you require.
•
Press ESC and then click on YES.
•
Put in CD, DVD or USB memory stick and refresh.
•
When ready, press START to export. Wait until completed. Create duplicate copy if needed.
Note
Keep clips as small as possible and only include cameras that are required so that exported data fits
onto the backup media.
Videoswitch
Page 47
Mdr602a.doc
Vi-R4000 Series
4.4 Remote Viewing
4.4.1 Browser
Connect to a Videwoswitch R-series Net Recorder with a browser for remote viewing and
management. You will need to allow the browser to install some add-ons.
4.4.2 Vi-Viewer4000 Camera Management System
Install Vi-Viewer4000 on PC running Windows (XP, Vista, Windows 7) to remotely monitor and
manage up to 256 Videoswitch Net Recorders.
Videoswitch
Page 48
Mdr602a.doc
Vi-R4000 Series
5 Reference
Videoswitch
Page 49
Mdr602a.doc
Vi-R4000 Series
5.1 Menu
5.1.1 Playback
5.1.2 Recording Configuration
5.1.2.1 Quick Schedule
5.1.2.2 Advanced Schedule Configuration
5.1.2.3 Record Quality Settings
5.1.2.4 Motion Detection Settings
5.1.2.5 Trigger Settings
5.1.3 Cameras Setup
5.1.3.1 Privacy Zones
5.1.3.2 Video Tampering Detection
5.1.3.3 Video Loss Detection
5.1.3.4 OSD Configuration
5.1.4 Status
5.1.4.1 Drive Information
5.1.4.2 Chan Status
5.1.4.3 Record Status
5.1.4.4 Alarm Status
5.1.4.5 Network Status
5.1.4.6 HD Status
5.1.5 System Configuration
5.1.5.1 Time/Date
5.1.5.2 Network
Videoswitch
Page 50
Mdr602a.doc
Vi-R4000 Series
5.1.5.3 PTZ
5.1.5.4 Serial Settings
5.1.5.5 On Camera Settings
5.1.5.6 Exception
5.1.5.7 Display
5.1.5.8 Disk Management
5.1.5.9 Email
5.1.6 File Management
5.1.7 Maintenance
5.1.7.1 Firmware Upgrade
5.1.7.2 Factory Default
5.1.7.3 Shutdown
5.1.7.4 Configuration Export/Import
5.1.7.5 System Logs
Videoswitch
Page 51
Mdr602a.doc
Vi-R4000 Series
5.2 Connector Pin-outs
5.2.1 Domes
Connector Type:
5
4
3
9
2
8
7
9-way D-type Female
1
6
Pin
Function
1
Dome Output 1 RS485 TX+
2
Dome Output 1 RS485 TX-
3
Dome Output 2 RS485 TX+
4
Dome Output 2 RS485 TX-
5
GND
6
Dome Output 3 RS485 TX+
7
Dome Output 3 RS485 TX-
8
Dome Output 4 RS485 TX+
9
Dome Output 4 RS485 TX-
5.2.2 Control
Connector Type:
5
4
9
3
8
2
7
9-way D-type Female
1
6
Pin
Function
1
RS485 RX+
2
RS485 RX-
3
RS485 TX+
4
RS485 TX-
5
GND
6
N/C
7
N/C
8
N/C
9
N/C
Videoswitch
Page 52
Mdr602a.doc
Vi-R4000 Series
5.2.3 Keyboards
Connector Type:
PIN1
RJ45 Female
PIN8
Pin
Function
1
RS485 RX+
2
RS485 RX-
3
RS485 TX+ (KBD1 only)
4
9V
5
GND
6
RS485 TX-+ (KBD1 only)
7
Twisted Pair Video+
8
Twisted Pair Video-
5.2.4 Cascade
Connector Type:
PIN1
RJ45 Female
PIN8
Pin
Function
1
RS485 TX+
2
RS485 TX-
3
RS485 RX+ (CASC1 only)
4
n/c
5
GND
6
RS485 RX-+ (CASC1 only)
7
Twisted Pair Video+
8
Twisted Pair Video-
5.2.5
Videoswitch
Page 53
Mdr602a.doc
Vi-R4000 Series
5.2.6 VGA
Connector Type:
15-way High Density D-type Female
Pin
Function
1
RED
2
GREEN
3
BLUE
4
N/C
5
GND
6
GND
7
GND
8
GND
9
N/C
10
GND
11
N/C
12
N/C
13
HSYNC
14
VSYNC
15
N/C
Videoswitch
Page 54
Mdr602a.doc
Vi-R4000 Series
5.2.7 Audio
Connector Type:
13 12 11 10 9
25-way D-type Female
8
7
6
5
4
3
2
1
25 24 24 22 21 20 19 18 17 16 15 14
Pin
Function
1
AUDIO INPUT 1
2
AUDIO INPUT 2
3
AUDIO INPUT 3
4
AUDIO INPUT 4
5
AUDIO INPUT 5
6
AUDIO INPUT 6
7
AUDIO INPUT 7
8
AUDIO INPUT 8
9
AUDIO INPUT 9
10
AUDIO INPUT 10
11
AUDIO INPUT 11
12
AUDIO INPUT 12
13
AUDIO INPUT 13
14
AUDIO INPUT 14
15
AUDIO INPUT 15
16
AUDIO INPUT 16
17
N/C
18
N/C
19
N/C
20
N/C
21
N/C
22
AUDIO LINE IN
23
AUDIO OUT (BNC)
24
AUDIO OUT (VGA)
25
GND
Videoswitch
Page 55
Mdr602a.doc
Vi-R4000 Series
5.3 Specifications
5.3.1 Video
•
Video Compression
H.264
•
Video Input
16-ch, BNC, 1.0 Vp-p
•
Termination
75Ω switchable
•
Video format
PAL/NTSC
•
BNC outputs
4-ch, 704×576 (PAL)
•
VGA/HDMI Outputs
1920×1080P/60Hz, 1600×1200/60Hz, 1280×1024/60Hz,
1280×720/60Hz, 1024×768/60Hz
•
Screen formats
Full screen, 2x2, 1+6, 1+7, 3x3, 4x4
5.3.2 Audio
•
Audio Inputs
16-ch, 2.0 Vp-p, 1 kΩ
•
Audio output
2-ch, 600Ω
•
Two-way Audio
2.0Vp-p, 1kΩ
•
Audio Compression
OggVorbis
•
Audio Bit Rate
16kbps
5.3.3 Recording
•
Recording formats
•
Frame rate per camera 1/16 to 25 fps
•
Video Bit Rate
32K to 8M bits per second
•
Sub-stream
CIF, QCIF up to 25 fps
•
Pre and post alarm
5s default, programmable
•
Time-lapse recording
1, 2, 3, 4, 5 seconds
•
Scheduling timers
Yes
•
Activity detection
Yes
4CIF(D1), 2CIF, CIF, QCIF
•
5.3.4 Playback
•
Multi-channel playback
16-ch
•
Playback rate
Single step, variable speed, forward/reverse
•
Search
Date/time, alarms, activity, retrospective activity
5.3.5 Storage
•
Removable hard discs
Videoswitch
x2, up to 4Tbytes each, SATA
Page 56
Mdr602a.doc
Vi-R4000 Series
•
Hard disc expansion
eSATA
•
DVD/CD backup
Built-in write (also plays back)
5.3.6 Network
•
Network Interface
RJ45 10M/100M/1000M Ethernet
•
Remote access
Web browser, Vi-Viewer4000, iPod, Android
5.3.7 Interface
•
Keyboards
x4, RS485 (can control multiple DVRs)
•
Video via CAT5
Each keyboard has BNC video output
•
Alarm Inputs
16-ch
•
Alarm Outputs
4-ch relays
•
Mouse
USB (can control multiple DVRs)
•
Backup
USB 2.0
•
RS485 dome control
4-ch, Pelco-D, Pelco-P and other protocols from Vi-K2A
•
Coax dome control
BBV
•
GUI
Graphical user interface can be controlled by Internal or
external keyboard, mouse or mouse emulator
5.3.8 Power
•
Power input
IEC, 100~240VAC, 2A, 50~60Hz
•
Power consumption
100W max
5.3.9 Environmental
•
Temperature
0 to 35deg C operating, -10 to 40deg C storage
•
Humidity
10 to 90% non-condensing
5.3.10 Dimensions & Weight
•
Dimension
355mm x 105mm x 400mm (W x H x D)
•
Weight
6kg
Videoswitch
Page 57
Mdr602a.doc
Vi-R4000 Series
Videoswitch
Page 58
Mdr602a.doc