1
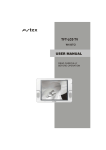
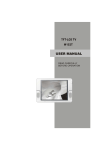
TFT-LCD TV
W150T
USER MANUAL
READ CAREFULLY
BEFORE OPERATION
W150T
IMPORTANT SAFETY INSTRUCTIONS
TO PREVENT ELECTRICAL SHOCK.
CAUTION
DO NOT REMOVE THIS COVER. NO
RISK OF ELECTRIC SHOCK.
DO NOT OPEN.
REFER SERVICING TO QUALIFIED
USER- SERVICEABLE PARTS INSIDE.
SERVICE PERSONNEL.
This symbol indicates
dangerous voltage
inside the product that
presents a risk of electric
shock or personal injury.
This symbol indicates
important instructions
accompanying the
product.
Please read this manual carefully before using this product.
Before connecting the AC power cord to the DC adapter outlet ,make sure the
voltage designation of the LCD TV corresponds to the local electrical supply .
If you are unsure of your power supply , ask your local power company .
Never insert anything metallic into the cabinet openings of the LCD TV;
otherwise may cause the danger of electric shock.
To avoid electric shock, never touch the inside of the LCD TV / adapter.
Only a qualified technician should open the case of the LCD TV/adapter.
Never use your LCD TV/adapter when the power cord has been damaged .
Make sure there is nothing resting on the power cord, and keep the cord
away from places where people can trip over it .
Be sure to hold the plug, not the cord when disconnecting the adapter from
an electric socket.
Openings in the LCD TV/adapter cabinet are provided for ventilation.
To prevent overheating, these openings should not be blocked or covered.
Also, avoid using the LCD TV on a bed ,sofa ,rug, or other soft surface. As
this, may block the ventilation openings in the bottom of the cabinet. If you
put the LCD TV in a bookcase or some other airless space, be sure to provide
adequate ventilation.
Do not expose the LCD TV to extreme temperature conditions or to extreme
humidity conditions.
The apparatus should not be exposed to dripping or splashing and no objects
filled with liquids, such as vases, should be placed on the apparatus.
IMPORTANT SAFETY INSTRUCTIONS
Do not clean the front with keton-type materials (e.g.Acetone ),ethyl alcohol,
toluene, ethy lacid, methyl, or chloride-these may damage the panel.
Locate your DC adapter near an easily accessible AC outlet.
If your LCD TV does not operate normally in particular, if there are any
unusual sounds or smells coming from it unplug it immediately and
contact an authorized dealer or service center.
High temperature can cause problems. Don' t use your LCD TV in direct
sunlight, and keep it away from heaters, stoves, fireplaces, and other
sources of heat.
Unplug the DC adapter when it is going to be left unused for a long time .
To reduce the risk of fire or electric shock, and annoying interference, use the
recommended accessories only.
If the LCD TV is broken, do not try to repair it yourself. Contact qualified service
personnel.
Unplug your DC adapter from the AC outlet before any service.
Be sure the service technician uses authorized replacement parts or their equivalents. Unauthorized parts may cause fire, electrical shock, or other hazards.
Following any service or repair, be sure the service technician performs safety
checks to certify that your TFT-LCD TV is in a safe operating order.
The apparatus with CLASS I construction shall be connected to a MAINS
socket outlet with a protective earthing connection.
CONTENT
INSTALLATION
Normal installation
1
PANEL BUTTON FUNCTIONS
Panel control
2
Rear panel
3
Battery installation
7
EXTERNAL EQUIPMENT
Connecting diagram
4
REMOTE CONTROL HANDSET
Remote buttons
5
LET'S START
Changing source operation
8
TV MENU SETUP
Picture
TV setup
9
12
Sound
11
Function
14
15
Page selection
Lock
Zoom in teletext
Colorized buttons
15
15
16
16
TELETEXT FUNCTION
Teletext display
Mix mode
Index
Display mode
15
15
16
AV and SCART SETUP
Video setting menu
17
VGA SETUP
Picture
TV setup
18
20
Sound
19
Function
21
22
Video setup
22
23
Password setup
25
26
Sound and TV troubleshooting
26
DVB FUNCTION SETUP
General setup
DVB-T setup
TROUBLE SHOOTING
Display troubleshooting
SPECIFICATIONS
Specifications
27
DISPLAY MODE
Display mode
28
INSTALLATION
NORMAL INSTALLATION
C
A
B
Hook
Ostium
M4 10
Screw 1pcs
Kickstand
Rear viewing of LCD TV
1, Hook the tache (labeled A)of the kickstand onto the plate (labeled C).
2, Tighten the screws ( M4 10) through the ostium (labeled B).
3, Figure 1 shows the finished installation. The kickstand can rotate 15 -degree.
1
25
10
1
PANEL BUTTON FUNCTIONS
PANEL CONTROL
3
4
5
6
7
8
9
1
2
Front panel
1
IR sensor window
2
Indicator( Indicator is red when in standby mode, green when working normally. )
Left panel
3
SETUP (Enter or exit setup menu)
4
VOL+/-(Increase or decrease volume)
5
CH+/- (Increase or decrease channel number)
6
SOURCE (Enter to exit source menu)
7
STANDBY (To switch between standby mode and power-on mode)
8
Headphone jack
9
POWER(Turns on or off the power supply).
2
PANEL BUTTON FUNCTIONS
REAR PANEL
7
PC IN
6
1
VGA AUDIO
5
COAXIAL
2
4
SCART
3
1
VGA input terminal
5
Coaxial digital audio output
2
SCART input terminal
6
PC audio input
3
12V DC input terminal
7
RF input terminal
4
Composite video/audio input
3
EXTERNAL EQUIPMENT
CONNECTING DIAGRAM
PC IN
VGA AUDIO
COAXIAL
SCART
R F cable
L
R
Power amplifier (with coaxial digital audio in)
DVD or VCR player
NOTE
You should connect all interconnecting cables BEFORE plugging in the power cord.
4
REMOTE CONTROLLER
REMOTE BUTTONS
Direct source buttons
Select signal source directly: TV, DVB, AV,
SCART.
Number button
To select program number.
1
1
1
2
3
4
5
6
7
8
9
0
2
3
RETURN
To exchange channel between the previous
program and the current program in TV and
DVB mode.
4
SLEEP
To set the sleep timer.
3
4
5
FAVORITE
Display your favorite channel list in DVB mode.
5
6
OK button
To confirm the selections.
Left/Right cursor(menu adjustment )
To move leftward/ rightward or adjust the
selected item in the menu, or adjust sound
volume (invalid in DVB mode).
2
6
7
7
8
9
10
11
12
13
14
15
16
17
18
8
SETUP
Enter or exit setup menu.
9
PICTURE
To select different picture modes: User,
Standard, Dynamic, Soft.
CHANNEL+/To increase or decrease program number in
TV/DVBmode.
NICAM
Switch in NICAM,A2 and mono channel (It is
effective in TV signal input with NICAM or A2
function).
10
11
W150T
16
12
SOUND
To select different sound field modes: User,
Music, Film, News.
13
HOLD/INFO
To stop teletext on current page/To display the
language and sound track in DVB mode.
REVEAL/EPG
Display the hidden teletext information
/ To display the program guide in DVB
14
mode .
17
CYAN
CYAN button.
18
YELLOW
YELLOW button.
INDEX/PAGE+
To display main content page when playing
the teletext /browse the next page of teletext
in DVB mode (not support MHEG5).
SUBPAGE/PAGETo display the subpage of the teletext/browse
the previous page of teletext in DVB mode( not
support MHEG5).
15
5
REMOTE CONTROLLER
19
STANDBY
To switch between standby mode and poweron mode.
20
No function
21
TWO-DIGIT NUMBER BUTTON
To switch between one or two-digit program
number.
22
23
SOURCE
To select input source: TV, DVB, AV, SCART,
VGA.
UP/DOWN cursor
To select upward/downward in the menu or
change the channel in TV/DVB mode.
24
DISPLAY
To display current source information.
25
MUTE
Sound mute switch.
26
Volume +/To increase or decrease sound volume.
27
LANG
To switch the output language in DVB mode.
28
SCAN
Long press the button to start scanning
automatically in TV/DVB mode.
29
19
20
21
1
2
3
4
5
6
7
8
9
0
22
23
24
25
26
27
28
29
30
31
32
33
34
TEXT/TEXT
To enable or disable the function of teletext.
30
MIX/SUBT
To display TV and teletext in the same time
/Selects the subtitle language in DVB mode.
31
CANCEL/AUDIO
To cancel teletext/To change the audio
language and sound track in DVB mode.
32
SIZE/TV/
To magnify teletext page/To switch between
TV and Radio modes in DVB mode.
33
RED
RED button.
34
GREEN
Green button.
6
W150T
REMOTE CONTROLLER
BATTERY INSTALLATION
Remove the battery cover. Insert two SUM-4(AAA) batteries matching the -/+ polarities of
the battery to the -/+ marks inside the battery compartment, as in the following figure:
BATTERY LIFE
Generally speaking, the battery may be used for one year, but the battery life is also
related to the usage times and remote controller operation.
If the remote controller is still not operating when very near to the remote sensor window,
please replace the battery.
Please use SUM-4(AAA) battery.
NOTES
Never use rechargeable battery.
Never charge, short-circuit, disassemble and heat the battery, or throw it into fire.
Pay attention not to fall or knock the remote controller, which may cause damage or
function failure to it.
Do not use new and old battery together.
When not using the remote controller for a long time, please take out the batteries to avoid
liquid leakage. Before replacing new batteries, please clean the electrolyte in the remote
controller.
If electrolyte splashes into body, please clean it with water.
CAUTION
Please put the battery in a place children cannot access. If swallowed by accident,
please contact your local doctor immediately.
POWER SUPPLY
Please confirm whether the accessories contain the power adapter.
Please make sure to use power adapter within the specification range, otherwise it will
cause damage.
Use the car adapter in the accessories, connect one end to the socket in you car, the
other to the DC socket in the TV.
The input voltage of the car adapter should be 12Volts.
7
LET'S START
After this unit is well fixed on the desk or on the wall, and the cords are well connected
for input and output, what you should do next is:
Firstly, connect the adapter to the LCD TV, and turn on the power switch then the unit will go
into standby mode, you can see the indicator turn red.
Secondly, press [STANDBY] key on the left side of the LCD TV or [STANDBY] button on the
remote control to make the unit switch into working mode, and you will see the indicator turns
green. Now you can enjoy all exciting features of the whole new product.
STANDBY
STANDBY
1
2
3
4
5
6
Power switch
INDICATOR
CHANGE SOURCE OPERATION
You can change the input source by using the source Menu. Press [SOURCE] button or
[SOURCE] key to show the menu as follows:
TV
DVB
AV
SCART
VGA
The current source item is highlighted. Press [
] button on the remote control or [ CH+
/CH- ] key on the left side of LCD TV to select different source, Press [
/VOL-] key or [OK] button to confirm your choice .
8
] button, [VOL+
TV MENU SETUP
This product can store up to 100-channel programs (0 99). You can scan and
store all of the channels through manual or automatic scan mode.
In TV mode, press [SETUP] button and the setup menu will show as follows:
Pressing [
] button on the remote control,
PICTURE
you can select setup menu sections(setup menu
consist of " PICTURE " , " SOUND " , " TV
PICTURE MODE
SETUP " , " FUNCTION ") . Press [
BRIGHTNESS
50
CONTRAST
40
SATURATION
50
TINT
50
] or [OK]
button to enter this menu section.
Press [
] button on the remote control to select
the item, and then press [
USER
] button to adjust
parameters. Press [SETUP] button to return to
SELECT
OK
ENTER
SETUP
RETURN
main menu sections.
PICTURE
PICTURE
Select "
Press [
[
" and menu will show as follows:
] button to select different items and
] button to adjust them.
CONTRAST
50
SATURATION
70
TINT
50
70
SHARPNESS
NORMAL
COLOR TEMP.
SELECT
ADJUST
SETUP
RETURN
Description
Item
PICTURE
MODE
Can be changed between : "USER ", "STANDARD ", " DYNAMIC "
and "SOFT ".
BRIGHTNESS
To adjust brightness.
CONTRAST
To adjust contrast.
SATURATION
To adjust color saturation.
TINT
To adjust picture tint, only valid in N 3.58/N 4.43/PAL60 and display
mode with V-scanning frequency equal to 60HZ (please refer to P28).
SHARPNESS
To adjust picture sharpness.
COLOR TEMP.
Select color temperature mode : "NORMAL ", " WARM "and "COOL ".
9
TV MENU SETUP
NOTE
"
" Means there are more items in this page, you can press [
] button to select them.
Select "BRIGHTNESS " to adjust it, the sub item will show as follows :
press [
] button to adjust the value of brightness.
BRIGHTNESS
50
ADJUST
SETUP
10
RETURN
TV MENU SETUP
SOUND
Select "
"and menu will show as follows:
SOUND
USER
SOUND MODE
BALANCE
50
BASS
50
50
TREBLE
MONO
NICAM
SELECT
OK
ENTER
SETUP
RETURN
Press [
] button to select different items and press [
following are the descriptions of the sound item.
Item
] button to adjust them. The
Description
SOUND MODE
Can be changed between " USER " , "MUSIC" , " FILM " and "NEWS" .
BALANCE
To adjust balance of left and right channels.
BASS
To adjust bass.
TREBLE
To adjust treble.
NICAM
Select the NICAM mode( please refer to the notes).
NOTES
If you can receive Nicam/A2 signal, you can operate as follows to enjoy that.
You can select Nicam stereo, mono channel or bilingual through NICAM button on the remote
control. If Nicam/A2 signal is too weak, this unit will switch into mono channel automatically.
When selecting mono channel, "MONO" will show on screen; when selecting bilingual I,
"DUAL I " will show on screen; when selecting bilingual II, "DUAL I I " will show on screen
and when selecting stereo, " STEREO " will show on screen.
Nicam/A2 function is only valid in TV mode while current program coming with Nicam/A2
signal.
11
TV MENU SETUP
TV SETUP
Select "
" and TV setup menu will show as follows:
TV SETUP
CHANNEL
TV SETUP
SOUND SYSTEM
1
COLOR SYSTEM
FINE TUNING
AUTO
SOUND SYSTEM
I
FINE TUNING
AUTO SEARCH
MANUAL SEARCH
40.00MHZ
CHANNEL EDIT
AUTO SEARCH
SELECT
Press [
OK
I
40.00MHZ
ENTER
SETUP
RETURN
SELECT
] button to select different items and press [
ADJUST
SETUP
RETURN
] button to adjust them.
Description
Item
CHANNEL
To change the channel number.
COLOR SYSTEM
Can be changed between: "AUTO ", "PAL " and " SECAM ".
SOUND SYSTEM
Can be changed between: "B/G ", "D/K " , " L " and " I ".
FINE TUNING
To adjust the channel frequency accurately to make the sound
and picture effect better.
AUTO SEARCH
To scan programs and store all of them automatically.
MANUAL SEARCH
To scan programs manually.
CHANNEL EDIT
To enter a submenu to set channel skip and channel swap.
Please refer to the next page.
NOTES
Which " COLOR SYSTEM" mode and " SOUND SYSTEM" mode to use is related to the
local TV broadcasting system.
If the local system is SECAM L, the color system must be selected as "SECAM" and sound
system must be selected as "L".
12
TV MENU SETUP
Select "AUTO SEARCH " , the searching menu will show as follows:
AUTO SEARCH
3
1
FOUND: 3
2
VHF L
112.25MHZ
SETUP
RETURN
4
1
The number of programs have found.
2
The current searching frequency Band, 3 Bands in total: "VHF L" ,"VHF H"," UHF".
3
The current searching frequency.
4
During the searching, you can press [SETUP] button to stop it.
Select "CHANNEL EDIT " , the menu will show as follows:
CHANNEL EDIT
5
CHANNEL
NO
SKIP
__
SWAP
SAVE
SELECT
Item
?
ADJUST
SETUP
RETURN
Description
CHANNEL
To select current channel here.
SKIP
To select "YES " or "NO ", you can select "YES " to make current
channel unaccessible while using [
] button to browse
channels.
SWAP
Select or enter the channel number directly to swap with current
channel.
SAVE
Highlight this option and press the [OK] button to confirm the swap
function.
13
TV MENU SETUP
FUNCTION
You can setup system configuration here.
Press [
] to select "
" item and press [
] button to enter the following section:
FUNCTION
LANGUAGE
ENGLISH
TRANSPARENCY
LEVEL 3
OFF
SLEEP
RESET
SELECT
Press [
OK
ENTER
SETUP
RETURN
] button to select different items and press [
Item
] button to adjust them.
Description
LANGUAGE
Set OSD language.
TRANSPARENCY
To adjust transparency of OSD. it can be change from OFF
to LEVEL6, 7 levels in total.
SLEEP
To set the sleep timer.
RESET
To reset all value to default.
14
15
TELETEXT FUNCTION
ZOOM IN TELETEXT
When teletext page shows, you may double zoom in to display this teletext page;
Press [SIZE] button to zoom in the upper half part of teletext page;
Press [SIZE] button again to enter the under half part of teletext page;
Press this button for the third time to return to original display mode.
DISPLAY MODE
Press [REVEAL] button to display the hidden teletext information. Press this button again
to cancel teletext information displaying.
SUBPAGE
User could press [SUBPAGE] button to select to the subpage of teletext.
COLORIZED BUTTONS (RED, YELLOW, GREEN, CYAN)
Select the corresponding teletext page through colorized buttons.
16
AV and SCART SETUP
VIDEO SETTING MENU
The menu setup of AV/SCART modes is much the same as that of TV mode, except the
"
" section is invalid and a bit difference in sound mode. It is not repeated here.
You can find it in preceding pages.
NOTE
If no signal input in TV, AV, SCART the screen will show a similar signal to the
following figure.
This unit will go into standby mode automatically
with no signal input for 5 minutes.
AV
NO SIGNAL
4:50
If the input channel is SCART, this unit will automatically recognise RGB or CVBS
signal of SCART; when normal RGB signal appears, this unit will automatically switch
into RGB display mode. For this unit is combined by multiple functions, when inserting
into SCART socket, it will not automatically switch into SCART mode. You have to
select SCART channel through [SOURCE] menu, that is a little difference with that of
others TV set.
17
VGA SETUP
With the VGA mode supported up to 1024*768@75Hz, and speakers built in, you can use
this unit as a multimedia PC monitor. When this unit works in VGA mode, the following setup
can be done.
Press [SETUP] button to enter main section. Press [
] button to select sections and then
press [ ] button or [OK] button to enter. If all is done, please press [SETUP] button twice to
exit and your setup data will be saved automatically.
PICTURE
Press [
] button to select "
", and press [
/OK] button to enter.
PICTURE
BRIGHTNESS
50
CONTRAST
40
COLOR TEMPERATURE
AUTO CONFIG
1024 X768
SELECT
Press [
OK
V:75 HZ
ENTER
SETUP
RETURN
] button to adjust value of item.
Item
Description
BRIGHTNESS
To adjust brightness of picture.
CONTRAST
To adjust contrast of picture.
COLOR TEMPERATURE
Enter sub menu to adjust color temperature of picture. Press
[
/OK ] button to enter.(details refer to the next page)
AUTO CONFIG
Auto config horizontal/vertical position, phase and frequency.
Press [
/OK] button to activate.
STATUS
The format of the input signal.
18
VGA SETUP
Here shows the color temperature sub menu.
COLOR TEMPERATURE
COLOR TEMP.
NORMAL
RED
50
GREEN
50
BLUE
50
SELECT
Press [
ADJUST
] button to select item and press [
SETUP
RETURN
] button to adjust the value of the item.
Description
Item
COLOR TEMP.
Select color temperature mode :"USER", "NORMAL", "WARM"
and "COOL".
RED
Adjust red value of color temperature.
GREEN
Adjust green value of color temperature.
BLUE
Adjust blue value of color temperature.
NOTE: The " RED " , " GREEN " , " BLUE
"
only can be adjusted in " USER
"
mode.
SOUND
Press [
] button to select "
" and press [
/OK] button to enter.
SOUND
USER
SOUND MODE
BALANCE
50
BASS
50
50
TREBLE
MONO
NICAM
SELECT
ADJUST
SETUP
RETURN
The operation of sound section here is the same as that in TV mode except the NICAM
is invalid. Please refer to P11.
19
VGA SETUP
MONITOR SETUP
Press [
] button to select "
" and press [
/OK] button to enter.
MONITOR SETUP
PHASE
50
FREQUENCY
50
H-POSITION
50
V-POSITION
50
SELECT
Press [
OK
ENTER
SETUP
RETURN
] button to select different items and press [
Item
] button to adjust .
Description
PHASE
To adjust phase.
FREQUENCY
To adjust frequency.
H-POSITION
To adjust screen horizontal position.
V-POSITION
To adjust screen vertical position.
NOTE
If you use this unit as a PC-monitor, This unit will go into sleep
mode with no signal input for in 2 minutes.
In this mode, the indicator will turn red, and the screen is turned
off. You can wake it up by waking up your PC .
20
VGA
NO SIGNAL
1:50
VGA SETUP
FUNCTION
Press [
] button to select "
", and press [
/OK] button to enter.
FUNCTION
LANGUAGE
ENGLISH
TRANSPARENCY
LEVEL 3
OFF
SLEEP
RESET
SELECT
Press [
OK
ENTER
SETUP
] button to select different items and press [
RETURN
] button to adjust .
Description
Item
LANGUAGE
Select OSD language .
TRANSPARENCY
To adjust transparency of OSD. it can be change from OFF
to LEVEL6, 7 levels in total.
SLEEP
To set the sleep timer.
RESET
Reset all value that related to picture and sound to default .
21
DVB FUNCTION SETUP
Turn on the TV, press [SOURCE] button to change source to DVB, then you can enjoy the
rich and colorful contents of Digital Video Broadcast!
In DVB mode, press [SETUP] button, then press [
setup menu will be introduce as follow:
] button to choose DVB item ,the DVB
GENERAL SETUP
DVB
General Setup Page
TV Display
Wide
OSD Lang
ENG
TV Type
PAL
Default
Go To General Setup Page
1. TV Display: This item is used to set the output picture ratio of this unit.
Optional settings: Normal/PS, Normal/LB, Wide, Wide Squeeze; Default: Wide.
2. OSD language: This item is used to set the OSD language .
Optional settings: English; Default: English
3. TV Type: To set the output video system of this player.
Optional settings: PAL, Auto, NTSC; Default: PAL.
4. Default: This item is used to restore all settings to the default value except "Parental control"
and "Password" in the setup menu.
NOTE: Please don' t do any operation during setting the value to default, or the unit may
work abnormally.
VIDEO SETUP
DVB
Video Quality Setup
Sharpness
Brightness
Contrast
Gamma
Hue
Saturation
Med
00
00
None
00
00
Go To Video Setup Page
1. Sharpness: This item is used to set the sharpness of video outputs.
Optional settings: High, Medium, Low; Default: Med.
2. Brightness: This item is used to set the brightness of video outputs.
3. Contrast: This item is used to set the contrast of video outputs.
4. Gamma: This item is used to set the color temperature of video output.
Optional settings: High, Medium, Low, None ; Default: None
5. Hue: This item is used to set the hue of video outputs.
6. Saturation: This item is used to set the saturation of video outputs.
22
DVB FUNCTION SETUP
DVB-T SETUP
DVB
DVB- T Setup Page
Area
Time Zone
Parental Age
Antenna Power
UK
DIS
Off
Channel setup
Go To DVB - T Setup Page
The DVB-T Setup Page is composed of five parts: Area, Time Zone, parental Age, Antenna
power, Channel Setup.
Note : Press [
] button to select different item, and press [OK] or [ ] button to enter it.
Press [ ] button to return to the previous menu or to exit the current menu .
1. Area
You can choose the area of your country.
Optional settings: Australia, Austria, Belgium, Denmark, Estonia, Germany, Spain, France,
Italy, Netherland, Taiwan, UK ,Others, Default: UK.
Note : you must set the correct area before searching channels.
2. Time zone
To choose your time zone, it is set depending on your country. If you dont know the exact
time, please ask local time manage department.
Default: 00:00
3. Parental age
This item is used to set the parental control ratings .To prevent your children watching
undesired programmes.
Optional settings: 4,5,6,7,8,9,10,11,12,13,14,15,16,17,18,Disable
Default: Disable
4. Antenna power
Turn on/off antenna power supply, optional settings: On, Off; Default: Off.
5. Channel setup
This item is used to search channels, edit the channel list or your favourite channel list,
view program guide information, etc.
DVB
Channel Setup
Auto Scan
Manual Scan
Adjust Channel
Channel Remap
Reserve Channel
Start
Auto Scan
Auto Scan
Connect the antenna to the RF socket on the TV as follows, then you can automatically
search channels without entering any other information.
23
DVB FUNCTION SETUP
In the scan process, the scan result will be displayed in the Auto Scan window.
Press [SCAN] on remote control more than 3
seconds to auto scan.
Using the [
] button to select the Auto Scan item,
and press [OK] or [ ] button to select Start item,
then press [OK] button;
A prompting message will be displayed to request that
you confirm, select OK and press the [OK] button to
confirm.
Auto Scan
Status
Freq: 65000KHz
TV Total:
00
Radio Total: 00
Progress:
Found Channels
40%
Note: If you press the [SETUP] button during scanning, the operation is stopped and a prompting
message will be displayed at the bottom of Auto Scan window. Select "OK"and press [OK]
button to abort auto scan operation, and the channels found until then will be saved. And
select "Cancel" and press [OK] button to return to auto scan process.
Wait while the TV searches for the channels, this may take a few minutes.
Once you press [OK] button to start auto search operation, all the saved channels will be
cleared.
Manual scan
You can scan channels manually by setting scan parameters.
1. In setup menu, select "Manual Scan" item using
Manual Scan
the[
]button, and press [OK] or [ ] button to
Status
Found Channels
select Start item, then press [OK] button.
Freq: 177500KHz
2. Use [
] button or enter you desired frequency
Scan
to search directly.
3. Select Scan item to start manual scan operation.
4. The scan result will be displayed on the manual scan
window, you can save the found channels or delete them if the TV has the same program.
Adjust channel
You can set your favorite channel, set parental control age for some channels or skip
channel in Adjust Channel window.
1. Select channel using [
] button , Press [RED] button to set this channel as one of
your favorite channels.
2. Select channel using [
] button , if you don't like this channel press [GREEN] button
to skip it .
3. Select channel using [
] button, press [YELLOW] button to set this channel as a
protected one, to prevent children dialog from watching the undesired program.
Note: If the password mode is set to be On, when you set a channel protected, a password
will be needed to inputted in the Protect Channel window. The default password is
000000.
Channel Remap
You can change every channel position as you like in channel remap window.
24
DVB FUNCTION SETUP
Reserve Channel
If you want to watch a special program on a channel at a later time, you can reserve it.
Then a reminding signal will be displayed on screen several minutes before it starts.
EPG
DVB
Tenestrial
002 FlowerGd 4Mbs
Channel FlowerGd 4Mbs
Program
Press [EPG] button, then a program information list of current channel will be displayed in
a window, move the cursor to PROGRAM, then press [OK] button, a more detailed program
list will be displayed, move the cursor to the program which you want to watch, then press
[OK] button ,the program is saved in your reserved channel.
You can set the time when the reminding signal should be displayed before the program
starts.
DVB
Notify time
03 min
OK
PASSWORD SETUP
Password : This item is used to set a six digit password to enable you to change the parental
control ratings or the protected channels..
DVB
Password Setup Page
Password Mode
Password
On
Go To Password Setup Page
Password Mode: To set whether parental control function or protected channels needs
a password, optional setting: On, Off; Default: On.
Password: To change the password, default :000000.
25
TROUBLESHOOTING
Please check for causes of problems in accordance with the following chart before contacting
maintenance personnel.
DISPLAY TROUBLESHOOTING
Symptom
Black screen, power
indicator light off
Causes and Correction
Check whether the power cord is well connected, and
whether this unit is powered on
Check whether the signal cord of input device is well
connected
Check whether input device is powered on
Check whether the input device signal is in this unit's
specification
Image display flicker,
unstable
Check computer output mode: control panel-display-setup
If the setup does not accord with this unit's specification,
please change the display setup
Horizontal scanning frequency: 30kHz ~75kHz
Vertical scanning frequency: 50 Hz~75Hz
Max display mode: 1024X768 @ 75 Hz
SOUND AND TV TROUBLESHOOTING
Symptom
Cannot power on
Causes and Correction
Please make sure the power cord is correctly connected
Please make sure the audio cord is correctly connected
No sound
Check volume
Make sure there is nothing plugged into the headphone jack
Check volume
Volume too low
If volume is still too low when adjusting volume to maximum,
please check whether the input device is correctly
Snowy picture
Please make sure the antenna is well connected
Remote control failure
Check whether remote control battery is full charged
Whether battery installation is correct
Whether obstacles exists between remote control and the
unit's receiving window
Check whether receiving window has strong light
26
VGA
SCART
Power
Normal
Standby mode
Less than
Input connector
Frequency range (VHF/UHF)
Channel range(VHF/UHF)
DVB
W H D
27
IEC-Type, IEC 169-2, Female
174MHz ~ 858MHz
7 & 8 Mhz
DISPLAY MODE
SUPPORTED PC INPUT MODE
Resolution
Hor scanning frequency Ver scanning frequency
(KHz)
(Hz )
Pixel frequency
(MHz)
Format
640
350
31.5
70.0
25.17
DOS
720
400
31.5
70.0
28.32
DOS
640
480
31.5
60.0
25.18
DOS
640
480
37.9
72.0
31.50
VESA
640
480
37.5
75.0
31.50
VESA
800
600
35.1
56.2
36.00
VESA
800
600
37.9
60.0
40.00
VESA
800
600
48.1
72.0
50.00
VESA
800
600
46.9
75.0
49.50
VESA
1024
768
48.4
60.0
65.00
VESA
1024
768
56.5
70.11
75.00
VESA
1024
768
60.0
75.0
78.75
VESA
NOTES
This product does not support the display mode not listed above. In order to achieve
the best display effect, please select the above-listed 12 display modes input signal.
Because of the difference of display card output signal (especially non-standard signal
output), the display image may appear little disturbance which can be adjusted through
" AUTO CONFIG " in the "PICTURE" menu by users.
To prolong this unit's service life, you are suggested to use power management function
of computer.
28
ACCESSORIES
Please check the following accessories.
Operational Manual
8
5
2
6
3
9
1
0
7
4
W150T
User manual
Remote control and battery
Power adaptor
Wall Mount Holder Kit (optional)
**
**
Kickstand Kit
AV cord
Automotive Power socket adapter
5195887 V0.0