Download User's Manual - Click Spares
Transcript
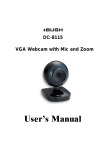
DC-7132 2MP Webcam User’s Manual Index Package Content........................................................................... 2 System Requirements................................................................... 2 Description for Each Part............................................................. 3 Features ........................................................................................ 4 Setting the Software ..................................................................... 5 Install the Hardware ..................................................................... 7 Uninstall the Software.................................................................. 13 Maintenance ................................................................................. 13 1 Package Content 7 MP PC Webcam Instruction CD System Requirements Windows XP(Service Pack2) / Vista / 7 Pentium III 800MHz or higher processor Available USB port & CD-ROM Drive 256MB RAM or higher Hard drive with 1GB free space 16-bit Color Display 2 Description for Each Part 3 Features 1. 2.0MP Pixels 2. Easy Plug and Play 3. Multi-Swivel Design 4. Clip on LCD monitor / Laptop 5. USB PC Webcam Driver features: (1) (2) (3) Effects and digital frames Face tracking and digital zoom Anti-flicker (50/60Hz) setting 6. Webcam Specification: (1) (2) (3) (4) (5) (6) (7) (8) (9) Sensor type: CMOS Native resolution: 1600 x 1200 Software enhancement still resolution: 3200 x 2400 Software enhancement video resolution: 1600 x 1200 Frame rate: 5fps ~ 30fps Image format: JPG USB protocol: UVC Power input: USB Product size: 48mm x 82.1mm x 77.3mm 4 Setting the Software Install Device driver first and follow the on-screen instruction. The steps of installation: 1. Insert the CD into your CD-ROM drive 2. The installer screen will automatically come up. Note: If the installer screen does not come up automatically, click Start, then run and execute the file “launch.exe” on the CD to start the installer program. 3. Click the “Install Device Driver” button to start installation. 5 4. Click “Next” to begin the installation. 5. Select “ Finish” then the software installation is completed. 6 Install the Hardware Ensure to install the device driver before connect the webcam. Plug Webcam’s cable to the USB port on your computer. Note: This Webcam features USB easy plug-and-play for Instant Messenger (e.g. MSN, Yahoo and Skype etc). When you connect the webcam to your PC, it will install the driver automatically. The different icons will pop up on Windows XP and VISTA as below: Windows XP Windows VISTA 7 How to use AMCAP tool AMCAP is an application that let you capture video in your system. Please click “ Start” the program. “Program” USB2.0 UVC Camera “ AMCAP” to launch After launch the AMCAP program, you can see the live picture is in the screen. If the live picture is not good, please turn the focus ring in either clockwise or anticlockwise until the picture is changed to sharp. File/ Save Captured Video As: Use this to copy the captured data to another file, so you can reuse the same preallocated for your next capture. 8 Device: under the devices menu you choose which of your video cameras you will be capturing from. Files/ Allocate file space: It is to set up the initial movie file size. The program will adjust the file automatically while recording. It is recommend to set it as default value. Options / preview: lets you watch the input video that is being recorded in the application window. Options/ Video Capture Filter: (1) Select “ Setting” page to adjust various video setting, such as brightness, contrast, etc. (2) Select the “Effects”page to choose the video effect. (3) Select the “Zoom” page to enable face tracking and adjust the digital zoom. 9 Options/ Video Capture Pin: choose the video color space and video size. Supported color spaces are RGB24, 1420 Supported size is 160 ͪ 120, 176 ͪ 144, 320 ͪ240, 352 ͪ 288, 640 ͪ 480, 800 ͪ 600, 1024 ͪ 768, 1280 ͪ 960 and 1600 ͪ 1200. Captures/ Start Capture: Save the capture file in your computer and select “ START” and then “OK” to start capture of video sequence or “ Cancel” to cancel the capture. Capture/Set Frame Rate: where you can set the frame rate you want for preview and video. (Recommend to set the frame rate as 30) Caprure/ Set Time Limit : where you can set the time limit for video. 10 Capture movies 1. Click “ File” Æ “ Set Capture File” Æ” Desktop” ( Or Click “ File” Æ” Set Capture” to setup the path of the movie file in your computer.) 2. Create a file name : ABC.avi 3. To set the file size : Suggest to enter 1Mbyte and press “OK “ 4. Then the file ABC.avi will appear on the desktop. 5. Recording & Stop Recording images: Click” Capture” to go into the pull down menu. Æ Click” Start Capture” Æ “ OK” to start recording. Æ Click” Stop Capture”, the recording process will be stopped. 6. You can use the “ Window Media Player” to play the movie. 11 Anti-Flicker Setting When the flickers, the rolling horizontal (vertical) bands, appear on the screen, change the power frequency setting. Set 50Hz or 60Hz according to your region. 50Hz : Europe, Australia, Africa, Asia, China and Japan(East). 60Hz: America, Taiwan, Korea and Japan(West). Options/ Video Capture Filter: select 50Hz or 60Hz in the “Flicker” option. 12 Uninstall the Software 1. Click “ Start” from the task bar and choose “ Programs” 2. Select “USB2.0 UVC Camera” Æ “Uninstall” and follow the instructions. Maintenance Unplug the webcam before cleaning the unit. Only use a soft damp cloth to clean the plastic case. Do not touch the lens as it may get damaged. Never use harsh or corrosive cleaning agent or sharp objects when cleaning. Store the unit in a cool an dry place and avoid the direct sun light. Always unplug it if it is not in use for long time. WASTE ELECTRICAL PRODUCTS SHOULD NOT BE DISPOSED OF WITH HOUSEHOLD WASTE. PLEASE RECYCLE WHERE FACILITIES EXIST. CHECK WITHYOUR LOCAL AUTHORITY FOR RECYCLING ADVICE. 13 PRODUCT GUARANTEE This product is guaranteed against manufacturing defects for a period of Year This product is guaranteed for twelve months from the date of original purchase. Any defect that arises due to faulty materials or workmanship will either be replaced, refunded or repaired free of charge where possible during this period by the dealer from whom you purchased the unit. The guarantee is subject to the following provisions: - The guarantee does not cover accidental damage, misuse, cabinet parts, knobs or consumable items. - The product must be correctly installed and operated in accordance with the - instructions contained in this manual. It must be used solely for domestic purpose. - The guarantee will be rendered invalided if the product is re-sold or has been damaged by inexpert repair. Specifications are subject to change without notice. The manufacturer disclaims any liability for the incidental or consequential damages. - The guarantee is in addition to, and does not diminish your statutory or legal rights. Guarantor: Argos Ltd 489 - 499 Avebury Boulevard Central Milton Keynes MK9 2NW 2520A7130L-C03S


