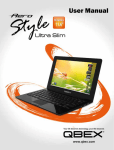
1
User Manual AT-Tablet Meanings of icons: Forbidden: Forbids improper operations to avoid damaging the AT-Tablet. Caution: Cautions for operators to avoid potential damages. Please note and remember. Important: Important information, common notes, definitions, general knowledge and references, etc. Other trademarks and trade names may be used in this manual to refer to either the entities claiming the trademarks and trade names or their products. The manufacture disclaims any proprietary interest in trademarks and trade names other than its own. Information in this manual is subject to change without notice. Product images in this manual are for your reference only. © ® Reproduction in any manner without written permission from the manufacturer, is strictly forbidden. 1 User Manual AT-Tablet Content DIRECTIONS .................................................................................................. 1 SAFETY PRECAUTIONS ................................................................................... 4 1 KNOWING YOUR AT-TABLET...................................................................... 5 1-1 FRONT SIDE ................................................................................................ 5 1-2 TOP SIDE.................................................................................................... 5 1-3 LEFT SIDE ................................................................................................... 6 1-4 BOTTOM SIDE ............................................................................................. 6 2 CARING YOUR AT-TABLET .......................................................................... 7 2-1 LCD SCREEN ............................................................................................... 7 2-2 CLEANING / SWITCHING ACCESSORIES .............................................................. 7 2-3 IF THE AT-TABLET COMES INTO CONTACT WITH WATER. ...................................... 8 2-4 OTHER NOTES ............................................................................................. 8 2-5 PREPARE FOR TRAVELING WITH THE AT-TABLET ................................................ 8 3 GETTING STARTED ..................................................................................... 9 3-1 CONNECTING THE POWER ADAPTER ................................................................ 9 3-2 TURNING ON THE AT-TABLET ......................................................................... 9 4 AT-TABLET MANAGER SETTINGS ............................................................. 10 4-1 CAMERA AND WI-FI SETTING ....................................................................... 10 4-2 G-SENSOR AND LIGHT-SENSOR SETTING ......................................................... 10 5 SYSTEM CONNECTIONS & FUNCTIONS .................................................... 11 5-1 CONNECTING A VGA-EQUIPPED DEVICE ......................................................... 11 5-2 CONNECTING A KEYBOARD OR MOUSE........................................................... 11 5-3 CONNECTING AUDIO DEVICES....................................................................... 11 5-4 KEYBOARD USAGE ...................................................................................... 12 5-5 MEMORY CARD USAGE ............................................................................... 12 5-6 ‘3G’ WIRELESS NETWORK CARD & ACTIVATION .............................................. 12 5-7 BLUETOOTH .............................................................................................. 13 2 User Manual AT-Tablet 6 ENTER THE BIOS SETUP MENU................................................................. 14 7 APPENDIX ................................................................................................ 16 7-1 TROUBLESHOOTING.................................................................................... 16 7-2 AT-TABLET SPECIFICATIONS ......................................................................... 18 3 User Manual AT-Tablet 1. 2. 3. 4. 5. 6. 7. 8. 9. 10. 11. 12. 13. 14. 15. 16. 17. 18. 19. 20. 21. DO NOT place small items on the AT-Tablet as they may scratch or damage the LCD Screen or AT-Tablet. DO NOT expose the AT-Tablet to dirty or dusty environments. Use and store the AT-Tablet in only clean and dry environments. DO NOT place the AT-Tablet on uneven or unstable work surfaces. DO NOT place or drop objects on the top of the AT-Tablet. DO NOT shove any foreign objects into the AT-Tablet. DO NOT press the LCD Screen strongly. DO NOT expose the AT-Tablet to strong magnetic or electrical fields. DO NOT place the hard drive of the AT-Tablet near or on a magnetic or electric field as this may cause the loss of data on the hard drive. DO NOT leave the AT-Tablet in the sun as it can damage the LCD Screen, especially in a car. Temperature Range: This AT-Tablet should only be used in environments with ambient temperatures between 5° C(41°F) and 35°C(95°F). DO NOT expose the AT-Tablet to or use near liquids, rain, or moisture. Caution: There is a risk of explosion if battery is replaced by an incorrect type. Dispose of used batteries according to the instructions. Warning: Excessive volume levels from headphones can cause hearing loss. DO NOT discard the AT-Tablet in municipal waste. Check local regulations for disposal of electronic products. Please recycle the Battery Pack, and check with your Local Authorities or retailer for recycling advice. The AT-Tablet and the Adapter may create some heat during operation or charging. DO NOT leave the AT-Tablet on your lap or any part of the body in order to prevent discomfort or injury from heat exposure. INPUT RATING: Refer to the rating label on the AT-Tablet and be sure that the Power Adapter complies with the rating. Only use attachments or accessories specified by the manufacturer. Check the connections between the main unit and attachments before turning on the AT-Tablet. DO NOT use the AT-Tablet while eating food to avoid dirtying the AT-Tablet. DO NOT insert anything into the AT-Tablet that may result in a short circuit or damage the circuit. Power off the AT-Tablet if you want install or remove certain external devices which are not supported by hot-plug. Disconnect the AT-Tablet from the electrical outlet and remove any installed batteries before cleaning. And Keep it away from children. DO NOT disassemble the AT-Tablet. Only a certified service technician should perform repairs on your AT-Tablet. Otherwise problems may result and the manufacturer does not hold responsibility for the damage. The AT-Tablet has a radiator to disperse heat. DO NOT place the AT-Tablet on soft objects (e.g.: bed, sofa, your lap), or else the AT-Tablet may become hot and halt the system operation. The socket-outlet shall be installed near the equipment and shall be easily accessible. 4 User Manual AT-Tablet 1-1 Front Side 1. 2. 3. 4. 5. 6. Built-in Camera Enable or disable the camera function by clicking “Notebook Manager”. LCD Touch-sensitive Screen (To open the “Notebook Manager” window) Up/Down Direction Button OK Button Light-Sensor 1-2 Top Side 1. 2. light turns off when the battery is fully charged and flashes when the battery is weak. Built-in Microphone Charge Indicator Light is orange during charging and is green during normal operation; 3. 5 Power Button User Manual AT-Tablet 1-3 Left Side 1. Ethernet/LAN Port 2. MINI-VGA Port 3. SIM Card Port 4. USB Port (2.0) 5. SD/MMC Memory Card Port 6. Microphone Jack 7. Headphone Jack 8. Speakers 9. DC Power Jack The USB card can only be inserted in one direction. Forcing the card in another way may result in damage. The Mini-VGA cable is necessary for connecting a Monitor 1-4 Bottom Side 1. Ventilation Holes 2. Forced-Off / Reset Button If the system halts or when there is no reaction by pressing the Power button for 4 seconds than press it with a paperclip to turn off the PC. 6 User Manual AT-Tablet The AT-Tablet is a precision device; operation errors may damage the device. 2-1 LCD Screen The LCD Screen is the most delicate component of the AT-Tablet and is made of thin glass. It may be broken by external, abrupt force. DO NOT scratch the cover of the AT-Tablet as the scratch cannot be removed. DO NOT cover the LCD Screen with heavy objects. DO NOT place objects on the LCD Screen to avoid damaging. Place the AT-Tablet in a carrying case to protect it from dirt, water, shock and scratches before traveling. DO NOT scratch the LCD Screen with your fingernails or any sharp objects. Use a soft and lint-free cloth to clean your AT-Tablet and clean it gently. Turn off the AT-Tablet if it will not be used for a long time. DO NOT clean the LCD Screen with chemical cleaners. DO NOT allow the LCD Screen to come into contact with hard objects that may scratch the screen. (E.g.: cloth button, watchband). DO NOT spill liquid on the AT-Tablet as it can damage the components of the ATTablet. Cover the LCD Screen gently with a protective case when not in use. DO NOT clean the Touch Screen with an acidic cleaner DO NOT spray cleaning solution directly on the AT-Tablet. 2-2 Cleaning / switching accessories 1. 2. 3. 4. Follow next steps for cleaning your AT-Tablet and/or accessories. Turn off the AT-Tablet. Disconnect the power cord from your AT-Tablet and all external devices from their electrical outlets and remove the installed battery or other accessories. Use a dust collector to pump the dust from the slot or the plug. Moisten a soft, lint-free cloth with water and wipe the surface of the AT-Tablet gently. DO NOT spray liquid directly onto the AT-Tablet in order to avoid short circuiting and damage of the AT-Tablet. Turn on the AT-Tablet after complete drying. 7 User Manual AT-Tablet 2-3 If the AT-Tablet comes into contact with water. DO NOT turn on the AT-Tablet. Disconnect the power cable in order to turn off the AT-Tablet instead of pressing the POWER button to turn off it. Disconnect all external devices. Spill out the water from the AT-Tablet. Use a soft cloth to gently wipe the surface of the AT-Tablet dry. Use a fan to dry the AT-Tablet and accessories and then send it to the service center for advice. DO NOT use a hair dryer to dry the AT-Tablet as the high temperature may harm it. DO NOT place the AT-Tablet into a dirty or wet carrying case again. 2-4 Other Notes DO NOT expose the AT-Tablet to a hot environment for a long time, especially in the car. The parts of the AT-Tablet will be harmed. Backup your data regularly. Install hardware and software updates regularly in order to keep the AT-Tablet at its best performance. 2-5 Prepare for Traveling with the AT-Tablet Follow the next steps for traveling with your AT-Tablet. 1. 2. 3. 4. 5. 6. Turn off the AT-Tablet and disconnect it from the wall power outlet. Disconnect the power cord. Disconnect all other cords from accessories that may be attached. Place the AT-Tablet in a carrying case to protect it from dirt, water, shock and scratches during travel. Do not forget to take the AC Adapter, power lines, manual and warranty card. DO NOT forget the passwords of the AT-Tablet and HDD. Find out the voltage type in the countries you will visit. Your AT-Tablet comes with a universal AC-DC adapter, so you only need to buy different plug adapters to connect to the different outlets. Or the hotel may provide universal outlets to support your power cord as well as voltages. When travelling by car, DO NOT leave the AT-Tablet in direct sunlight.. The Internet connection of your AT-Tablet will be interrupted when the system enters hibernation mode. 8 User Manual AT-Tablet Your AT-Tablet and accessories may differ from the pictures shown. 3-1 Connecting the Power Adapter The AT-Tablet comes with a universal AC-DC adapter that allows an input voltage from 100V to 240V. Follow next steps to connect the adapter: 1. Take the adapter and connect it with the power cord. 2. Plug the DC end (1) of adapter into the power jack of the AT-Tablet. 3. Insert the AC end (2) into the wall outlet 4. Check to make certain that both ends of the power adapter are inserted correctly before turning on the AT-Tablet. DO NOT remove the AC-DC power adapter from the AT-Tablet if the HDD is reading or writing as this may result in the loss of data and damage the disk. Follow the correct system steps to turn off the AT-Tablet. 3-2 Turning on the AT-Tablet Press the POWER button to turn on the AT-Tablet. 9 User Manual AT-Tablet 4-1 Camera and W i-F i setting You can enable/disable the camera, Wi-Fi function or manually adjust volume and brightness in Notebook Manager-〉Common. 4-2 G-sensor and Light-sensor setting To activate the revolving screen via the G-sensor, click the icon on the panel to select Notebook Manager Click the Advanced tab, as shown right: Click the “Auto Rotate Screen” option to activate Gsensor; Check the “Auto Brightness Adjust” box to activate the light sensor; However, do not check the box if you want to manually adjust the brightness (Or un- select to disable the function). When the G-sensor is enabled, the screen will rotate a full 360 degrees. See below (rotating clockwise): Horizontal revolving is unavailable. 10 User Manual AT-Tablet The AT-Tablet has a mini-VGA port for connecting an External Monitor or TV via a miniVGA transfer cable. 5-1 Connecting a VGA-equipped device Connect one end of the mini-VGA transfer cable to the VGA port on the AT-Tablet and connect the other end of the VGA cable to the VGA port on the external device as shown in the picture on the right: After connecting, switch the external display to VGA mode. While connecting an external digital television via the VGA port, you can select the display mode options ”LCD”, “LCD and CRT” and “CRT” in Notebook Manager. 5-2 Connecting a Keyboard or Mouse The AT-Tablet comes with an integrated virtual on-screen keyboard. To use an external keyboard or mouse, connect the external keyboard or mouse via the USB port. 5-3 Connecting Audio devices The AT-Tablet has connectors for headphones, speakers, and a microphone. 11 User Manual AT-Tablet The speaker will turn off automatically after connecting external headphones to the AT-Tablet. Excessively loud volume could damage your hearing. So turn down the volume before connecting headphones and then raise the volume to a comfortable level. 5-4 Keyboard usage The AT-Tablet has not a visible keyboard. To activate the virtual Touch keyboard click: Start > All Programs > Accessories > Ease of Access > On-Screen Keyboard 5-5 Memory Card usage The AT-Tablet has a single built-in memory card reader that can read several types of flash memory cards. Insert The Memory Card The card can only be inserted in one orientation (with the card‟s electrical contacts towards the bottom of the unit). Forcing the card in the improper direction may result in damage. Pull out the Memory Card Stop the card‟s operation/activities first and then pull the card out from the port. 5-6 ‘3G’ W ireless Network Card & Activation The AT-Tablet is equipped with a 3G module port, antenna and SIM card plug. Follow next steps to plug the SIM card into the card slot and to go online. 1. Insert the SIM card into the SIM card slot of the unit as shown > 2. 3. Click the “Notebook Manager” icon on the panel to enable the 3G Network. Set the related parameters according to the local service operator to be sure it will open the right service for you SIM card. Any doubt, call the local service operator. 12 User Manual AT-Tablet Pay attention to the orientation of the SIM card when you insert it. Refer to the directions stated before. Forcing the card in the improper direction may result in damage. Eject the card gently with its electrical contacts towards the bottom of the unit. Don‟t remove the SIM card when the unit is powered on. Always be sure to install the 3G module and SIM card when the unit is powered off. 5-7 Bluetooth The AT-Tablet has a built-in Bluetooth module that allows you to use Bluetooth with the system you install. 13 User Manual AT-Tablet First connect an external keyboard to access the BIOS Setup Menu using next steps: 1. Press the F2 button quickly during loading of the system. Then the system will enter in the “Setup Utility” as shown below: 2. 3. Use the left/ right direction keys to select “Boot” and press the “Enter” key to access the menu below: In the menu, click the up/down direction keys to select the “startup” option and click the F5/F6 buttons to remove the option position in “Boot Type Order” Click the up/down direction keys to select the “startup” option and click the F5/F6 keys to change the values of the “startup” options in “Boot Device Status”. Proceed to click the F10 key to bring up the dialogue box and select “Yes”. Then click the Enter key to save the setting and exit the system as shown below: 14 User Manual AT-Tablet Click the F9 key to setup defaults and select “Yes” to confirm. NOTE: There is no need to change the startup order permanently. So after turning on the unit, click the F12 key to select the temporary startup option. The BIOS version will be updated occasionally and may result in changes in operations as described in this manual. 15 User Manual AT-Tablet 7-1 Troubleshooting Q1:How do I turn off the AT-Tablet when the system is frozen / blocked? A:Press and hold the POWER button for 4 to 6 seconds to turn off the AT-Tablet. Q2:What can be done if the AT-Tablet will not power on? A: 1. If the power is low, connect the AT-Tablet to the adapter and electric outlets. 2. Check that the video display system is not in „external monitor mode‟. 3. Make sure the indicator on the adapter is on and the adapter is working correctly. 4. Remove any USB device, SD card, or any other external device. Q3:What if the AT-Tablet comes into contact with water? A: 1. DO NOT turn on the AT-Tablet. 2. Disconnect the power cable in order to turn off the AT-Tablet instead of pressing the POWER button to turn it off. Disconnect all external devices. 3. Spill out the water from the AT-Tablet. Use a soft cloth to wipe the surface of the ATTablet dry. 4. Use a fan (not a hair-dryer, is too hot) to dry the AT-Tablet and the accessories and then send it to the service center for advice. 5. DO NOT place the AT-Tablet into a dirty or wet carrying case again. Q4:Why is the operating system data crashed or blocked or frozen? A: 1. Damage to external memory or built-in memory: If the data is saved to damaged memory, then the data cannot be restored. 2. Incompatible external device: The system may enter standby mode and cannot resume when an incompatible external device is connected to the AT-Tablet. 3. The error is from a program driver or application program: The system may refuse to open some files (file formats: .dll, .sys, .exe and so on.) and enter standby mode or hibernate mode. If the incompatible application program cannot be run by the operating system, the system may fail to recover. Q5:What are the procedures to check the system when it will not start up? A: 1. Remove the external devices and their device program. 2. Refresh the BIOS system 16 User Manual AT-Tablet 3. 4. 5. Refresh the appropriate program. Remove the error application program. Reinstall the operating system. Q6:How does one prolong the batter life? A: 1. Adjust the brightness of the LCD Screen to proper level. 2. Turn down the volume. 3. Make the appropriate settings in the Power Management menu. Q7: What if the camera does not take clear pictures? A: Check that the lens is clean and if not, clean the camera with a soft cloth. Q8: What if the picture from the video camera is moving slowly or is shaky? A: The camera needs a certain amount of light or the image will be slower if there is not enough light present. Please adjust the screen position of the AT-Tablet or the position of the user to make certain there is enough light. The picture from the video will also be slower when too many applications are running. Close unused programs to increase performance. Note: Q7 and Q8 are questions regarding the use of the camera for video capture, conferencing and chatting. 17 User Manual AT-Tablet 7-2 AT-Tablet Specifications Main Feature CPU Intel Atom N450 1.66GHz CPU Power Consumption 5.5W MAX On-die, primary 32-Kb instructions cache and L1 Cache Size 24-Kb write-back data cache L2 Cache Size 512-kB on-die second level cache Internal Memory (#) 1GB Memory Type DDRII 667 MHz Storage HDD Capacity 160GB TFT Screen TFT Screen Size & pixels 10.1 inch -- 1024x600 Screen Type Multi Touch capacitive Built-in Camera Resolution 1.3 Mp Bluetooth Specification V2.1+ EDR Video/Audio Feature Video Card Type Intel GMA 3150 Video Card Capacity Shared Dynamic EMS Memory 128MB(Max) Audio System Built-in speaker 18 User Manual AT-Tablet Sound Card Type HD Codec Operating Conditions Operating Temperature 5-35℃ Operating Humidity 35%-85% Power Adapter Power / Watt AC 100-240V; DC 19V; ≤40W Battery (Type) & Volt Lithium rechargeable battery; 11.1V Standard Ports LAN Type: 100/10Mbps LAN Wireless Card: 802.11 b/g/n Headphone Port, Speaker, Built-in Microphone, Audio Ports Microphone Port USB Port 2x USB-2.0 SD Card Port Supports SD/MMC Cards VGA Port Mini-VGA 3G module Port(reserved) HSDPA/UMTS ZTE MF210 Module 7.2/5.76 Mbps Physical measures Weight 975 grams Dimension 265 x 166 x 18 mm Design and specifications are subject to change without notice. Ambiance Technology, November 2010 19