1
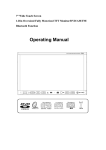
 3G CAMERA USER MANUAL ――3G Real Time Professional Mobile Surveillance System Please Read before Use 2011‐6‐1 3G Camera User Manual CONTENTS 3G Camera User Manual .......................................................................................................................... 1 1 IMPORTANT Information....................................................................................................................... 6 1.1 SAFETY INSTRUCTIONS ............................................................................................................... 6 2 PRODUCT Introduction .......................................................................................................................... 6 2.1 Brief Introduction ....................................................................................................................... 6 2.2 CharACTERISTIC .......................................................................................................................... 7 3 PACKAGE list .......................................................................................................................................... 8 4 Equipment Installation .......................................................................................................................... 8 4.1 3G camera installation................................................................................................................ 8 4.2 Security Settings ......................................................................................................................... 8 4.3 system Startup and error handling............................................................................................. 9 4.4 Function Configuration............................................................................................................. 10 5 3G camera Web Using Direction ......................................................................................................... 10 5.1 User Log In ................................................................................................................................ 10 5.2 Languages ................................................................................................................................. 12 5.3 Device Status ............................................................................................................................ 13 5.3.1 Examining System Information...................................................................................... 13 5.3.2 Examining Network Information ................................................................................... 14 5.3.3 Examining 3G Information............................................................................................. 15 5.3.4 Examining Service Information...................................................................................... 16 5.4 settings ..................................................................................................................................... 17 5.4.1 Ethernet Setting............................................................................................................. 17 2 3G camera User Menu 5.4.2 WIFI Setting ................................................................................................................... 17 5.4.3 3G Setting ...................................................................................................................... 18 5.4.4 NTP Setting .................................................................................................................... 19 5.4.5 Service Setting ............................................................................................................... 20 5.4.6 Video Source Setting...................................................................................................... 20 5.4.7 Alarm Setting ................................................................................................................. 21 5.4.8 WIFI Accessory Settings ................................................................................................. 22 5.5 Management ............................................................................................................................ 22 5.5.1 User Preferences ........................................................................................................... 23 5.5.2 Upgrade........................................................... .............................................................. 23 5.5.3 Log ................................................................................................................................. 24 5.6 Camera...................................................................................................................................... 24 5.6.1Real‐Time Video.............................................................................................................. 25 5.6.2 Audio and Video Setting ................................................................................................ 25 5.6.3 PTZ Setting..................................................................................................................... 26 5.7 Video......................................................................................................................................... 26 5.7.1 Video Management ....................................................................................................... 27 5.7.2 Video configuration ....................................................................................................... 27 6 3G Surveillance Operation Instructions............................................................................................... 28 6.1 3G Mobile phone accessing...................................................................................................... 28 6.2 Mobile Phone Surveillance Connecting and Releasing............................................................. 28 6.2 Keyboard Control...................................................................................................................... 29 6.3 Changing User Password on Mobile Phone.............................................................................. 30 6.4 Inquiring and CHANGE MOTION DEtection status on Mobile Phone....................................... 31 3 3G Camera User Manual 6.5 Inquiring and changing eavesdropping Status on Mobile Phone ............................................. 31 6.6 Controlling Video Recording on Moblie Phonec....................................................................... 31 6.7 Playing Surveillance Video Record on Mobile Phone ............................................................... 31 6.8 Deleting Surveillance Video Record on Mobile Phone ............................................................. 32 6.9 Motion detection alarm phone callback................................................................................... 32 6.10 Setting and CHANGing Callback Phone Number on Mobile Phone........................................ 32 6.11 Setting current Phone number as callback Phone Number ................................................... 33 7 3G camera manager Software Instructions......................................................................................... 33 7.1 Software Installation................................................................................................................. 33 7.2 Software Function Introduction ............................................................................................... 33 7.3 Camera List ............................................................................................................................... 34 7.4 NVS Server Logging in and quiting............................................................................................ 36 7.5 Surveillance CONTROL .............................................................................................................. 37 7.6 Camera Management............................................................................................................... 40 7.7 user management..................................................................................................................... 43 7.8 System Settings......................................................................................................................... 44 8 3G camera Management Function...................................................................................................... 48 8.1 Starting up Camera................................................................................................................... 48 8.2 Camera PTZ Self‐Checking ........................................................................................................ 48 8.3 Camera Indicator light .............................................................................................................. 48 8.4 Infrared Lighting ....................................................................................................................... 48 8.5 SD Card Memory PORT............................................................................................................. 48 8.6 SIM Card PORT.......................................................................................................................... 48 9 FAQ ...................................................................................................................................................... 48 10 Related Technology Parameters........................................................................................................ 49 4 3G camera User Menu 10.1 3G Network Technology Parameters...................................................................................... 49 10.2 Audio Technology Parameters................................................................................................ 50 10.3 Other Technology Parameters................................................................................................ 50 5 3G Camera User Manual 1 IMPORTANT INFORMATION 1.1 SAFETY INSTRUCTIONS Please use the equipment according to the following instructions, in order to reduce the risk of fire or electric shock which do harm to people or damage the equipment. ¾
Use the Power adapter prepared in equipment package only. ¾
Use the power source with correct voltage, frequency and current that marked in the power adapter. ¾
Keep away from heat source; Avoid exposure to direct sunlight. ¾
Keep the equipment dry; Keep away from water or high humidity. ¾
Keep the equipment completely installed and properly placed. 2 PRODUCT INTRODUCTION 2.1 BRIEF INTRODUCTION ¾
3G‐Camera System is the professional real time surveillance system which integrates the latest 3G technology with traditional security technology and uses high‐efficiency H264 hardware encoder and the industry leading H263 software encoder. It can simultaneously output video streams in both formats. It concurrently supports both 3G video call and IP video surveillance. ¾
Motion detection function of the system could efficiently avoid housebreaking. Apart from security, 3G‐CAMERA can ensure privacy with call‐in phone number filtering, login password checking and 3G network infrastructure security. 6 3G camera User Menu ¾
This solution seamlessly integrates the traditional security IP camera with 3G mobile phone network and IP network by using the safe and stable embedded Linux control system, as well as the embedded 3G‐Modem and the high efficiency 3G protocol stack,. ¾
The world’s first hardware solution that supports TD‐SCDMA, WCDMA and EVDO networks and provides multiple choices for users. 2.2 CHARACTERISTIC ¾
Real‐time video surveillance through 3G video call; Easy to use; Clear and smooth picture quality ¾
Support multiple camera connection; Allow switching between up to 6 cameras ¾
Wide coverage surveillance PTZ camera; Horizontal angle: 270°and Vertical angle: 90°. ¾
4‐Level zoom control; Enlarge portion of image with D1 quality which has fine details. ¾
Motion detection alarm function. Allow surveillance at anytime with 3G mobile phone callback feature. ¾
Remote video recording and motion detection triggered video recording; Support video recording history browsing using 3G phone at anytime ¾
Video surveillance through mobile Internet; Fully support three main mobile device types : Android, iPhone and Windows Mobile ¾
Enterprise‐level windows platform video surveillance software; Monitor and manage multiple cameras ¾
Safe Privacy protection; Protected by both password authentication and phone number filtering ¾
Able to connect with sensors which monitor various information such as temperature, gas, access control and infrared; Fulfill different requirements of users 7 3G Camera User Manual ¾
Multiple ways of alarming: inform users through video calls, sms and auto alarm center etc. In poor 3G network situation, auto‐alarm through normal voice call 3 PACKAGE LIST 3G Camera, power adapter, SD card (comes with the camera), 3G‐Modem (comes with the camera), products box, user manual, guarantee card Alarm equipment: there would be the relevant alarm equipment for wireless alarm supported camera 4 EQUIPMENT INSTALLATION 4.1 3G CAMERA INSTALLATION ¾
1、Insert 3G SIM card into SIM card slot. ¾
2、Insert SD card which comes with camera into SD card slot(p.s. For the cameras that use built‐in SD card, users do not need to manually remove or inset SD card. Users could manage and download video record files through mobile phone or web site. ¾
3、Connect the lan cable between the camera lan port and modem lan port.(skip this step when WIFI is used) ¾
4、Insert audio input and output device into relevant input and output port( if audio i/o device is needed) ¾
5、Connect power adaptor to power port. Wait until the rotation self checking is completed. ¾
6、If factory reset is needed, user could use tweezer to keep pressing the reset key for 10s. Camera could be used normally after rotation self checking is completed. After reset, the IP is 192.168.1.139 and gateway is 192.168.1.1. After reset, user could setup other functions through web browser. 4.2 SECURITY SETTINGS 8 3G camera 系统使用手册 ¾
Password for mobile phone surveillance by default is 1234. It could be changed through 3G mobile phone video call interface (see chapter six for details). Please properly keep the password in case of leaking or forgetting. ¾
User name by default for WEB visiting or terminal software is admin, and password by default is admin. User name and password could be changed through WEB site. Please properly keep this information in case of leaking or forgetting. ¾
If surveillance information involves sensitive information, regular changes of password are suggested. If password lost carelessly, it could be recovered through factory reset. 4.3 SYSTEM STARTUP AND ERROR HANDLING ¾
1、After equipment is powered up, hardware self‐checking begins. Camera rotates up, down, left and right, and finally stays in the middle or preset position. ( Some types of cameras do not support preset position) This stage lasts for 25s. The red light flashes quickly and blue light is off in the stage ¾
2、If hardware is in regular condition, system would enter the advance function startup stage which would lasts for 30s. The red light and blue light are off. If the network setting is correct, the audio and video can be checked through Web or terminal software. If wifi is used, it would take some extra time for the wifi network searching. ¾
3、After the advance function startup stage is completed, the blue light and red light would flash slowly. The camera support 3G video call by default. 3G video phone call could be used to connect camera at this stage. If alarm setting is set, camera could actively make alarm phone call. ¾
4、Blue light is off means WIFI connection is fail. It may be due to one of the following reasons: WIFI is not started, wrong WIFI setting (such as wrong ESSID or cryptography), damage of WIFI module, or other camera problems. Red light is off means 3G video call initialization or 3G network connection is fail. It may be due to one of the following reasons: SIM card is not inserted, SIM card overdue, no 3G network, 3G function is not started or wrong 3G setting, damage of WIFI module, or other camera problems. ¾
5、If red light flashes quickly, it means malfunctioning of system hardware. It may be due one of the following reasons: using non‐standard SD card, SD card is not inserted, damage of SD card, SD card storage full, some parts of camera are in bad contact. User should primarily check the camera or contact product technicians for help. 9 3G Camera User Manual ¾
6、Red light and blue light would flash quickly at the same time when user upgrade camera through Web site. ( see 5.5.2 for reference) 4.4 FUNCTION CONFIGURATION 1.
:3G video phone surveillance function configuration: z
Setting 3G modem configuration: application mode: Video Call Only, PPPOE Only or Video Call first; setting relevant device according to built‐in modem type.( see 5.4.4 3G modem settings for reference ) z
Setting alarm configuration: enable relevant alarm options, setting relevant callback phone number or sms number( see 5.4.3 for reference) 2.
Alarm function configuration: z
Setting 3G modem configuration: application mode: Video Call Only, PPPOE Only or Video Call first; setting relevant device according to built‐in modem type.( see 5.4.4 3G modem settings for reference ) z
Setting alarm configuration: enable relevant alarm options: external alarm equipments (infrared, door contact, gas sensor, breathing sensor, correlation); motion detection, setting relevant callback phone number; sms number; auto‐video‐record (If enabled, it would auto‐record real time video on H263 and H264. SD card is required); alarming center( If enabled, alarm video would upload to alarming center; if camera is installed in some place without network or WIFI, the application mode in 3G modem configuration should be set to “PPPOE Only”. Attention: this function would bring out Internet traffic cost, please contact the local operator for cost details. (see 5.4.3; 5.3.4 for reference) 3.
Web management function configuration: Ethernet configuration, 3G network configuration, video
configuration, audio configuration, PTZ configuration, motion detection setting, alarm setting, system
time setting etc, could be modified.( see chapter 5 3G camera web using direction for reference) 4.
Mobile phone surveillance function: username, password. (Please see chapter 6 3G Surveillance
Operation Instructions for reference). 5 3G CAMERA WEB USING DIRECTION 5.1 USER LOG IN 1.
input IP address on IE: 192.168.1.139 (factory default, modifiable) 2.
10 Input user name: admin (factory default, modifiable) 3G camera 系统使用手册 3.
Input password: admin (factory default, modifiable) 4.
click confirm button to log in ( user could tick remember my password according to habit and applications), see following picture for reference 5.
After log in, system by default displays system Status page ( “Status”‐‐‐‐>”System” page) 11 3G Camera User Manual 5.2 LANGUAGES User could click Chinese or English in the top right corner at any page and enter to the relevant language mode. See the following picture for reference: 12 3G camera 系统使用手册 5.3DEVICE STATUS 5.3.1 EXAMINING SYSTEM INFORMATION On status‐>system page, user could check: Relevant information: Device ID (one ID belongs to one piece of equipment), Company ID; Device SN (manufacturers’ own designed clipper chip ID number; unknown would be shown if it is not encrypted); Version; compile time; system time. Relevant Storage Device information: Inner storage; Outer USB storage (remaining space and capacity of SD card would be 0M if it is not inserted) Alarming status information: alarming status (Fortified; disarmed; by‐path; emergency) As following: 13 3G Camera User Manual 5.3.2 EXAMINING NETWORK INFORMATION On status‐>Network page, user could check: Ethernet information: DHCP service; IP address; Subnet mask; gateway; DNS server Wireless LAN
information: WIFI
device;WIFI status; SSID; Signal Intensity(value);
DHCP service;
IP address; Subnet mask; gateway; DNS server 3G Network information: 3G Dial-up; 3G IP; 3G DNS server; 3G flow. 14 security type;
3G camera 系统使用手册 Modem state information: WAN device.
5.3.3 EXAMINING 3G INFORMATION After inserting SIM card and configuration on status‐>3G page is set correctly, the 3G status information would be shown in status‐>3G page: Modem type; SIM status (If SIM card is inserted, it would be available, if not, it would be unavailable); 3G phone network status ( status‐>video phone option on 3G modem page would show registered or unregistered);network type; phone signal strength ( 3G phone network registered, present signal strength would be shown as good, ordinary, bad); 3G network status( status‐>set 3G modem page network option, connected or disconnected would be shown); Base station information. 15 3G Camera User Manual 5.3.4 EXAMINING SERVICE INFORMATION On status‐>Service, user could check the relevant Internet service information and Individual hot spot, such as following: Internet service information: Service status; connect status; server IP; Port; Related main device. Individual hot spot information: service status; AP SSID; WAN; password; gateway; current connection 16 3G camera 系统使用手册 5.4 SETTINGS 5.4.1 ETHERNET SETTING User could change Ethernet setting on setting‐>Ethernet page. User could change Ethernet setting then click change. After the setting is changed, user could input the changed IP to enter web page. If there is only one camera attached to Ethernet, MAC address is no need to change, otherwise, it is suggested to change MAC address of relevant IP ( such as IP:192.168.100.225, the last four MAC address could be changed into 02:25), in case of MAC address conflict. If user checked “enable DHCP” and press change button, then DHCP would be started. When DHCP has been enabled, user could check the camera IP through 3G camera managers and access the web page. 5.4.2 WIFI SETTING User could change the WIFI configuration on Setting‐>WIFI page. User can refresh new active AP list by pressing view wireless networks button. User can input SSID, encipherment and secret key and click change to update the setting. User can check Enable WIFI to start WIFI and uncheck it to stop wifi. User can check Enable DHCP to start DHCP and uncheck it to stop DHCP. User can access the web page using the new IP after the setting is changed. 17 3G Camera User Manual 5.4.3 3G SETTING User could change 3G modem parameters on Setting‐>3G page. 3G module would show its modem type if the 3G broadband network device exists; Relevant selection could be selected on application mode (video call only; dial‐up only; priority to phone); Relevant selection could be selected on network mode (3G only; network only; priority for 3G); If application mode is dial‐up only, dial‐up internet configuration should be set. After changing configuration, press change and configuration would be take effect after 45s. Relevant information could be checked on status‐>3G page. 3G modem configuration: China Unicom WCDMA configuration: Supportable 3G application mode: video call; dial‐up; priority for phone (priority for network when there is no phone) China Mobile TD‐SCDMA configuration: Supportable 3G application mode: video call; dial‐up; priority for phone (priority for network when there is no phone) 18 3G camera 系统使用手册 5.4.4 NTP SETTING User could set camera time on the page of setting‐>NTP. User connect camera to PC, click synchronize PC
time. The synchronized PC time would be seen in the top left corner of real time video. User could also check Enable
NTP, set time zone and NTP server, and press change button. After configuration takes effect, relevant setting time
would be seen on top left corner, video‐>real time video page(GMT+8 is Beijing Time). 19 3G Camera User Manual 5.4.5 SERVICE SETTING User could set service parameter on Setting‐>Service page. Relevant information could be modified by editing Internet monitor service: Enable service, server (network remote monitoring server IP), server port (network remote monitoring server port), related main device (device name and ID), and Internet Route. Relevant information could be modified by editing Individual hot spot: Enable service, SSID, WAN, password, and gateway. User pressing change button and relevant configuration information could be seen on status‐>service page after configuration come into effect. 5.4.6 VIDEO SOURCE SETTING Users can edit relevant configuration of video source parameter on Setting‐>Video Source page. You can choose single camera mode or auto search mode.You can also add the camera which you want to monitor to your video source using manually add mode. Users can check the setting information on System‐>Service page. 20 3G camera 系统使用手册 5.4.7 ALARM SETTING User could edit relevant configuration of alarming parameter on Setting‐>alarm setting page. Select enable external alarm option if external alarm is needed, select disable if not. Select enable motion detect option if motion detect alarm is needed. Select motion detect level (low sensitiveness, medium sensitiveness and higher sensitiveness. Enable serialTotcp Test if is needed; Enable Auto Record option if is needed. Six numbers could be set as alarming callback number. The numbers would be tried one by one until the call is connected. Three numbers could be set as sms numbers, messages would be sent to these numbers one by one. After changing relevant configuration, press the change button. Configuration would take effect after 30s. If there is something changes in camera video image, motion detect would be started. Camera would begin auto recording, dialing relevant video phone and send alarming messages to relevant sms numbers (enabled motion detect, auto recording, callback numbers, sms numbers) 21 3G Camera User Manual 5.4.8 WIFI ACCESSORY SETTINGS User could check, add and delete alarming messages on Setting‐>Accessory page. After adding or deleting relevant alarming messages, please press change button. After 10s, the alarming messages would change accordingly. (Attention: Additional alarm devices are required for setting in this page. User can skip this page if additional alarm device is not supported by the camera) 5.5 MANAGEMENT 22 3G camera 系统使用手册 5.5.1 USER PREFERENCES User could modify relevant user information in Admin‐>user page. User could edit user name and password. After changing configuration, press change button, configuration would take effect .New user name, password would be needed when log in again 5.5.2 UPGRADE User could upgrade system, reset equipment, and restore factory settings on admin ‐> upgrade page. Click browse, choose upgrade file, press upgrade system button, then system would be upgraded. System upgrading may cost 5 to 10 minutes depends on network state. After upgrading is completed, system would warn that system upgrading finished, please manually restart camera, user should wait with patient during this time. During system upgrading and restoring factory settings, user should not cut off the electricity or unplug the network cable. Otherwise, system upgrade and factory restore will fail and it will even cause permanent hardware damage. After system upgrade or factory restore, IP by default is 192.168.1.139; Subnet mask is 255.255.255.0; gateway is 192.168.1.1, MAC address is 00:84:14:43:00:00; user name is admin; password is admin; password for 3G video call is 1234 (If there is no special remark of parameter on product package or label, configuration would be the same as mentioned above) 23 3G Camera User Manual 5.5.3 LOG User could check log information on Admin‐>Log page. User could click different logs to check on different records of the system, such as normal log, 3G log and system log. 5.6 CAMERA 24 3G camera 系统使用手册 5.6.1REAL‐TIME VIDEO On camera‐>real‐time video, user could check on real‐time video and time of NTP (settings‐>NTP page set synchronizing PC time to device). User can zoom in the video or switch to the full screen mode. If motion detection alarm is set, a warning sign will be shown in the left bottom corner when there is moving object detected by the camera. 5.6.2 AUDIO AND VIDEO SETTING User could edit audio and video setting on Camera‐>audio and video setting. After insert audio input, output device and enable audio play and audio capture, speech input and output would take effect. Video setting could be viewed in real‐time video. (After changing configuration, press change button, configuration would take effect after 10s) 25 3G Camera User Manual 5.6.3 PTZ SETTING User could edit setting on camera‐>PTZ : Change the PTZ lock setting to lock / unlock the PTZ; Change the Default PTZ location; Change PTZ rotate L/R and PTZ rotate U/D options to control the left/right/up/down positions; 5.7 VIDEO 26 3G camera 系统使用手册 5.7.1 VIDEO MANAGEMENT On camera‐>video management page, user could check video information. User could download video files by clicking download link, delete video files by selecting video files and pressing batch delete for deleting the selected video files. 5.7.2 VIDEO CONFIGURATION On camera‐>video configuration page, user could edit video configuration including video files storage location and enable or disable automatically overwrite when SD card memory is full. If user need to set camera time recording, user could selecting date and time and press change button, then recording would take effect at once. What’s more, clicking delete could cancel time recording. 27 3G Camera User Manual 6 3G SURVEILLANCE OPERATION INSTRUCTIONS 6.1 3G MOBILE PHONE ACCESSING 3G phone user could dial 3G camera phone number and enter user password for real‐time video and audio surveillance. Operational process 1、Using 3G phone to dial modem number, modem would be automatically connected. 2、User enter pass word according to the prompt and log in.(Number of allowable attempts is three; password input timeout is 60s, 3G camera would automatically hang up) 3、After receiving surveillance video, user could control the camera according to the prompt on mobile phone 6.2 MOBILE PHONE SURVEILLANCE CONNECTING AND RELEASING Mobile phone surveillance basic flow as following (For English please refer to Chinese menu): 28 3G camera 系统使用手册 1.
Dialing video call with the phone number of the SIM card in the camera. Attention: voice call could not support video surveillance 2.
Enter password accroding to video prompt (default to 1234) 3.
Received video for video surveillance 4.
Hang up phone call to end surveillance 6.2 KEYBOARD CONTROL Keyboard Actions for controlling the camera during surveillance: Button Action Note 1,3 Zoom control 1 for zoom in, 3 for zoom out 2,4,6,8 Rotation direction control 7,9 Camera switching 5 Cruising 360°spinning camera * System Menu # Camera action menu 2 for move up, 4 for move down, 6for move leftward, 8for move right. Press 7 or 9 could switch amongs different cameras for multi‐angle surveillance Repeat pressing 0 for enable / disable voice 0 Voice‐operated control surveillance / two‐way voice communication 29 3G Camera User Manual 1、Press the buttons during surveillance: 2、4、6、8 or directional button to control moving top or button, right or left
5 Enable or disable cruising 1, 3 Zoom control: 1 for zoom in, 3 for zoom out 7、9 Switching camera: 7 for switching forward, 9 for switching backward 0 button is for Audio control, repeat pressing 0 could control: enable voice surveillance, enable two‐way voice communication, and disable surveillance or two‐way voice communicatio 2、* button System Menu 1 Surveillance 2 Record List 3 Change PIN 4 Change Callback *button Return to Control #button OK Enter number button to control, ended by pressing #. Such as return to surveillance, enter 1#. 3、# button Camera Menu 1 Motion Detection ON/OFF View or edit camera motion detection 2 Eavesdropping ON/OFF View or edit camera voice detection (do not open) * Button return to surveillance #button OK Enter number button to control, ended by pressing #. Such as View or edit camera motion detection, enter 1# then system would return to present camera motion detection, press # button to enable or disable motion detection, * button to return to camera menu. 6.3 CHANGING USER PASSWORD ON MOBILE PHONE User could choose menu item through mobile phone button for changing password. The maximum length
of password is 32 and only for numbers. Password by default is 1234.
1 Press [*] button to enter system menu. 30 3G camera 系统使用手册 2 Enter changing password menu according to system prompt. 3 Enter new password according to prompt, ended by pressing [#] (maximum for password length is 19 characters) 4 Enter password again according to prompt to confirm, ended by pressing [#] 5 Finish changing password. 6.4 INQUIRING AND CHANGE MOTION DETECTION STATUS ON MOBILE PHONE User could choose menu item through mobile phone button for inquiring and change motion detection
status.
Procedure:
1、Press [#] to enter setting menu
2、Press [1] [#] to enter Movement Detection setting. The current motion detection status (enable/disable) is displayed
3、Press [#] to change motion detection status. 6.5 INQUIRING AND CHANGING EAVESDROPPING STATUS ON MOBILE PHONE User could choose menu item through mobile phone button for inquiring and modifying eavesdropping
status.
1、Press [#] to enter setting menu 2、Press [2][#] to enter eavesdropping setting. The current eavesdropping status (Enable/Disable) is displayed
3、Press [#] to change eavesdropping status 6.6 CONTROLLING VIDEO RECORDING ON MOBLIE PHONEC User press 0 on mobile phone to enable or disable the current camera video recording. Pressing [0] to
begin recording, red frame is shown to indicate that camera is recording. Press [0] again to end recording,
red frame is disappeared and video record file is created.
6.7 PLAYING SURVEILLANCE VIDEO RECORD ON MOBILE PHONE User could play the surveillance video record through pressing mobile phone button and choosing menu
item. User could switch amongs different surveillance video records.
Operations: 1、Press [*] button to enter system menu. 31 3G Camera User Manual 2、Press [2][#] button to access the video list and video information, including camera ID, recording time. 3、Press [7] button to display the previous video information, Press [9] button to display the next video information. 4、When video list is displayed, press [#] to play video. When video is playing, press 0 to pause, press 0 again to continue. 5、After video record is played, “Record play end” is prompted, press [*] button to return to the list, press [#] to play the next video record. 6.8 DELETING SURVEILLANCE VIDEO RECORD ON MOBILE PHONE 1
Press [*] to enter system function menu
2 Press [2][#] to display video record list and video record information, including camera ID, record time;
surveillance video record would be arranged in reverse order.
3 Press [7] to display the previous video record information. Press [9] to display the next video record
information.
4 When the video record list is displayed, press [0] to delete the current record. Press # to confrm
delete video record.
5 When video record is played, press [0] to delete the record. 6.9 MOTION DETECTION ALARM PHONE CALLBACK After triggering mobile alarm, surveillance camera in fortification state would make video call to the user‐defined callback mobile phone number. The surveillance video will displayed on the phone as soon as the call is answered. If callback is fail, sms message would be sent to mobile phone. At the same time, video recording begins and the video record will be sent the the user‐defined E‐mail. Procedure: 1 Trigger motion detection alarm of camera 2 3G camera make 3G mobile video call and begin video record 3 Mobile phone answer video call; After logging in, user could see the surveillance video of alarmed camera. 4 Hang up call to end surveillance, video file would be automatically stored when its filesize reaches the defined value. 6.10 SETTING AND CHANGING CALLBACK PHONE NUMBER ON MOBILE PHONE User could press phone button and choose menu item for setting/changing the callback mobile phone number for motion detection alarm. ( It will be fail if the incoming call number cannot be acquired for some networks) 32 3G camera 系统使用手册 1 Press [*] during video surveillance state to enter system function menu. 2 Select the setting / changing callback phone number menu item according to the prompt. 3 Input callback mobile phone number according to the prompt and Press [#] to end. 4 The prompt that indicated successfully changed is shown. It automatically returns to system function menu after 3s. 6.11 SETTING CURRENT PHONE NUMBER AS CALLBACK PHONE NUMBER User could press phone button and choose menu item for setting the current phone number as the callback mobile phone number for motion detection alarm. ( It will be fail if the incoming call number cannot be acquired for some networks): 1 Press [*] during video surveillance state to enter system function menu. 2 Set current mobile phone number as callback number according to the system menu prompt. 3 The prompt that indicated successfully changed is shown. It automatically returns to system function menu after 3s. 7 3G CAMERA MANAGER SOFTWARE INSTRUCTIONS 7.1 SOFTWARE INSTALLATION 1.
Open product CD or download from specified website, then enter PC client‐site software installation path X:\WeFUN_WinXP\WeZoom_PC.msi 2.
Run installation according to the prompt.
3.
Can be used after the installation. 7.2 SOFTWARE FUNCTION INTRODUCTION Double click program icon to start the software. 33 3G Camera User Manual a b c d e f g h I j k m n o p q a:Camera;
b:System setting;
c:MIC;
d:HELP;
e:Show in window; f:PTZ control;
g:Single screen;
h:Four screens;
i:nine screens;
j:Full screen; k:Zoom in ;
m:Zoom out;
n:auto rotate;
o: remote camera log in;
p:minimizing;
q:exit
7.3 CAMERA LIST Click Camera button
. Camera List dialog box (hot keys: Ctrl+C) is poped out. Camera list is displayed. Two kinds of camera: Local camera and remote camera. 1.
Local camera: local camera shows under local node. After enable the software, system would detect available camera in local area network, then new camera would be shown under the local node in list form. Local camera could be connected without logging in.
2.
Remote camera: Log in to the relevant NVS is required. The list of cameras connected to the server would be shown under relevant NVS.
34 3G camera 系统使用手册 3. Camera management: Right click camera and pop out shortcut menu (In pic7‐1, click node 26, dialog box would be popped out): a. click Connect to connect to camera and view on surveillance image; b. click disconnect to end surveillance; c. click Configure… to set camera parameters; d. click Camera Record Manage… to manage camera record files; e. click Warn Report Manage to check on alarming record.
4.
NVS management: Right click NVS and pop put shortcut menu(In pic 7‐1, click 124.248.207.7 –SN dialog box would be popped out):
a. If have not logged in NVS, click Log In NVS… to log in; b. If have logged in NVS, click Log Out NVS… to log out; 35 3G Camera User Manual c. click Update Camera List to update camera list; d. If have not logged in NVS, click Remove It to remove NVS node; e. After log in with administrator ID, click Group User Manage… to manage group users. 7.4 NVS SERVER LOGGING IN AND QUITING User is divided into ordinary user and administrator user. After logging in, administrator could manage group users: view group users’ information, add users, change users’ information and delete users. 1.
Remote camera logging in through NVS Server: Press , open Remote camera Login (Hot keys: Ctrl+L), input NVS Address, User Name, Password, Master Camera SN, click Login to log in(During Logging in, NVS Status Icons is ). If Logged in, add NVS node under camera list (NVS Status Icons is
), camera list is shown under the node. When the user with the same name log in somewhere else, the current connection would be broken. As below: NVS Address is IP address of NVS server, UserName is divided into administrator and normal user. Initial users password of administrator is admin.Password could be set in web setting. Normal user’s username and password is set by system of administrator. 4. Quiting: right click NVS, choose Log out NVS. Choose Remove it to delete NVS from the list. Click Camera button
or press hot‐key Ctrl+C, Camera List would be popped out (pic 7‐1). Right click NVS, follow the fourth step in 7.3 to quit. 36 3G camera 系统使用手册 7.5 SURVEILLANCE CONTROL 1. Connecting to camera: open camera list, choose the camera which needed to be connected, click the right mouse button, choose Connect or double click camera. During connecting, the camera Status Icons is After connected, surveillance video will be displayed in surveillance area and camera status icons is There is only one camera that can be controlled at the same time and its status icon is . . . Red border would be shown on controlled camera in surveillance area. PTZ controlling: user could control the chosen camera on software interface
on keyboard) and camera would move accordingly; ;press Ctrl+R), and camera would start to touring. Press (hot keys: moving keys could control Tour mirror(hot‐key: could zoom in ( hot keys: Ctrl+ +);press could zoom out (hot keys: Ctrl+ ‐); 2.
Video bitrate: Video bitrate would be shown on top left corner of the window, units: Kbps. 3. Toolbar: during surveillance, move mouse cursor to the top right corner of the window and toolbar will be shown. 3G camera module signal, snapshot and record could be displayed and controlled on the toolbar. 37 3G Camera User Manual 或在视频窗口点击右键,弹出以下对话框 Right click on video window, dialog would be popped out: 7‐2 3.1 Snapshot: click and save current image snapshot. Or click Snap Shot in pic7‐2. Save path of the snapshot could be modified in system setting. 3.2 Record: click (or click start record in pic7‐2) to start record and toolbar icons would be
(Stop recording icon). Click stop recording icon to stop recording(or click Stop Record in pic7‐2). Remaining recording time would be shown on the left bottom corner of the surveillance window (pic7‐2). Right click on surveillance area during recording and choose Extend Record Time (pic7‐2) can extend the recording time for one more record period( 20S for one period). 38 3G camera 系统使用手册 7‐3 a)
3G signal strength: If 3G module is installed in camera, 3G signal strength of 3G module would be shown, strength is divided into 5 grades: bad, lower,
normal, good, abnormal. 3.
Status bar: Current camera status and event hints would be shown on the right button status bar of the window. Status / Events 4.
Status Bar 无连接 No Connection. 正在连接 Try Connecting... 连接中断 Camera (ID)'s connection was broken. 发起录像请求 Request recording 发起录像失败 Request recording failed 手动终止录像 Recording stopped 录像结束 Recording end 正在录像(显示剩余时间) Recording... remain time: 20 s Video and Audio Switch: During surveillance, right click surveillance area (In pic7‐2) and choose Video Switch (Audio Switch) to enable or disable video or audio transmission. 5.
Audio: click MIC button on the right of the software. Button turn to then the local microphone would be enabled and could begin audio communication. 6.
Surveillance image: This software supports the maximum of 36 video surveillance connections concurrently. ; four screens 错误!未找到引用
Surveillance image could be chosen as: nine screens 源。; single screen ;full screen
. 39 3G Camera User Manual nine screens four screens
single screen full screen
In nine screens mode, there are four pages and each page shows nine surveillance windows. Click or press key 1‐4 to choose surveillance page. In four screens mode, there are nine pages and each page shows four surveillance windows. Click or press key 1‐9 to choose surveillance page. Imput Backspace to quit full screen. 7.6 CAMERA MANAGEMENT Open Camera list dialog box, right click on the relevant camera (26 in pic7‐2,or right click on the relevant camera during surveillance), choose Camera Record Manage on the popped out shortcut menu, the remote camera list will be displayed. 40 3G camera 系统使用手册 Remote video list shows the basic information of video record: No. (video ID), Video Name, Type( Manual/ Alarm), Time, Size, Status. Video status list shows the download status of camera: When record download is done, user can right click to choose play or delete. When there is no download, user can right click to choose continue download or delete. When record is downloading, user can right click to choose pause or cancel. When download is paused, user can right click to recover or delete. When download is on the waiting list, user can right click to choose cancel. If user cancel download, system would prompt user for delete the downloaded record or not, choose yes to delete, choose no to keep the downloaded part. User can choose continuing download to download the remaining part. Click Refresh button to refresh video record files list. Select the files needed to be deleted and click Batch Delete to batch remove. Attention: the deletion here means delete the record on camera. If user wants to manage local record, please refer to local video management. Maximum concurrent download sessions could be change in the system setting. 2. Camera setting: Open Camera List for choosing camera. Right click on the relevant camera (or right click on the relevant camera during surveillance), choose configure…menu for modifying relevant parameters. 2.1 Media setting: Configure the camera video parameters including: Frame rate; Resolution; Bitrate. After modifying relevant parameters, click OK or APPLY. 41 3G Camera User Manual 2.2 Time synchronization setting: click Synchronize Time button to synchronize camera and local time. 2.3 3G data usage:Current usage; Daily usage; Monthly usage. 42 3G camera 系统使用手册 (该图需替换)
7.7 USER MANAGEMENT If user logged in with administrator ID, user could manage group user including viewing group users’ information, adding new user, renewing user information and delete user. Right click on the relevant NVS, choose Group User Manage… in the popped out shortcut menu, user management dialog box would be popped out. 1.
Adding new user: click New User and dialog box would be popped out. Fill in the user information then click Add User.
43 3G Camera User Manual 2.
Editing User Information: right click on the user information, choose Edit User Information in the popped out shortcut menu and update user information dialog box would be shown. After editing user information, click Update.
3.
Deleting user: right click on the user information, choose delete in the popped out shortcut menu and deleting dialog box would be popped out. Choose OK to delete user, choose cancel to return to user management dialog box. 7.8 SYSTEM SETTINGS Click Setting button, system setting dialog box would be popped out. Snapshot and record parameters can be changed. 1. Snapshot setting: click browse… button, browse snapshot saving folder, click OK. The new snapshot directory would be shown. Or input snapshot save path, click OK or Apply to save. 44 3G camera 系统使用手册 2.
Record setting: user could change record directory, download Concurrency (1), record period, record default time of single click and record format(PGM, AVI). 45 3G Camera User Manual Attention: after changing save path, the current downloading or previous downloaded record would be saved in the previous folder, but the newly downloaded record would be save in the updated folder. Self‐synchronizing reocord would be on effect after reconnection. If choose Auto Download, system would automatically download the unfinished video. 3.
Local record management: click Local Record Manage, local record management dialog box would be popped out. List of camera ID with downloaded record files would be shown on the left. In above picture, Camera with downloaded videos would show five cameras with id: 18, 22, 23,26,9. Click camera ID and relevant local record files information would be shown on the right. The last column shows the record download status. When record download is done, user can right click to choose play or delete local files. When record is not completed, user can right click to choose delete or play the downloaded files. User can check record files and click Batch Delete button to begin batch remove. 46 3G camera 系统使用手册 4.
Alarming Setting: Set showing realtime alarming information and view on local alarming record. a. Real time alarming warning: after choose Realtime Warning Notification, real time
information would be shown in the middle of video if camera alarms.
Real time alarming warning would be gone after clicking on it.
b.Local alarming history: click Local Warning History,local alarming history dialog would be
popped out
47 3G Camera User Manual Camera ID list shown on the left. Click camera ID, relevant local alarming record information would be shown on the right: Right click one of the record to delete the record. Or choose several records and click Delete to batch delete records. z
8 3G CAMERA MANAGEMENT FUNCTION 8.1 STARTING UP CAMERA 1、 Switch on the power, camera will startup and undergo self-detection
2、When self-detection is completed, camera enters surveillance mode. It can be connected to network
through wired or wireless network and send broadcast packet. 8.2 CAMERA PTZ SELF‐CHECKING After switching on the power, camera will undergo PTZ self-detection (right, left, up, down). The camera
will rotate to the default position after self detection.
8.3 CAMERA INDICATOR LIGHT Under camera working status and standby mode, red light flashes slowly means 3G works well; blue light flashes slowly means WiFi works well. Except for system startup or firmware updating state, red light flashes quickly means system is in failure. 8.4 INFRARED LIGHTING The infrared lighting of camera support surveillance at night and it would automatically switch on in dark situation. 8.5 SD CARD MEMORY PORT External SD card: SD card port is included that user can insert external memory storage for storing snapshot, audio record and video record. Internal SD card: SD card is included in the system. User do not need to insert manually. 8.6 SIM CARD PORT Camera includes SIM card port and internal modem. User can insert 3G SIM card, and then access Internet, make video call and audio call. 9 FAQ Q1: Which kind of 3G modem does current 3G camera support? 48 3G camera 系统使用手册 A1: There are ZTE MU301, W ZTE MF210, W Huawei 176G, ZTE M1900 which have been tested. New modem type will be suppored later and published and updated on the website. Q2: Why video call from mobile phone can not be connected? A2: Connection of video call from mobile phone depends on 3G network and the 3G signal strength which are different in different place. If 3G camera website shows that 3G signal is low, it means 3G network is out of signal or low signal. Please place the 3G camera to where 3G signal is good. Q33: Why the PC software appears short‐time mosaic in rare cases? A3: This kind of camera system supports multiple modes: 3G mode, Internet mode and Ethernet mode. System would switch mode according to different situation. Image would probably be inconsistent in a short time when the system is switching mode. Q4: Why it prompts failure when watching alarm video records on mobile phone? A4: If record quality has set as High (can be changed in the Webpage (application ‐> record)), video records could not be played on mobile phone; if user needs to watch records on mobile phone, please set the record quality to low. Q5: If user need to change language of the menu of video call into Chinese, what kind of format picture should be used and how to replace for the original file? A5: There is no function for changing from English to Chinese currently. The language is factory default. If Chinese is needed, please send the camera back to us or update software online. 10 RELATED TECHNOLOGY PARAMETERS 10.1 3G NETWORK TECHNOLOGY PARAMETERS 3Gnetwork
TD-SCDMA SMS Support GSM/GPRS/EDGE 900/1800MHz Signal Strength
Support, Beep when it is low signal strength standard Rate Detection Transmission Rate IMEI Lock Support, use with SIM card Video call channel(CS)network flow channel(PS) Image sensor High-definition CCD , High-definition CMOS PAL/NTSC Pixel count PAL:500(H)×582(V) NTSC:510(H)×492 (V) HSDPA rate:DL2.8Mbps/UL384Kbps,
EDGE:236.8Kbps 3G video transmission
channel Video Standard 49 3G Camera User Manual Resolution Color 420TVL B/W 480TVL Camera quality Fixed Focus:8mm/F1.6 Viewing angle:42° Luminance Color 0.5Lux/F1.2 B/W 0.05Lux/F1.2 视频压缩标准 Video
H.264+H.263 compression standard VGA/QVGA/CIF/QCIF Video frame rate PAL:25FPS/s, NTSC:30 FPS/s, adjustable 32K~2Mbps adjustable, can be set by user / auto
Streaming Type Video and Audio combined streaming AMR Audio code rate 12.2Kbps Audio input 1 path,RCA port Audio output 1path,RCA port Mobile Detecting
Support, three sensitivity levels Wireless alarm input Infrared, door contact, smoke, gas, Photoelectric
Video compression
resolution Video code rate adjustable 10.2 AUDIO TECHNOLOGY PARAMETERS Audio compression
Standard Alarm Beam Detector, broken glass sensor, water sensor,
emergency button, SOS Wired alarm input 2paths,semaphore Alarm output 1path,switch 10.3 OTHER TECHNOLOGY PARAMETERS Wired network 10BaseT/100BaseTX Ethernet,RJ45port Local storage Support internal SD storage Infrared Internal infrared light, effective range 10-15m Power Supply 12V DC Consumption About 5W 50 3G camera 系统使用手册 文档版本:V2.10 发布日期:2011‐6‐29 本手册所提及的产品规格和使用指导仅供参考,由于产品版本升级或其他原因,本手册内容会不定期更新,恕不另行通知 The product specifications and instruction of this booklet is for your reference only. This booklet would update irregularly and information is subject to changes without prior notice. 51