1
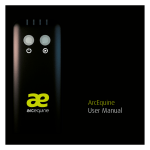
User Manual
!
Contents!
Important Information!!
!
!
!
Introduction ! !
!
!
!
!
Contents of your Kit! !
!
!
!
Instructions - How to charge your Delivery Unit!
Instructions - How to set up your Kit! !
!
General Treatment Protocol! !
!
!
Maintenance Programme!
!
!
!
Troubleshooting!
!
!
!
!
How to Find Us!
!
!
!
!
!
!
!
!
!
1!
2!
3!
8!
9!
12!
13!
15!
17
!
•
•
•
•
•
•
IMPORTANT INFORMATION!
Use of ArcEquine is in addition to, and in no way a
substitute for, your existing veterinary policy and
practice.!
The use of microcurrent technology can cause some
dehydration. Please ensure there is plenty of clean
and fresh water available at all times.!
Microcurrent technology acts systemically at a
cellular level, so it doesn’t matter where on the body
the current is introduced, it always goes to wherever
it’s required.!
Do NOT over tighten the leg strap.!
Rotate the strap around the legs each day!
Do not use daily for more than 6 consecutive weeks
1
!
INTRODUCTION!
ArcEquine has been specifically developed for use with
horses. The sequences of currents are not necessarily
the optimum currents for human use, nor is this use
intended or recommended. !
!
We are aware that an increasing number of ArcEquine
owners are now using the unit on themselves with some
apparent success and in a number of differing clinical
areas. This use is entirely their decision and at their
discretion.!
!
!
!
!
!
DISCLAIMER!
This device is only for use specifically as directed on
horses. Applied Microcurrent Technology (Equine)
Limited, it’s distributors, employees, agents or directors
cannot take any responsibility for any use of this
product other than as specifically directed, or on any
other animal or human.
2
THE CONTENTS OF YOUR ARCEQUINE CASE!
•
•
•
•
•
•
•
•
•
!
1 x Carbon Rubber Leg Strap!
1x Leg Strap with Press Studs!
1 x Carbon Rubber ArcPads (Pack of 4)!
1 x Delivery Unit!
1 x Control Unit!
AC Charger (plug)!
USB Cable!
Leather Pouch!
2 x Conductive Gel (250ml bottle)!
!
!
The conductive gel has been specially formulated for
use with ArcEquine. The contents comply with all
Equine and Veterinary regulations and requirements.!
!
Please Note: The Carbon Rubber ArcPads are not
adhesive. The adhesive ArcPads are not for general
equine use.
3
LEG STRAPS!
(Carbon Rubber)
Delivery of the current will always be via a leg strap.
There are two types of leg strap included in your kit. The
carbon rubber leg strap is the original strap. This strap
has the carbon rubber pads sewn in with the electrodes
behind the pads. This must be used in conjunction with
the conductive gel provided.!
!
!
Care Instructions: Wipe pads clean after every use with
warm water. Make sure there isn’t a build up of dirt
around the electrode.!
4
LEG STRAPS!
(Press Stud)
The leg strap with press studs are used with the black
carbon rubber ArcPads provided. The press studs act
as the electrical feed and return necessary to establish
a circuit. This strap is also used in conjunction with the
conductive gel provided.!
!
Care Instructions: Ensure carbon rubber pads are wiped
clean after every use with warm water.
5
DELIVERY UNIT
Your delivery unit will be delivered to you uncharged.
Charge by use of the AC Plug and USB cable provided.
Each time you turn on your unit, all lights will show
GREEN then RED. The unit is ready to program when
LED #1 shows GREEN and LED #3 shows RED. !
!
If LED #1 shows RED, your unit needs to be charged
before you can start using it. Ensure your unit is turned
ON when charging.!
!
A fully charged battery will last for 42hrs before needing
to be charged again.
6
CONTROL UNIT
The unit has 4 preset programs, as indicated by the
buttons 1-4. All programs are set in 45 minute periods.
You should select 4 periods for each 3 hour delivery
session.
7
Programmes 1 & 2 were designed to get rid of swelling,
bruising and inflammation quickly. They also enable
total rebalancing.!
The main clinical areas of application are:!
• Swelling, bruising and inflammation!
• All pain!
• Any hormonal imbalance!
• Any immune/auto-immune deficiency!
• Boost the immune system!
• Rapidly disperse lactic acid!
• Full range of psychological disorders!
!
!
!
Programmes 3 & 4 are totally different to programmes 1
& 2. They are delivered in slightly different ways to each
other and have been designed to:!
• Kick start and accelerate regenerative repair,
enabling total closure in a fraction of the normal time
with little, or often no, scar tissue!
• Enable pre-existing scar tissue, both internal and
external no matter how chronic, to be replaced by
original tissue.
8
INSTRUCTIONS!
How to charge your Delivery Unit
1. Connect the USB cable to the plug charger.!
!
2. Gently push the cable into the charger port at the !
bottom of the delivery unit. Ensure it is fully in, but do
not wiggle the cable.!
!
3. Switch the delivery unit ON. All lights should turn
GREEN then RED followed by LED #2 and #3 RED.
After 30 seconds the LEDs will flash. !
If LED #1 is lit, check the troubleshooting guide at the
back of this manual.!
!
4. Leave for two hours to charge. A full charge is
indicated by LED #2 turning GREEN.!
!
5. Ensure you remove the cable by pulling it directly out
of the delivery unit. Do not wiggle the cable.
9
INSTRUCTIONS!
How to set up the Arc
1. Turn on Delivery Unit and ensure LED #1 shows !
GREEN and LED #3 shows RED. !
If LED #1 shows RED, you need to charge your unit
(please see p.9).!
!
2. Turn on your Control Unit and press the preset
program number you wish to use once, followed by the
‘+’ button for each 45 minute period you wish to add.!
!
!
!
eg. For a 3 hour session of programs 1 and 2, !
!
you would press “1 + + 2 + +”!
!
3. If using the leg strap with press studs, affix the
carbon rubber pads.!
!
4. Squeeze the gel onto each carbon rubber pad. !
You want a blob that’s approximately the size of a pea.!
5. Attach the delivery unit to the strap using the Jack
Plug. Turn your delivery unit on and activate it using the
control unit.!
Point A at B (see image below) and press GO.!
10
7. LED #3 should now show GREEN. !
Please note LED #4 & #5 will show RED until
connected to the strap and horse. !
!
8. Attach the strap to the leg, this is usually placed on
the canon bone. !
The AE logo should be sitting upright and the spine of
the strap should be to the front or rear of the leg.
Ensure LED #4 and #5 now show GREEN. If either or
both lights still show RED please refer to the
troubleshooting guide at the back of this manual.!
Ensure the straps are not too tight. You should be
able to fit your finger between the leg strap and the leg. !
!
9. Place the delivery unit in the pouch and cover with a
stable bandage or similar.!
11
!
General Treatment Protocol!
FOR INJURIES!
Phase 1 !
!
!
!
!
!
!
!
!
!
!
1 WEEK or until no longer lame ! !
(whichever is longest)!
1++ 2++!
Daily!
Enable total rebalance, manage pain and !
reduce swelling!
Phase 2!
!
!
!
!
!
!
!
!
2 WEEKS!
1++ 3++!
Daily!
Starting program 3 will kick start and !
accelerate the regenerative repair!
Phase 3 !
!
!
!
!
2 WEEKS!
1+ 3++ 4+!
Daily! !
!
!
!
Phase 4!
!
!
!
!
1 week off!
With the use of ArcEquine you can get a very good
result in a fraction of the time it would normally take to
heal. !
This is entirely dependent on two factors, both your
responsibility.!
!
COMPLIANCE AND PATIENCE
12
General Treatment Protocol!
FOR BEHAVIOURAL ISSUES OR PAIN RELIEF!
!
Phase 1 !
!
!
!
!
!
!
!
!
6 WEEKS!
1++ 2++!
Daily!
Enable total rebalance, manage pain and !
reduce swelling!
Phase 2!
1 week off!
!
!
Maintenance Programme!
NO INJURY!
Phase 1 !
!
!
!
!
!
!
Phase 2!
!
!
!
!
3 WEEKS!
1++ 3++!
Daily!
!
2 MONTHS!
1++ 3++!
Every SECOND week!
Phase 3 !
!
!
!
!
2 MONTHS!
1++ 3++!
Every FOURTH week!
Phase 4!
!
!
!
!
ONGOING!
1++ 3++!
Every FOURTH weekend!
!
!
13
MAINTENANCE PROGRAMME!
FOR COMPETITIONS !
!
Can be used in conjunction with the Maintenance
Programme (p. )!
!
!
2-3 days prior to competition and when travelling!
1++ 2++!
This will keep the horse calm and boost its immune
system.!
!
In 3 day events where Show Jumping follows Cross
Country!
1++ 2++ as much as possible!
This will clear any lactic acid build up!
!
While travelling home/at home!
1++ 3++!
This will help calm the horse, clear lactic acid and
repair any tissue micro tears that will have occurred!
14
TROUBLESHOOTING
LED #4 or #5 is flashing RED when the strap is on
the horse.!
Make sure the jack plug is in properly, twist it 180
degrees when in the unit to dislodge any dust/hair that
may be trapped inside. If that doesn’t work, try putting
more gel directly onto the horses leg and rub it in to
ensure skin contact. !
For shorter horses or ponies, try placing the bottom
strap below the fetlock.!
If you are still having trouble getting a connection, you
can test the strap at home by attaching and activating
the delivery unit. Touch all four electrodes using your
forefingers and thumbs. LEDs #4 and #5 should now
turn GREEN. If not, please contact our office on
[email protected]. !
!
!
LED #1 is lit when charging.!
This means there is a loose connection somewhere and
the unit is not charging. Contact our office on
[email protected] for more advice.!
!
!
The delivery unit isn’t reading the control unit.!
Ensure you are pointing the control unit directly at the
eye of the delivery unit. If the problem persists, contact
our office on [email protected].
15
LED INDICATION
1
RED!
GREEN
Charging Required!
Charged
2
RED!
AMBER
GREEN
Charging!
Almost Charged!
Fully Charged
3
RED!
GREEN
Unit On!
Unit Activated
RED!
GREEN
Electrodes not
connected!
Electrodes connected
RED!
Electrodes not
connected!
Electrodes connected
4
5
!
GREEN
NO LEDS
SHOWING
RED
ALL then!
GREEN
Delivery Unit OFF
Delivery Unit Turned ON
16
HOW TO FIND US
There is a full list of FAQs and other information on our
website, !
www.arcequine.com!
!
Find us on Facebook for for regular updates and case
studies,!
www.facebook.com/arcequine!
!
Follow us on Twitter for snippets of news!!
www.twitter.com/arcequine!
!
You can even subscribe to our Blog to find out the latest
developments, treatment programmes for specific injuries
and more tips on how to use your Arc,!
www.arcequinesays.blogspot.com!
!
Or you can improve your networking and follow our Company
page on LinkedIn to find like-minded people and branch out
into the Equestrian world! Just search for “ArcEquine” in the
search bar at the top!
17