1
Ser-USB 2.0 Drivers
User Manual
by Adrian Ives
Memory Lane Computing Ltd
Truro, Cornwall, UK
Registered in England and Wales: No. 7074678
v2.00b, 13 th February, 2012
Ser-USB 2.0 Drivers User Manual
Table Of Contents
Important Notice For Standard QL Users ...............................................................................9
QUICK START.....................................................................................................................10
Introduction ..........................................................................................................................12
What is the Ser-USB? ......................................................................................................12
Native...........................................................................................................................12
FAT ..............................................................................................................................12
What Ser-USB is not! .......................................................................................................13
What configuration will get the best out of Ser-USB? .......................................................13
Getting Started.....................................................................................................................14
Preparation ......................................................................................................................14
Procedure ........................................................................................................................14
Loading the Legacy Driver on QL Hardware .................................................................16
Loading the Destiny Driver with QL Emulators..............................................................16
[ESC] ...........................................................................................................................16
[F4] ..............................................................................................................................16
[F5] ..............................................................................................................................16
Limitations and Restrictions .................................................................................................18
Supplied Software ................................................................................................................19
readme_txt ...................................................................................................................19
SERUSB2_bin..............................................................................................................19
SERUSB2L_RAM_bin ..................................................................................................19
SERUSB2L_ROM_bin..................................................................................................19
USBWIZ_RAM_bin ......................................................................................................19
USBWIZ_ROM_bin ......................................................................................................19
EDDE2_bin ..................................................................................................................19
pm_exe ........................................................................................................................19
uwt_exe .......................................................................................................................19
uzx_bin ........................................................................................................................20
wins_bin .......................................................................................................................20
How to Partition the Drive ....................................................................................................21
The Ser-USB Partition Manager .......................................................................................22
How to FORMAT the Drive...................................................................................................29
Formatting a Physical Drive..............................................................................................29
Formatting a Logical Drive ...............................................................................................30
Native Driver S*BASIC Procedures and Functions...............................................................32
Page: 2
Ser-USB 2.0 Drivers User Manual
MOUNT Number, Drive, Partition .....................................................................................32
MOUNT Number ..............................................................................................................32
UMOUNT Number............................................................................................................33
DRIVE_CAPACITY Number%,Size ..................................................................................33
SRU_FORMAT [#Ch,]Drive,Label$ ..................................................................................33
SRU_BAUD BaudRate.....................................................................................................34
SRU_PORT Name$ .........................................................................................................34
SRU_USE Name$............................................................................................................34
SRU_OK()........................................................................................................................35
SRU_BASE() ...................................................................................................................35
SRU_VER$(Mode%)........................................................................................................35
SRU_STATUS() ...............................................................................................................35
SRU_FLAG( [Flag%] [,Action%]) ......................................................................................36
SRU_ERR$......................................................................................................................36
Extra S*BASIC Procedures and Functions...........................................................................37
Obsolete Modules ................................................................................................................38
Direct Sector Access ...........................................................................................................39
Ser-USB FAT Driver.............................................................................................................40
The S*BASIC interface.....................................................................................................40
The Driver Command Manager (DCM) .............................................................................40
Starting the Driver ............................................................................................................40
[ESC] ...........................................................................................................................41
[F4] ..............................................................................................................................41
[F5] ..............................................................................................................................41
Using both drivers together ..............................................................................................41
FAT Driver S*BASIC Procedures .........................................................................................43
UZ_DCMSTART ..............................................................................................................43
UZ_DCMSTOP ................................................................................................................43
UZ_MNT Drive% ..............................................................................................................43
UZ_SW Drive% ................................................................................................................43
UZ_DIR [#Channel%][,][Drive%].......................................................................................44
UZ_FORMAT ...................................................................................................................44
UZ_COPY "Source Destination".......................................................................................45
UZ_LOAD Filename$ .......................................................................................................45
UZ_LRUN Filename$ .......................................................................................................45
UZ_FLD 0|1......................................................................................................................45
UZ_EX Filename$ [,#Ch ...][,Command$] ........................................................................46
Page: 3
Ser-USB 2.0 Drivers User Manual
UZ_EW Filename$ [,#Ch ...][,Command$] .......................................................................46
UZ_LRESPR Filename$ [,#Ch ...][,Command$] ...............................................................46
UZ_LBYTES Filename$, Address ....................................................................................46
UZ_SBYTES Filename$, Address, Length .......................................................................46
UZ_SBYTES_A Filename$, Address, Length...................................................................47
UZ_DEL Filename$..........................................................................................................47
UZ_REN "Old New"..........................................................................................................47
UZ_MD Directory$ ...........................................................................................................47
UZ_RD Directory$ ............................................................................................................47
UZ_CD Directory$ ............................................................................................................47
QL_CD Directory$ ............................................................................................................47
UZ_OPEN [#Ch,]Filename$,Mode$ .................................................................................47
UZ_CLOSE [#Ch].............................................................................................................47
UZ_PUTS([#Ch,]String$)..................................................................................................47
UZ_FLUSH ......................................................................................................................47
UZ_RESET ......................................................................................................................48
UZ_BAUD Rate................................................................................................................48
UZ_GETLBA Drive, LBA, Buffer .......................................................................................48
UZ_PUTLBA Drive, LBA, Buffer .......................................................................................48
UZ_GETLBAS Drive, LBA, Count, Buffer .........................................................................48
UZ_PUTLBAS Drive, LBA, Count, Buffer .........................................................................48
UZ_PORT Name$ ............................................................................................................48
UZ [#Ch,] Command$ ......................................................................................................48
UZ_CC [#Ch,] Filename$ .................................................................................................48
UZ_SCLK [DOSDateTime$] .............................................................................................48
UZ_SPOOL [#Ch, Filename$] ..........................................................................................49
UZ_SERVE [#Ch, Filename$] ..........................................................................................50
UZ_CHCHG #Ch%,Name$ ..............................................................................................50
FAT Driver S*BASIC Functions ............................................................................................51
UZ_COPYF("Source Target")...........................................................................................51
UZ_HDRS(State%) ..........................................................................................................51
UZ_FLEN(Filename$) ......................................................................................................51
UZ_FATTR(Filename$) ....................................................................................................51
UZ_FDATE(Filename$)....................................................................................................52
UZ_FTEST(Filename$) ....................................................................................................52
UZ_MTEST()....................................................................................................................52
UZ_MSIZE() .....................................................................................................................52
Page: 4
Ser-USB 2.0 Drivers User Manual
UZ_MFREE() ...................................................................................................................52
UZ_CDRIVE%() ...............................................................................................................52
UZ_VER$() ......................................................................................................................52
UZ_HWVER$().................................................................................................................52
UZ_WRITE% (String$) .....................................................................................................52
UZ_READ$(Bytes%) ........................................................................................................52
UZ_FETCH% (Template$) ...............................................................................................53
UZ_RESULT$(Index%) ....................................................................................................53
UZ_OK() ..........................................................................................................................53
UZ_BUSY(State%)...........................................................................................................53
UZ_LOCK(State%) ..........................................................................................................54
UZ_GETLBAF(Drive, LBA, Buffer) ...................................................................................54
UZ_PUTLBAF(Drive, LBA, Buffer)....................................................................................54
UZ_GETLBASF(Drive, LBA, Count, Buffer)......................................................................54
UZ_PUTLBASF(Drive, LBA, Count, Buffer) ......................................................................54
UZ_BAUDF()....................................................................................................................54
UZ_CHANNEL() ...............................................................................................................54
UZ_PORT$() ....................................................................................................................54
UZ_ERROR$() .................................................................................................................54
DATE_DOS$() .................................................................................................................54
DATE_DOS......................................................................................................................55
DOS_DATE$(DOSDate) ..................................................................................................55
UZ_VARS( [Offset%] ) .....................................................................................................55
UZ_HEAD(Address, Mode) ..............................................................................................55
UZ_HEAD$(Type, Dataspace, ExtraInfo) .........................................................................55
EOL_FIX$(Strings$).........................................................................................................55
QL_DIR$ ..........................................................................................................................55
UZ_GET$([#Ch,]Count%) ................................................................................................55
UZ_SPOOLING() .............................................................................................................56
UZ_SPL$ .........................................................................................................................56
Spooling And Serving ..........................................................................................................57
QDOS File System Operations.........................................................................................57
Anonymous Spool or Serve..............................................................................................57
Driver Command Manager ...................................................................................................59
Overview ..........................................................................................................................59
DCM Command Set .........................................................................................................59
$00 [GDN] Get Device Name .......................................................................................59
Page: 5
Ser-USB 2.0 Drivers User Manual
$01 [GDV] Get Driver Version ......................................................................................59
$02 [GHV] Get Hardware Version ................................................................................59
$03 [GHT] Get Hardware Type .....................................................................................60
$04 [OF] Open File.......................................................................................................60
$05 [CF] Close File ......................................................................................................60
$06 [WF] Write to File ..................................................................................................60
$07 [RF] Read from File ...............................................................................................60
$08 [DF] Delete File .....................................................................................................61
$0E [SRV] Serve ..........................................................................................................61
$0F [SPL] Spool ...........................................................................................................61
$C0 [SKE] Skip if Error .................................................................................................61
$D0 [RSKE] Report and Skip if Error ............................................................................61
$E0 [SKNX] Skip if No Extensions................................................................................62
$F0 [NOP] No Operation ..............................................................................................62
$F1 [RLRC] Report Last Response to Console ............................................................62
$F2 [RNRC] Report Next Response to Console ...........................................................62
DCM Signals and Status ..................................................................................................63
DCM S*BASIC Interface...................................................................................................64
DCM Procedures..............................................................................................................64
UZC_PUT Byte [,Byte]..................................................................................................64
UZC_CHREAD #Ch .....................................................................................................64
UZC_CHWRITE #Ch....................................................................................................64
DCM Functions ................................................................................................................64
UZC_STARTED() .........................................................................................................64
UZC_GET([ Byte [,Byte] ]) ............................................................................................64
UZC_GET4$([ Byte [,Byte] ]) ........................................................................................64
UZC_GET$([ Byte [,Byte] ]) ..........................................................................................64
UZC_PIPE_W() ............................................................................................................64
UZC_PIPE_R().............................................................................................................65
Installation .......................................................................................................................66
Usage ..............................................................................................................................66
WINS [Window Set]......................................................................................................66
WIN0 [Window Set] ......................................................................................................66
SRU_WINS ..................................................................................................................66
Configuration....................................................................................................................67
Window Set 0 ...............................................................................................................67
Window Set 1 ...............................................................................................................68
Page: 6
Ser-USB 2.0 Drivers User Manual
Window Set 2 ...............................................................................................................68
Window Set 3 ...............................................................................................................69
Configuring the Driver ..........................................................................................................70
Ser-USB Destiny RAM Driver ...........................................................................................70
Device Name................................................................................................................70
Buffers .........................................................................................................................70
USBWiz Channel .........................................................................................................70
Treat SER3 as superHermes........................................................................................71
Baud Rate ....................................................................................................................71
SRU1 is........................................................................................................................71
Ser-USB Legacy RAM Driver ...........................................................................................71
Name ...........................................................................................................................71
Port ..............................................................................................................................71
Baud ............................................................................................................................71
SRU1 ...........................................................................................................................71
Ser-USB FAT RAM Driver ................................................................................................72
USBWiz Channel .........................................................................................................72
Treat SER3 as superHermes........................................................................................72
Slow serial ports (standard QL)? ..................................................................................72
Baud Rate ....................................................................................................................72
SMSQ? ........................................................................................................................72
Ser-USB Legacy ROM Driver ...........................................................................................72
Ser-USB FAT ROM Driver ...............................................................................................73
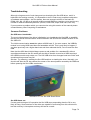
Troubleshooting ...................................................................................................................74
Common Problems ..........................................................................................................74
Ser-USB won’t handshake ...........................................................................................74
Ser-USB times out .......................................................................................................74
Drive 0 not found ..........................................................................................................75
In Use ..........................................................................................................................75
Bad or Changed Medium..............................................................................................75
Not Found ....................................................................................................................75
Data corruption.............................................................................................................76
Application crashes and hangs.....................................................................................76
Rom Driver Supplement .......................................................................................................77
Ser-USB Legacy Native Driver ROM ................................................................................77
SRU_START [LParam] ................................................................................................79
Ser-USB FAT Driver ROM ...............................................................................................79
Page: 7
Ser-USB 2.0 Drivers User Manual
UWZ_START [LParam] ................................................................................................79
Known Issues.......................................................................................................................80
Native RAM Driver Issues ................................................................................................80
FAT Driver Issues ............................................................................................................80
Native ROM Driver Issues ................................................................................................81
Changes from the 1.x Drivers ..............................................................................................82
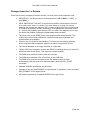
Appendix 1: The Ser-USB ROM Card ..................................................................................83
Background......................................................................................................................83
Instructions for Use ..........................................................................................................84
The Expansion Connector ................................................................................................85
Notes and Other Information ............................................................................................86
Acknowledgements ..............................................................................................................87
COPYRIGHT NOTICE .........................................................................................................88
DISCLAIMER .......................................................................................................................89
Page: 8
Ser-USB 2.0 Drivers User Manual
Important Notice For Standard QL Users
PLEASE READ THIS FIRST
Although the Ser-USB 2.0 Legacy Driver is useable on a standard QL, it is not possible
to guarantee its performance and stability in that environment for every configuration.
In order to create a workable driver it has been necessary to work around some parts
of the operating system when the driver is loaded. Tests have shown that, in most
cases, this does not result in any loss of stability of the QL but, as a result, not all
software will work with the Ser-USB driver running on legacy hardware.
Some configurations exhibit problems with the 2.0 legacy driver that may not manifest
on other systems. The reasons for this are many and complex. Despite hundreds of
hours having been spent trying to fix these issues it has not been possible to solve all
of them. Therefore you should thoroughly test the 2.0 drivers with your system first,
before committing valuable data to their care.
The Ser-USB Legacy Driver requires a minimum of 256K expansion memory.
The standard QL serial ports are limited to a maximum speed of 4800 baud when used
with a Ser-USB.
The Ser-USB driver is a complex piece of software that makes it possible to connect 21st
century storage devices to a 1980s microcomputer. It does this by using the simple serial
hardware present on the QL and by invoking, where possible, only the documented features
of its operating system.
Although the original QL serial ports are barely adequate for this task, they will support the
Ser-USB if the consequent performance limitations are accepted.
If you do not have expansion memory you may still be able to use the Ser-USB with SD
Cards and USB Drives formatted in FAT16 or FAT32 format using the alternative Ser-USB
FAT Driver.
If at all possible you should acquire a Hermes, superHermes or other enhanced serial port
hardware to use the Ser-USB with a standard QL.
If you are not in a position to upgrade the serial hardware on your QL we strongly
recommend that you use the FAT Driver on your system. In FAT mode, filing system
management happens on the Ser-USB and all I/O transactions are initiated from user mode,
resulting in more reliable performance over slow serial ports.
If your hardware can handle it, consider installing SMSQ; this has better serial I/O handling,
as well as other features that the driver can take advantage of.
Page: 9
Ser-USB 2.0 Drivers User Manual
QUICK START
FIRST: Make sure that the Ser-USB is connected to its power supply and that the power
supply is plugged into an active power socket. Connect the serial lead from the Ser-USB to
the QL or PC/Mac. Insert an SD Card in the Ser-USB. Switch on or reset the QL (or load the
QL emulator on your PC/Mac). Wait until the tweed pattern appears on the QL screen (or the
emulator has started) then push the reset button on the Ser-USB.
Now use this quick start guide to get the Ser-USB Native Driver up and running on your
system so that you can try it out before configuring the driver ...
SELect ON What machine you are using
= "Black Box" QL with standard serial ports :
LRESPR serusb2L_RAM_bin
WITHIN 1.5 SECONDS IF Connecting on SER2 THEN
PRESS [F5]
TYPE_IN 4802[ENTER]
END IF
= "Black Box" QL with a Hermes chip or superHermes using SER1/SER2 :
LRESPR serusb2L_RAM_bin
WITHIN 1.5 SECONDS PRESS [F5]
SELect ON Connecting Port
=SER1: TYPE_IN 19200[ENTER]
=SER2: TYPE_IN 19202[ENTER]
END SELect
= "Black Box" QL with a superHermes board using SER3 :
LRESPR ipcexts_bin : LRESPR serusb2L_RAM_bin
WITHIN 1.5 SECONDS PRESS [F5]
TYPE_IN 57603[ENTER]
= Q40 or Q60 or other QL compatible hardware not listed above :
LRESPR serusb2L_RAM_bin
WITHIN 1.5 SECONDS PRESS [F5]
TYPE_IN Baud Rate+Port Number [ENTER]
= QL Emulator running on PC, Mac or Linux system :
LRESPR serusb2_bin
END SELect
WHEN Everything is OK OR Nothing Works
ReadTheManual : REMark Especially the section "Configuring the Driver"
END WHEN
Page: 10
Ser-USB 2.0 Drivers User Manual
Note: If you have the ROM version of the Native Driver it should already be configured for
the port that you specified when you ordered it. If not, when the message: "Press any key in
1.5s to abort load" appears on the startup screen, hit the [ESC] key and then either F1 or F2
to start the QL. Then type the command SRU_START Baud Rate+Port Number.
Page: 11
Ser-USB 2.0 Drivers User Manual
Introduction
This is the second edition of the user manual for the Ser-USB Serial USB Device for Sinclair
QLs, compatibles and QL emulators running on PCs, Macs and Linux systems. It replaces
all previous manuals and documentation for add-ons and utilities.
This document is the intellectual property of Memory Lane Computing Ltd. Please see the
section Copyright Notice for any applicable restrictions on its distribution.
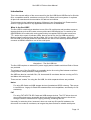
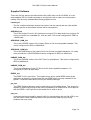
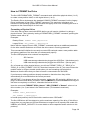
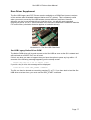
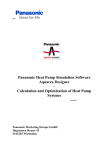
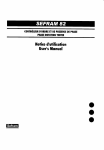
What is the Ser-USB?
The Ser-USB is a device that attaches to one of the QL serial ports and provides access to
storage devices such as SD cards, memory sticks and USB hard drives. It consists of an
OEM USBWiz I/O module with some extra circuitry to translate RS232 levels to and from
TTL, and to drive a pair of indicator LEDs. Now at end of life, the Ser-USB was sold by
Memory Lane Computing from the 8th of May, 2011 to the 12th of February, 2012. Although
the Ser-USB is no longer produced, these drivers can still be used with any hardware that
connects a USBWiz module to one of the serial ports.
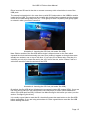
Illustration 1: The Ser-USB Unit
The Ser-USB requires an external 5V power supply and a suitable serial lead. Both of these
are provided.
The primary use of the Ser-USB is as a portable device for moving files between machines
using modern, readily available, storage devices.
Ser-USB can also be used with QLs, QL clones and QL emulators that are running on PCs
and Macs with serial ports.
There are two “modes” for using the Ser-USB, for which separate drivers are provided:
Native
For using SD Cards and USB storage devices formatted as QDOS volumes. This comes
in two flavours: Legacy for Black Box standard QLs and compatibles, and Destiny for QL
emulators).
FAT
For using FAT16/FAT32 SD Cards and USB storage devices. The FAT driver does not
mount the volume as an accessible device but instead provides access to the drives
through S*BASIC extensions for copying, deleting, renaming files etc.
Unusually for a device driver, because it does not need any QL-specific hardware, the
drivers will run under QL emulators, as long as they have access to suitable serial ports.
Page: 12
Ser-USB 2.0 Drivers User Manual
What Ser-USB is not!
It is not intended to be a replacement for a permanent fixed disk. Even with the fastest serial
ports it cannot deliver the performance necessary to equal that of a hard disk connected
through the QL’s expansion connector (such as, say, a QUBIDE interface).
It does not support the connection of USB devices that are not “mass storage” class (such
as mice, keyboards etc).
It is not a high speed device. On a standard QL without enhancements, the Ser-USB is
limited to running at 4800 baud. Whilst this works, it is very slow. Much slower than floppy
disk access.
What configuration will get the best out of Ser-USB?
For best possible performance on QL hardware use the Ser-USB with a Super Gold Card,
superHermes and the latest version of SMSQ. With this configuration 57600 baud is reliable,
with 115 Kbaud possible in some circumstances (depending on hardware and software
load).
Remember: The faster the serial port the better the performance.
The fastest possible performance will be obtained when using the Destiny Driver and a QL
emulator running on a PC, Mac or Linux system. Speeds up to 230 Kbaud are then perfectly
possible.
Page: 13
Ser-USB 2.0 Drivers User Manual
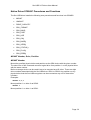
Getting Started
Preparation
You will need:
•
The Ser-USB Module
•
The 5V Power Supply
•
A lead to connect the QL serial port to the Ser-USB
•
The Ser-USB software (on CD ROM, download or ROM)
•
A suitable storage device (SD card, memory stick or USB hard drive)
•
If you need to configure the driver for your environment you will need the latest
version of Jochen Merz’s MenuConfig program.
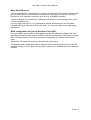
Procedure
Connect the power supply to the Ser-USB. The connection is made via a 2.1mm coaxial
power socket on the side of the unit. At this point, it is not important whether the power
supply is on or off.
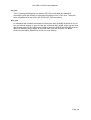
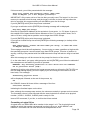
Connect the Ser-USB to the QL with the serial lead. On a standard QL make sure that you
connect to the correct port for the supplied serial lead; they are not interchangeable due to
the wiring of the QL's serial ports.
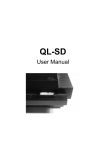
If you have superHermes then connect to the fast serial port. On a PC, Mac or Linux system
running a QL emulator you can use any serial port or USB to serial adapter that the emulator
recognises (but make sure that you know which SER port this corresponds to within the
emulator before starting).
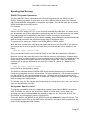
Illustration 2: The Ser-USB Connections
Page: 14
Ser-USB 2.0 Drivers User Manual
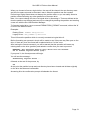
Either insert an SD card in the slot or connect a memory stick or hard drive to one of the
USB ports.
The narrow horizontal slot in the case lines up with SD Card socket on the USBWiz module
inside the Ser-USB. The card must be inserted with its label facing upwards and the sloping
corner on the side facing away from you . Push gently to latch it in place; push gently again
to unlatch it when you want to remove it.
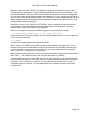
Illustration 3: Inserting the SD Card (old model Ser-USB)
Note: Earlier models of the Ser-USB had a single L-shaped cutout on the front which
exposed the whole socket assembly (as seen here) making it appear as though there were
actually two sockets, one on top of the other. If you have one of these early units then it is
vital that you only try to insert the card in the “top” half of the slot, as the “bottom” half is a
void which serves to raise the socket off the PCB.
Illustration 4: Inserting the SD Card (old model Ser-USB)
By default, the Ser-USB driver will attempt to mount an inserted SD card as SRU1. If you are
not using an SD card you can configure the Ser-USB driver to mount a drive attached to
either of the USB ports as SRU1 instead. Use MenuConfig for this before you start. (see the
section “Configuring the driver”)
It is usually a good idea to reset the QL, then briefly press the reset button on the Ser-USB
before proceeding. If you are using an emulator it is also a good idea to reset the Ser-USB
before loading the driver.
Page: 15
Ser-USB 2.0 Drivers User Manual
Loading the Legacy Driver on QL Hardware
Load the driver with a Toolkit 2 command such as:
LRESPR flp1_serusb2L_RAM_bin
Or, without Toolkit 2:
a= RESPR(17000)
LBYTES flp1_serusb2L_RAM_bin,a
CALL a
A short message will be displayed giving information about the driver.
Ser-USB Legacy Driver vN.NN.NNN by Memory Lane Computing, 2012
Loading the Destiny Driver with QL Emulators
If you are using a QL emulator such as QPC2 or Q-emuLator, running on a PC, Mac or Linux
system, then you should load the alternative Destiny Driver:
LRESPR flp1_serusb2_bin
or
a= RESPR(16300)
LBYTES flp1_serusb2_bin,a
CALL a
A short message will be displayed giving information about the driver.
Ser-USB Destiny Driver vN.NN.NNN by Memory Lane Computing, 2012
Note: The version number is made up of three components separated by periods:
Major Version . Minor Version . EDDE Build
The suffix L is appended for the Legacy Driver.
After this message there will be a brief pause, during which time you can press one of the
following keys to change the start-up behaviour of the driver:
[ESC]
Prevent the driver from mounting SRU1.
[F4]
Signal to the driver that the USBWiz is already set to the baud rate for which the driver
has been configured. This is useful if you had previously loaded the driver and the baud
rate had already been set and, for some reason, you have had to reboot the QL. In this
case pressing F4 will bypass the attempt to set the Ser-USB's baud rate.
[F5]
Displays the prompt:
F5 pressed. Enter config string:
at which point you can enter a long integer value consisting of baud rate + serial port
number (see the SRU_START command for more details).
Page: 16
Ser-USB 2.0 Drivers User Manual
After pressing any of these keys a message is displayed confirming that the keypress has
been recognised and will be acted upon. You have about 1.5 seconds after this message to
press another of the listed keys to invoke their special function as well.
Note that [F4] and [F5] cancel each other out. You cannot use [F4] to tell the driver that the
Ser-USB is already set to the baud rate that you specify using [F5], only that the Ser-USB is
already set to the driver's configured baud rate, as per its Config Block.
The driver will attempt to communicate with the Ser-USB on the configured port and baud
rate. During this process, the following messages (or similar) will be displayed:
Connecting to Ser-USB on: SERn ...
Setting the configured baud rate ...
Connected to a USBWiz vN.NN device on SERn at NNNN baud
Note: On a standard QL without superHermes, you are limited to 4800 baud. It ought to be
possible to use 9600 baud but, unfortunately, the QL hardware requires an additional stop bit
at this speed that the USBWiz module does not provide. (superHermes should work OK at
any baud rate up to 57600).
At 4800 baud two “Connecting to Ser-USB on …” messages will be displayed; the first a
brute force attempt to set 4800, the second the actual connection attempt at the lower rate.
If the connection was established successfully, the next step will depend upon how the driver
has been configured.
If the driver has not been configured to mount a drive for SRU1 (see the section Configuring
the Driver), or you pressed [ESC] when the information banner was displayed, then the
initialisation process is finished. If you subsequently wish to mount a drive you must
manually issue a MOUNT command.
Otherwise, the driver will try and mount SRU1. This involves loading and checking the FAT
and may take some time, especially on slow serial connections.
While this is happening you will see the following message:
Loading and checking FAT ...
… followed by OK if the drive was mounted successfully or, if this is the first time that you
have used the drive with Ser-USB, the message:
Drive 0 not found!
… in which case you will need to FORMAT the drive. See the section “How to FORMAT the
drive” for the full details of this procedure.
Once this process is complete you are ready to access SRU1 just like any other QL device.
Page: 17
Ser-USB 2.0 Drivers User Manual
Limitations and Restrictions
Although the Ser-USB appears like any normal QL directory device it is important to
understand that, behind the scenes, all input and output is taking place over the serial port. It
will be obvious that the serial port to which you have connected the Ser-USB cannot be used
for anything else, but there are some other limitations imposed by the architecture of QDOS.
The most important limitation is that the Ser-USB driver can only do one thing at a time. If an
application program performs repeated filing system operations in quick succession on a
Ser-USB device then it will either be stalled or may lock up altogether. There are ways to
mitigate this but it requires that special consideration is given to the Ser-USB in the coding of
the application. Tools are available from Memory Lane Computing to help developers who
wish to develop Ser-USB friendly applications and some programs (such as the Q-Trans File
Manager by Dilwyn Jones) have already been patched in this way.
Please remember that the Ser-USB is not intended to be a fixed disk replacement. It is
recommended to avoid having data-intensive applications use the Ser-USB for storage.
Page: 18
Ser-USB 2.0 Drivers User Manual
Supplied Software
These are the files that are provided with the Ser-USB, either on the CD ROM, or in the
downloadable ZIP file. Please remember to configure the file to match your setup before
loading. Use the freely available MenuConfig program for this.
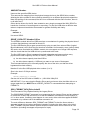
readme_txt
This file contains information that did not make it into the manual and any other details
that are specific to the software release that it accompanies.
SERUSB2_bin
This is the Destiny Driver for QL emulators running on PCs, Macs and Linux systems. Do
not try to load this on a standard QL; it will not work. This comes configured for SER1 at
115200 baud.
SERUSB2L_RAM_bin
This is the LRESPR version of the Legacy Driver for QL and compatible hardware. This
comes configured for SER1 at 4800 baud.
SERUSB2L_ROM_bin
This is the ROM image of the Legacy Driver for QL and compatible hardware. It is ready
to be burned into a 16K EPROM and comes configured for SER1 at 4800 baud.
USBWIZ_RAM_bin
This is the LRESPR version of the FAT Driver for all platforms. This comes configured for
SER1 at 4800 baud.
USBWIZ_ROM_bin
This is the ROM image of the FAT Driver for QL and compatible hardware. It is
configured for SER1 at 4800 baud.
EDDE2_bin
The EDDE 2 Link Layer Driver. This implements a device called EDDE which allows
application programs to communicate with any EDDE driver currently installed on the
system. It must be loaded before running the Partition Manager.
pm_exe
The EDDE Partition Manager used for partitioning and formatting drives. This program is
capable of partitioning any drive that can be accessed by an EDDE driver, but it requires
that the EDDE 2 Link Layer Driver be loaded first in order to do so.
uwt_exe
A simple serial terminal and file transfer utility for experimenting with the Ser-USB. It can
also be used to obtain additional data and to perform tests when trying to debug
problems with your setup.
Page: 19
Ser-USB 2.0 Drivers User Manual
uzx_bin
This is a special extension for use with the FAT Driver that adds two additional
commands (UZX and UZXW) for executing files directly from a FAT drive. These are
more compatible than the built in UZ_EX and UZ_EW commands.
wins_bin
An extension that contains commands for setting the three S*BASIC windows to one of
four pre-defined settings. It also includes the command SRU_WINS, which can be used
after booting with the Ser-USB Legacy ROM to adjust the QDOS and S*BASIC channel
tables so that they are the same as a normal start. (See the sections The WINS
Extension and Native ROM Driver Issues for more details).
Page: 20
Ser-USB 2.0 Drivers User Manual
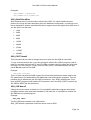
How to Partition the Drive
Overview
Before any storage device attached to the Ser-USB can be used directly in QDOS or SMSQ
it must be partitioned and formatted. Partitioning is the process of allocating the available
physical storage space on the drive to logical partitions that can then be mounted as the
drives SRU1 to SRU8.
The partitioning scheme used by Ser-USB is the same as that adopted by the last version of
the QUBIDE driver: a maximum of 32 partitions is possible on any physical drive. Note,
however, that QDOS/SMSQ can only "see" eight of these at any one time.
There are two ways to partition a drive with Ser-USB:
1. Use the FORMAT (or SRU_FORMAT) command to initialise the drive and create
partition #1. This may be all that you need to do if you do not have a use for the
additional storage space on the drive. This is discussed in the next section: "How to
FORMAT the Drive".
2. Use the Ser-USB Partition Manager (PM) to initialise the drive and create as many
partitions as you need (up to 32)
Because of the performance problems of loading and saving a large map over the Ser-USB's
serial connection it probably makes sense to keep partitions small and mount more of them,
rather than creating one or two large partitions.
It's worth mentioning at this stage that the Partition Manager displays a lot of information
about Heads, Tracks and Cylinders, but these values are, in fact, pure fantasy. Ser-USB
emulates the geometry of a physical hard drive for compatibility purposes (even when it's
connected to a real hard drive!). The only thing that matters to Ser-USB is the LBA (the
Logical Block Address) a 32 bit number that is the unique address of each 512 byte block on
the storage medium. And just to confuse matters, these blocks are not the same as the
blocks that are used in the filing system. Those blocks are called Groups by Ser-USB as
they represent groups of 2,4,8 or more 512 byte blocks and are the smallest unit of space
that the filing system allocates.
Whilst the preceding information may be interesting (or not), the Partition Manager does not
require you to use blocks, sectors, cylinders or tracks. Most of the time you can just say "I
want an N Megabyte partition" and the Partition Manager will do all the calculations for you.
Note: The Ser-USB FORMAT/SRU_FORMAT commands create partitions of exactly the size
in Megabytes that you request, whereas the Ser-USB Partition Manager will always try and
round up the size of the partition to completely occupy a fixed number of frames.
If you are wondering what a "frame" is, it is the term used by Ser-USB to describe the space
allocated to an emulated hard disk cylinder. There are no "real" cylinders in the Ser-USB
world, because all drives are addressed with the Logical Block Addressing scheme, but the
use of frames (emulated cylinders) enables partition structures to remain compatible with
other QL hard disk drivers, at the cost of some wasted space. In Ser-USB, one frame is
1008 LBAs (516096 bytes, or 504K).
Page: 21
Ser-USB 2.0 Drivers User Manual
The FORMAT/SRU_FORMAT commands calculate the size of the partition in LBAs with the
formula:
SizeMBs * 2048
The Partition Manager calculates the size of the partition in complete frames with this
formula:
INT( SizeMBs * 1024 * 1024 ) + 1
(
516096
)
Thus, for a 5MB partition, FORMAT arrives at a size of 10240 LBAs = 5MB. The Partition
Manager, however, creates a partition of 11 frames = 11088 LBAs = 5.414MB. As partitions
must start on frame boundaries, the FORMAT command results in 848 unused LBAs
between the end of the partition and the start of the next.
Clearly, then, the best way to allocate space on the drive is to use the Partition Manager.
However, given the enormous size of today's storage devices and the paltry amount of
space required by most QL applications such wastefulness is not really a critical issue.
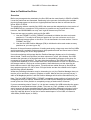
The Ser-USB Partition Manager
This program is written in TURBO'd S*BASIC, and uses the EDDE 2 API to manipulate drive
data structures. It requires that the EDDE 2 Link Layer Driver (EDDE2_bin) is loaded.
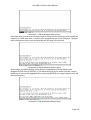
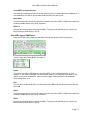
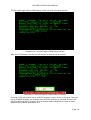
To start the program EXEC the file pm_exe. (If you don't have the Pointer Environment
loaded you will have to EXEC_W because PM does not have a cursor most of the time.)
You will see a screen something like this:
Illustration 5: The PM start-up screen
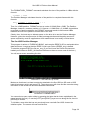
Make sure that there is at least one device attached to the Ser-USB (an SD card or USB
hard drive/memory stick) and press [F3]. The main screen will clear and the menu bar along
the bottom of the screen will show the available commands:
Illustration 6: PM Main Menu
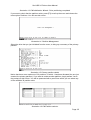
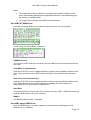
You can select a menu option either by pressing the letter that is shown capitalised in the
name (usually the first), or use the [LEFT] and [RIGHT] keys to move along the list, then hit
[ENTER] to choose.
To initialise a new drive that has not previously been used with Ser-USB, choose the
Initialise option. The screen will now look like this:
Page: 22
Ser-USB 2.0 Drivers User Manual
Illustration 7: PM Initialisation Wizard Step 1
Select the drive from the menu along the bottom. Either an SD card (which must already be
inserted) or a USB hard drive or memory stick plugged into one of the USB ports. The drive
will be scanned and the screen will describe the next step in the process:
Illustration 8: PM Initialisation Wizard Step 2
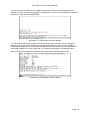
At this stage you define the size of the partition in Megabytes. Edit the default value
proposed by PM, then hit [ENTER]. If you decide that you do not wish to proceed, use the
delete key to remove the suggested value and press [ENTER] (An empty response here will
abort the process).
Illustration 9: PM Initialisation Wizard Step 3
Page: 23
Ser-USB 2.0 Drivers User Manual
You are now being asked to specify how many LBAs should be allocated to each filing
system group. PM will have calculated the optimum value for you here, so normally you can
just press [ENTER]. Again, if you want to abandon the process at this step, delete all the
characters and press [ENTER].
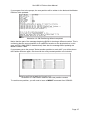
Illustration 10: PM Initialisation Wizard Step 4
Lastly, you will be asked to set the name of the partition. The PM offers the default value of
the name of the device, but you will almost certainly want to edit this. For this demonstration,
the label was changed to SDCardP1 (to remind us that it's partition 1). You can still abort
here, by deleting all the characters and pressing [ENTER]. Otherwise, the PM will build the
data structures for the partition in memory, then show you the selections that you have just
made and ask you to confirm that you want to go ahead with creating the partition:
Illustration 11: PM Initialisation Wizard Step 5
Answering Yes will result in a display showing the progress, as the new partition is written to
the drive:
Illustration 12: PM Initialisation Wizard - Partitioning the Drive
Once the process is complete a final message will be displayed to confirm that the operation
worked (or, if there was a problem, an error message will be displayed):
Page: 24
Ser-USB 2.0 Drivers User Manual
Illustration 13: PM Initialisation Wizard - Drive partitioning completed
If you want to check that the partition exists, press [F3] to call up the menu and choose the
menu option Partitions. You will see this screen:
Illustration 14: Partition Management
Select the drive that you just initialised from the menu, to bring up a summary of the primary
partition:
Illustration 15: Primary partition details
Notice that there are a maximum of 32 partitions, of which 1 has been allocated (the one just
created; the primary partition). If you want to create another partition, simply answer Yes to
the prompt on this screen. You will be presented with a panel from which you can select any
of the available 32 partition slots:
Illustration 16: PM Partition selector
Page: 25
Ser-USB 2.0 Drivers User Manual
You can move around this screen with the cursor keys, then press [ENTER] when the
partition slot that you want to work with is highlighted. To create a new partition on the drive,
select any empty slot and hit [ENTER]:
Illustration 17: PM Partition Creation Wizard
You will now be able to go through a similar process to the one that you have just gone
through to enter the values for the new partition and write them to disk. Note: It doesn't
matter which empty slot you selected in the partition selector screen, the new partition will
always be created in the next empty slot. You cannot create gaps in the partition table.
When you get to the end of the process, the screen will look something like this:
Illustration 18: PM Adding Partition Wizard
Page: 26
Ser-USB 2.0 Drivers User Manual
If you answer Yes to the prompt, the new partition will be written to the disk and the Master
Partition Table updated:
Illustration 19: PM Partitioning Wizard completed
Notice that the part of the message beginning @LBA is showing a different number. This is
confirming that the second partition is at a different location on the physical drive, in this
case at LBA 11088 (2B50 in hexadecimal). Note also the message about updating the
Master Partition Table.
If you answer yes to the prompt "Select another partition to work with?" you will be shown
the Partition Selector again, this time with the newly created partition now included:
Illustration 20: PM Partition Selector after new partition created.
To use this new partition, you will need to issue a MOUNT command from S*BASIC.
Page: 27
Ser-USB 2.0 Drivers User Manual
Notice that if you select this new partition you will see the following options in the menu bar:
Illustration 21: PM options for second and higher partitions
From here you can:
•
Show information about the partition.
•
Rename the partition.
•
Delete the partition.
These options should be fairly self-explanatory, so they will not be covered in depth here.
Note that you can only delete the last partition on a drive. It is not possible to create holes in
the partition table.
Page: 28
Ser-USB 2.0 Drivers User Manual
How to FORMAT the Drive
The Ser-USB FORMAT/SRU_FORMAT commands work with either physical drives (1 to 3)
to create a new partition table, or with logical drives (1 to 8).
The Destiny Driver implements the standard S*BASIC FORMAT command, but the Legacy
Driver implements its own SRU_FORMAT command. This restriction is because of a
limitation in the operating system that prevents the legacy driver from formatting the drive in
response to the normal trap #2 io.formt call.
Formatting a Physical Drive
If the drive has not been used with QDOS before you will need to initialise it by doing a
physical format. This is done by issuing a FORMAT/SRU_FORMAT command, prefixing the
medium name with a “#”.
Examples:
Destiny Driver: FORMAT "SRU1_#MySDCard"
Legacy Driver: SRU_FORMAT 1,"#MySDCard"
Notice that the Legacy Driver's SRU_FORMAT command requires an additional parameter
for the drive number and does not include the drive name in its string parameter.
This command will initialise the currently mounted SD card and create a new partition table
and primary partition of the size that you subsequently specify.
The Ser-USB physical drive numbers correspond to:
1
SD Card slot
2
USB mass storage class device plugged into USB Port 1 (the bottom port)
3
USB mass storage class device plugged into USB Port 1 (the top port)
So, to format one of the physical drives, you will use FORMAT "SRU1_#", "SRU2_#" or
"SRU3_#" (or SRU_FORMAT 1/2/3,"#"). Note that, because of the '#', you must enclose the
medium name in single or double quotes when you are formatting a physical drive.
Make sure that the drive that you want to format is connected to the Ser-USB.
If you have any existing partitions already mounted on that drive then they will be
automatically un-mounted before the format proceeds.
IMPORTANT: If you change drives (for example, replace the SD card with a different one, or
plug in a different USB drive) you MUST issue a UMOUNT n command before removing the
old drive to completely un-mount it, otherwise the format will fail.
Issue the command FORMAT "SRUn_#name" / SRU_FORMAT n,"#name", where n is a
drive number (1 to 3) and name is the medium name (10 characters maximum).
Examples:
FORMAT "SRU1_#SDCard01"
SRU_FORMAT 1,"#SDCard01"
to format (and partition) the SD Card with a medium name “SDCard01”.
The Ser-USB driver will first attempt to get the maximum capacity of the drive. If this fails or
hangs then you may have an SD card that does not support out of capacity LBA reads with
USBWiz (see DRIVE_CAPACITY for more details on drive capacities and a solution to this
problem).
Page: 29
Ser-USB 2.0 Drivers User Manual
If this succeeds, you will be presented with the message:
This will create the partition table: SRUn_name
Size in MBytes (or 0 for largest possible)?
IMPORTANT: Only create a drive of the size that you really need. The larger it is, the more
memory is required to hold its map, and the longer it will take to check the map when the
drive is mounted. We suggest starting off with 5MB to get a feel for things.
If you hit [ENTER] at this point the process is aborted.
If you type a valid size and hit [ENTER] the following message will be displayed:
How many LBAs per Group?
One LBA (Logical Block Address) is the equivalent of one sector, i.e. 512 bytes. A group is
the smallest unit of space that the driver allocates to files. For most partition sizes, use a
value of 2 here, noting that no partition can be larger than 65535 Groups.
If you hit [ENTER] at this point the process is aborted.
If you type an invalid Group size and hit [ENTER] the following message (or similar) will be
displayed:
Bad combination: either use more LBAs per Group, or make the size
in MBytes smaller
This message should be self-explanatory. You are trying to create a partition so big that with
the specified group size it would contain more than 65535 groups. This size of partition is,
anyway, unlikely to be practical with Ser-USB because the map will take too long to load and
save.
After this message you will be returned to the prompt for the size of the volume.
If, on the other hand, you type a valid group size and hit [ENTER] you will then be advised of
the consequences and asked if you wish to proceed:
WARNING: Any existing partitions on this drive will be removed!
OK to partition drive (Y/N)?
Answering Y at this point will begin the format process and you will see the RX/TX LEDs on
the Ser-USB flashing rapidly (or not so rapidly if you are running the connection at a low
baud rate). The message:
Formatting physical drive ...
will be displayed, followed, at the end of the process, by:
OK
On S*BASIC channel #1 there will be a message of the form:
nnnn/nnnn sectors
Indicating the free/total space on the drive.
Note: although the message says sectors, the values are actually in groups and not sectors.
The formatted volume is now mounted with the same logical drive number as its physical
number (1=SRU1, 2=SRU2, 3=SRU3) and is ready for use.
Issue a DIR command, if you like, to confirm that it has worked.
Formatting a Logical Drive
A logical drive is a QDOS SRU drive number in the range 1 to 8. The physical drive and
partition to which that number corresponds is entirely up to you, as the MOUNT and
UMOUNT commands can link and unlink drives and partitions at will.
Page: 30
Ser-USB 2.0 Drivers User Manual
When you choose to format a logical drive, the map will be cleared, the root directory reset
and the free space returned to the state it was in when the partition was first created.
Performing a logical format does not destroy the partition table, so you can safely format a
partition without affecting any other partitions on the same drive.
Note: You cannot change the size of a logical drive by formatting it. That was defined at the
time the partition was created and can only be changed by deleting the partition and creating
a new one with the Ser-USB Partition Manager.
To format a logical drive, issue a normal FORMAT/SRU_FORMAT command, without the '#'
in front of the medium name.
Examples:
Destiny Driver: FORMAT SRU6_PartSix
Legacy Driver: SRU_FORMAT 6,"PartSix"
This will format the partition which is currently mounted as logical drive 6.
Before formatting can proceed a check will be made to see if there are any files open on the
drive. If there are, then the format will be aborted with an "In Use" error.
After issuing the format command, you will be warned that the operation will erase any
existing data on the drive (partition) and asked to confirm that you want to proceed:
WARNING: Any existing data on this drive will be erased!
OK to format logical drive (Y/N)?
If you press Y, the format process will begin.
You will see the message ...
Formatting logical drive ...
followed, at the end of the process, by
OK
At this point the partition's map and root directory have been cleared and all data originally
on the drive has become inaccessible.
Answering N to the confirmation prompt will abandon the format.
Page: 31
Ser-USB 2.0 Drivers User Manual
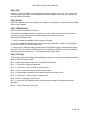
Native Driver S*BASIC Procedures and Functions
The Ser-USB driver installs the following new procedures and functions into S*BASIC:
•
MOUNT
•
UMOUNT
•
DRIVE_CAPACITY
•
SRU_FORMAT
•
SRU_BAUD
•
SRU_PORT
•
SRU_USE
•
SRU_OK()
•
SRU_BASE()
•
SRU_VER$()
•
SRU_STATUS()
•
SRU_FLAG()
•
SRU_ERR$()
MOUNT Number, Drive, Partition
MOUNT Number
Mount the specified physical drive and partition as the SRU device with the given number.
The short form of the command mounts a logical drive from partition 1 on the physical drive
with the same number.
Before a storage device can be used it has to be mounted as a QL drive. There are eight
drive numbers associated with the Ser-USB driver: SRU1 to SRU8. Any partition on any
physical drive that the Ser-USB recognises can be mounted as any one of those drive
numbers.
Examples:
MOUNT 2,2,1
Mount partition 1 on drive 2 as SRU2.
MOUNT 1
Mount partition 1 on drive 1 as SRU1.
Page: 32
Ser-USB 2.0 Drivers User Manual
UMOUNT Number
Unmount the specified SRU device.
This removes the mapping from the physical storage device to the QDOS drive number,
allowing the drive number to be re-used by attaching it to a different physical drive/partition.
Note the spelling of the command; like the Linux command with the same function, there is
no N after the U.
Other device drivers for the QL have tended to use a single command like WIN_DRIVE to
handle the functions of mounting and un-mounting. For the Ser-USB driver a decision was
taken to implement two distinct commands for greater flexibility and clarity.
Example:
UMOUNT 2
Un-mount SRU2.
DRIVE_CAPACITY Number%,Size
The USBWiz module which Ser-USB uses has no mechanism for getting the physical size of
a volume that has been mounted for direct I/O.
The Ser-USB Destiny Driver gets around this by trying to read from various LBAs (Logical
Block Addresses) until it finds the first size that succeeds. Unfortunately, some (mainly older)
SD cards, when used with the USBWiz module, do not support out of range LBA requests,
with the result that the Ser-USB will lock up and need to be reset.
The Ser-USB Legacy Driver bypasses this check altogether and assumes that every
physical drive has a capacity of 2GB, so DRIVE_CAPACITY must be used if
a) the drive has a capacity less than 2GB or
b) the drive has a capacity > 2GB and you want to use some of that space.
This command allows you to manually specify the size of the drive, so that the driver
bypasses this check entirely.
Number% is the Ser-USB physical drive number (1 to 3).
Size is the size in 512 byte sectors.
Example:
DRIVE_CAPACITY 1,262144
Set the size of the SD Card to 128MB; i.e. (128*1024*1024)/512
IMPORTANT: If you are using the Destiny Driver and you have a drive that fails with out or
range reads then you MUST issue a DRIVE_CAPACITY command before attempting to
FORMAT it.
SRU_FORMAT [#Ch,]Drive,Label$
This command is only implemented by the Legacy Driver.
The QDOS/SMS FORMAT command is not supported by the Legacy Driver and any attempt
to invoke the io.formt trap will return err.ni with the address of the driver's format routine in
d1. In other words, formatting must happen in user mode, either with the supplied S*BASIC
command or by a direct call to the address returned in d1.
The main difference between SRU_FORMAT and FORMAT is that the former takes a
separate integer drive number parameter instead of including the drive name in the label.
SRU_FORMAT may also take an optional channel number which will be used for all user
interaction (including messages and prompts for input).
Page: 33
Ser-USB 2.0 Drivers User Manual
Examples:
SRU_FORMAT 1,"#SDCard"
SRU_FORMAT #2,2,"USBStick"
SRU_BAUD BaudRate
Sets the baud rate for communication with the Ser-USB. The values listed below are
allowed, but not all will work depending upon the hardware configuration. In particular, note
that a standard QL without superHermes cannot support baud rates higher than 4800 even if
you are able to set that rate.
•
1200
•
2400
•
4800
•
9600
•
19200
•
38400
•
57600
•
115200
•
230400
SRU_PORT Name$
This command can be used to change the port to which the Ser-USB is connected.
To use: ensure that there are no current operations with the Ser-USB in progress (wait at
least five seconds with both the TX and RX LEDs out) then carefully unplug the serial lead
and plug it into the new port. Finally, issue the SRU_PORT command with the new port
name. Do not reset the Ser-USB.
Example:
SRU_PORT "ser2hr"
This is of most use with the ROM Legacy Driver and the superHermes which requires the
IPC extensions to be loaded before the additional serial ports can be accessed. Thus the
machine can be booted with the Ser-USB connected to, say, SER1 at 4800 baud. From
there a BOOT program could load the IPC extensions, then use SRU_PORT to switch the
Ser-USB to SER3 (the fast serial port).
SRU_USE Name$
Change the device name of the driver. For compatibility with older programs that cannot
recognise devices other than those installed on the basic QL, it is possible to rename the
Ser-USB driver to something else.
Example:
SRU_USE “MDV”
The Ser-USB now pretends to be a Microdrive.
SRU_USE without a parameter resets the driver name to SRU.
Page: 34
Ser-USB 2.0 Drivers User Manual
SRU_OK()
Returns 1 if the Ser-USB driver has been successfully loaded, or 0 if not. This is useful for
conditional boot programs or other applications where actions should only be performed if
the Ser-USB is connected.
SRU_BASE()
Return the address of the Ser-USB driver’s variables. If this fails, it means that the Ser-USB
driver is not installed.
SRU_VER$(Mode%)
Return version information as a string.
If the optional parameter Mode% is omitted, or is zero, this function returns the full driver
version string (including core driver build number and status) as a string.
Valid values for Mode% are:
1 : the four character hardware version string is returned.
2 : the four character hardware type string is returned (This will be "UWZL" for the Legacy
Driver and "UWZS" for the Destiny Driver).
3 : returns a four character string containing the compile-time options used when the driver
was built. The first character will always be a '2', signifying an EDDE 2 core, the remaining
three characters will either be a '-' or an alphanumeric option letter.
SRU_STATUS()
This function is primarily intended for debugging purposes. It returns the pending transaction
state of the driver as a bit field.
Bit 0 = Supervisor Stack Pointer set to Auxiliary Stack Space.
Bit 1 = The driver is inside a nested call.
Bit 2 = The driver is in the process of opening a file.
Bit 3 = One or more disk maps must be flushed to disk.
Bit 4 = A suspended transaction was initiated by the device driver itself.
Bit 5 = The driver is in the process of closing a file.
Bit 6 = Driver is handling a trap #3 call.
Bit 7 = A previous I/O transaction went into suspense and has not subsequently been
released.
Bit 15 = The I/O Servicer Lock is set.
Page: 35
Ser-USB 2.0 Drivers User Manual
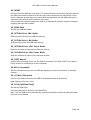
SRU_FLAG( [Flag%] [,Action%])
There are seven flags which can be used to control/interrogate the behaviour of the driver at
run-time. This function allows you to read their current values and to change them if needed.
Flag% is the number of the flag in the range 0 to 6.
Action% is 0 to clear the flag, 1 to set it and -1 to test it. Note that if Action% is omitted then
it defaults to -1 (test).
SRU_FLAG always returns the value of the flag before the operation was performed.
The only flags currently used are:
0 = Inhibit Extended Open Handler (Non-Fatal): If Flag 0 is set then it will prevent the driver
from using its extended open handler and instead returns err.nc (Not Complete) if the driver
is busy when a trap #2 io.open call is made. This would be mandatory for any program that
tries opening a file while in supervisor mode. It may be possible for the calling program to
recover from this and continue.
1 = Inhibit Extended Open Handler (Fatal): This has the same effect as setting Flag 0,
except that it returns err.iu (In Use) instead.
6 = FAT Driver is loaded: DO NOT set this flag yourself - it will be set by the FAT Driver if it
is loaded on top of the native Ser-USB driver.
SRU_ERR$
Returns a four character string containing the last hardware error code. If there has been no
error, the string returned will consist of four null (CHR$(0)) bytes.
Page: 36
Ser-USB 2.0 Drivers User Manual
Extra S*BASIC Procedures and Functions
Previous versions of the Ser-USB driver included the file drv_exts_bin, that contained
additional procedures and functions intended for use by third party tool developers. This file
is no longer supplied (or supported) but an EDDE 2 compliant replacement is available from
Memory Lane Computing for anyone who has made use of the functions that were included.
Note: The functions for direct loading and saving of sectors (LBAs) on any Ser-USB volume
that were in the Driver Extensions are now included in the Ser-USB FAT Driver.
Page: 37
Ser-USB 2.0 Drivers User Manual
Obsolete Modules
Previous versions of the Ser-USB drivers included the following modules:
•
The Queue Manager
•
The Driver Command Manager *
•
The Driver Status Monitor
These are no longer supported (or needed) and will not work with the 2.0 drivers.
In addition, the API documented for the Ser-USB 1.x drivers is no longer supported, although
equivalent functionality is now accessible through the EDDE 2 Link Layer Driver.
* A version of the Driver Command Manager is included with the Ser-USB FAT Driver but it
has no functionality for interacting with the Native Driver. Such interactions are now
conducted through the EDDE 2 Link Layer Driver by making sd.extop calls to the EDDE
device.
Page: 38
Ser-USB 2.0 Drivers User Manual
Direct Sector Access
For compatibility with existing software that does direct sector I/O on hard disks, the SerUSB driver supports this facility on native QDOS volumes.
To do this, open the special file "*D2D", as in:
OPEN #3,"SRU1_*D2D"
The driver also allows the shortened form:
OPEN #3,"SRU1_*D"
The channel so opened has the following limitations:
•
Data must be read or written in 512 byte blocks.
•
The file pointer is interpreted as a sector (LBA) number, relative to the start of the
partition.
•
Only absolute file pointer movements are permitted.
•
It is not possible to read a sector that lies beyond the end of the partition. Any
attempt to do so will return "End of File".
•
Note that no files can be open on the logical drive with which you wish to perform
direct I/O.
Direct sector access on non-native disks (e.g. FAT), or access to LBAs outside partition
boundaries, can be achieved with UZ_PUTLBA, UZ_GETLBA etc. in the FAT Driver.
Page: 39
Ser-USB 2.0 Drivers User Manual
Ser-USB FAT Driver
The Ser-USB FAT (File Allocation Table) Driver is an alternative software package for the
Ser-USB or other USBWiz-based devices. The Ser-USB Native EDDE 2-based driver
implements a native QDOS file system, but at the cost of performance, some compatibility
and relatively high memory utilisation; all issues that make it less than ideal for base QL
systems.
The FAT Driver, on the other hand, leverages the full power of Ser-USB's onboard USBWiz
module to handle all filing system management operations by using only FAT16 or FAT32
volumes. Because the USBWiz is doing most of the work, the software on the QL side
benefits from significantly reduced memory requirements and complexity.
The downside of this is that filenames are limited to the original DOS 8.3 format (this is a
restriction of the USBWiz) and support for application programs to work directly with files on
the Ser-USB is very basic. However, the driver is extremely well suited to the original design
goals of the Ser-USB as a tool for transferring files between systems; the FAT Driver now
makes it even easier to do this between QLs, PCs, Macs ... in fact any machines running an
OS that can read/write FAT disks.
The driver is made up of two components:
The S*BASIC interface
This provides additional commands to perform common filing system operations with files
on the Ser-USB. For example, you UZ_COPY a file instead of using COPY if either the
source or destination file is on the Ser-USB.
The Driver Command Manager (DCM)
This optional service can be started only when needed. When it is running it provides
spooling and serving capabilities that allow programs running on the QL to access a file
on the Ser-USB as if it were part of the QDOS filing system. There are special S*BASIC
commands to route an S*BASIC channel to the DCM, or just opening a file on the "UWZ"
device will do the same thing automatically. See the section on Spooling and Serving for
details of this feature.
Because the DCM is a user mode process it does not suffer from the problems of doing
serial I/O in supervisor mode which plagued early versions of the original Ser-USB driver.
Instead, it uses native QDOS pipes to communicate between the Ser-USB and the
QDOS I/O Sub System (IOSS).
Starting the Driver
Like the native Ser-USB driver, the software comes in RAM or ROM versions; the ROM
version is inactive until started by the command UWZ_START (which is documented in the
section Ser-USB FAT Driver ROM).
The RAM version is started by loading the file usbwiz_RAM_bin, either with LBYTES
followed by CALL or with Toolkit II's LRESPR.
The driver prints a message identifying itself to channel 0:
Ser-USB FAT Driver v2.00 by Memory Lane Computing Ltd, 2012
At this point you have 1.5 seconds to press one of the following keys, which modify the
operation of the driver:
Page: 40
Ser-USB 2.0 Drivers User Manual
[ESC]
Prevents the BOOT file (if present) from being run.
[F4]
Assumes that the Ser-USB is already set to the configured baud rate and so will not attempt
to change the rate. This is useful if you have rebooted but have not reset the Ser-USB.
[F5]
Displays the prompt:
F5 pressed. Enter config string:
at which point you can enter a long integer value consisting of baud rate + serial port number
(see the UWZ_START command in the section Ser-USB FAT Driver ROM for more details).
After pressing a key, you have a further 1.5 seconds to press another, so that you could
combine [ESC] and [F4], if, for example, you wanted to inhibit running the BOOT file and
also wanted to tell the driver that the Ser-USB was already set to the correct baud rate.
Note that [F4] and [F5] cancel each other out. You cannot use [F4] to tell the driver that the
Ser-USB is already set to the baud rate that you specify using [F5], only that the Ser-USB is
already set to the driver's configured baud rate, as per its Config Block.
Whether you have used any of the above options or not, the driver will then try and establish
communications with the Ser-USB.
If the Ser-USB native driver is already loaded, the FAT driver will use the existing connection
already established to the Ser-USB.
If the above steps succeed, the driver will then set the date and time on the USBWiz module
in the Ser-USB to the current date and time on the QL; this is so that any changes to the
FAT filing system are correctly date stamped.
The next stage of initialisation is normally to try and mount a FAT filing system on the SD
Card. This will not happen if the Ser-USB Native Driver is already loaded and the next step
will be skipped.
If this is successful, the driver looks for a file called BOOT (which it expects to be an
S*BASIC program). If the file is found, the driver will LRUN it, by stuffing its contents into the
keyboard queue, line by line. This mechanism has to be used, because it is not possible to
initiate a "real" LRUN command with a file on the FAT file system.
When these steps have been completed, the driver is ready to be used through the S*BASIC
interface. See the sections FAT Driver S*BASIC Procedures and FAT Driver S*BASIC
Functions for full details.
A special device driver called "UWZ" is also installed, but this does not behave like a normal
directory device driver. See the Section on Automatic Spooling and Serving for a description
of how the UWZ device works.
Using both drivers together
As mentioned above, It is possible to load both the Ser-USB native driver and the FAT driver
at the same time. In this case, the native driver must be loaded first, so that the FAT driver
can find it and establish an exchange of information.
Page: 41
Ser-USB 2.0 Drivers User Manual
Support for both drivers loaded together is still experimental and you should use this feature
with caution. The drivers automatically switch between modes whenever they are accessed
so it should be safe to copy files between QDOS and FAT volumes on the same Ser-USB. In
addition, the UZ_LOCK function is provided to lock the native driver while FAT operations
are being performed.
However, even though in testing no problems were detected, all of these safeguards are not
guaranteed to be foolproof, and there is the possibility that data corruption might result if you
intersperse native and FAT file operations. Thus, please use this feature with care until you
are certain that it works reliably in your environment.
Page: 42
Ser-USB 2.0 Drivers User Manual
FAT Driver S*BASIC Procedures
This section lists the new S*BASIC procedures installed by the Ser-USB FAT Driver. The
S*BASIC interface should be considered as the preferred way of doing FAT file operations.
Spooling and Serving (described later in this manual) is an advanced mechanism to provide
some limited support for using FAT through QDOS I/O calls, but it is not the recommended
way in which to use this driver.
IMPORTANT: The procedures in this section only work if the FAT Driver is loaded and
only with FAT volumes!
UZ_DCMSTART
Start the Driver Command Manager (DCM).
The DCM is a background task that provides spooling services for accessing files on the
Ser-USB through native QDOS IOSS calls. If you do not wish to use Spooling and Serving
(See UZ_SPOOL and UZ_SERVE) then you do not need to start it.
See the section Driver Command Manager for more details.
UZ_DCMSTOP
Stop the Driver Command Manager.
UZ_MNT Drive%
Mount a FAT file system on the Ser-USB.
Before you can use an SD Card or USB drive plugged into the device, it must be mounted
first. The UZ_MNT command is used for this. Unlike the MOUNT command in the Ser-USB
EDDE driver this has no effect on the QL side; it simply instructs the Ser-USB to mount the
drive ready for access.
Drive% is a number from 1 to 3, where:
1
SD Card
2
USB Port 1
3
USB Port 2
UZ_SW Drive%
Switch between mounted file systems on the Ser-USB.
Once a drive has been mounted on the Ser-USB it becomes the "current drive". In other
words, all file handling commands will use the last mounted drive until instructed otherwise. If
more than one drive is already mounted, you can switch between them using the UZ_SW
command. This is analogous to typing C: or D: etc. in a DOS command prompt.
Drive% is a number from 1..3, where:
1
SD Card
2
USB Port 1
3
USB Port 2
Page: 43
Ser-USB 2.0 Drivers User Manual
UZ_DIR [#Channel%][,][Drive%]
Display a directory of a currently mounted drive.
The output of the UZ_DIR command looks like this:
The files' DOS attributes are displayed in the third column, the sizes in the fourth. Note that
DOS attributes are completely ignored by the Ser-USB FAT Driver. Their QDOS equivalent,
the file header, is stored in the form of a prefix header when it is necessary (for executable
files).
By default the output from this command is sent to channel #1, but this can be overridden by
specifying the Channel% parameter.
UZ_DIR will display the directory of the current drive, as set by the most recent UZ_MNT or
UZ_SW commands, or you can explicitly specify a drive using the Drive% parameter.
UZ_FORMAT
Quick Format the media currently mounted on the Ser-USB.
You cannot specify a medium name and you cannot do a low level format with this
command. If either of these things need to be done, you will have to do them on a PC or
Mac or any other system supporting the FAT file system. This is a limitation of the USBWiz
module.
Page: 44
Ser-USB 2.0 Drivers User Manual
UZ_COPY "Source Destination"
Copy a file to/from the Ser-USB.
The parameter to this command consists of a single string containing two filenames
separated by a single space. The first filename is the Source file, the second is the
Destination. To signify that a file is located on the Ser-USB, its name must begin with a colon
(":").
One filename must be on the Ser-USB; one on the QL. Copying files from one Ser-USB FAT
drive to the other is not supported, nor is copying files solely on the QL side.
You can specify a drive for the Ser-USB file, by including a drive selector after the initial
colon. This is of the form "n:", where n is a drive number from 1 to 3, as documented for the
UZ_MNT and UZ_SW commands.
If the file is executable a prefix header will be pre-pended to the file when copying TO the
Ser-USB, and restored when copying FROM it. Prefix headers use the same format that is
used by Q-emuLator to store executable files on the host filing system.
If the file already exists on the destination, it must be deleted first or an error will be reported.
No surplus spaces are allowed anywhere in the parameter string. QL filenames with spaces
are not supported; DOS 8.3 filenames cannot have spaces in them.
Examples:
UZ_COPY "FLP1_Asteroids_bas :ASTROIDS.BAS"
Copy the file FLP1_Asteroids_bas to ASTROIDS.BAS on the current Ser-USB drive.
UZ_COPY ":2:TOOLKIT2.BIN WIN1_Toolkit2_bin"
Copy TOOLKIT2.BIN from the USB drive connected to USB port 1 to WIN1_Toolkit2_bin.
UZ_LOAD Filename$
Load a file from the Ser-USB by stuffing its contents into the keyboard queue. Filename$
should be the name of a S*BASIC program file.
The maximum file size is 32K.
UZ_LRUN Filename$
Load and run a file from the Ser-USB by stuffing its contents into the keyboard queue.
Filename$ should be the name of a S*BASIC program file.
The maximum file size is 32K.
UZ_FLD 0|1
Set fast load mode.
When set (1), UZ_LOAD does not pause between lines as they are stuffed into the keyboard
queue. This should only be used on very fast hardware or with a QL emulator, otherwise
characters will probably be lost.
The default is not set (0).
Page: 45
Ser-USB 2.0 Drivers User Manual
UZ_EX Filename$ [,#Ch ...][,Command$]
Load and execute a file from the Ser-USB. One or more S*BASIC channels may optionally
be passed to the job, along with a command string.
The file must have an executable prefix header or this command will report "Bad Parameter".
Note: Some programs make an assumption about the way in which they have been loaded
into memory. EXEC (ROM), EX (Toolkit II), EXECUTE (Turbo Toolkit) all load the job's code
into memory immediately following the job's header. UZ_EX first loads the file into memory
(so that it can get the file prefix header) then it creates a job containing a short stub that
jumps to the previously loaded code.
If a program assumes that its header is immediately before the start of its code, and it tries
to access the header directly, or if the program assumes that its data area follows on
immediately after its code area, then the program will fail using the UZ_EX method. Most
likely this will result in a catastrophic system crash, either immediately the program is
executed or very shortly afterwards.
The reason that UZ_EX (and UZ_EW) do it this way is for performance reasons. There are
no QDOS headers on a FAT volume (obviously) so the prefix header at the start of the file
has to be read before the size of the job header can be known.
If this causes a problem because an executable that you wish to be able to run from a FAT
drive does not work correctly, then you can load a special extension (uzx_bin) which
implements two new commands UZX and UZXW. These commands are slightly slower but
they mimic the way that other execute utilities (such as EXEC, EX and EXECUTE) operate
and so should cause fewer problems.
UZ_EW Filename$ [,#Ch ...][,Command$]
Load and execute a file from the Ser-USB and wait for completion. See UZ_EX for details of
parameters.
UZ_LRESPR Filename$ [,#Ch ...][,Command$]
Load and install an extension from the Ser-USB. Unique to the Ser-USB driver's LRESPR
command is the ability to pass one or more S*BASIC channel numbers and a command
string, although the extension being loaded has to be written to take advantage of this
feature. In this case, the signature passed in d5 is useful if code needs to determine whether
it is being called with parameters.
The called code gets passed the following:
d5 = ASCII Signature 'USBW'
d6 = ASCII version number 'N.NN'
a0 = Pointer to list of channels (if any)
a2 = Pointer to parameter string (if any)
a3 = Pointer to base of driver variables
a5 = Pointer to API entry point
UZ_LBYTES Filename$, Address
Load a file from the Ser-USB into memory.
UZ_SBYTES Filename$, Address, Length
Save memory (overwrite) to a file on the Ser-USB.
Page: 46
Ser-USB 2.0 Drivers User Manual
UZ_SBYTES_A Filename$, Address, Length
Save memory (append) to a file on the Ser-USB.
UZ_DEL Filename$
Delete a file on the Ser-USB.
UZ_REN "Old New"
Rename a file/directory on the Ser-USB.
UZ_MD Directory$
Make a directory on the Ser-USB.
UZ_RD Directory$
Remove a directory on the Ser-USB.
UZ_CD Directory$
Change directory on the Ser-USB.
QL_CD Directory$
Set the QL directory. On a system with a Level 2 device driver this will set DATAD$.
If no parameter is supplied, print the current directory to the console (channel #0).
Note: No checks are performed on the parameter. It is up to the user to ensure that it is in
the correct format; in particular that it starts with a valid device name and ends with an
underscore.
UZ_OPEN [#Ch,]Filename$,Mode$
Open a file on the Ser-USB for reading or writing. The Ser-USB has four channels available
for file handling; 0 to 3. If the channel number is omitted then #2 is used. This is to avoid
clashes, as many UZ_xxx file handling commands make use of channel 1, and channel 0 is
used for DCM spooling and serving.
Note that USBWiz channel numbers are not the same as QDOS S*BASIC channel numbers.
They refer specifically to the USBWiz module and have no other significance to the QL.
UZ_CLOSE [#Ch]
Close a file that was previously opened with UZ_OPEN on the specified channel.
UZ_PUTS([#Ch,]String$)
Write a string to the file currently open on the Ser-USB.
UZ_FLUSH
Flush the Ser-USB input queue.
Page: 47
Ser-USB 2.0 Drivers User Manual
UZ_RESET
Re-sync if the Ser-USB has to be reset. This command does not actually physically reset the
Ser-USB; this cannot be done from the QL and must be done with the reset button on the
device. What this actually does is to select 9600 baud and flush the Ser-USB input queue essential if you have just been forced to push reset!
Unfortunately this command cannot be used on a standard QL because it does not support
changing the baud rate to 4800.
UZ_BAUD Rate
Set the Ser-USB Baud Rate.
UZ_GETLBA Drive, LBA, Buffer
Read one LBA from the Ser-USB into memory.
UZ_PUTLBA Drive, LBA, Buffer
Write one LBA to the Ser-USB from memory.
UZ_GETLBAS Drive, LBA, Count, Buffer
Read the contents of consecutive LBAs into memory.
UZ_PUTLBAS Drive, LBA, Count, Buffer
Write the contents of memory into consecutive LBAs.
UZ_PORT Name$
Change the port through which the Ser-USB is connected. (See SRU_PORT in the Native
Driver section for a description of this command).
UZ [#Ch,] Command$
Send a command string to the Ser-USB and display the result to the console or specified
channel.
UZ_CC [#Ch,] Filename$
Copy a file's contents from the Ser-USB to the specified channel (default #1).
Note: Maximum file size = 32K.
UZ_SCLK [DOSDateTime$]
Set the Ser-USB Clock.
Omit the parameter to use the current Date/Time.
Note: The Ser-USB clock is automatically synchronised with the current QL date/time when
the driver is first loaded.
Page: 48
Ser-USB 2.0 Drivers User Manual
UZ_SPOOL [#Ch, Filename$]
Start spooling from an existing S*BASIC channel to a file on the Ser-USB. Note that the file
is opened in [A]ppend mode, so that data will be added to the end of it.
Everything that is subsequently written to the specified channel is routed to the Driver
Command Manager (DCM) which then spools it to the file. If the DCM is not running when
this command is first used, then it will automatically be started.
When used with no parameters, this command stops the spooler.
The spooler uses Ser-USB channel 0, so while spooling is active that channel number is not
available for any other operations.
Note that you need a valid S*BASIC channel number in order to use this command.
Unfortunately, there is no reliable way in which an entry can be added to the S*BASIC
channel table automatically for you, so this has to be done manually. The channel will be
closed and its number reassigned to the Driver Command Manager's Client Write pipe.
The preferred method is to use the function UZ_SPL$; this returns a special filename that is
guaranteed to be reserved for this purpose in all future software versions. (You should
always open this special file in shared mode).
So, for example:
OPEN_IN #3,UZ_SPL$
UZ_SPOOL #3,"SPOOL.TXT"
Will route anything printed to S*BASIC channel #4 to the file SPOOL.TXT on the current SerUSB drive.
The command UZ_SERVE operates in the reverse direction, allowing a file on the Ser-USB
to be read through an S*BASIC channel, but note that the current version of the software
only supports a single spooling operation (UZ_SERVE or UZ_SPOOL) at a time; you cannot
have both in operation, and you cannot Spool or Serve more than one file at a time.
IMPORTANT: DO NOT close the channel assigned in this way, or you will close one of the
DCM's pipes. Instead use the UZ_CHCHG command first.
See Spooling And Serving for an alternative way of doing this, and for more details of the
integration with the QDOS IOSS.
Page: 49
Ser-USB 2.0 Drivers User Manual
UZ_SERVE [#Ch, Filename$]
Start spooling from a file on the Ser-USB to an existing S*BASIC channel.
This command works exactly like UZ_SPOOL, except that it operates in reverse. It opens a
file on the Ser-USB, reads from it, and sends the file contents, via the DCM's Client Read
pipe, to the specified S*BASIC channel (see UZ_SPOOL for the method to obtain a suitable
channel number).
Example:
OPEN_IN #3,UZ_SPL$
UZ_SERVE #3,"SPOOL.TXT"
This command allows data to be read from SPOOL.TXT with a command such as:
INPUT #3,A$
With no parameters, this command stops the spooler.
As mentioned under the description of the UZ_SPOOL command, you cannot use
UZ_SERVE and UZ_SPOOL at the same time, and you cannot have multiple files being
spooled or served.
There is a further limitation with UZ_SERVE in that it shares the same 512 byte buffer that is
used by the UZ_GET$ function. If calls to UZ_GET$() are made while a UZ_SERVE is in
operation there is a risk of the data getting mixed up, so this should be avoided.
IMPORTANT: DO NOT close the channel assigned in this way, or you will close one of the
DCM's pipes. Instead use the UZ_CHCHG command first.
See the section Spooling And Serving for an alternative way of doing this, and for more
details of the integration with the QDOS IOSS.
UZ_CHCHG #Ch%,Name$
Change an existing S*BASIC channel number (default #3) to refer to the specified file/device
name.
IMPORTANT: The existing channel is NOT closed first.
The main use of this command is when you previously assigned a channel number with
UZ_SERVE or UZ_SPOOL, and you have now finished the operation and don't need the
channel anymore. Closing the assigned channel number with a normal S*BASIC CLOSE
command would close one of the DCM's pipes (which is obviously not what is wanted!).
Instead, to close the channel safely, do this:
UZ_CHCHG #3,UZ_SPL$
And then:
CLOSE #3
If you omit the device/file name parameter to UZ_CHCHG it will default to UZ_SPL$.
If you omit the channel number it will default to #3.
Page: 50
Ser-USB 2.0 Drivers User Manual
FAT Driver S*BASIC Functions
This section lists the new S*BASIC functions installed by the driver.
IMPORTANT: The functions in this section only work if the FAT Driver is loaded and
only with FAT volumes!
UZ_COPYF("Source Target")
Copy a file to/from the Ser-USB.
This is a function version of the UZ_COPY command, which otherwise operates in exactly
the same way. See the description of UZ_COPY for detailed information.
UZ_COPYF Returns 0 for success, else error code.
UZ_HDRS(State%)
Set/test whether file headers are processed during copy operations. If set, a Q-emuLatorstyle prefix header is pre-pended to files of types 1 and 2 before they are written to the FAT
file system, and extracted when they are read.
State% = 0
Ignore headers.
State% = 1
Process headers (the default)
State% = -1
Return current setting.
UZ_FLEN(Filename$)
Return the length of a file on the Ser-USB.
Note that if the file includes a prefix header (30 bytes), it will be included in the file length.
UZ_FATTR(Filename$)
Return the (FAT) attributes of a file on the Ser-USB.
The attributes are returned in a FAT-standard byte-sized bit field as follows:
Bit(s)
7..6
5
4
3
2
1
0
Description
Reserved
Archive
Directory
Volume ID
System
Hidden
Read Only
Page: 51
Ser-USB 2.0 Drivers User Manual
UZ_FDATE(Filename$)
Return the date stamp (as a FAT long word bit field) of a file on the Ser-USB.
The value returned is the 32-bit standard structure used in the FAT filing system. For
example, 0x34212002 is 01/01/2006 – 04:00:04.
Bits
31..25
24..21
20..16
15..11
10..5
4..0
Field
Year1980
Month
Day
Hour
Minute
Second2
Description
Years since 1980
1..12
1..31
0..23
0..59
Seconds divided by 2 (0..30)
The DOS_DATE$ function can be used to convert this value to a (slightly more useful) string.
UZ_FTEST(Filename$)
Test whether a file exists on the Ser-USB.
UZ_MTEST()
Test whether there is media currently mounted on the Ser-USB.
UZ_MSIZE()
Return the capacity of the media currently mounted on the Ser-USB.
UZ_MFREE()
Return the free space on the media currently mounted on the Ser-USB.
UZ_CDRIVE%()
Return the currently selected drive on the Ser-USB.
The drive is changed with either UZ_MNT (mount) or UZ_SW (switch).
UZ_VER$()
Return the Ser-USB FAT Driver version string as four characters "N.NN".
UZ_HWVER$()
Return the version string of the USBWiz module in the Ser-USB as four characters "N.NN".
UZ_WRITE% (String$)
Write a string to the Ser-USB channel.
Returns 0 for success, else negative error code.
This command is provided to allow direct communication with the USBWiz module in the
Ser-USB.
UZ_READ$(Bytes%)
Read a string of up to Bytes% characters from the Ser-USB channel.
This command is provided to allow direct communication with the USBWiz module in the
Ser-USB.
Page: 52
Ser-USB 2.0 Drivers User Manual
UZ_FETCH% (Template$)
Fetch a Ser-USB response and match the template.
The string should be in the form of the response expected from the USBWiz module to the
last string sent with UZ_WRITE%.
Characters in the template must match exactly, including carriage returns.
Special symbols are used to signify the positions of parameters in the string; when matched,
the values are extracted and stored in the Ser-USB Result Table so that they can be
retrieved with UZ_RESULT$. These symbols are as follows:
Where '%' characters appear in the template, each contiguous group of these is treated as a
value to be extracted and is matched by the same number of characters in the input stream.
These results are stored in the table
Where an '=' character appears in the template, it is followed by a word that indicates how
many bytes are expected from the input stream. These bytes are counted, but not copied to
the table, and the number must match for success. The actual data read can be extracted
from the 640 byte input buffer located at offset $500 (1280) from the base of the driver
variables. This buffer will contain the entire string received from the Ser-USB; its absolute
address in memory can be found with UZ_VARS(1280).
UZ_RESULT$(Index%)
Fetch an entry from the Ser-USB Result Table.
After calling UZ_FETCH% to match a response from the Ser-USB, this function can be used
to extract one of the returned values.
UZ_OK()
Get a response from the Ser-USB.
This function can be used in conjunction with UZ_WRITE% to perform complex operations
on the Ser-USB that are not supported by the driver's built-in commands and functions.
(Read the USBWiz documentation for detailed information about the other functions that it
can perform besides accessing file systems).
Return 1 if succeeded and it's OK, otherwise 0.
UZ_BUSY(State%)
This function can be used to modify/test the state of the USBWiz BUSY flag; a software flag
that signals whether the Ser-USB is currently performing serial I/O with the driver.
When used to try and set or clear the flag, UZ_BUSY will return 0 if the operation was a
success, otherwise a QDOS error code ("In Use" if the flag was already set, "Already Exists"
if the flag was already clear).
State% = 0
Try and clear the Ser-USB BUSY Flag.
State% = 1
Try and set the Ser-USB BUSY Flag.
State% = -1
Test the Ser-USB BUSY Flag, returning 1 if set or 0 if clear.
Page: 53
Ser-USB 2.0 Drivers User Manual
UZ_LOCK(State%)
If the Ser-USB Native Device Driver is installed, try to lock it so that FAT filing system
operations can safely be performed.
If State% <> 0, try to lock the Ser-USB Native Driver.
If State% = 0, try to unlock the Ser-USB Native Driver.
If State% is omitted, test whether the driver is present by trying to lock, then unlock it. In
which case a return value of either 1 or -9 should be expected if the driver is present, or -7 if
it is not.
UZ_LOCK returns one of the following values:
0
Driver was successfully locked
1
Driver was successfully unlocked
-9 (err.iu)
Diver was already locked
-7 (err.nf)
The driver is not installed
UZ_GETLBAF(Drive, LBA, Buffer)
Read one LBA from the Ser-USB into memory.
Return 0 if success, else error code.
UZ_PUTLBAF(Drive, LBA, Buffer)
Write one LBA from memory to the Ser-USB.
Return 0 if success, else error code.
UZ_GETLBASF(Drive, LBA, Count, Buffer)
Read the contents of consecutive LBAs into memory from the Ser-USB.
Return 0 for success, else negative error code.
UZ_PUTLBASF(Drive, LBA, Count, Buffer)
Write the contents of memory into consecutive LBAs on the Ser-USB.
Return 0 for success, else negative error code.
UZ_BAUDF()
Return the current Ser-USB baud rate.
UZ_CHANNEL()
Return the current Ser-USB Channel ID.
UZ_PORT$()
Return the current Ser-USB port name.
UZ_ERROR$()
Return the last Ser-USB error response.
DATE_DOS$()
Return the current Date/Time as a DOS long word bit field represented by an 8 digit hex
string.
Page: 54
Ser-USB 2.0 Drivers User Manual
DATE_DOS
Return the current Date/Time as a DOS long word bit field.
DOS_DATE$(DOSDate)
Convert a long word bit field DOS date to a string of the form "YYYY/MM/DD HH:MM:SS".
UZ_VARS( [Offset%] )
Return the base address of the Ser-USB FAT Driver variables.
Returns 0 if the driver variables could not be found; which almost certainly means that the
driver has not been installed.
An optional integer offset may be passed to this function; this will be added to the return
value and is a convenient way to get the address of a specific variable. If an offset is passed,
it will be checked to ensure that it is the range allocated to the driver variables; an illegal
offset will cause a Bad Parameter error.
UZ_HEAD(Address, Mode)
Check whether a file loaded in memory has a prefix header and return information from it.
This function would be useful to extract the header information from an executable file read
from the Ser-USB with UZ_LBYTES or even to extract the header information from a file
saved by Q-emuLator.
Mode = 0
Return 1 if a header was found at the start address, else 0
Mode = 1
Return the file type
Mode = 2
Return the file dataspace (if type 1)
Mode = 3
Return the file extra info
Mode = 4
Return the adjusted base address of the file contents (i.e. skip the header)
UZ_HEAD$(Type, Dataspace, ExtraInfo)
Construct a prefix header as a string.
This function creates a byte string containing a Q-emuLator-style prefix header constructed
from the supplied values for file type, dataspace and extra information. The primary use of
this function would be to create an executable binary file image before using UZ_SBYTES to
save it to a file on the Ser-USB.
EOL_FIX$(Strings$)
Swap end of line characters in a string between CR (Ser-USB) and LF (QL).
Returns the adjusted string.
QL_DIR$
Return the current QL directory, or an empty string if it is not set. If a level 2 device driver is
loaded, or Toolkit II is installed, this function is the same as DATAD$.
UZ_GET$([#Ch,]Count%)
Read up to Count% bytes from the file currently open on the specified channel on the SerUSB.
Page: 55
Ser-USB 2.0 Drivers User Manual
UZ_SPOOLING()
Returns a bit field indicating the spooling status of the Driver Command Manager (DCM).
Bit 0
Set if the DCM is currently spooling to (or serving from) a file on the SerUSB.
Bit 1
Set if the operation was initiated by the S*BASIC commands UZ_SPOOL
or UZ_SERVE.
Returns 0 if no spooling is in progress.
UZ_SPL$
Returns a string suitable for use as the filename when opening a spool channel.
To use the UZ_SPOOL or UZ_SERVE commands a valid S*BASIC channel ID is required
which is assigned to the Client Write pipe of the Driver Command Manager. This function
returns a string that can be used with a file open statement to get a channel suitable for this
purpose. In fact, it returns a filename that is guaranteed to be reserved for this purpose in all
future versions of the driver.
Page: 56
Ser-USB 2.0 Drivers User Manual
Spooling And Serving
QDOS File System Operations
The Ser-USB FAT Driver implements some limited integration with the QDOS I/O Sub
System, making it possible to open a file on the Ser-USB for Read or Write (but not both)
with normal S*BASIC commands or from within a program. This can be done with a normal
OPEN command to the UWZ device.
For example:
OPEN #3,'UWZ1_LIST.TXT'
will look for a file called LIST.TXT on the currently selected Ser-USB drive. If it exists, and it
can be opened, the DCM is requested to start serving the file. From that point on any reads
from that channel will be satisfied by the DCM. For this to work you must issue a
UZ_DCMSTART command first (if you haven't already), as the software cannot automatically
start the DCM from within the supervisor mode code of the device driver.
To open a file for writing you need to use OPEN_NEW or OPEN_OVER.
Also, the drive number after UWZ does not signify the drive on the Ser-USB. If you want to
specify that the file is on a specific Ser-USB drive you must include a drive selector in the
name:
OPEN #3,'UWZ1_2:MYLIST.BAS'
This command will look for the file MYLIST.BAS on the USB drive attached to USB port 1.
Because you can only open files on the Ser-USB for access in one direction (read or write)
at any one time, it is also possible to force a specific open mode for the file, regardless of the
mode setting which the program passes to the QDOS io.open call. To do this, suffix the
filename with an @ sign followed by the mode (R = Read, W = Write, A = Append). For
example:
OPEN #3,'UWZ1_2:MYLIST.BAS@W'
forces the file to be opened for writing.
The facility to integrate with the QDOS IOSS using spooling and serving is limited and
cannot be guaranteed to work in all situations. For most operations, it will usually be better to
use the native UZ_xxx commands and functions. Spooling and serving should be OK for
programs that just do sequential reads or writes, but is likely to be problematic if the program
does anything more sophisticated.
To reiterate: only one file may be open for spooling or serving at any time, and it can only be
open for read or write; not both!
Anonymous Spool or Serve
To improve compatibility with some application programs (and many S*BASIC commands
such as LOAD) you can use the Anonymous Spool or Serve mode. In this mode, the
spooling or serving is started before any attempt to open the file. When this is done, the
driver skips any processing to open or close the file.
To do this, issue a UZ_SPOOL or UZ_SERVE command without the channel number. The
next attempt to open a file on the UWZ device will result in all read or write operations to be
routed to the appropriate DCM channel.
Page: 57
Ser-USB 2.0 Drivers User Manual
Because, when using UZ_SERVE, the application program's requests are being routed
through a pipe, it would have no way of knowing that End of File has been reached. To get
around this problem, when the entire contents of the file have been served, the DCM waits
five seconds before signalling that spooling has ended; this, in turn, causes the UWZ device
driver to return EOF to the calling program. The relevance of all this being that there will be a
delay of approximately five seconds after the last data is read from the file in this way, and
the application program realising it!
Remember to issue a UZ_SERVE or UZ_SPOOL, with no parameters, when the file has
been loaded or saved by the application program to ensure that all buffers have been
flushed and to return the DCM to normal operation.
Here is an example of loading an S*BASIC program using anonymous serving:
UZ_SERVE "UWZ1_MYPROG.BAS" : LOAD "UWZ1_anything"
There will be about five seconds delay after the file has loaded before the cursor reappears.
Then, issue the command:
UZ_SERVE
To stop the serving operation and release the DCM.
Notice that the UZ_SERVE and LOAD commands were placed on the same line. This is
because the server will automatically close five seconds after the last data has been read
from the input file. In other words, to be safe, you must start reading from the served file
within 5 seconds of starting the serve operation.
Note that the filename passed to LOAD is irrelevant, although it must be a name that begins
with "UWZ1_"; the actual file used is the one specified in the UZ_SERVE.
For information, the drive number after UWZ is currently ignored, but it is intended to signify
individual Ser-USB devices - so UWZ2 would be a second Ser-USB attached to a different
serial port. This functionality is, however, not yet implemented and the drive number is
completely ignored. However, for compatibility with future software releases it should be
restricted to '1'.
Page: 58
Ser-USB 2.0 Drivers User Manual
Driver Command Manager
Overview
The Driver Command Manager (DCM) is a background task that implements a pipe-based
interface for accessing files on the Ser-USB, and provides spooling services for accessing
files through native QDOS IOSS calls.
If you do not have a need to use Spooling and Serving (See the section Spooling And
Serving) then you do not need to start the DCM.
Once started, the DCM uses two pipes for communication with the outside world. These are
the Client Write Pipe and the Client Read Pipe. The protocol for communicating with the
DCM is as follows:
•
Client puts a command in the Client Write Pipe
•
DCM reads and executes the command
•
DCM puts a response in the Client Read Pipe (this can be zero for success, an error
code, or some other response containing requested information)
•
Client reads the response from the Client Read Pipe
An extended variation of this protocol is used for spooling and serving:
Client sends a File Open command to the DCM
If the response is OK then
Client sends a Spool or Serve command to the DCM
If the response is OK then
Client writes data to the Client Write Pipe (spooling)
or Client reads data from the Client Read Pipe (serving)
When finished, client signals completion by setting bit 0 of the DCM Flags byte
Client reads completion response to confirm signal caught
All DCM commands consist of a single byte, followed by zero, one or more parameters of
variable length. When a parameter is a word or a long word, it is always sent most significant
byte first (as are all DCM responses).
DCM Command Set
$00 [GDN] Get Device Name
Returns the name of the device as a four byte string. At present this always responds with
'UWZ0'.
$01 [GDV] Get Driver Version
Returns the version string of the Ser-USB FAT Driver as a four byte string "N.NN".
$02 [GHV] Get Hardware Version
Returns the firmware version of the USBWiz module inside the Ser-USB as a four byte
string.
Page: 59
Ser-USB 2.0 Drivers User Manual
$03 [GHT] Get Hardware Type
Returns the type of hardware currently being used by the Ser-USB FAT Driver. Currently this
will always return 'USBW' for USBWiz.
$04 [OF] Open File
Open a file on the Ser-USB.
Note: The relevant file system must have been previously mounted or this command will fail.
Takes:
Byte : Channel 0..3
Byte : Mode 'R','W','A'
Long : Pointer to filename
Returns:
Long : 0 for success, else error code
$05 [CF] Close File
Close a file currently open on the Ser-USB.
Takes:
Byte : Channel 0..3
Returns:
Long : 0 for success, else error code
$06 [WF] Write to File
Write to a file currently open on the Ser-USB.
Takes:
Byte : Channel 0..3
Long : Number of bytes to write
Long : Pointer to buffer
Returns:
Long : 0 for success, else error code
$07 [RF] Read from File
Read from a file currently open on the Ser-USB
Takes:
Byte : Channel 0..3
Word : Number of bytes to read
Returns:
Long : 0 for success, else error code
Page: 60
Ser-USB 2.0 Drivers User Manual
$08 [DF] Delete File
Delete a file on the Ser-USB.
Note: The relevant file system must have been previously mounted or this command will fail.
Takes:
Long : Pointer to filename
Returns:
Long : 0 for success, else error code
$0E [SRV] Serve
Serve the contents of the file currently open on the Ser-USB using the specified channel to
the Client Read Pipe.
Takes:
Byte : Channel 0..3
Returns:
Long : 0 for success, else error code
$0F [SPL] Spool
Spools data from the Client Write Pipe to the file currently open on the Ser-USB using the
specified channel.
Takes:
Byte : Channel 0..3
Returns:
Long : 0 for success, else error code
$C0 [SKE] Skip if Error
If the last command reported an error then skip the next n bytes as specified by the low
nibble of the instruction.
1 <= n <= 15.
Takes:
Nothing
Returns:
Nothing
$D0 [RSKE] Report and Skip if Error
As Skip if Error, but also reports the error to the console.
Takes:
Nothing
Returns:
Nothing
Page: 61
Ser-USB 2.0 Drivers User Manual
$E0 [SKNX] Skip if No Extensions
As Skip if Error, but skips if the DCM does not support an extended command set.
At present, this command will always skip.
Takes:
Nothing
Returns:
Nothing
$F0 [NOP] No Operation
Performs no action; causes the DCM to read and execute the next command.
NOP is useful for aligning lists of commands sent to the DCM when you want to store word
or long word values directly into the list before sending it.
Takes:
Nothing
Returns:
Nothing
$F1 [RLRC] Report Last Response to Console
Causes the response from the last command to be reported to S*BASIC channel #0, or to
channel #1 if that is busy. This removes the response from the Client Read Pipe.
Takes:
Nothing
Returns:
Nothing
$F2 [RNRC] Report Next Response to Console
Signals that the next command should report its response to S*BASIC channel #0, or to
channel #1 if that is busy, instead of putting it in the Client Read Pipe.
Takes:
Nothing
Returns:
Nothing
Page: 62
Ser-USB 2.0 Drivers User Manual
DCM Signals and Status
When running, the DCM continuously monitors its flag byte. This is located at offset $4b (75)
from the base of the driver variables. The absolute address of the flag byte can be obtained
with UZ_VARS(75).
The DCM will act upon the following flags (signals) if they are set to 1:
Bit 6
Stop the DCM
Bit 5
Flush the Client Read Pipe
Bit 4
Flush the Client Write Pipe
Bit 2
Report next response direct to console
Bit 0
Stop the DCM spooler/server
Once a signal has been acted upon, the bit is set to 0 by the DCM.
The DCM also reports its status through the flag byte:
Bit 7
DCM is running
Bit 3
Last DCM command reported an error
Bit 1
DCM is spooling
Page: 63
Ser-USB 2.0 Drivers User Manual
DCM S*BASIC Interface
It is possible to interact with the DCM from S*BASIC by using the UZC_xxx group of
procedures and functions.
Note: These are not available until the DCM has been started with the UZ_DCMSTART
command.
DCM Procedures
UZC_PUT Byte [,Byte]
Put one or more bytes into the DCM's command pipe.
UZC_CHREAD #Ch
Use an existing S*BASIC channel number to read from the DCM.
This converts a currently open channel number (which is closed first) into a channel to the
Client Read Pipe.
DO NOT close this channel unless you set it to something else first, or you will close the
pipe. (You can use the UZ_CHCHG command to do this).
UZC_CHWRITE #Ch
Use an existing S*BASIC channel number to write to the DCM.
This converts a currently open channel number (which is closed first) into a channel to the
Client Write Pipe.
DO NOT close this channel unless you set it to something else first, or you will close the
pipe. (You can use the UZ_CHCHG command to do this).
DCM Functions
UZC_STARTED()
Return 1 if the Driver Command Manager is running.
UZC_GET([ Byte [,Byte] ])
Get a long word command response from the driver's command pipe.
If parameters are supplied, send them to the DCM first by doing a UZC_PUT.
UZC_GET4$([ Byte [,Byte] ])
Get a long word command response from the driver's command pipe and return it as a string
to S*BASIC. This can be used with DCM commands like GDV and GHV, for example.
If parameters are supplied, send them to the DCM first by doing a UZC_PUT.
UZC_GET$([ Byte [,Byte] ])
Get a string (terminated by newline) from the driver's command pipe.
If parameters are supplied, send them to the DCM first by doing a UZC_PUT.
UZC_PIPE_W()
Return the handle (QDOS channel ID) of the Client Write Pipe.
Page: 64
Ser-USB 2.0 Drivers User Manual
UZC_PIPE_R()
Return the handle (QDOS channel ID) of the Client Read Pipe.
Page: 65
Ser-USB 2.0 Drivers User Manual
The WINS Extension
The file wins_bin is a resident extension supplied with the Ser-USB driver that implements
some window redefinition commands. These were originally derived from the WSET
extension by Pedro Reina.
WINS adds three new commands to S*BASIC for setting the positions of the three windows
to one of four pre-defined Window Sets, at the same time restoring the colours and borders
to the QL defaults.
IMPORTANT: WINS does NOT change the display mode and you cannot configure the
colours and borders.
Installation
Load WINS like any other resident extension, either with a RESPR/LBYTES/CALL sequence
or with Toolkit II's LRESPR command (or equivalent).
Usage
WINS [Window Set]
Sets the windows according to the specified Window Set definition. WINS comes configured
with Sets 0 and 1 being equivalent to the QL's default Monitor and TV windows. Set 2 is
configured for an LCD TV connected to the QL through an RGB to SCART lead. Set 3 is for
an LCD monitor in SVGA mode connected to an Aurora replacement QL mainboard. (Note
that sets 2 and 3 are unlikely to be perfect matches for all makes of hardware but should
prove useful as starting points - see below for instructions on how to customise the Window
Sets).
If no Window Set number is supplied then the set number specified in the Level 1 Config
Block will be used.
WIN0 [Window Set]
Sets window #0 to full screen, according to the definition in the specified Window Set.
SRU_WINS
This is a special command that works with Memory Lane Computing's Ser-USB 2.0 Legacy
Driver ROM. If that driver is loaded from the startup screen, it has to open a channel to the
serial port before all of the S*BASIC windows have been opened. This means that S*BASIC
window #1 has a different channel number to that which it is normally mapped to after a
boot. Some software (even most QL ROM versions) make the assumption that the first three
channels in the system will always be the same. SRU_WINS tries to restore this situation by
manipulating the QDOS and S*BASIC channel tables, swapping the Ser-USB channel ID so
that the channel tables are left looking like they do after a normal boot. It then does a WINS
command to apply the configured Window Set definition.
If you issue the SRU_WINS command on a machine without the Ser-USB driver, or the
channel tables are found to be correct or cannot be adjusted, then this command is the
same as issuing WINS without a parameter.
WINS could be incorporated into the boot file of a Ser-USB drive like this:
100
110
120
130
a= RESPR(1000)
LBYTES 'sru1_wins_bin',a
CALL a
SRU_WINS
Page: 66
Ser-USB 2.0 Drivers User Manual
Note that you can only include line 130, and have the channels fixed and windows set
automatically, if your ROM is JS or later. With JM you will either have to chain to another
program that includes SRU_WINS or you will have to manually issue the command. This is
because early QDOS versions do not install extensions in such a way that they overwrite any
existing definitions with the same name (so it looks, instead, for an S*BASIC PROCedure
called SRU_WINS).
Configuration
WINS has an embedded Level 1 Config Block, but this can only be used to configure which
Window Set is used when the WINS or WIN0 commands are used without a parameter. In
order to change the Window Set definitions it is necessary to load the file wins_bin into a
binary editor (such as the Master Spy).
To find the Window Set definitions, search for the byte string: 02 00 01 00 00 00 00 00. In
WINS v1.02 this is at offset 0x2DA. The Window Set definitions are located eight bytes
further on (offset 0x2E2 in v1.02).
Each set has four window blocks, each containing four word-sized values for Width, Height,
X Origin and Y Origin. The four window blocks define S*BASIC windows in this order:
a) #0
b) A full screen version of #0 (that can be set by the WIN0 command)
c) #1
d) #2
The relative offsets of the Window Sets and their components are listed below. These start
at the address found above.
Window Set 0
Window #0
000
Width
002
Height
004
X Origin
006
Y Origin
Window #0 Full Screen
008
Width
010
Height
012
X Origin
014
Y Origin
Window #1
016
Width
018
Height
020
X Origin
022
Y Origin
Window #2
024
Width
026
Height
028
X Origin
030
Y Origin
Page: 67
Ser-USB 2.0 Drivers User Manual
Window Set 1
Window #0
032
Width
034
Height
036
X Origin
038
Y Origin
Window #0 Full Screen
040
Width
042
Height
044
X Origin
046
Y Origin
Window #1
048
Width
050
Height
052
X Origin
054
Y Origin
Window #2
056
Width
058
Height
060
X Origin
062
Y Origin
Window Set 2
Window #0
064
Width
066
Height
068
X Origin
070
Y Origin
Window #0 Full Screen
072
Width
074
Height
076
X Origin
078
Y Origin
Window #1
080
Width
082
Height
084
X Origin
086
Y Origin
Window #2
088
Width
090
Height
092
X Origin
094
Y Origin
Page: 68
Ser-USB 2.0 Drivers User Manual
Window Set 3
Window #0
096
Width
098
Height
100
X Origin
102
Y Origin
Window #0 Full Screen
104
Width
106
Height
108
X Origin
110
Y Origin
Window #1
112
Width
114
Height
116
X Origin
118
Y Origin
Window #2
120
Width
122
Height
124
X Origin
126
Y Origin
Page: 69
Ser-USB 2.0 Drivers User Manual
Configuring the Driver
Because the Ser-USB is connected to a serial port, and not all systems will use the same
serial port at the same speed, it may be necessary to configure the driver for your
requirements. The RAM drivers (Destiny, Legacy and FAT) all contain standard QJump
Level 1 Config Blocks that can be configured with the free MenuConfig program. The ROM
drivers do not include Config Blocks to save space and so must be configured by patching
the binary file directly. This section contains instructions for all drivers and variations.
Ser-USB Destiny RAM Driver
Load the file serusb2_bin into MenuConfig and choose the Config option:
There is only one Config Block, so select it:
There are five items which can be configured:
Device Name
The name of the Ser-USB device is normally SRU. If this causes problems on your
system, or you wish to change it for some other reason, you may alter the name of the
device to any three characters. These must be upper case, and the fourth character
must always be a zero.
Buffers
EDDE 2 drivers do not use the QDOS/SMS Slave Block system. Instead they allocate
their own private slave blocks which are strictly limited to a configured maximum to avoid
all available RAM being taken up by them. You may enter a value between 0 and 2048,
but the EDDE 2 core will automatically scale back that value if it would take an excessive
amount of RAM. A value of 0 causes the EDDE 2 core to allocate the most appropriate
number for the amount of RAM in the system.
USBWiz Channel
The full name of the serial port over which the Ser-USB driver will communicate with the
Ser-USB.
Page: 70
Ser-USB 2.0 Drivers User Manual
Treat SER3 as superHermes
This setting is intended for use when the Destiny Driver is used with future hardware. It is
not needed for use with a QL emulator and should be left set to NO.
Baud Rate
The baud rate which the driver will use to connect to the Ser-USB. 115200 will usually be
perfectly reliable when using a QL emulator.
SRU1 is
Choose which drive to be mounted as SRU1. The pop-up list allows you to select from
the SD Card or USB Ports 1 and 2.
Ser-USB Legacy RAM Driver
Load the file serusb2L_RAM_bin into MenuConfig and choose the Config option:
There is only one Config Block, so select it:
Name
The name of the Ser-USB device is normally SRU. If this causes problems on your
system, or you wish to change it for some other reason, you may alter the name of the
device to any three characters. These must be upper case, and the fourth character
must always be a zero.
Port
The full name of the serial port over which the Ser-USB driver will communicate with the
Ser-USB.
Baud
The baud rate which the driver will use to connect to the Ser-USB. 115200 will usually be
perfectly reliable when using a QL emulator.
SRU1
Choose which drive to be mounted as SRU1. The pop-up list allows you to select from
the SD Card or USB Ports 1 and 2.
Page: 71
Ser-USB 2.0 Drivers User Manual
Notes:
•
The Legacy Driver has no option for configuring the number of buffers as the
driver automatically determines the appropriate number to use depending upon
the amount of available RAM.
•
The Legacy Driver always treats SER3 as superHermes.
Ser-USB FAT RAM Driver
Load the file usbwiz_RAM_bin into MenuConfig and choose the Config option:
There is only one Config Block, so select it:
USBWiz Channel
The full name of the serial port over which the Ser-USB driver will communicate with the
Ser-USB.
Treat SER3 as superHermes
Valid only if the FAT driver is loaded standalone (without having loaded the Native driver
first). If the port name is set to SER3 assume that this is the superHermes fast serial
port.
Slow serial ports (standard QL)?
Valid only if the FAT driver is loaded standalone (without having loaded the Native driver
first). Signal that the driver is being loaded on a standard QL without serial port
enhancements such as Hermes or superHermes.
Baud Rate
The baud rate which the driver will use to connect to the Ser-USB. 115200 will usually be
perfectly reliable when using a QL emulator.
SMSQ?
Use SMSQ enhancements, if available.
Ser-USB Legacy ROM Driver
Open the ROM image in an editor capable of non-destructively editing binary files
(Master Spy, for example).
Page: 72
Ser-USB 2.0 Drivers User Manual
Search for the string "CFG=" (without the quotes).
Immediately following that string are the configuration items:
+0 : USBWiz Port Name (Length word followed by a maximum of 6 characters)
+8 : Baud Rate (Byte in the range 0 to 6)
0 = 4800
1 = 9600
2 = 19200
3 = 38400
4 = 57600
5 = 115200
6 = 230400
+10 : Name of the device (Length word, which must be 4, followed by 4 characters)
+16 : Drive to mount as SRU1 (Byte in the range 0 to 3)
0 = Nothing
1 = SD Card
2 = USB Port 1
3 = USB Port 2
Pre-configured versions for SER1/SER2 are supplied in the distribution. A standalone
config utility may be released later if there is sufficient demand.
Ser-USB FAT ROM Driver
Open the ROM image in an editor capable of non-destructively editing binary files
(Master Spy, for example).
Search for the string "CFG=" (without the quotes).
Immediately following that string are the configuration items:
+0 : USBWiz Port Name (Length word followed by a maximum of 6 characters)
+8 : Baud Rate (Byte in the range 0 to 6)
0 = 4800
1 = 9600
2 = 19200
3 = 38400
4 = 57600
5 = 115200
6 = 230400
Pre-configured versions for SER1/SER2 are supplied in the distribution. A standalone
config utility may be released later if there is sufficient demand.
Page: 73
Ser-USB 2.0 Drivers User Manual
Troubleshooting
Although a huge amount of work has gone into developing the Ser-USB driver, and it is
believed to be working correctly, it is impossible to test it under every possible combination
of hardware and software. Just for starters, there are several revisions of the basic QL
ROMs (AH, JM, JS, MG et al) as well as Minerva and SMSQ to consider, not to mention any
number of different hardware platforms (Aurora, Gold Card, Super Gold Card, QXL etc).
If you encounter a problem which you cannot solve using this section of the manual please
contact Memory Lane Computing for assistance.
Common Problems
Ser-USB won’t handshake
The most critical phase of the driver initialisation is to handshake the Ser-USB; to establish
the two way serial communications channel between the QL and the USBWiz module in the
Ser-USB unit.
The initial communication must take place at 9600 baud. If, for some reason, the USBWiz
module is not using 9600 baud then the handshake will fail. This is only likely to happen if
you have previously set a higher baud rate and then rebooted the QL, but not reset the SerUSB.
Note that the 9600 baud initial dialogue poses a real problem for a standard QL without
superHermes because the QL needs two stop bits to be able to receive at 9600 baud and
the USBWiz module only sends one. The Ser-USB driver thus changes baud rate “blind” and
sometimes this process may fail.
Solution: Try rebooting, resetting the Ser-USB and then re-loading the driver. Normally, you
should until after the QL has cleared the screen of the tweed pattern caused by the RAM test
before pressing the Ser-USB's reset button.
Illustration 22: The Ser-USB Reset Button
Ser-USB times out
If at any point during an I/O operation the Ser-USB stops responding then the QL is very
likely to hang. Some sections of the driver are capable of recovering from this critical error,
but this recovery is incomplete and may still lead to a crash.
Page: 74
Ser-USB 2.0 Drivers User Manual
Solution: Wait for at least five minutes before assuming that all is lost. The driver uses very
long timeouts to ensure that all the data is transferred on slow systems, so it might still
recover. If it doesn’t, then the only option is to reset both the QL and the Ser-USB.
If this keeps happening, try using a lower baud rate. 57600 should be reliable with
superHermes but, if not, try dropping it to 38400.
Drive 0 not found
Some SD cards don’t like being in the USBWiz module when it is powered up. If this
happens the driver cannot mount the card.
A symptom of this is that initial handshaking will succeed, but after the message “Loading
and checking the FAT” the message “Drive 0 not found!” is displayed.
This error will also be displayed if the drive has not yet been formatted.
Solution: If the drive is formatted as a QDOS volume and the error occurs, remove the SD
card from the slot, re-insert the SD card, wait 5 seconds, then issue a MOUNT command to
mount the card.
If the drive is not formatted, issue a FORMAT command to get the drive into a state that the
Ser-USB driver can use.
In Use
If you see this error in response to any command when accessing the Ser-USB it means that
one of the lock flags that the I/O Servicer Lock is set. The driver is servicing a trap #2 or trap
#3 request and hasn’t completed. No further traps can be serviced until the I/O Servicer lock
is cleared.
This can happen if more than one process tries to access the SRU device at the same time,
but most likely it’s a bug and should be reported.
Bad or Changed Medium
The USBWiz module has not returned the expected response from a command to mount a
drive for direct access
or
an attempt to read a sector from the drive has failed.
Solution: Restart and try again. If the problem persists, try a different drive. SD cards
(especially older ones) are more prone to this problem than USB hard drives.
Not Found
An attempt to mount a physical drive has failed because there is no drive attached to the
specified port.
or
a critical driver component is missing, which probably means that system memory has been
corrupted and the OS is going to crash in the very near future!
Solutions: Attach the required drive or restart.
Page: 75
Ser-USB 2.0 Drivers User Manual
Uncommon problems
Data corruption
Because the USBWiz module is handling the actual writes to the storage media, data
corruption is rare. If it does happen, and it wasn’t preceded by the Ser-USB hanging up or
QDOS crashing, then it indicates a critical driver-level error that has gone untrapped.
Solution: Contact Memory Lane Computing for assistance. Try to gather as much information
as possible about the circumstances in which the corruption occurred.
IMPORTANT: If the directory appears to be corrupted, do not under any circumstances write
to the drive. Try and copy the data off to another device. Continuing to write to a drive with a
corrupted map WILL result in irretrievable data loss!
DO NOT try to access partitions greater than 1 that were created with an earlier version of
the Partition Manager. Versions prior to 2.0 improperly set the value of the start LBA to a
value scaled in groups. Recreate these partitions again using PM 2.0 or higher.
Application crashes and hangs
Ser-USB is a standard QDOS directory device and so should be compatible with all well
written software. However, because of its single-threaded, non re-entrant nature, there may
be some software which fails when using the Ser-USB. In particular, applications that
perform data-intensive processing or open and close lots of files in succession are unlikely to
work reliably.
Solution: Contact Memory Lane Computing for assistance. Try to gather as much information
as possible about the circumstances in which the crash occurred.
Page: 76
Ser-USB 2.0 Drivers User Manual
Rom Driver Supplement
The Ser-USB Legacy and FAT Drivers are also available on a ROM Card (current versions
of the card are also switchable between Native and FAT drivers). This is extremely useful
when you want to move the Ser-USB between several different machines. However,
although you don’t need a floppy drive to load the driver, you will still need expanded
memory on the QL to run it. This is because of the amount of RAM that is needed to hold the
FAT and buffers (a limitation that also applies to hard disk drivers).
Illustration 23: The Ser-USB ROM Card
Ser-USB Legacy Native Driver ROM
The Native ROM driver will try and connect to the Ser-USB as soon as the QL is started and
will load and run a BOOT file if one is found.
If this is not what you want to happen then you have the option to press any key within 1.5
seconds of the following message appearing on the startup screen:
Press any key in 1.5s to abort load
If you hit a key in time, this message will be displayed:
Load driver with SRU_START command
The QL can then be booted as normal by pressing F1 or F2. If you then wish to load the SerUSB driver at a later time, you must use the SRU_START command.
Page: 77
Ser-USB 2.0 Drivers User Manual
The Ser-USB Legacy Driver ROM startup screen will look something like this:
Illustration 24: Ser-USB Legacy ROM Startup Screen
After the FAT has been checked you will be able to start the QL as normal:
Illustration 25: Ser-USB Legacy ROM loading completed
Pressing F1/F2 at this point will run a BOOT program is one is found on the drive. However,
due to a QDOS limitation, the channels will not be the same as on a normal QL start, and
this may affect the BOOT program. See the section Native ROM Driver Issues for more
details on this problem and how to fix it.
Page: 78
Ser-USB 2.0 Drivers User Manual
SRU_START [LParam]
SRU_START is the command provided to start the Ser-USB native driver if you chose to
abort loading at the startup screen.
Note: This command is NOT present in the Native RAM driver.
LParam is a long integer value consisting of baud rate + port number. If omitted the settings
as configured will be used (normally ser1hr @ 4800 baud).
Examples:
SRU_START 4801 (or SRU_START 4800)
Start the driver using SER1 @ 4800 baud. This is the normal setting for a standard
QL without enhanced serial hardware.
SRU_START 19202
Start the driver using SER2 @ 19200 baud. This requires the presence of a Hermes
or superHermes.
SRU_START 57603
Start the driver using SER3 @ 57600 baud. This requires the presence of a
superHermes.
Ser-USB FAT Driver ROM
The Ser-USB FAT Driver ROM does not try to establish a connection to the Ser-USB when
the QL starts up. Instead, it provides the UWZ_START command.
UWZ_START [LParam]
In all respects this command is identical to the native driver's SRU_START command.
Note: This command is NOT present in the FAT RAM driver.
LParam is a long integer value consisting of baud rate + port number. If omitted the settings
as configured will be used (normally ser1hr @ 4800 baud).
Examples:
UWZ_START 4801 (or UWZ_START 4800)
Start the driver using SER1 @ 4800 baud. This is the normal setting for a standard
QL without enhanced serial hardware.
UWZ_START 19202
Start the driver using SER2 @ 19200 baud. This requires the presence of a Hermes
or superHermes.
UWZ_START 57603
Start the driver using SER3 @ 57600 baud. This requires the presence of a
superHermes.
Page: 79
Ser-USB 2.0 Drivers User Manual
Known Issues
This is a list of the issues that were known at the time of writing.
Native RAM Driver Issues
•
You cannot copy files between Ser-USB drives. (e.g. wcopy sru1_,sru2_).
•
Application programs that attempt to perform trap #2/trap #3 calls with the SerUSB Legacy Driver whilst in supervisor mode will fail.
•
The QPAC Files Thing does not work.
•
WCOPY and its derivatives may fail when copying large numbers of files. This
problem may cause an inexplicable "Not found" error, a repeat of the "Y/N/A/Q?"
prompt or garbled filenames. If it happens, abort and reboot.
•
Partitions that require group sizes larger than 2 degrade performance and have
been shown to cause system crashes on some systems. The reason for these
crashes was not known at the time of writing. Test large partitions thoroughly on
your system before using them for important data. Better still, stick to partitions of
5 to 10 MB and use more of them instead of one large partition.
FAT Driver Issues
•
UZ_EX and UZ_EW cannot be used to execute programs that make assumptions
about the ordering and relative positions of the header, code and data areas.
Instead load the supplied uzx_bin extension which implements alternative
commands for starting problem programs.
Page: 80
Ser-USB 2.0 Drivers User Manual
Native ROM Driver Issues
On ROMs other than Minerva, S*BASIC window #1 will appear with the size and position of
the window used to display the copyright message on the startup screen. This is because
the ROM code makes assumptions about channel numbers that don't hold true if a serial
channel was opened to load the Ser-USB driver during QDOS initialisation.
With ROMs other than Minerva, the screen will look like something this after loading the
ROM driver:
Illustration 25: Ser-USB Legacy ROM loading completed
This shows the screen after pressing F1. Pressing F2 will obviously give a different result,
but the problem is the same.
This cannot be fixed in the driver, so the solution is to either to use Toolkit II's WMON
command or similar, which puts the windows in the right position (but leaves the QDOS
channel numbers as they are), or ...
... use the supplied WINS extension. This is a RESPR file that installs commands for quickly
setting all three S*BASIC windows according to one of four pre-defined sets of
positions/sizes. This extension includes the command SRU_WINS which directly
manipulates the QDOS and S*BASIC channel tables, returning things to the way they
normally are after the machine has started up. See the section The WINS Extension for
more details.
Page: 81
Ser-USB 2.0 Drivers User Manual
Changes from the 1.x Drivers
There are too many changes to list them all here, so here are the most important ones:
•
IMPORTANT: The device name has changed from USB to SRU (i.e. USB1_ is
now SRU1_).
•
VERY IMPORTANT: DO NOT try and mount a partition, other than the first one
on a card or disk, with a 1.x driver if you have written to it using a 2.x driver.
Although the formats are identical, the 2.x series of drivers fix a bug in the format
of a field in the partition header, rendering it incompatible with the earlier drivers.
A 1.x driver will probably report that the FAT is invalid if this happens, but it may
not detect the problem, leading to unpredictable data corruption.
•
The driver core is now EDDE 2 with many bug fixes and enhancements. This
renders ALL previous Ser-USB driver extensions and tools inoperable (but
replacements are available).
•
Write As You Go (WAYG) map handling. This removes the irritating delayedaction map flush that brought the system to a halt for long periods of time.
•
The Queue Manager is no longer required (or supported).
•
Tighter IOSS retry integration means that QDOS is handling the retry of serial I/O
operations and not the driver. This improves overall reliability.
•
The ROM driver does not need to load any overlays.
•
The ROM driver allows the QL to boot from a Ser-USB drive.
•
The ROM driver presents an option at the QL startup screen to either
automatically start the driver or to manually start it with the SRU_START
command.
•
Updated S*BASIC procedures and functions.
•
Changes to the way that FORMAT is implemented. In particular, a new command
SRU_FORMAT for the legacy driver.
•
API system replaced by a separate EDDE2 Link Layer Driver.
Page: 82
Ser-USB 2.0 Drivers User Manual
Appendix 1: The Ser-USB ROM Card
Illustration 26: The Ser-USB ROM Card
Background
The Ser-USB ROM Card is a small circuit board that plugs into the ROM socket on the back
of the QL. Depending upon the availability of memory chips at the time of production it
contains either a 32Kbyte EPROM or a 64Kbyte OTPROM (One Time Programmable Read
Only Memory).
As new EPROMS are very difficult to source nowadays, the chips used will normally be
recycled from old equipment whereas OTPROMs are always new stock.
Page: 83
Ser-USB 2.0 Drivers User Manual
Instructions for Use
The Ser-USB ROM Card is used just like a QL ROM cartridge. The card should be inserted
into the ROM socket (with the power switched OFF!), with the chips facing upwards.
We tried to keep the size of this card as close to the original dimensions of the common QL
ROM cartridges as possible, whilst still squeezing in new functionality. This means that,
when the card is inserted, about one millimetre along the edge of the EPROM will be in
contact with the lid of the QL, and it may look as if the card has not gone all the way in. This
is normal: please do not try and force the card any further into the socket or you may
damage it. When the card is correctly inserted it looks like this:
Illustration 27: Ser-USB ROM Card correctly inserted
Referring to illustration 26 (The Ser-USB ROM Card), the slide switch to the left of the small
integrated circuit selects which driver you wish to have available. When the switch is moved
to the left, the Ser-USB Native Driver will be available; when moved to the right, the Ser-USB
FAT Driver can be used.
You must not move the switch while the QL is running, or the system will crash. To change
the driver, either switch off the QL, move the switch, then turn the QL back on again, or:
Press and hold the QL's reset button, keep it pressed while you slide the switch to its new
position, then release it. The QL will now boot with the selected driver available, as should
be illustrated by the banner message that appears on the F1/F2 startup screen.
You will notice a small jumper below the slide switch, labelled A15. This is for selecting the
upper 32Kbytes of a 64Kbyte EPROM or OTPROM. With the jumper on the right hand pair of
pins, the lower 32K is selected; moving the jumper to the left hand side will allow the upper
32Kbytes to be selected - in which case the slide switch switches between the upper two
16Kbyte blocks of the ROM's address space. This function is reserved for future expansion
but, obviously, with the right chip, you could use it to have up to four ROM images on the
card, selectable by switch and jumper as needed.
Finally, there are two wire links above the switch, labelled CS and OE. These connectors are
intended to be used with additional hardware for software-controlled ROM paging and are
provided only for future product developments. If you cut these jumpers the card will stop
working!
Please refer to the instructions earlier in this user guide for instructions to load and use the
driver.
Page: 84
Ser-USB 2.0 Drivers User Manual
The Expansion Connector
At the opposite end to the QL side of the card are two rows of plated through connector
holes; these are designed to take a 34 pin box header. All of the QL's ROM socket lines are
brought out to this connector using the same pin configuration as the Aurora card's ROM
connector:
+--------+--------+
| 1 N/C | 2 N/C |
+--------+--------+
| 3 N/C | 4 +5V |
+--------+--------+
| 5 A12 | 6 A14 |
+--------+--------+
| 7
A7 | 8 A13 |
+--------+--------+
| 9
A6 | 10 A8 |
+--------+--------+
| 11 A5 | 12 A9 |
+--------+--------+
| 13 N/C | 14 N/C |
+--------+--------+
| 15 A4 | 16 A11 |
+--------+--------+
| 17 A3 | 18 ROE |
+--------+--------+
| 19 A2 | 20 A10 |
+--------+--------+
| 21 A1 | 22 A15 |
+--------+--------+
| 23 A0 | 24 D7 |
+--------+--------+
| 25 D0 | 26 D6 |
+--------+--------+
| 27 D1 | 28 D5 |
+--------+--------+
| 29 D2 | 30 D4 |
+--------+--------+
| 31 GND | 32 D3 |
+--------+--------+
| 33 N/C | 34 N/C |
+--------+--------+
Note: Pin 1 of this connector is the hole with a square pad.
Page: 85
Ser-USB 2.0 Drivers User Manual
Notes and Other Information
When used with standard QL serial port hardware and/or an unexpanded QL we recommend
that you use the FAT driver. The FAT Driver uses less memory and performs all filing system
management on the USBWiz device.
Due to the design of the QL hardware, if the ROM Card is plugged into an unexpanded QL
the ROM banner message may be repeated twice on the QL’s initial F1/F2 screen. This is
due to incomplete address decoding in the QL design itself. The problem is fixed if you have
a Minerva ROM. It could be fixed in software within the Ser-USB ROM but this would require
extra space which we would prefer to use for the driver itself.
Page: 86
Ser-USB 2.0 Drivers User Manual
Acknowledgements
The EDDE 2 core used by the Ser-USB Native Driver was originally derived from v2.02 of
the QUBIDE hard disk driver written by Andrew Reed and Phil Borman. Without this driver to
use as a base, Ser-USB would not have happened.
As this QUBIDE version was released under the GPL, the core code for the EDDE 2 driver is
also covered by the terms of the GPL and will be made open source as soon as beta testing
is completed successfully.
The latest source can normally be obtained from the same place that holds this manual, or it
can be found at the Memory Lane Computing web site: www.memorylanecomputing.com.
Source code for Ser-USB Destiny, Legacy and FAT Drivers and their associated add-ons
and utilities are the intellectual property of Memory Lane Computing Ltd and are not covered
by the GPL.
Page: 87
Ser-USB 2.0 Drivers User Manual
COPYRIGHT NOTICE
With the exceptions stated in the preceding section, Acknowledgements (namely, the EDDE
2 Core), the Ser-USB Drivers and their associated add-ons and utilities are the intellectual
property of Memory Lane Computing Ltd.
They are intended to be used with a Ser-USB unit, but permission is hereby granted to use a
copy of this software with any other hardware that connects a USBWiz to the QL, provided
that full acknowledgement is given and that the software is not modified in any way (other
than by changing the user configurable settings in the embedded configuration blocks).
This manual is copyright Memory Lane Computing Ltd.
It may only be distributed to third parties (with a copy of the software) for the purposes of
using a Ser-USB or USBWiz module with a Sinclair QL or compatible hardware or emulator.
It may not be modified in any way, nor incorporated, in whole or in part, in any other
publication, whether printed or electronic, without the permission of Memory Lane Computing
Ltd.
No charge may be made for distributing copies of this manual or the software, other than
reasonable costs of duplication and postage.
Page: 88
Ser-USB 2.0 Drivers User Manual
DISCLAIMER
Whilst Memory Lane Computing believe this manual to be accurate and the software to be
free from significant errors, no responsibility is accepted for the loss of data or consequent
damage of any kind resulting from the use of this product.
That said, we will use our best endeavours to correct any technical faults that are identified
and to issue updated software releases where this is required and feasible.
How to contact us:
e-mail: [email protected]
web: http://www.memorylanecomputing.com
phone: +44 (0) 1872 321020
Page: 89