1
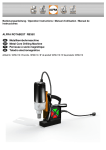
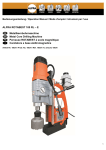
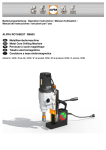
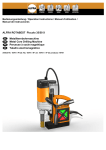
Service Manual
D21580K
Repair instructions for the diamond core drill D21580K
I. General
DEWALT diamond core drills should only be repaired by authorized service centres. The
following explanations are in accordance with the spare parts list and service drawing for the
D21580K
.
Before attempting service carry out the following,
1) Check condition of cord and plug.
2) Remove Tool bit / Accessory.
3) Carry out an Earth continuity, Earth leakage and Insulation test (flash test) where
appropriate.
4) Never repair a product whilst it is plugged into a power supply
5) Where fitted, ensure side handles function correctly.
II. Dismantling the diamond core drill
1. Motor Section
o Ensure the unit is disconnected from the mains supply. Remove the additional handle (61).
Place the drill in the correct service fixture in a vertical position with motor at the top, to
avoid the run out of gear oil! Remove the four screws 4,55x60 (24) and pull the motor from
the gearbox. Pour the gear oil into a proper container and dispose of it if necessary using
the correct procedures for the disposal of waste oil. Dismantling of the motor can now
start.
o Please Note: If the motor section is not required to be dismantled for a repair then care
should be taken as the gear bearing shield (7) will also pull out, bringing the armature with
it, this will then require the brush covers to be removed to refit the brushes.
o Release the five screws 4,0x25 (50) which fasten the pair of handle halves (23) together.
Remove the two screws 4,55x32 (51) which fix the upper half of handle to the motor
housing (10). After taking off the upper half, switch (5), anti interference capacitor, line cord
(3) and cable grommet (22) can be dismantled.
o Disconnect the printed circuit board (4) from switch (5). Remove the lower half of the
handle. Now exchange of the printed circuit board (4) is possible. To do this disconnect the
printed circuit board from stator (2) and release the two screws 4,0x12 (12).
o Put aside the brush holder covers (13) and take out the carbon brushes (14). After that lift
the gear bearing shield (17) and the rotor (1) together out of motor housing.
o Remove the two screws M4x16 (33) and pull out the rotor and the shaft seal (63) from the
gear bearing shield.
o Now the rotor (1) can be checked and exchanged if it is necessary. Take care of the
bearings and the correct position of the blue bearing cap.
o To exchange the motor housing (10) or the field (2) carry out the following. Disconnect the
field (2) from the brush holders (15). Unscrew the brush holders from motor housing and
put them aside. Take the air-guiding ring (11) out of the motor housing and pull out the
field.
1
Service Manual
D21580K
o Note: To remove the field from the fieldcase tap on the front of the fieldcase. When
reassembling tap on the rear.
2. Gearing Section
o Start dismantling the gearbox section by taking out the clutch (complete) (62). The torque
of safety clutch must be set between 14 and 16.5 Nm. A special service tool is used to
determine the torque setting. Do not reuse if the values are outside of this range.
o The 2 speed mode switch can now be removed. Loosen the screw M5x30 (29) and take off
the gear lever (20) press out the switch button (19). Check rubber “O” ring (21) for
damage.
o Now pull out the gear block (31) and remove the circlip 19/1 (30) from spindle.
o Using the correct Service tooling press out the spindle (9) with ball bearing 6004 2RS (25).
Now remove the ball bearing 6904 2RS (28) and the shaft seal (26).
o Removal of the bearings (27, 38 and 39) in the gearbox housing (18) and gear bearing
shield (17) is done by warming of these metal parts.
III. Assembling the diamond core drill
1. Motor Section
o Assembly starts with the motor housing (10). Press in the field (2) without trapping any
wires and ensuring that they are routed correctly. Screw on the brush holders (15).
Connect the wires from field (2) and the brushes (14) to the brush holders (15).
o Insert the air-guiding ring (11). The notches on the ring must fit with the rips of motor
housing.
o Using the correct service tooling press the shaft seal (63) (grease lips liberally!) into the
gear bearing shield (17), then press in the rotor (complete) (1). The rotor has to be locked
using the two screws M4x16 (32) with toothed locked washer (33), disc (34) and round ring
(35). These have to be set in with silicone glue for sealing.
o Press the armature SA into the motor housing exactly. The rotor should be free and move
easily. No wires must touch the rotor! Replace the brushes (14) and brush holder covers
(13).
o Assemble the printed circuit board (4) to the motor housing. Check the back side of the
PCB for full covering with black protection layer. Connect the printed circuit board with field
and PTC-resistor.
o Replace the lower half of the handle (23) replace the switch (5) with line cord (3) and cable
grommet (22). Finish all electrical connections – switch/printed circuit board, switch/line
cord (see Wiring Diagram). Ensure that all wires are routed correctly and there is no
chance of trapping when the top half of the handle is secured.
o Complete the assembly of motor by securing the upper half of the handle. Push the LED
and holder into the hole of the handle.
2
Service Manual
D21580K
2. Gearing Section
o Start with gearbox housing (18).
o Apply a liberal amount of grease on the shaft seal (26), insert it into the gearbox housing
using the correct service tooling. Press the ball bearing 6004 2RS (25) onto the spindle (9)
and press this SA into the gearbox. Press ball bearing 6904 2RS (28) onto the spindle
inside the gearbox housing. Check that the spindle has not been pressed back out slightly.
Replace the cir clip (30) over the spindle and using the service tooling press down until the
clip snaps into place.
o Replace the switch button (19) in the gearbox housing. Put the gear block (31) on the
spindle and mount the gear lever (20) by securing with the cap screw M5x30 (29). Use
loctite on the screw. Test smooth running of the switch button and the actuating of the gear
block.
o Ensure the clutch (62) is correct! Only use clutches matching the required torque setting
values! Furthermore the loose clutch parts have to slide smooth on the clutch shaft to
guarantee the full functionality of the safety clutch. After checking the clutch insert it into
the needle bearing in the gearbox and refill the gearbox housing with the correct gear oil
(180ml).
o Check and replace if necessary the “O” ring (36) on the gear bearing shield (17) and join
the gearbox to the motor using four screws 4,55x60 (24). Ensure that the spindles line up
with the bearings in the gear bearing shield (17) Replace the side handle (61).
IV. Checklist for testing the machine
o
o
o
o
o
Check for correct assembly!
Check the functionality of the machine (first and second gear)!
Test speed-adjustment in different switch positions!
Test overload cut-off!
Check isolation of machine with high voltage (1500V)!
V. Grease and Glue
Product:
Where used:
1. Gearbox Oil
Lubcon Turmogearoil PE 150
180ml inside gearbox housing (18)
2. Sealing Glue
Silicone Omnivisc 1002
Between screw M4x16 (32)
and gear bearing shield (17)
Fix LED in LED-holder (52)
3. Screw Glue
Loctite
Screws: (29)
Side handle (60) to adaptor (59)
4. Seal Grease
Rhenus Norlith LZP 2
Inside shaft seals (26), (63)
3