1
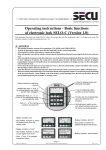
INTERNET BANKING User Manual Version 2.3 September 2010 IT Division E-BANKING CONTENTS 1. INITIAL REGISTRATION ........................................................................................4 1.1 2. 3. Logging on .....................................................................................................4 HOME ...................................................................................................................7 2.1 Fast buttons ..................................................................................................7 2.2 System functions ...........................................................................................8 2.3 Change username ..........................................................................................8 2.4 Change Password ...........................................................................................9 2.5 Edit the personal information ........................................................................9 2.6 How to request a certificate ..........................................................................10 2.7 Work with a certificate .................................................................................12 2.7.1 How to export the certificate on movable carrier ....................................12 2.7.2 How to import a certificate from movable carrier into a computer .........16 2.7.3 How to delete the certificate ..................................................................22 ACCOUNTS .........................................................................................................23 3.1 Information in menu ACCOUNTS .................................................................23 3.1.1 Checking the balance ............................................................................23 3.1.2 Information about movements in accounts ...........................................25 3.1.3 Checking the currency balance .............................................................27 3.2 System Tasks in menu ACCOUNTS ..............................................................29 3.2.1 4. Change of account name .......................................................................29 ORDERS .............................................................................................................30 4.1 Order a transfer/payment ............................................................................33 4.1.1 Create a payment template ...................................................................36 4.1.2 Create a Regular payment .....................................................................37 4.1.3 Save the beneficiary ..............................................................................37 4.1.4 Visible for all .........................................................................................38 4.2 Signing a transfer ........................................................................................39 4.3 Deleting a transfer .......................................................................................43 USER MANUAL 2 E-BANKING 5. 6. 4.4 Cash out ......................................................................................................43 4.5 Order <batch payment> and <salary payment> ............................................45 4.5.1 Batch payment......................................................................................45 4.5.2 Payment of salaries ...............................................................................46 4.6 Foreign payment ..........................................................................................48 4.7 Information in menu Orders ........................................................................56 4.8 System functions in menu Orders ................................................................59 4.8.1 Function – BENEFICIARIES ..................................................................60 4.8.2 Function – REGULAR PAYMENTS .........................................................60 4.8.3 Function - Templates ............................................................................61 CURRENCY.........................................................................................................62 5.1 Information in menu CURRENCY .................................................................62 5.2 System function in menu CURRENCY ..........................................................63 CARDS................................................................................................................64 6.1 7. Information in menu Cards ..........................................................................65 Loans ..................................................................................................................66 USER MANUAL 3 E-BANKING 1. INITIAL REGISTRATION 1.1 Logging on Enter Postbank’s site http://www.postbank.bg/ with “Internet Explorer Browser“: You can log in by entering the username and password from the Scratch Card in the field e- Postbank login. You can also click on . A new page appears: USER MANUAL 4 E-BANKING Click on Entrance on the right side of the page. A new window appears where you have to enter the data from the Scratch Card: Figure 1 Enter your username in . Enter your password in . Confirm by clicking on . After entering your user name and password, you will receive an activation key vie e-mail (specified by you in the registration form). In order to access the system, you must enter your user name, password and the received activation key (only for the initial log-in into the system). The main e-banking page appears: USER MANUAL 5 E-BANKING Figure 2 The main screen – Figure 2, allows access to the main menus in the system: [Home] – information about accounts’ balance and exchange rates; visualized messages for the user; [Accounts] – information for subscriber’s accounts; [Orders] – checks and transfer instructions; [Currency] – information for currency exchange rates; [Sessions] – information about last visits to e-banking; [Cards] – information for bank cards and limits; [Loans] – information about customer loans; Each of the above menus provides: System functions – in the left section of each menu’s screen. Fast buttons - , providing quick access to needed information. USER MANUAL 6 E-BANKING 2. HOME The [HOME] menu shows information about the balance of your accounts, Postbank’s currency and messages from the system administrators. 2.1 Fast buttons The “Fast buttons” currency: Figure 2allow quick access to relevant information – accounts and foreign By clicking on there appears a screen showing subscriber’s accounts and balances: -allows for a review on the movements in the accounts by transferring you to the main screen of the ACCOUNTS menu. By clicking on there appears a screen showing the exchange rates of major currencies: - provides additional information regarding exchange rates. Allows getting information for a specific date by transferring you to the main screen of the USER MANUAL 7 E-BANKING Currency menu. 2.2 System functions The system offers the following functions: System functions: refer to 2.3 Change user name refer to 2.4 Change password refer to 2.5 Edit the personal information refer to 2.6 Certificates Postbank recommends you to change you initial user name and password in the very beginning! The system offers the following functions: 2.3 Change username On the main screen – Figure 2, in [System Tasks], activate [Change user name] Screen appears: In New User Name you can enter a suitable for you username Click on Screen appears: It is recommended to use Latin characters in your username (in case you log in from a computer without Cyrillic characters). USER MANUAL 8 E-BANKING 2.4 Change Password On the main screen – Figure 2, in [System Tasks], activate [Change password]: Please enter the old and the new password. - press OK to activate the changes. Your new password should be at least 8 symbols and must contain capital letters, small letters and numbers (symbols). After having changed your username and password you can proceed and request a certificate. 2.5 Edit the personal information Click on [Edit the personal information]: After you make the changes in your personal data click on OK. A message appears: USER MANUAL 9 E-BANKING 2.6 How to request a certificate Go to Certificates in the main menu: Select the browser which you will be using for the transfers and on which the certificate will be installed and click on the button below to request it. A window pops-up asking for confirmation: Confirm with . There appears a message: Your certificate will be activated on the following business day at the latest. Until that time you will not be able to make orders. USER MANUAL 10 E-BANKING After your certificate is activated in the system you will have to install it on your computer: 1. For this purpose go to Certificates. 2. Mark the browser you are using and click on Install: 3. There appears a system message asking for confirmation to install the certificate on the computer: Confirm with . USER MANUAL 11 E-BANKING You must restart the browser in order the changes to take effect. 2.7 Work with a certificate You may have to make payments when you are on vacation, on a business trip or on other occasions when you are far away from your PC. To do this you have to carry your certificate with you. 2.7.1 How to export the certificate on movable carrier To view your certificate you have to go to Tools / Internet Options (in Internet Explorer): A window appears. Click on the Content menu and then on Certificates: USER MANUAL 12 E-BANKING All installed certificates appear on the screen. Mark the certificate, which you want to store/save on a movable carrier and click on Export: Click on and mark the fields as in the following screens: USER MANUAL 13 E-BANKING Click on in order to continue. The next screen requires entering a password in order to enable strong protection for your certificate. It is recommended the password to be at least 6 symbols (Latin characters and numbers). Click on saved: . A screen appears asking where and under what name the certificate will be USER MANUAL 14 E-BANKING Click on . You have to select the respective disc device in the field Save in. Next write down the name of the certificate in the field File name: Click on . The path and filename of the certificate is shown in the next window: USER MANUAL 15 E-BANKING Click on in order to continue. The following screen gives you information about the export of the certificate. Confirm by pressing Finish. There appears a message informing you that the certificate has been successfully saved: It is important that you read the section about saving certificates on movable carriers. If you delete your certificate by mistake you will have to apply for another certificate in the branch of the bank. 2.7.2 How to import a certificate from movable carrier into a computer USER MANUAL 16 E-BANKING Go to Tools>Internet Options>Content>Certificates. All installed certificates appear on the screen. To add a certificate from a movable carrier click on Import: The following screen appears: Click on . Specify the path to your certificate by clicking on USER MANUAL : 17 E-BANKING In the screen that appears specify the path to the device from which you will import your certificate: Mark the certificate and click on its name: . The system shows the path to your certificate and USER MANUAL 18 E-BANKING Continue by pressing . Since you will not be working from your PC you have to undertake some security measures. The next screen allows you to enter the certificate’s password. Please activate the first checkbox below the Password as indicated on the screen below: Click on . The next screen shows where your certificate can be stored. The first option is marked by default. Do not change it in order the certificate to be automatically saved in its standard place. USER MANUAL 19 E-BANKING Continue by clicking on certificate. Confirm by clicking on . The screen that appears contains basic information about your . The next screen shows that medium level of protection has been installed automatically. It is advisable that you change it to high by clicking on . The screen shows that you can change the level of protection of your certificate. The system automatically offers Medium level: USER MANUAL 20 E-BANKING Mark the first option – High – level of protection as shown on the next screen and continue by clicking on . The screen that appears requires the following information: Password for: the name of the file, under which your certificate has been stored/saved. Password: password of the certificate. Confirm: re-enter the password. It is recommended the password to contain at least 6 symbols (Latin characters and figures): Click on . USER MANUAL 21 E-BANKING In the following screen confirm by clicking on . The message that appears shows that your certificate has been transferred successfully. Click on OK: Your certificate appears in the respective window: USER MANUAL 22 E-BANKING 2.7.3 How to delete the certificate After finishing the transfer from a PC different from yours you have to delete your certificate. You can delete your certificate by entering Tools > Internet Options > Content > Certificates. All installed certificates appear in the following screen: Mark your certificate as shown on the screen above and click on the appearing message wants confirmation to delete the certificate. Confirm by button. The . Your certificate is no longer available in the certificates screen. USER MANUAL 23 E-BANKING 3. ACCOUNTS Menu [Accounts] provides information for your accounts – balance, movements, currency balance and direct debit payments: The main information regarding the accounts of the subscriber is visualized in the center of the screen. The information is sorted in the following lines: Ist line: Name of account – in the left part of the screen (according to the standard this is a 10- digit number of an account – depends on the settings in Accounts menu –> Rename account); Type (Deposit, Current, etc.); Currency (BGN, EUR, USD и др.); Status (active); ІІnd line: Balance – current balance; Availability –the difference between the balance and the blocked amount of money; Blocked – the amount of blocked money (minimal balance, money ordered as currency transfers, etc.); Date – current date of accounting. If you click on the name of the account the system provides additional information. 3.1 Information in menu ACCOUNTS 3.1.1 Checking the balance The system generates information about the balance of a certain account for a certain date or period. USER MANUAL 24 E-BANKING Mark the desired account Click on the fast button . The system provides three options: Current State – information about the current balance. If the information is generated on a holiday the system will provide information about the latest business day; You can export the information in (Error! Reference source not found.). by clicking on one of the icons: Fixed date information – information about the state of the account for a fixed date; USER MANUAL 25 E-BANKING Click on the date in blue and mark the desired date on the calendar that will open. - previous year - previous month - next month - next year Click on information. in order to generate the Information for a period of time – generates information for a desired period of time. Mark “Period” as shown on the screen. Select “from-to” as indicated above. Click on information. in order to generate the 3.1.2 Information about movements in accounts Generate information about movements of a given account for a date or period. The information covers all movements in the account such as: received transfers, deposits and withdrawals, payments ordered at the bank or via the Internet Banking.: Mark the desired account (Error! Reference source not found.). Click on fast button to open a screen and enter the parameters of the desired information. The system offers three options: USER MANUAL 26 Information for a particular date – gives information for the movements in a given account as at the particular date; Information for a period of time – provides generation of information for a particular period of time; Information for the latest “Х” movements – the system automatically selects the last 10 movements but you can change the number according to your own choice. The above information can be requested in greater detail. Type of operation – the system generates information about all operations by default ( ). You can select the particular type of operation in the Type field: Beneficiary – key in the name of the company/person from whom you expect incomings; Sum of operation – you can look for an operation of a particular amount of money: Details Figure 3 – provides basic information for each payment; Figure 4 – provides additional information for each payment. Version 2.3 September 2010 IT Division E-BANKING Figure 3 Figure 4 3.1.3 Checking the currency balance The currency balance can be equaled to one or several currencies. Click on fast button (Error! Reference source not found.) to open a screen and enter the parameters of the information. The system offers the following options: Select a date: Select a currency – by and buttons you can find and select the desired currency; enter it in the right part of the screen by clicking on : USER MANUAL 28 E-BANKING - deletes some of the selected currencies (GBP/EUR). - generates the information. USER MANUAL 29 E-BANKING 3.2 System Tasks in menu ACCOUNTS Figure 5 3.2.1 Change of account name The system offers the function “Change of account name” on the main screen in the ACCOUNT menu.. The name of the account is written in blue. This is the 10-digit number and the currency type. For your convenience you can save the account under a textual name. The account number exists after the textual name: Click on function to open the following screen: Figure 6 USER MANUAL 30 E-BANKING Click on in the line of the desired account. 1) The following screen appears: 2) Key in the new name in the Short name field 3) Reconfirm The account appears in the list of accounts under a new name. 4. ORDERS Transfers from your accounts can be ordered through ORDERS menu. The system provides the necessary information regarding payments initiated/made. Figure 7 Basic information for the transfers is visualized in the center of the screen and is shown in the following fields: 1st line: Number of transfer (in blue); Type of transfer (direct transfer, collection, transfer for the budget, exchange of currency, etc.); USER MANUAL 31 E-BANKING Amount of transfer; Date and time – of transfer initiation; Status: Collecting signatures – new transfer; Successfully sent – processed by the bank system; Rejected – has not been processed by the bank system; Expired – has not been signed and sent to the bank system within the determined period of time. Waiting for execution – the order is waithing to be executed by the bank’s system; Unable to be sent – the order was not sent to the bank’s system for execution due to some technical problems; Locked (in the queue) – the order is being executed at the moment. Please, check the status later; Rejected by the client/user – the order was rejected by the client. There will be no change in the balance of the account. Icons: Create similar orders Edit an order Delete an order Sign an order Send an order ІІnd line: Number of account and name of payer; Number of account and name of receiver; A screen with documents for the particular payment appears if you click on the number of the transfer. USER MANUAL 32 E-BANKING For your convenience there is an option for quick reviewing of the transfers classified in the following way: All Pending – shows all transfers waiting to be signed and sent; USER MANUAL 33 E-BANKING Today – shows all transfers made during the day (Figure 8); Not sent only – shows all unsent transfers. Figure 8 4.1 Order a transfer/payment Click on fast button in menu Orders to open a screen and choose the type of payment. The system offers the following options: Credit payment – order a standard transfer; To budget – order a transfer to a budget account; Direct Debit – Batch payment – order a group of similar in form payments initiated at the same time; Salary payment – batch payment of salaries; Currency exchange Foreign payment – order a foreign currency transfer; Foreign Payment in the Bank – order a foreign currency transfer within the bank; Cash out – order a cash withdrawal request. Budget transfer – order a transfer from a budget account; Click on Credit payment to open a screen and fill in the parameters of the transfer: USER MANUAL 34 E-BANKING Figure 9 Button in the Payer field allows you to select the account from which the payment will be made. After selecting it the system enters the data below automatically. Button in the Payee field allows you to select the account to which the payment will be made. The system automatically offers all accounts that are subscribed for the INTERNET BANKING and all additionally entered Beneficiaries. After selectiong the account the system automatically enters the data below. If you wish to make a payment to a new account, you have to enter the data manually. Fill in the fields Amount and Details. If you want the order to be sent by RINGS, you should choose RINGS in the field Payment system; - indicates the date on which the transfer will be made. USER MANUAL 35 E-BANKING ATTENTION! In the event that the payment is not signed and sent on the indicated date of execution, the transfer will be made on the date of its signing and sending to the bank system but only within the indicated period of validity. - The date till which the initiated payment will be maintained in the system as queued for signing and sending. - this button shows the payment according to the Bank Unified Standard: Figure 10 USER MANUAL 36 E-BANKING Section Save as - Figure 11 – offers the following options: Create a template; Create a regular payment; Save the beneficiary; Visible for all. Figure 11 4.1.1 Create a payment template This function allows you to save a document as a template in order to use it in future. After filling in the payment order: Mark the template field - Figure 11 Enter a name of the template Save by clicking on . . USER MANUAL 37 E-BANKING 4.1.2 Create a Regular payment The system gives you the opportunity to create a payment that will be automatically generated and executed on an exact date repeatedly. Mark the field date for execution. The system offers two options: Select a day for the regular payments. - Figure 11 and enter the Select a month for the regular payments. - shows how many days the payment will be kept in the system if the generated regular payment is not signed on time (the indicated date of execution). - “preperiod” indicates how many days before the date of execution the regular payment will be generated in the system. DO NOT FORGET! Mark the field. If you fail to mark it the regular payment will be available in the regular payments list but it will not be activated on the indicated date. Save by . 4.1.3 Save the beneficiary This function allows you to save the entered data about the beneficiaries. Mark the field automatically - Figure 11 and save by pessing in the transfer initiation USER MANUAL . Later on the data can be entered screen. Click on in the 38 E-BANKING field to open a list of saved Beneficiaries. Mark the desired beneficiary. 4.1.4 Visible for all By activating this function all the saved beneficiaries will be visible for all of the users of a given subscriber. If activated - a payment will be generated after clicking on Deactivate . if you only want to enter a Template/Regular payment. In order to make another type of payment (transfer to the budget, collection, currency exchange, currency transfer) please follow the instructions above. USER MANUAL 39 E-BANKING 4.2 Signing a transfer After creating a payment/transfer you have to sign it and send it to the bank system. Enter menu Orders and view all of the transfers waiting to be signed and sent. Figure 12 You can view the following document by clicking on the transfer number - USER MANUAL : 40 E-BANKING If you notice some mistake in the documents there exist two options: Make a correction – Edit icon ; Cancel the payment – Cancel icon . Sign and send a transfer: Click on icons - and to sign and send; USER MANUAL 41 E-BANKING The system message that appears shows all of the certificates installed on the PC. Each registration uses a unique certificate. Choose the respective certificate, according the registration you are using at the moment: The system message that appears requires confirmation for the creation of your electronic signature for the signing of the transfer. Confirm with . If you would like to avoid seeing the second message, you can mark the respective field as shown on the screen below. USER MANUAL 42 E-BANKING When you sign the transfer in field State appears the following message: When you click on the is not signed the screen is empty: a message with your digital signature appears. When a transfer Click on to send the transfer. A message in the field State appears: USER MANUAL 43 E-BANKING 4.3 Deleting a transfer The transfer can be deleted or rejected by the icon - reject. This is possible under “Collection of signatures” status. The icon disappears after the “successful sending” of the transfer: 4.4 Cash out Click on Cash Out in menu Orders: Choose Payer from the drop down menu - USER MANUAL ; 44 E-BANKING It is not obligatory to fill in the field Payee, but if you want you can select a person who will draw out the money; Fin. Center – choose the financial center where the cash out will be performed Amount – enter the amount of money; Finally, click on Submit. USER MANUAL 45 E-BANKING 4.5 Order <batch payment> and <salary payment> 4.5.1 Batch payment Batch payment is an order for a group of similar in form payments initiated at one and the same time that are directed from one client’s account to third persons’ accounts. In order to make a batch payment you have to use a file with a format determined by BPB. You can see more information about batch payment format on the following address: http://www.postbank.bg/TransformationService.asmx/XHTML?strXML=/enUS/customer_services/BBMasPayments/ Click on to open the following screen: Figure 13 Click on to open a screen indicating which file will be used for the batch payment. Mark the desired file and click . - The system enters the date and time the batch payment was made. system. - select a date on which the request will be forwarded to the bank - determine the date until which the batch payment will be available in the INTERNET BANKING system if the request is not signed and sent before the date of execution. USER MANUAL 46 E-BANKING Click on - to view the following message: Confirm by . In case the batch payment has status rejected, click on the status or on the number of the payment. The reason for the rejected appears in the BIS-log field of the opened screen. 4.5.2 Payment of salaries In its essence the payment of salaries is a batch payment and is also an order for a group of similar in form payments initiated at the same time that are directed from/to one client’s account to/from third persons’ accounts. For ordering of a batch payment you have to use a file with a format determined by BPB. Click on – a batch payment screen is opened but with additional fields for declaration that the social security contributions have been paid: USER MANUAL 47 E-BANKING Click on to open a screen in which you have to indicate which file will be used for the salaries payment (batch payment). Mark the desired file and click on . Mark the declaration and fill in the time period Fill in the fields from. 1 to 4: If you fail to fill in the declaration the system sends a message: USER MANUAL 48 E-BANKING 4.6 Foreign payment Select in menu Orders. <Foreign payment> screen is opened: The upper part of the screen is divided into two fields – Payer and Payee: Payer – the left part of the screen. The information about the payer is entered there. If the payer is a foreigner a “Permanent Residence Declaration” appears in the lower part of the screen. It is obligatory to fill in this declaration. It offers three possible options. Choose the right one and mark it: 1. With Bulgarian citizenship and undetermined period of stay; 2. Without Bulgarian citizenship but with undetermined period of stay; USER MANUAL 49 E-BANKING 3. Without Bulgarian citizenship and without rights to stay for undetermined period of time. Payee – the right field of the screen. The data for the beneficiary is entered there. Choose whether the payee is a local or a foreigner. Enter precise and correct data about the beneficiary, the bank of the payee and the identification code of the bank such as Swift or clearing number. The account number should be entered without space between the symbols. If the data is incorrect and that prevents the sending of the transfer, it will be invalidated by an employee of the bank. Enter the amount after entering the data. If the amount exceeds BGN 100 000 (in the respective foreign currency) a screen for entering the data from BNB statistics appears in the lower part of the screen. If the chosen sum exceeds BGN 25 000 (in the respective foreign currency), the Bank might require additional documents from the client in order to confirm the transfer, according to the procedure for processing foreign payments. You are requested to enter the following information in the middle of the screen: Reasons for the foreign payment Clearing number – this is the identification number of the bank in the payment system of the country of the beneficiary/payee. Such payment systems are FW, CHIPS, Sort Code, BLZ I, etc. The “Clearing number” field is obligatory only when the payment’s currency is USER MANUAL 50 E-BANKING USD and it is designated to the USA. The clearing number always starts with a [/]. For example the clearing number for USA might look like this: /FW322271627 (/FW followed by a nine-digit number), for Germany: /BL85050200, for UK: /SC400530, etc. Who will cover the expenses and transfer’s value date; Type of the SWIFT message - select from the list: The ordering customer of a foreign currency transfer may choose to use one of the following two options of SWIFT messages: 1. MT 103 – this is the standard message which is used when sending a foreign currency transfer. It contains a notification to the bank of the beneficiary for ordered transfer. The advantage of this option is that the expenses which the ordering party has to pay are known in advance. 2. MT 103 + MT 202 – with this combination of messages MT 103 is sent directly to the beneficiary’s bank and MT 202 – to the correspondent bank. MT 103 contains a notification to the bank of the beneficiary for an ordered transfer, i.e. right after its receipt, the bank of the beneficiary can inform the beneficiary of the transfer or directly credit his/her account. MT 202 contains information for payment between bank institutions . The advantages of the MT 103 + MT 202 option are: The transfer is executed faster, i.e. the information for the transfer is immediately received by the beneficiary’s bank. According to the policy of the beneficiary’s bank, the beneficiary account can be immediately credited with the amount of the transfer . The disadvantages of the MT 103 + MT 202 option are: The information for the commissions of the bank of the beneficiary for received foreign currency transfer is not known in advance. In case they are higher than the usual ones and the transfer is with charges of type OUR, the ordering customer shall have to additionally pay the difference up to the commission of the bank of the beneficiary . For using this option, the customer pays an additional commission according to the Tariff of the Bank. The usage of MT 103 + MT 202 message combination is recommended in case of ordered foreign currency transfers to an account with another Bulgarian bank . USER MANUAL 51 E-BANKING Part of the data in the statistic form is entered automatically by the system. You have to enter data in the blank fields. If you fail to fill in all blank fields the system will not allow signing and confirmation of the transfer. Messages appear: Data for BNB statistics: 1. Data for the Payer – In the “Type” field choose one of the options from the menu: 2. Payee country – Enter the respective country of the payee. If the payee is a local party, the system automatically selects “Bulgaria” and the selection cannot be changed. For another country press the button on the right: Select the country from the list, mark it and click on the “Confirm” button. USER MANUAL 52 E-BANKING 3. Operation code – use the arrow to open a list and select the appropriate option, which corresponds to the reason for the foreign payment according to the BNB nomenclature. USER MANUAL 53 E-BANKING 4. Details – as you will see, when the mouse cursor is positioned on the “Details” field, a text message appears to the right. It indicates how the filed should be filled in – follow the instructions when entering the respective information. 5. BNB number – for particular cases (e.g. financial credit between local and foreign person abroad, etc.) a number received from BNB upon declaration of the deal has to be entered. After entering data in all fields, click on in order to open the filled in statistics form: USER MANUAL 54 E-BANKING After entering all data you can view the ready payment document by clicking on : The further processing of the foreign transfer (confirmation, signing, etc.) is analogous to the processing of the direct transfer – i. 4.2. After the successful signing and confirmation of the USER MANUAL 55 E-BANKING foreign transfer, you can track its status from the “Orders” menu, by clicking on . A new window is opened – there you can set the parameters of a report according to the payment you are looking for. Press generate a report. Marking to will generate a report with all payments for a given period of time regardless of their status. You can view the foreign payment as shown: For details about its status and to see the whole payment order, click on the number of the payment in the left part of the screen. In the lower part of the screen you can see the document registration number and the status of the request. The possible statuses at this stage are: Currency availability – to be booked; Wait execution – to be confirmed by an employee in the branch; USER MANUAL 56 E-BANKING Ended – the payment is booked and the SWIFT message is sent ; Canceled – rejected by an employee of the Bank – the respective status can be seen in the lower part of the screen under the “Status” field. The reason for the rejection of the transfer is mentioned right underneath. 4.7 Information in menu Orders Predefined – credit payments to predefined payees. By clicking on Predefined there appear the following options: Select a recipient and fill in the details: GSM – Mtel and Globul: Credit Card Repayment – VISA, AMEX and EuroLine: USER MANUAL 57 E-BANKING Oriflame: With these transfers proceed in an analogous manner to other transactions. Show the date of execution, validity and confirmation. The following information can be viewed from the menu Orders, Figure 7 – by clicking on : USER MANUAL 58 E-BANKING Information – ALL TRANSFERS Provides information about all ordered (sent and created) transfers through the system. Information – SENT TRANSFERS Provides information about all sent transfers through the system. Information – CREATED TRANSFERS Provides information about all created transfers through the system.. By default the system generates information about all transfers. The information can be requested in more detail as follows: Order type – information according to order type. Order state – information according to order state; Period of the requested information: Click on the figures to open a screen and select a date. Order – find a transfer by entering the transfer’s number; Name of guarantor – find a transfer by entering the account party’s name; Name of Payee – find a transfer by entering the payee’s name. Click on USER MANUAL . 59 E-BANKING Information – ALL TRANSFERS 4.8 System functions in menu Orders Figure 14 The system offers the following functions in the main screen of TRANSFERS Menu: Beneficiaries Regular payments Templates USER MANUAL 60 E-BANKING 4.8.1 Function – BENEFICIARIES A list of all saved beneficiaries will appear if you click on - Figure 15. By clicking on the name in the beginning of the line the beneficiaries can be viewed and edited. Figure 15 For adding a new beneficiary, click on the fast button. The necessary data can be viewed on the following screen: A screen is opened: Confirm by Save by 4.8.2 Function – REGULAR PAYMENTS A list of all saved regular payments will appear if you click on existing regular payments can be viewed, edited or deleted. USER MANUAL . Thus the 61 If you click in the field on the left side of a transfer, the tick will disappear, which means that the regular payment is not active, i.e. it will not be generated on the determined date. 4.8.3 Function - Templates A list of all saved templates will appear if you click on Reference source not found.. You can view, edit or delete the existing templates: Version 2.3 September 2010 IT Division - Error! E-BANKING 5. CURRENCY Menu Currency provides information about the exchange rates of foreign currencies (BNB fixings, BPB sell and purchase rates). Information about all currencies currently quoted by BPB is visualized in center of the screen. 5.1 Information in menu CURRENCY Click on different currency types: to open a screen providing more detailed information about For a particular date Provides information about the rate of exchange (BNB fixings, BPB sell and purchase rates) for a particular date. For a particular period of time Provides information about the rate of exchange (BNB fixings, BPB sell and purchase rates) for a particular period of time. The above information can also be provided in greater detail as follows: When clicking in the date field, the following screen appears: Currency type – information about a particular type of currency; USER MANUAL 63 E-BANKING Main currencies – information about main types of currencies; All currencies – information about all types of currencies. Please specify the desired date or period. 5.2 System function in menu CURRENCY The system offers the following functions from the main screen in the CURRENCY menu: Currency converter Converts currencies according to the BNB fixed rate. USER MANUAL 64 E-BANKING For date – select a date for the conversion; Select the respective currencies; Amount – enter the amount to be converted; Confirm . The converted amount appears in the field Result. 6. CARDS Menu Cards provides information about your bank cards, their limits (АТМ and POS) and their reissuing. Monthly statements – click on the radio button next to the respective credit card and then click on Monthly statements. Under the cards appears a table with information about the monthly statements for the respective card: USER MANUAL 65 E-BANKING Debt payoffs – by clicking on Debt payoffs you will be automatically transferred to menu Orders – Credit payment. You have to fill in the fields Payer, Credit Card Number and Amount and click on Submit: 6.1 Information in menu Cards Click on the fast button Transactions on the right to open the following screen, where you can enter a date or a period and a limit for the sum. By pressing the Show button you will see the result on the bottom of the page. USER MANUAL 66 7. LOANS From menu [Loans] you can get information about your credit deals. Main information about the loans is displayed. The information is visualized in the following fields: Currency Credit Purpose Balance Available Maturity Interest on Standard Principle Amount Opening Date Version 2.3 September 2010 IT Division E-BANKING By clicking on the loan’s name “889436” appears information about the loan in details: You can check the same information from the corresponding for the loan account. In menu Accounts – click on the respective account: By clicking on the button Installment on the right side of the screen in menu Loans you can get information about the different ways for installment in details: USER MANUAL 68 E-BANKING Mark one of the buttons and click on Show. In the bottom of the screen appears a table with the information: USER MANUAL 69