1
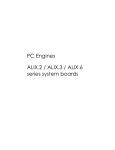
GN-FE605(M) PCI Adapter User’s Guide
GN-FE605(M) 10/100
Fast Ethernet PCI Adapter
User’s Guide
http://www.gigabyte.com.tw
Rev. 1.0 First Edition
i
GN-FE605(M) PCI Adapter User’s Guide
Contents
1.
SAFETY, CARE AND REGULATORY INFORMATION.............................1
2.
INTRODUCTION...............................................................................................5
CONTENTS OF YOUR SHIPMENT ..........................................................................5
GN-FE605(M) FAST ETHERNET PCI ADAPTER INDICATOR DESCRIPTION ..........6
FAST ETHERNET PORT LED INDICATOR DESCRIPTION .........................................6
GN-FE605(M) FAST ETHERNET PCI ADAPTER BLOCK DIAGRAM......................6
3.
ADAPTER SPECIFICATIONS.........................................................................7
4.
KEY FEATURES ................................................................................................8
5.
INSTALLATION PROCEDURES ....................................................................9
5.1
5.2
INSERT THE NETWORKING INTERFACE CARD .............................................9
INSTALL THE NETWORK DRIVER ................................................................9
5.3
SOFTWARE DRIVERS ................................................................................10
6.
TROUBLESHOOTING ................................................................................... 11
7.
APPENDIX........................................................................................................ 11
(A)WAKE-ON-LAN (WOL).............................................................................. 11
(B) DRIVER INSTALLATION FOR GN-FE605 .....................................................12
Windows NT4.0 ........................................................................................12
Windows 2000/XP ....................................................................................17
Windows 95/98/Me...................................................................................20
(C) DRIVER INSTALLATION FOR GN-FE605M..................................................24
Windows NT4.0 ........................................................................................24
Windows 2000/XP ....................................................................................29
Windows 95/98/Me...................................................................................32
8.
ii
LIMITED WARRANTY ..................................................................................36
GN-FE605(M) PCI Adapter User’s Guide
1. Safety, Care and Regulatory Information
Important safety information
Read and follow all instructions marked on the product and in the
documentation before you operate your system. Retain all safety and operating
instructions for future use.
The product should be operated only from the type of power source indicated
on the rating label.
If your computer has a voltage selector switch, make sure that the switch is in
the proper position for your area. The voltage selector switch is set at the
factory to the correct voltage.
The plug-socket combination must be accessible at all times because it serves
as the main disconnecting device.
All product shipped with a three-wire electrical grounding-type plug only fits
into a grounding-type power outlet. This is a safety feature. The equipment
grounding should be in accordance with local and national electrical codes. The
equipment operates safely when it is used in accordance with its marked
electrical ratings and product usage instructions
Do not use this product near water or a heat source.
Set up the product on a stable work surface or so as to ensure stability of the
system.
Openings in the case are provided for ventilation. Do not block or cover these
openings. Make sure you provide adequate space around the system for
ventilation when you set up your work area. Never insert objects of any kind
into the ventilation openings.
To avoid electrical shock, always unplug all power cables and modem cables
from the wall outlets before removing covers.
Allow the product to cool before removing covers or touching internal
components.
Precautions for Products With Laser Devices
Observe the following precautions for laser devices:
Do not open the CD-ROM drive, make adjustments, or perform procedures on
a laser device other than those specified in the product’s documentation.
Only authorized service technicians should repair laser devices.
1
GN-FE605(M) PCI Adapter User’s Guide
Precautions for Products With Modems, Telecommunications, or
Local Area Network Options
Observe the following guidelines when working with options:
Do not connect or use a modem or telephone during a lightning storm. There
may be a risk of electrical shock from lightning.
To reduce the risk of fire, use only No. 26 AWG or larger telecommunications
line cord.
Do not plug a modem or telephone cable into the network interface controller
(NIC) receptacle.
Disconnect the modem cable before opening a product enclosure, touching or
installing internal components, or touching an uninsulated modem cable or
jack.
Do not use a telephone line to report a gas leak while you are in the vicinity of
the leak.
Federal Communications Commission (FCC) Statement
Note: This equipment has been tested and found to comply with the limits for a Class B
digital device, pursuant to Part 15 of the FCC Rules. These limits are designed to provide
reasonable protection against harmful interference when the equipment is operated in a
commercial environment. This equipment generates, uses, and can radiate radio frequency
energy and, if not installed and used in accordance with the instruction manual, may cause
harmful interference to radio communications. Operation of this equipment in a residential
area is likely to cause harmful interference in which case the user will be required to correct
the interference at his own expense.
Properly shielded and grounded cables and connectors must be used in order to meet FCC
emission limits. Neither the provider nor the manufacturer are responsible for any radio or
television interference caused by using other than recommended cables and connectors or
by unauthorized changes or modifications to this equipment. Unauthorized changes or
modifications could void the user's authority to operate the equipment.
This device complies with Part 15 of the FCC Rules. Operation is subject to the following
two conditions:
(1) this device may not cause harmful interference, and
(2) this device must accept any interference received, including interference
that may cause undesired operation.
2
GN-FE605(M) PCI Adapter User’s Guide
FCC part 68 (applicable to products fitted with USA modems)
The modem complies with Part 68 of the FCC Rules. On this equipment is a label that
contains, among other information, the FCC registration number and Ringer Equivalence
Number (REN) for this equipment. You must, upon request, provide this information to your
telephone company.
If your telephone equipment causes harm to the telephone network, the Telephone
Company may discontinue your service temporarily. If possible, they will notify in
advance. But, if advance notice is not practical, you will be notified as soon as possible.
You will be informed of your right to file a complaint with the FCC.
Your telephone company may make changes in its facilities, equipment, operations, or
procedures that could affect proper operation of your equipment. If they do, you will be
notified in advance to give you an opportunity to maintain uninterrupted telephone service.
The FCC prohibits this equipment to be connected to party lines or coin-telephone service.
The FCC also requires the transmitter of a FAX transmission be properly identified (per
FCC Rules Part 68, Sec. 68.381 (c) (3)).
/ for Canadian users only /
Canadian Department of Communications Compliance Statement
This digital apparatus does not exceed the Class B limits for radio noise emissions
from digital apparatus as set out in the radio interference regulations of Industry
Canada.
Le présent appareil numérique n'émet pas de bruits radioélectriques dépassant les limites
applicables aux appareils numériques de Classe B prescrites dans le règlement sur le
brouillage radioélectrique édicté par Industrie Canada.
DOC notice (for products fitted with an Industry Canada-compliant
modem)
The Canadian Department of Communications label identifies certified equipment. This
certification means that the equipment meets certain telecommunications network
protective, operational and safety requirements. The Department does not guarantee the
equipment will operate to the user satisfaction.
Before installing this equipment, users ensure that it is permissible to be connected to the
facilities of the local Telecommunications Company. The equipment must also be installed
using an acceptable method of connection. The customer should be aware that
compliance with the above conditions might not prevent degradation of service in some
situations. Repairs to certified equipment should be made by an authorized Canadian
maintenance facility designated by the supplier. Any repairs or alterations made by the
user to this equipment, or equipment malfunctions, may give the telecommunications
3
GN-FE605(M) PCI Adapter User’s Guide
company cause to request the user to disconnect the equipment.
Users should ensure for their own protection that the electrical ground connections of the
power utility, telephone lines and internal metallic water pipe system, if resent are
connected together. This precaution may be particularly important in rural areas.
Caution: Users should not attempt to make such connections themselves, but should
contact the appropriate electric inspection authority, or electrician, as appropriate.
NOTICE: The Load Number (LN) assigned to each terminal device denotes the
percentage of the total load to be connected to a telephone loop which is used by the
device, to prevent overloading. The termination on a loop may consist of any combination
of devices subject only to the requirement that the sum of the Load Numbers of all the
devices does not exceed 100.
/ for European users only /
European Community Directive Conformance Statement
This product is in conformity with the protection requirements of EC Council Low
Voltage
Directive
(Safety)
73/23/EEC,
EMC
Directive
89/336/EEC
on
the
approximation of the laws of the Member States relating to electro-magnetic
compatibility.
R&TTE Directive (applicable to products fitted with European modems)
This modem does not require any physical and/or software additional switch settings
from the User and is suitable for use only on telephone lines provided with
Multi-Frequency Dialing facilities.
The equipment has been approved in accordance with Council Decision 99/5/EC on
radio equipment and terminal telecommunication equipment and the mutual recognition
of their conformity.
4
GN-FE605(M) PCI Adapter User’s Guide
2. Introduction
Welcome to the Gigabyte GN-FE605(M) 10/100 Fast Ethernet PCI Adapter
User’s Guide. Before start, please check your Ethernet Card is GN-FE605 or
FE605M. The user’s guide provides instructions for configuration software for
the Gigabyte GN-FE605(M) 10/100 Fast Ethernet PCI Adapter to your system.
To start the installation, read through each chapter for required information.
Contents of Your Shipment
Before the installation procedures, please ensure the components are not
damaged during the shipping. The shipment of the NIC includes:
Antistatic bag (used for protecting the networking interface card during the
shipment). Do not remove the product from its packaging until it is ready for
installation.
The installation CD with the network driver software and documentation.
One Wake On LAN cable
Contact your network supplier immediately for any missing or damaged
components. If you require returning the damaged product (NIC), you must
pack it in the original packing material or the warranty will be voided.
5
GN-FE605(M) PCI Adapter User’s Guide
GN-FE605(M) Fast Ethernet PCI Adapter Indicator Description
The faceplate on the 10/100 BASE-T NIC provides an RJ-45 connector for
connecting the card to another network device.
Fast Ethernet Port LED indicator description
LED
10/100
Status
Description
On
100Mbps Ethernet link active
Off
10Mbps Ethernet link active
On
Ethernet Link active
Link/ACT Off
Blinking
No connection
Package transmit
GN-FE605(M) Fast Ethernet PCI Adapter Block Diagram
(M)
6
GN-FE605(M) PCI Adapter User’s Guide
3. Adapter Specifications
Feature
Value
Interfaces
10/100-T Full/Half Duplex MAC
Crossover
Auto MDI/MDIX
Controller-Processor
VIA-VT6105(M)
PCI Bus support
PCI 2.2/2.1
Communication Standard IEEE 802.3 10 Base-T Ethernet
IEEE 802.3u 100 Base-TX Fast Ethernet
Network Management
WOL : Wake on LAN
ACPI 1.0
DMI 2.0
Advanced Function
Hardware Checksum off Loading(IP, TCP, UDP)
for FE605M
LBFO : Load Balance and Fail Over
Supported OS
Windows 95/98, ME, NT3.5 or later
Windows2000 and Windows XP
RedHat6.2 or later
FreeBSD4.2, SCO3.2.4, SCO5.X, Unixware7
DOS6.22
LED Indicators
Speed, Link, Active
Temperature
Operating temperature 0°C to 50°C
Storage temperature -25°C to 55°C
Humidity
5% to 90% non-condensing
Dimension
120mm * 42mm
Weight
Gross Weight 60 ± 5 g
7
GN-FE605(M) PCI Adapter User’s Guide
4. Key Features
GN-FE605(M) 10/100 Fast Ethernet PCI Adapter contains the several features.
These features provide respective advantages to your system. The key features of
the adapter are:
GN-FE605
10/100-T Full/Half Duplex MAC
Auto-Negotiation with Automatic Crossover MDI/MDIX
Wake on LAN
ACPI 1.0
DMI 2.0
GN-FE605M
10/100-T Full/Half Duplex MAC
Auto-Negotiation with Automatic Crossover MDI/MDIX
Hardware Checksum off Loading (IP, TCP, UDP)
Support IEEE802.1q VLAN Tagging support
Support IEEE802.1p Priority Tagging support
LBFO : Load Balance and Fail Over
Wake on LAN power management
ACPI 1.0
DMI 2.0
8
GN-FE605(M) PCI Adapter User’s Guide
5. Installation Procedures
5.1
Insert the Networking Interface Card
Step1.
Switch off the computer, unplug the power cord, and remove the
computer’s cover.
Step2. Select an unused PCI bus-master slot and remove its protective bracket.
Step3. Push the Adapter into the slot until the adapter is securely seated. Then
secure the adapter bracket with a screw.
Step4. Attached the Wake-On-LAN cable (Optional). If you require
Wake-On-LAN capability from a powered-off state, attach one end of
the 3-pin Wake-On-LAN cable to the connector on the top edge of the
card, and the other end to the “5 V Standby” connector on the
computer’s motherboard.
Step5. Connect the Adapter directly to a 10BASE-T or 100BASE-TX hub or
switch using UTP cable (Category 3,4 or 5for 10BASE-T;Category 5
for 100BASE-TX). The maximum allowable length of UTP cable
connections is 100 meters (328ft). When inserting an RJ-45 plug, be
sure the tab on the plug clicks into position to ensure that it is properly
seated.
Step6. Put back the computer cover and plug in the power cord.
Step7. Turn the power on. The computer's PCI BIOS automatically assigns
resources to the Adapter.
5.2
Install the Network Driver
You can install the Network drivers from the Gigabyte Software CD. The
Software CD that accompanies the GN-FE605(M) PCI Adapter contains all the
network operating system drivers supported by this Adapter. The instructions of
software installation are given as README files on the CD. Review the root
directory README for overview information, and for full installation details,
see the README and referenced instruction files in the sub-directory
9
GN-FE605(M) PCI Adapter User’s Guide
appropriate to your network operating system.
Note: Before installing the networking interface card, make sure your system
meets the requirements listed for your operating system.
Note: If you are installing a driver in a computer with other existing adapters,
be sure to update all the adapters and ports with the same new software.
This will ensure that all adapters will work correctly.
5.3
Software Drivers
Microsoft windows 95 \ 98 \ ME
Microsoft windows NT4.0 \ NT3.51
SCO Unix 5.04
Linux Driver
Microsoft windows 2000 \ XP
Windows for Workgroup 3.11
Unixware 7
FreeBSD 3.2 \ 4.x
Note: Please refer to Appendix(B)、(C) for the “Windows” driver installation. For
the other Operating Systems, like Unix…, please refer to the text file in the
CD for the further information.
10
GN-FE605(M) PCI Adapter User’s Guide
6. Troubleshooting
If you are facing any problems with the GN-FE605(M) 10/100 Fast Ethernet PCI
Adapter, use the following checklists to identify and correct the problem.
1. Make sure the adapter card is fully and firmly seated in the slot connector.
2. Check the length and rating of connecting cables.
3. Make sure the PCI slot is not deactivated at the BIOS level. The CMOS setup
utility in PCI computers ordinarily provides the option to activate or
deactivated PCI slots.
4. Replace the questioned adapter with another verified adapter then run the
diagnostic test again.
5. Install the questioned adapter in another PCI computer then run the test again.
6. Remove all other PCI adapters from the computer then run the test again. If
the verification / diagnostic run is normal, then there is probably an interrupt
number conflict which will must be resolved manually by a CMOS setup
utility run after you have reinstalled all of the expansion cards.
7. Appendix
(A)Wake-On-LAN (WOL)
A Wake-On-LAN is an ACPI function allowing a powered Off computer to be
powered On from a remote station. The ACPI can provide power management
support systems through hardware and operating system cooperation. While the
PC is powered Off the network card is always active and monitoring the network.
When a wake-up packet is detected, the card signals the motherboard to power up
the PC. With the PC powered On, maintenance and other support tasks can be
performed. By using Wake-on-LAN technology today, you can:
• Power up your PC or multiple PCs from a remote location
• Manage networks more efficiently
• Save bandwidth during the day by transmitting large files at night
• Help your company save on its energy bill
• Eliminate trips back to work to troubleshoot a problem
• Be on the leading edge when new applications for Wake-on-LAN technology
become available
11
GN-FE605(M) PCI Adapter User’s Guide
(B) Driver Installation For GN-FE605
Windows NT4.0
Step1. Click the Start button, select Setting, and Control Panel.
Step2. Double-Click on the “Network” icon. The Network dialog will be
displayed.
12
GN-FE605(M) PCI Adapter User’s Guide
Step3. In the Network window, click on the “Adapters” tab. Click on the Add
button.
Step4. From the list of network adapters, click on the Have Disk.. button.
13
GN-FE605(M) PCI Adapter User’s Guide
Step5. Insert the supplied driver CD into your CD-ROM. Enter E:\ (where “E” is
the CD-ROM drive.) as the driver path and click on the OK button.
Step6. The next screen allows you to select a Connection Type. Select the
communication rate type and click on the OK button.
Step7. Windows will copy the required files to the directory.
14
GN-FE605(M) PCI Adapter User’s Guide
Step8. Check the “VIA VT6105 Rhine lll Fast Ethernet Adapter” under “Network
Adapters” and click the Close button.
Step9. Storing binding configuration…
15
GN-FE605(M) PCI Adapter User’s Guide
Step10. If the TCP/IP protocol has been installed, the IP address entry screen will
appear. Enter the IP address, subnet mask, gateway address and other
required values and click on the Apply button. Consult with your network
administrator and if required, set DNS and WINS address as well. After
these values have been entered, click on the OK button.
Step11. Remove the CD and click on the Yes button to restart the computer.
16
GN-FE605(M) PCI Adapter User’s Guide
Windows 2000/XP
Note: For the Windows 2000 and XP are the same driver. For the following
instruction is for the Windows 2000.
Step1. Set the GN-FE605 to a PCI slot on your PC, and switch on the power of the
computer.
Step2. The system automatically detects the network adapter as Windows2000
starts.
Step3. The following window will be displayed. Click on the Next button to
continue.
17
GN-FE605(M) PCI Adapter User’s Guide
Step4. Select “Search for a suitable driver for my device” and click on the Next
button.
Step5. In the next window, you can specify a search location then click on the
Next button.
18
GN-FE605(M) PCI Adapter User’s Guide
Step6. The setup wizard reports that a driver for the device has been found. Click
on the Next button to initiate driver installation.
Step7. After the file copy has completed, the wizard reports that software for the
device has been installed. Click on the Finish button.
19
GN-FE605(M) PCI Adapter User’s Guide
Windows 95/98/Me
Note: For the Windows 95, 98 and Me are the same driver. For the following
instruction is for the Windows 98.
Step1. Set the GN-FE605 to a PCI slot on your PC, and switch on the power of the
computer.
Step2. The system automatically detects the Ethernet adapter at Windows98
startup, and a “Add New Hardware Wizard” window appears on the
screen. Click on the Next button.
20
GN-FE605(M) PCI Adapter User’s Guide
Step3. Select “Search for the best driver for your device” and click on the Next
button.
Step4. In the next window, you can specify the location of the driver to be
installed. Insert the supplied driver CD into your CD-ROM, and click on
the Next button.
21
GN-FE605(M) PCI Adapter User’s Guide
Step5. Click on the Next button.
Step6. Windows98 starts copying the files. If it asks for certain files on Windows
98 CD-ROM, insert your Windows98 CD-ROM and specify a path. (If
Drive E is your CD-ROM drive, enter e:\win98.)
22
GN-FE605(M) PCI Adapter User’s Guide
Step7. After the file copy has completed, click on the Finish button.
Step8. You will be asked to restart the computer. Remove the driver CD from the
drive and click on the Yes button to restart the computer. After the driver
installation has completed, follow the procedure below to verify that the
driver has been installed properly.
23
GN-FE605(M) PCI Adapter User’s Guide
(C) Driver Installation For GN-FE605M
Windows NT4.0
Step1. Set the GN-FE605M to a PCI slot on your PC, and switch on the power of
the computer.
Step2. Click the Start button, select Setting, and Control Panel.
Step2. Double-Click on the “Network” icon. The Network dialog will be
displayed.
24
GN-FE605(M) PCI Adapter User’s Guide
Step3. In the Network window, click on the “Adapters” tab. Click on the Add
button.
Step4. From the list of network adapters, click on the Have Disk.. button.
25
GN-FE605(M) PCI Adapter User’s Guide
Step5. Insert the supplied driver CD into your CD-ROM. Enter E:\ (where “E” is
the CD-ROM drive.) as the driver path and click on the OK button.
Step6. The next screen allows you to select a Connection Type. Select the
communication rate type and click on the OK button.
Step7. Windows will copy the required files to the directory.
26
GN-FE605(M) PCI Adapter User’s Guide
Step8. Check the “VIA VT6105M Rhine lll Fast Ethernet Adapter” under
“Network Adapters” and click the Close button.
Step9. Storing binding configuration…
27
GN-FE605(M) PCI Adapter User’s Guide
Step10.
If the TCP/IP protocol has been installed, the IP address entry screen
will appear. Enter the IP address, subnet mask, gateway address and
other required values and click on the Apply button. Consult with your
network administrator and if required, set DNS and WINS address as
well. After these values have been entered, click on the OK button.
Step11. Remove the CD and click on the Yes button to restart the computer.
28
GN-FE605(M) PCI Adapter User’s Guide
Windows 2000/XP
Note: For the Windows 2000 and XP are the same driver. For the following
instruction is for the Windows 2000.
Step1. Set the GN-FE605M to a PCI slot on your PC, and switch on the power of
the computer.
Step2. The system automatically detects the network adapter as Windows2000
starts.
Step3. The following window will be displayed. Click on the Next button to
continue.
29
GN-FE605(M) PCI Adapter User’s Guide
Step4. Select “Search for a suitable driver for my device” and click on the Next
button.
Step5. In the next window, you can specify a search location then click on the
Next button.
30
GN-FE605(M) PCI Adapter User’s Guide
Step6. The setup wizard reports that a driver for the device has been found. Click
on the Next button to initiate driver installation.
Step7. After the file copy has completed, the wizard reports that software for the
device has been installed. Click on the Finish button.
31
GN-FE605(M) PCI Adapter User’s Guide
Windows 95/98/Me
Note: For the Windows 95, 98 and Me are the same driver. For the following
instruction is for the Windows 98.
Step1. Set the GN-FE605M to a PCI slot on your PC, and switch on the power of
the computer.
Step2. The system automatically detects the Ethernet adapter at Windows98
startup, and a “Add New Hardware Wizard” window appears on the
screen. Click on the Next button.
32
GN-FE605(M) PCI Adapter User’s Guide
Step3. Select “Search for the best driver for your device” and click on the Next
button.
Step4. In the next window, you can specify the location of the driver to be
installed. Insert the supplied driver CD into your CD-ROM, and click on
the Next button.
33
GN-FE605(M) PCI Adapter User’s Guide
Step5. Click on the Next button.
Step6. Windows98 starts copying the files. If it asks for certain files on Windows
98 CD-ROM, insert your Windows98 CD-ROM and specify a path. (If
Drive E is your CD-ROM drive, enter e:\win98.)
34
GN-FE605(M) PCI Adapter User’s Guide
Step7. After the file copy has completed, click on the Finish button.
Step8. You will be asked to restart the computer. Remove the driver CD from the
drive and click on the Yes button to restart the computer. After the driver
installation has completed, follow the procedure below to verify that the
driver has been installed properly.
35
GN-FE605(M) PCI Adapter User’s Guide
8. Limited Warranty
1-Year Warranty
Gigabyte warrants to the original consumer/purchaser that the adapter product free
from defects in material and workmanship for no limited time from the original
manufactory shipment date. This warranty does not cover the adapter product if it
is damaged in the process of being installed or improperly used.
Gigabyte may replace or repair the adapter product with either new or
reconditioned parts. Repaired or replaced adapter products will be returned to you
at the same revision level as received or higher at Gigabyte’s option. Gigabyte
reverses the right to replace discounted adapter products with an equivalent
generation adapter product.
KEEP THIS STUB FOR YOUR PURCHASING RECORD
Customer:
Phone No:
Address:
Email:
Model:
Serial:
Date of Purchase:
Place of Purchase:
From Whom:
Distributor:
36