Download Troubleshooting the DM-80
Transcript
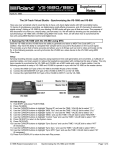
®ÂØÒňΠ® vs-880 digital studio workstation Supplemental Notes September 26, 1996 Synchronizing with Software Sequencers This document will explain different methods of synchronizing the VS-880 with many of the popular software sequencing programs that are available. Synchronizing the VS-880 with a MIDI sequencer allows you to mix MIDI instruments with other instruments without actually recording the MIDI instruments on the VS-880. This allows you to record more non-MIDI tracks (vocals, guitar, etc.) on the VS-880. We will provide step by step instructions for synchronizing the VS-880 to Cakewalk™, Performer™, Logic™, Vision™, and Cubase™. Cakewalk / Cakewalk Pro Audio PC There are basically two different methods for synchronizing the VS-880 with Cakewalk. You can use either MIDI Clock messages with the VS-880 as the master device or MIDI Machine Control/MIDI Time Code messages with Cakewalk as the master device. To sync the VS-880 with Cakewalk as the master device, use the following procedure. Connections: 1) Connect the MIDI OUT port of your MIDI interface to the MIDI IN port of the VS-880. 2) Connect the MIDI OUT port of the VS-880 to the MIDI IN port of your MIDI interface. Cakewalk Settings: 1) Under the SETTINGS menu, choose CLOCK and select SMPTE/MTC. Click on OK. 2) Under the SETTINGS menu, choose MIDI OUT and enable Transmit MMC. 3) From the same screen, set the Timecode Master’s Unit ID to 17. Click on OK. 4) Under the SETTINGS menu, choose Time Format and select 30 Frame Non-Drop. Click on OK. VS-880 Settings: 1) Press SYSTEM (under EDIT CONDITION) until the display reads “SYS Sync/Tempo ?” 2) Press YES/ENTER. 3) Use the TIME/VALUE dial to select Source = INT (if it is not already selected). 4) Press PARAMETER>> until “SYS Syn:Gen. =” is displayed. 5) Use the TIME/VALUE dial to select Syn:Gen.= MTC. 6) Press PARAMETER>> until “Syn:MTC Type =” is displayed. Use the TIME/VALUE dial to select 30. 7) Press SYSTEM until the display reads “SYS MIDI PRM ?” 8) Press YES/ENTER. 9) Use the TIME/VALUE dial to select Device ID = 17 (if it is not already selected). 10) Press PARAMETER>> and use the TIME/VALUE dial to select MIDI Thr = Out. 11) Press PARAMETER>> and use the TIME/VALUE dial to select SysEx.RX = On. 12) Press PARAMETER>> and use the TIME/VALUE dial to select MMC = Slave. Click on the play icon in Cakewalk. The VS-880 will begin playback in sync with Cakewalk. For the VS-880 to be the master device, use the following settings. Cakewalk Settings: 1) Under the SETTINGS menu, choose CLOCK and select MIDI Sync. VS-880 Settings: 1) Press SYSTEM until “SYS Sync/Tempo ?” is displayed. Press YES/ENTER. 2) Use the TIME/VALUE dial to select Source = INT (if it is not already selected). 3) Press PARAMETER>> until “Syn:Gen. =” is displayed. Use the TIME/VALUE dial to select MIDIclk. 4) Press SYSTEM until “SYS MIDI PRM ?” is displayed. Press YES/ENTER. 5) Press PARAMETER>> until “MIDI Thr =” is displayed. Use the TIME/VALUE dial to select Out (if it is not already selected). Click on the play icon in Cakewalk (it will start flashing). Press PLAY on the VS-880 and Cakewalk will begin playback in sync with the VS-880. © 1996 Roland Corporation U.S. Synchronizing with Software Sequencers Page 1 of 6 ®ÂØÒňΠVS-880 Supplemental Notes Performer / Digital Performer Macintosh There are a few different methods that can be used to synchronize Performer with the VS-880. For our purposes we will use MIDI Machine Control/MIDI Time Code messages to synchronize the units with Performer as the master and MIDI Time Code messages alone to synchronize with the VS-880 as the master. Connections: 1) Connect the MIDI OUT port of your MIDI interface to the MIDI IN port of the VS-880. 2) Connect the MIDI OUT port of the VS-880 to the MIDI IN port of your MIDI interface. FreeMIDI™ Configuration: FreeMIDI is a software program used by Performer to coordinate the various devices in your MIDI studio. When connecting a VS-880 to Performer, the first thing you need to do is create a VS-880 device in your FreeMIDI setup. You only have to do this once. 1) Open Performer and create a new song. 2) Select “Edit FreeMIDI Configuration” from the Basics menu. The FreeMIDI program will open and your current setup will be displayed. 3) Select “Create Device…” from the Configuration menu. A new FreeMIDI Device Specification window will appear. 4) Select “Roland” from the Manufacturer pop-up menu and select “Other” from the Model pop-up menu. 5) Click in the Name box and type ‘VS-880.’ 6) Click in the Device ID box and select 17. 7) Under the Properties pop-up menu select “Receives MTC”, “Transmits MTC,” and “MIDI Machine.” 8) Click on Icon and select an icon for the VS-880 (try number 32, 33, or 34). 9) Click on OK. The VS-880 icon will now appear in the settings window. 10) Click and drag from MIDI IN and OUT on the VS-880 icon to MIDI IN and OUT on the MIDI Interface icon. You should now see them connected on the screen. 11) Select “Return” from the MIDI menu to exit FreeMIDI and return to Performer. Use the following procedure to synchronize the VS-880 as a slave to Performer. Performer Settings: 1) Select “Receive Sync…” from the Basics menu. 2) In the “Sync to Port” pop-up menu select the MIDI interface port that is connected to the VS-880. 3) Under “Type of Sync” select MTC. 4) Under “SMPTE Frame Rate” select 30. Click on OK. 5) Select “Transmit Sync” from the Basics menu. 6) Under “Transmit Sync via Port(s)” select None. Click on OK. 7) Select “Slave to External Sync” from the Basics menu. A check mark appears next to the items that have been selected. 8) Select “MIDI Machine Control” from the Windows menu. The MMC window will appear and you will see the VS880 icon there. 9) Select the VS-880 icon. The name will become highlighted. 10) Select “Set Number of Tracks” from the mini-menu and enter 8. Click on OK. 11) Click on the arrow between the computer icon and the reel-to-reel tape deck icon until it is black (black = MMC enabled, white = MMC disabled). 12) Select a record mode (options are Safe, Rehearse, or Record). If “Offline” appears above track 8 click on it to toggle it to “Online” (if “Online” is not an option check your FreeMIDI configuration and make sure that the VS880 icon is connected to the active MIDI interface in both directions). VS-880 Settings: 1) Press SYSTEM until “MIDI PRM?” is displayed. Press YES/ENTER. 2) Use the TIME/VALUE dial to select “MID:Device ID= 17” (if it is not already selected). 3) Press PARAMETER>> and use the TIME/VALUE dial to select “MIDI Thr = Out” (if it is not already selected). 4) Press PARAMETER>> and use the TIME/VALUE dial to select “MID:SysEx.Rx = On.” 5) Press PARAMETER>> and use the TIME/VALUE dial to select “MID:MMC = SLAVE.” 6) Press SYSTEM until “SYS Sync/Tempo?” is displayed. Press YES/ENTER. 7) Use the TIME/VALUE dial to select “SYS Syn:Source = INT” (if it is not already selected). 8) Press PARAMETER>> and use the TIME/VALUE dial to select “SYS Syn:Gen. = MTC.” 9) Press PARAMETER>> until “SYS Syn:MTC Type =” is displayed. Use the TIME/VALUE dial to select 30. Performers transport controls will now control transport functions in the VS-880. © 1996 Roland Corporation U.S. Synchronizing with Software Sequencers Page 2 of 6 ®ÂØÒňΠVS-880 Supplemental Notes Use the following procedure to synchronize Performer as a slave to the VS-880. Performer Settings: 1) Select Receive Sync from the Basics menu. 2) Select MTC, DTL, or DTLe in the Type of sync portion of the window. 3) Select 30 fps in the SMPTE Frame Format portion of the window. Click on OK. 4) Select Transmit Sync from the Basics menu. 5) Under Transmit MTC via port(s), select None. 6) Under Transmit beat clocks via port(s), select None. Click on OK. 7) From the Basics menu, highlight Slave to External Sync so that there is a check mark next to it. VS-880 Settings: 1) Press SYSTEM until “SYS Sync/Tempo ?” is displayed. Press YES/ENTER. 2) Use the TIME/VALUE dial to select Source = INT (if it is not already selected). 3) Press PARAMETER>> until “Syn:Gen. =” is displayed. Use the TIME/VALUE dial to select MTC. 4) Press PARAMETER>> until “Syn:MTC Type =” is displayed. Use the TIME/VALUE dial to select 30. 5) Press SYSTEM until “SYS MIDI PRM ?” is displayed. Press YES/ENTER. 6) Press PARAMETER>> until “MIDI Thr =” is displayed. Use the TIME/VALUE dial to select Out (if it is not already selected). Click on the play icon in Performer (it will start flashing). Press PLAY on the VS-880 and Performer will begin playback in sync with the VS-880. Logic / Logic Audio Macintosh or PC There are a few different methods that can be used to synchronize Logic with the VS-880. For our purposes we will use MIDI Machine Control/MIDI Time Code messages to synchronize the units with Logic as the master and MIDI Time Code messages alone to synchronize the units with the VS-880 as the master. These procedures require that you use the built-in Logic MIDI drivers (OMS and FreeMIDI users will have to configure those programs accordingly). Connections: 1) Connect the MIDI OUT port of your MIDI interface to the MIDI IN port of the VS-880. 2) Connect the MIDI OUT port of the VS-880 to the MIDI IN port of your MIDI interface. Use the following procedure to synchronize the VS-880 as a slave to Logic. Logic Settings: 1) Go to the Arrangement window. 2) Select MIDI options from the Options menu. 3) Enable Auto Sync In and MIDI machine control. Logic will now be set to automatically recognize MIDI Time Code from the VS-880 and will send MIDI Machine Control messages to the VS-880. Click on OK. 4) Go to the Environment window. 5) Select New Multi Instrument from the New menu. 6) On the new icon that is created, click the boxes for channels 1-8 (to remove the cross). This indicates that we will use tracks 1-8 for the VS-880. 7) On the Parameter box on the left, change the icon to look like a tape recorder and change the name to VS-880. 8) Go back to the Arrangement window and select the VS-880 1-8 as the instrument for the corresponding track 1-8. VS-880 Settings: 1) Press SYSTEM until “MIDI PRM?” is displayed. Press YES/ENTER. 2) Use the TIME/VALUE dial to select “MID:Device ID= 17” (if it is not already selected). 3) Press PARAMETER>> and use the TIME/VALUE dial to select “MIDI Thr = Out” (if it is not already selected). 4) Press PARAMETER>> and use the TIME/VALUE dial to select “MID:SysEx.Rx = On.” 5) Press PARAMETER>> and use the TIME/VALUE dial to select “MID:MMC = SLAVE.” 6) Press SYSTEM until “SYS Sync/Tempo?” is displayed. Press YES/ENTER. 7) Use the TIME/VALUE dial to select “SYS Syn:Source = INT” (if it is not already selected). 8) Press PARAMETER>> and use the TIME/VALUE dial to select “SYS Syn:Gen. = MTC.” © 1996 Roland Corporation U.S. Synchronizing with Software Sequencers Page 3 of 6 ®ÂØÒňΠVS-880 Supplemental Notes Logic’s transport controls will now control the transport functions in the VS-880. Click on the track (1-8) that you would like to record on and that track will be record enabled on the VS-880. Logic will automatically recognize the frame rate that the VS-880 is using. If they are set differently the software will prompt you to change the settings in Logic. Choose OK. A blank sequence object will be displayed in Logic next to the track that you are recording on. This indicates that you have recorded data on an external device (such as the VS-880). NOTE: Logic allows you to start a sequence from before measure 1. If you start it from this location, the VS-880 will not follow it properly. Use the following procedure to synchronize Logic as a slave to the VS-880. Logic Settings: 1) Go to the Arrangement window. 2) Select MIDI options from the Options menu. 3) Enable Auto Sync In and click on OK. Logic will now automatically recognize MIDI Time Code from the VS-880. VS-880 Settings: 1) Press SYSTEM until “MIDI PRM?” is displayed. Press YES/ENTER. 2) Press PARAMETER>> and use the TIME/VALUE dial to select “MIDI Thr = Out” (if it is not already selected). 3) Press SYSTEM until “SYS Sync/Tempo?” is displayed. Press YES/ENTER. 4) Use the TIME/VALUE dial to select “SYS Syn:Source = INT” (if it is not already selected). 5) Press PARAMETER>> and use the TIME/VALUE dial to select “SYS Syn:Gen. = MTC.” Press PLAY on the VS-880 and Logic will start playback in sync with the VS-880. Logic will automatically recognize the frame rate that the VS-880 is using. If they are set differently the software will prompt you to change the settings in Logic. Choose OK. Vision / Studio Vision Macintosh or PC There are a few different methods that can be used to synchronize Vision with the VS-880. For our purposes we will use MIDI Machine Control/MIDI Time Code messages to synchronize the units with Vision as the master and MIDI Time Code messages alone to synchronize the units with the VS-880 as the master. Connections: 1) Connect the MIDI OUT port of your MIDI interface to the MIDI IN port of the VS-880. 2) Connect the MIDI OUT port of the VS-880 to the MIDI IN port of your MIDI interface. OMS Setup: OMS is a software program used by Vision to coordinate the various devices in your MIDI studio. When using a VS880 with Vision, the first thing you need to do is create a VS-880 device in your OMS setup. You should only have to do this once. 1) 2) 3) 4) 5) 6) 7) 8) 9) 10) 11) Create a new song in Vision and select OMS Studio Setup… from the Setups menu. Select New Device from the Studio menu. Select Roland for the Manufacturer and Other for the Model. Type ‘VS-880’ in the Name box. Check the Controller and Multitimbral boxes. Check on the boxes for all 16 MIDI channels. Check the Receive and Send boxes for MTC and MMC. Check the Send box for MIDI Beat Clock. Click on the Device ID and set it to 16. Click OK. Select Device Icon from the Studio menu and choose the desired icon for the VS-880. Select Save from the File menu. You can now exit OMS and return to Vision. Use the following procedure to synchronize the VS-880 as a slave to Vision. Vision Settings: 1) From the Options menu set the Receive Sync Mode to MTC/Machine Control. 2) From the Options menu set the Receive Sync Device to the MIDI Interface/Port that the VS-880 is connected to. 3) From the Options menu select Send Sync and make sure that there is not a check mark next to Send Sync Enabled. 4) From the Options menu select SMPTE Format and choose 30 Non-Drop. 5) From the Transport controls click on the pop-up menu next to the clock icon and select MMC. © 1996 Roland Corporation U.S. Synchronizing with Software Sequencers Page 4 of 6 ®ÂØÒňΠVS-880 Supplemental Notes VS-880 Settings: 1) Press SYSTEM until “MIDI PRM?” is displayed. Press YES/ENTER. 2) Use the TIME/VALUE dial to select “MID:Device ID= 17” (if it is not already selected). 3) Press PARAMETER>> and use the TIME/VALUE dial to select “MIDI Thr = Out” (if it is not already selected). 4) Press PARAMETER>> and use the TIME/VALUE dial to select “MID:SysEx.Rx = On.” 5) Press PARAMETER>> and use the TIME/VALUE dial to select “MID:MMC = SLAVE.” 6) Press SYSTEM until “SYS Sync/Tempo?” is displayed. Press YES/ENTER. 7) Use the TIME/VALUE dial to select “SYS Syn:Source = INT” (if it is not already selected). 8) Press PARAMETER>> and use the TIME/VALUE dial to select “SYS Syn:Gen. = MTC.” 9) Press PARAMETER>> until “SYS Syn:MTC Type =” is displayed. Use the TIME/VALUE dial to select 30. Vision will now control the transport controls of the VS-880. Start playback in Vision and the VS-880 will begin playback as well. To Record Enable VS-880 Tracks from Vision: Use the following procedure to record enable VS-880 tracks from the Macintosh version of Vision. 1) Select Open AV Controls… from the Setups menu. 2) The AV Controls toolbar will appear. If you do not see the VS-880s name and 8 icons representing the VS-880 tracks, click on the upper right corner of the AV Controls toolbar to expand it. 3) Click on the track icon (next to Ready Audio) that corresponds to the VS-880 track that you want to record on. The icon will turn red and the corresponding track on the VS-880 will start flashing red. Up to 4 tracks can be selected at one time. 4) Click on the Record icon in the AV Controls toolbar, Vision will start playing and the VS-880 will start recording. Use the following procedure to record enable VS-880 tracks from the PC version of Vision. 1) Select MMC Controls from the Windows menu. 2) Click on the icon (1-8) that corresponds to the VS-880 track that you want to record on. The icon will turn red and the corresponding track on the VS-880 will start flashing red. Up to 4 tracks can be selected at one time. 3) Click on the Record icon in the MMC Controls toolbar, Vision will start playing and the VS-880 will start recording. Use the following procedure to synchronize Vision as a slave to the VS-880. Vision Settings: 1) From the Options menu set the Receive Sync Mode to MIDI Time Code. 2) From the Options menu set the Receive Sync Device to the MIDI Interface/Port that the VS-880 is connected to. 3) From the Options menu select Send Sync and make sure that there is not a check mark next to Send Sync Enabled. 4) From the Options menu select SMPTE Format and choose 30 Non-Drop. VS-880 Settings: 1) Press SYSTEM until “MIDI PRM?” is displayed. Press YES/ENTER. 2) Press PARAMETER>> and use the TIME/VALUE dial to select “MIDI Thr = Out” (if it is not already selected). 3) Press SYSTEM until “SYS Sync/Tempo?” is displayed. Press YES/ENTER. 4) Use the TIME/VALUE dial to select “SYS Syn:Source = INT” (if it is not already selected). 5) Press PARAMETER>> and use the TIME/VALUE dial to select “SYS Syn:Gen. = MTC.” 6) Press PARAMETER>> until “SYS Syn:MTC Type =” is displayed. Use the TIME/VALUE dial to select 30. Click on the play icon in the transport controls of Vision, it will start to flash. Press PLAY on the VS-880 and Vision will start playback in sync with the VS-880. Cubase / Cubase Audio Macintosh or PC There are two types of messages that we can use to synchronize Cubase with the VS-880, MIDI Time Code or MIDI Clock messages. Because the VS-880 can function as a master or slave to MIDI Time Code, we will use that instead of MIDI Clock (the VS-880 does not slave to MIDI Clock). Use the following procedure to synchronize the VS-880 as a slave to Cubase. Connections: 1) Connect the MIDI OUT port of your MIDI interface to the MIDI IN port of the VS-880. 2) Connect the MIDI OUT port of the VS-880 to the MIDI IN port of your MIDI interface. © 1996 Roland Corporation U.S. Synchronizing with Software Sequencers Page 5 of 6 ®ÂØÒňΠVS-880 Supplemental Notes Cubase Settings: 1) Select Synchronization from the Options menu. 2) Select the interface/sound card that is connected to the VS-880 in the pop-up menu next to MIDI Timecode in the Send Sync portion of the window. 3) Select 30FPS in the pop-up menu next to Frame Rate in the Sync Source portion of the window. Click on OK. VS-880 Settings: 1) Press SYSTEM (under EDIT CONDITION) until “SYS Sync/Tempo?” is displayed. 2) Press YES/ENTER. 3) Use the TIME/VALUE dial to select “Syn:Source = EXT.” 4) Press PARAMETER>> until “Syn:MTC Type =” is displayed. Use the TIME/VALUE dial to select 30 (if it is not already selected). Press PLAY on the VS-880 (it will start flashing). Start playback in Cubase, the VS-880 will start playing in sync with Cubase. Use the following procedure to sync Cubase as a slave to the VS-880. Cubase Settings: 1) Select Synchronization from the Options menu. 2) Select the interface/sound card that is connected to the VS-880 in the pop-up menu next to From Input in the Sync Source portion of the window. 3) Select MTC in the pop-up menu next to SMPTE Sync in the Sync Source portion of the window. 4) Select 30FPS in the pop-up menu next to Frame Rate in the Sync Source portion of the window. 5) Click on the SYNC box in the Transport controls so that it darkens. VS-880 Settings: 1) Press SYSTEM (under EDIT CONDITION) until “SYS Sync/Tempo?” is displayed. 2) Press YES/ENTER. 3) Use the TIME/VALUE dial to select “Syn:Source = INT” (if it is not already selected). 4) Press PARAMETER>> until “Syn:Gen. =” is displayed. Use the TIME/VALUE dial to select MTC. 5) Press PARAMETER>> until “Syn:MTC Type =” is displayed. Use the TIME/VALUE dial to select 30 (if it is not already selected). 6) Press SYSTEM (under EDIT CONDITION) until “SYS MIDI PRM?” is displayed. 7) Press YES/ENTER. 8) Press PARAMETER>> until “MID:MIDI Thr =” is displayed. Use the TIME/VALUE dial to select Out (if it is not already selected). Press PLAY on the VS-880 and Cubase will start playback in sync with the VS-880. © 1996 Roland Corporation U.S. Synchronizing with Software Sequencers Page 6 of 6


