1
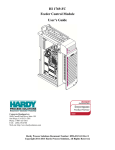
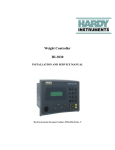
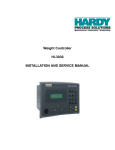
HI 2151/30WC
Weight Controller
Operation and Installation Manual
Hardy Instruments Document Number: 0596-0224 Rev H
Table of Contents
Table of Contents
Chapter 1 - Overview
About Hardy Manuals - - - - - - - - - - - - - - - - - - - - - - - - - - Description - - - - - - - - - - - - - - - - - - - - - - - - - - - - - - - WAVERSAVER® - - - - - - - - - - - - - - - - - - - - - - - - - C2® Calibration- - - - - - - - - - - - - - - - - - - - - - - - - - - IT®- - - - - - - - - - - - - - - - - - - - - - - - - - - - - - - - - Excitation Monitor - - - - - - - - - - - - - - - - - - - - - - - - - Digital Volt Meter (DVM) - - - - - - - - - - - - - - - - - - - - - - Return to Zero Test - - - - - - - - - - - - - - - - - - - - - - - - - Weighing System Tests - - - - - - - - - - - - - - - - - - - - - - - Secure Memory Module (SMM) - - - - - - - - - - - - - - - - - - - Set PointRelays - - - - - - - - - - - - - - - - - - - - - - - - - - - Serial Port - - - - - - - - - - - - - - - - - - - - - - - - - - - - - Hardy Link LAN - - - - - - - - - - - - - - - - - - - - - - - - - - Remote Functions - - - - - - - - - - - - - - - - - - - - - - - - - - Auto Zero Tracking - - - - - - - - - - - - - - - - - - - - - - - - - Output Device Options - - - - - - - - - - - - - - - - - - - - - - - Analog Output (-B1) - - - - - - - - - - - - - - - - - - - - - - Binary Coded Decimal (BCD) Output (-B2) - - - - - - - - - - - Binary Coded Decimal (BCD) Output (-B5) - - - - - - - - - - - BCD Single Termination Card (-B6) - - - - - - - - - - - - - - - BCD Quad Termination Card (-B7) - - - - - - - - - - - - - - - Remote I/O (RIO) Interface to the Allen-Bradley Network (-B8) - Binary Coded Decimal (BCD) Output (-B9) - - - - - - - - - - - PROFIBUS Interface Option (-B12) - - - - - - - - - - - - - - - Dynamic Data Exchange (DDE) (-B14) - - - - - - - - - - - - - Control Options - - - - - - - - - - - - - - - - - - - - - - - - - - - Peak Hold (-C1) - - - - - - - - - - - - - - - - - - - - - - - - Rate-of-Change (ROC) (-C2) - - - - - - - - - - - - - - - - - - Set Point Options - - - - - - - - - - - - - - - - - - - - - - - - - - TTL(Transistor - Transistor Logic) Level Output (-D1) - - - - - - External Setpoint Relays Card (-D2) - - - - - - - - - - - - - - - External Setpoint Relays Card (-D3) - - - - - - - - - - - - - - - Miscellaneous Options- - - - - - - - - - - - - - - - - - - - - - - - 240 VAC 50/60 Hz Input Voltage (-E2) - - - - - - - - - - - - - NIST/NTEP Certification Mode Kit (-E3 except for -F4 wall mount)
Portable Display and Keypad (-E4) - - - - - - - - - - - - - - - Intrinsic Barrier Assembly (-F1, -F3 thru -F7) - - - - - - - - - - Interpreting the Model Code Number - - - - - - - - - - - - - - - - - Model Code Breakdown- - - - - - - - - - - - - - - - - - - - - -
-
-
-
-
1-1
1-1
1-2
1-2
1-2
1-3
1-3
1-3
1-3
1-3
1-4
1-4
1-4
1-4
1-4
1-5
1-5
1-5
1-5
1-5
1-5
1-5
1-5
1-6
1-6
1-6
1-6
1-6
1-6
1-6
1-6
1-7
1-7
1-7
1-7
1-7
1-7
1-7
1-7
Chapter 2 - Specifications
HI 2151/30WC Specifications for a Standard InstrumentConversion Rate- - - - - - - - - - - - - - - - - Resolution - - - - - - - - - - - - - - - - - - - Excitation Voltage- - - - - - - - - - - - - - - - Averages - - - - - - - - - - - - - - - - - - - - Input - - - - - - - - - - - - - - - - - - - - - - Display - - - - - - - - - - - - - - - - - - - - - Display Increments (Graduations) - - - - - - - - Key Pad - - - - - - - - - - - - - - - - - - - - Standard Setpoint Relays - - - - - - - - - - - - Non-Linearity - - - - - - - - - - - - - - - - - - Maximum Zero Tolerance - - - - - - - - - - - - WAVERSAVER® - - - - - - - - - - - - - - - Excitation Monitor - - - - - - - - - - - - - - - Digital Voltmeter - - - - - - - - - - - - - - - - Power and Utility Requirements - - - - - - - - - - - -
-
-
-
-
2-1
2-1
2-1
2-1
2-1
2-1
2-1
2-1
2-1
2-1
2-1
2-1
2-1
2-2
2-2
2-2
-
-
-
-
-
-
-
-
-
-
i
HI 2151/30WC MANUAL
Chapter 3 -Installation
ii
Voltage - - - - - - - - - - - - - - - - - - - - - - - - - - - - Frequency - - - - - - - - - - - - - - - - - - - - - - - - - - - Power - - - - - - - - - - - - - - - - - - - - - - - - - - - - - Common Mode Voltage Range - - - - - - - - - - - - - - - - - Common Mode Rejection - - - - - - - - - - - - - - - - - - - Environmental Requirements - - - - - - - - - - - - - - - - - - - - Operating Temperature Range - - - - - - - - - - - - - - - - - Storage Temperature Range - - - - - - - - - - - - - - - - - - Temperature Coefficien - - - - - - - - - - - - - - - - - - - - Humidity Range - - - - - - - - - - - - - - - - - - - - - - - - Physical Characteristics- - - - - - - - - - - - - - - - - - - - - - - Panel Mount (Model # HI 2151/30WC) - - - - - - - - - - - - - Wall Mount Model HI 2151/30WC-WS - - - - - - - - - - - - - Remote Mount Model HI 2151/30WC-RM - - - - - - - - - - - Blind Remote Mount HI 2151/30WC-BR - - - - - - - - - - - - Portable Display HI 2151/30XX-E4 (use with HI 2151/30WC-BR) IT® Junction Box HI 215IT-SS or PS Series - - - - - - - - - - IT® Junction Box HI 215IT-FG Series - - - - - - - - - - - - - Approvals - - - - - - - - - - - - - - - - - - - - - - - - - - - Serial Communications- - - - - - - - - - - - - - - - - - - - - Bi-Directional Communications - - - - - - - - - - - - - - - - Optional Equipment - - - - - - - - - - - - - - - - - - - - - - - - Analog Output (-B1) - - - - - - - - - - - - - - - - - - - - - - Binary Coded Decimal (BCD) (-B2) - - - - - - - - - - - - - - Binary Coded Decimal (BCD) (-B5) - - - - - - - - - - - - - - BCD Single Termination Board (-B6) - - - - - - - - - - - - - - BCD Quad Termination Board (-B7) - - - - - - - - - - - - - - Allen-Bradley Remote I/O Interface (-B8) - - - - - - - - - - - - Binary Coded Decimal (BCD) (-B9) - - - - - - - - - - - - - - Profibus I/O Interface (-B12) - - - - - - - - - - - - - - - - - - Peak Hold (-C1) - - - - - - - - - - - - - - - - - - - - - - - - Rate of Change (ROC) (-C2) - - - - - - - - - - - - - - - - - - Totalizer (-C3) - - - - - - - - - - - - - - - - - - - - - - - - - Six TTL Level Outputs (-D1) - - - - - - - - - - - - - - - - - - Six External Solid State, Set Point Relays (-D2 & -D3) - - - - - -
-
-
-
-
-
-
- 2-2
- 2-2
- 2-2
- 2-2
- 2-2
- 2-2
- 2-2
- 2-2
- 2-2
- 2-2
- 2-2
- 2-2
- 2-3
- 2-3
- 2-4
- 2-4
- 2-4
- 2-5
- 2-5
- 2-5
- 2-5
- 2-6
- 2-6
- 2-6
- 2-7
- 2-7
- 2-7
- 2-7
- 2-8
- 2-8
- 2-8
- 2-8
- 2-9
- 2-9
- 2-9
Unpacking - - - - - - - - - - - - - - - - - - - - - - - - - Mechanical Installation - - - - - - - - - - - - - - - - - - - Installing the HI 2151/30WC in a Panel - - - - - - - - - Panel Cutout Specifications - - - - - - - - - - - - Installing the HI 2151/30WC Panel Mount - - - - - Installing the HI 2151/30 Remote Mount Model - - - Install the Front Panel - - - - - - - - - - - - - Installation of the Instrument Enclosure - - - - Installing the HI 2151/30WC-BR Blind Remote Model
Installing the HI 2151/30 Wall Mount Model - - - - Electrical Installation - - - - - - - - - - - - - - - - - - - - Cabling and Interconnecting - - - - - - - - - - - - - - Recommended Installation Procedures - - - - - - - Input Power Wiring - - - - - - - - - - - - - - - - Output Setpoint Relay Wiring - - - - - - - - - - - Optional Relays or TTL Level Outputs - - - - - - - J3 Serial Port Wiring- - - - - - - - - - - - - - - - Remote Functions Wiring - - - - - - - - - - - - - Load Cell/Point Connections (J1) - - - - - - - - - - - - About Load Cell Wiring - - - - - - - - - - - - - - C2 Load Cell Connections (J1) (See Fig. 3-9) - - -
-
-
-
-
-
-
- 3-1
- 3-2
- 3-3
- 3-3
- 3-3
- 3-5
- 3-5
- 3-6
- 3-7
- 3-7
- 3-8
- 3-8
- 3-8
- 3-9
- 3-10
- 3-10
- 3-11
- 3-12
- 3-12
- 3-12
- 3-13
-
-
-
-
Table of Contents
Non C2 Load Cell Connections (J1) (See Fig. 3-10) - - - - - Output Option Board Installation Procedures - - - - - - - - - - - - - - - Options Cabling and Interconnect - - - - - - - - - - - - - - - - - - Analog Output Option -B1 (See Fig. 3-12) - - - - - - - - - - - - BCD Option Board Installation Procedures -B2, -B5, -B9 - - - - - BCD Terminator Boards - B6, - B7 - - - - - - - - - - - - - - - BCD Termination Board Installation Procedures (See Fig. 3-14)
Allen-Bradley RIO Interface Option -B8 - - - - - - - - - - - - - Profibus Interface Option -B12 - - - - - - - - - - - - - - - - - Dynamic Data Exchange (DDE) I/O Server -B14 - - - - - - - - - HI 215IT Series Junction Boxes - - - - - - - - - - - - - - - - - Set Point Relay Option Board Installation -D2 - - - - - - - - - - - - Profibus Interface Card Option Wiring Diagram - - - - - - - - - - - Installation of the Secure Memory Module - - - - - - - - - - - - - - - - -
-
-
-
-
3-14
3-15
3-16
3-16
3-17
3-19
3-19
3-20
3-21
3-22
3-22
3-22
3-24
3-24
Chapter 4 - Configuration
Standard RS-232C/RS422/485 Configuration Procedures. - - - - - - - - Setting the Jumpers - - - - - - - - - - - - - - - - - - - - - - Analog Output Option Card Configuration Procedures -B1- - - - - - - - About the Analog Output Card Option - - - - - - - - - - - - - - - Setting the Jumpers - - - - - - - - - - - - - - - - - - - - - - Disassembling the rear panel and setting jumpers - - - - - - Reassembling Rear Panel - - - - - - - - - - - - - - - - - - - Front Panel Setup Procedures - - - - - - - - - - - - - - - - - Analog Card Adjustment - - - - - - - - - - - - - - - - - - - Voltage- - - - - - - - - - - - - - - - - - - - - - - - - - - - Current - - - - - - - - - - - - - - - - - - - - - - - - - - - - Parallel BCD Board Print Configuration Procedures -B2, -B5, -B9 - - - - About the BCD Board Print Output Signal - - - - - - - - - - - - - Jumper Location. (See Fig. 4-7) - - - - - - - - - - - - - - - - Jumper Settings (See Fig. 4-8) - - - - - - - - - - - - - - - - - Calibration Configuration Procedures When Security Code is not Available
Dip Switch Location (See Fig. 4-9) - - - - - - - - - - - - - - - - - Auto Zero Tolerancing Configuration Procedures - - - - - - - - - - - - About Auto Zero Tolerancing - - - - - - - - - - - - - - - - - - - Dip Switch Location (See Fig. 4-10) - - - - - - - - - - - - - - Dip Switch Setting - - - - - - - - - - - - - - - - - - - - - - Configuring Peak Hold Mode - - - - - - - - - - - - - - - - - - - - - About Configuring Peak Hold - - - - - - - - - - - - - - - - - - - Configuring Multidrop S3-1 - - - - - - - - - - - - - - - - - - - - - - Configuring Serial S3-3 - - - - - - - - - - - - - - - - - - - - - - - - Configuring Option S3-4 - - - - - - - - - - - - - - - - - - - - - - - - Configuring Set Point S3-5- - - - - - - - - - - - - - - - - - - - - - - Set Point S3-6 - - - - - - - - - - - - - - - - - - - - - - - - - - - - - Configuring Lock S3-7- - - - - - - - - - - - - - - - - - - - - - - - - Configuring the Power & Relay Board Dip Switches S2 (See Fig. 4-12) - -
-
-
-
-
-
4-1
4-2
4-4
4-4
4-4
4-4
4-5
4-5
4-5
4-5
4-5
4-6
4-6
4-6
4-7
4-7
4-7
4-8
4-8
4-8
4-8
4-8
4-8
4-9
4-9
4-9
4-9
4-9
4-10
4-10
Chapter 5 - Setup
Keypad Functions (See Fig. 5-1)
Zero - - - - - - - - - - Mode - - - - - - - - - - Tare - - - - - - - - - - Print - - - - - - - - - - —/Test/Clr - - - - - - - 1/Tare Val - - - - - - - 2/Status/Bar - - - - - - - 3/Lb Kg- - - - - - - - - 4/- - - - - - - - - - - - 5/¬ - - - - - - - - - - - 6/Set Pt - - - - - - - - - -
-
-
-
-
-
5-1
5-1
5-1
5-1
5-2
5-2
5-2
5-2
5-3
5-3
5-3
5-3
-
-
-
-
-
-
-
-
-
-
-
-
-
-
-
-
-
-
-
-
-
iii
HI 2151/30WC MANUAL
7/Option - - - - - - - - - - - - - - - - - - - - - - - - - - - - - - - - 8/Cal - - - - - - - - - - - - - - - - - - - - - - - - - - - - - - - - - 9/¯ - - - - - - - - - - - - - - - - - - - - - - - - - - - - - - - - - - 0/Exit - - - - - - - - - - - - - - - - - - - - - - - - - - - - - - - - - Enter - - - - - - - - - - - - - - - - - - - - - - - - - - - - - - - - - Block Diagram - - - - - - - - - - - - - - - - - - - - - - - - - - - - - - - RS-232C, RS 422/485 Bi-directional Serial Port Setup Procedures - - - - - - Bar Graph Setup Procedures - - - - - - - - - - - - - - - - - - - - - - - - About Bar Graph Setup- - - - - - - - - - - - - - - - - - - - - - - - - BCD Menu Setup Procedures - - - - - - - - - - - - - - - - - - - - - - - - About BCD Communication (See Section 4 for Configuration Procedures) BCD Print- - - - - - - - - - - - - - - - - - - - - - - - - - - - - Setup Procedures - - - - - - - - - - - - - - - - - - - - - - - - - Serial Port Menu Setup Procedure (See Chapter 4 for Configuration Procedures)
Serial Procedures - - - - - - - - - - - - - - - - - - - - - - - - - - - Analog Output Setup Procedures (Option) - - - - - - - - - - - - - - - - - - About Analog Output (See Chapter 4 for Configuration Procedures) - - - Analog Output Menu Setup Procedures - - - - - - - - - - - - - - - - - Setting the Rate of Change Procedures - - - - - - - - - - - - - - - - - - - TOTAL Setup Procedures - - - - - - - - - - - - - - - - - - - - - - - - - Set Up for Profibus Interface Card Option -B12 - - - - - - - - - - - - - - - Allen-Bradley Remote I/O Option -B8- - - - - - - - - - - - - - - - - - - - Chapter 6 - Calibration
iv
-
-
- 5-3
- 5-4
- 5-4
- 5-4
- 5-4
- 5-5
- 5-5
- 5-6
- 5-6
- 5-7
- 5-7
- 5-7
- 5-7
- 5-9
- 5-10
- 5-12
- 5-12
- 5-13
- 5-13
- 5-14
- 5-14
- 5-14
Pre-Calibration Procedure - - - - - - - - - - - - - - - - - - - - - - - - - - - Mechanical Check Procedures - - - - - - - - - - - - - - - - - - - - - - - Electrical Check Procedures - - - - - - - - - - - - - - - - - - - - - - - - Fourteen Segment Display - - - - - - - - - - - - - - - - - - - - - - - - - Combination Status Indicator/Bar-Graph LEDs - - - - - - - - - - - - - - - Load Check - - - - - - - - - - - - - - - - - - - - - - - - - - - - - - - - Calibration Setup Procedures - - - - - - - - - - - - - - - - - - - - - - - - - - The Calibration Menu - - - - - - - - - - - - - - - - - - - - - - - - - - - Setting the Unit of Measure. (UNIT) Pounds (Lb) or Kilograms (Gr) - - - - - Setting the Standard Decimal Point (DECPNT) - - - - - - - - - - - - - - - Setting the Total Decimal Point (Option -C6) (TOT DP) - - - - - - - - - - - Setting the Motion Tolerance Value (MOTION) - - - - - - - - - - - - - - - Setting the Graduation Size (GRAD) - - - - - - - - - - - - - - - - - - - - Setting the Zero Tolerance (0 TOL) - - - - - - - - - - - - - - - - - - - - - Setting The Auto Zero Tolerance (A0 TOT) - - - - - - - - - - - - - - - - - Setting the Number of Readings Averaged (AVRAGE) - - - - - - - - - - - Setting the Scale Capacity (SC CAP) - - - - - - - - - - - - - - - - - - - - WAVERSAVER® (WVRSVR) - - - - - - - - - - - - - - - - - - - - - - This ends the Calibration Setup Process - - - - - - - - - - - - - - - - - - - Calibration Procedures - - - - - - - - - - - - - - - - - - - - - - - - - - - - - C2® Second Generation Calibration Procedures - - - - - - - - - - - - - - - End of C2 Calibration - - - - - - - - - - - - - - - - - - - - - - - - - Hard Calibration Procedures (HDCAL) - - - - - - - - - - - - - - - - - - - Selecting the Hard Calibration Sub-Menu - - - - - - - - - - - - - - - - Setting the Zero Calibration Value - - - - - - - - - - - - - - - - - - - Setting the Span Calibration Value - - - - - - - - - - - - - - - - - - - The Return (RETURN) Display - - - - - - - - - - - - - - - - - - - - Checking for Mechanical Problems - - - - - - - - - - - - - - - - - - - Hard Calibration Self Test Procedures (Traditional Method Using Test Weights)
Perform the Hard Calibration Self Test - - - - - - - - - - - - - - - - - Soft Calibration Procedures for Single Load Cell/Point Systems - - - - - - - About Soft Calibration - - - - - - - - - - - - - - - - - - - - - - - - - Selecting the Soft Calibration Sub-Menu - - - - - - - - - - - - - - - - Setting Sensitivity Values - - - - - - - - - - - - - - - - - - - - - - - -
- 6-1
- 6-1
- 6-2
- 6-4
- 6-4
- 6-6
- 6-6
- 6-6
- 6-7
- 6-7
- 6-7
- 6-8
- 6-8
- 6-9
- 6-9
- 6-10
- 6-10
- 6-11
- 6-11
- 6-11
- 6-12
- 6-13
- 6-13
- 6-13
- 6-13
- 6-14
- 6-14
- 6-14
- 6-15
- 6-15
- 6-15
- 6-15
- 6-16
- 6-16
Table of Contents
Setting the Scale Range (RANGE) - - - - - - - Setting the Reference Point - - - - - - - - - - Using the Return (RETURN) Function - - - - - End of the Soft Calibration Process - - - - - - Soft Calibration Self Test Process - - - - - - - - - Performing the Self Test- - - - - - - - - - - - INTEGRATED TECHNICIAN (IT®) - - - - - - - - - Setting Resistance Baseline for Excitation Monitor - Quick C2® Calibration Procedures - - - - - - - - - - - About Quick C2 Calibration - - - - - - - - - - - - Procedures to Restore Calibration Parameters - - - - - - Before Clearing Memory - - - - - - - - - - - - - Clear Controller Memory - - - - - - - - - - - - - Restoring Calibration When Changing Decimal Points
Restoring Decimal Points - - - - - - - - - - - Chapter 7 - Operation
-
-
-
-
-
-
-
-
-
-
-
-
-
6-16
6-17
6-17
6-17
6-17
6-17
6-18
6-18
6-18
6-18
6-19
6-19
6-19
6-20
6-20
Description of Front Panel (See Fig. 7-1) - - - - - - - - - - Process Weighing Function Buttons - - - - - - - - - - Operator Displays - - - - - - - - - - - - - - - - - - - Instrument Operation Overview - - - - - - - - - - - - - - Option Menus and Option Parameters- - - - - - - - - - - - Option Boards - - - - - - - - - - - - - - - - - - - - - - - General Information - - - - - - - - - - - - - - - - - - Set Points - - - - - - - - - - - - - - - - - - - - - - - - - About Set Points - - - - - - - - - - - - - - - - - - - Set Point Limits - - - - - - - - - - - - - - - - - - - - - - Dead Band Limits - - - - - - - - - - - - - - - - - - - Three General Rules for Setpoints - - - - - - - - - - - Preact Limits (See Fig. 7-3) - - - - - - - - - - - - - - Entering Set Points - - - - - - - - - - - - - - - - - - About the Set Point Menu - - - - - - - - - - - - - Entering Set Point Procedures - - - - - - - - - - - Entering Dead Band Tolerance Procedures - - - - - Entering Preact Values Procedures - - - - - - - - - Serial Communications - - - - - - - - - - - - - - - - - - Bi-directional Communications- - - - - - - - - - - - - - - RS-232C - - - - - - - - - - - - - - - - - - - - - - - Operation- - - - - - - - - - - - - - - - - - - - - RS-422/485 - - - - - - - - - - - - - - - - - - - - - - Operation- - - - - - - - - - - - - - - - - - - - - Description of 422/485 Transmission Modes Available
RS-485- - - - - - - - - - - - - - - - - - - - RS-422- - - - - - - - - - - - - - - - - - - - Additional Non-standard Transmission Mode - RS-422/485 Wiring and Electrical Specifications RS-422/485 Configuration Wiring - - - - - - - - - RS-422/485 Electrical Specifications- - - - - - - - Instrument Serial Communications - - - - - - - - - - - - - About Instrument Serial Communications - - - - - - - Printer Output - - - - - - - - - - - - - - - - - - - - - Serial Protocol - Multidrop Mode - - - - - - - - - - - About Serial Protocol Multidrop Mode - - - - - - - Data Formats - - - - - - - - - - - - - - - - - - - - - - - Data Formats - Binary Representation - - - - - - - - - Data Formats - Weight Data Format - - - - - - - - - - Serial Commands - - - - - - - - - - - - - - - - - - - - - Serial Commands - Data Transmission Format - - - - - Serial Commands, Command Set- - - - - - - - - - - - -
-
-
-
-
-
-
-
-
-
-
-
7-1
7-1
7-2
7-2
7-3
7-3
7-3
7-4
7-4
7-4
7-4
7-5
7-5
7-5
7-5
7-6
7-6
7-6
7-7
7-7
7-7
7-7
7-7
7-7
7-7
7-7
7-7
7-8
7-8
7-8
7-9
7-9
7-9
7-9
7-9
7-9
7-10
7-10
7-10
7-11
7-11
7-12
v
HI 2151/30WC MANUAL
Command Meaning - - - - - - Parallel BCD Communication- - - - Operating Procedures - - - - - BCD Print - - - - - - - - - - - Output Disable- - - - - - - - - Rate of Change (ROC) - - - - - Example - - - - - - - - - Rate of Change Data - - - - Peak Hold Mode Option - - - - - - To display PEAK HOLD: - - - To reset the Peak Value to zero: To exit Peak Hold mode: - - - - Totalizer Mode Option - - - - - - - To display the Total Value: - - - To print the Total Value: - - - - To clear the Total: - - - - - - - To exit the Total Mode: - - - - Allen-Bradley Remote I/O Option -B8Profibus Interface Option -B12 - - - Chapter 8 - Troubleshooting
vi
-
-
-
-
-
-
-
-
-
-
-
-
-
-
-
-
-
-
-
-
-
-
- 7-13
- 7-19
- 7-19
- 7-20
- 7-20
- 7-20
- 7-20
- 7-21
- 7-21
- 7-21
- 7-21
- 7-21
- 7-21
- 7-21
- 7-21
- 7-22
- 7-22
- 7-22
- 7-22
Disassembly and Reassembly Notes and Cautions - - - - - - - - - - - - - Trouble Shooting Using Integrated Technician - - - - - - - - - - - - - - General Troubleshooting Flow Chart Index - - - - - - - - - - - - - - A - Guidelines for Instabilities on Formerly Operating Systems - - - - A1 - Guidelines for Instabilities on Formerly Operating System (Cont'd) B - Guidelines for Instabilities on Formerly Operating Systems (Cont'd) B1 - Guidelines for Instabilities on Formerly Operating Systems (Cont'd)B1 - Guidelines for Instabilities on Formerly Operating Systems (Cont'd)C - Guidelines for Instabilities on Formerly Operating Systems - - - - E - Non-Return to ZERO- - - - - - - - - - - - - - - - - - - - - - - F - Verify Individual Load Cell Milli-volt Readings - - - - - - - - - - G - Error 18 During Hard Calibration - - - - - - - - - - - - - - - - - H - Mechanical Inspection - - - - - - - - - - - - - - - - - - - - - - J - Electrical Inspection - - - - - - - - - - - - - - - - - - - - - - - K - Load Sharing and Load Sensor Checkout - - - - - - - - - - - - - M - HI Error- - - - - - - - - - - - - - - - - - - - - - - - - - - - - N - Blank Screen - - - - - - - - - - - - - - - - - - - - - - - - - - O - Excitation Monitor - - - - - - - - - - - - - - - - - - - - - - - - P - Stuck on “HARDY” Screen - - - - - - - - - - - - - - - - - - - - System Integrity Check and Fault Determination- - - - - - - - - - - - - - Self-Test - - - - - - - - - - - - - - - - - - - - - - - - - - - - - - Interpreting Diagnostic/Error Messages - - - - - - - - - - - - - - - - - - Overview of Typical Load Cell System - - - - - - - - - - - - - - - - No Keypad Operation - - - - - - - - - - - - - - - - - - - - - - - - Remote Functions Non-operational - - - - - - - - - - - - - - - - - - Using Solid State Relays with Light Loads (Optional Set Relays) - - - - - - About Solid State Relays With Light Loads - - - - - - - - - - - - - - IT Test Menu Breakdown - - - - - - - - - - - - - - - - - - - - - - - - Excitation Monitor (Current) Setup Menu - - - - - - - - - - - - - - - Digital Volt Meter (D.V.M) - - - - - - - - - - - - - - - - - - - - - Return to Zero Test - - - - - - - - - - - - - - - - - - - - - - - - - Weighing System Test - - - - - - - - - - - - - - - - - - - - - - - - Error Messages and Definitions - - - - - - - - - - - - - - - - - - - - - - - - LO - - - - - - - - - - - - - - - - - - - - - - - - - - - - - - - - HI - - - - - - - - - - - - - - - - - - - - - - - - - - - - - - ERREXC - - - - - - - - - - - - - - - - - - - - - - - - - - - - Error Messages - - - - - - - - - - - - - - - - - - - - - - - - - -
-
- 8-1
- 8-2
- 8-8
- 8-9
- 8-10
- 8-11
- 8-12
- 8-13
- 8-14
- 8-15
- 8-16
- 8-17
- 8-18
- 8-19
- 8-20
- 8-21
- 8-22
- 8-23
- 8-24
- 8-25
- 8-25
- 8-30
- 8-30
- 8-31
- 8-31
- 8-32
- 8-32
- 8-33
- 8-34
- 8-34
- 8-35
- 8-36
- 8-37
- 8-37
- 8-37
- 8-37
- 8-37
Table of Contents
General Policies and Information- - - - - - - - - System Support - - - - - - - - - - - - - - - - - Warranty - - - - - - - - - - - - - - - - - - - - FOR FURTHER INFORMATION CONTACT:
Ordering Replacement Parts - - - - - - - - - - - -
-
-
-
-
-
-
-
-
-
-
-
-
-
-
8-39
8-39
8-39
8-39
8-40
Index
System data survey sheet
Glossary of Terms
Self Test Display
Options
vii
HI 2151/30WC MANUAL
viii
Table of Illustrations
Table of Illustrations
CHAPTER 1 - OVERVIEW
MODEL NUMBER BREAKDOWN - - - - - - - - - - - - - - - - - - - - - - - - 1-8
CHAPTER 3 - INSTALLATION
2” REAR PANEL CLEARANCE REQUIREMENT- - - - - - - - - - PANEL CUTOUT DIMENSIONS - - - - - - - - - - - - - - - - - - NEMA 4 GASKET FLUSH AGAINST THE FRONT PANEL- - - - - MOUNTING REMOTE DISPLAY TO ENCLOSURE - - - - - - - - INSTALLING ELECTRONICS ENCLOSURE TO A PLATE - - - - - INSTALLATION OF WALL MOUNT MODEL - - - - - - - - - - - WIRE ROUTING FOR WALL MOUNT MODEL - - - - - - - - - - POWER WIRING DIAGRAM - - - - - - - - - - - - - - - - - - - - C2 LOAD CELL CONNECTION - - - - - - - - - - - - - - - - - - LOAD CELL CONNECTION (NON C2 LOAD CELLS) J1- - - - - - OPTION LABEL COVER - - - - - - - - - - - - - - - - - - - - - - ANALOG OUTPUT BOARD - - - - - - - - - - - - - - - - - - - - PARALLEL BCD BOARD - - - - - - - - - - - - - - - - - - - - - BCD QUAD TERMINATION BOARD OPTION - - - - - - - - - - BCD TERMINATION BOARD INSTALLATION DRILL TEMPLATE BCD TERMINATION INSTALLATION BLOCK DIAGRAM - - - - RIO CARD/PIN LAYOUT- - - - - - - - - - - - - - - - - - - - - - SET POINT RELAY OPTION BOARD - - - - - - - - - - - - - - - INSTALLATION DETAILS - - - - - - - - - - - - - - - - - - - - - STANDOFF ASSEMBLY - - - - - - - - - - - - - - - - - - - - - - SECURE MEMORY MODULE - - - - - - - - - - - - - - - - - - - INSTALLING AND REMOVING THE SECURE MEMORY MODULE
-
CHAPTER 4 - SYSTEM
CONFIGURATION
MAIN BOARD JUMPER AND DIP SWITCH LOCATIONS - - - REMOVING THE REAR PANEL - - - - - - - - - - - - - - - - RS-232 (DEFAULT), S422/485 JUMPER SETTINGS - - - - - - NON TERMINATING CONTROLLER, ALL DIP SWITCHES SET
IN THE OFF POSITION- - - - - - - - - - - - - - - - - - - - - TERMINATING CONTROLLER, ALL DIP SWITCHES SET
IN THE ON POSITION - - - - - - - - - - - - - - - - - - - - - ANALOG OUTPUT BOARD - - - - - - - - - - - - - - - - - - BCD CARD JUMPER LOCATION - - - - - - - - - - - - - - - BCD JUMPER SETTINGS - - - - - - - - - - - - - - - - - - - CAL TOGGLE SWITCH LOCATION - - - - - - - - - - - - - - AUTO ZERO DIP SWITCH SETTING- - - - - - - - - - - - - - PEAK HOLD MODE DIP SWITCH LOCATION- - - - - - - - - POWER & RELAY BOARD DIP SWITCH LOCATION - - - - - -
-
-
-
-
-
-
3-3
3-4
3-4
3-6
3-6
3-7
3-8
3-9
3-13
3-14
3-15
3-16
3-17
3-19
3-19
3-20
3-21
3-23
3-23
3-23
3-24
3-24
- - - - - - - - 4-1
- - - - - - - - 4-2
- - - - - - - - 4-3
- - - - - - - - 4-3
-
-
-
-
-
-
-
4-4
4-6
4-6
4-7
4-7
4-8
4-9
4-10
CHAPTER 5 - SETUP
FRONT PANEL- - - - - - - - - - - - - - - - - - - - - - - - - - - - - - - - - - 5-1
FRONT PANEL, BAR GRAPH DISPLAYED - - - - - - - - - - - - - - - - - - - 5-3
CHAPTER 6 - CALIBRATION
PROPERLY INSTALLED LOAD CELL W/NO BINDING
MILLIVOLTS/WEIGHT SCALE - - - - - - - - - - - FRONT PANEL DISPLAY WITH NUMBERS - - - - - FRONT PANEL DISPLAY WITH TEXT - - - - - - - FRONT PANEL STATUS LEDS DISPLAYED- - - - - -
-
-
-
-
-
-
-
-
-
-
6-2
6-3
6-4
6-4
6-5
CHAPTER 7 - OPERATION
FRONT PANEL, PROCESS WEIGHING FUNCTION BUTTONS
OPTION MENU TREE - - - - - - - - - - - - - - - - - - - - LOW AND HIGH PREACT TRIP LIMITS - - - - - - - - - - - WIRING DIAGRAM SERIAL COMMUNICATIONS - - - - - -
-
-
-
-
-
-
-
-
-
7-1
7-3
7-5
7-8
-
-
-
I
HI 2151/30WC MANUAL
II
Chapter 1 - Overview
CHAPTER 1 - OVERVIEW
This manual provides users and service personnel with specifications
and procedures for installation, setup, configuration, operation, communication, maintenance, and troubleshooting for the Hardy Instruments HI 2151/30WC Weight Controller. The HI 2151/30WC is
fitted with WAVERSAVER® , C2® Calibration, and the INTEGRATED TECHNICIAN™ (IT®) diagnostic tools.
NOTE:
IT®, WAVERSAVER®, and
ments Inc.
C2® are Registered Trademarks of Hardy Instru-
To ensure the safe operation, before using the weight controller, users
and maintenance personnel should read and understand all cautions,
warnings, and safety procedures stated or referenced in this manual. To
get the maximum service life from this product, follow the instructions
described in this manual.
Hardy Instruments appreciates your business. Should you not understand any information in this manual or experience any problems with
the product, please contact our Customer Support Department at:
Phone: (858) 278-2900
About Hardy Manuals
FAX: (858) 278-6700
Every Hardy Installation and Operation manual is organized into easily
referenced chapters, that are almost always the same:
Chapter One - Provides an introduction to the instrument and an
Overview of the equipment and its capabilities.
Chapter Two - Provides a list of Specifications.
Chapter Three - Contains information needed to Install the HI 2151/
30WC (both standard equipment and optional equipment) and the HI
215IT series Junction Box.
Chapter Four - Provides Hardware Configuration instructions for
setting dip switches and jumpers.
Chapter Five - Describes the Firmware Setup and preparation procedures to calibrate and operate the instrument.
Chapter Six - Provides Calibration instructions.
Chapter Seven - Describes the Operation of the HI 2151/30WC.
Chapter Eight - Describes Troubleshooting procedures for repair of
the instrument.
Description
The HI 2151/30WC is a compact, multipurpose, microprocessor-based
weight controller (See Fig. 1-1) that is used for a wide variety of process weighing applications, including batching, blending, check weighing, filling/dispensing, force measurement, level by weight, and weight
rate monitoring. As a standalone product, the HI 2151/30WC can control as many as eight set point relays, and transmit data via analog,
serial and BCD communications. The weight controller can also be
1-1
HI 2151/30WC MANUAL
used as a front end for a control system, transmitting weight values via
a standard operator-selectable serial port (RS-232, RS-422/485) to programmable logic controllers (PLC's), computers, and printers.
Data is displayed alpha-numerically on the six-digit, fourteen segment
LED display and graphically on the 30-segment bar-graph display.
Weight values can be based on either net, gross, Rate-of-Change
(ROC), peak hold or totalized weight values in pounds or kilograms.
An optional Allen Bradley Remote I/O and PROFIBUS interface is
available for communication to programmable logic controllers. The
weight controller’s 20-bit, analog-to-digital converter updates twenty
times per second and is capable of 985,000 counts of display resolution. This provides enough resolution for accurate weight measurement
and enough control to tolerate large “dead” loads and over sizing of
load cells/sensors. Users can enter commands either from the communication ports or locally from a sixteen-button, front-panel keypad. A
portion of the keys can be locked out to limit operator access and protect data. A limited number of commands can be entered through a rear
Remote Functions connector.
WAVERSAVER®
Typically, mechanical noise from other machinery in a plant environment exists in all industrial weight control and measurement applications. WAVERSAVER® enables the weight controller to distinguish the
actual weight data from the mechanical noise that comes in on the load
cell signal. WAVERSAVER® can be configured from the front panel to
ignore noise with frequencies as low as 0.25 Hz. Users can select one
of four higher additional cut-off frequencies to provide a faster instrument response time. The default factory configuration is 0.50 Hz vibration frequency immunity.
C2® Calibration
C2 second-generation electronic calibration can calibrate a scale system without using certified test weights. A C2 weighing system consists of up to eight load sensors, a junction box, interconnect cable and
an instrument with C2 capabilities, such as the HI 2151/30WC. Each
Hardy Instruments C2-certified load sensor sends a distinct digital signal that the HI 2151/30WC uses to calculate weight and count the number of sensors in the system. To factor in any known weight on the
scale, the user enters a reference value from the front panel. (A zero
reference value indicates there is no weight on the scale.)
The instrument is also capable of performing traditional calibration
such as with the use of certified test weights.
IT®
1-2
INTEGRATED TECHNICIAN™ is a built-in diagnostics utility that
continuously monitors the system and allows the operator to rapidly
troubleshoot problems from the front panel. Adding an optional an IT
junction box extends the diagnostics capability to any load sensor.
Chapter 1 - Overview
Excitation Monitor
Continuously monitors the system excitation current for evidence of
open or shorted load sensors or damaged or broken excitation wire(s),
including the wires between the instrument and the junction box. If the
measured current deviates from a ± 10% tolerance, an "ERRExC"
(Error Excitation) displays on the front panel. In a system with C2 load
sensors, IT computes the correct current and displays alarms if the initial measured current is out of tolerance. Without C2 load sensors, the
initial read is assumed to be correct and is used as the standard.
Digital Volt Meter
(DVM)
The DVM displays millivolts (mV to one digit to the right of the decimal point) and millivolts per volt (mV/V to four digits to the right of
the decimal point) for both the whole system and individual load sensors. The DVM helps enables the user to isolate a faulty component
from the front panel. The voltage reading can be used to level a balanced system and to make corner adjustments to platform scales. Accuracy is ± 2% or better of full scale.
Return to Zero Test
This test compares the original voltage reading saved at calibration
against the current voltage reading of an empty vessel and displays
either a pass (OK) or fail (ERR) message. The test checks for load sensor damage (due to electrical zero shift or abnormal mechanical forces)
that causes binding sensors in the system.
Weighing System Tests
•
With an IT junction box, the test will pass or fail the individual load
sensors providing a true fault isolation capability.
•
Without an IT junction box, the test will pass or fail on the basis of
a cumulative reading rather than an individual reading of each load
sensor.
(Requires the IT Junction Box) This test does the following analysis to
diagnose drifting or unstable weight reading problems:
1. It disconnects the controller and engages an internal reference signal to see if the problem is within the instrument.
2. It disconnects the load sensors and engages an internal (in the junction box) reference signal to see if the cable between the instrument
and the Junction Box is causing the problem.
3. It reads the weight of each load sensor to see if a load sensor might
be causing the problem.
Weight readings from the individual load sensors makes this test useful
for making cornering, leveling, and load-sharing adjustments.
Secure Memory
Module (SMM)
The Secure Memory Module stores critical HI 2151/30WC configuration, calibration and setup data (excluding Peak Hold) and protects it
from corruption. When a new parameter is entered during system operation, the SMM automatically updates that value in its memory. Since
the SMM is conveniently accessible from the instruments rear panel,
data stored in one HI 2151/30WC may be restored to the new instrument by physically transferring the SMM.
1-3
HI 2151/30WC MANUAL
NOTE:
The SMM is limited to 1,000,000 lift-time write functions. A write is performed after
any parameter change to the calibration, zero, and tare functions.
NOTE:
You cannot transfer the SMM from the HI 2151/30WC to the HI 2151/20WC.
Set PointRelays
The HI 2151/30WC is fitted with two standard, internal, selectable and
mechanical form C (SPDT) relays. Six optional, external, solid-state
relays are available and are field configurable as form A or B types.
Both types have individual set point, preact, and deadband parameters.
Each can be programmed to respond to the standard Net or Gross
modes of operation or the optional ROC, Totalizer or Peak Hold modes.
These relays can be used to open or close valves or gates or to turn
motors, mixers, vibration equipment, heaters, coolers, etc. on or off.
Serial Port
One standard serial port can be configured to receive commands and
transmit weight data to a serial device such as a printer output or bidirectional port. By resetting jumpers within the instrument, it can be
configured for RS 232 (-A1), RS 422 (-A2) or RS 485 (-A3). Baud
rates are user selectable at 600, 1200, 2400, 4800, 9600 or 19,200.
Hardy Link LAN
The Hardy Link Local Area Network (LAN) assigns an address to each
instrument and provides the firmware necessary to handle in-coming
and out-going communications.
Remote Functions
Rear panel input of a level or momentary grounding that can be used to:
Tare the instrument., activate a print sequence, totalize the display,
force the Net mode, toggle between pounds or kilograms, initiate the
optional ROC (Rate-of-Change) mode, freeze the front panel display or
one of the communications ports, and clear the totalizer or peak hold
values. This is useful for adding large additional industrialized switches
to the control panel.
Auto Zero Tracking
Auto Zero Tracking causes the display to indicate zero as long as any
"live weight" on the scale is below the set zero tolerance and the scale
is not in motion. This capability allows the instrument to ignore material build-up in the weigh system within the set zero tolerance.
NOTE:
Do not use auto zero tracking to correct a drifting-scale problem. Auto zero tracking will
zero and write to the SMM every second if there is a change in weight. A correct graduation
size is required to stop excessive weight changes and reduce write commands to the SMM.
See Chapter Six for graduation size setup guidelines.
NOTE:
The amount of weight zeroed off is cumulative. The autozero command will fail if the
current gross weight plus any previously zeroed amount exceeds the zero tolerance.
Auto Zero Tracking is enabled when switch eight of S3 (the configuration dipswitch), labeled Config on the instrument's rear panel is in the
on position.
1-4
Chapter 1 - Overview
Output Device
Options
Analog Output (-B1)
Analog Output is configured from the front panel or the serial port and
set up by jumpers on the printed circuit card. The option allows the
transmission of Gross, Net, Optional ROC, Peak or Total weight as 05V, 0-10V, 0-20mA or 4-20mA (or the reverse of these) and makes it
possible to span these ranges over a portion of the weight data. Resolution is either 16,000 counts or the number of display counts available in
the range selected, whichever is less. Two analog optional boards can
be installed in each instrument. Both voltage and current data are available simultaneously.
Binary Coded
Decimal (BCD)
Output (-B2)
This BCD Option provides six digits of parallel weight data representing Net, Gross, Tare and the present front panel display. If all types of
output data are requested, they appear one after the other, ten milliseconds apart. The BCD option provides a 37-pin, D-subminiature connector on a 6-inch cable.
Binary Coded
Decimal (BCD)
Output (-B5)
This BCD option provides six digits of parallel weight data representing Net, Gross, Tare and The Present Front Panel Display. If all types of
output data are requested, they appear one after the other, ten milliseconds apart. The BCD option provides a 40-pin connector on a 60-inch
cable for use with either the optional -B6 or -B7 external termination
boards.
BCD Single
Termination Card (B6)
The BCD Single Termination Card is an optional external interface
point for a single BCD port signal line. The card is designed for use
with a single HI-2151/30WC-B5 instrument.
BCD Quad
Termination Card (B7)
The BCD Quad Termination Card is an optional external interface point
for up to four sets of BCD port signal lines. All terminal positions
accept 20- to 26-gauge cable sizes. Additional terminal boards may be
interconnected to allow multiple BCD ports to exist in a tri-state
arrangement.
Remote I/O (RIO)
Interface to the AllenBradley Network (B8)
The RIO port allows bi-directional communications with Allen-Bradley Programmable Logic Controllers (PLC) and Small Logic Controllers (SLC). Supporting up to 230.4 Kbaud transfer rates and both
discrete and block data transfers, the HI 2151/30WC represents a quarter rack of discrete I/O (32 bits in the Logic Controllers output and
input image files) to the Logic Controller.
Binary Coded
Decimal (BCD)
Output (-B9)
This option provides six digits of parallel weight data representing Net,
Gross, Tare and the present front panel display. If all types of output
data are requested, they appear one after the other, ten milliseconds
apart. This option provides a 24-inch cable for use with the HI 2151/
30WC-WS wall mount controller.
1-5
HI 2151/30WC MANUAL
PROFIBUS Interface
Option (-B12)
Allows bi-directional communications to Profibus (Process Fieldbus)
products including those made by Siemens, GE Fanuc and Texas
Instruments. This interface supports PROFIBUS-DP (Decentralized
Periphery) and processes both Selectable Predetermined and Block
transfer commands. It supports up to 12 Mbaud transfer rates.
Dynamic Data
Exchange (DDE) (B14)
Allows bi-directional communications with a PC over the serial port
using Windows® 3.x, Windows® 95, or Windows® NT. The DDE links
the HI 2151 series weight controllers to a Windows-based application
software such as: Wonderware®, Visual Basic®, Excel®, Lotus 1-2-3®,
or Quattro Pro®.
NOTE:
Windows, Visual Basic and Excel are all registered Trademarks of the Microsoft Corporation. Wonderware is a registered trademark of the Wonderware Corporation.
Lotus 1-2-3 is a registered trademark of I.B.M. Quattro Pro is a registered trademark
of the Corel Corporation. All terms mentioned in this manual that are known to be
trademarks or service marks have been appropriately capitalized. Hardy Instruments
cannot attest to the accuracy of this information. Use of a term in this manual should
not be regarded as affecting the validity of any trademark or service mark.
Control Options
Peak Hold (-C1)
This option is generally used in testing to determine peak forces a product or material can withstand. It can also be used to track the highest
force applied to the scale. It displays and stores the highest gross
weight value measured until that value is cleared by a command from
the front panel key pad or a remote source.
Rate-of-Change
(ROC) (-C2)
The ROC option measures and displays the rate at which a material
enters or is dispensed from the scale over a period of time. The register
for ROC holds 21 entries. New weight values are input to the register at
the rate of 1/20th of the time base. The first register is subtracted from
the 21st Register, which is one time base older than the 1st register. The
time frame can be set to units per second, minute or hour. A time base
of discrete values is selectable from 1 to 1800.
Set Point Options
1-6
TTL(Transistor Transistor Logic)
Level Output (-D1)
Provides six TTL level outputs rated at 500 milliamps per line. A mating connector with eight 24-gauge, unterminated wires, 60 inches long
is also provided.
External Setpoint
Relays Card (-D2)
This externally mounted card is equipped with six solid-state triac
relays. (See Chapter Two for Specifications) Individual relays can be
configured as form A or form B by an on-board dip switch. Each can be
programmed to respond to the standard Net or Gross modes of operation or the optional ROC, Totalizer or peak hold modes. Each have
individual setpoint, preact, and deadband parameters. A 60-inch interface cable is provided. This option should not be used with the wallmount enclosure.
Chapter 1 - Overview
External Setpoint
Relays Card (-D3)
The same as the -D2 option except that the length of the cable provided
is six inches. This is designed to mount in the HI 2151/30WC-WS-D3
wall mount enclosure.
Miscellaneous Options
240 VAC 50/60 Hz
Input Voltage (-E2)
This is a factory configuration only.
NIST/NTEP
Certification Mode
Kit (-E3 except for F4 wall mount)
The HI 21251/30WC is approved for National Institute of Standards
and Technology (NIST) applications formally called the National
Bureau of Standards (NBS). It is certified under the National Type
Evaluation Program (NTEP) for up to 10,000 counts when the NIST
mode is activated. This option is required when products are to be
directly sold based on weight readings of the scale. This kit includes
special screws for sealing the instrument, a label plate, a NEMA 4 gasket and a NIST label.
Portable Display and
Keypad (-E4)
The HI 2151/30XX-E4 option is used for local set-up, calibration and
display of the blind remote version instrument, modelHI 2151/30WCBR.
Intrinsic Barrier
Assembly (-F8)
The Intrinsic Barrier Assembly Option is used with the Model HI 2151/
30WC. The option provides safety for Class I, II and III, Division I
Applications. Only the front face panel is rated for Class I and II Division II areas. The remaining portion of the HI 2151/30WC controller
must be installed in a NEMA4 enclosure for an intrinsically safe area.
See 2151/30 FM drawings (0584-0034) for information. Contact Hardy
Technical Support for questions:
Phone: 1-800-821-5831.
Web Address://www.hardyinstruments.com
Interpreting the
Model Code Number
Model Code
Breakdown
The model code number can be found on a label that is attached to the
HI 2151/30WC. It starts with the base model number (HI2151/30WC).
Fig. 1-1 shows dash alphanumeric code designations that indicate the
capabilities of the weight controller. For example: A model HI2151/
30WC-A1-C2-D1-E3 is a Panel Mount Instrument with a factory-configured RS 232 serial port, rate-of-change, six TTL level outputs, and
an NTEP Certification Kit.
1-7
HI 2151/30WC MANUAL
HI 2151/30WC - B3 - C2 - D1 - E3
MOUNTING OPTIONS
WC - Panel Mount
WC -WS - Wall Mount
WC - RM - Remote Mount
WC - BR - Blind Remote
OUTPUT OPTIONS
B1 - Analog Output
B2 - BCD Data Output Tri-Stated
(37 pin conn. w/6"Cable)
B5 - BCD Data Output Tri-Stated
(60" Cable)
B6 - BCD Single Termination Board
(Used w/B5)
B7 - BCD Quad Termination
(Used w/B5)
B8 - Remote I/O Interface for
Allen Bradley Network
B9 - BCD 24" cable
(wall mount version only)
B12 - PROFIBUS Interface Option
B14 - Dynamic Data Exchange (DDE)
I/O Server
CONTROL OPTIONS
C1 - Peak Hold
C2 - Rate-of-Change
C6 - Weight Totalization
SETPOINT OPTIONS
D1 - Six TTL level outputs w/60" unterminated cable
D2 - D1 + a solid state relay card w/60" cable
HARDWARE OPTIONS
E2 - 240 VAC 50/60 Hz Operation
E3 - NTEP Certification Kit
E4 - Portable Display (Blind Remote Only)
F2 - NTEP Option
F8 - Used with Advantage load sensors and
hazardous area-approved load cells
FIG. 1-1 MODEL NUMBER BREAKDOWN
1-8
Chapter 2 - Specifications
CHAPTER 2 - SPECIFICATIONS
Chapter Two covers the specifications for the HI 2151/30WC weight
controller and optional equipment. The specifications listed are
designed to assist in the installation, operation, and troubleshooting.
HI 2151/30WC
Specifications for a
Standard Instrument
Conversion Rate
•
20 updates per second
Resolution
•
Displayed:
•
Internal:
Excitation Voltage
•
0-5 VDC
Averages
•
1 to 200 User Selectable in single Increments
Input
•
•
Up to eight (8) 350 ohm Full Wheatstone Bridge, Strain Gauge
Load Sensors/Cells (5 volt excitation) on one vessel.
Signal Voltage Range0-15mV
Display
•
•
6 digit, 14 segment red LED, 0.6" alpha-numeric
Bar-Graph 30 segment LED
Display Increments
(Graduations)
•
•
1,2,5,10,20,50,100,200,500 user selectable via the front panel key
pad.
Corresponding weight is dependent on the decimal point location.
Key Pad
•
•
•
16 tactile keys
6 dedicated functions
10 dual numeric and function
Standard Setpoint
Relays
•
•
•
•
•
2 Standard SPDT (Form C) Relays
Wire Size: 12 AWG Maximum
Maximum Switch Current: 5 Amps
Maximum Switch Power: 150 Watts or 1250 Volt/Amps
Maximum Switch Voltage: 5 Amps @ 3 VDC or 125 VAC
Non-Linearity
•
0.0015% of Full Scale
Maximum Zero
Tolerance
•
32766
WAVERSAVER®
•
•
•
•
•
7.5 Hz
3.5 Hz
1.0 Hz
0.5 Hz
0.25 Hz
1:985,000 (@ 3 mV/V)
1:656,000 (@ 2 mV/V)
1:1,048,576
2-1
HI 2151/30WC MANUAL
Excitation Monitor
•
Current less than 10%
Digital Voltmeter
•
•
Accuracy ± 2% of full scale
Resolution
•
•
mV/V4 digits to the right of the decimal
mV 1 digit to the right of the decimal
Power and Utility
Requirements
Voltage
•
•
120 VAC ± 10% Standard
240 VAC ± 10% (-E2 Factory Option)
Frequency
•
47/63 Hz
Power
•
10 Watts maximum with options
Common Mode
Voltage Range
•
± 2.5 VDC
Common Mode
Rejection
•
100dB @ 50-60Hz
•
-10 to 50 C (14 to 122 F)
•
-20 to 85 C (-4 to 185 F)
Temperature
Coefficient
•
Less than 0.005% of full scale per degree C for zero and span.
Humidity Range
•
0-90% (non-condensing)
•
Depth
Environmental
Requirements
Operating
Temperature Range
Storage Temperature
Range
Physical Characteristics
Panel Mount (Model #
HI 2151/30WC)
11.35" (288.29mm) Back of the Bezel to rear cable clearance
•
Case Dimensions
2.99"H x 5.65"W x 9.02"D (75.9mmH x 143.51mmW x
229.11mmD)
2-2
Chapter 2 - Specifications
•
Front Panel Dimensions
3.74"H x 7.00"W x 0.42"D (95mmH x 177.80mmW x 10.67mmD)
•
Panel Cutout Dimensions
3.09"H x 5.75"W (78.5mmH x 146mmW)
•
Case Material
Aluminum alloy (6063-T5), Chem. Film (MIL-C-541)
•
Weight
4.6 pounds (2.1 Kilograms)
•
Rating
Front Panel NEMA 4 Seal
Wall Mount Model HI
2151/30WC-WS
•
Case Dimensions
15.5"H x 12.94"W x 6.42"D (393.7mmH x 328.68mmW x
173.07mmD)
•
Case Material
304 Stainless Steel Body (14 gauge) Cover (16 gauge)
•
Weight
19.8 pounds (9 Kilograms)
•
Enclosure Rating
NEMA 4 & 4X
Remote Mount Model
HI 2151/30WC-RM
•
Case Dimensions
3.23"H x 5.74"W x 10.40"D (82.04mmH x 145.8mmW x
264.2mmD)
•
Front Panel Dimensions
3.74"H x 7.00"W x 0.42"D (95mmH x 177.8mmW x 10.67mmD)
•
Panel Cutout Dimensions
3.09"H x 5.75"W (78.4mmH x 146mmW)
•
Weight
4.6 pounds (2.1 Kilograms)
NEMA Ratings
•
Case
None
2-3
HI 2151/30WC MANUAL
•
Font Panel
NEMA 4 seal
•
Cable
5 foot flat ribbon
Blind Remote Mount
HI 2151/30WC-BR
•
Case Dimensions
3.23"H x 5.74"W x 10.40"D (82.04mmH x 145.8mmW x
264.2mmD)
•
Weight
4.5 pounds (2.04 Kilograms)
•
Enclosure Rating
None
Portable Display HI
2151/30XX-E4 (use
with HI 2151/30WCBR)
•
Case Dimensions
4.72"H x 7.39"W x 2.06"D (11.89mmH x 187.71mmW x
52.32mmD)
•
Weight
1.08 pounds (0.49 Kilograms)
•
Enclosure Rating
None
•
Cable
72"L
IT® Junction Box HI
215IT-SS or PS Series
•
Case Dimensions
6.25"H x 6.25"W x 4.50D (158.75mmH x 158.75mmW x
114.3mmD)
•
Weight
5 pounds (2.27 Kilograms)
•
Enclosure Ratings
•
•
IT® Junction Box HI
215IT-FG Series
•
Case Dimensions
6.50"H x 8.0"W x 4.46D (165.1mmH x 203.2mmW x 113.28mmD)
•
2-4
-SSStainless Steel NEMA 4 & 4X
-PSPainted Carbon Steel NEMA 4
Weight
Chapter 2 - Specifications
5 pounds (2.27 Kilograms)
•
Enclosure Rating
Fiberglass - NEMA 4
Approvals
•
•
•
•
•
•
UL Certification
CSA Certification
Factory Mutual (FM) Class I, II, III Div. 2 Groups A-G
CE Approval
NTEP Approval
MC (Measurement Canada) Approval
Serial
Communications
•
•
•
•
Baud Rates:600, 1200, 2400, 4800, 9600, 19200
RS 232 (-A1):Full Duplex
RS 422 (-A2): Full Duplex, 4 wire
RS 485 (-A3): Half Duplex, 2 wire
Bi-Directional
Communications
1. RS-232C SPECIFICATIONS
SPECIFICATION
DESCRIPTION
High Level Output
Low Level Output
SPECIFICATION
+11V at 5 mA
-11V at -5 mA
DESCRIPTION
High Level Input
Low Level Input
+4V to +15V
+1.6V to -15V (Schmit trigger input
disallows logic changes with voltages
between these ranges.)
15V per microsecond maximum
20K ohms
SIGNAL GND
10 updates/sec.
Slew Rate
Input Impedance
GND
Update Time
Serial port connections are made to J3, located on the rear panel,
through the mating plug P3.
2. RS-422/485 Specifications
Interface specifications per EIA (Electronic Industries Association)
Standards RS-422 and RS-485.
Optional Equipment
Analog Output (-B1)
•
Resolution
16,000 counts
•
Linearity
0.01% (with 1 average selected)
2-5
HI 2151/30WC MANUAL
•
Response Time
1 millisecond after update
•
Isolation from Main Board
300 VAC or 450 VDC
•
Update
50 milliseconds (20 times/sec.)
•
Voltage Out
• Range
0 - 5 VDC, 0-10 VDC (or reverse of these)
• Max Current
•
•
Binary Coded Decimal
(BCD) (-B2)
•
5 ma (2 K ohm load @ 10 V)
Temp. Stability
10 ppm/C or 4 mV total from 30 to 120 degrees F
Current Out
•
Range
0 - 20 mA, 4-20 mA (or reverse of these)
•
Max Voltage
12 V allowing 0 - 600 ohm load at 20 mA
•
Mating Connector
6 pin Phoenix
Resolution
6 digits
•
Data Drive
15 LSTTL loads (6 mA total)
•
Print/Not Print Drive
10 LSTTL loads (4 mA)
•
Transmit Distance
50 feet (15.24 meters)
•
Cable
6" 40 pin right angle to 37 pin Dshell Connector. Use with -B6 and
-B7 Options
2-6
Chapter 2 - Specifications
Binary Coded Decimal
(BCD) (-B5)
•
Resolution
6 digits
•
Data Drive
15 LSTTL loads (6 mA total)
•
Print/Not Print Drive
10 LSTTL loads (4 mA)
•
Transmit Distance
50 feet (15.24 meters)
•
Cable
60"- 40 pin right angle to 40 pin right angle. Use with -B6 and -B7
Options
BCD Single
Termination Board (B6)
•
Overall Dimensions
7.75L" x 5.0W" (196.85mmL x 127.00mmW)
•
TB Wire Gauge
20 to 26 AWG
BCD Quad
Termination Board (B7)
•
Overall Dimensions
7.75L" x 5.0W" (196.85mmL x 127.00mmW)
•
TB Wire Gauge
20 to 26 AWG
Allen-Bradley Remote
I/O Interface (-B8)
•
Resolution
986,000 counts
•
Represents
1/4 Rack of Discrete I/O
•
Type Transfers
Discrete and Block (Read & Write)
•
Baud Rate
57.6 Kbaud
115.2 Kbaud
234.4 Kbaud
Binary Coded Decimal
(BCD) (-B9)
•
Resolution
2-7
HI 2151/30WC MANUAL
6 digits
•
Data Drive
15 LSTTL Loads (6mA Total)
•
Print/Not Print Drive
10 LSTTL Loads (4mA)
•
Transmit Distance
50 feet (15.24 meters)
•
Cable
24" For use with -WS Wall Mount Instrument
Profibus I/O Interface
(-B12)
•
Protocol
DP (Decentralized Periphery)
•
Data Configuration
16 words or 32 bytes
•
Standard Reference
Process Fieldbus - DIN 19 245
•
Baud Rate
9,600 Kbaud to 12 Mbaud (Auto-Selectable)
Peak Hold (-C1)
•
Display
Highest Gross Value
Average Peak Gross Value
Rate of Change (ROC)
(-C2)
•
Time Units
Seconds, Minutes and Hours
•
Time Base
1 - 6, 10, 12, 15, 30, 60, 120, 240, 450, 900 or 1800
Totalizer (-C3)
•
Display
Accumulated Net Weight
•
Activation Level
Momentary connection to remove functions ground min. 0.1 seconds
2-8
Chapter 2 - Specifications
Six TTL Level
Outputs (-D1)
•
Rating
300 ma per line
•
Cable Length
5 feet (1.52 meters)
Six External Solid
State, Set Point Relays
(-D2 & -D3)
•
Type
Solid State individually configurable form A or B
•
Rating
115 VAC, 3 Amperes Continuous
115VAC, 5 Amperes Momentary
•
Board Dimensions
5.7"L x 2.5"W (144.78mmL x 88.9mmW)
2-9
HI 2151/30WC MANUAL
2-10
Chapter 3 - Installation
CHAPTER 3 - INSTALLATION
Chapter 3 covers unpacking, cabling, interconnecting and installing the
HI 2151/30WC weight controller. Users and service personnel should
be familiar with the procedures in this chapter before installing or operating the HI 2151/30WC weight controller.
Unpacking
Step 1. Before signing the packing slip, inspect the packing for damage of any kind.
Step 2. Report any damage to the carrier company immediately.
Step 3. Check to see that everything in the package matches the bill
of lading. You should normally have:
1. HI 2151/30WC Panel Mount
1
HI 2151/30WC instrument with mating connectors and ordered
options installed.
1
Mounting Rail Kit (Prt. # 0551-0287-01)
• (4) mounting Rails
• (4) 6-32 UNC phillips pan head machine screws
1
Installation and Operation Manual
2. HI 2151/30WC-RM Remote Mount
1
1
1
1
Instrument with mating connectors and ordered options
installed.
Remote display/keypad with gasket and mounting hardware
attached.
60 inch display to instrument interconnect ribbon cable.
Installation and Operation Manual
3. HI 2151/30WC-WS Wall Mount
1
1
Instrument with mating connectors and ordered options
installed.
Installation and Operation Manual
4. HI 2151/30WC-BR Blind Remote
1
1
Instrument with mating connectors and ordered options
installed.
Installation and Operation Manual
3-1
HI 2151/30WC MANUAL
5. Dynamic Data Exchange (DDE) I/O Server - B14
1
1
1
1
DDE Server Software Diskette
6 foot test cable
9 pin to 25 pin adapter
Installation and Operation Manual
6. HI 215IT-SS1/-PS1/-FG1 Integrated Technician Junction Box
1
2
5
5
5
Enclosure and circuit card with nine mating connectors
installed.
1" diameter push in plugs
1.12" diameter rubber gaskets
0.5" diameter steel locknut fastener
½ " NPT nylon cord grip strain relief (.375" - .500")
7. HI 215IT-SS2/-PS2/-FG2 Integrated Technician Junction Box No
C2
1
2
5
5
1
4
Enclosure and circuit card with nine mating connectors
installed.
1" diameter push in plugs
1.12" diameter rubber gaskets
0.5" diameter steel locknut fasteners
½ NPT nylon cord grip strain relief (.375" - .500" Blue Grip)
½ NPT nylon cord grip strain relief (.375" - .500" White Grip)
Step 4. If any items are missing, damaged, or there are any questions,
please contact Customer Support at:
Hardy Instruments
9440 Carroll Park Drive, Suite 150
San Diego, CA 92121
Phone: (858) 278-4900
FAX: (858) 278-6700
Web Site: http//www.hardyinst.com
E-Mail: [email protected]
Step 5. Record the model number and serial number of the Weight
Controller. Store in a convenient, secure location for reference
when contacting Hardy Instruments Customer Service
Department or to buy parts or firmware upgrades.
Mechanical Installation
3-2
Chapter 3 - Installation
Installing the HI 2151/
30WC in a Panel
Panel Cutout
Specifications
1. Enclosure Size Requirements.
•
Overall depth of the enclosure must be a minimum of 11.5" to allow
for the 2" clearance between the rear panel of the HI 2151/30WC
and the inside surface of the rear panel of the enclosure. (See Fig. 31)
•
There must be a 1" clearance completely around the bezel
and other installed units.
Bezel
Rear
Panel
2.0"
Front Panel
FIG. 3-1 2” REAR PANEL CLEARANCE REQUIREMENT
2.
Dimensions of the enclosure cutout (See Fig. 3-2)
•
•
•
WARNING
Installing the HI
2151/30WC Panel
Mount
5.75" ± .06 (146.05mm ±1.52) Wide
3.09" ± .06 (78.49mm ±1.52) High
All cutout surfaces must be deburred before installation of
the controller.
DO NOT MOUNT THE HI 2151/30WC CONTROLLER NEAR A HIGH MAGNETIC FIELD OR HIGH VAC POWER SOURCE. TO DO SO WILL EFFECT
THE PERFORMANCE OF THE CONTROLLER AND MAY RESULT IN
PROPERTY DAMAGE.
Step 1. Ensure that all Electrostatic Discharge (ESD) precautions
have been taken before installation.
Step 2. The controller comes with a NEMA 4 rated compression gasket. Make sure the gasket is properly seated in the bezel
before installation.
3-3
HI 2151/30WC MANUAL
Step 3. Gently slide the controller into the cutout in the enclosure. Be
sure to secure the controller with both hands when installing.
5.75"
PANEL CUTOUT
3.09"
FIG. 3-2 PANEL CUTOUT DIMENSIONS
Step 4. Slide the controller into the panel cutout until the NEMA 4 &
4X gasket is flush against the front panel of the enclosure.
(See Fig. 3-3)
CAUTION
ONCE THE GASKET IS COMPRESSED IT SHOULD NOT BE USED
AGAIN. WHENEVER THE CONTROLLER IS REMOVED FROM THE
PANEL, RE INSTALL WITH A NEW GASKET. (HARDY PRT. # 0524-0011)
Step 5. Install the four mounting bars.
• Slide each of the mounting bars into the slots at the rear of
the controller.
• One end of the mounting bar is recessed. Make sure you
install the bars from this end.
• Check to be sure the mounting bars are flush against the
inside surface of the front panel.
Compression
Gasket
Rear
Panel
Front Panel
FIG. 3-3 NEMA 4 GASKET FLUSH AGAINST THE FRONT PANEL
3-4
Chapter 3 - Installation
•
•
•
•
CAUTION
Install the four (4) 6-32 pan head machine screws into the
threaded slots at each corner of the controller.
Hold the controller so that it is aligned and flush against the
enclosure front panel throughout the entire tightening process.
Facing the rear panel of the controller, tighten each screw in
a clockwise direction from corner to corner until each screw
is finger tight.
Using a phillips screw driver, continue the clockwise direction and partially tighten each screw until the NEMA 4
bezel gasket is completely compressed and the bezel is flush
against the front panel of the enclosure. Do not tighten one
screw down completely and then go on to the next screw.
Each screw must be tightened a little before going on to the
next to maintain the alignment between the controller and
the front panel of the enclosure.
DO NOT OVER TIGHTEN THE MACHINE SCREWS. OVER TIGHTENING
CAN DEFLECT THE BEZEL SO THAT IT WILL NOT BE WATER TIGHT
AND/OR BREAK OFF THE CORNERS OF THE BEZEL.
Step 6. The Panel Mount installation is complete.
Installing the HI
2151/30 Remote
Mount Model
NOTE:
See Figure 3-2 for information about the panel cutout.
Install the Front
Panel
Step 1. Ensure that all Electrostatic Discharge (ESD) precautions
have been taken before installation.
Step 2. The controller comes with a NEMA 4-rated compression gasket. Make sure this gasket is properly seated in the bezel
before installation.
Step 3. The front panel comes with two mounting brackets mounted
on the bezel. Remove the nuts that fasten the brackets to the
bezel, and remove the brackets.
Step 4. Gently slide the front panel into the enclosure cutout until the
gasket is seated against the front of the enclosure. (See Fig. 34)
NOTE:
The nuts on the mounting studs barely clear the cutout. It might take a little adjusting
to get the bezel into the cutout.
Step 5. Place the brackets, #6 flat washer, lock washer and hex nut on
the four bezel studs.
Step 6. Make sure that the bezel is centered in the cutout.
3-5
HI 2151/30WC MANUAL
FIG. 3-4 MOUNTING REMOTE DISPLAY TO ENCLOSURE
Step 7. Tighten the #6 hex nuts finger tight in turn.
Step 8. Use a nut driver or box-end wrench to tighten the nuts in turn
so that the bezel is flush against the front surface of the enclosure front panel.
CAUTION
DO NOT OVER TIGHTEN. OVER TIGHTENING CAN DEFLECT THE
BEZEL SO THAT IT WILL NOT BE WATER TIGHT AND/OR BREAK OFF
THE CORNERS OF THE BEZEL.
Installation of the
Instrument
Enclosure
Step 1. Drill four .156- inch tapped or thru holes and use four 6-32
pan-head machine screws to fasten the enclosure to a panel.
FIG. 3-5 INSTALLING ELECTRONICS ENCLOSURE TO A PLATE
3-6
Chapter 3 - Installation
Step 2. Connect the 60-inch, 40-pin ribbon cable to the 40-pin connection J5 on the electronics and the 40-pin connection J4 at
the rear of the front panel display.
Step 3. Remote panel mechanical installation is complete.
NOTE:
The electronics can be mounted on any of the four sides.
Installing the HI
2151/30WC-BR Blind
Remote Model
NOTE:
Step 1. Place the instrument in the enclosure so that there is two
inches of clearance from the each end of the enclosure.
Step 2. Drill four .156 inch either tapped or thru holes and use four 632 pan head machine screws to fasten the instrument to the
enclosure. (See Fig. 3-5)
The enclosure can be mounted on any four (4) of the six (6) sides.
Installing the HI
2151/30 Wall Mount
Model
Step 1. Make sure that all Electrostatic Discharge (ESD) precautions
have been taken.
Step 2. Mount the Instrument securely using all four mounting points.
(See Fig. 3-6)
FIG. 3-6 INSTALLATION OF WALL MOUNT MODEL
Step 3. To conform to NEMA 4 or 4X ratings, connections to the
enclosure must be made with NEMA 4 or 4X conduit fittings.
Step 4. Do not route any signal, voltage or ground wires under or
between printed circuit boards.
3-7
HI 2151/30WC MANUAL
Step 5. Route wiring types through enclosure as shown in Fig. 3-7)
FIG. 3-7 WIRE ROUTING FOR WALL MOUNT MODEL
WARNING
DO NOT MOUNT THE HI 2151/30WC CONTROLLER NEAR A HIGH MAGNETIC FIELD OR 120 VAC POWER SOURCE. ROUTE RIBBON CABLE A
MINIMUM OF 3 INCHES FROM ANY AC VOLTAGE CONDUCTING
CABLES. TO DO SO WILL EFFECT THE PERFORMANCE OF THE CONTROLLER AND MAY RESULT IN PROPERTY DAMAGE.
Electrical Installation
Cabling and
Interconnecting
Recommended
Installation
Procedures
CAUTION
1. Carefully plan the cable runs and wiring connections before routing, cutting and trimming cables and wires.
INSTRUMENT POWER AND RELAY WIRES SHOULD BE ROUTED AWAY
FROM ALL OTHER SIGNAL CABLES TO AVOID ELECTRICAL INTERFERENCE.
2. All cabling should be neatly bundled, tied, and dressed.
3. Use a 6-inch service bend to relieve stress on the connectors and to
ease servicing the unit.
4. Make sure that all plugs are firmly in place.
5. Secure the power cord with the two captive screw-on clips.
6. All connections are made at the rear panel of the weight controller.
3-8
Chapter 3 - Installation
Input Power Wiring
DO NOT OPERATE WITH INCORRECT LINE VOLTAGE. TO DO SO WILL
RESULT IN PROPERTY DAMAGE OR PERSONAL INJURY. CHANGING
THE INPUT VOLTAGE RATING BETWEEN 120 AND 240 VAC REQUIRES
MODIFICATIONS TO THE POWER/RELAY CIRCUIT BOARD AND
RELAY OUTPUT BOARD. THIS PROCEDURE SHOULD ONLY BE DONE
BY AUTHORIZED PERSONNEL. FOR FURTHER ASSISTANCE CONTACT
HARDY INSTRUMENTS, CUSTOMER SUPPORT.
Step 1. The HI 2151/30WC is factory configured to operate from
either 120 or 240 VAC, 50 or 60 Hz power. Check the model
number of your unit to verify the voltage. If the unit is configured for 240 VAC, an "E2" will be printed on the name plate.
Step 2. The power and relay circuit card filters and conditions AC
power. However, for noisy power lines, external conditioning
may be required. Contact Hardy Instruments Customer Support for more information.
Step 3. The AC power should be supplied by a "clean" primary line,
directly from the power panel. This line should not supply any
other equipment, including the feeding unit, and should be
supplied with a minimum 10 amp breaker.
Step 4. To connect power to the controller, install a 3-wire, minimum
of a 14 AWG power line to the 3-pin terminal block connector. (See Fig. 3-8)
Fuse: .5 AMP, 250 VAC Slow-Blow 3AG, located behind
J6 on the power relay printed circuit board.
GND
ASubsid iar yo f Dynamic Instruments Inc.
HOT
•
NEU
WARNING
FIG. 3-8 POWER WIRING DIAGRAM
3-9
HI 2151/30WC MANUAL
•
Power Input J6
J6 - 1 (Low) Neu
J6 - 2 (HI) Hot
J6 - 3 (Ground)
Step 5. For the Wall Mount -WS version, route the 14 AWG (Minimum) wires through the lower right side of the cut out (facing
the front of the instrument) to TB1 which is mounted at the
lower right hand corner of the back plane.
•
Output Setpoint Relay
Wiring
Optional Relays or
TTL Level Outputs
HI 2151/30WC-WS Power Connection
TB1-1 Hot (HI)
TB1-2 Neu (Low)
TB1-3 Gnd (Ground)
•
•
•
(2) Standard SPDT (Form C) Relays
Wire Size: 12 AWG Maximum
J5 Relays Connector
Pin 1NO (Normally Open) Relay 1
Pin 2C (ARM)Relay 1
Pin 3NC (Normally Closed)Relay 1
Pin 4NO (Normally Open)Relay 2
Pin 5C (ARM)Relay 2
Pin 6NC (Normally Closed)Relay 2
•
For Wall Mount Version (-WS) - Route the wiring through the
lower left side of the cutout (When facing the front of the instrument) to the J5 center connector of the lower Printed Circuit Card.
•
This option supplies six TTL level outputs, rated at 300 mA. It is
available as a -D1 option which includes the firmware and a sixty
inch, eight wire, 24 gauge customer terminated cable.
A -D2 option includes the following:
•
Firmware
•
Sixty inch eight wire, 24 gauge customer terminated ribbon cable.
•
Six (6) 115 VAC solid state triac relays on an externally mounted
option card. Mounting hardware includes:
4 standoffs
8 #6 split lock washers
8 #6 flat washers
8 #6-32 UNC pan head screws
3-10
•
-D2 option card contains a 5-amp fuse for each relay.
•
Each relay has a two-pin terminal connector
J3 Set Point 3
J4 Set Point 4
Pin 1 Lo
Pin 1 Lo
Pin 2 Hi
Pin 2 Hi
Chapter 3 - Installation
•
J5 Set Point 5
Pin 1 Lo
Pin 2 Hi
J6 Set Point 6
Pin 1 Lo
Pin 2 Hi
J7 Set Point 7
Pin 1 Lo
Pin 2 Hi
J8 Set Point 8
Pin 1 Lo
Pin 2 Hi
Use 22 AWG minimum to 12 AWG maximum wire for J3 through
J8.
NOTE:
See Output Option Board Installation for board installation procedures.
CAUTION
THE CONTACTS ON THE SOLID STATE RELAY WILL OPEN IF A POWER
FAILURE OCCURS. A LIT LED INDICATES THAT THE RELAY HAS BEEN
ACTIVATED.
J3 Serial Port Wiring
•
The standard serial port J3 is located on the second board inside the
instrument and is configured either as an RS-232 or RS-422/485
port. (See Section 4.1 for port configuration instructions)
•
The -A model designator in the model number indicates how the
instrument was configured from the factory. (See Table 3-1)
-A1
-A2
-A3
J3
RS-232
RS-422
RS-485
Pins
Signal
Signal
Signal
1
Cts
Tx+
Tr+
2
Rts
Tx-
Tr-
3
Rxd
Rx+
N/C
4
Txd
Rx-
N/C
5
Gnd
Gnd
Gnd
TABLE 3-1: FACTORY CONFIGURATION
Remote Functions
Wiring
•
•
Wire size: 22 AWG minimum to 12 AWG maximum
For -WS wall mount models, route the wiring to J3 through the
upper left side enclosure access hole when facing the front of the
enclosure.
•
Some functions are level conditions and some are activated by
momentary grounding. Both use the remote functions ground found
on pin 9.
Wire Size:
22 AWG Min. to 12 AWG Max. Shielded
•
3-11
HI 2151/30WC MANUAL
•
•
CAUTION
Momentary Functions require 100 mSEC or greater contact to
ground for proper activation. Use remote functions ground only for
activating remote functions.
For the -WS wall-mount version, route the wiring to J2 through the
enclosure access hole (upper left side when facing the front).
REMOTE FUNCTIONS ARE NOT ISOLATED. DO NOT BUNDLE WIRING
FROM REMOTE FUNCTIONS WITH POWER CABLE, RELAY CABLE OR
WITH ANY OTHER HIGH ENERGY CABLES. USE SHIELDED CABLE 50”
OR LESS. TO DO SO MAY RESULT IN UNSTABLE PERFORMANCE.
Load Cell/Point
Connections (J1)
About Load Cell
Wiring
NOTE:
The unit is capable of powering a maximum of eight 350 ohm load
cells/points. If more than eight load cells/points are used, an external
power supply is required. Figures 3-9, 3-10, Load cell/point connections (J1) shows how to connect a full six-wire hookup, a four-wire
hookup, and an external excitation supply. Load cell/point cables are
connected to J1 through a furnished mating plug, P1.
Contact Hardy Customer Support for installation information when using an external
power supply.
To ensure a "clean" signal from the load cells/points, follow these precautions :
•
•
•
•
Load cell/point cables MUST be run separate from all other cables
and in their own conduit. Load cell/point cable shield should be
attached to ground screw on rear panel only.
Six-wire, shielded load cell/point cable should be used for lengths
of 50 feet or more or if intrinsic safety barriers are used. Eight-wire
shielded cable, preferably Hardy C2 cable, must be used for C2 calibration.
Avoid load cell/point cable splices. If cables are longer than needed,
coil up and tape excess cable. If cables are short, use an appropriate
junction box. When terminal lugs are installed on load cell/point
cables, Hardy Instruments recommends the lug be crimped and soldered.
When connecting the HI 2151/30WC weight controller to the HI
215IT junction box using C2 load cell/point cable (6020-0001), use
the following color code:
Model
Exc +
Sen +
Sig +
Sig -
J-BOX
RED
BLUE
GRN
WHT
Sen BROWN
Exc -
C2 +
C2 -
BLK
GREY
VIO
TABLE 3-2: C2 CABLE COLOR CODE
WARNING
3-12
DO NOT OPERATE AT INCORRECT LINE VOLTAGE; THE UNIT WILL
BE DAMAGED. CHANGING THE INPUT VOLTAGE RATING BETWEEN
Chapter 3 - Installation
120 VAC AND 240 VAC REQUIRES MODIFICATIONS AT THE FACTORY.
FOR FURTHER HELP CONTACT CUSTOMER SUPPORT.
C2 Load Cell
Connections (J1)
(See Fig. 3-9)
Step 1. Attach load cell cable shield under screw near J1 on back of
weight controller.
Optional
WEIGHT
CONTROLLER
C2
C2
+
+EXC
+SEN
-EXC
-SEN
-EXC
LOAD
CELL
CONNECTOR
J1
SHIELD
-SEN
-SIG
N/C
+SIG
N/C
+
C2
- C2
TO AUXILLARY
JUNCTION BOX
FOR 5 OR MORE
LOAD CELLS
OR 5TH LOAD CELL
+SIG
+SEN
+EXC
-SIG
1
TB9
SHIE LD
LOAD CELL 1
LOAD CELL 2
LOAC CELL 3
LOAD CELL 4
FIG. 3-9 C2 LOAD CELL CONNECTION
Step 2. Remove Factory installed jumpers for C2 wire load cell connection.
• Do not run load cell cable in parallel with or in same conduit with power wiring, relay cables or any other high
energy cables.
• Recommend load cell cable, Hardy Instruments (Prt. #
6020-0001)
• IT Summing Card (Prt. # 0535-0465)
Non C2 Load Cell
Connections (J1)
(See Fig. 3-10)
Step 1. Attach load cell cable shield under screw near J1 on back of
weight controller.
Step 2. Factory installed jumpers to remain in place for 4 wire load
cell connection.
Step 3. Do not run load cell cable in parallel with or in same conduit
with power wiring, relay cables or any other high energy
cables.
Step 4. Eight conductor load cell cable required when:
•
•
•
Cable runs greater than 50 feet.
With Soft Calibration.
With INTEGRATED TECHNICIAN "IT®"
3-13
HI 2151/30WC MANUAL
Optional
WEIGHT
CONTROLLER
8
C2
C2
+
+EXC
+SEN
-EXC
-SEN
-EXC
LOAD
CELL
CONNECTOR
J1
SHIELD
-SEN
-SIG
N/C
+SIG
N/C
+ C2
- C2
+SEN
TO AUXILLARY
JUNCTION BOX
FOR 5 OR MORE
LOAD CELLS
OR 5TH LOAD CELL
+SIG
+EXC
-SIG
1
TB9
SHIELD
LOAD CELL 1
LOAD CELL 2
LOAC CELL 3
LOAD CELL 4
FIG. 3-10 LOAD CELL CONNECTION (NON C2 LOAD CELLS) J1
NOTE:
Contact Hardy Customer Support for installation information when using an external
power supply.
NOTE:
The Auxiliary Junction Box connector is an optional item and must be ordered from
the factory.
NOTE:
Record all load cell serial numbers and location on the label located on the inside
cover of the junction box.
Output Option Board
Installation Procedures
WARNING
DANGEROUS VOLTAGE IS PRESENT WITHIN THE ENCLOSURE OF
THE INSTRUMENT AND PRESENTS A RISK OF ELECTRICAL SHOCK.
ALWAYS UNPLUG THE POWER CORD BEFORE OPENING AND SERVICING THE INSTRUMENT.
CAUTION
INSTALLATION AND SERVICING OF THIS UNIT SHOULD BE PERFORMED BY AUTHORIZED AND QUALIFIED SERVICE PERSONNEL
ONLY. FOLLOW ALL ELECTROSTATIC DISCHARGE (ESD) PROCEDURES WHEN OPENING THE INSTRUMENT.
Step 1. Disconnect the power cord.
Step 2. Detach all interconnect cabling.
Step 3. Use a phillips screw driver and remove the four pan head
machine screws that fasten the rear panel to the extrusion.
Step 4. Gently pull out the rear panel with the printed circuit boards
attached. The main board is in clear view
Step 5. Remove the appropriate option cover from the rear panel
(Option 1 or Option 2 cover) as required. Option 1 cover has
3-14
Chapter 3 - Installation
two perforations to allow for installation of different options.
(See Fig. 3-11)
Step 6. Each Option Board is furnished with four mounting screws to
secure it to the main board. The main board has pre-mounted
standoffs which accept any of the Option Boards in either
position 1 or position 2. Note however, the BCD board may
be installed only in the Option 2 slot which is sized for the
BCD connector.
Remove for Profibus
Option
Remove for BCD option in
Option - 2 slot
Remove for Analog Option
in Option - 1 Slot or A-B
RIO
FIG. 3-11 OPTION LABEL COVER
NOTE:
Pin number 1 will always be on the left side of the unit (when facing the rear panel)
except for the parallel BCD board.
Step 7. Position the Option Board over the standoffs and carefully
align the mating connector pins of the Option Board with the
appropriate socket position, J4 or J5, on the main board.
Guide the connector pins straight into the socket.
Step 8. Push down on the option board to seat the option connector
pins into the socket on the main board. Visually verify that all
of the pins are properly seated into the mating connector.
Step 9. With the option board resting on top of the four standoffs fastened to the main board, install the four screws, lock washers
and flat washers.
Step 10. Gently slide the rear panel back into the extrusion
Step 11. Replace the four pan head machine screws that fasten the rear
panel to the extrusion.
Step 12. Connect the power cord.
Options Cabling and
Interconnect
Analog Output Option
-B1 (See Fig. 3-12)
•
The Analog Output Option card can be mounted in option slot positions one or two.
3-15
HI 2151/30WC MANUAL
This option has one output connector and uses pins 1 and 2 for +
and - voltage outputs and pins 5 and 6 for - and + current outputs.
One current and voltage range is selected by configuring the two
jumpers on jumper block "W" of the analog board.
CR1
-
+
25
26
+
R1
C11
+
RN2
R3
C13
C2
VR2
C20
C16
O
U3
RN1
R8
U4
S
D
D
C23
R6
R12
U9
G
D
R11
C8
C6
C22
R10
C15
Q1
C3
C25
R9
C14
C5
E
Q3
6
C24
R7
C9
U1
I
C21
TP1
C7
C
VR4
VR3
Q2
U5
U2
C1
TP2
ISO
GND
R2
U7
R18
P1
R20
CR3
CR4
R21
ANALOG OUT PWA
W
1
2
3
4
CR2
REV-
1
2
R17
0535-0406-
C17
•
C18
•
U10
R13
C26
R14
U6
S/N
C4
U8
R4
R5
R15
C19
1
R16
J1
R19
FIG. 3-12 ANALOG OUTPUT BOARD
Both current and voltage outputs are available simultaneously.
For Jumper Configurations See Chapter 4.
Wire Size: 22 AWG Min. To 12 AWG Max
-B1 Option Connector Wiring:
J1-1
V+
J1-2
VJ1-3
No Connection
J1-4
No Connection
J1-5
IJ1-6
i+
•
The BCD option board. (See Fig. 3-13) is installed in option slot 2
only and will provide parallel output of the sensed gross, net, or tare
weight.
0535-0407-
REV
ISO + 5V
J1
TP2
W2
C13
U8
C17
U12
U9
C18
U13
U10
C19
U14
U11
C20
C7
G
O
VR1
+
C4
C14
R3
I
R2
+
U2
U1
BCD PWA S/N
RN2
U6
P1
C3
C1
W1
C10
1
2
C15
BCD Option Board
Installation
Procedures -B2, -B5, B9
•
•
•
•
U15
+
C6
C8
R1
+
C2
RN1
U3
U7
C12
U4
C11
C5
S
G
Q1
C9
D
FIG. 3-13 PARALLEL BCD BOARD
Connector Requirements
3-16
40
39
ISO
GND
TP1
C16
U5
Chapter 3 - Installation
•
The board connector is a 40 pin right angle connector terminating to either a 37 pin D-subminiature assembly (option
B-2) a 40 pin connector with a 60-inch cable (option B-5),
or a 40 pin connector with a 24" cable (option B-9 used with
a Wall Mount Model) The B-5 option provides flexibility of
terminating BCD signal lines to the terminal board options
B-6 and B-7.
• The pin designations for the BCD output are noted in Cable
Pinouts List - Parallel BCD Board Connector to BCD Connector. All data outputs have a drive capability of 15 LSTTL
loads (6 mA total) and use positive true logic. PRINT/
READY has a drive capability of 10 LSTTL loads (4mA).
This option board is electrically and optically isolated from
the main board.
Cable Pinouts - Parallel BCD Board Connector to DB Connector
BCD BOARD
DB CONNECTOR SIGNAL
VALUE
1
3
5
7
9
11
13
15
17
19
1
2
3
4
5
6
7
8
9
10
1 x 10°
2 x 10°
4 x 10°
8 x 10°
1 x 101
2 x 101
4 x 101
8 x 101
1 x 10²
BCD BOARD
DB CONNECTOR
GND
BCD digit 1, bit 0
BCD digit 1, bit 1
BCD digit 1, bit 2
BCD digit 1, bit 3
BCD digit 2, bit 0
BCD digit 2, bit 1
BCD digit 2, bit 2
BCD digit 2, bit 3
BCD digit 3, bit 0
SIGNAL
VALUE
21
23
25
11
12
13
BCD digit 3, bit 1
BCD digit 3, bit 2
BCD digit 3, bit 3
2 x 10²
4 x 10²
8 x 10²
27
29
31
33
14
15
16
17
BCD digit 4, bit 0
BCD digit 4, bit 1
BCD digit 4, bit 2
BCD digit 4, bit 3
1 x 10³
2 x 10³
4 x 10³
8 x 10³
35
37
2
4
18
19
20
21
BCD digit 5, bit 0
BCD digit 5, bit 1
BCD digit 5, bit 2
BCD digit 5, bit 3
1 x 10⁴
2 x 10⁴
4 x 10⁴
8 x 10⁴
3-17
HI 2151/30WC MANUAL
6
8
10
12
22
23
24
25
1 x 10⁵
2 x 10⁵
4 x 10⁵
8 x 10⁵
BCD digit 6, bit 0
BCD digit 6, bit 1
BCD digit 6, bit 2
BCD digit 6, bit 3
14
16
26
27
+/- (- = +5V) (+ = OV)
OVR
18
20
22
24
26
28
30
32
34
36
38-40
28
29
30
31
WEIGHT SELECT - LSB (SEE CHART 3-3)
WEIGHT SELECT - MSB (SEE CHART 3-3)
OUTPUT DISABLE
not used
not used
MOTION (+5V = in motion)
PRINT/PRINT
not used
LB/KG
GND
not used
33
34
36
37
PIN
MODE
28
29
0
0
GROSS
0
1
NET
1
0
TARE
TABLE 3-3: WEIGHT MODE
OUTENBL
7
GND
8
BUSY
9
PRINT
10
PRTDIS
11
PRTTRIG
12
OUTENBL
13
GND
14
BUSY
15
PRINT
16
PRTDIS
17
PRTTRIG
18
OUTENBL
19
GND
20
BUSY
21
PRINT
22
DIS
PRT
PRT
TRIG
OUT
ENBL
UNIT 5
J5
J4
UNIT 4
J3
UNIT 3
J2
BCD EXTENDER ASSY8 0535-0384MSB 29
LB/KG 30
WSM 28
26
20
80K
LSB 27
19
40K
OVR
18
20K
800K 24
17
10K
400K 23
16
8K
200K 22
15
4K
100K 21
13
14
2K
12
800
1K
11
400
8
80
9
7
40
10
6
20
200
5
10
100
3
4
1
2
+ / - 25
S/N
TB2
1
24
REV
PRTTRIG
6
EXPANSION
PRTDIS
5
UNIT 2
J1
PRINT
23
3-18
UNIT 1
3
4
8
GND
BUSY
4
1
2
2
UNIT 4
UNIT 3
UNIT 2
BCD Termination
Board Installation
Procedures (See
Fig. 3-14)
UNIT 1
BCD Terminator
Boards - B6, - B7
Chapter 3 - Installation
FIG. 3-14 BCD QUAD TERMINATION BOARD OPTION
Step 1. Locate a clear, flat mounting area within five feet of all HI
2151/30WCs.
Step 2. Use the measurements shown in Figure 3-15 BCD Termination Board Installation Drill Template Illustration or P/N
0596-0117 drill template to mark five mounting holes. (See
Fig. 3-15)
3.62"
Dia .1875
5 places
4.50"
7.25"
FIG. 3-15 BCD TERMINATION BOARD INSTALLATION DRILL
TEMPLATE
Step 3. Drill 3/16-inch holes where marked.
Step 4. Install five P/N 2815-0053 standoffs in the holes.
Step 5. Install BCD terminal board on standoffs.
Step 6. Connect P/N 0509-0389-01 ribbon cables between the BCD
output (instrument option slot 2) of up to four HI 2151/
30WCs and BCD terminal board jacks J1 through J4.Connect
control lines from computer to TB1.
Step 7. For installations with more than four HI 2151/30WCs, proceed as follows:
Step 8. Install a second BCD terminal board within two feet of
installed BCD terminal board. Refer to steps 1 through 7.
Step 9. Connect P/N 0509-0389-02 ribbon cable from J5 on one BCD
terminal board to J5 on the other BCD terminal board.
Step 10. Connect data/status lines from BCD terminal board to computer. (See Fig. 3-16)
• Wire Size: 26 AWG to 20 AWG
3-19
HI 2151/30WC MANUAL
UNIT
#1
UNIT
#2
UNIT
#3
J2
J3
UNIT
#4
J4
BCD
TB2
J1
BCD
TERMINAL
BOARD
#1
UNIT
#5
UNIT
#6
UNIT # 2 CONTROL
TB1
UNIT # 3 CONTROL
PLC
OR
MAIN FRAME
COMPUTER
UNIT # 4 CONTROL
J5 EXPANSION
J5 EXPANSION
J1
J2
UNIT
#7
J3
UNIT
#8
UNIT # 1 CONTROL
BCD
TERMINAL
BOARD
#2
UNIT # 5 CONTROL
UNIT # 6 CONTROL
TB1
UNIT # 7 CONTROL
UNIT # 8 CONTROL
J4
FIG. 3-16 BCD TERMINATION INSTALLATION BLOCK DIAGRAM
Allen-Bradley RIO
Interface Option -B8
Refer to Hardy Instruments HI 2151 Series Weight Controllers Remote
I/O Installation and Operation Manual, Document Number 0596-0173
for installation instructions.
The Allen-Bradley RIO card can be mounted in either option slot one
or two. However, there is a limit of one RIO card per instrument. (See
Fig. 3-17)
3-20
Chapter 3 - Installation
FIG. 3-17 RIO CARD/PIN LAYOUT
Connector Wiring:
1
2
3
4
5
6
Profibus Interface
Option -B12
Blue (1/2 of twisted pair)
Shield (outer braided cable shield)
Clear (1/2 of twisted pair)
No Connection
No Connection
Wire to instrument chassis ground
Refer to Hardy Instruments Profibus Interface Option for the HI 2151/
30WC Installation and Operation Manual for installation instructions.
The Profibus option card can be mounted in either option slot one or
two. However, there is a limit of one Profibus card per instrument.
Connector Cable Wiring:
Top Row Right to Left
J1-1 Ground (outer braided shield)
J1-2 No Connection
J1-3 Transmit (1/2 of twisted pair)
J1-4 No Connection
J1-5 No Connection
Bottom Row Right to Left
J1-6 No Connection
J1-7 No Connection
J1-8 Receive (1/2 of twisted pair)
J1-9 No Connection
3-21
HI 2151/30WC MANUAL
Dynamic Data
Exchange (DDE) I/O
Server -B14
RS-232C- Requires an interface cable with a 9 pin or 25 pin serial port
female connector to connect to a computer. Wire the cable to the 5 pin
Phoenix connector J3 located on the rear panel of the weight controller.
Refer to Hardy Instruments optional DDE Installation and Operation
Manual, document number 0596-0221 for more details.
HI 215IT Series
Junction Boxes
Refer to Fig. 3-11 Load Cell/Sensor Connections for specific details.
Wiring to Hardy Instruments Load Points and Load Sensors
HI LPH
HI BB01
HI LPS
HI SB01
HI LPD
HI DSB01/2
HI LPT
HI SO1
+ EXC
Green or
Green/Blue
Red
Red
Red
-EXC
Black or
Black/Grey
Black
Black
Black
Shield
Orange or
Yellow
Orange or
Clear
Orange or
Clear
Orange or
Clear
TB1, 3, 5,7
Set Point Relay Option
Board Installation -D2
3-22
TB2, 4, 6, 8
HI LPH
HI BB01
HI LPS
HI SB01
HI LPD
HI DSBO1/2
HI LPT
HI SO1
C2+
Grey
Grey
Grey
Grey
C2 -
Violet
Violet
Violet
Violet
Sig +
White
Green
Green
Green
Sig -
Red
White
White
White
TB9
J1 HI 2151/30WC
+EXC
+SEN
-EXC
-SEN
Red
Blue
Black
Brown
Shield
C2+
C2+SIG
-SIG
Grey
Violet
Green
White
The setpoint relay option board must be installed outside of the HI
2151/30WC. (See Fig. 3-18).
Step 1. Locate a clear, flat mounting area within five feet cable distance of the HI 2151/30WC.
Chapter 3 - Installation
U1
S1
N.O. O
U2
PWA-RELAY,
HI2151/30WC
N
SP3
SP4
SP5
TP 1
+ 5V 1
S/N -
1 2 3 4 5 6 7 8
SP6
SP7
SP8
N.O.
RN1
1 2 3 4 5 6 7 8
RN2
TP2 GND
J1
DS4
DS5
DS7
DS8
0535-0357
REV -
DS3
1
DS6
K3
K4
F3 5A
J3
1
K5
F4 5A
J4
K6
F5 5A
J5
K7
F6 5A
J6
K8
F8 5A
F7 5A
J7
J8
2
FIG. 3-18 SET POINT RELAY OPTION BOARD
Step 1. Use the measurements shown in HI 2151/30WC InstallationDetails (See Fig. 3-19) to make four mounting holes.
FIG. 3-19 INSTALLATION DETAILS
Step 2. Drill 3/16-inch diameter holes where marked. (See Fig. 3-19)
Step 3. Install four P/N 28150063 standoffs in the
drilled holes.
Step 4. Install the relay
option board on the
standoffs. (Fig. 3-20)
FIG. 3-20 STANDOFF ASSEMBLY
3-23
HI 2151/30WC MANUAL
Profibus Interface
Card Option Wiring
Diagram
Step 1. Connect P/N 0509-0390 ribbon cable between relay option
board jack J1 and J4 on the rear panel of the HI 2151/30WC.
(See Fig. 2-12)
Step 2. For -WS wall mount versions the card can be mounted within
the enclosure. Route the wiring to J3 thru J8 via the lower left
side of the access hole.
For more complete instructions, see the Profibus Interface Option, Card
Operation and Installation Manual #0596-0211.
Installation of the Secure
Memory Module
FIG. 3-21 SECURE MEMORY MODULE
Step 1.
Step 2.
Step 3.
Step 4.
Make sure that the module has the notch facing up. (Fig. 3-21)
Slide the module with the notch up into the module housing.
Press the module in until it stops.
To remove the module pull the module straight out of the
housing. (See Fig. 3-22)
FIG. 3-22 INSTALLING AND REMOVING THE SECURE MEMORY
MODULE
3-24
Chapter 4 - Configuration
CHAPTER 4 - SYSTEM CONFIGURATION
Chapter Four covers procedures for configuring the HI 2151/30WC
Weight Controller. System Configuration includes only hardware
adjustments such as Jumper and Dip Switch settings. We recommend
that maintenance personnel be familiar with this chapter before configuring the weight controller. Alternative configuration procedures are
not recommended.
Standard RS-232C/RS422/
485 Configuration
Procedures.
About RS 232/RS422/
485 Bi-directional
Serial Ports (See
Chapter 5, for Setup
Procedures)
The RS 232/RS422/485 Bi-directional serial ports are configured by
setting jumpers, dip switches and are also setup from the front panel.
The setup instructions are located in Chapter 5- System Setup Bi-directional Serial Ports. The jumpers and dip switches are located on the
Main board. (See Fig. 4-1)
Dip Switch
Location
Jumper Location
FIG. 4-1 MAIN BOARD JUMPER AND DIP SWITCH LOCATIONS
4-1
HI 2151/30WC MANUAL
Setting the Jumpers
WARNING
DANGEROUS VOLTAGE IS PRESENT WITHIN THE ENCLOSURE OF
THE INSTRUMENT AND PRESENTS A RISK OF ELECTRICAL SHOCK.
ALWAYS UNPLUG THE POWER CORD BEFORE OPENING AND SERVICING THE INSTRUMENT.
CAUTION
SERVICING OF THIS UNIT SHOULD BE PERFORMED BY AUTHORIZED
AND QUALIFIED SERVICE PERSONNEL ONLY. FOLLOW ALL ELECTROSTATIC DISCHARGE (ESD) PROCEDURES WHEN OPENING THE
INSTRUMENT.
NOTE:
Remove jumpers with all barriers.
Step 1. Disconnect the power cord.
Step 2. Use a phillips screw driver and remove the four (4) pan-head
machine screws that fasten the rear panel to the extrusion.
(See Fig. 4-2)
Step 3. Gently pull out the rear panel with the printed circuit boards
attached. The main board is in clear view.
Phillips pan
head machine
screws
FIG. 4-2 REMOVING THE REAR PANEL
CAUTION
WHEN OPENING THE BACK OF THE HI 2151\30 WC, MAKE SURE THAT
YOU USE PROPER ELECTROSTATIC DISCHARGE PROCEDURES TO
PREVENT DAMAGE TO THE INSTRUMENT.
Step 4. If an option board is installed above jumpers, remove the
option board.
Step 5. The factory default position is for the RS-232 setting. (See
Fig. 4-3) The dip switches do not function when in the RS232 configuration.
4-2
Chapter 4 - Configuration
Step 6. To select the RS 422/485 ports, move the jumper to the RS
422/485 position. (See Fig. 4-3)
NOTE:
The selection for the RS 422 or the RS 485 is done from the front panel.
1
8
RS 422/485 RS 232
JP1
RS 232 JUMPER SETTING
1
8
RS 422/485 RS 232
JP1
RS 422/485 JUMPER SETTING
FIG. 4-3 RS-232 (DEFAULT), S422/485 JUMPER SETTINGS
Step 7. If the controller is not in a termination position, set all the dip
switches to the OFF position. (See Fig. 4-4)
Step 8. If the controller is in a termination position (i.e. at the end of
the communication line) set all the dip switches to the ON
position. (See Fig. 4-5)
1
3
5
2
4
6
ON
FIG. 4-4 NON TERMINATING CONTROLLER, ALL DIP SWITCHES SET
IN THE OFF POSITION
4-3
HI 2151/30WC MANUAL
1
3
5
2
4
6
ON
FIG. 4-5 TERMINATING CONTROLLER, ALL DIP SWITCHES
SET IN THE ON POSITION
Step 9. Replace the option board.
Step 10. Gently slide the rear panel back into the extrusion
Step 11. Replace the four pan-head machine screws that fasten the rear
panel to the extrusion.
Step 12. Connect the power cord.
Analog Output Option
Card Configuration
Procedures -B1
About the Analog
Output Card Option
The analog transmitter outputs to a receiving device (PLC, Computer
etc.). The transmitter outputs a user selectable Gross, Net, Rate of
Change (ROC), Peak or Total Weight as 0-5V, 0-10V, 0-20mA, or 420mA (via the front panel you can reverse the voltage and current
ranges, See Chapter 5 for procedures). When configuring the Analog
Output Card, both the receiver and the HI 2151\30WC must be in
the same mode (e.g. Gross, Net, Rate of Change (ROC) Peak or
Total Weight). The analog card can also span the voltage or milliamp
ranges over a portion of the weight data. The outputs are electrically
and optically isolated from the main board. The Analog Output Card is
adjusted at the factory. (See Chapter 5, Section 5.6 for Setup Instructions)
Setting the Jumpers
Disassembling the
rear panel and
setting jumpers
4-4
Step 1. Repeat steps 1-4 above. (See Fig. 4-2)
Step 2. Set the jumper that matches the system's feedback voltage or
current configuration. (See Table 4-1)
Chapter 4 - Configuration
JUMPER CONFIGURATION CHART
CURRENT VOLTAGE
JUMPER
0-20 mA/0-5V
W1 & W3
0-20mA/0-10V (Factory Default)
W1 & W4
4-20mA/0-5V
W2 & W3
4-20mA/0-10V
W2 & W4
TABLE 4-1: ANALOG OUTPUT JUMPER SETTINGS
NOTE:
W1 & W4 are factory default settings.
Reassembling Rear
Panel
Step 1. Gently slide the rear panel back into the extrusion.
Step 2. Replace the four pan-head machine screws that fasten the rear
panel to the extrusion.
Step 3. Connect the power cord.
Front Panel Setup
Procedures
To complete the Analog Option Card installation, you must complete
the Setup procedures before operating the system. (See Chapter 5 for
instructions)
Analog Card
Adjustment
Step 1. Slight adjustments may be necessary to insure that the display
on your Programmable Logic Controller reads precisely with
the display on your weight controller. Use the procedure
below which corresponds to the input card in your PLC.
Step 2. Make sure the Analog Option card is programmed correctly
prior to performing any adjustments.
Voltage
Step 1. If 0 volts represents other than empty put weight on your load
cells equal to your 0 volt selection.
Step 2. Otherwise, with the hopper empty adjust R4 for the correct
reading
Step 3. Put weight on your load cells equal to your 10 volt selection.
Adjust R16 for the correct reading.
Current
Step 1. Put weight on your load cells equal to your 4 ma selection, if
4 ma represents other than empty. Adjust R19 for the correct
reading.
Step 2. Put weight on your load cells equal to your 20 ma selection.
Adjust R5 for the correct reading.
4-5
HI 2151/30WC MANUAL
CR1
-
+
25
26
R1
C11
+
O
U3
RN1
R8
U4
S
D
R6
C14
D
C23
R12
U9
G
D
R10
R11
C8
C6
C25
R9
C15
Q1
C3
U1
C22
E
Q3
6
C24
R7
C9
C5
I
C21
TP1
C7
VR4
VR3
Q2
C2
C
VR2
C20
C16
R18
RN2
R3
C13
W
1
2
3
4
CR2
U5
U2
C1
TP2
ISO
GND
R2
U7
C18
+
P1
R20
CR3
CR4
R21
ANALOG OUT PWA
R17
REV-
C17
0535-04061
2
U10
R13
C26
R14
U6
C4
U8
S/N
R4
R5
C19
R15
1
R16
J1
R19
Voltage Span
Voltage Zero
Current Span
Current Zero
FIG. 4-6 ANALOG OUTPUT BOARD
Parallel BCD Board Print
Configuration Procedures B2, -B5, -B9
About the BCD Board
Print Output Signal
Some receivers require either a positive (high) pulse or a negative (low)
when printing. Select the jumper that meets the receiver input signal
requirements.
Jumper Location
The switch is marked W1 W2 in the top center of the board.
Jumper Settings (See
Fig. 4-7 and 4-8)
•
•
W2
W1
W2
W1
Positive Pulse = W1
Negative Pulse = W2 (Default)
Positive
Pulse
Negative
Pulse
FIG. 4-7 BCD CARD JUMPER SETTING FOR POSITVE PULSE
FIG. 4-8 BCD JUMPER SETTING FOR NEGATIVE PULSE
4-6
Chapter 4 - Configuration
Calibration Configuration
Procedures When Security
Code is not Available
When the security code is not available, the config dip CAL switch
(S3) on the rear panel can be toggled to enter the CAL menu. (See
Chapter 5, Section 5.2, sub paragraph 9 for setup instructions) When
you press the CAL button at the front panel, and the CAL switch (S3) is
not toggled, the display will read ERR 8. Simply perform the following
procedures to enter the Calibration Menu.
Dip Switch Location
(See Fig. 4-9)
A Subs
i diar yof Dynami cInst rumentsI nc.
Calibration
Dip Switch
FIG. 4-9 CAL TOGGLE SWITCH LOCATION
Step 1. Change the position of the toggle switch (#2). (For Calibration procedures See Chapter 5, Section 5.4)
Step 2. Check to see if the CTR ZERO, MOTION, and ZERO
TRACK leds are flashing.
Auto Zero Tolerancing
Configuration Procedures
About Auto Zero
Tolerancing
When the Auto Zero Tolerance is enabled, any weight within the
entered tolerance of zero and not in motion, will cause the display to
automatically read zero.
NOTE
The amount of weight zeroed off is cumulative. The zero command will fail if the current
gross weight plus any previously zeroed amount exceeds the zero tolerance.
4-7
HI 2151/30WC MANUAL
Dip Switch Location
(See Fig. 4-10)
A Subsida
i r yof D n
yamic Inst rumentsI nc.
Auto
Zero
Tolerance
Dip Switch
FIG. 4-10 AUTO ZERO DIP SWITCH SETTING
Dip Switch Setting
Step 1. To enable the Auto Zero Tolerancing, set dip switch #8 to ON.
Step 2. To disable the Auto Zero Tolerancing, set dip switch #8 to
OFF.
Configuring Peak Hold
Mode
About Configuring
Peak Hold
NOTE:
4-8
Highest gross or averaged gross is selectable on dip switch S2 position
number 2, located internally on the Main Controller board. (See Fig. 411)
Dip Switches S2 on the Power Relay Board are all normally in the OFF position.
Contact Hardy Instrument Customer Support Department before changing any of
these switch positions.
Chapter 4 - Configuration
FIG. 4-11 PEAK HOLD MODE DIP SWITCH LOCATION
Configuring Multidrop S3-1
When the switch is ON it enables communication to more than one
controller on the same line. To use the Multidrop function the Hardy
Link software option must be installed. Multidrop is only available
when using the RS-422/485 serial port setting.
Configuring Serial S3-3
1. Serial Port Lockout. When the switch is ON, the following commands cannot be executed over the serial interface:
Format
Set Setpoints
2. When the Serial switch is OFF it enables these commands. OFF is
the default position.
Configuring Option S3-4
1. When the switch is ON, there is no access to the Option Menu.
2. When the switch is OFF, the full Option menu is available.
Configuring Set Point S3-5
1. When the switch is ON, there is no access to the Set Point Menu.
2. When the switch is OFF the Set Point Menu is available.
Set Point S3-6
Not Used.
Configuring Lock S3-7
1. When the switch is ON, the Tare, Mode, Zero, and lb/kg keys are
locked out or not available.
4-9
HI 2151/30WC MANUAL
2. When the switch is OFF, Tare, Mode, Zero, and lb/kg keys are
available.
Configuring the Power &
Relay Board Dip Switches
S2 (See Fig. 4-12)
FIG. 4-12 POWER & RELAY BOARD DIP SWITCH LOCATION
1. When the switch is ON, incoming checksums are ignored. When
the switch is OFF incoming checksums are read.
2. S2-2 - When the switch is ON, the Peak Hold signal read is averaged. When the switch is OFF, the Peak Hold signal is instantaneous.
3. S2-3 - When the switch is ON, the instrument is in the NBS mode
of operation. Resolution is limited to 1:10,000 counts. When the
switch is OFF, the resolution is 1:985,000.
4. S2-4 - This switch must be toggled (position changed) to enter NBS
calibration from the front panel CAL button.
5. S2-5 - Turns Off > character on print output serial port.
6. S2-6 - Puts unit in Blind Remote Mode.
7. S2-7 - is not used.
8. S2-8 - is used for resetting Calibration & Configuration to the Factory Defaults
4-10
Chapter 5 - Setup
CHAPTER 5 - SETUP
Chapter 5 covers firmware settings to prepare the controller for calibration and operation. User and service personnel should be familiar with
the information in this chapter before going through the setup procedures. Alternatives to these procedures are not recommended.
Keypad Functions (See
Fig. 5-1)
8.8.8.8.8.8
FIG. 5-1 FRONT PANEL
Zero
Mode
NOTE:
Tare
•
Used in Gross mode to zero the display to within the tolerance
level.
•
This function can be used as many times as desired as long as the
total does not exceed the value entered as the zero tolerance.
•
The zero key is also used to exit a menu after entering number(s)
without changing the original number. For example - when entering
a Span value (18), the user decides that the original number (15) is
OK. By pressing the Zero Key you can exit the menu without
changing the original number (15), even though you have typed
new numbers and they appear on the display.
•
In standard controllers, the mode key toggles between gross and net
weight.
•
In controllers with any one or all of the mode options (Total Mode,
Peak Hold Mode, or Rate of Change Mode) installed the mode key
toggles between gross/net weight and the option(s).
To order Total, Peak or ROC options, contact your local Hardy Representative or
call/FAX/E-mail Hardy Instruments, Sales Department.
•
The Tare button captures the current Gross weight at the instant the
Tare button is pressed and places it in the tare register setting the
Tare Value. The tare value is the difference between the Net (e.g.
Vessel weight) and Gross weight (e.g. vessel weight + material
5-1
HI 2151/30WC MANUAL
weight). You can also type in the Tare Value by using the 1/Tare Val
key.
•
Print
The Tare function can also be actuated by activating the appropriate
remote function pin. See Remote Function Configuration in Chapter 4.
Transmits data to the printer.
NOTE:
The serial port must be configured as a printer. If the serial port is not configured as a
printer port, the print key is not going to respond, and you cannot print.
NOTE:
The print function cannot print data if the weight is in motion or exceeds the capacity
of the scale.
—/Test/Clr
•
The Test/Clr function Initiates one of the selected tests
•
•
1/Tare Val
2/Status/Bar
•
This (—) key is used to enter a minus sign (-) for a negative number. This function can be used only when the display reads the number 0.
•
The clear "CLR" function is operable when the controller is a menu
requiring a numeric input. Use CLR to clear the display before
entering a new value.
•
This function displays the current Tare value stored in the Tare Register. (See paragraph 5.1.3)
•
This function allows the user, after pressing the "Clr" button, to
enter a Tare Value using the numeric keys. To exit the Tare Val
menu press the Zero button.
•
The key also enters the digit "1."
•
The Status/Bar toggles between the mode settings and the bar
graph.
•
The Status function indicates the following:
•
•
•
•
NOTE:
Selected Mode
Selected Engineering Unit: lbs/kg
Status of Relays 1 & 2
The Bar Graph function displays in graphical form the value of the
mode (Total, Gross, Net, ROC, Peak) selected in the bar graph
setup menu. (See Fig. 5-2)
The bar graph mode and the display mode are totally independent. Make sure you
know what mode each are in before reading.
•
5-2
Self Test - "SLFTST" on the display.
Integrated Technician - "IT SEC" on the display.
The key also enters the digit "2."
Chapter 5 - Setup
3/Lb Kg
4/↑
•
Toggles between read pounds (Lb.) or kilograms (Kg.).
•
The key also enters the digit "3."
•
This key moves forward through a menu, step by step and will wrap
to the beginning of the menu.
•
The key also enters the digit "4"
•
Resumes the Self Test
Bar Graph
FIG. 5-2 FRONT PANEL, BAR GRAPH DISPLAYED
5/←
6/Set Pt
•
Moves the decimal point position to the left when in Calibration
Mode.
•
Selects user selectable formats in the serial and optional BCD
menus.
•
The key also enters the digit "5".
•
This key is used to enter the Set point Menu
•
Values for standard and optional Relays.
Set point Values
Deadband Values
Preact Values
7/Option
•
The key also enters the digit "6".
•
This key selects the standard serial ports and available option
menus:
•
Rate of Change
5-3
HI 2151/30WC MANUAL
•
•
•
•
8/Cal
9/↓
0/Exit
NOTE:
Enter
5-4
Analog Transmitter(s)
BCD Port
Remote I/O
PROFIBUS
•
The key also enters the digit "7".
•
This key opens the Calibration set up menu.
•
The key also enters the digit "8".
•
This key moves backward through a menu, step by step and will
wrap to the beginning of the menu.
•
Selects user selectable formats in the Serial and optional BCD
menus.
•
Pauses the Self-Tests.
•
The key also enters the digit "9".
•
This key Exits a menu/sub-menu back to the normal operating
mode when text is on the screen
The zero key is used to exit a menu when numbers are entered (See Zero).
•
The key also enters the digit "0".
•
When changing numerical values in a sub-menu, this key accepts or
rejects the value.
•
When a value is accepted a "GOOD" message will appear on the
display and step forward to the next item on the menu.
•
When a value is rejected, an "ERR" message appears on the display
along with the entered value, allowing the user to change the value.
For a list of error messages see Chapter 7, Troubleshooting.
Chapter 5 - Setup
Remote
Functions
Removeable
EEPROM
2k x 8-bit
Resident
EEPROM
2k x 8-bit
Load Cell
Interface and
Diagnostics
Exc itation Monitor
RXD
TXD
CTS
RTS
Serial
Interface
EPROM
64k x 16-bit
RAM
32k X 16-bit
Microcontroller
Relay
Driver
Configuration
Switches
Display and
Keypad
Option
Card
Bus
Drivers
Option
Card A
Option
Card B
Block Diagram
RS-232C, RS 422/485 Bidirectional Serial Port
Setup Procedures
Step 1. Check the jumpers and dip switches to see that they are in the
correct position. (See Chapter 4)
NOTE:
Remove jumpers with all barriers.
Step 2. Press the Options button.
Step 3. Select the Serial Port (SERPRT) sub-menu.
5-5
HI 2151/30WC MANUAL
Step 4. Press the Enter button. RS-232 appears. RS-232 is the default
setting from the factory.
Step 5. To select RS-232, press on the Enter button.
Step 6. To select another port use the up or down arrows to select
another serial option.
Step 7. Select either RS-422, or RS-485.
Step 8. Press the Enter button to set the port setting. If the jumpers are
in the correct position the unit accepts the setting. Press exit to
return to the main menu.
Step 9. If the jumpers are not in the correct position or there are no
jumpers installed, a jumper error (JMPERR) will appear.
•
•
•
•
Go through the configuration again to select the correct
jumper position or install a jumper in the correct position.
(See Chapter 4 for instructions.)
Repeat steps 2 - 8.
Press the Enter button to set the port setting.
Press the Exit button to return to the main menu.
Bar Graph Setup
Procedures
About Bar Graph
Setup
The user can set the bar graph parameters by entering the lowest weight
(value) and the highest weight (value) of the scale or any portion of the
scale. When the user selects the Bar Graph function, the bar graph displays the current reading as a percentage of the selected scale range
(e.g. 60 pounds on a scale from 0-100 lbs will read 60%). The bar graph
can be setup to indicate Net Weight, Gross Weight and the options
Totalizer, Rate-of-Change and Peak. Keep in mind that the bar graph
can be totally independent of the displayed values.
Step 1. Press the Options button. The Options (OPTINS) sub-menu
appears.
Step 2. Press the up arrow until BAR GR appears.
Step 3. Press the Enter button. BAR LO appears. This is the submenu to select the lowest weight in the selected scale range.
Step 4. Press the Enter button.
Step 5. If a value is present, press the test/clear button to clear the
value. Use the numeric key pad to enter the new low value.
Step 6. Press Enter to select the new value. A GOOD will appear
briefly if the setting is correct.
Step 7. BAR HI appears This is the sub-menu to select the highest
weight in the selected scale range.
Step 8. Press the Enter button.
5-6
Chapter 5 - Setup
Step 9. If a value is present, press the test/clear button to clear it. Use
the numeric key pad to enter the new high value.
NOTE:
It is important to know that the high setting can be a lower value than the low setting,
which is necessary for some applications such as dispensing. The high setting value
can also be a negative number.
Step 10. Press the Enter button.
•
A GOOD will appear briefly if the setting is a value other
than the value for the low setting.
•
An ERR will appear if the value is equal to the LO value.
•
To correct the error, simply set the high value to a value
other than the low value.
BCD Menu Setup
Procedures
About BCD
Communication
(See Section 4 for
Configuration
Procedures)
BCD Print
The BCD option board provides parallel output of a sensed gross, net,
or tare weight. The BCD option is setup by first entering the Option
Menu and selecting the FORMAT menu.
The menu display shows a combination of GNTDP (G = gross, n = net,
T = tare, D = display, P = print).
•
•
•
•
Setup Procedures
NOTE:
The weight select mode tells the output device which type
of data is present.
The user selects which type of data is desired by toggling
"GNT" under the Option/BCD sub-menu.
If all three types of data are requested, then all three will
appear on the output one after the other, 10 milliseconds
apart.
If "D" is selected, the output will follow the mode being displayed.
Step 1. Press the 7/Option key. This gives the user access to the Setup
Sub-Menu. ROC or another option displays.
The display may show an option other than "ROC", depending upon which options
were installed. The HI 2151/30WC will show the first available option, in our example, ROC.
Step 2. Press the up or down arrow until the sub-menu BCD P1
appears.
Step 3. Press the Enter Button, the FORMAT sub menu appears.
Step 4. Press Enter. A series of letters (GNTDP) and spaces appear.
For example: G N _ _ D P. Note that in our example the “T” is
not displayed and that there are 6 spaces total. The sixth
value is used in other communication protocols.
5-7
HI 2151/30WC MANUAL
Print Output Options
If you want to print mode value(s) selected, such as G (Gross weight),
N (Net weight) or T (Tare) on demand, select "P."
a. Press the up or down arrow until the letter "P" appears.
b. Now when the Print button is pressed it will print the
Gross, Net, or Tare weights, whichever one is selected.
c. If you select all three, "GNT", it will print all three in
sequential order.
NOTE:
If your input device cannot handle rapid input of data, do not select more than one
mode.
•
If you don't want this function, press the up or down arrow
until a space "_" appears.
•
To output what appears on the display, select "D".
a. Press the left arrow one time to select "D" (BCD).
b. Press the up or down arrow until the "D" appears.
c. Now whatever mode appears on the display it is output.
•
If you do not want output, press the up or down arrow until
a space appears "_".
Step 5. Output Mode Options
•
Tare Mode
a. Press the left arrow two times to select "T".
b. Press the up or down arrow until the "T" appears.
c. Now when the Output is triggered by the BCD Controller, the Tare Weight is sent.
d. If you do not want to select the Tare mode, press the up
or down arrow until a space appears "_".
•
Net Mode
a. Press the left arrow one time to select "N".
b. Press the up or down arrow to until the N appears.
c. Now when the BCD Controller triggers the output, the
Net Weight is sent.
d. If you do not want to select Net mode, press the up or
down arrow until a space appears "_".
•
5-8
Gross Mode
Chapter 5 - Setup
a. Press the left arrow on time to select "G".
b. Press the up or down arrow
until the G appears.
c. Now when the BCD Controller triggers the output, the
Gross Weight is sent.
d. If you do not want to select Gross mode, press the up or
down arrow until a space appears "_".
Step 6. Press the Exit button three times to return to the Main Menu
Serial Port Menu Setup
Procedure (See Chapter
4 for Configuration
Procedures)
•
The standard serial port is setup through the option menu and is
identified as SER P1.
•
The following is a brief description of each parameter, followed by
details on menu operation.
DISPLAY
MEANING
SERCON
Serial port configuration. The port can be used as
either a print output port or as a bi-directional
communication port.
BAUD
Baud rate selection. The baud rates that can be
selected are: 1200, 2400, 9600, or 19,200.
PARITY
Parity selection for transmission error detection.
Allows parity to be set at even, odd, or no parity.
STOPS
Stop bit selection. Sets number of bits used to
indicate end of a transmission frame. The number of
stop bits can be set to 1 or 2.
LENGTH
Word length selection. Sets the number bits for each
data word. Word length can be set to 7 or 8 bits.
FORMAT
Formats the serial data output. To configure the
output use the left arrow button to select the code
letter corresponding to the specific parameter(s).
When the letter is flashing use the up or down arrow
buttons to toggle the code letter on the display. To
enable a specific parameter, the code letter must be
shown on the display. Pressing the -/Test/Clr button
will restore all code letters. The codes are:
G
N
T
R
S
Gross Weight
Net Weight
Tare Value
Rate of Change (ROC)
Set point, Deadband, Preact Values
5-9
HI 2151/30WC MANUAL
DISPLAY
MEANING
PRINT
Selects print mode. P sets print trigger and "-" sets
continuous output.
Selects bi-directional mode. The bi-directional
codes are:
BI-DIR
ADDRESS
A
Altered print (removes checksums)
P
Bi-directional with print trigger
Bi-directional without print trigger.
Selects the instrument address. This is a two digit
value, being 01 to 99.
ECHO
Selects whether instrument commands are returned
or displayed. Echo can be turned on or off. If the
(bi-directional only) Echo is turned on, commands
sent to the instrument are returned. If turned off,
only data transmitted from the instrument will be
displayed.
CONTRL
Selects hardware and software handshaking
control. The hardware mode controls Request to
Send (RTS) lines. In this mode the receiving device
must set Clear to Send (CTS) lines to high to enable
transmission. The software mode controls the transmission by the following control codes:
XOFF - (CTRL-S) halt transmission
XON - (CTRL-Q) resume transmission
When a serial port is configured for bi-directional communication with a Print Trigger format, the control port will respond to the remote
function print or serial print command just like a
print port.
Serial Procedures
NOTE:
If you have a problem with weight readings not changing or not being able to exit
from a menu, check to see that the instrument has not been set in the Display Hold
mode by a serial command. A C H (change hold) command will toggle between Hold
and Unhold. There is no visual indication showing the present mode.
Step 1. Enter the Option Setup Menu by pressing the 7/Option button.
The Rate of Change Sub-Menu ROC appears.
NOTE:
5-10
Display may show an option other than "ROC", depending upon the options installed.
The HI 2151/30WC will show the first available option, in the example, ROC.
Chapter 5 - Setup
Step 2. Press the up arrow ↑ until the Serial Port 1 SER P1 is displayed on the screen.
Step 3. Press the Enter button twice. First the Serial Connect display
SERCON appears; then the Bi-directional or Print appears.
BI - DIR or PRINT
Step 4. Use the up or down arrows ↑↓ to choose between bi-directional BI - DIR or PRINT. We used bi-directional for the
example below.
Step 5. Press the Enter button twice. First the Serial Type Sub-Menu
SERTYP appears; then the Configured Serial Protocol
appears. For Example RS-232. (See Chapter 4 for Configuration Information)
NOTE:
If the Serial Protocol number displayed is not the one you want, STOP the setup process. Reconfigure the serial protocol (See Chapter 4) and begin the setup procedures
again.
Step 6. Press the Enter button twice. First the Baud Rate Sub-Menu
BAUD appears; then the current preset BAUD rate is displayed.
Step 7. Use the up or down arrow ↑↓ buttons to select 1200, 2400,
4800, 9600, or 19,200. The example uses 19,200 BAUD.
Step 8. Press Enter twice. First the Frame sub-menu FRAME
appears; then 8-N-1 appears.
Step 9. Press the down arrow ↓ button five times. First 7-0-1 appears,
then 7-E-1 appears, then 8-N-2 appears, then 8-0-1 appears,
and finally A-E-1 appears.
Step 10. The down arrow ↓ is used to select the Frame you want.
When the frame selection you want appears press the Enter
button. FORMAT appears.
Step 11. Press the Enter button. Gross, Net, Tare, Rate of Change, Set
Point, Print, either one G-----, or any combination such as GT--- or all GNTRSP may appear.
Step 12. Use up arrow ↑ to select "P" (to output on demand), or "_" (to
output continuously).
• Use the left arrow ← to move cursor one space to the left to
highlight the letter "S". The "S" starts flashing.
• Use the up arrow ↑ to select "S" (to output set points) or "_"
(will not output set points).
• Use the left arrow ← to move the cursor one space to the
left to highlight the letter "R". The letter "R" starts flashing.
• Use the up arrow ↑ to select "R" (to output the rate of
change), or "_" (will not output rate of change)
5-11
HI 2151/30WC MANUAL
•
•
•
•
NOTE:
Use left arrow ← to move cursor one space to the left. The
letter "T" starts flashing.
Use the up arrow ↑ to select "T" (to output the tare value),
or "_" (tare value will not be output).
Use left arrow ← to move the cursor one space to the left.
The letter "N" starts flashing.
Use up arrow ↑ to select "N" (to output net weight) or "_"
(will not output net weight).
•
Use the left arrow ← to move the cursor one space to the
left. The letter "G" starts flashing.
•
Use up arrow ↑ to select "G" (to output gross weight), or
"_" (will not output gross weight).
At least one of the letters "G", "N", "T", "R", or "S" must be selected or Error 54 will
be displayed.
Step 13. Press the Enter button twice. First the control Sub-Menu
CONTRL appears; then SOFTRE or HARDRE appears.
Step 14. Use the up or down arrows ↑↓ to select either option.
Step 15. Press the Enter button twice. First the Echo Sub-Menu ECHO
appears; then ON or OFF will be displayed).
Step 16. Use the up or down arrows ↑↓ to select either parameter. For
our example select OFF.
Step 17. Press the Enter button twice. First the Address Sub-Menu
ADDRES appears; then the current two-digit address appears.
Step 18. Press the -/Test/Clr button to clear the display.
Step 19. Enter the desired instrument address, 99 maximum. 10 (unit
10 is used for this example).
Step 20. Press the Enter button three times to return to the weight display and normal operation.
NOTE:
* Available only when "BI-DIR" mode is selected
Analog Output Setup
Procedures (Option)
About Analog
Output (See Chapter
4 for Configuration
Procedures)
5-12
The analog output option allows the user not only to output gross, net,
ROC, Peak, or total weight as 0-5V, 0-10V, 0-20 mA or 4-20 mA (or
the reverse of these via the front panel), but makes it possible to span
these ranges over a portion of the weight data. A full analog output is
obtained over the range desired. Resolution of the analog out is 16,000
counts, or the number of display counts available in the range selected,
whichever is less. All of this is accomplished via the front panel or the
serial port. Two analog option boards may be installed in each unit.
Chapter 5 - Setup
Analog Output
Menu Setup
Procedures
Step 1. Press the 7/Option button. ROC appears.
Step 2. Press the up arrow until Analog Output 1 ANAOUT1 or
Analog Output 2 ANAOUT2 is displayed.
Step 3. Press the Enter button. ANLO appears.
Step 4. Press Enter button.
Step 5. Press -/Test/Clr button to clear the entry.
Step 6. Use the numerical keypad to enter the value desired. (Enter () for loss-in-weight systems.)
Step 7. The value displayed will equal 4 milliamps, 0 milliamps, or0
volts, depending on which output and configuration is used.
Step 8. Press the Enter button. A GOOD will momentarily appear and
AN HI appears.
Step 9. Press the Enter button.
Step 10. Press -/Test/Clr button to clear the entry.
Step 11. Use the numerical key pad to enter the numerical value
desired. (Enter (-) for loss-in-weight systems.)
Step 12. The value displayed will equal 20 milliamps, 10 volts, or 5
volts, depending on which output and configuration is used.
Step 13. Set mode by pressing the MODE button until the cursor is
flashing under the desired option. Select from total, gross, net,
ROC, or peak. The default is gross.
Step 14. Press the Enter button. AN - LO re-appears.
Step 15. Press the Exit button. ANOUT re-appears.
Step 16. Press the Exit button again to return to the weight display.
NOTE:
Display may show an option other than "ROC", depending upon the option boards
installed.
NOTE:
Previously set numerical value will be displayed. "0" is the default.
NOTE:
Display momentarily flashes GOOD if value is a valid entry.
Setting the Rate of
Change Procedures
Step 1. To select Rate of Change Mode: Push the MODE button until
the ROC LED indicator is lit
Step 2. Press the 7/Option button. ROC appears.
Step 3. Press the Enter button. UNITS appears.
Step 4. Press the Enter button. U-SEC appears.
NOTE:
Previously set time value will be displayed. For this example, the time value will be
set to seconds.
5-13
HI 2151/30WC MANUAL
Step 5. Use the up ↑ or down arrows ↓ to select the appropriate measurement of time (seconds U-SEC, minutes U-MIN, or hours
U-HR).
Step 6. Press Enter button. BASE appears.
Step 7. Press the Enter button.
Step 8. Use the up or down arrows to select time base from one of the
following: 1, 2, 3, 4, 5, 6, 10, 12, 15, 30, 60, 120,240, 450,
900, or 1800.
Step 9. Press the Enter button. The UNITS re-appears.
Step 10. Press the Exit button twice to return to the weight display.
NOTE:
Display may vary depending on which options were installed in your instrument. The
HI 2151/30WC will show the first available option, in this case, ROC.
TOTAL Setup
Procedures
Step 1. Via the Calibration Menu, select the desired decimal point
position.
Step 2. To add weight value to the Total Register: The current net
weight displayed will be added to the net weight accumulated
in the total register when the total remote function input is
detected (this is accomplished by providing a momentary
switch to the remote function connector between J2, Pin 8 and
J2, Pin 9 or 10.
Set Up for Profibus
Interface Card Option B12
See the Profibus Interface Option, Card Operation and Installation
Manual #0596-0231 for complete instructions.
Allen-Bradley Remote I/O
Option -B8
See the Allen-Bradley Remote I/O Installation and Operation Manual #
0596-0173 for complete instructions.
5-14
Chapter 6 - Calibration
CHAPTER 6 - CALIBRATION
Chapter 6 covers calibration procedures for the HI 2151/30WC weight
controller. Users and service personnel should be familiar with these
procedures before installing or operating the HI2151/30WC.
For the weight controller to work properly, it must be calibrated prior to
operation. We also recommend that the instrument be re-calibrated
periodically or when not in use for extended periods. Be sure to follow
the procedures completely to ensure that the weights read by the controller are accurate.
All calibration should be done in the Gross mode.
Pre-Calibration Procedures
Mechanical Check
Procedures
Step 1. Check to determine if the load cells have been installed properly.
•
•
Refer to your load cell I&M manual for proper installation
instructions.
On some single and double ended shear beam load cells
there is an arrow (↓) that indicates the direction of the
applied load. If the arrow is pointing in the wrong direction,
change the position of the load cell so that it is mounted in
the direction of the applied load.
Step 2. Check for Binding on the Load Cell or other parts of the system.
CAUTION
BINDING ON A SCALE/VESSEL OR LOAD CELL DOES NOT ALLOW THE
LOAD CELL FREE VERTICAL MOVEMENT AND MAY PREVENT THE
INSTRUMENT FROM RETURNING TO THE ORIGINAL ZERO REFERENCE POINT.
•
•
A load cell must be mounted in such a way that 100% of the
load (Vessel w/Contents) is vertically passed through a load
cell. (See Fig. 6-1)
Check to see that nothing is binding the load cell. This
means that nothing is draped across the scale/vessel or the
load cell, such as a hose, electrical cord, tubes, or other
objects.
6-1
HI 2151/30WC MANUAL
Direction of
the applied
load
Vessel
FIG. 6-1 PROPERLY INSTALLED LOAD CELL W/NO BINDING
Step 3. Check to see that nothing is coming in contact with the scale/
vessel other than service wires and piping that have been
properly mounted with flexible connectors.
Electrical Check
Procedures
Step 1. Check to see that there is power to the controller.
•
•
•
If there is power to the controller The front panel display
should be lit.
If an error message (ERREXC) appears in the display, it
means there is a problem in the system. See Troubleshooting Chapter 8 for corrective action.
If the display appears with a value the unit is ready for calibration.
Step 2. Typical Load Cell/Point Input/Output Measurements (EXC &
SIG Outputs)
•
6-2
The HI 2151/30WC is designed to supply 5 vdc excitation
to as many as eight 350 ohm load cells/points.
Chapter 6 - Calibration
•
•
•
•
The expected output from each load cell/point depends on
the mV/V rating of the load cell/point and weight.
For example, a 2 mV/V load cell/point will respond with a
maximum of 10 mVDC at full weight capacity of the system which includes the weight of the vessel and the weight
of the product as measured by the load cell/point.
If the load cell/point weight capacity is rated at 1000
pounds, the load cell/point output will be 10 mVdc at 1000
pounds, 7.5 mVdc at 750 pounds, 5 mVdc at 500 pounds
and so on.
A zero reference point will vary from system to system
depending on the "Dead Load" of the vessel. "Dead Load"
is the weight of the vessel and appurtenances only, with no
product loaded. In our example we will assume the dead
load to be 500 lbs. (See Fig. 6-2)
10
MAXIMUM LOAD CAPACITY
9
8
MILLIVOLTS DC
7
6
5
4
DEAD LOAD 500#
ZERO REFERENCE POINT
3
2
1
250
500
750
1000
WEIGHT IN POUNDS
FIG. 6-2 MILLIVOLTS/WEIGHT SCALE
•
NOTE:
Based on the example, the operating range for this scale is
5-10 mVdc with a 500 pound weight range. Understand that
after zeroing the instrument, the 0 reading on the instrument
refers to the zero reference point and not absolute 0 mVdc
or absolute 0 weight.
Load cell/point measurements are checked with a digital volt meter at the summing
junction box or the J1 connector on the rear panel of the HI 2151/30WC or use Integrated Technician. if using the IT Junction Box.
6-3
HI 2151/30WC MANUAL
Step 3. Allow the controller to warm up for about 15 minutes before
doing the calibration procedures.
Fourteen Segment
Display
The display is a six-digit, fourteen segment display with selectable decimal placement. The display can show positive values up to 999999 and
negative values down to -99999. The LED display shows operational
status messages as well as actual numeric values. (See Figs. 6-3 & 6-4)
8.8.8.8.8.8
FIG. 6-3 FRONT PANEL DISPLAY WITH NUMBERS
ITSEC
FIG. 6-4 FRONT PANEL DISPLAY WITH TEXT
Combination Status
Indicator/Bar-Graph
LEDs
NOTE:
6-4
•
There are 30 discrete LEDs above the fourteen segment display,
that function as status indicators and a bar-graph display. (See Fig.
6-5)
The status indicators use every other led whereas the bar graph uses all thirty when
displayed.
Chapter 6 - Calibration
IT SEC
FIG. 6-5 FRONT PANEL STATUS LEDS DISPLAYED
•
To switch between status and bar graph display, press the Status/
Bar button. In the status mode, LEDs will light to indicate the following weight controller conditions:
DISPLAY
MEANING
CTR ZERO
Indicates when the sensed weight is within 1/4 of a
display grad of calibrated zero.
MOTION
Indicates when the variation in consecutive weight
readings exceeds the calibrated motion tolerance.
ZERO TRACK Indicates when the zero track function is activated.
Zero track is toggled on or off by the 0 Trk
dipswitch (S3) on the rear panel.
RELAY 1
The status relay LED flashes when the respective set
point value has been reached. Indication is only for
the standard, internal set points.
6-5
HI 2151/30WC MANUAL
DISPLAY
MEANING
RELAY 2
The status relay LED flashes when the respective set
point value has been reached. Indication is only for
the standard, internal set points.
Indicates the mode of the measured value on the
display. All calibration should be done in Gross
mode.
Indicates the mode of operation currently PEAK
configured.
GROSS/NET
TOTAL/ROC
NOTE:
Total, Rate-of-change, and Peak are options that must be installed before these led
indicators will function.
Lb/Kg
Bar Graph
NOTE:
Load Check
Indicates U.S. or metric unit-of-measure of the
weight parameter on the display.
The Bar Graph function displays in graphical form
the value of the mode (Total, Gross, Net, ROC,
Peak) selected in the bar graph setup menu.
The bar graph mode and the display mode are totally independent. Make sure you
know what mode each are in before reading.
Step 1. Place a load (weight) on the scale or vessel.
Step 2. Check to see if the weight reading changes on the display in
the proper direction.
• e.g. if the display reads 100 pounds and a 20 pound load is
placed on the vessel or scale, the display should read 120
or some value over 100.
• If the display reads 80 pounds and a 20 pound load is
placed on the vessel or scale, the reading is going in the
wrong direction and indicates a problem. (See the Chapter
8, Troubleshooting for corrective action.)
• If the display is reading improperly or shows no change,
something is wrong either with the setup or configuration.
Step 3. If the display changes in the proper direction, remove the
weight and proceed to calibrate the controller.
Calibration Setup
Procedures
The Calibration Menu
NOTE:
When calibrating the instrument for the first time, go from one sub-menu to the next in
sequence. If you want to change one of the sub-menus, continue to press the Up Arrow
button until you reach the sub-menu you want to change.
NOTE:
After entering a value in each sub-menu the display will flash a GOOD if the value is
accepted. If the value is not accepted the display will flash an ERR # statement.
6-6
Chapter 6 - Calibration
NOTE:
The example settings provided below depict a typical system and are for illustration
only, your setting requirements may vary.
Step 1. Make sure the controller is in Gross Mode.
Step 2. Press the Cal button. Security Code (SEC CD) is displayed.
Step 3. Press the Enter button. A flashing zero (0) appears.
Step 4. Enter the security code number (5321).
Step 5. Press Enter. The word UNIT appears. Note the three leds
(Zero Track, Motion, and CTR Zero) start to flash on the left
side of the status display.
Setting the Unit of
Measure. (UNIT)
Pounds (Lb) or
Kilograms (Gr)
Step 1. Press the Enter button. LB appears.
Step 2. To select pounds (LB) press the enter button.
Step 3. To select kilograms, press either the up or down arrow button
until GR is displayed. Press the enter button.
Step 4. The unit of measure is selected and will be the basis for all set
points.
Step 5. "DECPNT" appears on the display.
NOTE:
Setting the Standard
Decimal Point
(DECPNT)
The displayed unit of measure can be changed during normal operation. However, all
internal calculations use the unit of measure selected during calibration.
This parameter sets the number of decimal places to use in weight values (Total weight may be set to a different number of decimal places).
Step 1. To determine the highest recommended decimal point, divide
the total load cell capacity by 10,000, and use the number of
decimal places in your answer as a reference. For example:
10,000 EU scale divided by 10,000 = 1, no decimal point is
recommended. 100 EU load cell capacity divided by 10,000 =
.01, requiring two decimal points or less is recommended.
Step 2. Press the Enter button. Six number eights (88888.8) are displayed.
Step 3. To select the decimal point location, push the left arrow ←
until the decimal point is in the correct position. The decimal
point will wrap from left to right.
NOTE:
There is no right arrow (→).
Step 4. Press the Enter button to accept the decimal location.
Setting the Total
Decimal Point (Option
-C6) (TOT DP)
NOTE:
This parameter sets the number of decimal places to use in total weight
values.
The Total Decimal Point must be less than or equal to the standard decimal point
position. For example: A Decimal Point that equals 88888.8, the Total Decimal Point
should equal 88888.8 or 88888.
6-7
HI 2151/30WC MANUAL
Step 1. If the optional weight totalizer is installed, TOT DP appears
on the display.
Step 2. Press the Enter button. There are six number eights 888888
displayed.
Step 3. To select the decimal point location, push the left arrow ←
until the decimal point is in the correct position. The decimal
point will wrap from left to right.
Step 4. Press the Enter button to accept the decimal location, The
Motion Tolerance sub-menu MOTION appears on the display.
Setting the Motion
Tolerance Value
(MOTION)
NOTE:
Step 1. The base motion number can be calculated by using the following formula:
Base Motion Number = Total Load Cell Capacity/10,000 x 3
Motion Tolerance must be greater than or equal to the Graduation Sizes. Recommendation would be three graduation sizes.
Step 2. The motion tolerance is the tolerance value used to determine
if the scale is in motion.
Step 3. The controller displays the MOTION LED when a change in
the displayed (averaged) reading is outside the value entered.
Step 4. Default value is 3 units of measure.
Step 5. Press the -/Test/Clr button to clear the current value.
Step 6. Use the numeric keys to type in the new tolerance value.
Step 7. Press Enter. The Graduation Size GRAD is displayed.
Setting the
Graduation Size
(GRAD)
NOTE:
The graduation size sets the minimum increment the instrument will
compute and display. The Base Graduation Number is calculated by
dividing the total load cell capacity by 10,000. For example: With two
decimal points selected, the graduation size 10 will display increments
of .10 engineering units. With two decimals points selected, the graduation size 50 will display increments of .50 engineering units.
If you undersize your graduation setting to increase display resolution, do not use
auto zero tracking. This combination will damage the SMM due to excessive write
operations.
Step 1. Press the Enter button. The graduation size 20 appears on the
display with the zero flashing.
Step 2. There are nine graduation size selection options:
1
50
2
100
5
200
10
500
20
6-8
Chapter 6 - Calibration
Step 3. To select one of the sizes, use the up arrow ↑ or down arrow
↓ keys to scroll through the selections.
Step 4. The graduation size is recalculated each time the instrument is
calibrated for span.
Step 5. Press Enter to accept the selection. The Zero Tolerance
(OTOL) sub-menu appears on the display.
Setting the Zero
Tolerance (0 TOL)
NOTE
This sets a weight limit for an operator adjusting the weight of an
empty scale using the upper left ZERO push button. This value is the
zero tracking window and reflects an amount of weight differential of
an empty scale. Normally, a Zero Tolerance amount equal to 2% of the
total load cell capacity is acceptable. The default zero tolerance is 10
units of measure (10 is displayed). The maximum Zero Tolerance number that can be entered is 32766.
The amount of weight zeroed off is cumulative. The zero command will fail if the current
gross weight plus any previously zeroed amount exceeds the zero tolerance.
Step 1. Press the Enter button. The default display will appear (10) or
the previous set value (10).
Step 2. Press the -/Test/Clr button to clear the current value
Step 3. Use the numeric keys to enter the new value.
Step 4. Press the Enter button to accept the new value. Zero Tolerance
sub-menu (O TOT) appears on the display.
Setting The Auto Zero
Tolerance (A0 TOT)
NOTES:
This parameter sets a weight limit that applies when the Auto Zero
Tracking feature (0 TRK) or a communication command adjusts an
empty scale. When 0 TRK is enabled, the display is reset to zero when
the weight is within the set limits and not in motion.When the Auto
Zero Tolerance (0 TOT) is enabled (Set Dip Switch #8, See Chapter 4),
any weight within the set zero tolerance limit will cause the display to
automatically read zero when the scale is not in motion.
Normally an acceptable Zero Tolerance amount is less than or equal to
1.5% of the total load cell capacity. The default auto zero tolerance is
10 units of measure, and the maximum number you can enter is 32766.
Incorrect graduation size or a drifting scale with auto zero tracking enabled can damage
the SMM.
The amount of weight zeroed off is cumulative. The autozero command will fail if the
current gross weight plus any previously zeroed amount exceeds the zero tolerance.
Step 1. Press the Enter button. The default display will appear (10) or
the previous set value.
Step 2. Press the -/Test/Clr button to clear the current value
Step 3. Use the numeric keys to enter the new value.
Step 4. Press the Enter button to accept the new value.
6-9
HI 2151/30WC MANUAL
Step 5. If the value does not exceed the maximum zero tolerance
value or is not a negative value, the screen will accept the new
value.
Step 6. If the value exceeds the maximum zero tolerance value or is a
negative number, an ERR 15 is displayed. You need to change
the value to meet the requirements in step "3". Go to step 4
and repeat steps 4, 5 & 6 to enter new values until the value
meets the requirements in Step 3.
Step 7. Press the Enter button to accept the new value. "AVRAGE"
sub-menu appears.
NOTE:
Setting the Number of
Readings Averaged
(AVRAGE)
Weight can accumulate up to the value entered for the Auto Zero Tolerance and the
instrument will automatically display a 0.
Step 1. This setting is to aid in ignoring the effects of material impact.
If material is not entering or exiting the scale evenly, necessary weight fluctuations can be seen. Averages also contribute
50 ms each to the overall time to calculate the scale weight.
Applications requiring very quick weight readings should
reduce this setting to it's minimum. If the weight is unstable
due to material impacting, increase the averages. This sets the
number of weight readings that will be used to compute the
displayed weight. The average is a sliding average so that a
new average is available for display at every reading.
Step 2. This sets the number of weight readings which will be used to
compute the displayed weight.
Step 3. The average is a sliding average so that a new average is
available for display at every reading.
Step 4. The default number of readings per average is 10.
Step 5. Press the Enter button.
Step 6. Use the numeric keys to enter the new value in the range of 1
to 200. (If you enter a number greater than 200 or a negative
number, the ERR 3 statement will appear.) Press the -/Test/Clr
button. Enter a new number.
Step 7. Press the Enter button. The Scale Capacity (SC CAP) submenu appears.
Setting the Scale
Capacity (SC CAP)
Step 1. If this value is exceeded by 5% an HI indication appears on
the front display. Communications to and from optional
devices are not effected. This value is the nominal operating
capacity of the scale. The value you set should be the small
value between the capacity of the vessel (volume in Gallons
or Liters converted to weight in Lbs or Kgs) and the combined
weight capacity of the load cells (Lbs or Kgs).
Step 2. The value you set should be the smaller value between the
capacity of the vessel (volume in gallons or Liters converted
6-10
Chapter 6 - Calibration
to weight in Lbs or Kgs) and the combined weight capacity of
the load cells (Lbs or Kgs).
For example: A vessel's capacity in volume is 2,000 gallons,
in this case water. (One gallon of water weighs approximately
8.54 lbs.) The weight will be 17,080 lbs. The combined live
load capacity of the load cells is 20,000 lbs. Select the lesser
of the two values which in our example is 17,080 lbs. Enter
17,080.
Step 3. Press the Enter button. The WAVERSAVER® (WVRSVR)
sub-menu appears.
WAVERSAVER®
(WVRSVR)
Step 1. The lower the vibration the more steps and time required to
calculate the vibration frequency. Adjust the Average and
WAVERSAVER settings to establish minimal weighing time.
Use WAVERSAVER settings 1-3 for low amplitude high frequency vibrations. Use WAVERSAVER settings 3-5 for high
amplitude low frequency vibrations.
Step 2. Press the Enter button.
Step 3. A value appears. The Default setting is 4.
Step 4. There are 5 selectable levels. 1 provides the least vibration
immunity with the fastest response time, and 5 provides the
most vibration immunity with the slowest response time.
Step 5. Press the up arrow ↑ to select the setting (1-5).
Step 6. 6.Press Enter to accept the value. The Calibration (CAL) submenu appears.
This ends the
Calibration Setup
Process
Calibration Procedures
Step 1. Press the Enter button. The Hard Calibration HD CAL SubMenu appears.
Step 2. Use the Up or Down arrows ↑↓ to select one of the Calibration procedures:
•
•
•
NOTE:
C2™ Calibration (C2 CAL)
Hard Calibration (HD CAL)
Soft Calibration (S CAL)
Select one calibration process only. C2 and Hard Calibration are used most often. C2
Calibration is only possible with Hardy Instruments Load Cells/Sensors or Points.
6-11
HI 2151/30WC MANUAL
C2® Second
Generation
Calibration
Procedures
Step 1. From the CAL menu, press the down arrow button. The C2
CAL sub-menu appears.
Step 2. Press the Enter button. The Load Cell Count LC CNT submenu appears.
Step 3. Verify that the load cells detected by C2 calibration equal the
actual number of load cells installed in the system. If the load
cells detected do not match the load cells installed in the system do the following:
1. Press the Enter button.
2. Press the Exit button three times.
3. Press the -/Tst/Clr button. The Self Test (SLFTST)
menu appears.
4. Press the Enter button to perform the Self Test. The Self
Test will give the serial numbers of the load cells that
are found by the instrument. If one of the serial numbers
is not found it means that a load cell is not communicating with the instrument. Verify that the load cell wires
are properly connected. See the Load Cell certificates
for color code information.
NOTE:
The controller can detect up to 8 C2 load point/cells on one vessel. The load points/
cells are detected during power-up.
5. Press the Enter button. The Reference Point REF PT
sub-menu appears.
Step 4. Setting the Reference Point (REF PT)
•
•
•
•
•
Press the Enter button.
Press the -/Tst/Clr button to clear the current entry.
Use the numeric keys to enter the reference weight or use
the default reference weight "0" by pressing the Enter button. Any known weight within the scale range can be used
as the reference weight. The recommended and default
value is zero (0).
Make sure that there is no vibration on or around the scale/
vessel or is as low as possible.
Press the Enter button. The RETURN display appears.
Step 5. Using the Return button. (RETURN)
1. If you want to change any setting(s) in the C2 Calibration
procedures, push the up arrow which takes you back to
the load cell count LC CNT sub-menu. Press the up arrow
until the sub-menu you want to change appears then press
the Enter button. Follow the procedures above for the
menu.
6-12
Chapter 6 - Calibration
2. If you want to accept the C2 Calibration parameters press
the Enter button. The End Calibration END CAL message
is displayed.
3. Press the Enter button again. This seals all calibration settings and exits the C2 Calibration Menu.
4. The instrument returns to the normal weight display.
NOTE:
If the Enter button is not pushed after End Cal appears, three leds will flash indicating that the settings are not sealed in memory.
End of C2 Calibration
NOTE:
To correct mistakes during calibration, or to return to a previous calibration parameter, press the down arrow to bypass parameters, press the up arrow↑.
Hard Calibration
Procedures (HDCAL)
NOTE:
Hard Calibration is the traditional method of calibration that uses test weights. We
recommend that the test weights total 80 to 100% of the scale weight.
NOTE:
Hard Calibration must be performed with the instrument in GROSS MODE.
Selecting the Hard
Calibration Sub-Menu
Step 1. Make sure that the instrument is in Gross Mode.
Step 2. From the Weight Display, Press the 8/Cal button. The Security Code (SEC CD) displays.
Step 3. Press the Enter Button. A flashing zero (0) appears.
Step 4. Enter the security code number (5321), then press the Enter
button. The Unit of Measure UNIT Sub-menu appears.
Step 5. Press the down arrow ↓ until the CALSub-Menu appears.
Step 6. Press the Enter button. The Hard Calibration HD CAL SubMenu appears.
Step 7. Hard Calibration requires a zero point and the physical placement of test weights on the scale.
Step 8. Press the Enter button. The ZERO sub-menu appears.
Setting the Zero
Calibration Value
Step 1. Remove all weight "live load" from the scale.
Step 2. Press the Enter button. A dash "--" appears.
Step 3. Press the -/Test/Clr button. A "0" appears.
Step 4. Wait 12 seconds.
Step 5. Press the Enter button.
Step 6. Either a GOOD or ERR# appears.
Step 7. If an ERR number appears go to Chapter 8, Troubleshooting
for more information.
6-13
HI 2151/30WC MANUAL
Step 8. If a GOOD appears the Span (SPAN) display appears.
NOTE:
The resistance baseline for non C2 load cells, is also set when the Zero Calibration
Value is entered. (See Section 5 for more information)
Setting the Span
Calibration Value
Step 1. Place a certified test weight on the scale.
Step 2. Press the Enter button. A dash "--" appears.
Step 3. Press the -/Test/Clr button. The previous span value appears.
Step 4. Press the -/Test/Clr button. A "0" appears.
Step 5. Use the numeric keys to enter the value of the test weight. (If
a 50 lb weight is used, enter 50).
NOTE:
Ideally the test weight used for the dead load should be the typical weight that will be
measured in the application.
Step 6. Wait 12 seconds.
Step 7. Press the Enter button to set the span. The Linear Correction
(LINCOR) Sub-Menu appears. Press the -/Test/Clr button two
times. The Return (RETURN) Sub-Menu appears.
The Return
(RETURN) Display
The RETURN Display allows the user to change any setting(s) entered
in the Hard Calibration Sub-Menu.
Step 1. Push the up arrow ↑ which takes you back to the Zero SubMenu.
Step 2. Press the up ↑ arrow until you reach the sub-menu you want
to change and press enter.
Step 3. Follow the procedures for each Sub-Menu you want to
change.
Step 4. If you want to accept the Hard Calibration parameters
entered, press the Enter button. The End Calibration END
CAL message is displayed.
Step 5. Press the Enter button. This seals all calibration settings and
exits the Hard Calibration Menu.
Checking for
Mechanical Problems
Step 1. Place a test weight on the scale.
Step 2. Check the displayed weight value.
Step 3. Remove the test weight from the scale. If the displayed value
is zero the hard calibration is complete. If some value other
than zero is displayed, check for mechanical problems, most
likely binding in the system. (See Chapter 8, Flow Chart H for
details) Correct the problems and perform the Hard Calibration Process again.
NOTE:
6-14
To correct mistakes during calibration, or to return to a previous calibration parameter, press the down arrow ↓ to bypass parameters, press the up arrow ↑ .
Chapter 6 - Calibration
Hard Calibration Self
Test Procedures
(Traditional Method
Using Test Weights)
Perform the Hard
Calibration Self Test
Step 1. Press the -/Test/Clr button. The Self Test SLFTST Sub-Menu
appears.
Step 2. Write down all the Hard Calibration self test parameters on
the Self-Test, Calibration Results form. (See Appendix C, HI
Document # 0570-0016-01 for single controllers or 05750016-02 for multiple controllers) Please photocopy as many
copies of the form(s) as you need.
Step 3. Press the down arrow ↓ button to pause the test.
Step 4. To review the test results, Slot 1 for example. Press the down
arrow to pause the Self Test. Press the up arrow one time
and the value for Slot 1 appears for example "none". Write
"none" down in the results column for Slot 1 on the Self Test Calibration form. The user can continue to push the up arrow
to review more results, or let the controller resume the self
test until the tests are completed.
Step 5. There are two tests which are Pass/Fail. The Check Sum and
the RAM test. If the controller fails either one of these tests,
contact your local representative or Hardy Instruments, Customer Support Department.
Soft Calibration
Procedures for Single
Load Cell/Point
Systems
NOTE:
Soft Calibration for systems with more than one load cell/point contact: Hardy Instruments Inc., Customer Support Department.
About Soft
Calibration
•
Soft-Cal is a procedure that quickly calibrates a scale system, onsite, without test weights, material substitution or forced calibration.
•
The process uses the certified, full scale mV/V output (sensitivity
and range) of each load cell.
•
The full scale mV/V output of each load cell is mathematically
combined with a measured reference point, usually but not always
zero, to calibrate the scale.
•
The full scale mV/V data is on the calibration certificate which is
shipped with every Hardy load cell.
•
The process assumes a consistent center of gravity on the scale with
even distribution.
6-15
HI 2151/30WC MANUAL
NOTE:
•
All load cells must be correctly installed with no binding of any
kind on the scale.
•
You must use the same length cable as supplied with the load cell.
DO NOT CUT THE CABLE!!!
•
A multiple load cell system, using a junction box, all balance potentiometer and resistors must be zero.
For multiple load cell systems contact your local dealer or Hardy Instruments, Customer Support Department.
•
Selecting the Soft
Calibration Sub-Menu
The Soft-Cal menu cannot be entered while in the National Bureau
of Standards (NBS) mode.
Step 1. From the Weight Display, Press the 8/Cal button. The Unit of
Measure UNIT Sub-menu appears.
Step 2. Press the down arrow ↓ until the CAL Sub-Menu appears.
Step 3. Press the Enter button. The Hard Calibration HD CAL SubMenu appears.
Step 4. Press the down arrow ↓ until the Soft Calibration S CAL SubMenu displays.
Step 5. Press Enter. The Sensitivity Sub-Menu SNSTVY appears.
Setting Sensitivity
Values
Step 1. Use the numeric keys and enter the load cell full scale output
in mV/V found on the load cell calibration certificate.
Step 2. You must enter five digits. If a load cell is listed at less than
five digits, add 0's to make up the five digit number. For
example: When the full scale output in mV/V is "2.99". You
need to enter the number as "29900". The least significant
numbers are on the right when looking at the display.
Step 3. When multiple load cells are used, contact Hardy Instruments
Customer Service Department to compute the system total
full scale output sensitivity.
Step 4. Press Enter. The Scale Range sub-menu RANGE appears.
Setting the Scale
Range (RANGE)
Step 1. Press the Enter button.
Step 2. Use the numeric keys and enter the sum of the rated capacities
of all load cells being used. An example: There are 3 load
cells rated at 1,000 lbs capacity each. The value to enter is
3000.
Step 3. Press the Enter button. The Reference Point Sub-Menu REF
PT appears.
NOTE:
6-16
For HI 2151/20WC users the next setting would normally be the sticker value. The
sticker value for the HI 2151/30WC is entered at the factory and cannot be changed.
Therefore it is not necessary to set the sticker value in Soft Cal.
Chapter 6 - Calibration
Setting the Reference
Point
•
The reference point = the current live load on the scale platform.
•
Any known weight within the scale range can be used as the reference point. The zero point (no material load) is recommended.
Step 1. Press the Enter button. A dash "--" appears.
Step 2. Press the -/Test/Clr button to clear the entry and enter a value.
Step 3. Use the numeric keys and enter the reference point. For example: 0.00
Step 4. Wait 12 seconds.
Step 5. Press the Enter button. A WAIT prompt appears, then either a
GOOD or an ERR 4 or ERR 18 appear.
Step 6. If the GOOD appears. Press the Enter button. The RETURN
Sub-Menu appears.
Step 7. If either of the two ERR statements occur, go to Chapter 8,
Troubleshooting for more details.
Using the Return
(RETURN) Function
Step 1. If you want to accept the Soft Calibration parameters press the
Enter button. The End Calibration ENDCAL message is displayed.
Step 2. Press the Enter button. (DO NOT PRESS THE EXIT BUTTON) This updates all the calibration parameters in the Calibration Menu and saves the parameters to the Secure Memory
Module. The Weight Display appears.
End of the Soft
Calibration Process
Soft Calibration Self
Test Process
Performing the Self
Test
Step 1. Press the -/Test/Clr button. The Self Test SLFTST Sub-Menu
appears.
Step 2. Write down all the Soft Calibration Self Test parameters on
the Self-Test, Calibration Results form. (See Appendix A, HI
Document # 0570-0016-01 for single controllers or 05750016-02 for multiple controllers) Please photocopy as many
copies of the form(s) as you need.
Step 3. The down arrow pauses the test and the up arrow scrolls
through the tests one at a time.
Step 4. To review the test results, Slot 1 for example. Press the down
arrow to pause the Self Test. Press the up arrow one time
and the value for Slot 1 appears for example "none". Write
"none" down in the results column for Slot 1 on the Self Test Calibration form. The user can continue to push the up arrow
6-17
HI 2151/30WC MANUAL
to review more results, or let the controller resume the self
test until the tests are completed.
Step 5. There are two tests which are Pass/Fail. The Check Sum and
the RAM test. If the controller fails either one of these tests,
contact your local representative or Hardy Instruments, Customer Support Department.
NOTE:
To correct mistakes during calibration, or to return to a previous calibration parameter, press the down arrow to bypass parameters, press the up arrow ↑.
INTEGRATED
TECHNICIAN (IT®)
Setting Resistance
Baseline for Excitation
Monitor
1. C2 Load Cells
If C2 load cells are used in the weight control system, the controller
calculates the resistance value during power up and turns on the excitation monitor.
2. Non C2 Load Cells
If Non C2 Load Cells are used in the weight control system, the controller will capture the resistance value when performing the Hard Calibration when setting the Zero Calibration Value.
Quick C2® Calibration
Procedures
About Quick C2
Calibration
The quick C2 calibration should be used when the controller has
already been properly calibrated and when the system is determined to
be slightly out of specification, for a scheduled periodic calibration.
•
The Quick C2 calibration procedures do not replace the regular C2
calibration procedures.
Step 1. From the CAL menu press the Enter button. The HD CAL
menu appears.
Step 2. Press the down arrow. The C2 Calibration sub- menu C2
CAL appears.
Step 3. Press the Enter button. The Load Cell Count LC CNT
appears.
Step 4. Press the up arrow. The Reference Point sub-menu appears.
Step 5. Press the Enter button.
Step 6. Enter the weight of the current "live load" that is on the scale.
Step 7. Press the Enter button. The RETURN display appears.
Step 8. Press the Enter button. The END CAL display appears
6-18
Chapter 6 - Calibration
Step 9. Press the Enter button to set the changes.
Procedures to Restore
Calibration Parameters
Before Clearing
Memory
CAUTION
Clear Controller
Memory
•
If the parameters for the controller are on the Self Test - Calibration
Form (Prt. # 0575-0016) enter the values from the form.
•
If the user does not have the parameters from Self Test - Calibration
Form handy, go through the Self Test again and write them the
parameters.
IF CONTROLLER MEMORY IS CLEARED, ALL OPERATING SETTINGS
ARE RETURNED TO THE ORIGINAL FACTORY DEFAULT PARAMETERS.
ALL CALIBRATION, OPTION AND SET POINT VALUES SHOULD BE
RECORDED BEFORE CLEARING MEMORY OR THE CONTROLLER WILL
HAVE TO BE RE-CALIBRATED.
Step 1. Contact Hardy Instruments, Customer Support Department
for instructions to clear controller memory.
Step 2. Re-enter the original Set point and Option parameters on the
Self Test - Calibration form.
Step 3. Re-enter the Calibration parameters.
Step 4. From the CAL menu press the Enter button. The Hard Calibration Sub-Menu HD CAL appears.
Step 5. Press the Mode button. The Zero Count sub-menu ZR CNT
appears.
Step 6. Press the Enter button.
Step 7. Enter the ZR CNT self test parameter from the Self Test - Calibration form.
Step 8. Press the Enter button. The Span Sub-Menu SPAN appears.
Step 9. Press the Enter button.
Step 10. Enter the SPAN self test parameter from the Self Test - Calibration form.
Step 11. Press the Enter button. The Full Scale Count FS CNT SubMenu appears.
Step 12. Press the Enter button.
Step 13. Enter the FS CNT self test parameter from the Self Test - Calibration form.
Step 14. Press the Enter button. The RETURN display appears.
Step 15. Press the Enter button to set the parameters, the END CAL
display appears.
Step 16. Press the Enter button to save the updated parameters to the
SMM and return to the weight display.
6-19
HI 2151/30WC MANUAL
Restoring Calibration
When Changing
Decimal Points
Restoring Decimal
Points
Step 1. If you wrote down the parameters for this controller on the
Self Test - Calibration Form (Prt. # 0575-0016) enter the values from the form.
Step 2. If you didn't write down the parameters on the Self Test - Calibration Form, get the form and write them down.
Step 3. Check all Set point, Option and Calibration entries for the
correct decimal position.
NOTE:
You must complete procedures "c" before moving to procedure "d" to be sure that the
decimal points in the correct position. If you don't check the decimal positions the calibration will be incorrect.
Step 4. From the CAL menu press the Enter button. The Hard Calibration Sub-Menu HD CAL appears.
Step 5. Press the Mode button. The Zero Count Sub-Menu ZR CNT
appears.
Step 6. Press the Enter button. The current value is displayed.
Step 7. Press -/Test/Clr button and enter the correct ZRCNT or Press
the Enter button to accept the current value. The Span SubMenu SPAN Sub-Menu appears.
Step 8. Press the Enter button. The current value is displayed.
Step 9. The new decimal point will be displayed in the SPAN SubMenu but it might be in the wrong place and displaying the
wrong span value.
Step 10. If the Span Value should be 2000.00 and the current display
shows 200.00, add a zero (0) by pressing the 0 button. Now
the value is correct.
Step 11. If the Span Value should be 200.00 and the current display
shows 2000.00, press -/Test/Clr button and enter 200.00.
Step 12. Press the Enter button twice. First the Full Scale Count SubMenu FS CNT appears, then the current value is displayed.
Step 13. Press the -/Test/Clr button, enter the correct FSCNT then
press the Enter button or press the Enter button to accept the
current value.
Step 14. The RETURN display appears.
Step 15. Press the Enter button twice. First the END CAL display
appears, then the Secured Memory Module is updated and the
system returns to the weight display.
6-20
Chapter 7 - Operation
CHAPTER 7 - OPERATION
Chapter 7 covers operation of the HI 2151/30WC weight controller.
Follow the procedures in this chapter to ensure maximum quality performance.
Description of Front
Panel (See Fig. 7-1)
Mode
Zero
Tare
Print
8.8.8.8.8.8
FIG. 7-1 FRONT PANEL, PROCESS WEIGHING FUNCTION BUTTONS
Process Weighing
Function Buttons
ITEM
LABEL
BRIEF DESCRIPTION
ZERO
ZERO
Sets current count as new gross zero reference
point. The ZERO button will only zero up to the
zero tolerance value entered in the calibration
menu. (See Chapter 6)
The user can zero the instrument as many times
as desired as long as the total does not exceed
the value entered as the zero tolerance.
Exits a numeric entry in a menu without changing the original value.
MODE
MODE
Standard mode
Selects Standard Net, Gross modes and any
installed optional modes.
Optional Modes
Peak Hold Mode (-C1) - The PEAK mode displays the highest measured average gross
weight. The peak value is continuously monitored and stored in any mode of operation. The
user can reset the peak hold mode by pressing
the clear button while the Peak Value is displayed. The peak value is stored in memory but
will not be retained in the event of a power failure.
7-1
HI 2151/30WC MANUAL
Operator Displays
ITEM
LABEL
TARE
TARE
PRINT
PRINT
Sets display to zero in net mode.
Outputs to RS232C serial port (NOT used with
multidrop).
ITEM
LABEL
BRIEF DESCRIPTION
LEDs
Display
Instrument Operation
Overview
BRIEF DESCRIPTION
Rate-Of-Change Mode
(-C2) - The ROC mode displays the rate-ofchange of the input with respect to a pre-selected
time base.
Total (-C6) - The TOTAL mode displays the
accumulated total weight. The instrument adds
the current net weight to the total net weight
when a remote function is entered. The value is
available for displaying, clearing or printing.
Captures current displayed gross weight and
places value in the tare register.
30 discrete LEDs that displays either weight
controller status or a bar-graph representation of
the selected weight display mode.
Fourteen-segment LED display for displaying
menus, operator inputs and selected weight
displays.
There are two main operating menus - Set Point and Option. To enter
these menus, press the proper button. Once in a particular menu, use the
up and down arrow buttons to scroll through the choices of that menu.
Some of the menus have sub-menus. To select an item for viewing and/
or changing, press the Enter button when the menu item displays; the
current value or status of the menu item is displayed.
To change values, use the numeric keypad, or press the Exit button if
no changes are made. Use the -/Test/Clr button when a value is shown
on the display to clear the display to all zeros. When clearing the display, the unit will always keep the decimal location intact by putting
zeros to the right and one zero to the left of the decimal point.
Some menu selections can be toggled using the ← and → buttons.
Pressing the arrow buttons will display all available selections for the
menu item. Whether altering a value or not, when you are ready to stop
viewing this parameter and go on to the next, press the Enter button to
accept the value or press the exit button to keep the original value. This
will save the parameter as shown on the display.
The instrument will also verify that the value entered is a logical
choice. If a parameter has been entered correctly, a GOOD will briefly
appear and the display advances to the next item in the menu. If a
parameter has been entered incorrectly, an error ERR statement
7-2
Chapter 7 - Operation
appears. A list of error statements are provided in Chapter 7 - Troubleshooting. After checking the error statement, correct the error.
To simply view a parameter value without changing the value, push the
Enter button. If when changing a value you decide to retain the original
value, press the ZERO button instead of the Enter button. This will
save the original value and advance to the next parameter.
Option Menus and
Option Parameters
Option menus are used to set parameters for the various option boards.
All option parameters except for Peak Hold are automatically saved
and updated in the Secure Memory Module. The following sections
describe menu operation.
NOTE:
Do not modify ANY Sub menus, while the serial interface or A-B RIO are attempting
to modify information.
OPTION MENU TREE
Rate of Change
Units
Analog Ouput
Port 1
Analog Ouput
Port 2
BCD Port
Bar
Graph
T-Base
Analog
LO
Analog Analog
HI
LO
Analog
HI
Bar Hi
Profibus
Allen
Bradley
RIO
Node
Address
Rate
Bar Lo
Rack Number
Format
Gross
Net
Tare Display
Print
Quar ter
Number
Last
Quar ter
Sercon Ser Type Baud
Bi-Dir RS-422
19200
Print
9600
RS-485
4800
2400
1200
600
Frame
8-N-1
7-0-1
7-E-1
8-N-2
8-0-1
8-E-1
Format Control
G
HARDRE
N
SOFTRE
T
R
S
P
Echo
ON
OFF
Address
1-99
FIG. 7-2 OPTION MENU TREE
Option Boards
The Hardy Instrument option boards provide added capabilities. They
are easily installed into the option board slots, labeled Option 1 and
Option 2 on the rear panel of the instrument.
General Information
NOTE:
If your options have already been installed at the factory, move on to Set points.
The options are implemented by installing the appropriate optional circuit board onto the main analog/digital board in the instrument. (See
Chapter 3 for installation instructions)
The following option boards are available for the HI 2151/30WC:
• Analog Output board (voltage and current outputs: Net,
Gross, Total*, ROC*, or Peak Hold*). Prt. # 0551-0326,
model HI2151/30X-B1.
7-3
HI 2151/30WC MANUAL
(* if ordered)
• Parallel BCD board, tri-stated. With 6" cable P/N 05510327, model HI2151/20XX-B2. With 24" cable Prt. # 05090389-02, model HI 2151/30XX-B9. With 60" cable Prt. #
0551-0330, model HI2151/30XX-B5.
• Allen-Bradley RIO. Prt. # 0551-0351, model HI2151/
30XX-B8.
• PROFIBUS Field Bus Interface. Prt. # 0535-0439, model
HI2151/30XX-B12.
• DDE I/O Server, Prt. 0551-0419-01, HI2151/30XX-B14
• Setpoint Option Card Prt. # 0551-0288, model HI2151/
30XX-D2
Option slots are labeled on the top circuit board as follows:
READ PANEL LABEL
Option 1
Option 2
26 PIN CONN NUMBER
J5
J4
Output Option Boards may be ordered and installed into these slots as
follows:
NOTE:
BOARD
QUANTITY
OPTION SLOT
Analog
2
BCD
A-B RIO
PROFIBUS
1 only
1 only
1 only
1 and/or 2 (When using only 1 board,
position 1 is preferred due to option
cover compatibility)
1
1 or 2
1 or 2
You can install either the A_B RIO or the Profibus option but you cannot install both
at the same time.
Set Points
About Set Points
NOTE:
The set point value is the target weight or level. It may be set in either
net, gross, ROC*, Total*, or Peak* hold weight units. When entering
this value, the corresponding LED flag will appear on the display. The
operator may toggle this flag to the desired mode by pressing the
MODE button. Refer to the Set point Limits section following installation for a description of set point limits.
Only works when the ROC, Total, or Peak options are installed in the controller.
Set Point Limits
Dead Band Limits
7-4
The dead band value can be set as a positive or negative value. It is
used to prevent relay chatter once the set point is reached.
Chapter 7 - Operation
For example: if a set point value was 1000 pounds and the dead band
was set to -5 pounds, the relay would close at a 1000 pounds but not
open until the weight dropped to 995 pounds. This would be used if a
set point is a high trip limit. A positive dead band would be used for a
low trip limit. Examples are shown for Low and High Trip Limits.
(See Fig. 7-3) Using a set point of 1,000 pounds and a dead band of 800 pounds will cause the level to remain between 200 and 1,000
pounds.
Three General Rules
for Setpoints
1. Set points activate at the set point plus the preact.
2. Set points deactivate at the set point plus the deadband.
3. The deadband should be numerically larger than the preact to prevent relay chatter.
RELAY TRIPS
WEIGHT
SET POINT
NEGATIVE
DEADBAND
(-) PREACT
SETPOINT
AFTER TRIP
PROCESS
RELAY RESETS
TIME
HIGH TRIP LIMIT
WEIGHT
RELAY RESETS
SETPOINT
AFTER TRIP
POSITIVE
DEADBAND
(-) PREACT
SET POINT
RELAY TRIPS
TIME
LOW TRIP LIMIT
FIG. 7-3 LOW AND HIGH PREACT TRIP LIMITS
Preact Limits (See
Fig. 7-3)
•
•
The preact value is the number of units below (negative value) or
above (positive value) the set point value at which the relay will
trip.
It is used as an "in-flight" compensation value when filling a vessel.
If set to zero, there will be no compensation.
Entering Set Points
About the Set Point
Menu
•
•
NOTE:
Used to enter the set point, dead band, and preact values for the two
standard internal relays.
Used to enter the associated values for the six optional, external
relays when installed.
To scroll forward or backward through the Set Point Menus, press the Up or Down
arrow ↑↓ buttons.
7-5
HI 2151/30WC MANUAL
Entering Set Point
Procedures
NOTE:
A previously assigned set point value will be displayed. For this example, the set point
value will be set to 500.
Step 1. Press the 6/SetPt button to select set point menu, RLY -- 1
appears with the 1 flashing.
Step 2. Press the Enter button. Set Point #1 appears SPNT - 1.
NOTE:
The mode status display indicator flashes on the present set point mode. To change
modes, press the round mode button until the desired mode display flashes.
Step 3. To enter a new set point value, press the -/Test/Clr button.
Step 4. Use the numeric buttons to enter a desired set point value; in
our example 500.00.
Step 5. Press the Enter button. The controller indicates that the value
was valid by briefly displaying GOOD. The Dead Band SubMenu DBND-1 appears.
Entering Dead Band
Tolerance
Procedures
Step 1. Press the Enter button. The Dead Band Sub-Menu DBND-1
appears.
Step 2. Press the -/Test/Clr button to clear the existing value.
Step 3. Press the -/Test/Clr button again to enter a negative value if
desired.
Step 4. Use the numeric buttons to enter dead band value (e.g. 125.00 value).
Step 5. Press the Enter button. The controller indicates that the value
was valid by briefly displaying GOOD. The Preact Sub-Menu
PRE - 1 appears.
Entering Preact
Values Procedures
NOTE:
Step 1. Press the Enter button.
Previously set preact value will be displayed. For this example, the preact value will
be set to 20.
Step 2. To enter a new value, press -/Test/Clr button.
Step 3. Press the -/Test/Clr button for a negative value if desired.
Step 4. Use the numeric buttons to enter a new preact value.
Step 5. Press the Enter button. The controller indicates that the value
was valid by briefly displaying GOOD. Set Point 1 Sub-Menu
SPNT - 1 appears.
Step 6. Press 0/Exit button to advance to Relay 2 RLY-2
Step 7. Repeat above procedure to enter set point parameters for relay
2
7-6
Chapter 7 - Operation
Step 8. If the option for 8 relays is active, enter set point parameters
for relay 3-8 at this time.
Step 9. When the last set point parameter is entered, press Exit button
to return to the weight display and resume normal operations.
Serial Communications
The standard serial ports are user selectable RS-232C, and RS-422/485
which may be configured as a printer output port or as a bi-directional
communication port. Transmission speed is selectable from 600 to
19.2K baud and may be configured for a continuous data output mode.
The port allows host computer control using ASCII character commands and RS 422/485 ports support multiple weight controllers via a
multidrop configuration.
Bi-directional
Communications
RS-232C
One RS-232C allows serial communication from one weight controller
to one peripheral device. The RS-232C is user-selectable as a print-output only port or as a bi-directional control port through the Menu and
jumper settings on the main board. (See Chapter 4 for configuration
information)
Operation
The operation consists of properly executing commands over the serial
port.
RS-422/485
The RS-422/485 meet RS-422 or RS-485 requirements providing drive
over long distances. With the Hardy Link two way multidrop, communication can take place between any of the Hardy Instruments series
2100 controllers and a host computer.
Operation
Operation of the RS-422/485 consist of properly configuring the board
(See Chapter 4, Section 4.1 for configuration information) and executing commands over the port. Commands available and their actions are
identical to the commands for the RS-232C.
Description of 422/
485 Transmission
Modes Available
Many devices available today are called RS-422/485 because their
electrical signals meet or exceed both specifications. This does not necessarily mean they both meet the strict intent of RS-485 to provide for
two wire multidrop networks. They are instead multidrop RS-422 or
four wire RS-485 networks.
RS-485
The RS-485 mode when configured as two wire (2 wire jumper) with
the transmitter enabled.
RS-422
If the unit is in the four wire (4 wire jumper) mode with the transmitter
always enabled, then the board operates in a true RS-422 mode. This
flexibility allows compatibility between the host computer and the HI
2151/30WC.
7-7
HI 2151/30WC MANUAL
Additional Nonstandard
Transmission
Mode
•
•
•
RS-422/485
Wiring and
Electrical
Specifications
Serial communication signal configuration and wiring is dependent on
how the board is configured. The following notes are typical methods
of connection. It should be realized that these methods vary and are
only furnished to offer a starting point for configuration:
Used most frequently. Only one "host" permitted.
Four wire RS-485 or multidrop RS-422 mode
When configured in four wire mode with the transmitter selectively
tri-stated, the board is operating in a four wire RS-485 or multidrop
RS-422 mode. This configuration doesn't meet either specification
but can be easier to program than either true specification.
•
Signal Grounds
A direct connection between signal grounds of the different
devices is not desirable, rather a connection with approximately 100 ohms of resistance is recommended. Signal
ground should NOT be used as a shield.
•
Earth Ground Cable Shield
Typically, cable shields are tied to the ("frame") ground at
the end that is the best earth ground.
Pick up frame ground on the HI 2151/30WC with the phillips head screw on the rear of the instrument labeled Shield.
•
Cable Type
The Tx+/Tx- and Rx+/Rx- wires are twisted pair (with outer
shield).
•
Serial Connector
Each function is wired to two pins to allow only one wire to
be put in each terminal position. (The same electrical signal
is routed to pins one and two on the board.)
RS-422/485
Configuration
Wiring
7-8
+TXD
-TXD
+RXD
-TXD
+TXD
HI 2151
HI 2151
SIG
GND
-RXD
+RXD
-TXD
+TXD
HI 2151
SIG
GND
-RXD
+RXD
-TXD
+TXD
-RXD
+RXD
-RXD
SIG
GND
SIG
GND
HOST
DEVICE
FIG. 7-4 WIRING DIAGRAM SERIAL COMMUNICATIONS
Chapter 7 - Operation
RS-422/485
Electrical
Specifications
Description
Receiver Impedance
Specification
12 k ohm
Description
Receiver Common Mode Range
Maximum Input Threshold
Minimum Input Hysteresis
Driver Output Capability
Driver Short Circuit Limit
Bus Loading By Unpowered Board
Specification
+12 to -7 V
+200 mv
50 mv
+60 ma at 2 V differential
250 ma to +12 or -7 V
One Receiver Load
Instrument Serial
Communications
About Instrument
Serial
Communications
The HI 2151/30WC's serial options provide the user with a full complement of RS-232C, RS-422, and RS-485 communications. There is a
standard RS-232C/422/485 serial port on the main board. Each port can
be an output only port to drive a printer or similar device, or as a bidirectional port for both status and control.
Printer Output
Below is an example of the printout with the weight controller formatted for Gross, Net and Tare.
>
GROSS
1.430 LB
NET
0.430 LB
TARE
1.000 LB
Serial Protocol Multidrop Mode
About Serial
Protocol Multidrop
Mode
Hardy Instruments HI 2151/30 WC weight controller employs an
ASCII command protocol and accompanying command set, described
in the following paragraphs. The protocol is via RS-232 or RS-422 with
the network being called Hardy Link. Hardy Link supports a multidrop
configuration.
•
Serial Protocol - Multidrop Mode
Multidrop is a configuration denoting that there are multiple
HI 2151/30WC units connected to a host computer whereby
each HI 2151/30WC receives and sends data through a
unique address. The fastest possible instrument response
will be from the multidrop configuration. The multidrop
configuration also lends itself well to host computer control
of multiple weight controllers. RS-422/485 is utilized and
provides excellent noise immunity and drive capability supporting long cable runs.
7-9
HI 2151/30WC MANUAL
NOTE:
The 2151/30WC weight controller contain intelligent front ends to a distributed system, therefore network speed is not usually critical.
Data Formats
Relays, dip switches and LED data along with weight data have their
own special format for transmission. These formats are described in the
following two sections.
Data Formats Binary
Representation
1. Relay, dipswitch and LED numbers are represented by the binary
bit position. In the case of a relay, 0 disables the relay and a 1
enables the relay.
2. Binary bit position:
7
6
5
4
3
2
1
0
3. Relay(binary bit position +1):
7
6
8
2
1
3
4
5
4. Example:
To enable relays 4 and 8, the following would be the binary representation:
0
0
1
0
0
0
1
0
This would be 22 hex, hence the command to enable relays 4 and 8
would be E 22.
Data Formats Weight Data Format
1. Weights are transmitted according to the following rules:
•
Positive numbers:
Maximum of 6 numeric + decimal point.
•
Negative numbers:
Maximum of 5 numeric + minus sign + decimal point.
•
7-10
Examples:
Transmitted Correct?
Received
Reason
-123.45
Y
-123.45
5 numerics +
minus sign + decimal
point (B above).
1234.56
Y
1234.56
6 numerics + decimal
point (A above).
Chapter 7 - Operation
Transmitted
Serial Commands
Serial Commands Data Transmission
Format
Correct?
Received Reason
-12345
Y
-12345
5 numerics + minus
sign (B above)
-123456
N
-12345
The "6" would be
truncated since only 5
numerics + the minus sign
is legal (B above).
12345.67
N
12345.6
The "7" would be
truncated since only a
maximum of 6 numerics +
decimal points is legal (A
above).
Serial commands are transmitted to the instrument in ASCII format.
Each command has a single letter corresponding to the command. The
instrument will accept command strings up to 40 characters (the 40th
will internally default to a carriage return).The front panel serial port
menu allows setup of serial communication parameters, i.e. BAUD,
parity, etc.
The following table uses the mnemonics corresponding to the outgoing
command format (some of which are optional):
Mnemonic
Meaning
Number of ASCII Bytes
CMD
SUB-CMD
DATA-n
MODE
CR
Command
Subcommand
Data byte n
Mode
Carriage return
1
1 to 3
1 to 7
1
1
1. Serial commands are transmitted from the host to the instrument (in
ASCII bytes) in the format:
2. Control characters are transmitted in HEX. (See the ASCII to HEX
table in Appendix A)
3. An example using the "x" transmit command with Hardy Link and
an address of 10 is:
2 BYTE CHECKSUM
START
CHAR
INSTRUMENT
ADDRESS
CMD
>
10
X
SUB-CMD
G
CR
CR
EOT
CHK-1
CHK-2
CHK-1
CHK-2
EOT
7-11
HI 2151/30WC MANUAL
NOTE:
The example uses decimal and mnemonic abbreviation format for clarity, however,
the actual data would be in ASCII format. A leading zero (i.e. 01) is required for single digit addresses for serial port #2.
4. There is one space (20 hex) required between each type of data following the INSTRUMENT ADDRESS, hence, the outgoing command represented in hex format would be:
3E
31
30
>
1
0
20
Serial Commands,
Command Set
58
20
47
0D
34
44
04
X
G
CR
4
D
EOT
An example using the "x" transmit command without Hardy Link
is:
2 BYTE CHECKSUM
START
CHAR
CMD
>
X
SUB-CMD
G
CR
CR
EOT
CHK-1
CHK-2
CHK-1
CHK-2
EOT
The checksum is computed by totaling the bytes in the command
stream starting with the INSTRUMENT ADDRESS through (and
including) the CR and then subtract 256 from the total until the remainder is less than 256 (to achieve a one byte maximum). The result is then
represented as two ASCII bytes and appended to the command, followed by an EOT (04).
Value
Description
31
30
20
58
20
47
0D
--------------=
address - instrument number 10 - ASCII "1"
address - instrument number 10 - ASCII "0"
space
X
space
G
CR
Value
--------------=
Description
100
14d
4d
Serial commands are transmitted from the instrument back to the host
in the format they were received from the host with the return data (and
units) added to the message and an LF added to the CR.
Using the above example, the return data would be:
7-12
Chapter 7 - Operation
START
CHAR
INSTRUMENT
ADDRESS
CMD
>
10
X
2 BYTE CHECKSUM
SUB
CMD
7 BYTE
DATA
D-7 . . . D-1
MODE
G
D-7 . . . D-1
Lb or Kg
CR
CRLF
EOT
CHK-1
CHK-2
CHK-1
CHK-2
EOT
* Lb or Kg follow data.
In the case where return data is appropriate for the command, an A is
returned by the instrument in the form of:
2 BYTE CHECKSUM
START
CHAR
INSTRUMENT
ADDRESS
CMD
>
10
A
SUB-CMD
CR
CRLF
EOT
CHK-1
CHK-2
CHK-1
CHK-2
EOT
In the case of an error, the message returned would be:
2 BYTE CHECKSUM
START
CHAR
INSTR.
ADDRESS
CMD
>
10
N
CMD
9
SUB
9
CR
CRLF
EOT
CHK-1
CHK-2
CHK-1
CHK-2
EOT
where 99 is the error number (See Chapter 8,
Troubleshooting, Error Codes and Definitions for a
breakdown of error codes)
NOTE:
Command Meaning
The example uses decimal and mnemonic abbreviation format for clarity, however,
the actual data would be in ASCII format.
1. X
Xmit. When this command is issued without a sub
command, the type of data specified in the format command
will be transmitted to the port issuing the request. When
this command is issued with a subcommand only, the
subcommand data will be transmitted. Only one
subcommand per command is allowed.
2. Transmit data specified in SUB-CMD as follows:
SUB-CMD
Meaning
none
A
G
N
T
DE
P
Default to data setup by the format command
Accumulated total
Gross
Net
Tare
Deadband
Preact
7-13
HI 2151/30WC MANUAL
S
DI
L
REL
REM
C
E
Set point
Dipswitch
LED Status
Relay
Remote
ROC
Excitation Monitor
SUB-CMD
Meaning
REL
Relay
Bit
RELAY
01
02
04
08
5
4
3
1
10
20
40
80
2
8
7
6
SUB-CMD
Meaning
The L command returns a two-byte status, each bit describing the LED
status.
The values returned are the hex values of the two bytes.
Byte 1: LED STATUS, BYTE 1 Byte 2: LED STATUS, BYTE 2
Bit 0 - Pounds led
Bit 1 - Zero track led
Bit 2 - Not used
Bit 3 - Center zero led
Bit 4 - Motion led
Bit 0 - Rate of change led.
Bit 1 - Alarm #2 led.
Bit 2 - Alarm #1 led.
Bit 3 - Peak led.
Bit 4 - Total led.
Byte 1: LED STATUS, BYTE 1 Byte 2: LED STATUS, BYTE 2
Bit 5 - Gross led
Bit 6 - Net led
Bit 7 - Kilograms led
7-14
Bit 5 - Not used
Bit 6 - Not used
Bit 7 - Not used
SUB-CMD
Meaning
DI
The HI 2151/30WC will return two bytes for the dip
switches. Dip switch #1 is the one on the rear panel
and Dip Switch #2 is internal to the unit located on
the bottom power relay board.
Chapter 7 - Operation
Dip Switch #1 (S3)
Position Bit
Function ("ON" position)
1
2
3
4
5
6
7
8
Multi-drop
Calibrate toggle (Non NBS applications)
Serial command lockout (Requests OK)
Option menu lockout
Set point menu lockout
Spare
Lb/Kg, N/G, Tare and Zero lockout
Zero track
80
01
40
02
04
20
08
10
SUB-CMD
Meaning
Dip Switch #2 (S2)
Position Bit
Function ("ON" position)
1
2
08
10
3
4
5
6
7
8
20
04
40
80
02
01
Ignore incoming checksums
On is averaged peak hold, Off is instantaneous
peak hold
NBS
NBS Re-Cal toggle switch
Spare
Spare
Spare
Spare
SUB-CMD
Meaning
E
Excitation Monitor
ERR
OKK
OFF
3. E IT® serial command
Results
Description
OKK
ERR
OFF
No Errors Detected
Error Detected
IT is Not Turned On
4. I
Load cell input command. Used primarily to
check the analog input section of the unit. The command
will return the number of averaged counts that is currently
being read from the load cell input.
7-15
HI 2151/30WC MANUAL
SUB-CMD
Meaning
REM
Level status of the Remote Input connector (J2)
pins.
Bit
Remote Function Bit
Remote Function
01
02
04
08
Rate of change
Totalizer
Display Hold
Option Hold
Net
Lbs/Kgs
Tare
Print
5. Q
NOTE:
7-16
The query command obtains a block of information as
follows:
SUB-CMD
Meaning
A.
B.
C.
D.
E.
F.
G.
H.
I.
J.
Gross weight (6 bytes plus label)
Net weight (6 bytes plus label)
Peak gross value reached (6 bytes plus label)
Internal counts (6 bytes)
Total net accumulation (6 bytes plus label)
Rate of change value (6 bytes plus label)
Not Used (6 bytes set to 000000)
Not Used (6 bytes set to 000000)
LED status (4 bytes)
Relay status (2 bytes)
Command
Meaning
F
Format the output data. Used to
configure data to be sent on a
TRANSMIT or PRINT request.
The SUB-CMD letters can be
issued in any combination or
order and are as follows:
SUB-CMD
Meaning
G
N
T
R
S
Gross
Net
Tare
ROC
Set point, Deadband, Preact
The last (6th) position is one of the following (must be accompanied by at least one of
the above SUB-CMDs):
P
NOTE:
10
20
40
80
Continuous printing.
Button on front panel "triggers" output.
The default FORMAT is GNTRSP.
Chapter 7 - Operation
M
CAUTION
Monitors the specified SUB-CMD data as follows by requesting a report whenever a change
in the type of status occurs.
DO NOT USE THIS MCOMMAND IF THE SYSTEM IS CONFIGURED IN
RING OR MULTIDROP MODES. IF USED IN MULTIDROP MODE, IT WILL
CAUSE DATA TRANSMISSION PROBLEMS. IT IS INTENDED ONLY FOR
SINGLE UNITS.
SUB-CMD
Meaning
R xx
D xx
Relay number where xx is a two ASCII digit value.
Dipswitch number where xx is a two ASCII digit
value.
L xx
LED number where xx is a two ASCII digit value.
Use this command to request a report when a change in status occurs in
the subcommand selected. You may request the status of the Relays,
Dipswitches, or LED's. Only one MONITOR subcommand may be
issued per command. After the command is received, the instrument
immediately sends back the present status of the subcommand requested followed by a # sign and a bell character (cntrl G). This can be used
to mark the beginning of the MONITOR command. To select which
particular relays, dipswitches, or LED's you want to monitor, enter the
appropriate 2-byte Hexadecimal number after the subcommand. To
shut off a MONITOR command, enter the MONITOR command, subcommand, and Hex 00.
SUB-CMD
Meaning
S
Set specified SUB-CMD data as follows:
SUB-CMD
Meaning
S y xxxxxxx Set point value.
D y xxxxxxx Deadband value.
P y xxxxxxx Preact value.
xxxxxxx is up to a seven digit ASCII value.
y is the Set point Relay number.
NOTE:
The above xxxxxx data may be followed by a MODE as follows:
Mode Meaning
Mode Meaning
N
G
R
T
P
Net
Gross
ROC
Total
Peak
7-17
HI 2151/30WC MANUAL
For example, to set point one to 1000 Lbs gross on instrument number
10, the outgoing command would be as follows:
START
CHAR
INSTRUMENT
ADDRESS
CMD
>
10
S
NOTE:
SUB
CMD
CMD
S
1
2 BYTE CHECKSUM
7 BYTE
DATA
D-7 . . . D-1
MODE
1000
G
CR
CR
EOT
CHK-1
CHK-2
CHK-1
CHK-2
EOT
The example uses decimal and mnemonic abbreviation format for clarity, however,
the actual data would be in ASCII format.
Command
Meaning
C
Allows you to change modes between Net/Gross,
lb/kg, or Hold/Unhold Display.
SUB-CMD
Meaning
M
U
H
Toggles between Net and Gross weight mode.
Unit (toggles between Lbs. and Kg.)
Toggles between display hold and unhold.
Command
Meaning
A
Used to auto tare or auto zero the instrument.
SUB-CMD
T
Meaning
Auto tare the instrument. (Scale must not be in
motion.)
Auto zero the instrument.(Scale must not be in
motion and mode must be set to Gross)
Print command. Functionally the same as the print
button on the key board.
Z
P
The data setup through the format command will be
sent to the port configured as a printer.
Command
Meaning
P1 or P2
Print to either ports 1 or 2.
An optional "subcommand" of up to 37 ASCII characters may be
entered and will be printed before the formatted data.
SUB-CMD
Meaning
37 ASCII characters maximum.
H
7-18
The ASCII characters supplied in the subcommand
(maximum of 20 characters) will be printed as a
heading and saved for each subsequent X - transmit
Chapter 7 - Operation
or P - print command requested. Heading is not
stored in the Secure Memory Module.
To remove the heading, transmit H with no subcommand.
H1 or H2
The ASCII characters supplied in the subcommand
(maximum of 20 characters) will be printed as a
heading and saved for each subsequent X - transmit
or P - print command requested.
To remove the heading, transmit H1 or H2 with no
subcommand.
N
Adds the current net weight to the accumulated
total.
E
A two ASCII digit hex number is transmitted with
this command to enable a relay to be under the control of it's set point value. The power-on default is all
relays enabled.
!
This command is used to reset instrument communication. It is typically used when an error or unintelligible response is received from the instrument and
should used sparingly. It is recommended that it not
be used during "normal" communication retries (i.e.
unintelligible response), but instead be used as a last
resort (no response after retries are exhausted).
Internally, it performs the same operations as done
on instrument power-up. Refer to the REL SubCommand under the X (Xmit) Serial Commands
Command Set.
Parallel BCD
Communication
Operating
Procedures
Step 1. The BCD option is setup by first entering the Option Menu
and selecting the BCD menu. The menu display shows a combination of GNTDP (G = gross, n = net, T = tare, D = display,
P = print). (See Chapter 5 for setup instructions)
Step 2. The user may select which data will be present at the output.
If the "P" or print flag is selected, the data will only change at
the output once the PRINT button is pressed or the remote
functions print has been activated. Otherwise, the output will
be continuous.
Step 3. You can trigger the output by any of the following methods:
•
By pressing the PRINT button.
•
By sending a command over the serial port.
7-19
HI 2151/30WC MANUAL
•
By connecting the remote functions print to the remote
functions ground.
Step 4. The output can be tri-stated if the OUTPUT DISABLE is
brought low. This is useful for multiple parallel outputs to be
connected to the same device. Once this input is brought high,
the latched data will be accessible again. The PRINT output is
normally low and goes high for 25 milliseconds. If the opposite polarity (normally high, pulsed low) is desired, move
jumper from W1 to W2.
BCD Print
Step 1. The weight select mode tells the output device which type of
data is present.
Step 2. The user selects which type of data is desired by toggling
"GNT" under the option BCD sub-menu.
Step 3. If all three types of data are requested, then all three will
appear on the output one after the other, 10 milliseconds apart.
Step 4. If "d" is selected, the output will follow the mode being displayed.
Output Disable
Data output is discontinued if the OUTPUT DISABLE, pin 22 on the
PWA (pin 30 on the D-Subminiature connector), is low. The data pins
will be tri-stated even though print pulses will be sent.
Rate of Change
(ROC)
(See Chapter 5 for Setup Procedures) The Rate of Change Option
is used to measure the rate at which a material enters or is dispensed
from a vessel over a given period of time.
To develop ROC data, a Register is used that is 21 entries in length.
New weight is input to the register at the rate of 1/20th of the Time
Base. The 1st register is subtracted from the 21st register. The 21st register is one Time Base older than the 1st register. The results of this
subtraction are divided or multiplied, as necessary, to equal the appropriate measurement time for display, U-SEC, U-MIN, U-HOUR.
Example
In this example the units of display are units per minute (U-Min) with a
Time Base of 10 seconds. Every ½ second new data is inserted into the
1st register and old data is shifted down one register. The 1st register is
subtracted from the 21st register and the results are multiplied by 6 so
the Time Base results of 10 seconds corresponds to Units per Minute.
100
102
104
106
108
110
112
7-20
21st - 1st (x) 6 = ROC
Chapter 7 - Operation
114
140 - 100 = 40 (x) 6 = 240
116
118
120
122
124
At time one there is 100 lbs on the scale.
One half second later there is 102 lbs on the
scale. At time twenty one, 10 seconds laterthere is 140 lbs on the scale. A 40 lb
change in 10 seconds converts to 240 lbs
per minute.
126
128
130
132
134
136
138
140
Rate of Change
Data
Peak Hold Mode Option
To display PEAK
HOLD:
•
Rate of change data can be transmitted through the standard or
optional serial ports or the analog output. It can also be displayed
numerically or as a bar graph.
The Peak Hold Option, when selected, will display the highest gross
value that has been measured or the averaged peak gross value. Peak
does not need to be displayed in order to capture the peak value. (See
Chapter 4, Section 4.6 for Configuration Information)
Step 1. Press the MODE button until the "PEAK" LED indicator is
lit.
Step 2. The value now displayed is the highest gross value that has
been measured since last RESET.
To reset the Peak
Value to zero:
With the Peak Value displayed, press the -/TEST/CLR button.
To exit Peak Hold
mode:
Press the MODE button until desired mode is indicated.
Totalizer Mode Option
When Total Option is selected, the display will indicate the accumulated total net weight stored in the total register. To Setup the Totalizer
Mode Option See Chapter 5.
To display the Total
Value:
Press MODE button until the "TOTAL" indicator is illuminated. The
value displayed is the total accumulated net weight.
To print the Total
Value:
With the Total displayed, press the PRINT button.
7-21
HI 2151/30WC MANUAL
To clear the Total:
With the Total displayed, press the TEST/CLR button. The Total Register will now be reset to zero.
To exit the Total
Mode:
Press the MODE button until the desired mode is indicated.
NOTE:
The Peak Hold and Totalizer modes do not support the LB/KG button or LB/KG
remote input. They will display and transmit only the mode the instrument was calibrated in.
Allen-Bradley Remote I/O
Option -B8
See the Allen-Bradley Remote I/O Installation and Operation Manual
(P/N 0596-0173) for complete Operating Instructions.
Profibus Interface Option
-B12
See the Profibus Installation and Operation Manual (Prt. # 0596-0211)
for complete Operating Instructions.
7-22
Chapter 8 - Troubleshooting
CHAPTER 8 - TROUBLESHOOTING PROCEDURES
Chapter Eight covers the procedures for troubleshooting the electrical,
mechanical and firmware elements of the HI 2151/30WC Weight Controller in the event of a malfunction. A flow chart provides a road map
for troubleshooting a weight control system, including load cells,
weight controller and cabling. Chapter Eight also provides instructions
for using Hardy's INTEGRATED TECHNICIAN™ software utility to
isolate problems that may occur in a weight system.
Disassembly and
Reassembly Notes
and Cautions
•
Always disconnect the power cord before disassembling.
•
Make sure that any disassembly is done in a clean, well ventilated,
properly controlled static environment.
•
Always make sure that the assemblies and sub-assemblies are well
supported and insulated when doing any repairs on the HI 2151/
30WC Weight Controller.
•
Place small fasteners, connectors and electrical parts in closed containers so as not to lose parts during reassembly.
•
Read all the disassembly instructions before any disassembly
begins. Be sure that you are familiar with the procedures. If any of
the instructions for disassembly are unclear, contact Hardy Instruments, Customer Support Department for additional information
and assistance.
•
Do not disconnect any electrical plug, connector or terminal unless
an identification tag is present or one is attached. Always note
where the connector or plug was attached to the electrical component or wiring harness.
•
Always install complete hardware groups (Screws, Washers, Lock
Washers, Spacers, Etc.) back to the original point of removal.
•
Always replace broken or damaged modules or hardware immediately!
•
Always check to be sure that no loose parts are sitting on printed
circuit boards or electrical connectors or wires when disassembling
or reassembling.
•
Always protect printed circuit boards from electrostatic discharge
(ESD). Always use approved ESD wrist straps and anti-static pads
when working on the PROFIBUS Interface Card.
•
Always perform a final inspection after completing any reassembly
to be sure that all fasteners are tight, all connectors are secure and
there are no loose parts on any of the printed circuit boards in the
HI 2151/30WC.
•
Always follow proper safety procedures when working on or
around the HI 2151/30WC Weight Controller.
8-1
HI 2151/30WC MANUAL
Trouble Shooting
Using Integrated
Technician
NOTE:
8-2
Systems using the Integrated Technician features relating to the isolation or measurement of the instrument-junction box cable, the junction box and individual load sensors or the measurement of weight or voltage of the individual load sensors, require
an HI 215T series junction box.
Chapter 8 - Troubleshooting
NOTE:
Systems using the Integrated Technician features relating to the isolation or measurement of the instrument-junction box cable, the junction box and individual load sensors or the measurement of weight or voltage of the individual load sensors, require
an HI 215T series junction box.
8-3
HI 2151/30WC MANUAL
NOTE:
8-4
Systems using the Integrated Technician features relating to the isolation or measurement of the instrument-junction box cable, the junction box and individual load sensors or the measurement of weight or voltage of the individual load sensors, require
an HI 215T series junction box.
Chapter 8 - Troubleshooting
NOTE:
Systems using the Integrated Technician features relating to the isolation or measurement of the instrument-junction box cable, the junction box and individual load sensors or the measurement of weight or voltage of the individual load sensors, require
an HI 215T series junction box.
8-5
HI 2151/30WC MANUAL
NOTE:
8-6
Systems using the Integrated Technician features relating to the isolation or measurement of the instrument-junction box cable, the junction box and individual load sensors or the measurement of weight or voltage of the individual load sensors, require
an HI 215T series junction box.
Chapter 8 - Troubleshooting
8-7
HI 2151/30WC MANUAL
General Troubleshooting Flow Chart Index
8-8
Chapter 8 - Troubleshooting
A - Guidelines for
Instabilities on
Formerly Operating
Systems
A
Press TST/CLR: To START INTEGRATED TECHNICIAN
( I.T.) diagnostic program
Select System Check:
This program level
isolates the instrument
from the rest of the
weigh system and
checks the internal
electronics stability
SYS_TST
Monitor the display for
stability
STABLE ?
This next step isolates
the controller and
loadpoint signal cable
from the weight
vessel. Tests the
controller and loadcell
signal cable to the I.T.
JUNCTION BOX.
Press: ENTER
A1
NO
Yes
Press ENTER
to continue testing
Monitor the
Display for stability
Verify tight cable connections and
cable integrity.
NO
YES
STABLE ?
NO
STABLE ?
Replace
Integrated Technician
Summing card
YES
Cont.
C
YES
STABLE ?
NO
B1
8-9
HI 2151/30WC MANUAL
A1 - Guidelines for
Instabilities on
Formerly Operating
System (Cont'd)
A1
UNSTABLE WEIGH CONTROLLER
(Internal check)
SYSTST (cont.)
INTREF
Disconnect external signal cables and
shields, except AC power.
Monitor the display for
stability
YES
Reconnect signal
cables one at a
time.
STABLE ?
NO
Problem could be in
the instrument. Contact
Hardy Customer Support.
800-821-5831
Monitor the display for
stability.
If installing any cable causes
unstable readings.
REVIEW TROUBLE-SHOOTING
SECTION B: B1.1 -B1.7
8-10
GOTO
B
Chapter 8 - Troubleshooting
B - Guidelines for
Instabilities on
Formerly Operating
Systems (Cont'd)
B
Check for
Electrical Stability
OK ?
No
B1
No
B2
No
B3
Yes
Check for
Mechanical Stability
OK ?
Yes
Check Configuration
settings for
Stability
OK ?
Yes
GOTO
A
Re-run I. T.
Diagnostics
8-11
HI 2151/30WC MANUAL
B1 - Guidelines for
Instabilities on
Formerly Operating
Systems (Cont'd)
B1
B1.1
Electrical
Physical Grounding All common equipment share a common ground point.
Keep the ground cable length to earth ground as short as possible.
Install a new ground rod if the cable length is excessive.
Cable B1.2
B1.3
Vessel, Fill and discharge piping Ground all to a common point to eliminate electrical differences in potential,
and static build-up.
B1.4
Loadcells Ground straps must be installed to provide a direct discharge path to ground
around the loadpoints.
B1.5
B1.6
B1.7
8-12
Cuts or breaks in the loadcell cable insulation allow moisture to wick into the
cable and loadpoints. This can setup stray capacitance charges and allow
ground currents to exist. This could create a highly intermittent situation.
Cable Routing Seperate high voltage sources and cables from low voltage signal cables.
Stay a minimum of 14 inches from Magnetic fields and SCR controls.
Avoid parallel high voltage and signal cable runs.
Cable Shielding Ground low voltage cable shields only at the controller end.
Grounding both cable ends will produce ground currents.
Verify, with an ohm meter, the shield is only grounded at the weight controller.
Disconnect the shield at the controller and check for an open circuit between ground
and shield. Reconnect the shield to ground and confirm a proper ground path from
the I.T. Junction box to the controller.
Verify the shield is not connect to ground at the I.T. Junction Box.
Loadcell cable shields only pass thru the I.T. Junction Boxes and are not connected
to ground at that point.
Weight Controller - Common AC ground and Chassis grounds.
GOTO
B
Chapter 8 - Troubleshooting
B1 - Guidelines for Instabilities on Formerly Operating Systems (Cont'd)
Mechanical Stability
B2
Stable ?
No
Vessel When inspecting a vessel keep in mind, the Center of Gravity (COG) should be
low and centered equally over all the load cells.
Insure the load is directly over or under the load point to avoid side-loading.
Insure there isn't any side loading from piping or external forces.
Install flexures on all piping to insure a free floating vessel.
Insure the vessel and loadcell mounts are mechanically stable and fixed.
Large changes in individual Loadcells indicate a shift in COG or faulty
Loadcells.
Piping and motors will effect the individual loadcell readings.
Allow for a higher reading on Loadcells that support motors and piping.
Insure pneumatic lines are not applying pressure to the vessel when energized.
Yes
Use check (stay) rods to minimize vessel movement.
Insure the check rods are loose and not interacting with the vessel.
Power down all vibration, vacuum and pressurization equipment during the test
process.
B3
Configuration settings
Stable ?
No
Incorrect Waversaver settings can cause unstable weight readings
Adjust to the lowest WS setting that gives you a stable reading.
Higher frequencies with low amplitude vibrations; - Use WS settings 1 or 2
Low frequency with high amplitude vibrations; - Use WS setting 3 and higher.
Incorrect number of decimal places; Reading weight increments beyond the
equipments applications level. (see guideline caluculations below)
Yes
Repeatability Divide the total loadcell capacity, including decimal points, by 10,000.
(expected stable weight reading).
Resolution Divide the total loadcell capacity, including decimal points, by 30,000.
(The amount you can expect to see, but not necessarily stable)
Return To
A
I.T. Diagnostics
C
8-13
HI 2151/30WC MANUAL
C - Guidelines for
Instabilities on
Formerly Operating
Systems
C
Press ENTER
SYS_TST (cont.) REF_LS
This program checks individual Load
Sensors.
Record Load
Sensor data for
comparison. If
stable or not.
Next
loadpoint
Press: ENTER
To continue checking
load Sensors
NO
Repeat for all load
Sensors
At the I.T. JUNCTION BOX
Remove and Replace
the load sensor(s) determined to be faulty.
YES
stable ?
Replace summing card
Re-install all load
sensors
STABLE ?
YES
NO
TEST
COMPLETE
YES
STABLE ?
NO
If you are unable to isolate the instability:
Compare your results by testing the vessel when empty
and then re-testing under load.
GO TO B for additional system checks
OR
Contact Hardy Instruments
Customer Support
800-821-5831
8-14
Chapter 8 - Troubleshooting
E - Non-Return to
ZERO
E
Error 6?
Yes
NO
This program level checks, records and
compares the milli-volt output of each
individual loadpoint
Press TST/CLR Intergrated Technician
Select RTNTO0
(Return to zero)
Press: ENTER
This program level reads and compares the
milli-volt output of each individual loadpoint to
the values recorded at calibration. Out of
tolerance readings flag an error
Down Arrow and Select
TEST_E
Press: ENTER
LS1?
Scale capacity limits at empty have been
exceeded. Check for product buildup.
The vessel must be within tolerance to
adjust this Gross zero reference point.
See box E1 for additional test
suggestions.
Yes
ERROR? Check load sensor ONE
Yes
ERROR? Check load sensor TWO
NO
LS2?
F
NO
LS3?
Yes
ERROR? Check load sensor
THREE
Yes
ERROR? Check load sensor FOUR
NO
LS4?
No
TEST COMPLETE
E1
Additional Testing Suggestion
Verify cable connections and cable integrity.
REVIEW TROUBLE-SHOOTING SECTION
F Individual loadcell Milli-volt readings
A Verify Sensor readings are stable
B Electrical and Mechanical Guidelines.
8-15
HI 2151/30WC MANUAL
F - Verify Individual
Load Cell Milli-volt
Readings
Using the load cell certificate, verify the Milli volt per volt rating
Example: 3 mV/V load cells will produce approximately 15 mV at full load.
That is 5 volts excitation X 3 mV/V. A scale capacity of 1,000 lbs with 100
lbs of deadload at empty the loadpoint mV reading should equal 1.5 mV.
F
Press TST/CLR
START
INTEGRATED TECHNICIAN
( I.T.)
diagnostic program
Select DVMTST
DVMMV
Press: ENTER
DVMTST
checks individual
load sensor output
mV readings.
Press: ENTER
To check load
sensor
NEXT
Zero mV
reading
High mV
reading
1) No dead load.
Apply load and re-test.
2) Wiring error.
Verify color code using the
load cell certificate.
3) Open bridge circuit.
Disconnect power and verify
loadpoint bridge resistance
reading with an Ohmmeter.
1) Stressed load cell, remove
all load and re-test.
2) Excessive loading.
For additional
H
testing go to:
NO
Record load
sensor mV output
level for
comparison.
Repeat for all load
sensors
mV
readings
acceptable?
Negative
mV reading
K
Unstable
reading
A
Defective load cell?
Replace and repeat
TEST
F
Yes
TEST COMPLETE
8-16
If you are unable to determine the Millivolt readings. Go to
K Load sharing
OR
Contact Hardy Customer Support
800-821-5831
Chapter 8 - Troubleshooting
G - Error 18 During
Hard Calibration
G
ERROR 18
The difference between zero and span is less than +100
counts.
There are two places during HARD CAL where error 18 can occur.
ZERO and SPAN
ZERO
The new Zero Reference (ZRCNT) is larger
than the original Span (FSCNT)
(1)
At ZERO, arrow to SPAN
(2)
Add the test weight to the scale
and perform the SPAN entry.
(3)
After SPAN GOOD, arrow back to
ZERO
(4)
Remove the test weights and set
the ZERO reference point
(5)
Again perform the SPAN
operation and continue with the
calibration.
SPAN
The milli-volt signal reading did not show a positive
increase.
(1)
Use INTEGRATED TECHNICIAN to verify
Milli-volt levels.
(2)
Compression Load cells can be installed
upside-down. Giving negative signal readings.
(3)
Mechanical binding restricts the scales
movement.
(4)
Load cell wires disconnected or improperly
wired.
(5)
Improper load sharing or mechanical loading
on the load cell.
The SPAN weight to small.
(1)
100 counts out of 985,000 is very small
(100,000 lb scale would require 11 lbs.)
(2)
Mechanical binding can mask weight readings
ERROR
18
?
YES
Contact
Hardy Instruments
Customer Service.
800-821-5831
NO
Proceed with
Calibration.
8-17
HI 2151/30WC MANUAL
H - Mechanical
Inspection
H
1)
2)
3)
4)
5)
6)
7)
8)
H1
All pipes and conduits
flexible?
H2
Mechanically isolated from
ladders and connecting
structures?
1)
2)
3)
Floors or structure does not interact.
Local traffic does not interact
Protected from forklifts and adjacent processing
equipment
H3
Are the load cells
properly mounted?
1)
2)
3)
4)
Level, solid mounting base
The load cell is mounted right side up.
All load cell bolts installed using anti-seize compounds.
Mechanically aligned to compensate for expansion and
contraction.
H4
Are Check rods
installed to dampen
vessel movement?
1)
2)
3)
Protects the load cells from overload and impact forces
Limits the movement of the vessel
Rods must be loose and not interacting with the vessel.
H5
Are cables routed
properly?
1)
2)
3)
4)
5)
Separate conduit for low and high voltage cables.
Do not bundle Low voltage with High voltage cables
Maintain at least 3 inches of seperation.
Maintain 14"seperation from magnetic fields and 440 vac.
Cables are in conduit or tied up and protected from damage.
H6
Housekeeping
1)
2)
3)
4)
Product, tools and production aids are off the vessel.
No workers are physically on the scale
Must protect equipment from environmental damage
Insure openings are sealed to keep water and environmental
contaminates from damaging:
(a)
Instrument cabinet or enclosure
(b)
Summing card
(c)
Load Cells
(d)
Conduit runs
(e)
covers are properly installed
To
Verify Electrical
Go to
J
8-18
Keep flexures on the horizontal
Vertical flexures should be avoided
Do not use flexures to correct for misaligned piping
Do not use hose flexures to make right angle bends
Non-flexed piping should have an unsupported
horizontal run using a ratio of 36 times it's diameter.
Pipe flexure lengths should be a ratio of 6 times it's diameter
Feed and discharge piping flexed
Are the flex joints on the correct side of the valve ?
(a)
You weigh the output valve, not the input valve
(b)
Does the weigh scale see all the product to be
weighed?
(c)
If the product applies a force to a valve or pipe, that .
pipe or valve must be included in the weigh vessel.
(d)
Proper positioning of the flexures are key.
(e)
Your vessel must seem to float.
Chapter 8 - Troubleshooting
J - Electrical
Inspection
J
1)
J1
Verify the proper voltage
level has been supplied.
2)
3)
4)
5)
6)
7)
DO NOT POWER UP THE CONTROLLER UNTIL
INPUT VOLTAGES CAN BE VERIFIED.
Check the specification label attached to the weight controller
chassis. (110 vac or 220 vac?)
Use a meter to verify neutral, ground and Hot are proper.
Computer grade power
Use Active filters for motor noises and spikes.
Use Isolation transformers to combat surges and sags.
Isolated from SCR and motor control circuits
Use a Common earth ground.
a.
Keep ground cable runs as short as possible
b.
Excessive ground cable runs can act as an antenna
for AC noise
c.
Install grounding straps around load cells to direct
static away from the load cell and directly to ground.
d.
Install ground straps on the input and discharge
piping, and the vessel to a common earth ground.
J2
Apply power to the
controller only if supply
voltage is correct.
1)
2)
3)
Verify the front display illuminates.
Completes the initialization process
Displays a weight reading. This weight value will not be
correct if a calibration procedures was not performed.
J3
Does the scale reflect
a weight change?
1)
2)
3)
Press the MODE Button to display NET weight.
Press the TARE button to ZERO the NET weight.
Apply weight to the vessel
(a)
Does the weight increase and decrease in the
correct direction with the weight?
(b)
Does the weight return to ZERO NET?
(c)
The weight value will not be correct until a proper
calibration is complete.
1)
J4
Cabling
To Verify Proper Load Cell
Operations Go to
K
2)
3)
4)
Use the load cell certificates to verify color code Input is
excitation, Output is signal.
Shielding
a)
Grounded only at the weigh controller
b)
Continuous shield connection from the Load cell cable
to the controller. Single point EMI/RFI drain.
c)
Terminated, but not grounded, at the summing box.
Sense lines installed?
a)
Jumpers or sense lines in the J1 connector ?
b)
Sense lines must be installed for C2 of Softcal
calibration
Using Integrated Technician SYSTST verify readings.
8-19
HI 2151/30WC MANUAL
K - Load Sharing
and Load Sensor
Checkout
1)
2)
Does the mV signal increase in a positive direction.
If you receive a negative results, check if load cell is
mounted correctly.
a)
The arrow goes with the direction of force.
b)
If there isn't an arrow, you must manually verify
the correct direction. A negative reading
indicates the load cell is upside down.
c)
Load cells in tension will not reflect a negative
reading if install upside down. If upside down,
only the force applied by the cable would be
included in the weight readings.
d)
If you are still receiving a negative signal, verify
load cell wire color code
1)
Verify a positive reading from each load cell, using
Intergrated Technician's DVMTST, DVM MV.
Record the mV reading and compare each corner for
proper load sharing.
a)
Proper load sharing should see only a difference
of +/- .5 mV.
b)
Larger differences due to motors and piping,
should not exceed +/- 2 mV.
c)
If there isn't any motors, valves, or piping to
explain the mV difference, adjust the
corners and balance the mV readings.
d)
Use shims, or if equipped adjusting bolts on the
load cell mounting hardware.
e)
Drawing a load cell map will help determine the
correct leg to adjust and in which direction.
K
K1
Load cell wiring is
complete and
correct?
2)
K2
Multiple load cells?
MAP the mV reading.
Balance the load
Monitor system for proper
operation.
Check out complete
8-20
Three load cells balance like a three legged chair.
1)
Using a sprit level, verify the vessel is vertically and
horizontally correct.
2)
Verify if any height change will effect the attitude of adjacent
vessels or piping.
3)
Adjust each legs to dynamically match mV outputs
4)
Verify the mV readings and physical level when complete.
Four load cells or more present a challenge.
1)
Use Integrated Technician DVMTST, DVM MV
Determine the sum of the load cell signals and your target
mV setting for each load cell.
2)
Read the output of individual load cells.
3)
Adjust the load cell with the lowest reading to dynamically
match the target mV readings obtained in step 1.
4)
Read the mV readings from each load cell to verify a proper
correction.
5)
Repeat step 3 and 4 to achieve a proper load sharing vessel.
6)
Verify the mV readings and vessel level when complete.
Chapter 8 - Troubleshooting
M - HI Error
HI
The Load sensor output Signal has exceeded the
millivolt limits set in Configuration and/or the Internal
factory setting.
M
1)
2)
3)
4)
5)
Verify the signal wires are properly connected.
a.
Verify load cell cable color code
(1)
Load Cell Certificate.
(2)
Installation manual.
(3)
Cable marking strips.
b.
Broken signal wires act as antenna for EMI/RFI.
c.
Load cell cable shields must be grounded only at the Weight
controller to dampen EMI/RFI signals.
The load cell output Signal voltage has exceeded 15 mV dc
a.
Use INTEGRATED TECHNICIAN to verify mV levels.
(1)
Verify total milli-volt signal level.
(2)
Verify individual load cell milli-volt signals.
(a)
An individual load cells may be over-ranged
and exhibit high milli-volt readings.
(b)
Possible physical damage to the load cell.
(c)
Internal Strain gauge bond broken.
(d)
Moisture in the load cell cable or body.
Weight in the hopper exceeds the configuration Scale Capacity setting.
a.
Under configuration verify the Scale Capacity setting.
b.
105% of the Scale Capacity setting will cause a HI indication.
c.
This is used only as a warning and does not effect calibration.
d.
Optional communication signals are unaffected by this
indication.
Weight in the hopper exceeds the load cell capacity
a.
Mechanical forces or product acting on the scale overloads the
load cells.
b.
Use INTEGRATED TECHNICIAN to verify Milli-volt levels.
Review Mechanical and Electrical Flow charts for additional tips. B1
YES
Contact
Hardy Instruments
Customer Service.
800-821-5831
HI
ERROR
?
NO
Proceed with
Weighing
Process
8-21
HI 2151/30WC MANUAL
N - Blank Screen
N
Weight Controller's front display is blank
Measure A.C. Power
at J6
OK?
1)
Check for proper power at J6
and the source connection.
Check the circuit breaker at the
source
No
2)
Yes
Measure the excitation
voltage at J1.
5 vdc ?
No
Check the power fuse located inside
the case.
OK?
Yes
Yes
Contact
Hardy Instruments
Customer Service
800-821-5831
No
Disconnect all the
connectors from the
back panel except
power.
Measure the
Excitation voltage
at J1.
5 vdc?
Replace the 1/2
amp slo-blow fuse
and apply power.
Does the fuse blows
again?
Yes
1) Reconnect the jacks one
at a time checking the 5 vdc
excitation.
2) If reconnecting any jack
effects the 5 vdc, check for
wiring errors.
No
YES
Display OK
Monitor system for proper
operation.
Check out complete
8-22
NO
Contact
Hardy Instruments
Customer Service
800-821-5831
Chapter 8 - Troubleshooting
O - Excitation
Monitor
Excitation Monitor
Continuously monitors the system excitation current. Checking for open or shorted load sensors,
or damaged or broken excitation wire(s). This includes the wires between the instrument and the
junction box. If the measured current ReadR deviates from the BaseR, an "ERRExC" (Error
Excitation) displays on the front panel. In a system with C2 load sensors, IT computes the correct
current and displays alarms if the initial measured current is out of tolerance. Without C2 load
sensors the initial current read becomes the standard, whether the initial current is right or wrong.
O
A comparison error has been detected by the load cell excitation
monitoring system. For more information on Excitation monitor
setup, see chapter 8 in the HI2151/30WC manual.
ERREXC
System was
calibrated using a
simulator or Intrinsic
barriers are present
The current measurements stored during calibration is that of a
simulator or system with Intrinsic Barriers and not the present
load cells. You will need to turn off the Excitaion monitor. The
values can only be set during calibration using the load cells.
Record the readR value and use for future comparison.
YES
ErrEXC Displayed on a formerly operating
system.
NO
1.
Load cell input is
actually damaged.
YES
a.
b.
NO
F
Load cell
Excitation wires
are disconnected.
YES
NO
System is not
calibrated.
2.
ErrEXC
NO
J3
1.
2.
3.
4.
YES
Contact
Hardy Instruments
Customer Service.
800-821-5831
5.
Compare the BaseR and the ReadR
readings.
These are the readings, in ohms, of
the load cell(s) connected in parallel.
A low reading indicates a
shorted or miswired load cell.
A high reading indicates an
open or missing load cell.
Isolate and measure the individual
load cell excitation OHMS and
compare to the load cell certificates.
The Advantage load sensor
certificates are located on the
WWW.Hardyinst.com website.
Displayed on a new system.
Was calibration completed?
Are all wires properly terminated?
Verify individual load cell resistance
readings.
If using C2 calibration, was the load
cell count correct?
Compare readings with the BaseR
and the ReadR. If correct, check for
barriers or miswired load cells.
8-23
HI 2151/30WC MANUAL
P - Stuck on
“HARDY” Screen
8-24
Chapter 8 - Troubleshooting
System Integrity
Check and Fault
Determination
To determine if an instrument or cabling problem exists, verify the basic operation of the system by performing the following system checks.
Self-Test
1. Self-test can be entered only from the net, gross or rate of change
operating modes.
2. To initiate self-test, press the -/Test/Clr button.
3. Press the Enter button.
4. The name of each test is displayed for about 2 seconds after which
the result is displayed for another 2 seconds. The self-test program
automatically steps through each test and continues through any
failed tests until all are completed.
5. When the self-test program has completed all tests, the instrument
returns to the keyboard test, which can be ended by pressing the 0/
exit button.
6. Speed up the self-test by holding down the UP arrow key. Pause the
self-test display by pressing the down arrow key. To resume the
self-test, press the up ↑ arrow key. To exit the self-test at any time,
press the exit key.
7. Write down the test results and compare them to the System Data
Survey Sheet. Determine if any differences are due to system modifications, and update the Survey Sheet.
8. Following are the sequential tests conducted by the self-test program:
DISPLAY
TEST
FAILURE SOLUTIONS
SLFTEST
Indicates beginning of self-test.
None
VER
Version of EPROM installed.
None
X.XX
8.8.8.8.8.8
Display Test - All segments and words
on display turned on.
1. Main card not seated
properly in display board.
2. Contamination on
connector pins.
3. LED display not
functioning.
ERREXC
Indicates that the measured current is
out of tolerance by ± 10%.
1. New System Calibration
has not been completed.
2. Load Cell is faulty.
3. Broken or Open excitation wire.
8-25
HI 2151/30WC MANUAL
DISPLAY
TEST
FAILURE SOLUTIONS
RAMTST
Ram Test - Writes to each location
in RAM & reads back and verifies data.
Test is non-destructive.
None
PASSED or
Indicates whether RAM test passed
1. With most RAM failures
system will not operate.
FAILED
failed.
1. Check that EPROM (U13)
on main board is seated.
2. Contact Hardy
Instruments for assistance.
OE OE
(example)
Two hex numbers displayed; right one
Discrepancy between two
is actual checksum, left one is
numbers indicates EPROM
calculated from test. The two numbers must faulty.
match. For each revision to EPROM
numbers will be different.
PASSED or
FAILED
If the two numbers matched, test will
pass; otherwise fail is indicated. It is
possible for EPROM to loose one or more
bits & still operate.
SLOT 1
Indicates next display is for slot 1.
NONE or
OPTION
Indicates which type of option card is
installed in slot 1, if any.
1. Check connector for
proper mating.
2. Try card in another slot.
SLOT 2
NONE or
OPTION
Indicates next display is for slot 2.
Indicates which type of option card is
installed in slot 2, if any.
1. Check connector for
proper mating.
2. Try card in other slot.
3. Swap with spare option card.
CALTYP
How instrument was calibrated
None
NOTE:
If failed, replace EPROM.
(If this doesn't eliminate
the problem, there could be a
BUS problem.)
One of the next three messages will be displayed, depending on the type of calibration
that was performed
C2 CAL
C2TM Second Generation Calibration
None
H CAL
Hardware Calibration
None
S CAL
Software Calibration
None
UNITS
Indicates next parameter will be units
of measure.
None
8-26
Chapter 8 - Troubleshooting
DISPLAY
TEST
FAILURE SOLUTIONS
KGS or LBS
Kilograms or pounds.
Default is Lb.
WSVR = 4
Indicates WAVERSAVER that was selected Default is 4.
In Calibration
GRAD
Indicates next parameter will be
graduation size.
None
1 or 2 or 5 etc.
Graduation size calibrated in unit (least
significant digit on display will change by
this amount).
Default is 1.
SPAN
Indicates next parameter will be Span.
None
10000
(example)
Span value calibrated in unit.
Default is 10,000.
ZR CNT
Indicates next parameter will be A to D
counts representing the Zero Count.
--
36780
(example)
A to D counts that indicate the calibrated
Zero.
FS CNT
Indicates next parameter will be Full Scale None
Count. 0 in most significant digit indicate
value >1,000,000.
992000
(example)
A to D counts that indicate the Calibrated
Span Value.
Default is 992000.
SC CAP
Indicates next parameter will be Scale
Capacity.
None
999999
(example)
Scale capacity value calibrated in unit.
Default is 10,000.
0 TOL
Indicates next parameter will be Zero
Tolerance.
None
10
(example)
Zero Tolerance value calibrated in unit.
Default is 10.
AO TOL
Indicates next parameter will be
None
Auto Zero Tolerance
Auto Zero Tolerance set during calibration None
10
Default is 36780.
8-27
HI 2151/30WC MANUAL
DISPLAY
TEST
FAILURE SOLUTIONS
MOTION
Indicates next parameter will be
motion value.
None
3
(example)
Motion value calibrated in unit.
Default is 3.
AVRAGE
Indicates next display will be number of
values set in the running average table
(1 - 200).
None
100
(example)
Number of values set up to be averaged.
Default is 100.
LINCOR
Indicates next display will be single point
linear correction.
None
0
(example)
If 0, linear correction is not used. Number Default is 0.
other than 0 indicates single-point calibrated
value.
AD OFF
Indicates next display will be A to D
Off Set.
None
28912
A to D Offset Value.
None
ADGAIN
Indicates next value will be A to D gain.
None
828238
A to D Gain Value
None
DIP 1
Indicates next display will be settings of
rear panel Config dipswitch S3 segments.
Settings represented by hexadecimal
notation.
If value is other than desired,
reset dipswitch segment and
retest.
00 thru FF
SWITCH
POSIT
VALUE
ON
OFF
2
4
5
7
01
02
04
08
Cal toggle
No opt menu lock
No S.P. menu lock
zero Keys not locked
8
6
3
10
20
40
1
80
Cal toggle
Opt menu lock
S.P. menu lock
Tare, lb/kg, N/G,
lock
Zero track on
Spare
Serial requests
only
P2 multidrop
8-28
Zero trk off
Spare
All serial I/O
Not multidrop
Chapter 8 - Troubleshooting
DIP 2
Indicates next display will be settings of
If value is other than desired,
internal dipswitch S2 on power relay board. reset dipswitch segment and retest.
Settings represented by hexadecimal notation.
00 thru FF
SWITCH
POSIT
VALUE
ON
8
7
4
1
2
01
02
04
08
10
3
5
6
20
40
80
Spare
Spare
NBS Re-Call toggle switch
Ignore incoming checksums
On is averaged gross,
Off is instantaneous gross
NBS
Spare
Spare
OFF
LC CNT = 0 - 8
SN1 xxxx-xxxx
“
“
“
SN8 xxxx-xxxx
NOTE:
LC CNT SN1 through SN8 is for C2 only.
TAG 1
Indicates next display will be value of
software control options. Settings
represented by hexadecimal notation
If options are not as desired,
another memory key must be
ordered. Contact Hardy
Instruments Customer Support
Department.
DISPLAY
TEST
FAILURE SOLUTIONS
00 thru FF
VALUE
01
02
04
08
10
20
40
80
TAG 2
Indicates next display will be value of software control options.
00 thru FF
VALUE
01
02
04
08
ON
Bar-graph
Rate of change
Peak hold
Hardy link
Optional relays
Spare
CAL SW override
Totalizer
ON
Spare
Remote clear total
Remote clear peak
Partial Setpoint Lock
OFF
No bar-graph
No ROC
No peak hold
No Hardy link
No optional relays
Spare
Normal CAL mode
No totalizer
OFF
Spare
No remote clear total
No remote clear peak
8-29
HI 2151/30WC MANUAL
10
20
40
KEY - BD
Out (Only setpoint #1
Is Active.
Remote CAL (lb/Kg
Override for CAL
Switch
Zero Button Enable on
Key Lockout
Remote Function Zero
No partial setpoint lock out
No remote CAL override
No zero button enable
Spare
Indicates next display will be the keyboard test. Ensure the keyboard operates
properly by pressing each key, starting with the ZERO key in the upper left
corner of the keypad and moving from left to right. The LED will display each
key as it is pressed. Do not press the 0/exit key until you are ready to leave the
keyboard test.
IT ®Section appears. Press the Exit key to resume weighing mode of operation.
Interpreting
Diagnostic/Error
Messages
Overview of Typical
Load Cell System
These techniques are limited to external observations. Checking of
internal test points and voltages requires special test equipment and
exposure of the circuit cards during normal operation. This should only
be done by qualified technicians.
1. The typical system consists of one or more load cells/points, a summing junction box, and a weight controller (the HI 2151/30WC).
(See Figure 8-1).
FIG. 8-1 TYPICAL LOAD CELL SYSTEM
a. Load Cell/Sensor/Point - is a strain gauge based force transducer,
which generates an electrical signal proportional to the load applied
to the scale. Load cells/points can be used any place a person needs
8-30
Chapter 8 - Troubleshooting
to measure pressure, load, or torque. This can be accomplished by
either Tension or Compression type load cells/points. The load cell/
point takes as an input the 5 volts DC Excitation Voltage generated
by the HI 2151/30WC, and depending upon how much weight is
applied to the scale, generates a millivolt output (proportional to the
weight, 0-10mv DC for 2mv/V load cells/points or 0-15mv DC for
3mv/V load cells/points).
b. IT Junction Box (Prt. # HI-215IT-SS1 - Stainless Steel, HI-215ITPS1 - Painted, HI-215IT-FG1 - Fiber Glass) - is a system control
box used to sum the incoming and outgoing signals of from one to
four load sensors or load cells. The Junction Box distributes the
excitation voltages to each load sensor/load cell and transfers each
load sensor's performance characteristics and weight signals to the
weight controller. The IT Junction Box when used with the HI
2151/30WC allows for some automated system diagnostics. It uses
connectors for isolation and troubleshooting of the weight system.
The IT Junction Box allows an operator to automatically switch in
an internal test circuit to perform a system stability test and read the
individual load sensor voltages (in millivolts or millivolt/volt) for
up to 4 load sensors from the HI 2151/30WC front panel. Bias voltages will come from the load sensor excitation voltage and will not
affect calibrated weight readings. Switching commands come over
the C2 lines from the weight controller. Nomenclature on the board
will identify positions. The user will know where load sensors 1-4
are physically located by filling out a label mounted to the inside
top cover of the IT Junction Box.
c. Weight Controller - is an electronic instrument which, among other
functions, is used primarily to power the load cell(s)/point(s), take
the millivolt signal output from the load cell(s)/point(s), and digitize, interpret, communicate and display the results as a weight
indication.
No Keypad
Operation
1. Config dipswitch S3 set to keypad lockout; reposition switch.
Remote Functions
Non-operational
1. Check wiring at J2.
2. Check for "HI" on display. Whenever "HI" is displayed, the keypad
will be disabled except for the Cal Menu and the -/Test/Clr buttons.
2. Ensure correct ground is used (J2 pins 9 or 10).
3. Check for correct setting of Config dipswitch S3, See Chapter 4,
Configuration.
NOTE:
The HI 2151/30WC should have a quality power conditioning product installed
between the controller and the AC power source to reduce the likelihood of faults
caused by poor or intermittent AC power.
8-31
HI 2151/30WC MANUAL
Using Solid State
Relays with Light
Loads (Optional Set
Relays)
About Solid State
Relays With Light
Loads
There have been installations where solid state relays have been used
and failed to shut off a solenoid or relay when de-energized. The actual
problem comes from the internal snubbing network in parallel with the
Silicon Controlled Rectifier (SCR) which does the actual switching.
This network presents an impedance of 30K ohms, which means with
120 volts across, it will pass 4mA of AC current.
FIG. 8-2 SCR SWITCHING LOAD CIRCUIT
1. The SCR itself presents no leakage current. Some solid state relay
manufactures specify 20mA minimum load. This is based on the
presumption a relay or solenoid will drop out with only 4mA
through it, which is not always true. That may not be true. When
switching a light load with a solid state relay across the line, you
must look at the rated drop-out current of the load, and if it is less
than 4mA it may not turn off. The solution is to put a loading resistor in parallel with the light load, to be sure leakage current is sufficiently shunted away from the coil.
2. Assume a load like a relay with a coil of 15,000 ohms and of 5% of
nominal drop-out. When the solid state relay is off, there will still
be 1/3 of the line voltages across the relay, so it will not drop out.
For the relay to have 5% of the line across it, it and a parallel shunt
resistor must be 20 times less resistance than the 30K snubbing network, or 1.5K ohms. Use less than a 1.67K ohm parallel resistor
and now total load is below 1.5K ohm or 80mA.
8-32
Chapter 8 - Troubleshooting
IT Test Menu
Breakdown
8-33
HI 2151/30WC MANUAL
Excitation Monitor
(Current) Setup
Menu
1. Press the -\Test\Clr button. SLFTST appears.
2. Use the up or down arrows to toggle between SLFTST and Integrated Technician Security Code Number IT SEC.
3. Press the Enter button with IT SEC displayed.
4. Use the numeric key pad to enter 5321.
5. Press the Enter button.
6. Use the up or down arrows to select one of the following, Excitation Monitor EXCMON, Digital Volt Meter Test DVMTST, Return
to Zero Test RTNTO0, System Test SYSTST or Self Test SLFTST.
Select the Excitation Monitor EXCMON.
7. Press the Enter button. The On Line ONLINE Sub-Menu appears.
8. Use the up or down arrows to select one of the following:
a. ONLINE - Press the Enter button. Use the up or down arrows to
toggle between ON and OFF. After a selection is made press the
Enter button to turn the online monitor ON or OFF. The BASE
R display appears. The Excitation monitor must be ON to
enable on line diagnostics. Press the Enter button, the BASE R
sub-menu appears.
b. BASE R - Displays the resistance reading taken at power up for
C2 load points or the reading taken at zero of hard or soft calibration for no C2 load sensor. Press the Enter button. The
READ R display appears.
c. READ R - Reads the current resistance and display the value.
Press the Enter button, TEST R appears.
d. TEST R - Test the base reading against the current reading, and
displays R=GOOD or R=ERR.
e. Press the Enter button and ONLINE re-appears.
f. Press the Exit button. The Digital Volt Meter Test DVMTST
appears.
Digital Volt Meter
(D.V.M)
NOTE:
The IT Junction Box must be used to display individual load sensors.
1. Press the Enter button. NUMLS# appears indicating the number of
C2 load cells. Press the Enter button. The Digital Volt Meter in Millivolts DVM MV appears.
8-34
Chapter 8 - Troubleshooting
2. Use the up or down arrows to toggle between Millivolts DVM MV
and millivolts per volt DVMMVV.
3. Press the Enter button to select either one. LS1 Load Sensor 1
appears. The display may also show LS1 indicating that the load
sensor is a C2 load sensor.
4. Use the up or down arrows to select whichever load sensor you
want to check LS1, LS2, LS3, LS4 OR LS ALL or press the Enter
button to move onto the next load sensor.
5. Press the Enter button. The controller reads the present value in
millivolts or millivolts/volt whichever was selected. The Millivolt
scale will display to one decimal place. The Millivolt/volt scale will
display to four decimal places.
6. Press the Exit button. The Return to Zero Test RTNTO0 appears.
Return to Zero Test
NOTE:
The IT Junction Box must be used to display individual load sensors.
1. 1.Press the Enter button. NUMLS# appears indicating the number
of C2 cells found. Press the Enter button.
2. 2.Use the up or down arrows to toggle between the test voltage
TEST E and to read the base voltage BASE E.
a. Voltage Test TEST E
•
•
•
•
•
Press the Enter button.
Use the up or down arrows to select LS1, LS2, LS3, L24, or
LS ALL.
To test, press the Enter button. The controller reads the voltage of the load sensor(s) and compares that value to the
stored value.
The display may read LS#=OK or ERRLS# for each load
sensor if used with the IT Junction Box, ALL=OK or
ERRALL. If you get an error statement go to the troubleshooting flow chart Section K to resolve the problem.
Press the Exit button to go to view the Base Voltage BASE
E.
b. View Base Voltage BASE E
•
•
•
•
Use the up or down arrows to select LS1, LS2, LS3, L24, or
LS ALL.
To view the base voltage reading, press the Enter button.
The controller displays the base millivolt value taken at zero
calibration.
Press the Exit button to return to the TEST E Sub-Menu.
Press the Exit button. The SYSTST (System Test) appears.
Go to step 8.6.4.5.
8-35
HI 2151/30WC MANUAL
Weighing System
Test
NOTE:
The IT Junction Box must be used to display individual load sensors.
1. Press the -\Test\Clr button. SLFTST appears.
2. Use the up or down arrows to toggle between SLFTST and Integrated Technician Security Code Number IT SEC.
3. Use the numeric key pad to enter 5321.
4. Use the up or down arrows to select one of the following, Excitation Monitor EXCMON, Digital Volt Meter Test DVMTST, Return
to Zero Test RTNTO0, System Test SYSTST or Self Test SLFTST.
Select System Test SYSTST.
5. Press the Enter button. The Internal Reference INTREF appears.
6. Use the up or down arrows to select either the Internal Reference
INTREF or the IT Junction Box Reference REFBOX.
7. To read the Internal Weight reading of the controller press the Enter
button with the INTREF displayed.
a. This disconnects the instrument from the sense and signal load
sensor lines and connects the instrument to an internal resistance. The controller stays in this mode until it is determined if
the weight reading with this resistance pulled in is stable and
repeatable (the input section of the controller is functioning correctly).
b. Press the Enter button. The controller goes to the REFBOX if
the IT junction box is used. If the IT junction box is not used the
display will read NUMLS# or LSALL.
8. To read the internal weight reading of the IT Junction Box press the
Enter button
a. The sense and signal load sensor lines are reconnected in the
controller.
b. Next a switch in the Junction disconnects the IT junction box
from the load sensors and connects a resistance in the junction
box.
c. It stays in this mode until the weight reading with this resistance
pulled in is stable and repeatable (the input section of the controller along with the cable connecting it to the junction box is
functioning correctly).
d. Press the Enter button. The display will read NUMLS# or
LSALL.
e. Number of Load Sensor NUMLS#
•
8-36
The number after the NUMLS# represents the number of
C2 load points found.
Chapter 8 - Troubleshooting
•
•
•
Press the Enter button to see the list of C2 load sensors
(LS1, LS2, LS3, etc.).
Use the up or down arrows to select the load sensor that
you want to read.
Press the Enter button to read the weight reading.
f. The IT Junction Box must be used to display individual load
sensors.Non C2 Load Points with the IT Junction Box
•
•
The Default is 0 for NUMLS0.
Press the Enter button.
•
Use the numeric key pad to enter the number of load sensors.
Press the Enter button to view the list of Non C2 load sensor
(LS1, LS2, LS3, etc.)
Use the up or down arrows select the load sensor you want
to read.
Press the Enter button to view the weight reading.
•
•
•
NOTE:
For A&B: The sense and signal load sensor lines are reconnected in the controller.
Next a switch in the Junction box disconnects all but one of the load sensors. If the
weight reading is stable, the first load sensor is disconnected and the next load sensor
is switched in by pressing the Enter button.
g. LSALL (Without an IT Junction Box) Press the Enter button to
view the weight reading for the sum of all the load sensors.
h. Press the Exit button to return the INTREF Menu.
i. Press the Exit button again to return to the Weight Display.
Error Messages and
Definitions
Error Message
Definition
- - LO - -
A Load cell(s) is wired backwards and load cell/point signal displays a
weight lower than the scale capacity (i.e. negative number)
- - HI - -
Load cell/point signal represents a weight higher than scale capacity.
ERREXC
A ± 10% comparison error has been detected by the load cell excitation
monitor.
Error
Invalid character entry.
Err 1
Invalid grad size. Grad size must be 1, 2, 5, 10, 20, 50, 100, 200, 500.
Err
Err 2
NTEP grad size error. Grad size must be greater than the full scale
divided by the range.
Err 3
Average out of range. Average must be from 1 to 200.
Err 4
Instrument in motion when value entered.
8-37
HI 2151/30WC MANUAL
Error Message
Definition
Err 5
Not in Gross mode when trying to enter CAL menu.
Err 6
Invalid zero. Zero must be less than zero tolerance.
Err 7
Invalid grad size. Grad size must be greater than the full scale divided
by the range minus one valid grad size.
Err 8
Unable to enter Calibration Menu without toggling ReCal segment on
S3 or using the proper security code.
Err 9
Invalid zero. When the instrument is in NTEP mode, the zero must be
within the zero tolerance.
Err 10
Invalid motion tolerance. Motion must be greater than 0 and greater
then or equal to Grad Size.
Err 11
Negative gross weight during acquire tare. (NTEP only)
Err 12
All decades after decimal point must be active. (NTEP only)
Err 13
Full scale calibration of zero or negative value not allowed.
Err 14
Scale capacity of zero or at negative value not allowed or indicates
Err 15
Zero tolerance of zero or a negative value not allowed or indicates linear correlation value entered is not > 0 or < Span value.
Err 16
Tare greater than span. (NTEP only)
Err 17
Acquire tare cannot be used with zero gross weight. (NTEP only)
Err 18
Difference between zero and span is less then 100 counts in the positive
direction or indicates the linear correction point is not 100 counts > 0 or
100 counts < Span point.
Err 19
Occurs when configuring Serial Port 1 and entering a negative address.
Err 20
Option held when a print command was requested. Option hold active
on remote functions TB when print command from serial port
requested. (Serial Port only)
Err 24
Clock malfunction.
Err 25
Invalid total decimal point.
Err 26
Faulty time or date entry.
Err 40
Software Cal sticker value too small.
Err 41
Software Cal reference point weight out of range.
Err 42
Software Cal load cell overloaded.
Err 43
Software Cal range is zero error.
Err 44
Sensitivity out of range.
Err 45
No Software Cal in NBS range.
Err 50
Too many BCD Options.
Err 52
Too many Serial Options.
Err 54
Invalid serial or BCD format entry.
(_ _ _ _ _ _ P or _ _ _ _ _ _)
8-38
Chapter 8 - Troubleshooting
Error Message
Definition
Err 55
Illegal analog weight span. Analog span weight minus analog zero
weight must be larger than 2% of the calibrated span.
Err 60
The number of load points found did not match the number entered.
Err 61
No load points found.
Err 62
Load point capacities or sensitivities do not match.
Err 63
Check Sum Error on 1 or more load points.
Err 64
Too many significant digits, after the decimal point, to be displayed.
Err 65
One or more C2 load cell connections are reversed.
Err 99
Bad command sequence. (Serial Port only)
General Policies
and Information
With over 70 years of industrial weighing experience and products in
the field, Hardy Instruments continues to design, manufacture, install
and support Hardy products worldwide. The following paragraphs
describe Hardy's customer support services and equipment warranty.
System Support
Customer support is provided as follows:
1. New system start-up: Ensure that the installation is checked and
correct; instruments are calibrated, and operators trained.
2. Service: Engineers are trained and qualified to provide on-site
installation, calibration, and maintenance.
3. On-site training: A Hardy Support Representative can be scheduled
to train your operations and maintenance personnel. This can be as
simple as basic load cell theory or as complete as troubleshooting
techniques which allow you to service your equipment.
Warranty
NOTE:
A warranty problem may be handled by returning the product to the
factory for repair or replacement under warranty.
Before returning any product to Hardy Instruments, call the Customer Support
Department listed below for a Return Authorization Number. Have your company
name, address, telephone, equipment model number, S/N, and a brief description of
the problem ready for the customer service representative. In addition, please have
Appendix A completed and ready to FAX to us before calling.
FOR FURTHER
INFORMATION
CONTACT:
Customer Support Manager
Hardy Instruments, Inc.
9440 Carroll Park Drive, Suite 150, San Diego, CA 92121
Telephone: (858) 278-2900
FAX: (858) 278-6700
Web Site: http://www.hardyinst.com
E-Mail: [email protected]
8-39
HI 2151/30WC MANUAL
Ordering
Replacement Parts
8-40
Contact the Hardy Instruments Sales Department to order replacement
parts and option boards. Have your equipment model number ready, as
well as your completed System Data Survey Sheet (Appendix A: Data
Survey Sheet).
Index
Index
Symbols
—/Test/Clr
5-2
Numerics
14 AWG power line 3-9
2/Status/Bar 5-2
240 VAC 50/60 Hz Input Voltage (-E2) 1-7
3-pin terminal block connector 3-9
4 connector pin description 3-10
5 AMP, 250 VAC Slow-Blow 3AG, 3-9
5 volts DC Excitation Voltage 8-31
A
Allen Bradley Remote I/O 1-2
Allen-Bradley Remote I/O Installation and Operation
Manual (P/N 0596-0173) 7-22
Allen-Bradley Remote I/O Interface (-B8) 2-7
Allen-Bradley Remote I/O Option -B8 5-14, 7-22
Allen-Bradley RIO Interface Option -B8 3-20
analog card 4-4
Analog Card Adjustment 4-5
Analog Output (-B1) 1-5, 2-6
Analog Output Menu Setup Procedures 5-13
Analog Output Option -B1 (See Fig. 3-12) 3-16, 4-4
Analog Output Setup Procedures (Option) 5-12
analog transmitter 4-4
Approvals 2-5
Auto Zero Tolerancing Configuration Procedures 4-8
Auto Zero Tracking 1-4
averaged gross 4-8
Averages 2-1
B
B1 Option Connector Wiring 3-16
bar graph parameters 5-6
Bar Graph Setup Procedures 5-6
Base Graduation Number 6-8
base motion number 6-8
Baud rate selection 5-9
Baud rates 1-4
BCD Menu Setup Procedures 5-7
BCD option board 5-7
BCD Option Board Installation -B2, -B5, -B9 3-17
BCD Print 5-7, 7-20
BCD Quad Termination Board (-B7) 2-7
BCD Quad Termination Card (-B7) 1-5
BCD Single Termination Board (-B6) 2-7
BCD Single Termination Card (-B6) 1-5
BCD sub-menu 7-20
BCD terminal board 3-20
BCD Termination Board Installation Procedures (See
Fig. 3-14) 3-19
BCD Terminator Boards - B6, - B7 3-19
Before Clearing Memory. 6-19
Bi-Directional Communications 2-5
Bi-directional Communications 7-7
bi-directional communications 1-6
Bi-directional serial ports 4-1
Binary Coded Decimal (BCD) 2-8
Binary Coded Decimal (BCD) Output 1-5
Binding on the Load Cell 6-1
Blind Remote Mount HI 2151/30WC-BR 2-4
C
C2 Load Cell Connections (J1) (See Fig. 3-9) 3-13
C2 weighing system 1-2
C2® Calibration 1-2
C2® Second Generation Calibration Procedures 6-12
C2™ Calibration (C2 CAL) 6-11
Cable Pinouts 3-17
cable runs 3-8
Cable Type 7-8
Cabling and Interconnecting 3-8
CAL button 4-7
CAL menu 4-7
Calibration Configuration without Security Code 4-7
Calibration Menu 5-14
Calibration Procedures 6-11
Calibration Results form 6-15
Calibration Setup Procedures 6-6
Case Dimensions 2-3
change values 7-2
Checking for Mechanical Problems 6-14
clean" primary line 3-9
Clear Controller Memory 6-19
Clear to Send (CTS) 5-10
Cockpit Configuration Assistant 2-9
Combination Status Indicator/Bar-Graph LEDs 6-4
Command Meaning 7-13
command strings 7-11
Common Mode Rejection 2-2
Common Mode Voltage Range 2-2
communications ports 1-4
compact 1-1
complete hardware groups 8-1
config dip CAL switch 4-7
Configuring Lock S3-7 4-10
Configuring Multidrop S3-1 4-9
Configuring Option S3-4 4-9
Configuring Peak Hold Mode 4-8
Configuring Serial S3-3 4-9
Configuring Set Point S3-5 4-9
Configuring the Power & Relay Board Dip Switches S2
(See Fig. 4-12) 4-10
Conversion Rate 2-1
Current 4-5
cut off frequencies 1-2
HI 2151/30WC MANUAL
D
D2 option card 3-11
Data Formats 7-10
Data Formats - Binary Representation 7-10
Data Formats - Weight Data Format 7-10
data/status lines 3-20
DDE Installation and Operation Manual, document
number 0596-0221 3-22
Dead Band Limits 7-4
Dead Band Sub-Menu 7-6
dead band value 7-4
deadband 1-4
default auto zero tolerance 6-9
Digital Volt Meter (D.V.M) 8-34
Digital Volt Meter (DVM) 1-3
Digital Voltmeter 2-2
Dimensions of the enclosure cutout 3-3
Dip Switch Locations (See Fig. 4-10) 4-7/8
Dip Switch Setting 4-8
Dip Switches S2 4-9
Disassembling the rear panel and setting jumpers 4-4
Disassembly and Reassembly Notes and Cautions 8-1
Display 2-1
Display Increments (Graduations) 2-1
DO NOT CUT THE CABLE!!! 6-16
Document Number 0596-0173 3-20
Dynamic Data Exchange (DDE) (-B14) 1-6
Dynamic Data Exchange (DDE) I/O Server -B14 3-22
E
E2 3-9
Earth Ground Cable Shield 7-8
Echo 5-10
Electrical Check Procedures 6-2
Electrical Installation 3-8
Electrostatic Discharge (ESD) 3-3
End Calibration 6-14
Enter 5-4
Entering Dead Band Tolerance Procedures 7-6
Entering Preact Values Procedures 7-6
Entering Set Point Procedures 7-6
Entering Set Points 7-5
Environmental Requirements 2-2
ERR 8 4-7
Error Messages and Definitions 8-37
Excitation Monitor 1-3, 2-2
Excitation Monitor (Current) Setup Menu 8-34
Excitation Voltage 2-1
External Setpoint Relays Card (-D2) 1-6
External Setpoint Relays Card (-D3) 1-7
Front Panel Dimensions 2-3
Front Panel Setup Procedures 4-5
full analog output 5-12
full scale mV/V output 6-15
full weight capacity 6-3
G
gasket 3-5
Gross Mode
1-2
H
Hard Calibration (HD CAL) 6-11 to 6-15
Hardy Link LAN 1-4
Hardy Link Local Area Network (LAN) 1-4
Hardy Link software option 4-9
Hexadecimal number 7-17
HI 215IT Series Junction Boxes 3-22
HI 215T series junction box 8-4
Highest gross 4-8
host computer control 7-7
Humidity Range 2-2
I
individual set point 1-4
in-flight" compensation value 7-5
Input 2-1
Input Power Wiring 3-9
Install the Front Panel. 3-5
Installation Details 3-23
Installation of the Instrument Enclosure 3-6
Installation of the Secure Memory Module 3-24
Installing the HI 2151/30 Remote Mount Model 3-5
Installing the HI 2151/30 Wall Mount Model 3-7
Installing the HI 2151/30WC in a Panel 3-3
Installing the Blind Remote Model 3-7
INTEGRATED TECHNICIAN (IT®) 6-18
INTEGRATED TECHNICIAN™ (IT®) 1-1
IT ® 1-2
IT Junction Box 8-31
IT junction box 1-3
IT® Junction Box HI 215IT-FG Series 2-5
IT® Junction Box HI 215IT-SS or PS Series 2-4
J
J3 Serial Port Wiring 3-11
jumper error 5-6
Jumper Location. (See Fig. 4-7) 4-6
Jumper Settings (See Fig. 4-8) 4-7
jumpers and dip switches 4-1
F
K
Firmware 3-10
Formats the serial data output 5-9
Fourteen Segment Display 6-4
Frequency 2-2
Key Pad 2-1
Keypad Functions (See Fig. 5-1)
5-1
Index
L
Linear Correction 6-14
live load 6-13
Load Cell Count 6-12
Load cell/point 3-12
Load Cell/Point Connections (J1) 3-12
Load Cell/Sensor/Point 8-30
Load Check 6-6
Logic Controllers 1-5
logical choice 7-2
M
material impacting 6-10
Maximum Zero Tolerance 2-1
Mechanical Check Procedures 6-1
Mechanical Installation 3-2
mechanical noise 1-2
Miscellaneous Options 1-7
Mode 5-1
mode key 5-1
Model Code Breakdown 1-7
MONITOR subcommand 7-17
Motion Tolerance 6-8
Multidrop function 4-9
multipurpose 1-1
N
National Institute of Standards and Technology (NIST)
1-7
Negative Pulse 4-7
NEMA 4 or 4X conduit fittings 3-7
NEMA Ratings 2-4
Net 1-2
NIST/NTEP Certification Mode Kit (-E3 except for -F4
wall mount) 1-7
No Keypad Operation 8-31
Non C2 Load Cell Connections (J1) 3-14
Non-Linearity 2-1
ntrinsic Barrier Assembly (-F1, -F3 thru -F7) 1-7
numeric keypad 7-2
numeric keys 6-16
O
Operating Procedures 7-19
Operating Temperature Range 2-2
Option Board 3-15
Option Boards 7-3
option connector pins 3-16
Option Menu 7-19
Option Menus and Option Parameters 7-3
Optional Equipment 2-6
Optional Modes 7-1
Optional Relays or TTL Level Outputs 3-10
Options button 5-6
Options Cabling and Interconnect 3-16
Ordering Replacement Parts 8-40
original voltage reading 1-3
Output Device Options 1-5
OUTPUT DISABLE 7-20
Output Disable 7-20
OUTPUT OPTION BOARD INSTALLATION PROCEDURES 3-15
Output Setpoint Relay Wiring 3-10
Overview of Typical Load Cell System 8-30
P
Panel Cutout Dimensions 2-3
Panel Cutout Specifications 3-3
Panel Mount (Model # HI 2151/30WC) 2-2
Panel Mount Instrument 1-7
Parallel BCD Board Connector to DB Connector 3-17
Parallel BCD Board Print Configuration Procedures B2, -B5, -B9 4-6
Parallel BCD Communication 7-19
Parity selection 5-9
Peak Hold 1-2, 7-3
Peak Hold (-C1) 1-6, 2-8
Peak Hold Mode 7-1, 7-21
Perform the Hard Calibration Self Test 6-15
Performing the Self Test 6-17
phillips screw driver 3-5
Physical Characteristics 2-2
Portable Display and Keypad (-E4) 1-7
Portable Display HI 2151/30XX-E4 (use with HI 2151/
30WC-BR) 2-4
positive dead band 7-5
Positive Pulse 4-7
Power 2-2
preact 1-4
Preact Limits (See Fig. 7-3) 7-5
preact value 7-5
Pre-Calibration Procedures 6-1
Print 5-2
Procedures to Restore Calibration Parameters 6-19
Process Weighing Function Buttons 7-1
Profibus I/O Interface (-B12) 2-8
Profibus Installation and Operation Manual (Prt. # 05960211) 7-22
Profibus Interface Card Option Wiring Diagram 3-24
PROFIBUS Interface Option (-B12) 1-6
Profibus Interface Option -B12 3-21, 7-22
Programmable Logic Controller 4-5
Q
Quick C2® Calibration Procedures
R
Rate of Change (ROC) 7-20
Rate of Change (ROC) (-C2) 2-8
Rate-of-Change (ROC) 1-2
Rate-of-Change (ROC) (-C2) 1-6
Rate-Of-Change Mode 7-2
6-18
HI 2151/30WC MANUAL
readings per average 6-10
Rear panel input 1-4
Reassembling Rear Panel 4-5
re-calibrated periodically 6-1
Recommended Installation Procedures 3-8
Register 7-20
Remote Functions 1-4
Remote Functions Non-operational 8-31
Remote Functions Wiring 3-12
Remote I/O (RIO) Interface to the Allen-Bradley Network (-B8) 1-5
Remote Mount Model HI 2151/30WC-RM 2-3
Report any damage 3-1
Request to Send (RTS) lines 5-10
Resolution 2-1, 4-10
Return to Zero Test 1-3, 8-35
ribbon cables 3-19
ROC data 7-20
ROC LED 5-13
Route wiring types 3-8
RS 232 1-4
RS 422 1-4
RS 422/485 ports 4-3
RS 485 1-4
RS-232C 7-7
RS-232C, RS 422/485 Bi-directional Serial Port 5-5
RS-422/485 7-7
RS-422/485 Configuration Wiring 7-8
RS-422/485 Electrical Specifications 7-9
RS-422/485 Wiring and Electrical Specifications 7-8
S
Secure Memory Module (SMM) 1-3
Selecting the Hard Calibration Sub-Menu 6-13
Selecting the Soft Calibration Sub-Menu 6-16
Self-Test 8-25
self-test program 8-25
sequential tests 8-25
Serial Commands 7-11
Serial Commands - Data Transmission Format 7-11
Serial Commands, Command Set 7-12
serial communication parameters 7-11
Serial Communications 2-5, 7-7
Serial Connector 7-8
Serial Port 1-4
Serial port configuration 5-9
Serial Port Menu Setup Procedure (See Chapter 4 for
Configuration Procedures) 5-9
Serial Procedures 5-10
Serial Protocol - Multidrop Mode 7-9
Set Point Limits 7-4
Set Point Options 1-6
Set Point Relay Option Board Installation -D2 3-22
Set Point S3-6 4-9
Set PointRelays 1-4
Set Points 7-4
Set Up for Profibus Interface Card Option -B12 5-14
Signal Grounds 7-8
Six External Solid State, Set Point Relays (-D2 & -D3)
2-9
Six TTL Level Outputs (-D1) 2-9
Six-wire, shielded load cell/point cable 3-13
sliding average 6-10
SMM 1-3
socket 3-16
Soft Calibration (S CAL) 6-11
Soft Calibration Procedures for Single Load Cell/Point
Systems 6-15
Soft Calibration Self Test Process 6-17
solenoid 8-32
special test equipment 8-30
standard RS-232C/422/485 serial port 7-9
Standard RS-232C/RS422/485 Configuration 4-1
Standard Setpoint Relays 2-1
Standard SPDT (Form C) Relays 3-10
standoffs 3-23
Status/Bar button 6-5
Stop bit selection 5-9
Storage Temperature Range 2-2
strain gauge based force transducer 8-30
switch eight of S3 1-4
System Configuration 4-1
System Integrity Check and Fault Determination 8-25
System Support 8-39
T
Tare 5-1
Tare button 5-1
Tare Value 5-1
target weight or level 7-4
Temperature Coefficient 2-2
The Calibration Menu 6-6
The Full Scale Count Sub-Menu 6-20
The Return (RETURN) Display 6-14
Three General Rules for Setpoints 7-5
toggle switch (#2) 4-8
Total (-C6) 7-2
Total Option 7-21
TOTAL Setup Procedures 5-14
Totalized 1-2
Totalizer (-C3) 2-9
Totalizer Mode 7-21
Transmission speed 7-7
Trouble Shooting Using Integrated Technician. 8-2
TTL level outputs 3-10
TTL(Transistor - Transistor Logic) Level Output (-D1) 1-
6
two main operating menus - Set Point and Option 7-2
U
Unpacking 3-1
user-selectable 7-7
Using Solid State Relays with Light Loads (Optional Set
Index
Relays) 8-32
Using the Return (RETURN) Function 6-17
Using the Return button 6-12
V
valid 7-6
value is accepted 5-4
value is rejected 5-4
vessel 6-6
Voltage 2-2, 4-5
voltage reading 1-3
W
Wall Mount Model HI 2151/30WC-WS 2-3
Wall Mount Version (-WS) 3-10
Warranty 8-39
WAVERSAVER® 1-1, 1-2, 2-1
WAVERSAVER® (WVRSVR) 6-11
Weighing System Test 8-36
Weighing System Tests 1-3
weight differential 6-9
weight limit 6-9
When multiple load cells are used, 6-16
Word length selection 5-9
X
Xmit
7-13
Z
Zero 5-1
ZERO button 7-1
Zero Key 5-1
zero reference point 6-3
Zero Sub-Menu 6-14
Zero Tolerance amount 6-9
HI 2151/30WC MANUAL
Appendix A - System Data Survey Sheet
SYSTEM DATA SURVEY SHEET
TO:
Hardy Instruments Inc.
FROM:___________________________________
ATTN:
Customer Support
COMPANY:_______________________________
FAX NO:
858-278-6700
DATE:____________________________________
Make a copy of this page and store it in a safe place. This information helps us assist you if, for any reason
you need to consult Hardy Instruments Inc.
DATE OF INSTALLATION:_____________________________________________________
INSTRUMENT MODEL NUMBER:_______________________________________________
INSTRUMENT SERIAL NUMBER:_______________________________________________
(The serial number is located on the back panel of the instrument)
CORNER FREQUENCY SELECTED:____________________________________________
LOAD CELLS:_______________________________________________________________
Model #:____________________________________________________________________
Rated Capacity:______________________________________________________________
Number of Load Cells:_________________________________________________________
mv/V Rating:________________________________________________________________
Type of Vessel/Hopper:_______________________________________________________
Deadload or weight of vessel:__________________________________________________
RESULTS OF SELF-TEST: Press the -/Test/Clr button on the keypad while in the operating mode, and record the
results on the following page. Use the down arrow to pause the display, and the up arrow to resume the self-test.
HI 2151/30WC MANUAL
Appendix B - Glossary ot Terms
GLOSSARY OF TERMS
Accuracy
Closeness of a reading to the actual value of the quantity being measured.
ALARM - Indication of a tolerance deviation.
Analog Shield Can
A metal enclosure placed over the analog section of the electronics to prevent
radio frequency interference.
Analog Transmitter
An option card which outputs an analog representation of net, gross, total
weight or rate of change data.
Appurtenance
Any added equipment other than the weigh vessel, platform scale or feeder.
Baud Rate
Baud rates are used as a measure of how fast serial data is transmitted, (BIT/
SEC).
BCD
Binary Coded Decimal - a type of positional value code in which each decimal
digit is binary coded into 4-bit "words".
Bi-Directional
A capability used to transmit data in either direction at the same time, for
example: to or from the instrument.
Clear Key
A key used to clear data or formats entered into a menu.
CTS
Clear to send an RS-232C level signaling a readiness to accept data.
Dead Band
A value used to prevent relay chatter once the setpoint is reached.
Dead Load
Weight of hopper assembly or platform assembly sitting on top of load cells.
Decimal Point Position
Menu item used to set the decimal point position for all display readouts.
Dip-Switch
A switch installed in a circuit card with several individual switches built in.
Used to set different options in a system.
Display
A device used to show information from the instrument.
Engineering Units
Pounds or Kilograms
Electrostatic Discharge (ESD)
Electrostatic Discharge is an electric charge (static electricity) which occurs
when an electrically charged object, such as a person, touches the HI 2151/
30WC. To avoid damage to personnel and to the unit, a grounded static control wrist strap should always be worn when opening and/or servicing the HI
2151/30WC.
Enter Key
This key is used to accept user input into the memory.
EPROM
Electrically programmable read-only memory.
Error
A message that indicates an unacceptable input has been entered.
Even
A parity configuration.
Excitation
D.C. voltage supplied to the load cell for power.
Full-Scale
Full scale input as defined by instrument and load cell parameters. Example:
3MV/V load cell @ 10 volts = 30mV full scale.
Graduation Size
Minimum increment displayed by the instrument.
HI 2151/30WC MANUAL
Gross Weight
An overall weight exclusive of tare deductions. Weight of material plus container.
Input Average
The number of readings averaged into a displayed value.
Keypad Lockout
A selectable switch used to prevent input from the keyboard.
Kilograms
A unit of mass in the metric system. Equal to 1000 grams or 2.2046 pounds.
"Gr" represents kilograms on the display.
LED
Light Emitting Diode. These are used in the front panel displays and indicators.
Load Cell
A device which produces an output signal proportional to the applied weight
or force.
Menu
A set of prompts used to configure the instrument.
Menu Driven
Operational prompts supplied in common language statements via the system
display to guide an operator through a procedure.
Microprocessor
A semiconductor device that performs control, input/output, arithmetic, and
logical operations by executing instructions obtained from memory sources.
Midpoint Linearity Correction
Allows operator to "BEND" the response of an instrument to match a non-linear input.
Motion
The amount of allowable deviation between consecutive readings before a
weighment is accepted as being complete.
NEMA 4
An enclosure that is watertight, dust-tight, and usable both indoors and outdoors. Will protect the enclosed equipment against splashing water, seepage
of water, falling or hose-directed water, and severe external condensation.
NEMA 4X
An enclosure that is watertight, dust-tight, and usable both indoors and outdoors. Will protect the enclosed equipment against splashing water, seepage
of water, falling or hose-directed water, and severe external condensation.
Corrosion Resistant.
Net Weight
Gross Weight minus the Tare value.
Next Key
A key used to step through menus or increase the value of a digit.
Non-Linearity
A deviation of an instrument response from a straight line.
Number Of Readings Per
Average
The number of weight readings used to compute the displayed weight.
Odd
A parity configuration.
Option
A device not supplied with a standard instrument.
Option Slot
A location on the main board used to install an option card.
Parity
A binary digit error correction appended to an array of bits to make the sum of
all the bits always odd or always even.
Pounds
A unit of mass in the Avoirdupois System. Equal to 16 ounces or 0.4536 kilograms.
Appendix B - Glossary ot Terms
Preact
The number of units above or below the set point value of which the relay will
trip. Use as an "in flight" compensation value.
Previous Key
A key used to step back through menus.
Prompts
Instructions or options presented, in a menu, by the instrument.
RAM
Random-Access-Memory. Read/write memory out of which the microprocessor can both write and read data.
Rate of Change
A measure of the rate at which weight is changing. For example, if 100
pounds were dispensed in 1 minute the rate of change would be 100 lb/
minute.
Relay Sense Selection
Optional procedure which reverses the relay sense from normally energized
to normally de-energized, or back again.
Remote Function
A function in the instrument that can be accessed away from the instrument.
Repeatability
The maximum difference between readings for repeated readings under identical conditions.
ROM
Read-Only-Memory. This permanent, non-volatile memory gives the processor instructions and cannot be altered.
RTS
Request to send an RS-232C level, signaling a readiness to send.
RXD
Received data at a serial port. Accepts RS-232C data signals.
Scale Capacity
The maximum amount of weight the scale is capable of supporting, (Live load
plus deadload).
Secure Memory Module
(SMM)
The Secure Memory Module stores and protects vital information from corruption, including calibration, configuration of setpoints, RS-232C Serial Port,
Optional Serial, BCD, Bar-graph, and Rate of Change. Also allows the transference of data from one unit to another, with no re-calibration or re-configuration necessary.
Set Point
Ordered weight of a particular ingredient. Weight reading at which a relay will
be actuated.
Span
The total amount of test weights used (placed on the scale) when performing
a "Hard Calibration".
Tag
Another name for Secure Memory Module.
Tare
Artificial zeroing of the weight hopper so that a net weight can be displayed.
Also, the action of adjusting out the known weight of the container from the
total indicated weight, so that the indicator reads net weight directly.
Temperature Coefficient
The change in indication due solely to a change in temperature from a reference temperature. Expressed as a percentage of span value for a specified
temperature change.
Time Base
Time in seconds between values subtracted to determine rate of change.
Transmitter Span
Value the transmitter puts out with the maximum weight on the load cell.
Transmitter Zero
Value the transmitter puts out with minimum weight on the load cell.
HI 2151/30WC MANUAL
TTL
Transistor-transistor Logic
TXD
Transmit Data
Update Rate
Number of times per second a new weight reading is taken.
Zero
Weight reading once the dead load has been offset.
Zero Calibration
Offset of the value of the dead load of the weight hopper.
Zero Tolerance
The number of graduations from zero that will be accepted as zero by the
instrument.
Zero Track
Logic command used to adjust the instrument automatically from small variances in zero readings.
Appendix C - Self Test Display
SELF TEST DISPLAY
SELF-TEST DISPLAYYOUR RESULTS
EPROM#_________________________
VER_________________________
CALDAT:
CALTYP_________________________
UNITS_________________________
WSVR_________________________
GRAD_________________________
SPAN_________________________
ZR CNT_________________________
FS CNT_________________________
0 TOL_________________________
A0 TOL_________________________
MOTION_________________________
AVRAGE_________________________
LINCOR_________________________
DIP 1____________________________________
DIP 2____________________________________
TAG 1____________________________________
TAG 2____________________________________
HI 2151/30WC MANUAL
OPTIONS:
Press the 7/Option key to enter the opti0ns menu and record the results. (The order of parameters may vary from
this list, depending on which options were installed.)
OPTIONS
ROC
UNITS___________________________________________
TBASE___________________________________________
BARGR
BAR - LO_________________________________________
BAR - HI__________________________________________
BCD
FORMAT_____ _____ _____ _____ _____ _____
AN OUT 1
AN OUT 2
AN LO_____________________
___________________
AN HI______________________
___________________
SERIAL PORT
SERCON
[ ] Print
[ ] bi-dir
BAUD_______________________
PARITY
[ ] odd
[ ] even
[ ] none
STOPS
[ ] 1 bit
[ ] 2 bits
LENGTH
[ ] 7 bits
[ ] 8 bits
FORMAT__ __ __ __ __ __
CONTRL
[ ] softre
[ ] hardre
ECHO
[ ] On
[ ] off
ADDRES _______________________
____________________
RIO
RATE________________________________________________
RAC NO ______________________________________________
OTR NO ______________________________________________
L-OTR _______________________________________________
Appendix C - Self Test Display
SETPOINT MENU: Press the 6/Set Pt. key to enter the Setpoint menu and record settings.
SETPOINT MENU
SEtPnt/rLY
1
2
3
4
5
6
7
8
MODE
SPNT DBND PRE -
PRINTER INFORMATION
Make and Model #:________________________________________________________________________
Baud Rate:_______________________________________________________________________________
Parity:__________________________________________________________________________________
Stop Bits:_______________________________________________________________________________
Length:_________________________________________________________________________________
Format:_________________________________________________________________________________
MISCELLANEOUS INFORMATION
Format:_________________________________________________________________________________
Control:_________________________________________________________________________________
* Address:_______________________________________________________________________________
* Configured with Hardy-Link______________________________________________________________
HI 2151/30WC MANUAL
9440 Carroll Park Drive, Suite 150, San Diego, CA 92121
Telephone: 1-800-821-5831
FAX: (858) 278-6700
Web Address: http://www.hardyinstruments.com
Copyright April 1999, Dynamic Instruments, All Rights Reserved. Printed in the U.S.A.