1
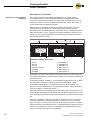
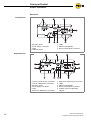
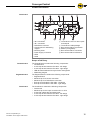
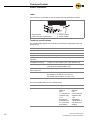
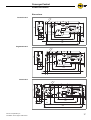
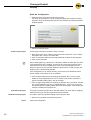
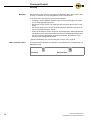
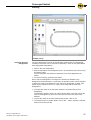
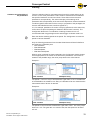
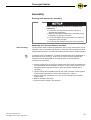
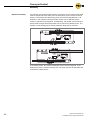
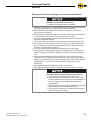
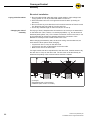
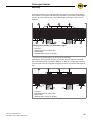
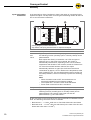
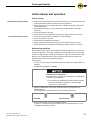
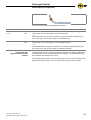
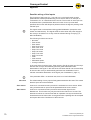
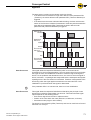
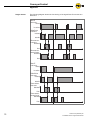
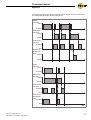
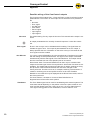
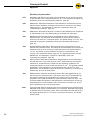
ConveyorControl Planning Constructing the conveyor line In this step, the conveyor line must be constructed in the Configurator. To this end, virtual zones with various conveyor directions (to the right, to the left, upward, downward) and ConveyorControl modules are available. A zone is shown as a square in the Configurator: Visualization of a zone in the function area (left) and in the work area (right) The arrow shows the conveyor direction. The red and green circles are catch points with which several zones can be connected. The blue dots show the corner points. The catch and corner points can be hidden (see "Menu bar", page 24). The number is the zone designation (the last three digits of the zone designation are always shown). A zone always contains at least one RollerDrive and a zone sensor which, however, is not shown separately. Zones which have been selected are highlighted in yellow. Positioning zones Drag a zone from the function area to the work area with the mouse button held down. To change the shape of the zone click on one of the zone's catch points and drag on this with the mouse button held down. Reshaping can be restricted using the button bar as follows: Zone can be freely shaped Shaping with a constant angle of curvature Shaping with a constant radius Shaping with a constant length To change the angle of curvature in a controlled manner, click on the zone with the mouse wheel. This causes the zone to be curved by 15° with each click. Attach further zones in the same way. To connect two zones, merge their catch points. The zones are docked together. Hint Zones which are to be connected, must have the same conveyor direction. Only zones which have been docked together are functionally connected. To release docked zones, move these quickly with the mouse wheel held down. Slow dragging does not result in separation in order to avoid accidental break-up of a zone connection. To delete one or several zones, mark these and press the DEL button or click on the marked zone with the right mouse button and select Delete object. 26 Version 2.0 (04/2013) en Translation of the original instructions