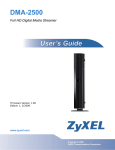
1
NSA-220 Plus
Network Storage Appliance
Default Login Details
Web Address
nsa220plus
User Name
admin
Password
1234
Firmware Version 3.10
Edition 1, 2/2009
Color: www.zyxel.com
Black / White
www.zyxel.com
Copyright © 2008
ZyXEL Communications Corporation
About This User's Guide
About This User's Guide
Intended Audience
This manual is intended for people who want to configure the NSA using the web
configurator. A basic knowledge of TCP/IP networking concepts and topology will
be helpful.
Related Documentation
• Quick Start Guide
The Quick Start Guide is designed to help you get up and running right away. It
contains information on setting up your network and configuring for Internet
access.
• Web Configurator Online Help
Embedded web help for descriptions of individual screens and supplementary
information.
• Support Disc
Refer to the included CD for support documents.
• ZyXEL Web Site
Please refer to www.zyxel.com for additional support documentation and
product certifications.
User Guide Feedback
Help us help you. Send all User Guide-related comments, questions or suggestions
for improvement to the following address, or use e-mail instead. Thank you!
The Technical Writing Team,
ZyXEL Communications Corp.,
6 Innovation Road II,
Science-Based Industrial Park,
Hsinchu, 300, Taiwan.
E-mail: [email protected]
Customer Support
In the event of problems that cannot be solved by using this manual, you should
contact your vendor. If you cannot contact your vendor, then contact a ZyXEL
office for the region in which you bought the device. See http://www.zyxel.com/
web/contact_us.php for contact information. Please have the following information
ready when you contact an office.
NSA-220 Plus User’s Guide
3
About This User's Guide
• Product model and serial number.
• Warranty Information.
• Date that you received your device.
• Brief description of the problem and the steps you took to solve it.
Disclaimer
Graphics in this book may differ slightly from the product due to differences in
operating systems, operating system versions, or if you installed updated
firmware/software for your device. Every effort has been made to ensure that the
information in this manual is accurate.
4
NSA-220 Plus User’s Guide
Document Conventions
Document Conventions
Warnings and Notes
These are how warnings and notes are shown in this User’s Guide.
Warnings tell you about things that could harm you or your
device.
Note: Notes tell you other important information (for example, other things you may
need to configure or helpful tips) or recommendations.
Syntax Conventions
• The NSA may be referred to as the “NSA”, the “device” or the “system” in this
User’s Guide.
• Product labels, screen names, field labels and field choices are all in bold font.
• A key stroke is denoted by square brackets and uppercase text, for example,
[ENTER] means the “enter” or “return” key on your keyboard.
• “Enter” means for you to type one or more characters and then press the
[ENTER] key. “Select” or “choose” means for you to use one of the predefined
choices.
• A right angle bracket ( > ) within a screen name denotes a mouse click. For
example, Maintenance > Log > Log Setting means you first click
Maintenance in the navigation panel, then the Log sub menu and finally the
Log Setting tab to get to that screen.
• Units of measurement may denote the “metric” value or the “scientific” value.
For example, “k” for kilo may denote “1000” or “1024”, “M” for mega may
denote “1000000” or “1048576” and so on.
• “e.g.,” is a shorthand for “for instance”, and “i.e.,” means “that is” or “in other
words”.
NSA-220 Plus User’s Guide
5
Document Conventions
Icons Used in Figures
Figures in this User’s Guide may use the following generic icons. The NSA icon is
not an exact representation of your device.
6
NSA
Computer
Notebook computer
Server
Television
Firewall
Router
Switch
Internet
NSA-220 Plus User’s Guide
Safety Warnings
Safety Warnings
• Do NOT use this product near water, for example, in a wet basement or near a swimming
pool.
• Do NOT expose your device to dampness, dust or corrosive liquids.
• Do NOT store things on the device.
• Do NOT install, use, or service this device during a thunderstorm. There is a remote risk
of electric shock from lightning.
• Connect ONLY suitable accessories to the device.
• Do NOT open the device or unit. Opening or removing covers can expose you to
dangerous high voltage points or other risks. ONLY qualified service personnel should
service or disassemble this device. Please contact your vendor for further information.
• ONLY qualified service personnel should service or disassemble this device.
• Make sure to connect the cables to the correct ports.
• Place connecting cables carefully so that no one will step on them or stumble over them.
• Always disconnect all cables from this device before servicing or disassembling.
• Use ONLY an appropriate power adaptor or cord for your device.
• Connect the power adaptor or cord to the right supply voltage (for example, 110V AC in
North America or 230V AC in Europe).
• Do NOT allow anything to rest on the power adaptor or cord and do NOT place the
product where anyone can walk on the power adaptor or cord.
• Do NOT use the device if the power adaptor or cord is damaged as it might cause
electrocution.
• If the power adaptor or cord is damaged, remove it from the power outlet.
• Do NOT attempt to repair the power adaptor or cord. Contact your local vendor to order
a new one.
• Do not use the device outside, and make sure all the connections are indoors. There is a
remote risk of electric shock from lightning.
• CAUTION: RISK OF EXPLOSION IF BATTERY (on the motherboard) IS REPLACED BY AN
INCORRECT TYPE. DISPOSE OF USED BATTERIES ACCORDING TO THE INSTRUCTIONS.
Dispose them at the applicable collection point for the recycling of electrical and
electronic equipment. For detailed information about recycling of this product, please
contact your local city office, your household waste disposal service or the store where
you purchased the product.
• Do NOT obstruct the device ventilation slots, as insufficient airflow may harm your
device.
Your product is marked with this symbol, which is known as the WEEE mark. WEEE
stands for Waste Electronics and Electrical Equipment. It means that used electrical
and electronic products should not be mixed with general waste. Used electrical and
electronic equipment should be treated separately.
NSA-220 Plus User’s Guide
7
Safety Warnings
8
NSA-220 Plus User’s Guide
Contents Overview
Contents Overview
Introduction ............................................................................................................................ 19
Getting to Know Your NSA ........................................................................................................ 21
Web Configurator Basics ........................................................................................................... 27
Tutorials ..................................................................................................................................... 49
System Setting, Storage, Network and Applications ....................................................... 103
System Setting ........................................................................................................................ 105
Storage .....................................................................................................................................111
Network ................................................................................................................................... 125
Applications ............................................................................................................................. 131
Sharing .................................................................................................................................. 183
Users ....................................................................................................................................... 185
Groups ..................................................................................................................................... 191
Shares ..................................................................................................................................... 195
Maintenance and Protecting Data ...................................................................................... 205
Maintenance Screens ............................................................................................................. 207
Protecting Your Data ................................................................................................................ 227
Troubleshooting and Specifications .................................................................................. 229
Troubleshooting ...................................................................................................................... 231
Product Specifications ............................................................................................................. 245
Appendices and Index ......................................................................................................... 253
NSA-220 Plus User’s Guide
9
Contents Overview
10
NSA-220 Plus User’s Guide
Table of Contents
Table of Contents
About This User's Guide .......................................................................................................... 3
Document Conventions............................................................................................................ 5
Safety Warnings........................................................................................................................ 7
Contents Overview ................................................................................................................... 9
Table of Contents.................................................................................................................... 11
Part I: Introduction................................................................................. 19
Chapter 1
Getting to Know Your NSA..................................................................................................... 21
1.1 NSA Overview ..................................................................................................................... 21
1.1.1 LEDs .......................................................................................................................... 23
1.1.2 COPY/SYNC Button ................................................................................................... 25
1.1.3 RESET Button ............................................................................................................ 25
Chapter 2
Web Configurator Basics ....................................................................................................... 27
2.1 Overview .............................................................................................................................. 27
2.2 Accessing the NSA Web Configurator ................................................................................. 27
2.2.1 Access the NSA Via NDU .......................................................................................... 28
2.2.2 Web Browser Access ................................................................................................. 28
2.3 Login .................................................................................................................................... 29
2.4 User-level Screens Overview ............................................................................................. 30
2.5 My NSA Screens ................................................................................................................. 31
2.5.1 My NSA Share Browsing Screen ............................................................................... 32
2.5.2 My NSA Share Browsing Move or Copy Screen ........................................................ 35
2.5.3 My NSA Configuration Screen ................................................................................... 36
2.5.4 My NSA Edit Share Screen ........................................................................................ 37
2.5.5 Share and Folder Names ........................................................................................... 38
2.5.6 Share Paths ............................................................................................................... 39
2.5.7 Password Screen ...................................................................................................... 40
2.6 Administration Screens ....................................................................................................... 41
2.6.1 Global Administration Icons ....................................................................................... 41
2.6.2 Navigation Panel ........................................................................................................ 42
NSA-220 Plus User’s Guide
11
Table of Contents
2.6.3 Main Window .............................................................................................................. 44
2.6.4 Status Messages ........................................................................................................ 44
2.6.5 Common Screen Icons ............................................................................................... 44
2.7 The Status Screen ............................................................................................................... 46
2.7.1 Session Example (Windows) ..................................................................................... 48
Chapter 3
Tutorials ................................................................................................................................... 49
3.1 Overview .............................................................................................................................. 49
3.2 File Sharing Tutorials ........................................................................................................... 49
3.2.1 Creating a User Account ............................................................................................ 49
3.2.2 Creating a Share ........................................................................................................ 52
3.2.3 Creating a Group ........................................................................................................ 53
3.2.4 Accessing a Share From Windows Explorer .............................................................. 54
3.2.5 Accessing a Share Using FTP ................................................................................... 56
3.2.6 Accessing a Share Through the Web Configurator .................................................... 58
3.3 Download Service Tutorial ................................................................................................... 59
3.3.1 Copying/Pasting a Download Link ............................................................................. 59
3.3.2 Installing the Link Capture Browser Plugin ................................................................ 62
3.3.3 Using the Link Capture Browser Plugin ..................................................................... 67
3.3.4 Configuring the Download Service Preferences ........................................................ 69
3.3.5 Using Download Service Notification ......................................................................... 71
3.4 Broadcatching Tutorial ......................................................................................................... 75
3.5 Printer Server Tutorial .......................................................................................................... 78
3.6 Copy and Flickr Auto Upload Tutorial .................................................................................. 80
3.7 FTP Uploadr Tutorial ........................................................................................................... 82
3.8 Web Configurator’s Security Sessions ................................................................................ 86
3.8.1 Customizing the NSA’s Certificate .............................................................................. 86
3.8.2 Downloading and Installing Customized Certificate ................................................... 88
3.8.3 Turn on the NSA’s Web Security ................................................................................ 92
3.9 Using FTPS to Connect to the NSA .................................................................................... 98
3.10 Using a MAC to Access the NSA ...................................................................................... 99
3.10.1 Finder ..................................................................................................................... 100
3.10.2 Go Menu ................................................................................................................ 101
Part II: System Setting, Storage, Network and Applications ........... 103
Chapter 4
System Setting ...................................................................................................................... 105
4.1 Overview ............................................................................................................................ 105
4.1.1 What You Can Do in the System Setting Screens ................................................... 105
12
NSA-220 Plus User’s Guide
Table of Contents
4.1.2 What You Need to Know About System Settings ..................................................... 105
4.2 The Server Name Screen .................................................................................................. 106
4.3 The Date/Time Screen ...................................................................................................... 107
Chapter 5
Storage................................................................................................................................... 111
5.1 Overview .............................................................................................................................111
5.1.1 What You Need to Know About Storage ...................................................................111
5.2 The Storage Screen ............................................................................................................112
5.2.1 Disk Replacement Restrictions .................................................................................112
5.2.2 Displaying the Storage Screen ..................................................................................113
5.3 Creating an Internal Volume ...............................................................................................115
5.3.1 Volume Status ...........................................................................................................116
5.4 Editing a Volume .................................................................................................................117
5.5 Creating an External Volume ..............................................................................................118
5.5.1 External Disks ...........................................................................................................119
5.6 Storage Technical Reference ............................................................................................. 120
5.6.1 Volumes and RAID ................................................................................................... 120
5.6.2 Choosing a Storage Method for a Volume ............................................................... 121
5.6.3 Storage Methods ...................................................................................................... 121
Chapter 6
Network.................................................................................................................................. 125
6.1 Overview ............................................................................................................................ 125
6.1.1 What You Can Do in the Network Screens .............................................................. 125
6.1.2 What You Need to Know About Network .................................................................. 125
6.2 The TCP/IP Screen ........................................................................................................... 126
6.2.1 Jumbo Frames ......................................................................................................... 126
6.2.2 Configuring the TCP/IP Screen ................................................................................ 127
6.3 The PPPoE Screen ........................................................................................................... 129
Chapter 7
Applications .......................................................................................................................... 131
7.1 Overview ............................................................................................................................ 131
7.1.1 What You Can Do in the Application Screens .......................................................... 131
7.1.2 What You Need to Know About Applications ........................................................... 131
7.2 The FTP Screen ................................................................................................................ 133
7.3 The Media Server Screen .................................................................................................. 135
7.3.1 Sharing Media Files on Your Network ...................................................................... 135
7.3.2 Configuring the Media Server Screen ...................................................................... 136
7.4 The Download Service Screen .......................................................................................... 138
7.4.1 Download Service .................................................................................................... 138
7.4.2 Configuring the Download Service Screen .............................................................. 139
NSA-220 Plus User’s Guide
13
Table of Contents
7.4.3 Adding a Download Task .......................................................................................... 142
7.4.4 Link Capture Browser Plugin .................................................................................... 143
7.4.5 Download Service Notification ................................................................................. 144
7.4.6 Configuring Download Service General Settings ..................................................... 145
7.4.7 Configuring the BitTorrent Settings .......................................................................... 146
7.4.8 Displaying the Download Task Information .............................................................. 149
7.4.9 BitTorrent Security .................................................................................................... 150
7.5 The Web Publishing Screen .............................................................................................. 152
7.5.1 Web Publishing Example ......................................................................................... 153
7.5.2 Web Publishing ........................................................................................................ 155
7.6 The Broadcatching Screen ................................................................................................ 158
7.6.1 Adding or Editing a Broadcatching Channel ............................................................ 160
7.6.2 Channel Guides ....................................................................................................... 161
7.7 The Print Server Screen .................................................................................................... 162
7.7.1 Printer Sharing ......................................................................................................... 162
7.7.2 Configuring the Print Server Screen ........................................................................ 162
7.7.3 Print Server Rename ................................................................................................ 163
7.8 The Copy/Sync Button Screen .......................................................................................... 164
7.8.1 Copying Files ........................................................................................................... 164
7.8.2 Synchronizing Files .................................................................................................. 165
7.8.3 Configuring the Copy/Sync Button Screen ............................................................... 167
7.9 The Flickr/YouTube Screen ............................................................................................... 169
7.9.1 Configuring the Flickr Settings ................................................................................. 170
7.9.2 Configuring the YouTube Settings ............................................................................ 175
7.10 The FTP Uploadr Screen ................................................................................................. 178
7.10.1 Adding or Editing an FTP Server Entry .................................................................. 180
7.10.2 The FTP Uploadr Preferences Screen ................................................................... 181
Part III: Sharing .................................................................................... 183
Chapter 8
Users ...................................................................................................................................... 185
8.1 Overview ............................................................................................................................ 185
8.1.1 What You Can Do in the Users Screen .................................................................... 185
8.2 The Users Screen .............................................................................................................. 186
8.2.1 User Icons ................................................................................................................ 187
8.3 Adding or Editing an Account ............................................................................................ 188
8.3.1 Usernames ............................................................................................................... 189
8.4 Displaying User Info .......................................................................................................... 190
Chapter 9
Groups ................................................................................................................................... 191
14
NSA-220 Plus User’s Guide
Table of Contents
9.1 Overview ............................................................................................................................ 191
9.1.1 What You Can Do in the Groups Screen .................................................................. 191
9.2 The Groups Screen ........................................................................................................... 191
9.2.1 Adding or Editing a Group ........................................................................................ 193
9.2.2 Group Names ........................................................................................................... 194
Chapter 10
Shares .................................................................................................................................... 195
10.1 Overview .......................................................................................................................... 195
10.1.1 What You Can Do in the Shares Screens .............................................................. 195
10.2 The Shares Screen .......................................................................................................... 196
10.3 Adding or Editing Share ................................................................................................... 198
10.3.1 Configuring Advanced Share Access ..................................................................... 199
10.3.2 Public and ANONYMOUS Share Access Rights ................................................... 200
10.4 The Recycle-Bin Configuration Screen ........................................................................... 201
10.4.1 Recycle Bins .......................................................................................................... 201
10.4.2 Configuring Recycle Bins ....................................................................................... 201
10.5 The Share Browser Screen ............................................................................................. 202
10.5.1 Moving or Copying Files ......................................................................................... 204
Part IV: Maintenance and Protecting Data ......................................... 205
Chapter 11
Maintenance Screens .......................................................................................................... 207
11.1 Overview .......................................................................................................................... 207
11.1.1 What You Can Do in the Maintenance Screens ..................................................... 207
11.2 The Power Management Screen ..................................................................................... 208
11.2.1 Editing the Power Control Schedule Screen .......................................................... 210
11.3 The Log Screen .............................................................................................................. 212
11.3.1 Log Classes ............................................................................................................ 213
11.4 Log Severity Levels .......................................................................................................... 213
11.4.1 Log Messages ........................................................................................................ 213
11.5 The Configuration Screen ............................................................................................... 220
11.6 SSL .................................................................................................................................. 221
11.6.1 Modifying or Creating a Certificate ......................................................................... 223
11.7 The Firmware Upgrade Screen ....................................................................................... 224
11.8 The Shutdown Screen .................................................................................................... 225
Chapter 12
Protecting Your Data............................................................................................................. 227
12.1 Overview .......................................................................................................................... 227
NSA-220 Plus User’s Guide
15
Table of Contents
12.2 Protection Methods .......................................................................................................... 227
12.2.1 Configuration File Backup and Restoration ............................................................ 228
12.2.2 Memeo Autobackup ............................................................................................... 228
Part V: Troubleshooting and Specifications...................................... 229
Chapter 13
Troubleshooting................................................................................................................... 231
13.1 Troubleshooting Overview ............................................................................................... 231
13.2 Power, Hardware, Connections, and LEDs ..................................................................... 231
13.3 NSA Login and Access .................................................................................................... 233
13.3.1 Reset the NSA ....................................................................................................... 234
13.3.2 Enabling Scripting of Safe ActiveX Controls .......................................................... 235
13.4 I Cannot Access The NSA ............................................................................................... 238
13.5 External USB Drives ........................................................................................................ 238
13.6 Some Features’ Screens Do Not Display ........................................................................ 239
13.7 Media Server Functions ................................................................................................... 239
13.8 Download Service and Broadcatching Functions ............................................................ 242
13.9 Web Publishing ................................................................................................................ 242
13.10 Auto Upload ................................................................................................................... 243
Chapter 14
Product Specifications ......................................................................................................... 245
14.1 Physical Features ............................................................................................................ 245
14.2 Firmware Features .......................................................................................................... 246
14.3 Specification Tables ......................................................................................................... 247
14.4 Supported Media Server Content Formats ...................................................................... 250
14.5 Supported iTunes Server Content Formats ..................................................................... 251
14.6 Power Consumption ........................................................................................................ 251
Part VI: Appendices and Index ........................................................... 253
Appendix A Setting up Your Computer’s IP Address............................................................ 255
Appendix B Pop-up Windows, JavaScripts and Java Permissions ...................................... 271
Appendix C Common Services ............................................................................................ 281
Appendix D Importing Certificates........................................................................................ 285
Appendix E Open Source Licences...................................................................................... 317
16
NSA-220 Plus User’s Guide
Table of Contents
Appendix F Legal Information .............................................................................................. 355
Index....................................................................................................................................... 359
NSA-220 Plus User’s Guide
17
Table of Contents
18
NSA-220 Plus User’s Guide
P ART I
Introduction
Getting to Know Your NSA (21)
Web Configurator Basics (27)
Tutorials (49)
19
20
CHAPTER
1
Getting to Know Your NSA
This chapter covers the main features and applications of the NSA.
1.1 NSA Overview
Use the NSA (Network Storage Appliance) to do the following.
• Share files between computers on your network.
• Back up files from your computers to the NSA.
• Use the COPY/SYNC button to copy or synchronize files between the NSA and
USB devices like card readers, MP3 players, memory sticks, and digital cameras
without using a computer.
• Have the NSA handle large file downloads.
• Automatically download files from website feeds for convenient viewing.
• Play the NSA’s video, music and photo files on your computers using the
included media client software.
• Play the NSA’s video, music and photo files on hardware-based media clients
like the DMA-1000.
• Use the NSA’s website to share files with remote users.
• Use iTunes on your computer to play video and music files stored on the NSA.
• Share printers.
• Automatically upload photo and video files to your FTP server, Flickr and
YouTube accounts.
NSA-220 Plus User’s Guide
21
Chapter 1 Getting to Know Your NSA
Figure 1 Example of the NSA in a Home Network
Above is the NSA in a home network. Users back up and share data on the NSA.
The DMA-1000 plays the NSA’s media files on the TV. A USB hard drive provides
extra storage space and files are copied directly from the USB memory stick to the
NSA.
Place the NSA behind a firewall and/or IDP (Intrusion Detection and Prevention)
device to protect it from attacks from the Internet.
Note: See Chapter 14 on page 245 for a more detailed list of NSA features and lists of
compatible hard drives and USB devices.
Refer to the Quick Start Guide for hardware connections and how to install and
remove hard drives from the disk trays.
Note: Turn off and disconnect the NSA before you install or remove internal hard
drives.
22
NSA-220 Plus User’s Guide
Chapter 1 Getting to Know Your NSA
1.1.1 LEDs
The NSA LEDs (lights) tell you important information.
Figure 2 NSA Front Panel
Figure 3 NSA Rear Panel
NSA-220 Plus User’s Guide
23
Chapter 1 Getting to Know Your NSA
This table describes the NSA’s LEDs.
Table 1 LEDs
LED
COLOR
STATUS
DESCRIPTION
POWER
Blue
On
The NSA is turned on and receiving power.
Off
The NSA is turned off.
On
The hard disk drive is connected properly to the NSA.
Blinking
The NSA is saving data to the hard disk drive.
On
The NSA detected an error on the hard disk drive (like a
bad sector for example). The NSA automatically tries to
recover a bad sector, but the LED stays orange until the
NSA restarts.
Blinking
The hard disk drive connection came loose or the NSA
detected an error on the hard disk drive (like a bad sector
for example) and is saving data to the hard disk drive.
On
The hard disk drive has failed and the NSA can no longer
detect it.
Off
The NSA cannot detect a hard disk in the disk bay.
HDD1/
HDD2
Green
OrangeA
Red
SYS
LAN
Green
On
The NSA has fully started and is operating normally.
Blinking
The NSA is starting up.
Red
On
The NSA has failed.
Green
On
The NSA has a successful 10/100 Mbps Ethernet
connection.
Blinking
The 100M LAN is sending or receiving packets.
Off
The NSA does not have a 10/100 Mbps Ethernet
connection.
On
The NSA has a successful 1000 Mbps Ethernet
connection.
Blinking
The 1000 M LAN is sending or receiving packets.
Off
The NSA does not have a 1000 Mbps Ethernet
connection.
On
A USB device is connected to the NSA.
Blinking
The NSA is copying or synchronizing files to or from the
USB device.
On
Copying or synchronizing files to or from the USB device
failed.
Off
No USB device is connected.
Yellow
COPY/
SYNC
Green
Red
A. The HDD1 and HDD2 LEDs are dual-color (green and red). The green LED is normally on when you have a hard
disk installed. If the NSA detects an error on the disk, the disk’s connection comes loose, or the disk fails, the red
LED also comes on. Since the green LED still stays on, the color appears to be orange. If the NSA is no longer
able to detect a hard disk in the disk bay, the green LED turns off and the LED appears as red.
24
NSA-220 Plus User’s Guide
Chapter 1 Getting to Know Your NSA
1.1.2 COPY/SYNC Button
Use the COPY/SYNC button on the front panel to copy or synchronize files
between a connected USB device and the NSA. See Section 7.8 on page 164 for
more details on how to configure the copy/sync settings.
1.1.3 RESET Button
Use the RESET button on the rear panel to restore the NSA’s default settings.
Figure 4 The RESET Button
Press
1 Beep
2 Beeps
5 more seconds
Release to Reset
IP Address
Password
Release to
Clear All Settings
• Press the RESET button until you hear one beep (after about two seconds),
then release it. You will hear one more beep after you release the button.
This resets the NSA’s IP address and password to the default values.
• Press the RESET button until you hear two beeps. After the second beep,
continue pressing the button for five more seconds, then release it. You will
hear three quick beeps after you release the button.
This resets the NSA to the factory default configuration. All settings you have
configured on the NSA, including IP address, password, user accounts, groups,
and so on will be reset to the factory defaults.
The reset process does NOT affect the volume settings, nor data stored on the
NSA.
You should periodically back up your configuration file to your computer (see
Section 11.5 on page 220 for details about managing the NSA’s configuration file).
You could then restore your configuration in the event that you or someone else
reset the NSA to the factory defaults.
Note: You should keep the NSA in a secure location in order to prevent unauthorized
reset of the device.
NSA-220 Plus User’s Guide
25
Chapter 1 Getting to Know Your NSA
26
NSA-220 Plus User’s Guide
CHAPTER
2
Web Configurator Basics
2.1 Overview
This chapter describes how to access the NSA web configurator and provides an
overview of its screens.
The web configurator is an HTML-based management interface that allows easy
NSA setup and management using an Internet browser. Use Internet Explorer 6.0,
Mozilla Firefox 1.07, Netscape Navigator 7.0 or later versions of these browsers.
The recommended screen resolution is 1024 by 768 pixels or higher.
In order to use the web configurator you need to allow:
• Web browser pop-up windows from your device. Web pop-up blocking is
enabled by default in Windows XP SP (Service Pack) 2.
• JavaScript (enabled by default).
2.2 Accessing the NSA Web Configurator
Make sure your NSA is properly connected and that your computer is in the same
subnet as the NSA (refer to the Quick Start Guide or the appendices).
NSA-220 Plus User’s Guide
27
Chapter 2 Web Configurator Basics
2.2.1 Access the NSA Via NDU
If you don’t know the IP address of the NSA, then use the NDU to find it. Refer to
the Quick Start Guide for how to install and run the NDU.
Figure 5 NDU Main Screen
From the NDU main page click an icon under Admin to see the web configurator’s
login screen.
2.2.2 Web Browser Access
Open your browser and type in the server name of the NSA (“nsa220plus” by
default).
Figure 6 NSA URL
28
NSA-220 Plus User’s Guide
Chapter 2 Web Configurator Basics
2.3 Login
The default username and password are ‘admin’ and ‘1234’ respectively. Enter
your username and password, then click Login. See Chapter 8 on page 185 for
how to create other user accounts.
Figure 7 NSA Login Screen
You should see a screen asking you to change your password (highly
recommended) as shown next. Type a new password (and retype it to confirm)
and click Apply or click Ignore.
Figure 8 Change Password Screen
NSA-220 Plus User’s Guide
29
Chapter 2 Web Configurator Basics
2.4 User-level Screens Overview
All users (including the administrator) first see the user-level access My NSA
screen after login.
Figure 9 My NSA
1
Note: The web configurator management session automatically times out if it is left
idle for 15 minutes. Simply log back into the NSA if this happens to you.
The icons and language label at the top-right of the screen ( 1 ) are visible from
most screens. Use the tabs at the top of the screen to navigate between the userlevel screens and menus. The following table describes the ‘global’ icons and tabs
in the user-level screens.
Table 2 User-level Global Labels and Icons
30
LABEL/ICON
DESCRIPTION
Language
Select the web configurator language from the drop-down list box.
Help
Click this to open a web help page specific to the screen you are
currently configuring.
Logout
Click this at any time to exit the web configurator.
My NSA
Click this to go to screens where you can manage your shares and
access the files on public shares. The administrator must go into the
administration screens to manage other user’s shares.
Password
Click this to go to a screen where you can change your password.
NSA-220 Plus User’s Guide
Chapter 2 Web Configurator Basics
Table 2 User-level Global Labels and Icons
LABEL/ICON
DESCRIPTION
Administration
This tab displays when you log in as the administrator. Click this to go
to screens where you can manage advanced configurations.
Download
Service
This tab displays when you log in as the administrator. Click this to go
to screens where you can have the NSA handle file downloads. See
Section 7.4.1 on page 138 for more information.
2.5 My NSA Screens
Use the My NSA screens to manage your shares and access the files in folders to
which you have access.
A share is a set of user access permissions for a specific folder on a volume (gives
someone access to a folder). It is equivalent to the Windows concept of a shared
folder, but the access rights are independent of the folder (you configure the
share and the folder separately). You can map a share to a network drive for easy
and familiar file transfer for Windows users.
The main My NSA screen displays the shares to which you have access.
Figure 10 My NSA
NSA-220 Plus User’s Guide
31
Chapter 2 Web Configurator Basics
The following table describes the labels in this screen.
Table 3 My NSA
LABEL
DESCRIPTION
My Shares
These are the shares that you own (and manage). The share icons are
folder shaped. Click a share icon to access the share’s contents.
A plain share icon displays for a share on a volume on the
internal hard drives.
A USB symbol displays on the icon for a share on an external
(USB) device. An external share’s icon turns gray if the share
is not currently available (because the USB device was
removed for example).
An orange icon displays a built-in system share created by the
NSA.
The administrator owns and manages the public shares.
Configure
Click this to see and configure the management details for a share.
Other Shares
These are other shares on the internal hard drives or external (USB)
devices that you can access (but not manage).
2.5.1 My NSA Share Browsing Screen
Click My NSA and then click a share to open the following screen. Use the My
NSA share browsing screens to see and access share contents.
• Click a folder’s name to go into the folder.
• Click a file’s name to be able to save the file to your computer.
• Click the play icon to play the file. At the time of writing this is supported for
MP3 files.
• Click to the right of a file or folder name to select it.
• Use the [SHIFT] key to select a range of entries. Hold down the [CTRL] key to
select multiple individual entries.
32
NSA-220 Plus User’s Guide
Chapter 2 Web Configurator Basics
Figure 11 My NSA Share Browsing
The following table describes the labels in this screen.
Table 4 My NSA Share Browsing
LABEL
DESCRIPTION
Create Folder
Click this to create a new folder within the share. Specify a name
to identify the folder. See Section 2.5.5 on page 38 for more
information on folder names. Click Apply to create a folder.
Upload
Click this to add files to the share. Use the Browse button to
locate a file and click Apply to upload the file.
NSA-220 Plus User’s Guide
33
Chapter 2 Web Configurator Basics
Table 4 My NSA Share Browsing (continued)
LABEL
DESCRIPTION
Rename
Select a folder or file and click this to open the Rename screen.
Enter the name you want and click OK to make the changes.
See Section 2.5.5 on page 38 for more information on the
number and types of characters you can use to name a folder or
file.
Note: When you change a file name, make sure you keep
the file extension unchanged.
Delete
Select a folder or file and click this to open a warning screen.
Click Yes to delete the file, or click No to close the screen.
Move
Select a folder or file and click this to move it to another location
within this share or another share that you can access. See
Section 2.5.2 on page 35 for more details.
Copy
Select a folder or file and click this to move create a copy of it in
another location within this share or another share that you can
access. See Section 2.5.2 on page 35 for more details.
Current location
This is the name of the share and folder path that you are in.
Type
The icon in this column identifies the entry as a folder or a file.
The folder with an arrow pointing up is for the link that takes
you to the next higher layer in the share’s folder tree.
Name
This column identifies the names of folders and files in the
share.
Click Up One Level to go to the next higher layer in the share’s
folder tree.
Click a file’s file name to open the file or save it to your
computer.
Click a folder’s name to display the folder’s contents.
Size
34
This column displays a file’s size in bytes.
NSA-220 Plus User’s Guide
Chapter 2 Web Configurator Basics
Table 4 My NSA Share Browsing (continued)
LABEL
DESCRIPTION
Modified Date
This column displays the last time the file or folder was changed
(in year-month-day hour:minute:second format).
Close
Click this to return to the My NSA screen.
2.5.2 My NSA Share Browsing Move or Copy Screen
Select a folder or file in the My NSA share browsing screens and click the Move
button or the Copy button to display a screen like the following. Use this screen to
select the target path for moving or copying the folder or file.
Figure 12 My NSA Share Browsing > Move (or Copy)
The following table describes the labels in this screen.
Table 5 My NSA Share Browsing > Move (or Copy)
LABEL
DESCRIPTION
Shares
Select a target share from the drop-down list box.
Path
Select a folder on the NSA. You can also browse to find or create a folder on
the NSA or type the location of the folder using forward slashes as branch
separators.
Browse Click this to put the file in a specific folder. Select a folder and then click
Apply.
If you click Apply without selecting a folder, a forward slash displays in the
Path field. All contents within the specified share are selected.
Yes
Click this to move or copy the file.
Close
Click this to return to the My NSA share browsing screen without saving.
NSA-220 Plus User’s Guide
35
Chapter 2 Web Configurator Basics
2.5.3 My NSA Configuration Screen
Use the My NSA configuration screens to see and configure share management
details.
Click My NSA and then the Configure button of one of your shares to open the
following screen. This screen displays a share’s management details.
Figure 13 My NSA Configuration Overview
The following table describes the labels in the this screen.
Table 6 My NSA Management Overview
36
LABEL
DESCRIPTION
Share Owner
The share belongs to (and is managed by) this user account.
The share owner controls access rights to the share.
Location
The share is for a folder on this volume.
Path
This is the share’s file path.
Share Browsing
Click this to see and access the share’s contents.
Edit Share
Click this to configure the share’s management details.
Delete Share
Click this to permanently remove the contents associated with
this share or to disable the share so that no users can access it.
NSA-220 Plus User’s Guide
Chapter 2 Web Configurator Basics
2.5.4 My NSA Edit Share Screen
Use this screen to configure share management details.
Click My NSA and a share’s Configure button. Then click Edit Share to open the
following screen. This screen displays a share’s management details.
Figure 14 My NSA > Edit Share
The following table describes the labels in the this screen.
Table 7 My NSA > Edit Share
LABEL
DESCRIPTION
Share Name
Configure a name to identify this share. Type a share name from 1 to
255 single-byte (no Chinese characters allowed for example) ASCII
characters. The name cannot be the same as another existing local
share. See Section 2.5.5 on page 38 for more information on share
names.
Volume
You should have already created volumes (a single accessible storage
area with a single file system) on the NSA.
Select the volume that you want to use with this share.
Make this share
owned by
Select the administrator or user account that is to own (manage) this
share. The share owner controls access rights to the share.
Enable This
Share
Select this option to allow users to access this share. When this option
is not selected, you cannot see and access this share.
Enable Recycle
Bin
Select this option to keep deleted items in a recycle bin. When you
delete an item, a recycle folder is created within the share, and the
deleted item is stored in the recycle bin. Later if you want to retrieve a
deleted item, you can select the item from the recycle folder and
move/copy the item to another share.
Publish this
share to Media
Server
Select this option to make the share’s files available to media clients.
Publish this
share to Web
Select this option to let people use a web browser to access this share’s
files without logging into the My NSA screens.
NSA-220 Plus User’s Guide
37
Chapter 2 Web Configurator Basics
Table 7 My NSA > Edit Share (continued)
LABEL
DESCRIPTION
Share Access
Select who can access the files in the share and how much access they
are to be given. If you publish the share to the media server or the
web, all users will have at least read-only access to the share,
regardless of what you configure here.
Select Keep it private to owner to allow only the share owner to read
files in the share, delete files in the share and save files to the share.
Select Make it public to allow anyone (with or without a user account
on the NSA) to read files in the share, delete files in the share and save
files to the share.
Select Advanced to select which individual users can read the share’s
files, which users can delete the share’s files, and which users are
blocked from doing either.
Apply
Click this to save your changes.
Cancel
Click this to return to the previous screen without saving.
2.5.5 Share and Folder Names
The name can only contain the following characters:
• Alphanumeric (A-z 0-9) and Unicode.
The NSA allows FTP access to shares, folders or files with names encoded in the
UTF-8 (8-bit UCS/Unicode Transformation Format) format. So your FTP client
must support UTF-8 in order to access shares, folders or files on the NSA with
Unicode names.
• Spaces
• _ [underscores]
• . [periods]
• - [dashes]
Other limitations include:
• All leading and trailing spaces are removed automatically.
• Multiple spaces within names are converted to a single space.
• Share names must be unique (they cannot be the same as other share names).
• The NSA creates automatic volume names for external (USB) disk volumes.
These are a type of share, so the share name you configure cannot conflict with
the external (USB) disk volume names. “ExtVol1” or “ExtVol2” are examples of
external (USB) disk volume names.
• Folder names must be unique (they cannot be the same as other folder names).
• The minimum character length of a name is one character, that is a name
cannot be blank.
• The maximum character length of share name is 255 characters.
38
NSA-220 Plus User’s Guide
Chapter 2 Web Configurator Basics
• Unicode is supported for share names, although your FTP client must support
UTF-8. Full support should be available in all Windows versions after Windows
2000.
2.5.6 Share Paths
A share path is the full path to a folder on a volume that will be shared, for
example, /mynsa/topsecret/ugs/. This is independent from a “share name” which
is the name shown for this share when accessing the share via CIFS or FTP. The
path should start with a '/' (forward slash) followed by a parent folder, child
folders leading to the folder that is to be shared.
The share path can include all characters including unicode characters (that is,
you can use Chinese folder names for example) except for the following
characters:
• \ [backslash] this will be converted to forward slash and interpreted as a path
delimiter
• / [forward slash] this is always interpreted as a path delimiter, so a folder
cannot include it in its folder name
• : [colon]
• * [asterisk]
• ? [question mark]
• “[double quote]
• < [less than]
• > [greater than]
• | [pipe]
Please also note the following as regards share paths:
• If the share path is missing the root path slash (the first forward slash), the
system will automatically add the initial slash.
• If the share path is missing the end trailing slash, the system will automatically
add the trailing slash.
• If the share path has '\' (backslashes) instead of '/' (forward slashes) they will
all be automatically converted to forward slashes.
• Share paths are case sensitive.
• The maximum share path length is 600 characters (the entire path string
including slashes)
• The share path cannot be blank
• You cannot have an empty folder name, that is, two consecutive slashes (for
example, '/My//Corner/')
• Each individual folder in the path (that is, the content between the slashes)
cannot exceed 255 characters
NSA-220 Plus User’s Guide
39
Chapter 2 Web Configurator Basics
2.5.7 Password Screen
Click Password to open the following screen. Use this screen to change an
account’s password. Enter a new password and confirm it by re-entering it.
Figure 15 Password
The following table describes the labels in this screen.
Table 8 Password
40
LABEL
DESCRIPTION
Account Name
Type the user name of the account for which you want to change
the password.
Old Password
Type the user’s current password.
New Password
Create a new password for the user. You can type from one to
14 single-byte (no Chinese characters allowed for example)
ASCII characters.
Password (Confirm)
You must type the exact same password that you just typed in
the above field.
Apply
Click this to save your changes.
Reset
Click this to refresh the screen.
NSA-220 Plus User’s Guide
Chapter 2 Web Configurator Basics
2.6 Administration Screens
The Administration tab displays when you log in as the administrator. Click
Administration in the My NSA screens to open the advanced administration
screens.
The Status screen is the first advanced administration screen that displays.
Figure 16 Status
1
3
2
4
2.6.1 Global Administration Icons
The icons and language label at the top-right of the screen ( 1 ) are visible from
most of the administration screens. The following table describes the ‘global’ icons
and labels.
Table 9 Global Labels and Icons
LABEL/
ICON
DESCRIPTION
Language
Select the web configurator language from the drop-down list box.
Help
Click this to open a web help page specific to the screen you are currently
configuring.
NSA-220 Plus User’s Guide
41
Chapter 2 Web Configurator Basics
Table 9 Global Labels and Icons
LABEL/
ICON
DESCRIPTION
About
Click this to view the model name, firmware version and copyright.
Home
Click this to return to the user-level screens.
Logout
Click this at any time to exit the web configurator. This is the same as
clicking the Logout link at the bottom of the Navigation panel.
2.6.2 Navigation Panel
The navigation panel on the left of the screen ( 2 ) contains screen links. Click a
link to display sub-links. There are no sub-links for the Status screen. Certain
screens also contain hyper links that allow you to jump to another screen.
The following screen shows the features listed in the navigation panel.
Figure 17 Navigation Panel Links
42
NSA-220 Plus User’s Guide
Chapter 2 Web Configurator Basics
The following table describes the navigation panel screens.
Table 10 Screens Summary
LINK
SCREEN
Status
System
Setting
This screen shows system information, the status of the
volumes, and the users who are currently using the NSA.
Server Name
Specify the NSA’s server name and workgroup name.
Date & Time
Chose a time zone and/or allow the NSA to synchronize
with a time server.
Storage
Network
Applications
Sharing
NSA-220 Plus User’s Guide
FUNCTION
View volume and disk information and create and edit
volumes. A volume is a storage area that can span one
or more internal disks or a single external (USB) disk.
TCP/IP
Assign the NSA a dynamic or static IP address and DNS
information.
PPPoE
Configure PPPoE settings for a direct Internet
connection.
FTP
Enable FTP file transfer to/from the NSA, set the number
of FTP connections allowed, an FTP idle timeout, and the
character set.
Media Server
Enable or disable the sharing of media files and select
which shares to share.
Download
Service
Have the NSA handle large file downloads.
Web Publishing
Let people use a web browser to access files in shares
without logging into the My NSA screens.
Broadcatching
Subscribe the NSA to feeds to download frequently
updated digital content like TV programs, radio talk
shows, Podcasts (audio files), YouTube videos, or even
BitTorrents.
Print Server
View and manage the NSA’s list of printers and print
jobs.
Copy/Sync
Button
Copy or synchronize files between a USB device and the
NSA.
Auto Upload Flickr/YouTube
Upload files in selected shares to your Flickr and/or
YouTube accounts.
Auto Upload FTP Uploadr
Upload files in selected shares to FTP servers.
Users
View, create and edit administrator and user accounts to
let people use the NSA.
Groups
View, create and edit groups. Groups allow you to
organize users into specific groups. You can create
shares accessible only by the group members.
Shares
View, create and edit shares. Shares are shared folders
to which you can allow specific users read/write access
rights.
43
Chapter 2 Web Configurator Basics
Table 10 Screens Summary (continued)
LINK
SCREEN
FUNCTION
Maintenance
Power
Management
Configure power saving settings for the NSA.
Log
View the NSA’s logs.
Configuration
Back up and/or restore the NSA configuration file.
SSL
Configure HTTPS and the NSA’s SSL certificate.
FW Upgrade
Upload new firmware to your NSA.
Shutdown
Restart the NSA or shut it down.
Logout
Click this to exit the web configurator. This is
recommended to prevent unauthorized administrator
access to the NSA.
2.6.3 Main Window
The main window ( 3 ) shows the screen you select in the navigation panel. It is
discussed in the rest of this document.
The Status screen is the first administration screen to display. See Section 2.7 on
page 46 for more information about the Status screen.
2.6.4 Status Messages
The message text box at the bottom of the screen
as you configure the NSA.
( 4 ) displays status messages
2.6.5 Common Screen Icons
The following table explains some icons that appear in several configuration
screens.
Table 11 Common Configuration Screen Icons
ICON
DESCRIPTION
Edit
Click this to go to a screen where you can change the configuration settings
of an entry.
Delete
Click this to delete an entry from the list.
Edit
Click this to jump to related item’s configuration screen.
Refresh
Click this to refresh the data for the field or value with which it is associated.
44
NSA-220 Plus User’s Guide
Chapter 2 Web Configurator Basics
Table 11 Common Configuration Screen Icons (continued)
ICON
DESCRIPTION
User
See the chapter on user accounts for detailed information on variants of this
icon.
Share
See the chapter on shares for detailed information on variants of this icon.
Healthy
This represents a healthy volume.
Degraded
This represents a degraded RAID 1 volume. Replace the faulty disk. If the
replacement disk does not contain a volume, the NSA automatically restores
the volume. If the replacement disk already contains a volume, you need to
delete the volume and then click the Repair icon to fix the degraded RAID
volume.
Down
This represents a down volume. Click the Initialize icon to create a volume.
Scan Disk
Click this to scan a hard disk for file system errors.
Eject
Click this before you remove an external hard drive so that you do not lose
data that is being transferred to or from that hard drive.
Locate
Click this to cause the LED on the external storage device to blink.
Repair
If you replace a faulty disk with a disk that contains a volume, you need to
delete the volume and then click this to fix the degraded RAID volume.
NSA-220 Plus User’s Guide
45
Chapter 2 Web Configurator Basics
2.7 The Status Screen
The Status screen is the first main web configurator screen you see after you
enter the administrator screens. To view the status screens, click Status on the
top-left of the navigation panel.
Figure 18 Status
The following table describes the labels in this screen.
Table 12 Status
LABEL
DESCRIPTION
Status
Click this to refresh the status screen statistics.
System Information
46
Server Name
This displays the name which helps you find the NSA on the
network. Click the Edit icon to go to the screen where you can
configure this.
Model Name
This displays which model this NSA device is.
Firmware Version
This is the NSA firmware version. Click the Edit icon to go to the
Maintenance > FW Upgrade screen from which you can
upload new firmware.
MAC Address
This displays the NSA’s unique physical hardware address
(MAC). You need the MAC address to register the product at
myZyXEL.com. Customer support may also request it for
troubleshooting purposes.
Media Server
Status
This shows whether the media server function is enabled or
disabled. It must be enabled for media clients to play content
files stored on the NSA. Click the Edit icon to go to the screen
where you can configure this.
FTP Server Status
This shows whether the FTP server function is enabled or
disabled. It must be enabled to use FTP file transfer to/from the
NSA. Click the edit icon to go to the screen where you can
configure this.
Web Publishing
Status
This shows whether the Web server function is enabled or
disabled. It must be enabled to use HTTP to access shares on
the NSA. Click the Edit icon to go to the screen where you can
configure this.
NSA-220 Plus User’s Guide
Chapter 2 Web Configurator Basics
Table 12 Status (continued)
LABEL
DESCRIPTION
UPS
This shows the Uninterruptible Power Supply (UPS) capacity.
Click the Edit icon to go to the screen where you can configure
this.
CPU Usage
This displays a summary of CPU usage by all current processes.
Click the Refresh icon to update this display. It also
automatically updates itself every 10 seconds.
Note: If too many users are using the NSA then the NSA
may appear sluggish.
CPU Temperature
This displays the current temperature near the NSA’s CPU. The
NSA generates an emergency log if the temperature goes out of
the normal operating range. If the temperature goes even
higher, the NSA shuts down automatically to avoid damage from
overheating. If the NSA overheats, make sure the fans are
working and it is in a well ventilated place.
Click the Refresh icon to update this display. It also
automatically updates itself every 60 seconds.
Fan Speed
This is the RPM (Rotations Per Minute) of the NSA’s fans.
Click the Refresh icon to update this display. It also
automatically updates itself every 60 seconds.
Memory Usage
This shows how much of the NSA's total memory is being used.
Click the Refresh icon to update this display. It also
automatically updates itself every 10 seconds.
Volume Status
A volume is a storage area on a single disk or spread across a
number of disks within a single file system.
Internal Volume
This displays the volumes created on the hard drives installed in
the NSA.
Click the Edit icon to open the Storage screen. You can create
and edit the NSA’s internal volume. See Chapter 5 on page 111
for more details.
External Volume
This displays the volumes created on USB hard drives connected
to the NSA. USB disks are numbered in the order that you insert
USB devices.
Click the Edit icon to open the Storage screen. You can create
and edit the external volume. See Chapter 5 on page 111 for
more details.
Status
This icon indicates whether the volume is healthy, degraded, or
down.
Name
This field shows the name for the volume. Read only displays for
an external volume that uses Windows NTFS. This means the
NSA can read the volume but can’t save files on it.
Configuration
This field (also known as Type) shows what type of data storage
system (a RAID type or JBOD) an internal volume is using.
File System
This field shows what file system an external (USB) volume is
using.
NSA-220 Plus User’s Guide
47
Chapter 2 Web Configurator Basics
Table 12 Status (continued)
LABEL
DESCRIPTION
Disk(s)
For internal drives, this shows which hard drive bays are
included in the volume. For external drives, this field shows
USB1 for the first external hard drive you connect to the NSA
(regardless of which USB port) and USB2 for the second.
Disk Usage
This field shows total disk size, the percentage of the disk being
used and the percentage that is available.
Active Sessions
This shows how many users are currently connected to the NSA.
Type
This shows whether it’s a Windows/CIFS, web (web
configurator), or FTP connection to the NSA.
Share Name
This displays the shared folder name on the NSA that the user is
connected to for CIFS sessions and is blank for FTP sessions.
Username
This displays the name of the user connected to the NSA if one is
defined. ANONYMOUS FTP displays if a username is not
defined for the user’s connection.
Connected At
This displays the date and time the user last connected to the
NSA in year, month, day, hour, minute, second format.
IP Address
This displays the IP address of the computer connected to the
NSA.
2.7.1 Session Example (Windows)
Open Windows Explorer and type two back slashes followed by the NSA name or
IP address. Initially you can only read and write to the Public, Video, Music, and
Photo folders until you create other shares on the NSA. This session is then
displayed as shown in the following figure.
Session Example (Windows)
48
NSA-220 Plus User’s Guide
CHAPTER
3
Tutorials
3.1 Overview
This chapter provides tutorials that show how to use the NSA.
• File Sharing Tutorials, see page 49
• Download Service Tutorial, see page 59
• Broadcatching Tutorial, see page 75
• Copy and Flickr Auto Upload Tutorial, see page 80
• FTP Uploadr Tutorial, see page 82
• Web Configurator’s Security Sessions, see page 86
• Using FTPS to Connect to the NSA, see page 98
• Using a MAC to Access the NSA, see page 99
3.2 File Sharing Tutorials
The following sections cover using the NSA for file sharing. This chapter assumes
you have already followed the Quick Start Guide instructions to perform initial
setup and configuration (so you have a working volume). See the rest of this
User’s Guide for details on configuring the NSA’s various screens.
3.2.1 Creating a User Account
Bob wants to create accounts for his sons Jimmy and Kevin. This is how he would
do it.
NSA-220 Plus User’s Guide
49
Chapter 3 Tutorials
1
Log into the NSA web configurator (see Section 2.3 on page 29) and click
Administration to go to the configuration screens.
My NSA
2
Click Sharing > Users to open the Users screen. Then click Add User.
Users
50
NSA-220 Plus User’s Guide
Chapter 3 Tutorials
3
Configure the screen as follows and write down the username and password to
give to Jimmy. If the username and password are the same as Jimmy’s Windows
login, Jimmy will not need to enter a username and password when he logs into
his share from his computer. Set the Account Type to User so Jimmy doesn’t get
to configure the whole NSA. Click Apply to create the account.
Users > Create Example
4
The account now displays in the Users screen.
Users (Account Created)
Now that Bob has created Jimmy’s account, he can go through the steps again to
create another account for Kevin. After both accounts are created, he can go to
Section 3.2.2 on page 52 to create shares for Jimmy and Kevin.
NSA-220 Plus User’s Guide
51
Chapter 3 Tutorials
3.2.2 Creating a Share
Suppose Bob has already created separate accounts for his sons Jimmy and Kevin.
Now Bob wants to create a share for each son. He also wants to make sure that
each son can only access his own share (to keep them from deleting each other’s
files). This is how he would do it.
1
In the NSA’s administration web configurator screens, click Shares > Add Share.
Click Add Share to create a new share.
Shares
2
Specify a name for the share and select which volume it should be on. Configure
the screen as follows. Then click Edit.
Shares > Add Share Example
52
NSA-220 Plus User’s Guide
Chapter 3 Tutorials
3
Configure the screen as follows to give Jimmy full access right to the share. Then
click Apply to create the share.
Shares > Add Share > Share Access > Advanced Example
Now that Bob has created Jimmy’s share, he can go through the steps again to
create another share for Kevin.
3.2.3 Creating a Group
After creating user accounts for Jimmy and Kevin, Bob wants to create a group for
his sons and another one for the parents. Bob can assign access rights to his sons’
group for certain shares such as a cartoons share and allow only the parents’
group to access the scary moview share. This is how he would create the group.
1
In the NSA’s administration web configurator screen, click Groups > Add Group.
Groups
NSA-220 Plus User’s Guide
53
Chapter 3 Tutorials
2
Specify a name for the group. Select the user(s) you want to add to the group
from the Available User(s) list and click Add Selected User(s). Configure the
screen as follows. Then click Apply to create the group.
Groups > Add Group Example
Now that Bob has created a group for Jimmy and Kevin, he can go through the
steps again to create another group for the parents. Then he can see the rest of
the tutorials for how to use the groups in assigning access rights to shares.
3.2.4 Accessing a Share From Windows Explorer
If you map a NSA share (where data is stored) to a Windows network drive, you
can use Windows Explorer to transfer files to and from the NSA as if it was another
folder on your computer. Here he maps Jimmy’s share to Jimmy’s computer.
1
Start Windows Explorer and go to the NSA’s server name (“nsa220plus” is the
default) or IP address.
2
Click Tools > Map Network Drive.
NSA Top Level
54
NSA-220 Plus User’s Guide
Chapter 3 Tutorials
3
Select the network drive that you want to map the NSA to from the Drive list box.
This example uses I. Then browse to and select the share on the NSA. Click
Finish.
Map Network Drive
4
Enter the username and password for Jimmy’s account and click OK. You do not
need to do this if the username and password are the same as Jimmy’s Windows
login.
Enter Network Password
NSA-220 Plus User’s Guide
55
Chapter 3 Tutorials
5
After the mapping is done, you can then simply copy and paste or drag and drop
files from/to your local computer’s drives to or from this network folder. Just like
the NSA’s share was another folder on your computer.
Example Share Mapped (Folders View)
Now that Bob has mapped Jimmy’s share to Jimmy’s computer, he can go through
the steps again to map Kevin’s share to Kevin’s computer.
3.2.5 Accessing a Share Using FTP
You can also use FTP to access the NSA. Suppose Jimmy is temporarily using a
different computer and wants to access his share without mapping it to the
computer. This is how he would do it.
1
Open the FTP client (Windows Explorer is used here) and type “ftp://
username@server” where “username” is the account’s username and “server” is
the NSA’s IP address or server name.
FTP Example: Typing the FTP Target
56
NSA-220 Plus User’s Guide
Chapter 3 Tutorials
2
Enter your password and click Login.
FTP Example: Enter the Password
3
Now you can access files and copy files from/to your local computer’s drives to or
from this network folder.
FTP Example: Logged In
NSA-220 Plus User’s Guide
57
Chapter 3 Tutorials
3.2.6 Accessing a Share Through the Web Configurator
You can browse and access files through the web configurator.
1
Log into the NSA web configurator (see Section 2.3 on page 29) using your
username and password. Click a share to see the top level of the share’s contents.
My NSA User Login
2
Here is the Jimmy share.
Share Browsing
58
3
Click a folder’s file name to browse the folder. You can open files or copy them to
your computer. You can also create new folders and upload additional files to the
share.
4
Click the logout icon when your are done.
NSA-220 Plus User’s Guide
Chapter 3 Tutorials
3.3 Download Service Tutorial
This tutorial covers using the NSA to download a file from the Internet. Use this
same procedure for BitTorrent downloads as well as regular HTTP (web) and FTP
downloads. See Section 7.4.1 on page 138 for more on the download service.
3.3.1 Copying/Pasting a Download Link
1
Open your Internet browser (this example uses Internet Explorer).
2
Find a download link for the file you want. In this example, www.zyxel.com has a
Download Now link for downloading a datasheet for ZyXEL’s GS-2024 (a device
for making phone calls over the Internet).
Download Link Example
Note: Make sure the link opens either the file you want or a pop-up window about how
to handle the file.
Note: It is also OK for the link to open a .torrent file. If you are redirected to a screen
that says the download should start in a few seconds, there may be a link to
click if the download does not start automatically. See if that link opens the file
or the pop-up window.
NSA-220 Plus User’s Guide
59
Chapter 3 Tutorials
3
Right-click the download link and select Copy Shortcut in Internet Explorer (or
Copy Link Location in Firefox).
Copy Shortcut
4
Log into the NSA web configurator (see Section 2.3 on page 29) using the
administrator account and click Download Service.
Download Service Tutorial: My NSA
5
Click Add.
Download Service Tutorial: Download Service
60
NSA-220 Plus User’s Guide
Chapter 3 Tutorials
6
Right-click the URL field and select Paste.
Download Service Tutorial: Paste Link
7
The URL displays in the URL field. Click Apply.
Download Service Tutorial: Apply Pasted Link
8
After a few moments, the download task appears in the Download Service
screen’s Active tab.
The download appears in the Completed tab when it is done. By default the NSA
stores all downloads in the admin share’s download folder. See Section 3.2.4 on
page 54, Section 3.2.5 on page 56, or Section 3.2.6 on page 58 for how to access
a share.
NSA-220 Plus User’s Guide
61
Chapter 3 Tutorials
3.3.2 Installing the Link Capture Browser Plugin
In addition to copying and pasting a download link to the Download Service
screen, you can also install a link capture browser plugin in your web browser. Use
the plugin to easily add a download link to the NSA’s download service. See
Section 7.4.4 on page 143 for more on the link capture browser plugin.
Internet Explorer
1
Open the folder containing the link capture browser plugin.
2
Double-click on the plugin to display the following screen. Click I Agree to begin
installation.
Link Capture Browser Plugin: IE
62
NSA-220 Plus User’s Guide
Chapter 3 Tutorials
3
Select a location to save the plugin and click Install. Close the screen once the
installation is complete.
Link Capture Browser Plugin: IE Installation
4
Open Internet Explorer and locate a download link. In this example,
www.zyxel.com has a Download Now link for downloading a user’s guide for
ZyXEL’s NBG410W3G (a 3G wireless router). Right-click on the download link and
select NSA Setting.
Link Capture Browser Plugin: IE Setting
NSA-220 Plus User’s Guide
63
Chapter 3 Tutorials
5
Enter the NSA’s web address (nsa220plus by default) and click Apply. A warning
message displays asking for confirmation. Click OK to apply the setting.
Link Capture Browser Plugin: Setting NSA’s Web Address in IE
Firefox
1
Open Firefox.
2
Open the folder containing the link capture browser plugin.
3
To install the plugin, drag and drop the plugin to Firefox.
Link Capture Browser Plugin: Firefox
64
NSA-220 Plus User’s Guide
Chapter 3 Tutorials
4
The following screen displays. Click Install Now.
Link Capture Browser Plugin: Firefox Installation
5
You need to restart Firefox after the installation.
Link Capture Browser Plugin: Restart Firefox
NSA-220 Plus User’s Guide
65
Chapter 3 Tutorials
6
When Firefox restarts, a message displays to show the installation succeeded. The
plugin is installed as an extension in Add-ons. Click Options to configure the
NSA’s web address.
Link Capture Browser Plugin: Firefox Options
7
Enter the NSA’s web address (nsa220plus by default) and click OK.
Link Capture Browser Plugin: Firefox Settings
66
NSA-220 Plus User’s Guide
Chapter 3 Tutorials
3.3.3 Using the Link Capture Browser Plugin
Once you install the plugin, you may begin sending download links to the NSA
from your web browser. This example shows how to send a download link to the
NSA’s download service using the link capture browser plugin.
1
Open your Internet browser (this example uses Firefox).
2
Find a download link for the file you want. In this example, www.zyxel.com has a
Download Now link for downloading a user’s guide for ZyXEL’s P-660W-T1 (an
ADSL router).
Link Capture Browser Plugin Example
3
Right-click on the download link and select Send to NSA.
Send to NSA
NSA-220 Plus User’s Guide
67
Chapter 3 Tutorials
4
The login screen shows up. Enter your NSA’s login information and click Login to
send the link to the download service. A confirmation message displays.
Link Capture Confirmation
5
Log into the NSA web configurator (see Section 2.3 on page 29) using the
administrator account and click Download Service.
Link Capture Browser Plugin: My NSA
6
The download task appears in the Download Service screen’s Active tab. It may
appear in the Completed tab if the NSA already finished downloading the file.
By default the NSA stores all downloads in the admin share’s download folder.
See Section 3.2.4 on page 54, Section 3.2.5 on page 56, or Section 3.2.6 on page
58 for how to access a share.
68
NSA-220 Plus User’s Guide
Chapter 3 Tutorials
3.3.4 Configuring the Download Service Preferences
Once you added a list of download tasks to the NSA (see Section 3.3.1 on page 59
and Section 3.3.3 on page 67), you can have the NSA download files during a
specific time period of the day. You can also configure the BitTorrent settings to
control bandwidtch and optimize download efficiency.
Say you have the NSA turned on all the time, but you only want the NSA download
files at night. Here is how you use the download period control feature to set the
time range.
1
Click Applications > Download Service > Preferences to open the General
Settings screen.
2
Select Enable Download Period Control and use the arrows to adjust the time
period from 23:30 to 09:00. Click Apply to save your changes. The NSA only
downloads files within this 9.5-hour period every day.
Note: If you configure the Power On/Off Schedule feature in the Power
Management screen, make sure your active download period does not conflict
with the power-off period.
Note: If power failure occurs during the active download period, the NSA will verify
whether the downloaded files were damaged. If a file is corrupted, the NSA will
download the file again. If the file is intact but not completely downloaded, the
NSA will resume the download task after it restarts.
NSA-220 Plus User’s Guide
69
Chapter 3 Tutorials
3
When it is not the download time, you see a message in the Download Service
screen, indicating the active download period.
Here is a list of BitTorrent settings you want to configure for your NSA:
• Limit the maximum upload rate to 20 KB/s.
Enter this value in the Max. upload rate field.
• Actively download three torrent files but only upload one at a time.
Enter 3 in the Maximum Number of Active Torrents field and enter 1 in the
Maximum Number of Seeding Jobs field.
• Keep sharing until the NSA has shared equal or greater amount of the
downloaded files.
Select the check box and enter 100 in the Upload/Download Ratio field.
• Use an online IP filter table from http://www.bluetack.co.uk/config/level1.gz for
example to protect BitTorrent downloads.
Enter the URL in the Update IP Filter from the Internet Every Week field.
70
NSA-220 Plus User’s Guide
Chapter 3 Tutorials
Click Applications > Download Service > Preferences > BitTorrent to open
the following screen. Enter the above information and then click Apply.
3.3.5 Using Download Service Notification
Use an RSS feed reader on your computer to keep track of files the NSA has
downloaded. The following examples show how to subscribe to the NSA’s
download service notifications. See Section 7.4.5 on page 144 for more on
download service notifications.
Some RSS readers may not support the NSA’s download service notifications. For
example, Google Reader cannot support this feature if the NSA has a private IP
address.
Note: It is recommended to subscribe to the download service notifications using the
built-in reader in Internet Explorer 7 or Firefox.
NSA-220 Plus User’s Guide
71
Chapter 3 Tutorials
You have to activate this feature in the Download Service screen. Click
Applications > Download Service to open the following screen. Select Enable
Download Notify and click Apply.
Download Service Notification: Activation
Internet Explorer 7 Example
1
After you activate download service notification, click the RSS feed icon.
Download Service Notification: RSS Feed Icon
2
The following screen displays. Select Subscribe to this feed.
Subscribe to Download Service Notifications
72
NSA-220 Plus User’s Guide
Chapter 3 Tutorials
3
The following screen displays. Click Subscribe.
Add the RSS Feed
4
Click the Favorite icon on your browser and select the Feeds tab to check the
updates of your NSA’s download list.
Download Service Notification
Firefox Example
1
After you activate download service notification, click the RSS feed icon.
Download Service Notification: RSS Feed Icon
NSA-220 Plus User’s Guide
73
Chapter 3 Tutorials
2
The following screen displays. Select LiveBookmarks from the drop-down list
and click Subscribe Now.
Subscribe to Download Service Notifications
3
The following screen displays. Select Bookmarks Menu and click Add.
Add the RSS Feed
4
From the Firefox’s Bookmarks Menu, select Download Notify to check the
updates of your NSA’s download list.
Download Service Notification
74
NSA-220 Plus User’s Guide
Chapter 3 Tutorials
3.4 Broadcatching Tutorial
Use broadcatching to have the NSA download frequently updated digital content
like TV programs, radio talk shows, Podcasts (audio files), and blogs. This
example shows how to subscribe the NSA to the CNET TV Internet television
channel. See Section 7.6 on page 158 for more on the broadcatching service.
1
Open your Internet browser (this example uses Firefox).
2
Find the link for the RSS feed containing the channel you want to add. In this
example, http://reviews.cnet.com/4520-11455_7-6333605-1.html has an RSS
link for subscribing to the CNET Live podcast. However this is not the link for the
actual RSS feed. Click the link to go to another screen that has RSS feed links.
Broadcatching Link Example
Note: Make sure the link goes to the actual RSS feed instead of to another list of links
or information about the channel.
One way to test this is by clicking the link. Clicking an actual RSS feed link opens
a screen of XML code (in browsers without an RSS feed aggregator) or a window
where you can add the RSS feed (in browsers with an RSS feed aggregator).
NSA-220 Plus User’s Guide
75
Chapter 3 Tutorials
3
Right-click the download link and select Copy Link Location in Internet Explorer
(or Copy Shortcut in Internet Explorer).
Copy Link Location
4
Log into the NSA web configurator (see Section 2.3 on page 29) using the
administrator account and click Administration > Applications >
Broadcatching.
5
Click Add Channel.
Broadcatching Tutorial: Broadcatching
76
NSA-220 Plus User’s Guide
Chapter 3 Tutorials
6
Right-click the URL field and select Paste.
Broadcatching Tutorial: Paste Link
7
The URL displays in the URL field.
8
Select a policy for what items to download. This example uses Manually Choose
Items for Download so you will be able to select individual items to download
later.
9
Select a policy for what items to delete. This example keeps the most recent 10
items.
10 Click Apply.
Broadcatching Tutorial: Apply Pasted Link
11 After a few moments, the channel appears in the Broadcatching screen where
you can select items you want to download. The NSA saves the items you
download in a folder named after the channel. By default, the channel folders are
created in the admin share’s download folder. The NSA’s media server feature
makes it easy for users on your network to play the broadcatching files you
download. See Section 7.3.1 on page 135 for more on the media server.
NSA-220 Plus User’s Guide
77
Chapter 3 Tutorials
3.5 Printer Server Tutorial
Do the following to have the NSA let computers on your network share a printer.
See www.zyxel.com for a list of compatible printers.
1
Make sure the NSA is on and the SYS light is on steady (not blinking).
2
Use a USB cable to connect the printer’s USB port to one of the NSA’s USB ports.
Make sure the printer is also connected to an appropriate power source.
Printer Sharing
78
3
Turn on the printer.
4
The NSA detects the printer after a few moments.
NSA-220 Plus User’s Guide
Chapter 3 Tutorials
5
On your computer, open your CIFS file sharing program (Windows Explorer for
example) and browse to the NSA. Double-click the printer’s icon.
Printer Connected to NSA: Windows Explorer
6
If you get a warning screen, click the option that lets you continue (Yes in this
example).
Printer Connected to NSA: Windows Explorer Warning
7
If your computer does not already have the printer’s driver installed, you will need
to install it. In this example, click OK.
Printer Driver Needed
8
Use the wizard screens to install the printer driver on the computer. You may need
to get the file from the printer’s CD or the printer manufacturer’s website (the
driver is not installed on the NSA).
NSA-220 Plus User’s Guide
79
Chapter 3 Tutorials
Note: You must install the printer driver on each computer that will use the printer.
Applications > Print Server
After the driver installation finishes, the computer is ready to use the printer.
Select the printer in an application to use it to print. Browse to the NSA using a
CIFS program (like Windows Explorer) and double-click the printer’s icon to open
the printer’s queue of print jobs.
Printer Screen in Windows Explorer
Note: Repeat steps 5 to 8 on your other computers so they can also use the printer.
3.6 Copy and Flickr Auto Upload Tutorial
Amy received some photos taken during her best friend’s wedding and saved the
files on a USB disk. She wants to save a copy of the photos in the NSA and upload
the photos to her Flickr account.
Amy has to activate the NSA’s auto upload feature. See Section 7.9.1 on page 170
for more details on setting up a Flickr account for auto upload. In this example
Amy select the NSA’s photo share for auto upload.
This is how Amy would transfer the files from her USB disk to the NSA.
80
NSA-220 Plus User’s Guide
Chapter 3 Tutorials
1
Click Applications > Copy/Sync Button in the navigation panel to open the
screen.
2
Configure the copy settings as shown and click Apply.
Copy Tutorial: Copy Settings
3
Press and release the COPY/SYNC button on the NSA’s front panel to start
copying files.
4
The copied files can be found in a new folder in the photo share.
Copy Tutorial: Copied Files
NSA-220 Plus User’s Guide
81
Chapter 3 Tutorials
5
The NSA also automatically uploads the copied files to Flickr.
Copy Tutorial: Auto Upload to Flickr
3.7 FTP Uploadr Tutorial
FTP Uploadr can automatically upload files saved on the NSA to a remote FTP
server. Amy wants to share files on her NSA with Susan. They each have an NSA
at home, so Susan has to set her NSA as an FTP server for Amy to automatically
send files using FTP Uploadr.
FTP Uploadr Tutorial
Amy’s NSA
Susan’s NSA
To set the NSA as an FTP server, click Applications > FTP to open the FTP
screen. Select Enable FTP and click Apply.
FTP Uploadr Tutorial: Enable FTP
82
NSA-220 Plus User’s Guide
Chapter 3 Tutorials
Susan also has to create a user account and share on her NSA for Amy to upload
files. The share is used for files uploaded from Amy’s NSA. Amy will then use the
following information to configure FTP Uploadr on her NSA.
Table 13 FTP Uploadr Tutorial: FTP Server Information
FTP Domain Name or IP
Address
example2.com
FTP User Name
Amy
FTP Password
xxxxx
Share (Remote Path)
Amy
This is how Amy would set up the NSA’s FTP Uploadr.
1
Click Applications > Auto Upload > FTP Uploadr to open the FTP Uploadr
screen. Select Enable FTP Uploadr and click Apply to turn on FTP Uploadr.
FTP Uploadr Tutorial: Enable FTP Uploadr
2
Click Add Server.
FTP Uploadr Tutorial
3
Enter the information as describe in Table 13 on page 83. Click Apply to add the
server.
FTP Uploadr Tutorial: Add Server
NSA-220 Plus User’s Guide
83
Chapter 3 Tutorials
4
In the FTP Uploadr screen, click Preferences to configure the auto upload
settings.
FTP Uploadr Tutorial: Preferences
5
Amy wants to share video files with Susan. In the Preferences screen, select
video from the Shares drop-down list box, enter a forward slash in the Path field
and click Add to add the share to the Folder Watch List.
FTP Uploadr Tutorial: Folder Watch List
84
NSA-220 Plus User’s Guide
Chapter 3 Tutorials
6
Amy also set the Bandwidth Limit to 20KB/s so that the upload doesn’t slow
down her Internet connection.
FTP Uploadr Tutorial: Bandwidth Limit
Now Amy has set up FTP Uploadr to send files to Susan’s NSA. Everytime Amy
adds new files or renames files in the video share, these new or modified files will
be uploaded automatically to the Amy share on Susan’s NSA.
Similarly, Susan can go through the steps described above to configure FTP
Uploadr on her NSA. Once Susan completes the setup, Amy can also receive files
from Susan’s NSA.
FTP Uploadr Tutorial: Exchange Files
Amy’s NSA
NSA-220 Plus User’s Guide
Susan’s NSA
85
Chapter 3 Tutorials
3.8 Web Configurator’s Security Sessions
These tutorials show you how to configure security for the NSA’s Web Configurator
sessions. You will customize the NSA’s self-signed SSL certificate and distribute it
to your users.
3.8.1 Customizing the NSA’s Certificate
1
Click Maintenance > SSL and then select Edit a self-signed CA certificate and
click Edit.
Maintenance > SSL
86
NSA-220 Plus User’s Guide
Chapter 3 Tutorials
2
Next, let’s modify the certificate by changing the Common Name to this NSA’s
host name of “nsa220plus”, the Organization to “Test” and the Key Length to
2048.
Maintenance > SSL > Edit a Self-Signed Certificate
3
The NSA restarts its network services and returns you to the login screen.
Maintenance > SSL > Edit a Self-Signed Certificate
NSA-220 Plus User’s Guide
87
Chapter 3 Tutorials
3.8.2 Downloading and Installing Customized Certificate
1
Log in and return to Maintenance > SSL. Under Modify the Existing
Certificate, click Download.
Maintenance > SSL
2
Save the file to your computer.
Downloading the NSA’s Certificate
88
NSA-220 Plus User’s Guide
Chapter 3 Tutorials
3
Find the certificate file on your computer and double-click it.
Downloading the NSA’s Certificate
4
Install the certificate. The rest of the steps in this section are an example of
installing a certificate in Windows. See Appendix D on page 285 for other
examples. In the Certificate dialog box, click Install Certificate.
Certificate
NSA-220 Plus User’s Guide
89
Chapter 3 Tutorials
5
In the Certificate Import Wizard, click Next.
Certificate Import Wizard: Welcome
6
Leave Automatically select certificate store based on the type of
certificate selected and click Next.
Certificate Import Wizard: Certificate Store
90
NSA-220 Plus User’s Guide
Chapter 3 Tutorials
7
In the Completing the Certificate Import Wizard screen, click Finish.
Certificate Import Wizard: Finish
8
If you are presented with another Security Warning, click Yes.
Security Warning
9
Finally, click OK when presented with the successful certificate installation
message.
Certificate Import Wizard: Successful
NSA-220 Plus User’s Guide
91
Chapter 3 Tutorials
3.8.3 Turn on the NSA’s Web Security
Now that you have customized the NSA’s certificate and installed it in your
computer, you can turn on security for your Web Configurator sessions. This
example uses Firefox 3.0. See Appendix D on page 285 for more information on
browsers and certificates.
1
Close your web browser and open it again to reset its session with the NSA. Log in
and click Maintenance > SSL. Select Force HTTPS and click Apply.
Maintenance > SSL
92
NSA-220 Plus User’s Guide
Chapter 3 Tutorials
2
A warning screen pops up if applying your change may disconnect some users.
Click Apply to continue.
Maintenance > SSL > Force HTTPS Warning
3
The NSA logs you out and automatically redirects your formerly non-secure
(HTTP) connection to a secure (HTTPS) connection. Your browser may give you a
warning about the device’s public key certificate. Add an exception to allow your
browser to bypass the warning.
Firefox: Secure Connection Failed
NSA-220 Plus User’s Guide
93
Chapter 3 Tutorials
4
Click Add Exception.
Firefox: Secure Connection Failed
5
Click Get Certificate.
Firefox: Add Security Exception
94
NSA-220 Plus User’s Guide
Chapter 3 Tutorials
6
Before you add an exception, verify that the device to which you are trying to
connect is providing the correct certificate. Click View.
Firefox: Add Security Exception
NSA-220 Plus User’s Guide
95
Chapter 3 Tutorials
7
The SHA1 fingerprint must match the NSA’s certificate you downloaded from the
NSA to your computer. (Double-click the NSA’s certificate file and then click
Details and look at the Thumbprint). Click Close.
Firefox: Add Security Exception
96
NSA-220 Plus User’s Guide
Chapter 3 Tutorials
8
If the certificate fingerprints match, click Confirm Security Exception, otherwise
click Cancel.
Firefox: Add Security Exception
9
The login screen displays.
HTTPS Login
NSA-220 Plus User’s Guide
97
Chapter 3 Tutorials
Now, anyone who connects to the NSA’s Web Configurator screens will
automatically do so by HTTPs. Use a secure method to let your users know the
correct fingerprint for the NSA’s certificate so they can check it before adding a
security exception (as in steps 6 to 7 on pages 95 to 96). See the next section for
how to use FTPS with the NSA for secure FTP transfers.
3.9 Using FTPS to Connect to the NSA
This section covers how to use FTP over TLS with the NSA for secure FTP
transfers. Before you go through this section, read Section 3.8 on page 86 to
configure HTTPS. This example uses FileZilla.
1
Open FileZilla and click File > Site Manager > New Site.
• Configure the Host field with the NSA’s address.
• Set the Servertype to FTPES - FTP over explicit TLS/SSL.
• Configure the account name and password.
• Click Connect.
FileZilla Site Manager
98
NSA-220 Plus User’s Guide
Chapter 3 Tutorials
2
A security warning screen displays. The SHA1 fingerprint must match the NSA’s
certificate you downloaded from the NSA to your computer. (Double-click the
NSA’s certificate file and then click Details and look at the Thumbprint). If they
match, click OK.
FileZilla Unknown Certificate Warning
The shares and folders to which Gonzo has access display. Now you can use FTP to
securely transfer files to or from the NSA. Use a secure method to let your users
know the correct fingerprint for the NSA’s certificate so they can check it before
adding a security exception.
3.10 Using a MAC to Access the NSA
This tutorial shows you how to find the NSA on MAC OS X 10.5 (Leopard).
You can access the NSA in two ways:
• Use the Finder to browse for the NSA, or
• Use the Finder > Go option to connect to the NSA.
NSA-220 Plus User’s Guide
99
Chapter 3 Tutorials
3.10.1 Finder
100
1
Open a new Finder window.
2
Select All under the SHARED sidebar. Look for the NSA from the Network list.
NSA-220 Plus User’s Guide
Chapter 3 Tutorials
3
Expand the NSA to display the shares you may access.
3.10.2 Go Menu
4
In the Finder, click Go > Connect to Server.
NSA-220 Plus User’s Guide
101
Chapter 3 Tutorials
102
5
When the Connect to Server dialog box opens, enter smb:// and the NSA’s IP
address in the Server Address field. You may also click Browse to have the MAC
search for the NSA. Click Connect.
6
Once you establish the connection, you can access the NSA from the Finder or
directly from the desktop.
NSA-220 Plus User’s Guide
P ART II
System Setting,
Storage, Network
and Applications
System Setting (105)
Storage (111)
Network (125)
Applications (131)
103
104
CHAPTER
4
System Setting
4.1 Overview
This chapter gives an overview of the various features included in the system
setting screens.
4.1.1 What You Can Do in the System Setting Screens
• Use the Server Name screen (Section 4.2 on page 106) to specify the NSA’s
server and workgroup names.
• Use the Date/Time screen (Section 4.3 on page 107) to set up date/time and
choose a time zone for the NSA.
4.1.2 What You Need to Know About System Settings
Windows/CIFS
Common Internet File System (CIFS) is a standard protocol supported by most
operating systems in order to share files across the network.
• CIFS is included by default in Windows and Mac OSX operating systems.
• You can use Samba with Linux to use CIFS.
• CIFS transfers use security.
Time Lag
Time lag occurs when the time on the NSA falls behind the time on the time
server. This may happen if:
• the time server is no longer reachable
• if the NSA is shut down often (the NSA internal battery keeps time when the
NSA is shut down and this may cause possible variance)
• power surges occur.
The NSA gives no warning if time lag occurs. You should resynchronize the time
after a power surge or after you have shut down the NSA several times.
NSA-220 Plus User’s Guide
105
Chapter 4 System Setting
4.2 The Server Name Screen
Click System Setting > Server Name to open the following screen. Use this
screen to configure your CIFS settings. In this screen you can set your server
name and specify if your NSA is a part of a workgroup or domain.
Note: CIFS cannot be disabled on the NSA.
Figure 19 System Setting > Server Name
The following table describes the labels in these screens.
Table 14 System Setting > Server Name
LABEL
DESCRIPTION
Server Name
Enter a name to identify your NSA on the network in this field.
You can enter up to 15 alphanumeric characters with minus
signs allowed but not as the last character. The name must
begin with an alphabetic character (a-z) and is NOT case
sensitive.
Description
Add text here to describe the NSA if the Server Name field was
not enough. Use up to 61 characters. You can use all characters
except the following: /\:|[]<>+;,?=*"~.
Workgroup Name
Type your workgroup name in this field. A workgroup is a group
of computers on a network that can share files.These user
accounts are maintained on the NSA.
You can enter up to 15 alphanumeric characters with minus
signs allowed but not as the last character. The name must
begin with an alphabetic character (a-z) and is NOT case
sensitive.
106
Prevent NSA From
Being Master Browser
Select this option if computers in your workgroup are named
with non-English characters (such as Chinese and Russian).
When you perform a search in the workgroup, this option allows
you to locate computers named with non-English characters.
Apply
Click this to save your changes.
Reset
Click this to restore previously saved settings.
NSA-220 Plus User’s Guide
Chapter 4 System Setting
4.3 The Date/Time Screen
Use this screen to select a time zone and a time server from which your NSA can
get the time and date. This time is then used in NSA logs and alerts.
Click the System Setting link in the navigation panel and then click the Date/
Time link to access the Date/Time screen.
Figure 20 System Setting > Date/Time
The following table describes the labels in this screen.
Table 15 System Setting > Date/Time
LABEL
DESCRIPTION
Current System Date Time Setting
Current Time
This field displays the time of your NSA.
Current Date
This field displays the date of your NSA.
Date Time Setup
Manual
Select this radio button to enter the time and date manually.
When you enter the time settings manually, the NSA uses the
new setting once you click Apply.
Note: If you enter time settings manually, they revert to their
defaults when power is lost.
NSA-220 Plus User’s Guide
107
Chapter 4 System Setting
Table 15 System Setting > Date/Time (continued)
LABEL
DESCRIPTION
New Date (yyyymm-dd)
This field displays the last updated date from the time server or
the last date configured manually.
When you set Time and Date Setup to Manual, enter the new
date in this field and then click Apply.
New Time
(hh:mm:ss)
This field displays the last updated time from the time server or
the last time configured manually.
When you set Time and Date Setup to Manual, enter the new
time in this field and then click Apply.
Get from Time Server
Select this check box to have the NSA get the time and date
from the time server you select in the Time Server Address
field.
Time Server
Address
Select a time server from the drop-down list box or select
Specify my own time server and enter the time server you
wish to use in the field below. Check with your ISP/network
administrator if you are unsure of this information.
Synchronize Now
Click this for the NSA to retrieve the correct time from the
configured time server right away.
Time Zone
Time Zone
Choose the time zone of your location. This will set the time
difference between your time zone and Greenwich Mean Time
(GMT).
Enable Daylight Saving
Daylight saving is a period from late spring to early fall when
many countries set their clocks ahead of normal local time by
one hour to give more daytime light in the evening.
Select this option if you use Daylight Saving Time.
Start Date
Configure the day and time when Daylight Saving Time starts if
you selected Enable Daylight Saving. The hour field uses the
24 hour format. Here are a couple of examples:
Daylight Saving Time starts in most parts of the United States
on the second Sunday of March. Each time zone in the United
States starts using Daylight Saving Time at 2 A.M. local time. So
in the United States you would use March, Second, Sunday, at
2:00.
Daylight Saving Time starts in the European Union on the last
Sunday of March. All of the time zones in the European Union
start using Daylight Saving Time at the same moment (1 A.M.
GMT or UTC). So in the European Union you would select
March, Last, Sunday. The time you specify depends on your
time zone. In Germany for instance, you would type 2 because
Germany's time zone is one hour ahead of GMT or UTC
(GMT+1).
108
NSA-220 Plus User’s Guide
Chapter 4 System Setting
Table 15 System Setting > Date/Time (continued)
LABEL
DESCRIPTION
End Date
Configure the day and time when Daylight Saving Time ends if
you selected Enable Daylight Saving. The o'clock field uses
the 24 hour format. Here are a couple of examples:
Daylight Saving Time ends in the United States on the first
Sunday of November. Each time zone in the United States stops
using Daylight Saving Time at 2 A.M. local time. So in the United
States you would select November, First, Sunday, at 2:00.
Daylight Saving Time ends in the European Union on the last
Sunday of October. All of the time zones in the European Union
stop using Daylight Saving Time at the same moment (1 A.M.
GMT or UTC). So in the European Union you would select
October, Last, Sunday. The time you specify depends on your
time zone. In Germany for instance, you would type 2 because
Germany's time zone is one hour ahead of GMT or UTC
(GMT+1).
Offset
Specify by how many hours to change the time for Daylight
Saving Time.
Apply
Click this to save your changes. If you configured a new time
and date, Time Zone and Daylight Saving at the same time, all
of the settings take affect.
Cancel
Click this to restore your previously saved settings.
NSA-220 Plus User’s Guide
109
Chapter 4 System Setting
110
NSA-220 Plus User’s Guide
CHAPTER
5
Storage
5.1 Overview
Several NSA features require a valid internal volume. This chapter covers the
management of volumes and disks (both internal and external).
Use the Storage screen (Section 5.2 on page 112) to display information on all
volumes, create internal and external volumes, and configure the volume’s
properties.
5.1.1 What You Need to Know About Storage
Volume
A volume is a storage area on a disk or disks. You can create volumes on the
internal disks and external disks attached to the USB port(s). You can spread a
volume across internal disks but not between internal and external disks.
Storage Methods
RAID (Redundant Array of Independent Disks) or JBOD (Just a Bunch of Data) is
the storage method that the NSA uses. The storage method you use depends on
how many disks you have and how many volumes you want to create. It’s
important that you consider this carefully as all data is deleted when you re-create
a volume. See Figure 5.6.2 on page 121 for details on choosing a storage method.
Finding Out More
See Section 5.6 on page 120 for more technical background information on
storage.
NSA-220 Plus User’s Guide
111
Chapter 5 Storage
5.2 The Storage Screen
The Storage screen allows you to create and edit volumes in the NSA.
5.2.1 Disk Replacement Restrictions
See the Quick Start Guide for information on replacing disks in the NSA. When
replacing a disk in a degraded or down RAID volume, the new disk must be at
least the same size or bigger than the other disks that are already in the RAID
volume, so as all data in the volume can be restored.
For example, if you have RAID with 250 GB disks, you must put in a 250 GB or
bigger disk as a replacement in order to restore all original data in that volume. If
you put a bigger disk, the extra space on the disk will not be used.
Note: The NSA automatically repairs a degraded RAID if you insert an empty disk
without an existing file system. Otherwise, when you replace a disk you must go
to the Storage > Internal Volume > RAID screen, select the degraded array,
and click Repair.
Resynchronizing or Recovering a RAID 1 Volume
Resynchronizing or recovering a RAID 1 volume that was down is done block-byblock, so the time it takes depends more on the size of your hard drive(s) than the
amount of data you have on them.
Note: Do not restart the NSA while the NSA is resynchronizing or recovering a volume
as this will cause the synchronization to begin again after the NSA fully reboots.
Note: You can access data on a RAID volume while it is resychronizing or recovering,
but it is not recommended.
112
NSA-220 Plus User’s Guide
Chapter 5 Storage
5.2.2 Displaying the Storage Screen
Click Storage in the navigation panel to display the following screen. Use this
screen to display internal and external volumes on the NSA.
Note: It is recommended to scan the volume every three months or 32 reboots.
Figure 21 Storage
The following table describes the labels in this screen.
Table 16 Storage
LABEL
DESCRIPTION
Internal/External
Volume
These tables display information on all internal volumes (created
on NSA internal disk drives) and external volumes (created on
external disk drives attached to the NSA USB ports).
Create an Internal
Volume
Click this to format internal hard drives and create a new
volume. All data on the disk(s) will be lost.
Create an External
Volume
Click this to format an external hard drive and create a new
volume. All data on the disk will be lost.
Status
This field shows whether the volume is Healthy, Resync,
Recovering, Degraded, or Down. See Section 5.3.1 on page
116 for details on a volume’s status.
Volume
The NSA creates the volume name automatically. You can edit
it.
Disk Configuration
This field shows which disks and data storage system the
volume is using.
File System
This field displays the file system that an external (USB) volume
is using.
NSA-220 Plus User’s Guide
113
Chapter 5 Storage
Table 16 Storage (continued)
LABEL
DESCRIPTION
Disk(s)
Click or roll your mouse over a link in this column to display the
following details about the hard drive located in the
corresponding hard drive bay.
Type: Whether it is an internal or external (USB) hard drive.
Model Name: This is the hard disk number that identifies the
disk.
File System: The file system that an external volume is using
Capacity: The total storage space on the disk.
Capacity
This field shows total disk size, the percentage of the volume
being used and the percentage that is available.
Actions
This field displays icons allowing you to edit, scan, repair or
delete a volume. You can also locate or eject an external
volume.
Note: If you delete a volume, all data in the volume disk(s) is
erased.
You see a warning screen before you delete a volume.
Figure 22 Delete a Volume Warning Screen
114
NSA-220 Plus User’s Guide
Chapter 5 Storage
5.3 Creating an Internal Volume
Click the Create an Internal Volume button in the Storage screen as shown in
Figure 21 on page 113 to open the following screen. Use this screen to create a
new NSA internal disk drive volume.
Note: Creating a volume formats the hard drive. All data on the disk will be lost.
Figure 23 Storage > Create an Internal Volume
NSA-220 Plus User’s Guide
115
Chapter 5 Storage
The following table describes the labels in this screen.
Table 17 Storage > Create an Internal Volume
Volume Name
Type a volume name from 1 to 31 characters. To avoid confusion, it is
highly recommended that each volume use a unique name.
Acceptable characters are all alphanumeric characters, " " [spaces],
"_" [underscores], and "." [periods].
The first character must be alphanumeric (A-Z 0-9).
The last character cannot be a space " ".
For an external volume, type a volume name from 1 to 32 single-byte
(no Chinese characters allowed for example) ASCII characters. The
name cannot be the same as another existing external volume.
JBOD
Use this if you want maximum storage capacity and/or you have other
means of protecting your data. JBOD is the only option if you only
have one disk installed. With two disks, you can choose to create a
JBOD volume on one of the disks or both.
RAID 0
Use this if you want maximum speed for your disks, and/or you have
other means of protecting your data. This is only available when you
have two hard disks installed.
RAID 1
Use this if you want to mirror all data on one disk to the other disk.
This is only available when you have two hard disks installed.
Volume will be
created on
This field lists all hard disks installed inside the NSA. Select which
disks should make up this volume. A disk can only belong to one
volume. You do not need to select anything if only one hard disk is
installed.
Apply
Click this to save your changes and create the volume.
Cancel
Click this to exit this screen without saving your changes or creating a
volume.
Note: Once you create the first volume on the NSA, it is recommended to restart the
NSA for better performance.
5.3.1 Volume Status
You (the administrator) can see the status of a volume in the Status or Storage
screens.
The NSA has the following classifications for the status of a volume:
• Healthy if all disks in the volume are OK and the file system is functioning
properly.
• OK means the USB connected device is functioning properly.
• Resync when you create a RAID volume.
116
NSA-220 Plus User’s Guide
Chapter 5 Storage
• Recovering appears when repairing a RAID 1 volume. (A RAID1 volume was
once degraded, but you have installed a new disk and the NSA is restoring the
RAID1 volume to a healthy state.)
• Degraded when a volume is currently down, but can be fixed. Data access may
be slower from a degraded volume, so it’s recommended that you replace the
faulty disk and repair the volume as soon as you can.
• Inactive when a disk is missing from a RAID 0 volume or a two-disk JBOD
volume. The volume is unusable. If you removed one of the disks you should be
able to re-install it and use the volume again (as long as you did not change
anything on the disk). If a disk has failed, you need to replace it and re-create
the whole volume. All data will be lost. See page 232 for how to install or
replace a hard drive.
• Down when a volume is down and can not be fixed.
A down RAID volume cannot be used until you repair or replace the faulty disk(s)
in the volume. Degraded means one of the disks in the RAID volume is not
available but the volume can still be used. For a degraded volume, you should
replace the faulty disk as soon as possible to obtain previous performance. See
your Quick Start Guide for more information on replacing a disk.
If it’s down, then the only indication is that you can no longer transfer files to/
from the shares in the down volume. If it’s degraded, then file transfer to/from the
shares in the degraded volume will be slower.
Note: There is no explicit message from CIFS that tells users their volume is
degraded or down.
5.4 Editing a Volume
Click an internal volume’s Edit icon in the Storage screen as shown in Figure 21
on page 113 to open the following screen. Use this screen to change the volume’s
name.
Figure 24 Storage > Edit
NSA-220 Plus User’s Guide
117
Chapter 5 Storage
The following table describes the labels in this screen.
Table 18 Storage > Edit
LABEL
DESCRIPTION
Volume Name
For an internal volume, type a volume name from 1 to 31
characters. To avoid confusion, it is highly recommended that
each volume use a unique name.
Acceptable characters are all alphanumeric characters and " "
[spaces], "_" [underscores], and "." [periods].
The first character must be alphanumeric (A-Z 0-9).
The last character cannot be a space " ".
For an external volume, type a volume name from 1 to 32
single-byte (no Chinese characters allowed for example) ASCII
characters. The name cannot be the same as another existing
external volume.
Apply
Click this to save your changes and rename the volume.
Cancel
Click this to close this screen without saving your changes.
5.5 Creating an External Volume
Click the Create a New External Volume button in the Storage screen as
shown in Figure 21 on page 113 to open the following screen. Use this screen to
create a new NSA external disk drive volume.
Note: Creating a volume formats the drive. All data on the disk will be lost.
Figure 25 Storage > Create an External Volume
118
NSA-220 Plus User’s Guide
Chapter 5 Storage
The following table describes the labels in this screen.
Table 19 Storage > Create an External Volume
LABEL
DESCRIPTION
Volume Name
Type a volume name from 1 to 31 characters. The name cannot be the
same as another existing external volume.
Acceptable characters are all alphanumeric characters and " " [spaces],
"_" [underscores], and "." [periods].
The first character must be alphanumeric (A-Z 0-9).
The last character cannot be a space " ".
Available
Disk(s)
Select the external (USB) device upon which you want to create the
volume.
File System
Select the file system you want the new volume to use.
Windows file systems
FAT32: Newer, and more efficient than FAT16. Supports a volume
size of up to 2 TB (Tera Bytes) and individual file sizes of up to 4 GB.
FAT16: Compatible with older Windows operating systems. Supports
volume and file sizes of up to 2 GB.
Linux file systems
EXT2: Older file system.
EXT3: The same as EXT2, but adds a journaled file system and is
more robust.
ReiserFS: Offers better performance for small files.
Apply
Click this to save your changes and create the volume.
Cancel
Click this to exit this screen without saving changes.
5.5.1 External Disks
You may connect USB storage devices that support the following file systems to
the NSA.
• Windows File Systems: NTFS, FAT32 and FAT16.
• Linux File Systems: ReiserFS, EXT2, and EXT3.
NSA-220 Plus User’s Guide
119
Chapter 5 Storage
5.6 Storage Technical Reference
This section provides some background information about the topics covered in
this chapter.
5.6.1 Volumes and RAID
A volume is a storage area on a disk or disks. You can create volumes on the
internal disks and external disks attached to the USB port(s). You can spread a
volume across internal disks but not between internal and external disks.
RAID (Redundant Array of Independent Disks) or JBOD is the storage method that
the NSA uses. The storage method you use depends on how many disks you have
and how many volumes you want to create. It’s important that you consider this
carefully as all data is deleted when you re-create a volume.
Note: Back up your data before deleting or re-creating a volume!
For example if you originally have one disk configured as JBOD, and you then
install another disk and want to configure the two disks to use RAID 1, you should
first back up all your data on the two disks (see the Memeo Autobackup utility on
the included CD) and then restore your data later after you create the new volume
type.
Below is a table that summarizes some attributes of the various RAID levels as
supported on the NSA. For capacity and storage efficiency, “S” is the size of the
smallest drive in the array, and “N” is the number of drives in the array.
Storage efficiency assumes all drives are of identical size.
Performance rankings are approximations.
Table 20 RAID Quick Comparison
RAID Level
Number of Disks
1
2
2
Capacity
S*N
S*N/2
Storage
Efficiency
100%
50%
Fault Tolerance
None
YYYY
Y
YYYY
Read
Performance
YYYY
YYY
Write
Performance
YYYY
YYY
Availability
120
0
NSA-220 Plus User’s Guide
Chapter 5 Storage
5.6.2 Choosing a Storage Method for a Volume
The following is a guide to help you choose a storage method for the various
number of disks supported on the NSA. See Section 5.6.3 on page 121 for
theoretical background on JBOD and the RAID levels used on the NSA. Typical
applications for each method are also shown there.
One Disk
If you only have one disk, you must use JBOD. All disk space is used for your data
- none is used for backup. If the disk fails, then you lose all the data on that
volume (disk). You can add another disk to your one-disk JBOD volume later
without having to re-create shares, access rights, and so on. Alternatively, you
could create a different JBOD volume if you install a second disk. (and create new
shares, access rights and so on).
Two Disks:
You may choose JBOD, RAID 0 or RAID 1. With two disks you could create:
• up to two JBOD volumes
• one RAID 0 or RAID 1 volume
• Choose JBOD for flexibility and maximum usage of disk space for data.
• Choose RAID 0 if performance matters more than data security. RAID 0 has
the fastest read and write performance but if one disk fails you lose all your
data on the volume. It has fast performance as it can read and write to two
disks simultaneously. Performance may matter more than data security to
gamers for example. This method may also be acceptable for data that is
already backed up somewhere else.
• Choose RAID 1 if data security is more important than performance. Since RAID
1 mirrors data onto a second disk, you can recover all data even if one disk fails,
but the performance is slower than RAID 0.
5.6.3 Storage Methods
This section contains theoretical background on JBOD and the RAID levels used on
the NSA. Redundant Array of Independent Disks (RAID) is a method of storing
data on multiple disks to provide a combination of greater capacity, reliability,
and/or speed. JBOD (Just a Bunch Of Disks) is not a RAID storage method but it is
included in this discussion.
These are some terms that you need to know in order to understand storage
systems.
NSA-220 Plus User’s Guide
121
Chapter 5 Storage
• Mirroring
In a RAID system using mirroring, all data in the system is written
simultaneously to two hard disks instead of one. This provides 100% data
redundancy as if one disk fails the other has the duplicated data. Mirroring
setups always require an even number of drives.
• Duplexing
Like in mirroring, all data is duplicated onto two distinct physical hard drives but
in addition it also duplicates the hardware that controls the two hard drives (one
of the drives would be connected to one adapter and the other to a second
adapter).
• Striping
Striping is the breaking up of data and storing different data pieces on each of
the drives in an array. This allows faster reading and writing as it can be done
simultaneously across disks. Striping can be done at the byte level, or in blocks.
Byte-level striping means that the first byte of the file is sent to the first drive,
then the second to the second drive, and so on. Block-level striping means that
each file is split into blocks of a certain size and those are distributed to the
various drives. The size of the blocks used is also called the stripe size (or block
size).
• Parity
In mirroring 50% of the drives in the array are reserved for duplicate data.
Parity is another way to allow data recovery in the event of disk failure using
calculations rather than duplicating the data. If you have ‘n’ pieces of data,
parity computes an extra piece of data. The’n+1’ pieces of data are stored on
‘n+1’drives. If you lose any one of the ‘n+1’ pieces of data, you can recreate it
from the ‘n’ that remain, regardless of which piece is lost. Parity protection is
used with striping, and the “n” pieces of data are typically the blocks or bytes
distributed across the drives in the array. The parity information can either be
stored on a separate, dedicated drive, or be mixed with the data across all the
drives in the array.
Note: In the following figures, A1, A2, A3 and so on are blocks of data from the A file.
Similarly, B1, B2, B3 and C1, C2, C3 ar blocks of data from the B and C files.
JBOD
JBOD allows you to combine multiple physical disk drives into a single virtual one,
so they appear as a single large disk. JBOD can be used to turn multiple differentsized drives into one big drive. For example, JBOD could convert 80 GB and 100
GB drives into one large logical drive of 180 GB. If you have two JBOD volumes
(with one disk in each), a failure of one disk (volume) should not affect the other
volume (disk). JBOD read performance is not as good as RAID as only one disk
can be read at a time and they must be read sequentially. The following figure
122
NSA-220 Plus User’s Guide
Chapter 5 Storage
shows disks in a single JBOD volume. Data is not written across disks but written
sequentially to each disk until it’s full.
Table 21 JBOD
A1
B1
A2
B2
A3
B3
A4
B4
DISK 1
DISK 2
RAID 0
RAID 0 spreads data evenly across two or more disks (data striping) with no
mirroring nor parity for data redundancy, so if one disk fails the entire volume will
be lost. The major benefit of RAID 0 is performance. The following figure shows
two disks in a single RAID 0 volume. Data can be written and read across disks
simultaneously for faster performance.
Table 22 RAID 0
A1
A2
A3
A4
A5
A6
A7
A8
DISK 1
DISK 2
RAID 0 capacity is the size of the smallest disk multiplied by the number of disks
you have configured at RAID 0 on the NSA. For example, if you have two disks of
sizes 100 GB and 200 GB respectively in a RAID 0 volume, then the maximum
capacity is 200 GB (2 * 100 GB, the smallest disk size) and the remaining space
(100 GB) is unused.
Typical applications for RAID 0 are non-critical data (or data that changes
infrequently and is backed up regularly) requiring high write speed such as audio,
video, graphics, games and so on.
RAID 1
RAID 1 creates an exact copy (or mirror) of a set of data on another disk. This is
useful when data backup is more important than data capacity. The following
NSA-220 Plus User’s Guide
123
Chapter 5 Storage
figure shows two disks in a single RAID 1 volume with mirrored data. Data is
duplicated across two disks, so if one disk fails, there is still a copy of the data.
Table 23 RAID 1
A1
A1
A2
A2
A3
A3
A4
A4
DISK 1
DISK 2
As RAID 1 uses mirroring and duplexing, a RAID 1 volume needs an even number
of disks (two or four for the NSA).
RAID 1 capacity is limited to the size of the smallest disk in the RAID array. For
example, if you have two disks of sizes 150 GB and 200 GB respectively in one
RAID 1 volume, then the maximum capacity is 150 GB and the remaining space
(50 GB) is unused.
Typical applications for RAID 1 are those requiring high fault tolerance without
need of large amounts of storage capacity or top performance, for example,
accounting and financial data, small database systems, and enterprise servers.
RAID and Data Protection
If a hard disk fails and you’re using a RAID 1 volume, then your data will still be
available (but at degraded speeds until you replace the hard disk that failed and
resynchronize the volume). However, RAID cannot protect against file corruption,
virus attacks, files incorrectly deleted or modified, or the NSA malfunctioning.
Here are some suggestions for helping to protect your data.
• Place the NSA behind a hardware-based firewall. It should have stateful packet
inspection, IDP (Intrusion Detection and Prevention), and anti-virus (like
ZyXEL’s ZyWALL UTM products for example).
• Use anti-virus software on your computer to scan files from others before saving
the files on the NSA.
• Keep another copy of important files (preferably in another location).
124
NSA-220 Plus User’s Guide
CHAPTER
6
Network
6.1 Overview
This chapter discusses the network configuration screens. The Network screens
allow you to configure TCP/IP and PPPoE settings for the NSA.
6.1.1 What You Can Do in the Network Screens
• Use the TCP/IP screen (Section 6.2 on page 126) to assign the NSA a dynamic
or static IP address and DNS information
• Use the PPPoE screen (Section 6.3 on page 129) to configure PPPoE settings
for a direct Internet connection.
6.1.2 What You Need to Know About Network
IP Address
The NSA needs an IP address to communicate with other devices on your network.
The NSA can get an IP address automatically if you have a device on your network
that gives them out. Or you can assign the NSA a static (fixed) IP address.
DNS Server Address
A DNS (Domain Name System) server maps domain names (like www.zyxel.com)
to their corresponding numerical IP addresses. This lets you use domain names to
access web sites without having to know their IP addresses. The NSA can receive
the IP address of a DNS server automatically (along with the NSA’s own IP
address). You can also manually enter a DNS server IP address in the NSA.
Jumbo Frames
Jumbo frames are Ethernet frames larger than 1500 bytes. They enable data
transfer with less overhead. The bigger the frame, the better the network
performance. Your network equipment such as computers, switches and routers
must be capable of supporting jumbo frames. You also need to enable jumbo
frames in all related network devices.
NSA-220 Plus User’s Guide
125
Chapter 6 Network
PPPoE
Point-to-Point Protocol over Ethernet (PPPoE) allows the NSA to establish a direct
Internet connection if you do not have a router. PPPoE is a dial-up connection. You
need a username and password from your Internet Service Provider (ISP) to set
up the connection.
6.2 The TCP/IP Screen
Use the TCP/IP screen to have the NSA use a dynamic or static IP address,
subnet mask, default gateway and DNS servers.
6.2.1 Jumbo Frames
To use jumbo frames, your LAN must support 1 Gbps transmissions (Gigabit
Ethernet). All of your network devices (computer Ethernet cards and switches,
hubs, or routers) must also support the same size of jumbo frames that you
specify in the NSA.
Note: If you enable jumbo frames on the NSA in a network that does not support
them, you will lose access to the NSA. If this occurs, you will have to restore the
factory default configuration. Push the RESET button on the NSA’s rear panel
and release it after you hear a beep.
In the following example, the NSA has jumbo frames enabled and set to 8KB
frames. This means the computer, notebook computer, and switch must also have
jumbo frames enabled and be capable of supporting 8KB frames.
Figure 26 Jumbo Frames
1 Gbps Ethernet
8KB
8KB
126
8KB
8KB
NSA-220 Plus User’s Guide
Chapter 6 Network
6.2.2 Configuring the TCP/IP Screen
Click Network > TCP/IP in the navigation panel to open the following screen.
Note: If you change the NSA’s IP address, you need to log in again after you apply
changes.
Figure 27 Network > TCP/IP
The following table describes the labels in this screen.
Table 24 Network > TCP/IP
LABEL
DESCRIPTION
IP Address
Dynamic
Select this option to have the NSA get IP address information
automatically.
If no IP address information is assigned, the NSA uses Auto-IP to
assign itself an IP address and subnet mask. For example, you could
connect the NSA directly to your computer. If the computer is also
set to get an IP address automatically, the computer and the NSA will
choose addresses for themselves and be able to communicate.
Static
IP Address
NSA-220 Plus User’s Guide
Select this option for the NSA to use fixed TCP/IP information. You
must fill in the following fields.
Type an IP address in this field.
127
Chapter 6 Network
Table 24 Network > TCP/IP (continued)
LABEL
DESCRIPTION
IP Subnet Mask Type an IP subnet mask in this field.
Default
Gateway
Type a default gateway address in this field.
DNS
DNS (Domain Name System) is for mapping a domain name to its
corresponding IP address and vice versa. If you have the IP
address(es) of the DNS server(s), enter them.
Dynamic
Select the option to have the NSA get a DNS server address
automatically.
Static
Select this option to choose a static DNS server address. Type the
DNS server IP address(es) into the fields below.
Primary DNS
Server
Type a primary DNS server IP address.
Secondary
DNS Server
Type a secondary DNS server IP address.
HTTP (Web Configurator)
Enable Another
Web Configuration
Port
Select this to configure an additional HTTP port for accessing the web
configurator. Specify a number in the Port Number field.
Jumbo Frames
Jumbo frames improve network performance. You must have a 1
Gbps (Gigabit Ethernet) network that supports jumbo frames. Select
the largest size of frame that all of your network devices (including
computer Ethernet cards and switches, hubs, or routers) support.
Note: If you enable jumbo frames on the NSA in a network that
does not support them, you will lose access to the NSA. If
this occurs, you will have to restore the factory default
configuration. Push the RESET button on the NSA’s rear
panel and release it after you hear a beep.
128
Network
Diagnostic Tool
Use this section to test the network connection to a particular IP
address or domain name. Select an address or type it into the field.
Then click Ping to have the NSA send a packet to test the network
connection. If the NSA is able to “ping” the host, the network
connection is OK.
Apply
Click this to save your TCP/IP configurations. After you click Apply,
the NSA restarts. Wait until you see the Login screen or until the
NSA fully boots and then use the NDU to rediscover it.
Reset
Click this to restore your previously saved settings.
NSA-220 Plus User’s Guide
Chapter 6 Network
6.3 The PPPoE Screen
Click Network > PPPoE in the navigation panel to open the following screen.
PPPoE allows the NSA to establish a direct Internet connection.
Figure 28 Network > PPPoE
The following table describes the labels in this screen.
Table 25 Network > PPPoE
LABEL
DESCRIPTION
Status
Status
This field displays the status of PPPoE connection.
IP Address
This field displays the IP address of your PPPoE connection.
IP Subnet Mask
This field displays the IP subnet mask of your PPPoE connection.
Configuration
Enable PPPoE
Connection
Select this option to establish a direct Internet connection for the NSA.
You need to enter the username and password as given by your ISP.
Username
Enter the username exactly as your ISP assigned. If assigned a name
in the form user@domain where domain identifies a service name,
then enter both components exactly as given.
Password
Enter the password associated with the username above.
Password
(Confirm)
Retype the password for confirmation.
Apply
Click this to save your changes.
Reset
Click this to restore previously saved settings.
NSA-220 Plus User’s Guide
129
Chapter 6 Network
130
NSA-220 Plus User’s Guide
CHAPTER
7
Applications
7.1 Overview
This chapter discusses the features in the Application screens. The NSA contains
various applications for file sharing and downloading.
7.1.1 What You Can Do in the Application Screens
• Use the FTP screen (Section 7.2 on page 133) to configure settings for FTP file
transfers to/from the NSA.
• Use the Media Server screen (Section 7.3 on page 135) to share files with
media clients.
• Use the Download Service screen (Section 7.4 on page 138) to download files
from the Internet.
• Use the Web Publishing screen (Section 7.5 on page 152) to publish shares
for people to access files using a web browser.
• Use the Broadcatching screen (Section 7.6 on page 158) to download
frequently updated digital content like TV programs, radio talk shows, Podcasts
(audio files), and blogs.
• Use the Print Server screen (Section 7.7 on page 162) to share a printer.
• Use the Copy/Sync Button screen (Section 7.8 on page 164) to transfer files
between a USB device and the NSA.
• Use the Flickr/YouTube screen (Section 7.9 on page 169) to upload photos
and music to your Flickr and YouTube accounts.
• Use the FTP Uploadr screen (Section 7.10 on page 178) to upload files to your
FTP servers.
7.1.2 What You Need to Know About Applications
FTP
File Transfer Protocol (FTP) is a file transfer service that operates on the Internet.
A system running the FTP server accepts commands from a system running an
FTP client. FTP is not a secure protocol. Your file transfers could be subject to
snooping.
NSA-220 Plus User’s Guide
131
Chapter 7 Applications
FTPS (File Transfer Protocol over TLS)
File Transfer Protocol over TLS (FTPS) is a file transfer service that uses TLS
(Transport Layer Security) for secure transfers across the Internet.
Media Server
The media server feature lets anyone on your network play video, music, and
photos from the NSA (without having to copy them to another computer). The
NSA can function as a DLNA-compliant media server and/or an iTunes server. The
NSA streams files to DLNA-compliant media clients or computers using iTunes.
The Digital Living Network Alliance (DLNA) is a group of personal computer and
electronics companies that works to make products compatible in a home
network.
iTunes Server
The NSA iTunes server feature lets you use Apple’s iTunes software on a computer
to play music and video files stored on the NSA. You can download iTunes from
www.apple.com.
Download Service
The NSA’s download service downloads files from the Internet directly to the NSA.
You do not have to download to your computer and then copy to the NSA. This can
free up your computer’s system resources.
The NSA can download using these protocols.
• HTTP: The standard protocol for web pages.
• FTP: A standard Internet file transfer service.
• BitTorrent: A popular distributed peer-to-peer files sharing protocol.
BitTorrent
The NSA includes a BitTorrent client for fast downloading and sharing of large files
(such as educational public domain videos). With BitTorrent, you share while
you’re downloading the file. BitTorrent breaks up the file and distributes it in
hundreds of chunks. You start sharing the file as soon as you have downloaded a
single chunk.
Web Publishing
Web publishing lets you “publish” shares (containing folders and files) on the NSA
so people can access the files using a web browser without having to log into the
132
NSA-220 Plus User’s Guide
Chapter 7 Applications
My NSA screens. This way you can share files with others without them having to
know and enter a username and password.
For example, if you want to share photos in a FamilyPhotos share, you could “web
publish” it and others could use a web browser to access the photos at http://myNSA’s-IP-Address/MyWeb/FamilyPhotos.
Broadcatching
Broadcatching is the downloading of digital content from Internet feeds. Use
broadcatching to have the NSA download frequently updated digital content like
TV programs, radio shows, podcasts (audio files), and blogs.
RSS
RSS (Really Simple Syndication) is a format for delivering frequently updated
digital content. A channel uses a feed to deliver its contents (items). Subscribe the
NSA to a feed to be able to download the contents.
7.2 The FTP Screen
Use FTP or FTP over TLS to upload files to the NSA and download files from the
NSA. Click Applications > FTP to open the following screen.
Note: Your FTP client must be set to use FTP over TLS in order to use FTPS with the
NSA. If your FTP client offers multiple types of FTP over TLS, use explicit
encryption.
Figure 29 Applications > FTP
NSA-220 Plus User’s Guide
133
Chapter 7 Applications
The following table describes the labels in this screen.
Table 26 Applications > FTP
LABEL
DESCRIPTION
FTP
Enable FTP
You can use FTP to send files to the NSA or get files from the NSA.
Select this check box to allow users to connect to the NSA via FTP;
otherwise clear the check box.
Connection Limit
Enter the maximum number of concurrent FTP connections allowed
on the NSA in this field.
Idle Timeout
Enter the length of time that an FTP connection can be idle before
timing out.
Enable Anonymous
FTP Access
Select this check box to allow any user to log into the NSA using
‘FTP’ or ‘anonymous’ as a username and no password. Any other
name is considered a username, so must be valid and have a
corresponding correct password.
Customize the port
range for data
transfer
Select this check box to assign a port range for FTP clients to use
when downloading files from the NSA using passive mode.
The connection limit is restricted to half of the port numbers within
the range if this value is smaller than the one configured in the
Connection Limit field. For example, you specified a port range
from 1024 to 1029 and configured 10 in the Connection Limit
field. The FTP connection limit will only be 3 (6 ports in the range
divided by 2) because it is the smaller value.
Starting Port
Enter the first port number in the range. Choose from 1024 to
65535.
Ending Port
Enter the last port number in the range. Choose from 1024 to
65535.
Character Set
The NSA uses UTF-8 (8-bit UCS/Unicode Transformation Format)
format for FTP by default. If the NSA’s folders, or file names do not
display correctly in your FTP client, select the appropriate language
encoding here.
This setting applies to all FTP client connections to the NSA. It does
not affect your Windows/CIFS connections (it will not correct the
character display in Windows Explorer).
134
Apply
Click this to save your changes.
Reset
Click this to restore your previously saved settings.
NSA-220 Plus User’s Guide
Chapter 7 Applications
7.3 The Media Server Screen
The Media Server screen allows you to share files with media clients.
7.3.1 Sharing Media Files on Your Network
The media server feature lets anyone on your network play video, music, and
photos from the NSA (without having to copy them to another computer). The
NSA can function as a DLNA-compliant media server and/or an iTunes server. The
NSA streams files to DLNA-compliant media clients or computers using iTunes.
The Digital Living Network Alliance (DLNA) is a group of personal computer and
electronics companies that works to make products compatible in a home
network.
• Publish shares to let others play the contained media files.
• The media server is a convenient way to share files you download using the
broadcatching service (see Section 7.6 on page 158).
• Hardware-based media clients like the DMA-1000 can also play the files. See
Section 14.4 on page 250 for the supported multimedia file formats.
Note: Anyone on your network can play the media files in the published shares. No
user name and password or other form of security is used. The media server is
enabled by default with the video, photo, and music shares published.
Songs and Videos from the iTunes Store
After using iTunes on your computer to download songs and videos from Apple’s
iTunes Store, you can copy them to the NSA. Many of these songs and videos
have DRM (Digital Rights Management). At the time of writing, you can use your
Apple account ID and password to authorize up to a total of five computers to play
the files. To authorize a computer, open iTunes and click Store > Authorize
Computer.
NSA-220 Plus User’s Guide
135
Chapter 7 Applications
A link for the NSA in iTunes under SHARED. Click it to display the NSA’s published
media files as shown next.
Figure 30 NSA link in iTunes
7.3.2 Configuring the Media Server Screen
Click Applications > Media Server to open the following screen. Use this screen
to turn the media server and/or iTunes server on or off and select shares to
publish (share with media clients like iTunes).
Figure 31 Applications > Media Server
136
NSA-220 Plus User’s Guide
Chapter 7 Applications
The following table describes the labels in this screen.
Table 27 Applications > Media Server
LABEL
DESCRIPTION
Media Server Name
This is the name of the NSA media server on the network. It is
the same as the NSA’s server name. This name lets media
clients distinguish between multiple media servers on your
network.
Disable / Enable Media
Server
Turn on the media server to let (DLNA-compliant) media clients
on your network play media files located in the published
shares. See Section 14.4 on page 250 for the multimedia file
formats iTunes supports.
Rebuild Database
This option is available when you select Enable Media Server.
Select this option to repair the files on the media server. For
example, if the NSA got disconnected while downloading or
uploading files, it might corrupt some files on the media server.
Unpublished Shares
This list box displays the shares that the NSA does not share
with the media clients.
Publish Selected
Share(s)
Select shares in the Unpublished Shares box and click this to
share the shares with media clients. Use the [SHIFT] key to
select a range of entries. Hold down the [CTRL] key to select
multiple individual entries.
Published Shares
This list box displays the shares that the NSA shares with the
media clients.
Unpublish Selected
Share(s)
Select shares in the Published Shares box and click this to not
share the shares with media clients. Use the [SHIFT] key to
select a range of entries. Hold down the [CTRL] key to select
multiple individual entries.
Enable iTunes Server
Select this option to let anyone on your network use iTunes to
play music and video files in the published shares.
Apply
Click this to save your changes.
Reset
Click this to restore your previously saved settings.
NSA-220 Plus User’s Guide
137
Chapter 7 Applications
7.4 The Download Service Screen
The Download Service screen allows you to download files from the Internet.
7.4.1 Download Service
The NSA’s download service downloads files from the Internet directly to the NSA.
You do not have to download to your computer and then copy to the NSA. This can
free up your computer’s system resources. The download service also handles
your broadcatching downloads. See Section 7.6 on page 158 for information on
broadcatching.
The NSA can download using these protocols.
• HTTP: The standard protocol for web pages.
• FTP: A standard Internet file transfer service.
• BitTorrent: A popular distributed peer-to-peer files sharing protocol.
Note: Do not use the NSA for illegal purposes. Illegal downloading or sharing of files
can result in severe civil and criminal penalties. You are subject to the
restrictions of copyright laws and any other applicable laws and will bear the
consequences of any infringements thereof. ZyXEL bears NO responsibility or
liability for your use of the download service feature.
Torrent Files
The NSA needs a “.torrent” file for BitTorrent to download a file. The torrent file
gives the NSA information about the file to be downloaded (and shared) and the
tracker(s) (computers) that coordinates the distribution of the file.
When you add a BitTorrent download task in the NSA’s web configurator screens,
you can copy and paste the URL of the torrent file. The NSA automatically
downloads the torrent file and saves it in a torrent folder within the folder where
the NSA stores downloaded files (the admin share’s download folder by default).
If you already have the torrent file saved on your computer, you can just specify
its location when adding a download task through the web configurator. Another
method is to use FTP or a CIFS program (Windows Explorer for example) to copy
the torrent file into the torrent folder. The NSA automatically uses the torrent file.
After your BitTorrent download and sharing are finished, you can go to the
incoming folder within the destination share or folder and delete the .torrent file
if you need to free up hard disk space.
138
NSA-220 Plus User’s Guide
Chapter 7 Applications
7.4.2 Configuring the Download Service Screen
Click Applications > Download Service to open the following screen. Use this
screen to manage the NSA’s file downloads.
Note: By default, the NSA saves downloads in the admin share’s download folder.
Figure 32 Applications > Download Service
The following table describes the labels in this screen.
Table 28 Applications > Download Service
LABEL
DESCRIPTION
Enable
Download
Service
Use this option (and the Apply button) to turn the download service off
or on. If you turn off the service, all downloads are paused. The files
that were downloading are treated as queued. Turning the download
service back on resumes your downloads (or restarts them if they are
not able to be resumed).
Enable
Download
Notify
Use this option (and the Apply button) to turn the download service
notification off or on. See Section 7.4.5 on page 144 for more details
about this feature.
Add
After you find a file to download, copy the file’s URL. Then log into the
NSA web configurator and go to the Applications > Download Server
screen and click this button. A screen opens where you create a new
download task. You can paste the file’s URL or use a BitTorrent file.
Preferences
Click this to open a screen where you can set the default location for
saving downloads and configure your BitTorrent settings.
Refresh
Click this to update the information displayed on the screen.
Delete
To delete download tasks (or manually clear out completed download
tasks), select a download task and click this to remove it from the list. A
pop-up screen asks you to confirm. Click Apply to delete or Cancel to
quit. When you delete a download task, you are given the option to
delete the associated files. Selecting this option deletes a downloaded
file and in the case of a BitTorrent download task, also deletes the
related .torrent file.
Use your keyboard’s [SHIFT] key to select a range of download tasks.
Use the [CTRL] key and click individual download tasks to select
multiple individual download tasks.
NSA-220 Plus User’s Guide
139
Chapter 7 Applications
Table 28 Applications > Download Service (continued)
LABEL
DESCRIPTION
Pause
Select a downloading item and click this to temporarily stop the
download. Paused downloads appear in the Download Service
screen’s Inactive tab.
Use your keyboard’s [SHIFT] key to select a range of download tasks.
Use the [CTRL] key and click individual download tasks to select
multiple individual download tasks.
Resume
Select a paused item and click this to continue downloading the file.
Select a completed item and click this to re-seed a torrent file or
download a file again. If you want to re-seed a BitTorrent task, keep the
torrent file and the completed file in their original locations.
Task Info
Select an item on the list and click this to display information about the
download task. See Section 7.4.8 on page 149 for more details.
The table lists your downloads. Click a column’s heading to sort the
entries by that criteria.
Active
Click this to see the list of files the NSA is currently downloading or
sharing with other BitTorrent users. The NSA handles a maximum of 10
active tasks at a time (or fewer depending on how much of the NSA’s
system memory is available). If you add more, they appear in the
Inactive tab.
Bit Torrent downloads may appear in the Inactive tab for a while
before showing in the Downloading tab. The NSA automatically moves
completed tasks to the Completed tab.
Inactive
Click this to see the list of files that are queued (waiting in line) for the
NSA to download or the downloads that have been manually paused.
Completed
Click this to see the list of files that the NSA has finished downloading.
The Location column shows where a downloaded file is saved on the
NSA. Click on the location link to open the share browser and access the
file.
Error
Click this to see the list of files that the NSA was not able to download.
The NSA automatically retries unsuccessful download attempts. The
download displays in the error tab when the re-attempts are also
unsuccessful and the NSA stops trying to download the file. To try the
download again, use the Add button to create a new download task.
Status
The icon shows the download’s status.
Completed: The NSA has downloaded the whole file.
Seeding: The download is finished and the NSA is allowing other
BitTorrent users to download it.
Downloading: The NSA is getting the file.
Queued: The download is waiting in line for the NSA to download it.
Pause: The download has been manually stopped. Select it and click
Resume to continue it.
Error: The NSA was not able to complete the download. Select it and
click Resume to reattempt the download.
140
NSA-220 Plus User’s Guide
Chapter 7 Applications
Table 28 Applications > Download Service (continued)
LABEL
DESCRIPTION
Name
This identifies the download file. A “...” indicates an abbreviated name.
Hold your cursor over the name to display the full name.
Complete (%)
This is the percentage of the file that the NSA has downloaded.
Location
This appears in the Completed tab. It displays the path for where the
file is saved. Click on the location link to open the share browser and
access the file.
Seeds
Seeds apply to BitTorrent downloads. This is the number of computers
that are sharing the complete file that you are downloading.
Peers
Peers apply to BitTorrent downloads. This is the number of other
computers that are also downloading (and sharing) the file you are
downloading.
Download
Speed
This is how fast the NSA is getting the file.
Upload Speed
This is how fast the NSA is sending the file to other BitTorrent users.
Time Left
This is how much longer (in hours, minutes, and seconds) it should take
to finish the download at the current download speed.
Priority
This is the download’s priority on the NSA. You can set a currently
downloading or queued download to high or automatic priority. You can
set a download to high priority to have the NSA try to download it
before the other files. However the actual download speed depends
more on factors like the speed of you Internet connection, the speed of
the download source’s Internet connection, how many others are trying
to download at the same time, the peers and seeds available and
general network conditions.
NSA-220 Plus User’s Guide
It is normal for a BitTorrent download to start out with a slow download
speed since it has to set up numerous connections. The speed should
increase as the download progresses and decrease near the end of the
download.
141
Chapter 7 Applications
7.4.3 Adding a Download Task
Click Applications > Download Service > Add to open the following screen.
Use this screen to specify a file for the NSA to download. Section 3.3 on page 59
provides a tutorial on adding a download task.
Figure 33 Applications > Download Service > Add
The following table describes the labels in this screen.
Table 29 Applications > Download Service > Add
LABEL
DESCRIPTION
URL
Paste the URL of the file you want to download into this field. The URL can
be for an HTTP, FTP, or BitTorrent download.
For a BitTorrent download, you can copy and paste the URL of the .torrent
file. The NSA will automatically download the .torrent file and use it. You do
not have to manually download the .torrent file or save it to your computer.
Note: Make sure the link opens either the file you want or a pop-up
window about how to handle the file.
It is also OK for the link to open a .torrent file. If you are redirected to a
screen that says the download should start in a few seconds, there may be
a link to click if the download does not start automatically. See if that link
opens the file or the pop-up window.
142
Torrent File
A “torrent” file has information the NSA uses to do a BitTorrent download. A
torrent file uses a .torrent extension. If you already have a torrent file saved
on your computer, select the Torrent File option and specify its path or
click Browse and look for its location.
Default
Destination
This shows where the NSA stores files after downloading them.
Volume
This is the volume where the NSA saves downloaded files.
Path
This is the location of the share where the NSA will save the downloaded
files. Click Edit to go to a screen where you can set the default location for
saving downloads and configure your BitTorrent settings.
NSA-220 Plus User’s Guide
Chapter 7 Applications
Table 29 Applications > Download Service > Add
LABEL
DESCRIPTION
Apply
Click this to save your changes.
Cancel
Click this to return to the previous screen without saving.
7.4.4 Link Capture Browser Plugin
The link capture browser plugin is an add-on feature for your web browser. Use
the plugin to directly add a file’s URL to the NSA’s download service.
Note: The link capture browser plugin is located in the included CD.
The following screen displays how the plugin works.
Figure 34 Link Capture Browser Plugin
Instead of copying and pasting a file’s URL to the NSA’s download service, you can
right-click on the URL in the web browser and select Send to NSA. The URL is
then added to the NSA’s download service list.
See Section 3.3.2 on page 62 and Section 3.3.3 on page 67 for tutorials about
installing and using the link capture browser plugin.
Note: At the time of writing, the plugin supports Internet Explorer 6.0/7.0 and Mozilla
Firefox 2.0/3.0.
NSA-220 Plus User’s Guide
143
Chapter 7 Applications
7.4.5 Download Service Notification
Use the download service notification to keep track of downloaded files on the
NSA. You can subscribe the NSA’s download list to an RSS reader on your
computer. When the NSA finishes downloading new files, your RSS reader displays
the information and links for the files. You can download the files from the RSS
reader to your computer.
See Section 3.3.5 on page 71 for a tutorial about using the download service
notification.
In the Download Service screen, select Enable Download Notify and click
Apply. An RSS feed icon appears. Click the icon to subscribes the NSA’s download
list to an RSS reader.
Note: The download service notification only keeps track of files downloaded via
BitTorrent.
Figure 35 Download Service Notification
144
NSA-220 Plus User’s Guide
Chapter 7 Applications
7.4.6 Configuring Download Service General Settings
Click Applications > Download Service > Preferences to open the following
screen. Use this screen to set the default location for saving downloads and
configure the download period.
Figure 36 Applications > Download Service > Preferences > General Settings
The following table describes the labels in this screen.
Table 30 Applications > Download Service > Preferences > General Settings
LABEL
DESCRIPTION
Default Destination
Use these fields to select where on the NSA to store the files the
NSA downloads.
Files downloaded via HTTP/FTP are saved in the destination share
or folder.
Files downloaded via BitTorrent are saved in the incoming folder
within the destination share or folder.
Shares
If you have more than one volume, select the one that contains
the share where you want to save downloaded files.
Path
Type the location of the share to save downloaded files in or click
Browse and navigate to the file’s location.
Download Period
Control
This feature sets the NSA to download files only within a specified
time period.
Enable Download
Period Control
Use the check box to turn the download period control on or off.
NSA-220 Plus User’s Guide
145
Chapter 7 Applications
Table 30 Applications > Download Service > Preferences > General Settings
LABEL
DESCRIPTION
Download Service is
active in the time
period (hh:mm hh:mm)
Specify the time period for the NSA to download files.
Apply
Click this to save your changes.
Reset
Click this to restore your previously saved settings.
Cancel
Click this to return to the previous screen without saving.
Note: If you also configured the Power On/Off Schedule
feature in the Power Management screen, make sure
your active download period does not conflict with the
power-off period.
7.4.7 Configuring the BitTorrent Settings
Click Applications > Download Service > Preferences > BitTorrent to open
the following screen. Use this screen to configure BitTorrent settings.
Figure 37 Applications > Download Service > Preferences > BitTorrent
146
NSA-220 Plus User’s Guide
Chapter 7 Applications
The following table describes the labels in this screen.
Table 31 Applications > Download Service > Preferences > BitTorrent
LABEL
DESCRIPTION
Port Number
Assign a port number for BitTorrent downloads. You can select a
number from 2 to 65536. It is recommended to use a port
number greater than 1025.
Max. download rate
You may need to limit the bandwidth the NSA uses for BitTorrent
downloads if your network’s other Internet applications are not
getting enough downstream bandwidth. 0 has the NSA impose no
restriction.
Max. upload rate
You may need to limit the bandwidth the NSA uses to share files
through BitTorrent if your network’s other Internet applications
are not getting enough upstream bandwidth. 0 has the NSA
impose no restriction.
If you do not allow any uploads, (for example, you set a limit of 1
KB/s) you will not have a good standing in the BitTorrent
community.
Note: The settings for maximum download/upload rates
would not affect peers accessing the NSA from the
same LAN.
Maximum Number of
Active Torrents
Specify how many simultaneous BitTorrent downloads are allowed
on the NSA. You can enter a number from 1 to 10.
Maximum Number of
Seeding Jobs
Specify how many simultaneous seeds are allowed on the NSA.
Enter a number from 1 to 10. This value cannot exceed the one
you configured in the Maximum Number of Active Torrents
field.
Keep Sharing While
With BitTorrent, the NSA starts sharing a file while you are
downloading it. Set how long to continue sharing a file after the
NSA finishes the download.
Select Upload/Download Ratio to keep sharing a file until the
NSA has uploaded a specific percent compared to the download.
Select Seeding Time to keep sharing a file for a specific number
of minutes after the download finishes.
Continuing to share a file helps other BitTorrent users finish
downloading it. Sharing out at least as much as you download
helps keep you in good standing in the BitTorrent community.
Enter -1 to share a file indefinitely. Leave both check boxes blank
to have the NSA stop sharing the file as soon as the download
finishes.
If you select both options, the NSA keeps sharing a file until both
conditions exceed the values you configure. For example, you
entered 150% in the Upload/Download Ratio field and 120
minutes in the Seeding Time field. The NSA keeps sharing a file
until it has shared 1.5 times the size of the file and has passed
120 minutes.
NSA-220 Plus User’s Guide
147
Chapter 7 Applications
Table 31 Applications > Download Service > Preferences > BitTorrent
LABEL
DESCRIPTION
Enable IP Filter
Use the check box to enable or disable IP filtering for BitTorrent
downloads.
IP filtering blocks IP addresses known to share fake files. You can
either get an IP filter table from a website or use your own table.
Update IP Filter
Table File from the
Internet Every
Week
Select this option and enter a URL to use an online IP filter table.
You can find an online IP filter table in websites such as http://
www.bluetack.co.uk/config/level1.gz.
Update Now
Select the check box and click Apply to update the IP filter table
from the specified URL.
When you change the URL of the online IP filter table, the NSA
also performs an update after you click Apply.
Upload IP Filter
Table
Select this option to upload your own IP filter table. Use the
Browse button to locate the file and click Upload to save it on
the NSA.
The NSA supports .txt, .dat, .gz, .tgz, and .tar.gz file extentions.
The NSA saves the IP filter table as /admin/download/
ipfilter.dat.
148
Download Current IP
Filter Table
Click this to save a copy of the IP filter table on your computer.
Apply
Click this to save your changes.
Reset
Click this to restore your previously saved settings.
Cancel
Click this to return to the previous screen without saving.
NSA-220 Plus User’s Guide
Chapter 7 Applications
7.4.8 Displaying the Download Task Information
Select an item on the list and click Task Info. Use this screen to check detailed
information about the download task.
Figure 38 Applications > Download Service > Task Info
The following table describes the labels in this screen.
Table 32 Applications > Download Service > Task Info
LABEL
DESCRIPTION
Status
This is the current status of the download task.
Name
This is the name of the download task.
Size
This is the size of the file to be downloaded.
Uploaded/
Downloaded Ratio
This is the ratio of total uploaded data to downloaded data.
Complete(%)
This field displays how much has been downloaded to the NSA.
Seeds
This field displays how many seeds are being shared for this
download task.
Peers
This field displays how many peers are sharing the file.
Download Speed
This field displays how fast the NSA downloads the file.
Upload Speed
This field displays fow fast the NSA uploads the file.
Health
This field displays how many full copies of the file are available for
this download task. The NSA can download a file with a higher
health value more efficiently. If the health value is less than 1
(0.65 for example), there is no full copy of the file, and the NSA
may not be able to complete downloading the file.
Time Left
This is the time remaining to complete the download task.
NSA-220 Plus User’s Guide
149
Chapter 7 Applications
Table 32 Applications > Download Service > Task Info
LABEL
DESCRIPTION
Priority
Use this field to set the priority for downloading the task.
Select Auto to have the NSA automatically determine the
download task’s priority.
Select High to have the NSA download this file before the other
files.
Comment
Enter a description for this download task.
Start Time
This field displays when the NSA started to download files.
Completed on
This field displays when the file was successfully downloaded to
the NSA.
Info-Hash
This information is used to verify the torrent file.
Tracker
This field displays the tracker that NSA is currently connected to.
A tracker is a server used for finding peers sharing the file.
Close
Click this to close the screen.
7.4.9 BitTorrent Security
When you download using BitTorrent, you reveal your IP address. This increases
the risk of hacking attacks, which can be protected against by a good firewall.
Use a Hardware-based Firewall
Place a hardware-based firewall between your network and the Internet (a
software-based firewall on your computer would just protect the computer itself,
not the NSA since your computer is not between your NSA and the Internet).
Ideally your firewall should have all of the following.
Figure 39 Firewall
Hacking
Malicious
Packets
Viruses
• Stateful packet inspection to control access between the Internet and your
network and protect your NSA (and computers) from hacking attacks.
150
NSA-220 Plus User’s Guide
Chapter 7 Applications
• IDP (Intrusion Detection and Prevention) to detect malicious packets within
normal network traffic and take immediate action against them.
• Anti-virus to check files you download for computer viruses.
BitTorrent and Your Firewall
The anti-virus feature on a firewall probably cannot check BitTorrent downloads
for viruses, so use anti-virus software on your computer to scan the NSA for
viruses.
When you download using BitTorrent, many other BitTorrent users are also trying
to download the file from you. The firewall slows this down because by default, it
only allows traffic from the Internet in response to a request that originated on the
LAN (it lets you get files from the Internet and blocks those on the Internet from
getting files from you).
Figure 40 Firewall Blocking Incoming BitTorrent Requests
Incoming BitTorrent Requests Blocked
Outgoing BitTorrent Request Allowed
Corresponding BitTorrent Reply Allowed
To speed up BitTorrent file transfers, configure your firewall’s port forwarding to
send incoming TCP port 6881 and UDP port 6880 connections to the NSA. You
probably need to use your firewall’s HTML (web-based) configuration interface to
NSA-220 Plus User’s Guide
151
Chapter 7 Applications
set this up (see the firewall’s manual for details). You may also have to configure
a corresponding firewall rule.
Figure 41 Firewall Configured to Allow Incoming BitTorrent Requests
Incoming BitTorrent Requests Allowed
Other Incoming Traffic Blocked
7.5 The Web Publishing Screen
Click Applications > Web Publishing to open the following screen. Use this
screen to turn web publishing on or off and select shares to publish.
Figure 42 Applications > Web Publishing
152
NSA-220 Plus User’s Guide
Chapter 7 Applications
The following table describes the labels in this screen.
Table 33 Applications > Web Publishing
LABEL
DESCRIPTION
Disable / Enable Web
Publishing
Turn on web publishing to let people access files in the published
shares using a web browser, without having to log into the My
NSA screens.
Port Number
Specify a port number for accessing the published share
websites hosted on the NSA. If you enter a number other than
80, make sure you include it when telling others how to access
the web-published share. For example, say you specified port
8080, the NSA’s IP address is 192.168.1.23, and the name of
the web-published share is FamilyPhotos. You would have to
enter “http://192.168.1.23:8080/MyWeb/FamilyPhotos/” in
your browser’s address bar to access the share’s web page.
Unpublished Shares
This list box displays the shares that the NSA does not publish
for web browser access.
Publish Selected
Share(s)
Select shares in the Unpublished Shares box and click this to
let people access files in the published shares using a web
browser, without logging into the My NSA screens. Use the
[SHIFT] key to select a range of entries. Hold down the [CTRL]
key to select multiple individual entries.
Published Shares
This list box displays the shares people can access using a web
browser, without logging into the My NSA screens.
Unpublish Selected
Share(s)
Select shares in the Published Shares box and click this to not
let people access using a web browser without logging into the
My NSA screens. Use the [SHIFT] key to select a range of
entries. Hold down the [CTRL] key to select multiple individual
entries.
Apply
Click this to save your changes.
Reset
Click this to restore your previously saved settings.
7.5.1 Web Publishing Example
This example covers how to configure the Web Publishing screen to let people
use a web browser to access a share named FamilyPhotos without logging into the
My NSA screens and shows how to access the share through the Internet.
NSA-220 Plus User’s Guide
153
Chapter 7 Applications
1
Click Applications > Web Publishing and configure the screen as shown
(enable the web publishing and move FamilyPhotos over to Published Shares)
and click Apply.
Figure 43 Applications > Web Publishing (Example)
154
NSA-220 Plus User’s Guide
Chapter 7 Applications
2
Now open your web browser and type in the address of the NSA’s FamilyPhotos
web page. In this example, the NSA’s IP address is 192.168.1.33, and the name
of the web-published share is FamilyPhotos. So you would enter “http://
192.168.1.33/MyWeb/FamilyPhotos/” in your browser’s address bar. Then press
[ENTER] or click Go. A screen displays listing the share’s files.
Figure 44 Browsing to an NSA Share Example
• Click a file’s link to open the file.
• Right-click a file’s link and select Save Target As.. (in Internet Explorer) to
save a copy of the file.
• Click a label in the heading row to sort the files by that criteria.
• To customize how the page looks and works, create an index.html or index.htm
file and store it in the share.
7.5.2 Web Publishing
Web publishing lets you “publish” shares (containing folders and files) on the NSA
so people can access the files using a web browser without having to log into the
My NSA screens. This way you can share files with others without them having to
know and enter a user name and password.
For example, if you want to share photos in a FamilyPhotos share, you could “web
publish” it and others could use a web browser to access the photos at http://myNSA’s-IP-Address/MyWeb/FamilyPhotos.
NSA-220 Plus User’s Guide
155
Chapter 7 Applications
Note: The NSA does not use any security for the files in the published folders. It is not
recommended to publish shares if you do not have the NSA behind a good
hardware-based firewall. See page 150 for more on firewalls.
Additionally, you can use HTML editing software (not included) to create an
index.html or index.htm file to define and customize how your website works and
looks.
Accessing Web-published Shares from the Internet
You need to use a public address to access the NSA’s web-published shares from
the Internet. If your NSA uses a private IP address, you may need to use the
public IP address of your Internet gateway and configure NAT or port forwarding
on your Internet gateway and possibly firewall rules in order to let people access
the NSA’s web-published shares from the Internet.
Web Publishing Port Number
If the web-published shares use a port number other than 80 (the normal port for
web traffic), users must include it after the NSA’s IP address in order to access the
NSA’s web-published shares. For example, say you specified port 8080, the NSA’s
IP address is 192.168.1.23, and the name of the web-published share is
FamilyPhotos. You would have to enter “http://192.168.1.23:8080/MyWeb/
FamilyPhotos/” in your browser’s address bar to access the share’s web page.
The NSA’s web configurator uses port 80. To make the web configurator more
secure, you can have the web-published shares use another port number. Then
you can configure one set of firewall rules and NAT or port forwarding settings on
your Internet gateway specifically for allowing access to the web-published shares
and another separate set of rules for accessing the NSA’s web configurator.
156
NSA-220 Plus User’s Guide
Chapter 7 Applications
In the following example, the Internet gateway’s firewall is configured to allow
anyone to access the NSA’s web-published screens using port 8080. Web
configurator access (port 80) however, is only allowed from IP address a.b.c.d.
Figure 45 Web Publishing Port Number Example
8080
e.f.g.h
8080
a.b.c.d
80
80
NSA-220 Plus User’s Guide
157
Chapter 7 Applications
7.6 The Broadcatching Screen
Click Applications > Broadcatching to open the following screen. This screen
displays the NSA’s subscribed channels and the associated contents.
• The NSA saves a channel’s downloaded items in a folder named after the
channel.
• The NSA creates the channel folders in the same destination as the download
service. See Section 7.4.6 on page 145 to change the destination for saving
downloads.
• The NSA’s media server feature makes it easy for users on your network to play
the broadcatching files you download. See Section 7.3.1 on page 135 for more
on the media server.
Figure 46 Applications > Broadcatching
The following table describes the labels in this screen.
Table 34 Applications > Broadcatching
158
LABEL
DESCRIPTION
Add Channel
When you find a channel to subscribe to, copy the URL of the channel’s
feed and click this button. A screen opens for you to subscribe to the
feed. When you are done, the feed’s channel and contents display in the
Applications > Broadcatching screen.
Delete
Channel
Select a channel and click Delete Channel to remove the channel from
the NSA. Any of the channel’s items that you have already downloaded
stay in the channel’s folder (in the admin share’s download folder).
Refresh
Channel
Select a channel and click Refresh Channel to check for new files.
Edit Channel
Select a channel and click Edit Channel to open a screen where you can
set the channel’s download and delete policies.
NSA-220 Plus User’s Guide
Chapter 7 Applications
Table 34 Applications > Broadcatching
LABEL
DESCRIPTION
The table lists channels and their files. Click a column’s heading to sort
the entries by that criteria.
Channel Name This identifies the channel. A channel displays in red if there was an error
the last time the NSA attempted to connect to it. When this happens, you
can select the channel and click Refresh Channel to have the NSA
reattempt to connect to it. Select a channel to see its available files. A
“...” indicates an abbreviated name. Hold your cursor over the name to
display the full name.
Item Name
These are the downloadable files. The icon shows the file’s status in the
NSA. A ... indicates an abbreviated name. Hold your cursor over the
name to display the full name.
Completed: The NSA has downloaded the whole file. Double-click the
item to go to the Download Service screen where you can see the file’s
name and location.
Seeding: The NSA downloaded the complete file and NSA is sharing it
with other BitTorrent users. Double-click the item to go to the Download
Service screen.
Downloading: The NSA is downloading the file. Double-click the item to
go to the Download Service screen.
Queued: The file is waiting in line for the NSA to download it. Doubleclick the item to go to the Download Service screen.
Pause: The download has been manually stopped. Double-click the item
to go to the Download Service screen.
Missing File: The NSA could not find the file.
Error: The NSA automatically retries unsuccessful download attempts.
The status displays as error when the re-attempts are also unsuccessful
and the NSA stops trying to download the file. To try the download again,
use the Add button to create a new download task.
Published
Date
This is when the file was made available for download.
Description
This is the publishers introduction for the file.
Actions
Start Downloading: Click this to add the file to the NSA’s download
queue or check the file’s status in the NSA’s download service.
Click the Delete icon to remove the file from the channel’s list.
NSA-220 Plus User’s Guide
159
Chapter 7 Applications
7.6.1 Adding or Editing a Broadcatching Channel
At the time of writing, the NSA supports RSS 2.0 feeds. Websites with a feed
usually display a feed icon (shown next). Copy and paste the feed’s URL into the
Applications > Broadcatching > Add Channel screen and you can download
new files as they are added.
Figure 47 Feed Icon
A channel uses a feed to deliver its contents (items). Subscribe the NSA to a feed
to be able to download the contents.
Click Applications > Broadcatching > Add Channel to open the following
screen. Use the Add Channel screen to subscribe the NSA to a channel’s feed so
you can view the channel. You also select policies for downloading and deleting
the channel’s items. Section 3.4 on page 75 provides a tutorial on adding a
broadcatching channel. Click Applications > Broadcatching, then select a
channel and click Edit Channel to open a similar Edit screen. Use the Edit
Channel screen to change the download or delete policies.
Figure 48 Applications > Broadcatching > Add Channel
160
NSA-220 Plus User’s Guide
Chapter 7 Applications
The following table describes the labels in this screen.
Table 35 Applications > Broadcatching > Add Channel
LABEL
DESCRIPTION
Subscribe to
Paste (or type) the URL of the feed for the channel to which you want to
Channel Feed subscribe into this field. This is read-only in the Preferences screen.
Note: Make sure the link goes to the actual RSS feed instead of to
another list of links or information about the channel.
One way to test this is by clicking the link. Clicking an actual RSS feed link
opens a screen of XML code (in browsers without an RSS feed aggregator)
or a window where you can add the RSS feed (in browsers with an RSS
feed aggregator).
Download
Policy
Set which of the channel’s items the NSA downloads.
Download All Items: Download every file in the feed.
Download Only New Items: Download new files from today on.
Manually Choose Items for Download: Only download individual files
you select later in the Applications > Broadcatching screen.
Delete Policy
Set how the NSA handles deleting the items downloaded from the
channel.
Manual: Only delete individual files you select later in the Applications
> Broadcatching screen.
Keep last N of items: Select this to set the NSA to only keep a number
of the channel’s most recent files. When this number has been reached, if
the NSA downloads another file from the channel, it deletes the oldest file
from the NSA.
Apply
Click this to save your changes.
Cancel
Click this to return to the previous screen without saving.
7.6.2 Channel Guides
Here are some popular broadcatching channel guide web sites.
Note: ZyXEL does not endorse these web sites and is not responsible for any of their
contents. Use these or any other web sites at your own risk and discretion.
http://www.zencast.com/
http://www.miroguide.com/
http://www.vuze.com/
http://www.mefeedia.com/
http://www.vodstock.com/
NSA-220 Plus User’s Guide
161
Chapter 7 Applications
7.7 The Print Server Screen
Use the Print Server screen to view and manage the NSA’s list of printers and
print jobs.
7.7.1 Printer Sharing
The NSA can act as a print server. A print server lets multiple computers share a
printer. Connect a printer to the NSA’s USB port to let multiple computers on your
network use it. See www.zyxel.com for a list of compatible printers.
Figure 49 Printer Sharing
7.7.2 Configuring the Print Server Screen
Click Applications > Print Server to open the following screen.
Figure 50 Applications > Print Server
162
NSA-220 Plus User’s Guide
Chapter 7 Applications
The following table describes the labels in this screen.
Table 36 Applications > Print Server
LABEL
DESCRIPTION
Refresh
Click this to update the list of printers and print jobs.
The table lists printers and their queued print jobs. Click a column’s heading to
sort the entries by that criteria.
Status
This fields shows whether the printer is connected and turned on (on-line) or
not (off-line).
Name
This identifies the printer. Each printer connected to the NSA must use a
unique name.
Actions
Rename: Click this to change the name the NSA uses for the printer.
Cancel Job: Click this to remove all print jobs from the NSA queue for a
particular printer. However, since the NSA sends print jobs to the printer as
soon as it can, this button may only have an effect if there are very large or
many print jobs in the queue. To stop a print job that has already started, you
may have to turn off the printer.
Delete: Click this to remove a printer from the NSA’s printer list. To add the
printer back into the list, disconnect the printer from the NSA’s USB port and
reconnect it. If that does not work, disconnect the USB port and turn off the
printer’s power. Then reconnect the printer and turn it back on.
7.7.3 Print Server Rename
Click Applications > Print Server and a printer’s Rename icon to open the
following screen. Use this screen to change the name the NSA uses for the printer.
Figure 51 Applications > Print Server > Rename
The following table describes the labels in this screen.
Table 37 Applications > Print Server > Rename
LABEL
DESCRIPTION
Name
Type a new name to identify the printer. The name must be unique from all the
other names of printers connected to the NSA.
Apply
Click this to save your changes.
Cancel
Click this to return to the previous screen without saving.
NSA-220 Plus User’s Guide
163
Chapter 7 Applications
7.8 The Copy/Sync Button Screen
The COPY/SYNC button on the front panel allows you to copy or synchronize files
between a connected USB device and the NSA.
7.8.1 Copying Files
You can copy files from a USB device to the NSA or from the NSA to a USB device.
Simply press and release the COPY/SYNC button to start copying files. See
Section 7.8.3 on page 167 for details about configuring the copy settings.
The following figure illustrates how copying files works when you copy files from a
USB device to the NSA. The same concept applies when you copy files from the
NSA to a USB device.
Figure 52 Copying Files Example
Before Copy
NSA
USB
A
B
C
A
After Copy
NSA
USB
A
B
A
B
C
Both storage devices contain file A.
• A copy of files A and B from the USB device is transferred to the NSA.
• File A from the USB device replaces file A on the NSA.
164
NSA-220 Plus User’s Guide
Chapter 7 Applications
7.8.2 Synchronizing Files
Synchronization makes the contents on the target device identical to the ones on
the source device. You can synchronize files from a USB device to the NSA or from
the NSA to a USB device. In addition, you may also synchronize files in both
directions simultaneously.
Press and hold the COPY/SYNC button until you hear a beep to synchronize files.
See Section 7.8.3 on page 167 for details about configuring the synchronization
settings.
USB -> NSA or USB <- NSA
When you synchronize files in one direction, contents on the source device replace
the files on the target device.
The following figure illustrates how synchronization works when you synchronize
files from a USB device to the NSA. The same concept applies when you
synchronize files from the NSA to a USB device.
Figure 53 Synchronizing Files Example 1
Before Sync
NSA
USB
A
B
A
C
After Sync
NSA
USB
A
B
A
B
Both storage devices contain A.
• A copy of files A and B from the USB device is transferred to the NSA.
• File A from the USB device replaces file A on the NSA.
• File C on the NSA is deleted.
NSA-220 Plus User’s Guide
165
Chapter 7 Applications
USB <-> NSA
When you synchronize files in both directions simultaneously, both storage
devices transfer unique files to one another. Files with the same file name are
synchronized according to their modification date/time. The difference in
modification time between the two files has to be greater than five minutes. More
recently modified files overwrite the older ones during synchronization.
The following figure illustrates how synchronization works when you synchronize
files in both directions simultaneously.
Figure 54 Synchronizing Files Example 2
Before Sync
NSA
USB
A
C
B
(new)
A
B
(new)
D
After Sync
NSA
USB
A
B
(new) (new)
C
D
A
B
(new) (new)
C
D
A on the USB device and B on the NSA are modified more recently.
• File A from the USB device replaces file A on the NSA.
• File B from the NSA replaces file B on the USB device.
• A copy of file C from the USB device is transferred to the NSA.
• A copy of file D from the NSA is transferred to the USB device.
166
NSA-220 Plus User’s Guide
Chapter 7 Applications
7.8.3 Configuring the Copy/Sync Button Screen
Click Applications > Copy/Sync Button to open the following screen.
Figure 55 Applications > Copy/Sync Button
The following table describes the labels in this screen.
Table 38 Applications > Copy/Sync Button
LABEL
DESCRIPTION
Copy Settings
Copy Target
Select the NSA share to use with the copy function.
USB Volume
If your USB device has multiple partitions, select which partition to
use with the copy function.
Copy Direction
Select USB -> NSA to copy files from your USB device to the NSA.
Select NSA -> USB to copy files from the NSA to your USB device.
Create a New
Folder for Copied
Files
Select this option to place the copied files in a new folder.
Backup Files to be
Replaced
This option is only available if you do not select Create a New
Folder for Copied Files. Select this option to save the files that will
be replaced by the source files.
NSA-220 Plus User’s Guide
The name of the folder created for the copied files consists of the
date and time of the copy in year_month_day_hour_minute_second
format.
167
Chapter 7 Applications
Table 38 Applications > Copy/Sync Button
LABEL
Backup Target
DESCRIPTION
Select a share in which to save the backup files.
Note: The NSA will not create a new folder to store the backup
files. It is recommended to create a specific share (such as
“backup”) for backup purposes.
Apply
Click this to save your changes.
The configuration file is saved on the USB device.
Reset
Click this to restore your previously saved settings.
Sync Settings
Sync Target
Select the NSA share to use with the synchronization function.
USB Volume
If your USB device has multiple partitions, select which partition to
use with the synchronization function.
Sync Direction
Select USB -> NSA to synchronize files from your USB device to the
NSA.
Select NSA -> USB to synchronize files from the NSA to your USB
device.
Select NSA <-> USB to synchronize files in both directions
simultaneously.
Backup Files to be
Replaced or
Removed
Backup Target
Select this option to save the files that will be replaced by the source
files.
Select a share in which to save the backup files.
Note: The NSA will not create a new folder to store the backup
files. It is recommended to create a specific share (such as
“backup”) for backup purposes.
Apply
Click this to save your changes.
The configuration file is saved on the USB device.
Reset
168
Click this to restore your previously saved settings.
NSA-220 Plus User’s Guide
Chapter 7 Applications
7.9 The Flickr/YouTube Screen
The auto upload feature uploads media files stored in the NSA to the Flickr and/or
YouTube sharing websites. Besides web publishing and media server, auto upload
is another convenient way to share media files with your friends and family. You
can link the NSA to your Flickr and/or YouTube account and select shares for the
NSA to upload. The NSA uploads the media files stored in the specified shares to
your Flickr and/or YouTube account. When you add new files to the specified
shares, the NSA also automatically uploads the new files to your Flickr and/or
YouTube account.
Click Applications > Auto Upload > Flickr/YouTube to open the following
screen.
Figure 56 Applications > Auto Upload > Flickr/YouTube
The following table describes the labels in this screen.
Table 39 Applications > Auto Upload > Flickr/YouTube
LABEL
DESCRIPTION
Disable/
Enable
Select a service from the list and click this to turn the service on or off.
If you disable the service and add more files to the watch folder(s), the
NSA will not auto upload these files. However, the NSA still uploads any
files added before you turned off the service.
Pause/
Resume
Select a service from the list and click this to pause or resume the auto
upload feature.
Config
Select a service from the list and click this to manage the service’s
settings.
Status
This field displays the service’s status.
The service may be Enabled, Disabled, Uploading or Paused.
Service
Name
This field displays the name of a sharing website to which the NSA can
automatically upload files.
Account
Information
This field displays the username of the account to use with the auto
upload feature.
NSA-220 Plus User’s Guide
169
Chapter 7 Applications
7.9.1 Configuring the Flickr Settings
In the Applications > Auto Upload > Flickr/YouTube screen, select Flickr
from the list and then click the Config button.
The following screen displays if you have not authorized the NSA to use a Flickr
account. Click OK to continue the authorization process.
Figure 57 Linking NSA to Flickr
The web browser opens the Yahoo! Flickr login page. Enter your Yahoo account’s
information and click Sign In.
Figure 58 Yahoo! Flickr Login Page
170
NSA-220 Plus User’s Guide
Chapter 7 Applications
The following page displays asking for your authorization. Click OK, I’LL ALLOW
IT to establish a link between the NSA and your Flickr account.
Figure 59 Flickr Authorization
A confirmation page displays indicating successful authorization. Return to the
NSA web configurator. Click Get Ready in the following screen to complete the
authorization process.
Figure 60 Confirming Flickr Authorization
NSA-220 Plus User’s Guide
171
Chapter 7 Applications
Once the NSA is associated with your Flickr account, you can configure auto
upload settings in the following screen.
Figure 61 Applications > Auto Upload > Flickr/YouTube > Config (Flickr)
172
NSA-220 Plus User’s Guide
Chapter 7 Applications
The following table describes the labels in this screen.
Table 40 Applications > Auto Upload > Flickr/YouTube > Config (Flickr)
LABEL
DESCRIPTION
Flickr Account Configuration
Username
This field displays the username authorized for the auto upload
feature.
Account
Information
This field displays how much storage space is available on your Flickr
account.
Switch User
Click this to use a different Flickr account for the auto upload feature.
Folder Selection
Folder Watch List
This table displays a list of shares and folders selected for auto
upload. Files stored in these locations are uploaded to your Flickr
account.
Status
This indicates whether the share is available.
represents a valid folder. The share is available for auto upload.
represents a missing folder. The share may be deleted from the
NSA, or the hard disk was removed from the NSA.
Share Name
This is the share selected for auto upload.
Path
This is the path of a folder selected for auto upload. The NSA only
uploads files stored in the specified share or folder to your Flickr
account.
Action
Use the Remove icon to remove a share from the Folder Watch
List.
Shares
Select a share for auto upload from the drop-down list.
Path
Select a folder on the NSA. You can use Browse to find or create a
folder on the NSA or type the location of the folder using forward
slashes as branch separators.
Browse
Click this to choose a folder from the selected share. Select a folder
and then click Apply.
If you click Apply without selecting a folder, a forward slash (/)
displays in the Path field. All contents within the specified share are
selected for auto upload.
Add
Click this to add the specified share or folder to the Folder Watch
List.
Grace Period Setting
NSA-220 Plus User’s Guide
173
Chapter 7 Applications
Table 40 Applications > Auto Upload > Flickr/YouTube > Config (Flickr) (continued)
LABEL
DESCRIPTION
Grace Period N
minutes
Specify how long the NSA should wait when you add a new file for
auto upload. For example, if you set the grace period to 5 minutes,
the NSA uploads a new file after it has been in a watched folder for 5
minutes. You can choose from a range of 1 to 10080 minutes (up to
one week).
Default Privacy Setting
Who can see your
media files on
Flickr
Determine who has the right to see files uploaded to your Flickr
account.
Select Only You if you do not want anyone else to see your files. You
may also restrict the access to Your friends and/or Your family.
You can set up a friend/family list in your Flickr account.
Select Anyone to allow everyone to see your files.
Hide from public
site area
Check this option to prevent others from finding your files when they
perform a search in the Flickr website.
Default Safety
Level
Assign a safety level to your files.
Select Safe if the contents of your files are suitable for the general
public.
Select Moderate if the contents of your files may be offensive to
some people.
Select Restricted if the contents of your files are not suitable for
certain people, such as children or your colleagues.
174
Default Content
Type
Select a content type for your files. You can choose Photo,
Screenshot, or Other. Other types may include illustration, art,
animation and etc.
Apply
Click this to save your changes.
Reset
Click this to begin restore your previously saved settings.
NSA-220 Plus User’s Guide
Chapter 7 Applications
7.9.2 Configuring the YouTube Settings
In the Applications > Auto Upload > Flickr/YouTube screen, select YouTube
from the list and then click the Config button.
Note: Your YouTube account must be associated with a Google account.
Get a Google account and use it to log into YouTube. You can then merge the
existing YouTube account to your Google account.
If you have not authorized a YouTube account on the NSA, the following screen
displays. Enter your Google e-mail address and password in the fields and click
OK to authorize the service.
Figure 62 YouTube Account Settings
NSA-220 Plus User’s Guide
175
Chapter 7 Applications
Once the NSA is associated with your YouTube account, you can configure auto
upload settings in the following screen.
Figure 63 Applications > Auto Upload > Flickr/YouTube > Config (YouTube)
176
NSA-220 Plus User’s Guide
Chapter 7 Applications
The following table describes the labels in this screen.
Table 41 Applications > Auto Upload > Config (YouTube)
LABEL
DESCRIPTION
Flickr Account Configuration
Username
Switch User
This field displays the username authorized for the auto upload
feature.
Click this to use a different YouTube account for the auto upload
feature.
Folder Selection
Folder Watch List
This table displays a list of shares and folders selected for auto
upload. Files stored in these locations are uploaded to your YouTube
account.
Status
This field indicates whether the share is available.
represents a valid folder. The share is available for auto upload.
represents a missing folder. The share may be deleted from the
NSA, or the hard disk was removed from the NSA.
Share Name
This field displays the share selected for auto upload.
Path
This field displays the path of a folder selected for auto upload. The
NSA only uploads the files stored in the specified share or folder to
your YouTube account.
Action
Use the Remove icon to delete a share from the Folder Watch List.
Shares
Select a share for auto upload from the drop-down list.
Path
Select a folder on the NSA. You can use Browse to find or create a
folder on the NSA or type the location of the folder using forward
slashes as branch separators.
Browse
Click this to choose a folder from the selected share. Select a folder
and then click Apply.
If you click Apply without selecting a folder, a forward slash (/)
displays in the Path field. All contents within the specified share are
selected for auto upload.
Add
Click this to add the specified share or folder to the Folder Watch
List.
Grace Period Setting
NSA-220 Plus User’s Guide
177
Chapter 7 Applications
Table 41 Applications > Auto Upload > Config (YouTube) (continued)
LABEL
DESCRIPTION
Grace Period N
minutes
Specify how long the NSA should wait when you add a new file for
auto upload. For example, if you set the grace period to 5 minutes,
the NSA uploads a new file after it has been in a watched folder for 5
minutes. You can choose from a range of 1 to 10080 minutes (up to
one week).
Default Video
Category
Select the category that best describes the media files you want to
upload.
Default Privacy Setting
Who can see your
media files on
YouTube
Determine who has the right to see files uploaded to your YouTube
account.
Select Only You if you do not want anyone else to see your files.
Select Anyone to allow everyone to see your files.
Apply
Click this to save your changes.
Reset
Click this to restore your previously stored settings.
7.10 The FTP Uploadr Screen
The FTP Uploadr feature uploads files stored in the NSA to FTP servers. Besides
web publishing and media server, auto upload is another convenient way to share
media files with your friends and family. You can link the NSA to your FTP server
or the FTP server on another NSA and select shares or folders for the NSA to
upload. The NSA uploads the files stored in the specified shares to your FTP
server. When you add new files to the specified shares, the NSA also automatically
uploads the new files to your FTP server.
Use this screen to configure the FTP Uploadr.
Click Applications > Auto Upload > FTP Uploadr to open the screen shown
next.
Figure 64 Applications > Auto Upload > FTP Uploadr
178
NSA-220 Plus User’s Guide
Chapter 7 Applications
The following table describes the labels in this screen.
Table 42 Applications > Auto Upload > FTP Uploadr
LABEL
DESCRIPTION
Enable FTP Uploadr
Use the check box to enable or disable the FTP Uploadr. Click
Apply to save your changes.
When you disable the FTP Uploadr, a screen opens requesting
confirmation. Select the check box to stop any current or
queued uploads. If you do not select the check box, the FTP
Uploadr finishes uploading files already in the queue list. Click
Yes to disable the FTP Uploadr.
Add Server
Click this to add a target FTP server entry. See Section 7.10.1
on page 180 for more details.
Preferences
Click this to manage the settings of the FTP Uploadr.
Edit Server
Select a server from the list and click this to edit the FTP server
entry.
Delete Selected
Server(s)
Select a server from the list and click this to remove the FTP
server entry.
Server Information
Select a server from the list and click this to display the status
and settings about the FTP server.
Domain Name/IP
Address
This is the domain name or IP address of the FTP server.
Port Number
This is the port number used by the FTP server.
Remote Path
The NSA automatically uploads files to this location.
Account Name
This is the login account for the FTP server.
Description
This is the information related to the FTP server.
NSA-220 Plus User’s Guide
179
Chapter 7 Applications
7.10.1 Adding or Editing an FTP Server Entry
Use this screen to add or edit an FTP server entry for auto upload.
In the FTP Uploadr screen, click the Add Server or Edit Server button to open
the following screen.
Figure 65 Applications > Auto Upload > FTP Uploadr > Add or Edit a Server
The following table describes the labels in this screen.
Table 43 Applications > Auto Upload > FTP Uploadr > Add or Edit a Server
180
LABEL
DESCRIPTION
Domain Name/IP
Address
Enter the domain name or IP address of the FTP server.
Account Name
Enter the account name used to access the FTP server.
Password
Enter the password associated with the account name.
Port Number
Enter the port number for the FTP server.
Remote Path
Enter the path to where the NSA automatically uploads files.
Description
Enter additional information about this FTP server.
Test Connection
Click this to test your setttings.
Apply
Click this to save your changes.
Cancel
Click this return to the previous screen without saving.
NSA-220 Plus User’s Guide
Chapter 7 Applications
7.10.2 The FTP Uploadr Preferences Screen
Use this screen to configure the general settings for the FTP Uploadr.
In the FTP Uploadr screen, click the Preferences icon to open the following
screen.
Figure 66 Applications > Auto Upload > FTP Uploadr > Preferences
The following table describes the labels in this screen.
Table 44 Applications > Auto Upload > FTP Uploadr > Preferences
LABEL
DESCRIPTION
Folder Watch List
Status
This indicates whether the share is available.
represents a valid folder. The share is available for auto
upload.
represents a missing folder. The share may be deleted from
the NSA, or the hard disk was removed from the NSA.
Share Name
This is the share selected for auto upload.
Path
This is the path of a folder selected for auto upload. The NSA
only uploads files stored in the specified share or folder to your
FTP server.
Action
Use the Remove icon to remove a share from the Folder
Watch List.
Shares
Select a share for auto upload from the drop-down list.
NSA-220 Plus User’s Guide
181
Chapter 7 Applications
Table 44 Applications > Auto Upload > FTP Uploadr > Preferences (continued)
LABEL
DESCRIPTION
Path
Select a folder on the NSA. You can use Browse to find or
create a folder on the NSA or type the location of the folder
using forward slashes as branch separators.
Browse..
Click this to choose a folder from the selected share. Select a
folder and then click Apply.
If you click Apply without selecting a folder, a forward slash (/)
displays in the Path field. All contents within the specified share
are selected for auto upload.
Add
Click this to add the specified share or folder to the Folder
Watch List.
Settings
Grace Period
Specify how long the NSA should wait when you add a new file
for auto upload. For example, if you set the grace period to 5
minutes, the NSA uploads a new file after it has been in a
watched folder for 5 minutes. You can choose from a range of 1
to 10080 minutes (up to one week).
Bandwidth Limit
Enter the maximum upload rate for auto upload. You can choose
from a range of 0 to 100,000 KB/s. Enter 0 if you do not want to
set any limit.
Use this to leave bandwidth on your network connection for
other traffic, especially if your Internet connection has restricted
upload speed.
Apply
182
Click this to save your changes in this section.
Reset
Click this to restore previously saved settings.
Close
Click this to return to the previous screen without saving.
NSA-220 Plus User’s Guide
P ART III
Sharing
Users (185)
Groups (191)
Shares (195)
183
184
CHAPTER
8
Users
8.1 Overview
This chapter introduces the Users screens of the NSA. Use the Users screens to
create and manage administrator and user accounts.
Administrators can:
• Configure and manage the NSA.
• Create volumes, shares, and user accounts.
• Assign individual users specific access rights for specific shares.
Users are people who have access rights to the NSA and can store files there for
later retrieval. A user can:
• Manage shares that he owns.
• Change his own password.
• Access the contents of other shares to which he is given access rights.
8.1.1 What You Can Do in the Users Screen
• Use the main Users screen (Section 8.2 on page 186) to display a list of user
accounts created on the NSA.
• Use the Add User screen (Section 8.3 on page 188) to create new user
accounts.
• Use the Edit User screen (Section 8.3 on page 188) to edit the properties of an
existing account.
• Use the User Info screen (Section 8.4 on page 190) to display the amount of
volume space used by a selected account and the account’s membership in any
groups.
NSA-220 Plus User’s Guide
185
Chapter 8 Users
8.2 The Users Screen
Click Sharing > Users to display the screen shown next.
Use this screen to create and manage accounts for users who can store files on
the NSA.
Figure 67 Sharing > Users
The following table describes the labels in this screen.
Table 45 Sharing > Users
186
LABEL
DESCRIPTION
Add User
Click this to open a screen where you can configure a new user
account.
Search
Click this to display a search field. Type in the name of an
account and then click Search to look up the account you
specified. Click Clear to close the search function.
Edit User
Select an account and click this to open a screen where you can
edit the properties of the account.
NSA-220 Plus User’s Guide
Chapter 8 Users
Table 45 Sharing > Users (continued)
LABEL
DESCRIPTION
Delete Selected Users
Select an account and click this to open a screen where you can
delete the user account.
User Info
Select an account and click this to open a screen displaying the
amount of storage space used by the account. You can also
check the account’s membership in any groups.
Display Number
Click the drop-down menu to set how many accounts you want
to display in one screen.
Go to Page
Click the drop-down menu to display and access more user
accounts.
User Type
This field displays whether the selected account is an
administrator account or a user account.
Username
This field displays the usernames of each account.
8.2.1 User Icons
The following table describes the user icons.
Table 46 User Icons
ICON
DESCRIPTION
The blue icon is for an administrator account.
The green icon is for a user account.
NSA-220 Plus User’s Guide
187
Chapter 8 Users
8.3 Adding or Editing an Account
Use this screen to create or edit a NSA user account with NSA access password.
Click the Add User button in the Users screen to open the following screen. Click
the Edit User button in the screen shown previously to edit an existing account.
Figure 68 Sharing > Users > Add or Edit a User
The following table describes the labels in this screen.
Table 47 Users > Add or Edit a User
LABEL
DESCRIPTION
Username
Type a name from 1 to 32 single-byte (no Chinese characters
allowed for example) ASCII characters. See Section 8.3.1 on
page 189 for more details on usernames.
Password
Create a password associated with this user. You can type from
one to 14 single-byte (no Chinese characters allowed for
example) ASCII characters.
Password (Confirm)
You must type the exact same password that you just typed in
the above field.
Account Type
Select Administrator to give the account full configuration and
management access to the NSA.
Select User to give the account basic access rights to the NSA
and allow the user to manage his own shares, change his own
password, and access the contents of other shares to which he is
given access rights.
Group Membership
188
Available Groups
This field lists the groups created on the NSA.
Group Membership
This field lists the groups that the selected account belongs to.
Add Selected
Group(s)
Select a group from the Available Groups list and click this to
add the account to that group.
NSA-220 Plus User’s Guide
Chapter 8 Users
Table 47 Users > Add or Edit a User (continued)
LABEL
Remove Selected
Group(s)
DESCRIPTION
Select a group from the Group Membership list and click this
to remove the account from that group.
Apply
Click this to save your changes.
Cancel
Click this to return to the previous screen without saving.
8.3.1 Usernames
Enter a username from one to 32 characters. The first character must be
alphabetical (case insensitive, [A-Z a-z]); numeric characters are not allowed as
the first character.
The username can only contain the following characters:
• Alphanumeric A-z 0-9. Unicode usernames are supported with CIFS logins, but
not FTP or web configurator logins.
• Spaces
• _ [underscores]
• . [periods]
• - [dashes]
Other limitations on usernames are:
• All leading and trailing spaces are removed automatically.
• Multiple spaces within names are converted to a single space.
• Usernames are case insensitive. The username cannot be the same (no matter
the letter case) as an existing user. For example, if a user exists with the name
'BOB', you cannot create a user named 'bob'. If you enter a user 'bob' but use
'BOB' when connecting via CIFS or FTP, it will use the account settings used for
'bob'.
• The username cannot be the same as a system username such as
ANONYMOUS_FTP nor be the same as an existing user. Other reserved
usernames that are not allowed are:
• bin
• daemon
• ftp
• anonymous-ftp
• nobody
• root
• pc-guest
• admin
NSA-220 Plus User’s Guide
189
Chapter 8 Users
• password
8.4 Displaying User Info
Use this screen to display a user’s information.
In the Users screen, select an account and click User Info to open the following
screen.
Figure 69 Sharing > Users > User Info
The following table describes the labels in this screen.
Table 48 Sharing > Users > User Info
190
LABEL
DESCRIPTION
Usermame
This field displays the selected username.
Space Usage
Click this to display the amount of volume space used by the selected
account.
Group List
Click this to display the selected user’s group membership.
Volume Name
This field displays the volume(s) created on the NSA.
Used Space
This field displays how much storage space the selected account is
currently using. This only applies for files that the user saved onto the
NSA while logged in with that username.
OK
Click this to close the current screen.
NSA-220 Plus User’s Guide
CHAPTER
9
Groups
9.1 Overview
This chapter introduces the Groups screens. Use the Groups screens to create
and manage groups. You can assign users to groups and grant individual groups
access rights to specific shares.
9.1.1 What You Can Do in the Groups Screen
• Use the main Groups screen (Section 9.2 on page 191) to display and manage
a list of groups created on the NSA.
• Use the Add Group screen (Section 9.2.1 on page 193) to create new groups.
• Use the Edit Group screen (Section 9.2.1 on page 193) to edit the properties of
an existing group.
9.2 The Groups Screen
Use this screen to create and manage groups.
Click Sharing > Groups to display the screen shown next.
Figure 70 Sharing > Groups
NSA-220 Plus User’s Guide
191
Chapter 9 Groups
The following table describes the labels in this screen.
Table 49 Sharing > Groups
LABEL
DESCRIPTION
Add Group
Click this to open a screen where you can configure a new
group.
Search
Click this to display a search field. Type the name of a group and
then click Search to look up the group you specified. Click Clear
to close the search function.
Edit Group
Select a group and click this to open a screen where you can edit
the properties of the selected group.
Delete Selected
Group(s)
Select a group and click this to open a screen where you can
delete the group.
Display Number
Click the drop-down menu to set how many groups you want to
display in one screen.
Go to Page
Click the drop-down menu to select a page number. Jump to a
different page to display and access more groups.
Status
Group Name
192
This field displays the group icon.
This field displays the group names created on the NSA.
NSA-220 Plus User’s Guide
Chapter 9 Groups
9.2.1 Adding or Editing a Group
Use this screen to create or edit a NSA group.
Click the Add Group button in the Groups screen to open the following screen.
Click the Edit Group button in the screen shown previously to edit an existing
group.
Figure 71 Sharing > Users > Add or Edit a Group
The following table describes the labels in this screen.
Table 50 Users > Add or Edit an Account
LABEL
DESCRIPTION
Group Name
Type a name from 1 to 32 single-byte (no Chinese characters
allowed for example) ASCII characters. See Section 9.2.2 on
page 194 for more details on group names.
Group Membership
Use this field to assign group membership to individual users.
Available User(s)
This field lists the user accounts created on the NSA that are not
members of the current group.
Group Membership
This field lists the user accounts added to the group.
Add Selected
User(s)
Select a user account from the Available Users list and click
this to add the account to the group.
Remove Selected
User(s)
Select a user account from the Group Membership list and
click this to remove the account from the group.
Apply
Click this to save your changes.
Cancel
Click this to return to the previous screen without saving.
NSA-220 Plus User’s Guide
193
Chapter 9 Groups
9.2.2 Group Names
Enter a group name from 1 to 30 characters. The first character must be
alphabetical (case insensitive, [A-Z a-z]); numeric characters are not allowed as
the first character.
The group name can only contain the following characters:
• Alphanumeric A-z 0-9. Unicode usernames are supported with CIFS logins, but
not FTP or web configurator logins.
• Spaces
• _ [underscores]
• . [periods]
• - [dashes]
Other limitations on group names are:
• All leading and trailing spaces are removed automatically.
• Multiple spaces within names are converted to a single space.
• Group names are case insensitive. The group name cannot be the same (no
matter the letter case) as an existing group. For example, if a group exists with
the name 'FAMILY', you cannot create a group named 'family'.
• The group name cannot be the same as a system group name such as
EVERYONE nor be the same as an existing group. Other reserved groups
names that are not allowed are:
• nobody
• root
194
NSA-220 Plus User’s Guide
CHAPTER
10
Shares
10.1 Overview
A share is a set of user access permissions mapped to a specific folder on a
volume. It is equivalent to the Windows concept of a shared folder, but is
independent of the folder. You can map a share to a network drive for easy and
familiar file transfer for Windows users.
10.1.1 What You Can Do in the Shares Screens
• Use the Shares screen (Section 10.2 on page 196) to navigate a list of shares
created on the NSA.
• Use the Add Shares screen (Section 10.3 on page 198) to create additional
shares on the NSA.
• Use the Configuration screen (Section 10.4 on page 201) to configure and
clean up the recycle bins.
• Use the Change Share Properties screen (Section 10.3 on page 198) to edit a
share’s properties.
• Use the Share Browser screen (Section 10.5 on page 202) to navigate, add
and edit the contents in a share.
NSA-220 Plus User’s Guide
195
Chapter 10 Shares
10.2 The Shares Screen
Click Sharing > Shares in the navigation panel to open the following screen. This
screen lists all shares created on the NSA.
Figure 72 Sharing > Shares
The following table describes the labels in this screen.
Table 51 Sharing > Shares
196
LABEL
DESCRIPTION
Add Share
Click this to create a new share.
Recycle Bin
Click this to configure recycle bins.
Edit Share
Select a share and click this to edit the share.
Delete Share
Select a share and click this to remove or restrict access to the
share.
Share Browser
Select a share and click this to browse the share’s contents.
NSA-220 Plus User’s Guide
Chapter 10 Shares
Table 51 Sharing > Shares (continued)
LABEL
DESCRIPTION
Status
This field displays the share icons.
represents a Built-in share on a volume on the internal
hard drives.
represents a Predefined or User-created share on a
volume on the internal hard drives.
represents an Auto share on a volume on the external
(USB) devices.
represents a disabled share that no user can access.
represents a missing share. The NSA cannot find the hard
disk associated with the share (the disk may be removed from
the NSA for example). You may install the disk back to the NSA
to recover the share, or you may delete the share from the NSA.
Share Type
This field displays Built-in for system shares. You cannot delete
these shares (these are the public and admin shares).
This field displays Predefined for default shares. You can delete
these shares (these are the video, music, and photo shares).
This field displays User-created for shares that an
administrator has created. You can delete these shares.
This field displays Auto for shares located on an external (USB)
device.
Share Name
This field displays the share’s names.
Share Path
This field displays the share’s file path, for example, volume1/
music.
Share Owner
This is the name of the user account to which this share belongs.
Permission Type
This field displays the access permission of a share.
Everyone on the network can access a Public share.
Only the share owner can access a Private share.
An Advanced share allows you to assign specific access rights
(read-only for example) to individual users/groups.
NSA-220 Plus User’s Guide
197
Chapter 10 Shares
10.3 Adding or Editing Share
Click Add Share to create a new share. In the Shares screen, select a share and
click Edit Share to open the following screen. Use this screen to create or edit a
share.
Figure 73 Shares > Add Share (or Edit Share)
The following table describes the labels in this screen.
Table 52 Shares > Add Share (or Edit Share)
LABEL
DESCRIPTION
Share Name
Type a share name from 1 to 255 single-byte (no Chinese characters
allowed for example) ASCII characters. The name cannot be the same
as another existing local share. See Section 2.5.5 on page 38 for more
information on share names.
Volume
You should have already created volumes (a single accessible storage
area with a single file system) on the NSA. Select the one that contains
the folder that you want to share out.
You cannot modify this when editing a share.
198
Make this share
owned by
Select the administrator or user account that is to own (manage) this
share. The share owner controls access rights to the share.
Enable this
share
Click this to allow access to this share.
Enable Recycle
Bin
Click this to activate the recycle bin. When you delete a file from this
share, a recycle folder is created to store the deleted item.
Publish this
share to Media
Server
Select this option to have the NSA share files in this folder with media
clients. The media clients do not have to use a password to play the
shares you publish.
Publish this
share to Web
Select this option to let people use a web browser to access this share’s
files without logging into the My NSA screens.
NSA-220 Plus User’s Guide
Chapter 10 Shares
Table 52 Shares > Add Share (or Edit Share) (continued)
LABEL
DESCRIPTION
Share Access
Assign access rights (full, read only or deny) to users. If you publish the
share to the media server or the web, all users will have at least readonly access to the share, regardless of what you configure here.
Keep it private to owner means only the share owner (selected
above) can access the share.
Make it Public means every user (including people who do not have
accounts on the NSA) can access the share.
Advanced allows you to assign specific access rights (full, read only or
deny) to individual users/groups.
Edit
This button is available only when you select Advanced share access.
Click this to configure advanced share acess rights.
Apply
Click this to save your changes.
Cancel
Click this to return to the previous screen without saving.
10.3.1 Configuring Advanced Share Access
In the Sharing > Shares > Add Share or Edit Share screen, select Advanced
from the Share Access drop-down list. Click Edit to open the following screen.
Use this screen to configure share access rights for individual users and groups.
Figure 74 Sharing > Shares > Add Share (or Edit Share) > Advanced
NSA-220 Plus User’s Guide
199
Chapter 10 Shares
The following table describes the labels in this screen.
Table 53 Sharing > Shares > Add Share (or Edit Share) > Advanced
LABEL
DESCRIPTION
Available Users/
Groups
This field lists the users/groups you can assign access rights.
Authority
Use this field to assign access rights to users/groups.
Full Control gives users/groups full access (read, write and
execute) to all files contained within this share.
Read-Only gives users/groups read-only access (they cannot
modify nor execute) to all files contained within this share.
Deny blocks access (users/groups cannot read, modify, nor
execute) to all files contained within this share.
Among all access rights, Deny has the highest priority. For
example, User A belongs to Group 1. You assign User A full
access rights to the Music share but deny access rights to Group
1. Then User A cannot access the Music share.
Note: If you deny access to all users, no-one can use the
share, not even the administrator.
Click an arrow button to move users/groups between the left
and right fields. Use the arrow buttons to assign access rights to
users/groups.
Apply
Click this to save your changes.
Cancel
Click this to return to the previous screen without saving.
10.3.2 Public and ANONYMOUS Share Access Rights
If you make a share public, users do not need to log in.
With ANONYMOUS FTP, you must enter either 'anonymous' or 'ftp' as the
username. Any other name is considered a username, so must be valid and have a
corresponding correct password.
200
NSA-220 Plus User’s Guide
Chapter 10 Shares
10.4 The Recycle-Bin Configuration Screen
Use this screen to periodically clean up items in all recycle bins.
10.4.1 Recycle Bins
Recycle bins in the NSA help users recover accidentally deleted files or folders in
the shares. When you delete an item, a recycle folder is created within the share
to hold the deleted item.
Every share can have its own recycle folder. You must enable the recycle-bin
function to recycle deleted items. You can configure this setting when you add or
edit a share. See Section 10.3 on page 198 for details on activating the recycle bin
in a share.
Later if you want to retrieve a deleted item, you can locate the item in the recycle
folder. You may move or copy the deleted item to another share.
10.4.2 Configuring Recycle Bins
In the Sharing > Shares screen, click Recycle Bin to open the following screen.
Figure 75 Sharing > Shares > Recycle Bin
The following table describes the labels in this screen.
Table 54 Sharing > Shares > Recycle Bin
LABEL
DESCRIPTION
Clean Recycle Bin
every N days
Specify how often you want to clear the contents in all recycle
bins. The specified days correspond to how long a file has been
stored in a recycle bin. For example, if you set the interval to be
3 days, recycle bins will clean up items deleted or not accessed
for 3 days.
Note: Cleaning up recycle bins permanently removes the
files from the NSA.
Clean all recycle bins
now
Click this to immediately remove contents from all recycle bins.
Apply
Click this to save your changes.
Cancel
Click this to return to the previous screen without saving.
NSA-220 Plus User’s Guide
201
Chapter 10 Shares
10.5 The Share Browser Screen
Use this screen to create folders, upload files, and edit files within the share.
Figure 76 Sharing > Shares > Share Browser
The following table describes the labels in this screen.
Table 55 Sharing > Shares > Share Browser
202
LABEL
DESCRIPTION
Create Folder
Type a folder name and click Apply to make a new folder. The name can
be 1 to 255 single-byte (no Chinese characters allowed for example)
ASCII characters. The name cannot be the same as another existing
folder in the same path. See Section 2.5.5 on page 38 for more
information on folder names.
Upload
Click this to add files to the share. Use Browse to locate a file and click
Apply to upload the file.
NSA-220 Plus User’s Guide
Chapter 10 Shares
Table 55 Sharing > Shares > Share Browser (continued)
LABEL
DESCRIPTION
Rename
Select a folder or file and click this to open a screen. Enter the name you
want and click OK to make the changes.
Note: When you change a file name, make sure you keep the file
extention.
Delete
Select a file from the list and click this to open a warning screen. Click
Yes to delete the file, or click No to close the screen.
Move
Select a file from the list and click this to relocate the file to another
share.
Copy
Select a file from the list and click this to make a duplicate of the file to
another share.
Current
location
This is the name of the share and folder path that you are in.
Type
The icon in this column identifies the entry as a folder or a file.
The folder with an arrow pointing up is for the link that takes you to the
next higher layer in the share’s folder tree.
Name
This section lists the volume’s existing folders. Select the one for which
you want to create a share (click to the right of the folder name to select).
You can also click the folder’s name to navigate to a sub-folder within the
folder.
Size
This field displays a file size.
Modified Date
This field displays a file’s latest modification date.
Close
Click this to close the screen.
NSA-220 Plus User’s Guide
203
Chapter 10 Shares
10.5.1 Moving or Copying Files
Use this screen to move or copy files to another share.
In the Share Browser screen, select a file or folder and click Move or Copy to
open the following screen.
Figure 77 Sharing > Shares > Share Browser > Move (or Copy)
The following table describes the labels in this screen.
Table 56 Sharing > Shares > Configuration
LABEL
DESCRIPTION
Shares
Select the destination share from the drop-down list.
Path
This field displays the share folder’s path. You can use Browse to find
or create a folder on the NSA or type the location of the folder using
forward slashes as branch separators.
Browse
Click this to put the file in a specific folder. Select a folder and then click
Apply.
If you click Apply without selecting a folder, a forward slash displays in
the Path field. All contents within the specified share are selected.
204
Yes
Click this to move or copy the file to the designated share.
Close
Click this to return to the Share Browser screen.
NSA-220 Plus User’s Guide
P ART IV
Maintenance and
Protecting Data
Maintenance Screens (207)
Protecting Your Data (227)
205
206
CHAPTER
11
Maintenance Screens
11.1 Overview
This chapter discusses the Maintenance screens. The Maintenance screens
allow you to manage system configurations.
11.1.1 What You Can Do in the Maintenance Screens
• Use the Power Management screen (Section 11.2 on page 208) to set up
power saving for the hard disks installed in the NSA.
• Use the Log screen (Section 11.3 on page 212) to check the system’s logs.
• Use the Configuration screen (Section 11.5 on page 220) to manage the NSA
configuration file.
• Use the SSL screen (Section 11.6 on page 221) to configure HTTPS and the
NSA’s SSL certificate.
• Use the Firmware Upgrade screen (Section 11.7 on page 224) to upload new
firmware.
• Use the Shutdown screen (Section 11.8 on page 225) to restart or shut down
your NSA.
NSA-220 Plus User’s Guide
207
Chapter 11 Maintenance Screens
11.2 The Power Management Screen
Use this screen to manage power saving for the hard disks installed on the NSA.
Click Maintenance > Power Management to display the following screen.
Figure 78 Maintenance > Power Management
The following table describes the labels in this screen.
Table 57 Maintenance > Power Management
LABEL
DESCRIPTION
Power Management
Turn off hard
disk(s)
Enter the number of minutes the NSA will sit idle before spinning the
hard disks down to sleep. The default power-off time is 3 minutes.
Apply
Click this to save your changes in this section.
Reset
Click this to restore your previously saved settings.
Minimum UPS Capacity
208
NSA-220 Plus User’s Guide
Chapter 11 Maintenance Screens
Table 57 Maintenance > Power Management (continued)
LABEL
DESCRIPTION
Minimum UPS
Capacity
When you use an APC Uninterruptible Power Supply (UPS) with a USB
connection to the NSA, the NSA shuts itself down if the APC UPS’s
battery charge gets down to the percentage you specify in this field. This
allows the NSA to shut down properly and avoid data loss caused by a
power failure when the UPS stops supplying power.
A setting around 50% is recommended. A setting close to 100% is not
recommended since it would cause the NSA to shut down whenever the
UPS is charging. A setting close to 0 is also not recommended since the
UPS would not have enough power to allow the NSA to shutdown
properly.
Apply
Click this to save your changes in this section.
Power On After
Power Failure
Select an option to set whether or not the NSA restarts when the power
is restored after a power failure.
Keep Former
Status
Select this option to have the NSA automatically restart only if it was
operating when the power failed. The NSA remains off if it was already
off when the power failed.
Always Power
On
Select this option to keep the NSA operating as much of the time as
possible. The NSA restarts automatically even if it was turned off when
the power failed.
Always Power
Off
Select this option to keep the NSA from automatically restarting when
the power is restored after a power failure. This is a computer’s
“traditional” behavior. Select this if you have other servers such as a
domain controller or DNS server that you want to start or check after a
power failure before the NSA turns on.
Apply
Click this to save your changes in this section.
Power On/Off Schedule
Enable Power
Control
Schedule
Select this option to have the NSA turn itself off and on or reboot
according to the schedules you configure.
Apply
Click this to save your changes in this section.
NSA-220 Plus User’s Guide
Click Edit to go to the screen where you can configure the power control
schedules.
209
Chapter 11 Maintenance Screens
11.2.1 Editing the Power Control Schedule Screen
Click Maintenance > Power Management > Edit to open this screen. Use this
screen to configure power control schedules to have the NSA turn on, turn off, or
reboot at specified times.
Figure 79 Maintenance > Power Management > Edit
The following table describes the labels in this screen.
Table 58 Maintenance > Power Management > Edit
210
LABEL
DESCRIPTION
Power Control
Schedule List
This table lists the power on, power off, and reboot schedules. For
example, you could have one schedule to turn the NSA on every
morning, at 8:00, another schedule to turn it off every evening at 18:00,
and a third schedule to have it reboot every Friday at 14:00. Click a
column’s heading cell to sort the schedules by that column’s criteria.
Click the heading cell again to reverse the sort order.
Type
This field displays whether the power control schedule has the NSA turn
on, turn off, or reboot.
Frequency
This field shows how often (monthly, weekly, or daily) the NSA is to
apply this power control schedule.
Execute Time
This field shows when the NSA is to use this power control schedule
(when the NSA is to turn on, turn off, or reboot).
Actions
Click the Delete icon to remove a power control schedule from the list.
Add Power
Control
Schedule
Use this part of the screen to configure power on, power off, and reboot
times.
NSA-220 Plus User’s Guide
Chapter 11 Maintenance Screens
Table 58 Maintenance > Power Management > Edit (continued)
LABEL
DESCRIPTION
Type
Select whether this power control schedule has the NSA turn on, turn
off, or reboot.
Frequency
Select whether the NSA is to apply this power control schedule entry on
a monthly, weekly, or daily basis.
Execute Time
(hh:mm)
Enter the time, day, and/or day of the month as appropriate for this
power control schedule entry. Leave more than 10 minutes between the
execution times of the entries.
If the NSA turns off or restarts while a user is transferring files to or
from the NSA, the transfer fails. The user will need to restart the
transfer.
The NSA skips a scheduled restart or power off if the execution time
comes while the NSA is doing any of the following:
•
•
•
Resynchronizing a RAID
Upgrading firmware
Replacing the configuration file
If the NSA is turned off at the time when a restart or power off is
scheduled, the NSA does not perform the restart or power off.
If the NSA is turned on at the time when a power on is scheduled, the
NSA does not perform the power on.
Please select
the day of the
month
Use this part of the screen to configure power on, power off, and reboot
times.
Add
Click this to add the power control schedule to the list.
Apply
Click this to save your changes.
Cancel
Click this to return to the previous screen without saving.
NSA-220 Plus User’s Guide
211
Chapter 11 Maintenance Screens
11.3 The Log Screen
Click Maintenance > Log to open the following screen.
Use this screen to display all NSA logs. There are at most 128 entries in the log.
Older logs are removed by the system. You cannot download the log file via FTP or
CIFS.
Figure 80 Maintenance > Log
The following table describes the labels in this screen.
Table 59 Maintenance > Log
212
LABEL
DESCRIPTION
Display
The screen always shows all logs by default. Choose a specific log
category to view logs for just that category.
Refresh
Click this to update the log display.
Purge all Logs
Click this to erase all logs from the NSA.
#
This is the log entry’s number in the list according to the currently
selected sort order.
Time
This shows the date and time the log was created. Click the top of the
column to sort by oldest or newest.
Class
This displays the log category; see Table 60 on page 213 for details.
Severity
This displays how serious the log is rated by the NSA. See Table 61 on
page 213 for more information.
Message
This displays a description of the log. Click the top of the column to sort
by alphabetical or reverse alphabetical order.
First/Prev
Use these hyperlinks to navigate to the first or previous log page.
Next/Last
Use these hyperlinks to navigate to the next or final log page.
NSA-220 Plus User’s Guide
Chapter 11 Maintenance Screens
11.3.1 Log Classes
The following table shows information on log classes.
Table 60 Log Classes
LOG
CATEGORY DESCRIPTION
Network
This log class shows information on network configuration, setting changes
and so on.
Services
This log class shows information on the operation of the NSA’s built-in
services.
Shares
This log class shows information on shares being created or deleted.
System
This log class shows all other system related messages.
Users
This log class shows information on user access to the NSA.
11.4 Log Severity Levels
The following table shows information on log severity levels. Levels range from 0
to 6 with 0 being the most severe level log and 6 being an informational log only.
Log levels are not displayed in the logs and are for your reference only.
Table 61 Log Severity Levels
LEVEL
DESCRIPTION
0
Emergency
1
Alert
2
Critical
3
Error
4
Warning
5
Notice
6
Info
11.4.1 Log Messages
Here are some example log messages.
Table 62 Log Messages
CLASS
SEVERITY
MESSAGE
Auto upload
INFO
%s is queued.
Auto upload
INFO
%s uploaded (Flickr or YouTube Upload).
Auto upload
WARNING
error uploading "%s" (%s): %s
NSA-220 Plus User’s Guide
213
Chapter 11 Maintenance Screens
Table 62 Log Messages (continued)
214
CLASS
SEVERITY
MESSAGE
Auto upload
- FTP
uploadr
INFO
%s will not be uploaded to %s for there is already a
duplicate file.
Auto upload
- FTP
uploadr
INFO
Failed to upload %s to %s (FTP Upload) : %s
Auto upload
- FTP
uploadr
INFO
Successfully upload %s to %s (FTP Upload)
Copy/Sync
Button
ERROR
[USB %s] Backup Folder Does Not Exist.
Copy/Sync
Button
ERROR
[USB %s] Target Folder Does Not Exist.
Copy/Sync
Button
ERROR
[USB Sync] Failed at %s: It is a Folder in Internal Volume.
But It is not a Folder in USB.
Copy/Sync
Button
ERROR
[USB Sync] Failed at %s: It is a Folder in USB. But It is not
a Folder in Internal Volume.
Copy/Sync
Button
ERROR
[USB Sync] Failed at File %s.
Copy/Sync
Button
ERROR
[USB Sync] Sync Failed at Folder %s.
Copy/Sync
Button
ERROR
Modify COPY/SYNC Button Configuration: %s
Copy/Sync
Button
ERROR
Please Change Your Folder Name. Invalid Path: %s
Copy/Sync
Button
INFO
[USB Sync] Copying %s from Internal Volume to Backup
Folder.
Copy/Sync
Button
INFO
[USB Sync] Copying %s from Internal Volume to USB.
Copy/Sync
Button
INFO
[USB Sync] Copying %s from USB to Backup Folder.
Copy/Sync
Button
INFO
[USB Sync] Copying %s from USB to Internal Volume.
Copy/Sync
Button
INFO
[USB Sync] Deleting %s from Internal Volume.
Copy/Sync
Button
INFO
[USB Sync] Deleting %s from USB.
Copy/Sync
Button
INFO
[USB Sync] Deleting %s from USB Recursively.
Copy/Sync
Button
INFO
[USB Sync] Finished. Elapsed Time %s Seconds.
Copy/Sync
Button
INFO
[USB Sync] Moving %s from Internal Volume to Backup
Folder.
Copy/Sync
Button
INFO
[USB Sync] Moving %s from USB to Backup Folder
NSA-220 Plus User’s Guide
Chapter 11 Maintenance Screens
Table 62 Log Messages (continued)
CLASS
SEVERITY
MESSAGE
Copy/Sync
Button
INFO
[USB Sync] Skip %s: File not Exist
Copy/Sync
Button
INFO
[USB Sync] Skip %s: Not a Regular File.
Copy/Sync
Button
INFO
[USB Sync] Start Pre-Processing: Generating File Lists.
Copy/Sync
Button
NOTICE
[USB Sync] Start Copying Files.
Download
Service
ERROR
Download service cannot find a volume
Download
Service
ERROR
Download service failed to find ipfilter.dat
Download
Service
INFO
Download service add a URL download job %s
Download
Service
INFO
Download service delete %s by user
Download
Service
INFO
Download service download %s error (0x%08x)
Download
Service
INFO
Download service download %s finished in %s
Download
Service
INFO
Download service found a new torrent file %s
Download
Service
INFO
Download service initialized
Download
Service
INFO
Download service pause %s by user
Download
Service
INFO
Download service set %s to %s priority by user
Download
Service
INFO
Download service set default download location to %s
Download
Service
INFO
Download service set max BT download rate to %d KB/s by
user
Download
Service
INFO
Download service set max BT upload rate to %d KB/s by
user
Download
Service
INFO
Download service set max download slot to %d
Download
Service
INFO
Download service set seeding time to %d minutues
Download
Service
INFO
Download service set TCP port to %d and UDP port to %d
Download
Service
INFO
Download service set torrent monitor location to %s
Download
Service
INFO
Download service start to download %s
NSA-220 Plus User’s Guide
215
Chapter 11 Maintenance Screens
Table 62 Log Messages (continued)
216
CLASS
SEVERITY
MESSAGE
Download
Service
INFO
Download service stopped
Download
Service
INFO
Download service suspend %s because of no data income
detected or to limit max download slot
Download
Service
INFO
Download service add comment %s to %s by user
Download
Service
INFO
Download service set min upload/download ratio to %d%
Download
Service
INFO
Download service set max seed slot to %d
Download
Service
INFO
Download service start loading ipfilter.dat
Download
Service
INFO
Download service clear all ipfilter rules
Download
Service
INFO
Download service blocked peer removed from peer list
Download
Service
INFO
Download service disconnected blocked peer
Download
Service
INFO
Download service incoming connection blocked by IP filter
Download
Service
INFO
Download service peer from tracker blocked by IP filter
Download
Service
INFO
Download service abort loading ipfilter.dat
Download
Service
INFO
Download service will update ipfilter.dat from %s after %d
day(s)
Download
Service
INFO
Download service added 500 rules from ipfilter.dat
Download
Service
INFO
Download service detected invalid ip range %s in ipfilter.dat
Download
Service
WARNING
Download service default location does not exist. Load
default
Download
Service
WARNING
Download service default torrent location does not exist.
Load default
Groups
NOTICE
Add new group %s.
Groups
NOTICE
Delete group %s.
Network
NOTICE
%s is active because of changing Port Group. Enable DHCP
client.
Network
NOTICE
%s is inactive because of changing Port Group. Disable
DHCP client.
Network
NOTICE
%s MTU > (%s MTU - 8), %s may not work correctly.
Network
NOTICE
(%s MTU - 8) < %s MTU, %s may not work correctly.
Network
NOTICE
Add interface %s.
NSA-220 Plus User’s Guide
Chapter 11 Maintenance Screens
Table 62 Log Messages (continued)
CLASS
SEVERITY
MESSAGE
Network
NOTICE
Because %s link down. Default route will not apply until %s
link up.
Network
NOTICE
Because base interface %s will be disabled.Interface %s is
disabled now., base_ud_iface
Network
NOTICE
Network Config setting is changed
Network
NOTICE
Interface %s was disabled.
Network
NOTICE
Interface %s was enabled.
Network
NOTICE
Port Group on %s is changed. Renew DHCP client.
Network PPPoE
NOTICE
Account pppoe was changed
Network PPPoE
NOTICE
Add account pppoe
Network PPPoE
NOTICE
ADD interface ppp0
Network PPPoE
NOTICE
Interface ppp0 will reapply because Device-Ha become
active status.
Network PPPoE
NOTICE
Interface ppp0 will reapply because Device-Ha is not
running.
Network PPPoE
NOTICE
Network port is disabled
Network PPPoE
NOTICE
Network port is enabled
Services
INFO
admin has changed the password
Services
INFO
HTTP management port has changed to %s
Services
INFO
Clock timezone is set to GMT%s
Services
INFO
Clock timezone is set to default
Services
INFO
Clock daylight saving is enabled
Services
INFO
Clock daylight saving is disabled
Services
INFO
Clock has disable daylight saving
Services
INFO
MyClock has enable daylight saving
Services
INFO
MyClock has set timezone to %s
Services
INFO
MyClock has set timezone to default
Services
INFO
The date and time are updated from NTP server.
Services
INFO
The date and time are updated manually.
Services
INFO
The time is updated manually.
Services
NOTICE
FTP server stops
Services
NOTICE
FTP server starts
Services
NOTICE
MyClock has changed daylight saving interval
Services
NOTICE
MyClock has disabled daylight saving interval
Services
NOTICE
NTP server has set to '%s'
Services
NOTICE
NTP server has set to null
NSA-220 Plus User’s Guide
217
Chapter 11 Maintenance Screens
Table 62 Log Messages (continued)
218
CLASS
SEVERITY
MESSAGE
Services
NOTICE
The NTP service is disabled.
Services
NOTICE
The NTP service is enabled.
Services
WARNING
Reaching Maximum Allowed Rules
Services
WARNING
Reaching Maximum Allowed Rules
Services
WARNING
Rule is empty
Services
WARNING
The Rule Does Not Exist
Shares
INFO
Expire recycle-bin finish for share %s, process time: %s
seconds, remove %s file (%s bytes)
Shares
NOTICE
Add new disabled share %s for unshared folder: %s in
volume: %s.
Shares
NOTICE
Add new share %s.
Shares
NOTICE
Delete share %s.
Shares
NOTICE
Purge all files in recycle-bin folder in share: %s.
Shares
NOTICE
Recycle-bin disabled. Remove recycle-bin folder in share:
%s.
Storage DISK
ERROR
Add %s to Jbod: FAILED
Storage DISK
ERROR
Eject External Disk (%s): FAILED
Storage DISK
INFO
Add %s to Jbod: SUCCESS
Storage DISK
INFO
Eject External Disk (%s): SUCCESS
Storage RAID
ERROR
Relabel Raid to [%s]: FAILED
Storage RAID
ERROR
Start Repairing Degraded Raid by disk%s: FAILED
Storage RAID
INFO
Relabel Raid to [%s]: SUCCESS
Storage RAID
INFO
Start Repairing Degraded Raid by disk%s: SUCCESS
Storage RAID
NOTICE
Auto Repair Degraded RAID by disk%s.
Storage RAID
NOTICE
There is a RAID Degraded.
Storage Volume
ERROR
Cancel External Volume Scan: FAILED
Storage Volume
ERROR
Cancel Internal Volume Scan: FAILED
Storage Volume
ERROR
Cannot Unmount Volume and RAID. System Busy Using
Volume and RAID: Please Reboot and Try Again
Storage Volume
ERROR
Create External Normal Volume [%s] (%s): FAILED
NSA-220 Plus User’s Guide
Chapter 11 Maintenance Screens
Table 62 Log Messages (continued)
CLASS
SEVERITY
MESSAGE
Storage Volume
ERROR
Create Internal Volume [%s] (%s): FAILED
Storage Volume
ERROR
Rename External Volume to [%s]: FAILED
Storage Volume
ERROR
Scan External Volume: FAILED
Storage Volume
ERROR
Scan Internal Volume (%s operation): FAILED
Storage Volume
INFO
Cancel External Volume Scan: SUCCESS
Storage Volume
INFO
Cancel Internal Volume Scan: SUCCESS
Storage Volume
INFO
Create External Normal Volume [%s] (%s): SUCCESS
Storage Volume
INFO
Create Internal Volume [%s] (%s): SUCCESS
Storage Volume
INFO
Rename External Volume to [%s]: SUCCESS
Storage Volume
INFO
Scan External Volume: SUCCESS
Storage Volume
INFO
Scan Internal Volume (%s operation): SUCCESS
System
INFO
NTP update failed
System
INFO
NTP updates successfully from %s
System
INFO
NTP fails to update from %s
System
INFO
Device is rebooted by administrator!
System
INFO
Device is shutdown by administrator!
System
NOTICE
DNS server is changed.
System
NOTICE
Hostname is cleared.
System
NOTICE
Hostname is set to '%s'.
System
NOTICE
System description is changed.
System
NOTICE
System description is empty now.
System
NOTICE
DNS server setting is changed
System
NOTICE
DNS server address is changed to be given from DHCP
server
System
NOTICE
DNS server setting is changed
System
NOTICE
DNS server address is changed to be assigned by user
System
NOTICE
Name server is changed.
USB
NOTICE
An external APC UPS device is plugged/unplugged.
USB
NOTICE
An external Mass Storage device is plugged/unplugged.
USB
NOTICE
An external Printer device is plugged/unplugged.
USB
NOTICE
An external USB hub device is plugged/unplugged.
NSA-220 Plus User’s Guide
219
Chapter 11 Maintenance Screens
Table 62 Log Messages (continued)
CLASS
SEVERITY
MESSAGE
Users
ALERT
Failed %s login attempt (incorrect password or inexistent
username)
Users
ALERT
Failed %s login attempt (incorrect password or inexistent
username)
Users
INFO
User %s has logged in from %s!
Users
INFO
User %s has logged out from %s!
Users
INFO
User %s from %s has been logged out (re-auth timeout)!
Users
INFO
User %s from %s has been logged out (lease timeout)!
Users
NOTICE
Add new user %s by %s from %s.
Users
NOTICE
Change user %s's password.
Users
NOTICE
Delete user %s by %s from %s.
Users
NOTICE
The user %s from %s has attempted to change the user %s
password but old password verification fail.
Users
NOTICE
User %s on %u.%u.%u.%u has been denied access from
%s
Users
NOTICE
User %s password has been changed by %s from %s.
11.5 The Configuration Screen
Click Maintenance > Configuration to open the following screen. Use this
screen to back up or restore the NSA configuration settings.
Figure 81 Maintenance > Configuration
The following table describes the labels in this screen.
Table 63 Maintenance > Configuration
LABEL
DESCRIPTION
Backup Current Configuration Settings
Backup
220
Click this to save the current configuration of the NSA to your
computer. A pop-up screen appears asking you to confirm. Click
OK to continue or Cancel to quit.
NSA-220 Plus User’s Guide
Chapter 11 Maintenance Screens
Table 63 Maintenance > Configuration
LABEL
DESCRIPTION
Restore Configuration
After you restore a configuration, if a share path does not exist,
then it appears be in red.
Browse
Click this to locate a previously-saved configuration file.
Restore
Click this to load the previously-saved configuration file to the
NSA. This replaces your current NSA configuration settings with
the settings in the previously-saved configuration file.
A pop-up screen appears asking you to confirm. Click OK to
continue or Cancel to quit.
11.6 SSL
Click Maintenance > SSL to open this screen, where you can turn on HTTPS,
create a public key certificate, or upload a public key certificate that was issued by
a known certificate authority.
Figure 82 Maintenance > SSL
NSA-220 Plus User’s Guide
221
Chapter 11 Maintenance Screens
The following table describes the labels in this screen.
Table 64 Maintenance > SSL
LABEL
DESCRIPTION
Force HTTPs
Select the Force HTTPs option to turn on the NSA’s web
browser security. Anyone who connects via HTTPS to the NSA
must install the public key certificate associated with it.
Note: The NSA will restart the web configurator after you
click Apply.
The NSA displays a warning screen if applying your change may
disconnect some users. Click Apply if you want to continue.
Install System Default
CA
Click Download button to save a copy of the NSA’s public key
certificate to your local computer. This is useful for installing the
certificate without having to connect to the NSA, or for sending
by email to other users for them to install prior to logging into
the NSA for the first time. After saving the certificate to your
computer, double-click it to install it.
Note: Each web browser handles certificate installation
differently. See Appendix D on page 285 for more
information.
Modify the Existing
Certificate
Select Edit a self-signed CA certificate, then follow the onscreen instructions for creating a public key certificate signed by
the NSA as the local certificate authority.
Note: Use certificates created and signed by the NSA if the
device is not open to external access.
Select Create a certificate authorized by other CA, then
follow the on-screen instructions to install a certificate that has
been authorized by a third-party certificate authority.
Note: Use this method if the device is open to external
access, such as allowing users to connect through the
Internet using FTP over TLS or HTTPs.
222
NSA-220 Plus User’s Guide
Chapter 11 Maintenance Screens
11.6.1 Modifying or Creating a Certificate
When you select the Edit a self-signed CA certificate option, then click the Edit
button, a screen opens to allow you to make adjustments to the NSA’s public key
certificate.
The screen is also the same for the Create a certificate authorized by other
CA option.
Figure 83 Maintenance > SSL > Create or Edit a Certificate
The following table describes the labels in this screen.
Table 65 Maintenance > SSL > Create or Edit a Certificate
LABEL
DESCRIPTION
Common Name
This name describes the certificate’s origin, either in the form of
an IP address or a domain name.
Host IP Address
Select this option and enter the NSA’s IP address if you want to
use this for the common name.
Host Domain Name
Select this option and enter the NSA’s domain name if you want
to use this for the common name
Organizational Unit
(Optional)
Enter this name of the organizational unit which owns or
maintains the NSA. This is an optional field.
Organization
(Optional)
Enter this name of the organization or company which owns or
maintains the NSA. This is an optional field.
Country (Optional)
Enter this name of the country in which the NSA is located. This
is an optional field.
Key Type
Select the certificate’s key type, either RSA or DSA.RSA is a
public-key encryption and digital signature algorithm, while DSA
is only a digital signature algorithm.
Key Length
Select the encryption key length. The longer the key, the better
the encryption security. The only drawback to having a long key
is that the file encrypted with it swells in size as well.
NSA-220 Plus User’s Guide
223
Chapter 11 Maintenance Screens
Table 65 Maintenance > SSL > Create or Edit a Certificate
LABEL
DESCRIPTION
Apply
Click this to save your changes.
Cancel
Click this to discard changes and close the window.
11.7 The Firmware Upgrade Screen
Click Maintenance > FW Upgrade to open the following screen.
Use this screen to upgrade the NSA firmware. You should first have downloaded
the latest firmware files from the ZyXEL website.
Figure 84 Maintenance > FW Upgrade
The following table describes the labels in this screen.
Table 66 Maintenance > FW Upgrade
LABEL
DESCRIPTION
Firmware File
Type the location of the firmware file you want to upload
Browse
224
Click this to find the file on your computer
Upload
Click this to upload the new firmware. The NSA automatically
restarts after you upgrade. Wait until the restart completes
before accessing the NSA again. If you interrupt the upgrade,
then the NSA may become unusable.
Reset
Click this to refresh the screen.
NSA-220 Plus User’s Guide
Chapter 11 Maintenance Screens
11.8 The Shutdown Screen
Click Maintenance > Shutdown to open the following screen.
Use this screen to turn off the NSA or perform a software restart. A software
restart is faster than turning the NSA off and then turning it on again. Before
shutting down or restarting, check the System Status > Active Sessions screen
to make sure that no one is logged into the NSA or transferring files to or from the
NSA.
Figure 85 Maintenance > Shutdown
The following table describes the labels in this screen.
Table 67 Maintenance > Shutdown
LABEL
DESCRIPTION
Restart
Click this to have the device perform a software restart.
Shutdown
Click this to shut down the system and restart it again later.
When you click the Restart button a pop-up screen will appear asking you to
confirm. Click OK to continue or Cancel to quit the restart.
Figure 86 Maintenance > Shutdown > Confirm Restart
When you click the Shutdown button a pop-up screen will appear asking you to
confirm. Click OK to continue or Cancel to quit the shutdown.
Figure 87 Maintenance > Shutdown > Confirm Shutdown
NSA-220 Plus User’s Guide
225
Chapter 11 Maintenance Screens
226
NSA-220 Plus User’s Guide
CHAPTER
12
Protecting Your Data
12.1 Overview
This chapter compares the different ways of protecting data on the NSA and
explains how to use backup management software included on the CD.
12.2 Protection Methods
There are a variety of ways to protect your data on the NSA. Below is a summary
table of what can be done in each situation.
Table 68 Overview of Protection Methods
SITUATION
ACTION
Unexpected NSA behavior after
configuration changes
Back up the NSA configuration file before you
make major configuration changes.
Need to transfer data from your
computer to the NSA after volume(s)
have been created
Use the Memeo Autobackup program.
Data infected by virus
Use anti-virus software on your computer to
scan files before saving them onto the NSA.
Although this may be slow so you may want
to schedule it to occur while no one is using
the NSA.
Use a firewall with anti-virus capability on
your network.
Hard drive malfunction.
Use RAID.
NSA malfunction
Back up data to another NSA or external USB
hard drive.
Network down
Natural disaster such as a fire or
earthquake occurs where your NSA is
located
The following sections describe these methods in more detail. See Section 5.6.3
on page 121 for more information on RAID.
NSA-220 Plus User’s Guide
227
Chapter 12 Protecting Your Data
12.2.1 Configuration File Backup and Restoration
Use the Maintenance > Configuration menus to create a file of your NSA
configurations such as passwords, shares and volumes created, network settings
and so on. If you’re going to do some major configuration changes, then it is
advisable to create a configuration backup file. If things go wrong after you make
the configuration changes, you can always go back to the previous configuration
by restoring an earlier configuration file.
If you forgot the NSA password, then use the RESET button (see Section 13.3.1
on page 234) to return the NSA to the factory default configuration.
Note: Configuration File Backup and Restoration does not affect data (your files and
folders), volumes on the NSA.
12.2.2 Memeo Autobackup
Use the Memeo Autobackup software (included on the CD) on your computer to
schedule and manage backups. You can backup from your computer to the NSA.
You can also backup from one NSA on your network to another. You can set the
Memeo Autobackup software to automatically back up files from your computer to
the NSA whenever you modify the files.
Install the included DLNA-compliant Memeo Autobackup software on your
Windows 2000 or later computers to let them browse and play files stored on the
NSA.
See the Quick Start Guide for how to install the Memeo Autobackup software and
the requirement details.
Note: The Memeo Autobackup program uses the same network port as the NDU to
discover the NSA. To avoid a port conflict, do not run the Memeo Autobackup
program at the same time as the NDU.
228
NSA-220 Plus User’s Guide
P ART V
Troubleshooting
and Specifications
Troubleshooting (231)
Product Specifications (245)
229
230
CHAPTER
13
Troubleshooting
13.1 Troubleshooting Overview
This chapter offers some suggestions to solve problems you might encounter. The
potential problems are divided into the following categories.
• Power, Hardware, Connections, and LEDs
• NSA Login and Access
• Reset the NSA
• I Cannot Access The NSA
• External USB Drives
• Media Server Functions
• Download Service and Broadcatching Functions
• Web Publishing
• Auto Upload
13.2 Power, Hardware, Connections, and LEDs
The NSA PWR LED does not turn on (no LEDs are on).
• Make sure the NSA is turned on.
• Make sure you are using the power adaptor or cord included with the NSA.
• Make sure the power adaptor or cord is connected to the NSA and plugged in to
an appropriate power source. Make sure the power source is turned on.
• Turn the NSA off and on.
• If the problem continues, contact the vendor.
NSA-220 Plus User’s Guide
231
Chapter 13 Troubleshooting
An HDD LED is off.
The HDD LED is off when the NSA cannot detect a hard drive in the drive bay.
Replace or install a hard drive. See Installing or replacing a hard drive
An HDD LED is orange.
Orange means that the NSA detected an error on the hard drive (like a bad sector
for example). The NSA automatically tries to recover a bad sector, but the LED
stays orange until the NSA restarts. Even if the hard drive still functions, it is
recommended that you replace it since errors are a sign that the hard drive may
fail soon. See Installing or replacing a hard drive
An HDD LED is red.
Red means the hard drive has failed and the NSA can no longer detect it. Replace
the hard drive. See Installing or replacing a hard drive If you are using a RAID I
volume, you may still be able to use the volume but you should replace the faulty
drive as soon as possible.
Installing or replacing a hard drive
Do not remove or install hard drives while the NSA is turned on.
The NSA must be turned off before you remove or install hard
drive(s).
1
Turn the NSA off, remove the rear panel and the drive tray and make sure:
• there is a SATA I or SATA 3.0 Gbit/s compatible hard drive installed.
• the hard drive is installed correctly in the drive tray. Push the tray back into
NSA drive bay until the screw hole at the top of the drive tray is flush with the
drive bay (see the NSA Quick Start Guide and Section 5.2.1 on page 112).
• the hard drive could be faulty. Try a different hard drive or test the original
hard drive in a different NSA or computer.
2
232
If you had to replace the drive, turn on the NSA and go to the Storage screen.
NSA-220 Plus User’s Guide
Chapter 13 Troubleshooting
• If you have a RAID I volume click the Repair icon next to the new drive.
• If you are using RAID 0 you will need to recreate the whole volume. All of
your data is lost.
• If you are using a single-disk JBOD volume, you need to create a new volume
on the new drive.
• If you are using a two-disk JBOD volume, you need to create a whole new
volume on both drives.
The LAN LED (by the LAN port) is off.
• Make sure the Ethernet cable is connected properly to the NSA and connected to
another (Ethernet) device. Make sure the other device is turned on. If it’s
connected directly to a computer, make sure that the computer network card is
working (ping 127.0.0.1 on the computer).
• Use another Ethernet cable. If you’re connecting to a Gigabit Ethernet, make
sure you’re using an 8-wire Ethernet cable.
• If the problem continues, contact the vendor.
See Section 1.1.1 on page 23 for a description of NSA LEDs.
13.3 NSA Login and Access
I forgot the server name of the NSA.
• The default server name is nsa220plus.
• Use the NDU (NSA Discovery Utility) to discover your NSA. If you have admin
privileges, you can directly change the IP address of the NSA using the NDU.
• If the server name has changed and you don’t have the NDU, see Section
13.3.1 on page 234 to use the RESET button to return the default setting.
I cannot get to the NSA login screen.
• Use the NDU (NSA Discovery Utility) to discover your NSA. If you have admin
privileges, you can directly change the IP address of the NSA using the NDU.
• If you used the RESET button, the NSA may have a new IP address. Close and
reopen the NDU to discover the NSA.
NSA-220 Plus User’s Guide
233
Chapter 13 Troubleshooting
• Make sure the NSA is turned on.
• If you are trying to login directly by typing the server name into your web
browser’s address field, make sure you are using the correct server name as the
web site address.
• The default server name is nsa220plus, if you have changed the server
name, use the new one.
• If the server name has been changed and you do not know the new server
name, see the troubleshooting suggestions for I forgot the server name of the
NSA.
• If it still doesn’t work, try using the NDU.
• Check the hardware connections, and make sure the LEDs are behaving as
expected. See the Quick Start Guide and Section 1.1.1 on page 23.
• By default, the NSA gets an IP address automatically. The NSA assigns itself an
IP address if no device assigns one. If your computer is also set to get an IP
address automatically, the computer and the NSA can both assign themselves
IP addresses and communicate. See Chapter 6 on page 125 if you need to
configure the NSA with a static IP address.
• Make sure your computer’s IP address is in the same subnet as the NSA’s IP
address. You can use the NDU to find the NSA’s IP address. See Appendix A on
page 255 for how to change your computer’s IP address. Skip this if you know
that there are routers between your computer and the NSA.
• Ping the NSA from your computer. Make sure your computer’s Ethernet adapter
is installed and functioning properly. In a (Windows) computer, click Start,
(All) Programs, Accessories and then Command Prompt. In the Command
Prompt window, type “ping” followed by the NSA’s IP address (use the NDU to
find the NSA’s IP address if you don’t know it) and then press [ENTER].
• Make sure you are using Internet Explorer 6.0 (and later) or Firefox 1.07 (and
later).
• Make sure your Internet browser does not block pop-up windows and has
JavaScripts and Java enabled. See Appendix B on page 271. With Internet
Explorer 6, you may also have to enable scripting of safe ActiveX controls. See
Section 13.3.2 on page 235.
13.3.1 Reset the NSA
If you forget your password or cannot access the web configurator, use the
RESET button at the rear of the NSA. When you use the following reset
procedure, the system name and admin password are returned to the factory
defaults.
You may need to close and re-open the NDU to discover the NSA. This is because
the NSA automatically re-acquires IP address information, so its IP address may
change since. If no IP address information is assigned, the NSA uses Auto-IP to
assign itself an IP address and subnet mask. For example, you could connect the
NSA directly to your computer. If the computer is also set to get an IP address
234
NSA-220 Plus User’s Guide
Chapter 13 Troubleshooting
automatically, the computer and the NSA will choose addresses for themselves
and be able to communicate.
1
Press and hold the RESET button (for about two seconds) until you hear a beep,
and then release it.
2
The NSA automatically restarts to complete the reset.
I forgot the password.
• The default password is 1234.
• If you have changed the password and forgotten it, you will have to reset the
NSA.
The NDU cannot discover my NSA.
• Confirm that the computer running the NDU has a network connection. See the
section on the NSA’s LAN connection for related information.
• The computer running the NDU can only discover NSAs in the same subnet.
NSAs connected to the same switch or router as your NDU computer are usually
in the same subnet unless the router is doing subnetting or the switch is
implementing VLAN.
• The Memeo Autobackup program uses the same network port as the NDU to
discover the NSA. To avoid a port conflict, do not run the Memeo Autobackup
program at the same time as the NDU.
• Close the NDU and reopen it.
13.3.2 Enabling Scripting of Safe ActiveX Controls
If pages of the web configurator do not display properly in Internet Explorer,
check that scripting of safe ActiveX controls is enabled.
NSA-220 Plus User’s Guide
235
Chapter 13 Troubleshooting
1
In Internet Explorer, click Tools, Internet Options and then the Security tab.
Figure 88 Internet Options: Security
236
2
Click the Custom Level... button.
3
Under Script ActiveX controls marked safe for scripting, make sure that
Enable is selected (the default).
NSA-220 Plus User’s Guide
Chapter 13 Troubleshooting
4
Click OK to close the window.
Figure 89 Security Settings - Script Safe ActiveX Controls
I can see the login screen, but I cannot log in to the NSA.
• Make sure you have entered the username and password correctly. The default
username is admin, and the default password is 1234. These fields are casesensitive, so make sure [Caps Lock] is not on.
• Turn the NSA off and on.
• If this does not work, see Section 13.3.1 on page 234 to reset the device.
I cannot see the multi-language web configurator screens while using Internet
Explorer.
Use Section 13.3.2 on page 235 to enable the scripting of safe ActiveX controls.
NSA-220 Plus User’s Guide
237
Chapter 13 Troubleshooting
13.4 I Cannot Access The NSA
I cannot access a share
• Check that the NSA is turned on and connected to the network. Try to ping the
NSA or use the NDU to discover it.
• Check that you entered your login name and password correctly.
• Check that the share exists and check its access settings.
• Check if the shared folder is a subfolder of another (parent) share. Check that
the parent share’s access rights do not conflict with the subfolder share. It is
recommended that you do not create subfolder shares.
• Check if there are any existing mapped network drives to the NSA. You may
need to disconnect existing mapped network drives as a new mapped network
drive connection may use (different) previously-saved login information. To do
this, open Windows Explorer and click Tools > Disconnect Mapped Network
Drives.
• Check that the volume in which the share resides, exists and is not down or
degraded. If it is down or degraded, see Section 13.2 on page 231.
• Make sure you have the client for Microsoft networks installed and enabled in
your network connection’s properties.
• In Windows XP or 2000, click Start > Settings > Control Panel > Network
Connections (Network and Dial-up Connections in Windows 2000/NT) >
Local Area Connection > Properties.
• Check that Client for Microsoft Networks is in the list of components and
has its check box selected.
13.5 External USB Drives
My external USB drive is read-only.
If your USB drive was formatted as NTFS, then it is read-only on the NSA (the
volume status displays as OK). To solve this problem, re-format your USB drive
using the NSA (or FAT or FAT32 using a computer). See Chapter 5 on page 111 for
information on volume creation using the NSA (recommended). Back up the files
on your computer before you format the USB drive.
238
NSA-220 Plus User’s Guide
Chapter 13 Troubleshooting
The COPY LED is red.
Copying files from a USB device failed. The USB device may not be compatible
with the NSA. Try save the files onto a computer and then from the computer to
the NSA (through the network connection).
13.6 Some Features’ Screens Do Not Display
Many NSA features require a valid internal volume.
Features like the print server, download service, broadcatching, FTP and
Windows/CIFS access will not work without a valid internal volume. Make sure you
have a volume on an internal disk and that the volume is in the healthy state.
• Install an internal disk if one is not installed yet or has failed. See the Quick
Start Guide for how to install an internal disk.
• Create a new volume if you do not have one on the internal disk yet.
• Make sure the volume on the installed internal disk is in the healthy state.
13.7 Media Server Functions
I set the media server function to publish a folder, but some of the files in the
folder do not display in the list on the media client.
Files with formats that are not supported on the media server may not display in
the list. See Appendix on page 250 for the file formats that the media server
supports.
I published a folder with the media server function, but the media client does not
play some of the files (or does not play them properly).
NSA-220 Plus User’s Guide
239
Chapter 13 Troubleshooting
1
Files with formats that are not supported on the media server may not display in
the list. See Section 14.4 on page 250 for the file formats that the media server
supports.
2
If you are using media client software, you may need to install codecs on your
computer. Since the media client software uses your computer’s installed codecs,
files do not play if the required codec is not installed on your computer.
3
The media client may not support the file’s format.
iTunes does not display the names of all the music or video files I just put on the
NSA.
1
Make sure the files are a format supported by iTunes. See Section 14.5 on page
251.
2
Go to Applications > Media Server. Make sure the share containing the music
and video files is published and the iTunes server option is enabled.
3
If an iTunes client is connected, the NSA’s iTunes server function scans the
published media server folders for files every three minutes. Leave iTunes
connected to the NSA for three minutes. Then use the NSA’s eject button (as
shown next) to disconnect.
Figure 90 iTunes Eject Button
240
NSA-220 Plus User’s Guide
Chapter 13 Troubleshooting
4
Then click the NSA’s link to reconnect.
Figure 91 iTunes Reconnected
5
Another way to get the NSA’s iTunes server function to scan the published media
server folders for files is to go to Applications > Media Server and disable and
re-enable the iTunes server option. If you uploaded many files, it may take awhile
for the NSA to find and list all of them. Then try reconnecting your iTunes client.
I cannot use iTunes to play files located on my NSA.
1
Make sure the files are a format supported by iTunes. See Section 14.5 on page
251.
2
If you have files from the iTunes Store that use DRM, you need to use your Apple
account ID and password to authorize other computers to play the files. Apple
permits you to authorize up to five computers at a time. To authorize a computer,
open iTunes and click Store > Authorize Computer.
3
If you are connecting through a NAT router, make sure that TCP port 3689 and
UDP port 5353 are open for traffic on both the server and the client and all points
in between (especially the NAT router). If your router includes a firewall, make
sure it also allows TCP port 3689 and UDP port 5353 traffic.
NSA-220 Plus User’s Guide
241
Chapter 13 Troubleshooting
13.8 Download Service and Broadcatching
Functions
The download list or broadcatching items are missing after I removed a hard
drive.
The NSA’s download and broadcatching lists are stored on the system volume. If
you have two JBOD volumes, it is possible to remove one and still use the other.
However if you remove the system volume, you may lose the download and
broadcasting lists. With two JBOD volumes, the hard disk that was installed first is
usually the system volume.
13.9 Web Publishing
A web-published share cannot be accessed by web browser from the Internet.
• Make sure the person trying to access the share is using the correct web
address (and port number if the NSA’s web publishing feature is not using port
80). See page 156 for details.
• Make sure the publishing feature is turned on and the share is in the list of
published shares.
• Make sure the person trying to access the share is using Internet Explorer 6.0
(and later) or Firefox 1.07 (and later).
• You need to use a public address to access the NSA’s web-published shares
from the Internet. If your NSA uses a private IP address, use the public IP
address of your Internet gateway (firewall) and configure NAT or port
forwarding on your Internet gateway and possibly firewall rules in order to let
people access the NSA’s web-published shares from the Internet.
• Make sure the firewall’s public IP address is static or that the firewall uses a
Dynamic Domain Name (DDNS).
• Web publishing uses TCP protocol and the port number you specify. Make sure
there is not another service using TCP protocol with the same port number. See
Appendix C on page 281 for a list of common services and their associated
protocols and port numbers.
242
NSA-220 Plus User’s Guide
Chapter 13 Troubleshooting
• If Firefox access to the share does not work, check that you did not set the Web
publishing feature to use one of the following ports. (Firefox blocks these ports
by default.)
Table 69 Ports Blocked By Default in Firefox
POR
T
SERVICE
POR
T
SERVICE
POR
T
SERVICE
1
tcpmux
95
supdup
513
login
7
echo
101
hostriame
514
shell
9
discard
102
iso-tsap
515
printer
11
systat
103
gppitnp
526
tempo
13
daytime
104
acr-nema
530
courier
15
netstat
109
POP2
531
chat
17
qotd
110
POP3
532
netnews
19
chargen
111
sunrpc
540
uucp
20
ftp data
113
auth
556
remotefs
21
ftp control
115
sftp
563
NNTP+SSL
22
ssh
117
uucp-path
587
submission
23
telnet
119
NNTP
601
syslog
25
smtp
123
NTP
636
LDAP+SSL
37
time
135
loc-srv
epmap
993
IMAP+SSL
42
name
139
netbios
995
POP3+SSL
43
nicname
143
IMAP2
2049
nfs
53
domain
179
BGP
4045
lockd
77
priv-rjs
389
LDAP
6000
X11
79
finger
465
SMTP+SSL
87
ttylink
512
print exec
• Make sure your ISP allows you to run a server and is not blocking the port
number of the NSA’s web publishing feature.
13.10 Auto Upload
The NSA does not automatically upload files to Flickr or YouTube.
1
Make sure the NSA is connected to the Internet. See Section 6.2.2 on page 127
for details about testing network connections.
2
Click Maintenance > Log to check the NSA’s log for a message about the file.
NSA-220 Plus User’s Guide
243
Chapter 13 Troubleshooting
2a
If the log message displays “no such file or directory”, the file may have been
removed from the NSA. Make sure the file still exists in the watch folder.
2b
If the log message displays “filename is queued”, the file may still be waiting
for auto upload. Check the grace period setting in the service’s Configuration
screen. You can set a smaller grace period to shorten the queue time.
2c
If you cannot find any log messages about the file:
• Make sure the Folder Watch List includes the folder containing the file.
You can upload the file to the watch folder again.
• Make sure the file’s format is supported by Flickr or YouTube. You can find
the supported file extensions in the Folder Watch List.
2d
244
If the log message displays “not authorized yet”, check if you can enter the
NSA’s Configuration screen for the service. If you changed the password of
your Flickr or YouTube account, you cannot access the service’s
Configuration screen, and the NSA cannot auto upload files. Make sure you
also update the account information in the NSA.
3
Make sure the file size does not exceed the limit imposed by the service. At the
time of writing, Flickr restricts the file size to 10 MB, and YouTube restricts the file
size to 100 MB.
4
Make sure you did not exceed the service’s upload quota. Flickr and YouTube have
different policies about how much you can upload within a certain period, for
example, 100 MB/week.
5
The NSA may have temporarily failed to connect to the service. You can upload
the file to the watch folder again.
NSA-220 Plus User’s Guide
CHAPTER
14
Product Specifications
See also Chapter 1 on page 21 for a general overview of the key features.
14.1 Physical Features
These are the main external physical features.
Table 70 Physical Features
USB Ports
2 USB (version 2) ports.
Copy files directly to the NSA from compatible USB devices
like card readers, MP3 players, memory sticks, and digital
cameras without using a computer.
Expand the NSA’s storage capacity with compatible USB
devices (like hard drives).
Gigabit Ethernet Port
The 10/100/1000 Mbps auto-negotiating Ethernet port
allows the NSA to detect the speed of incoming
transmissions and adjust appropriately without manual
intervention. It allows data transfer of either 100 Mbps or
1000 Mbps in either half-duplex or full-duplex mode
depending on your Ethernet network. Use an 8-wire
Ethernet cable for Gigabit connections. The port is also autocrossover (MDI/MDI-X) meaning it automatically adjusts to
either a crossover or straight-through Ethernet cable.
Actual data throughput varies depending on the network
conditions and environmental factors, including volume of
network traffic, network overhead and building materials.
SATA Interface
Serial ATA is a low cost interface technology that allows high
speed data transfer. Serial ATA also allows more efficient
internal airflow and also smaller chassis design.
RESET Button
If you forget your (admin) password, then use the RESET
button to restore the factory default password to “1234”
(with username “admin”), and auto-IP address (DHCP
client).
NSA-220 Plus User’s Guide
245
Chapter 14 Product Specifications
14.2 Firmware Features
These are some of the main firmware features of the NSA.
Table 71 Firmware Features
DLNA Server
The NSA is a DLNA-compliant media server that lets DLNAcompliant media clients play video, audio, and photo content
files stored on the NSA.
RAID File Storage
Use RAID 0 if you want pure write speed and/or maximum
capacity for your drives, and/or you have other means of
protecting your data.
Use RAID 1 if you have two drives and want to mirror
primary data to the second drive. If one drive fails, replace it
and then re-synchronize to recover all data.
User Passwords
Configure a password for an individual User to restrict
access to the NSA.
Client Support
Data can be shared among all Windows, Mac, Linux, and
UNIX users that have FTP client software or CIFS file sharing
support (such as Samba for Linux and UNIX users).
The NSA is also a DLNA-certified media server that lets
DLNA-compliant media clients play video, audio, and photo
content files stored on the NSA.
246
HTTP
Access the NSA using a regular web connection (HTTP).
DHCP (Dynamic Host
Configuration Protocol)
DHCP (Dynamic Host Configuration Protocol) allows the NSA
to obtain an IP address and subnet mask at start-up from a
centralized DHCP server. Alternatively, you can give the NSA
a static IP address and subnet mask.
Full Network
Management
The embedded web configurator is an platform-independent
web-based utility that allows you to easily access the NSA’s
management settings.
Hard Disk Drive Power
Saving
If a hard disk inside the NSA is idle for six minutes, the NSA
puts it to sleep until you use it again.
Firmware Upload and
Configuration File
Management
Upload new firmware to the NSA using the web configurator.
You can also back up and restore the NSA configuration file
containing all its settings to/from your computer.
NSA Discovery Utility
(NDU)
Use the NDU from a Windows computer to find NSA(s) in
your network, access the NSA login page, change its IP
address configuration or map to a Windows network drive.
Memeo Autobackup
Memeo Autobackup is a tool for Windows users to create
backups of data stored on their Windows computers to an
NSA. This software is included on the CD.
Time and Date
Configure a time server and set a time zone for your NSA to
show the correct times in logs.
NSA-220 Plus User’s Guide
Chapter 14 Product Specifications
14.3 Specification Tables
The NSA hardware specifications are shown in the following table.
Table 72 NSA Hardware Specifications
Default IP Address
DHCP client. If no DHCP server is found, the NSA uses Auto-IP to
choose an IP address in the 169.254.X.X subnet (where X is a
number from 1 to 254).
Default Subnet Mask
DHCP client by default. If no DHCP server is found, the subnet
mask defaults to 255.255.255.0 (24 bits).
Default Username
admin
Default Password
1234
Dimensions
113 (D)*202 (W)*142 (H) mm
Weight
1.5 kg (without hard drives)
Drive Trays
Two
Compatible Hard
DisksA
SATA I and SATA II 3.0 Gbit/s (Serial Advanced Technology
Attachment) compatible hard drives.
Maximum Number of
Folders Per Share
The NSA’s media server function can detect up to 8,000 folders
within a single published share.
After 8,000 folders have been created, new folder contents will
not be added to the media server's list. However you can still
access the folders using Samba.
Ports
Ethernet
One auto-negotiating, auto MDI/MDI-X 10/100/1000B Mbps RJ-45
Ethernet port (1000BASE-T)
USB v2.0 Storage
Two ports on front panel.
Windows: NTFS (read only), FAT32 and FAT16
Linux: ReiserFS, EXT2, and EXT3
LEDs
PWR, SYS, HDD1, HDD2, COPY, and LAN
Operating
Temperature
0º C ~ 40º C
AC Input
Voltage: 100 - 240 V at 50 - 60 Hz
Current: 3.42 A
Storage Temperature
-30º C ~ 60º C
Operating Humidity
20% ~ 90% RH (non-condensing)
Storage Humidity
20% ~ 90% RH (non-condensing)
Certifications
EMC: FCC Part15B, VCCI, BSMI, EN55022, EN55024
Safety: CSA International, EN60950-1
A. Hard drives may not be included with your NSA.
B. Use an 8-wire Ethernet cable for Gigabit connections.
NSA-220 Plus User’s Guide
247
Chapter 14 Product Specifications
The NSA firmware specifications are shown in the following table
Table 73 NSA Firmware Specifications
File Storage System
JBOD, RAID 0, 1,
Network Protocols
TCP/IP, UDP/IP
DHCP Client
FTP
HTTP
File Management
Create/Delete System Volume
Network File Sharing
Protocol
CIFS/SMB for Windows and Mac OSX
HTTP for web browser
FTP
Network Security
Authentication
Share level
Supported Clients
Windows 2000 Professional/Server
Windows XP Home/Professional
Windows Server 2003
Windows Vista
Linux
Maximum Number of Users
Allowed
100A
Maximum Number of
Concurrent FTP Sessions
20A
Maximum Number of
Concurrent CIFS Sessions
20A
System Management
Remote Management via Web Configurator (HTTP)
NSA Discovery Utility (NDU)
Logging/Monitoring
Centralized Logs
Firmware Upgrade
Web Configurator
Web Browsers Supported
Internet Explorer 6.0 and later versions.
Firefox 1.07 and later versions.
Netscape Navigator 7.0 and later versions.
A. Limits may vary depending on user-share resource usage.
The following list, which is not exhaustive, illustrates the standards and
recommendations supported in the NSA.
Table 74 Supported Standards and Recommendations
248
CSS level 1
Cascading Style Sheets.
CSS level 2 revision 1
(“CSS 2.1”)
Cascading Style Sheets.
NSA-220 Plus User’s Guide
Chapter 14 Product Specifications
Table 74 Supported Standards and Recommendations
DATETIME
"Date and Time Formats", W3C (World Wide Web Consortium)
Note, M. Wolf and C. Wicksteed, 15 September 1997. Revised 27
August 1998. See http://www.w3.org/TR/1998/NOTE-datetime19980827
DLNA v1.5 Server
The DLNA (Digital Living Network Alliance) group of companies
works to make products compatible and able to work in a home
network in order to make digital living easy and seamless. DLNA
clients play files stored on DLNA servers.
ECMA-262
The original ECMAScript standard, also known as JavaScript.
ECMA-262 Edition 2
The ECMAScript standard’s second revision; also ISO standard
16262.
ECMA-262 Edition 3
The ECMAScript standard’s third revision; corresponds to
JavaScript 1.5.
ECMA-357
ECMAScript for XML (E4X). See also the E4X errata.
HTML 3.2 Reference
Specification
The HyperText Markup Language (HTML).
HTML 4.01
Specification
Defines the HyperText Markup Language (HTML), the publishing
language of the World Wide Web.
ISO 3166-1
Country names (official short names in English) in alphabetical
order as given in ISO 3166-1 and the corresponding ISO 3166-1alpha-2 code elements.
ISO 639-2
Two-letter and three-letter language code sets.
MIMETYPES
IANA registered content types (MIME types). See the IANA web
site (ftp://ftp.isi.edu/in-notes/iana/assignments/media-types/).
ISO 15740
Picture Transfer Protocol (PTP) from the International imaging
Industry Association allows you to transfer pictures from digital
cameras or other devices without needing additional device
drivers.
RFC 1001
(STD-19) - Protocol standard for NetBIOS service on a TCP/UDP
transport: Concepts and methods
RFC 1002
(STD-19) - Protocol standard for NetBIOS service on a TCP/UDP
transport: Detailed specifications
RFC 1034
(STD-13) - Domain names - concepts and facilities
RFC 1035
(STD-13) - Domain names - implementation and specification
RFC 1305
Network Time Protocol (NTP version 3)
RFC 1415
FTP-FTAM Gateway Specification
RFC 1510
The Kerberos Network Authentication Service (V5)
RFC 1738
Uniform Resource Locators (URL)
RFC 1808
Relative Uniform Resource Locators
RFC 1945
The Hypertext Transfer Protocol (HTTP) 1.0.
RFC 2131
Dynamic Host Configuration Protocol
RFC 2396
Uniform Resource Identifier (URI)
RFC 2396
Uniform Resource Identifiers (URI): Generic Syntax
RFC 2616
Hypertext Transfer Protocol (HTTP) 1.1.
NSA-220 Plus User’s Guide
249
Chapter 14 Product Specifications
Table 74 Supported Standards and Recommendations
RFC 2854
History of HTML development, and lists the relevant W3C (World
Wide Web Consortium) recommendations for the "text/html"
MIME type.
RFC 3066, BCP 47
(Best Current
Practice)
Language tags
RFC 3282
"Content-language:" headers.
RFC 3986
(STD-66) - Uniform Resource Identifier (URI): Generic Syntax
RFC 4120
The Kerberos Network Authentication Service (V5)
RFC 4248
The telnet URI Scheme
RFC 793
(STD-7) - Transmission Control Protocol
RFC 959
(STD-9) - File Transfer Protocol
SATA
SATA I and SATA II 3.0 Gbit/s (Serial Advanced Technology
Attachment) compatible hard drives.
UPnP
Universal Plug and Play (UPnP) is a distributed, open networking
standard that uses TCP/IP for simple peer-to-peer network
connectivity between devices.
USB 2.0
USB (Universal Serial Bus) version 2.0 allows for interfacing
devices with data transfers rates of up to 480 Mbps.
XHTML 1.0
Extensible HyperText Markup Language (Second Edition)
XHTML 1.1
Module-based XHTML
14.4 Supported Media Server Content Formats
The following describes the details about the files that the NSA media server can
publish.
Table 75 Supported Media Server Content Formats
250
CATEGORY FILE TYPE
EXTENSION
Video
dat, m1v, m2t, m2v,
m4v, mp2, mp2t, mp2p,
mpa, mpe, mpeg,
mpeg2, mpg, mpg2, vob
MPEG-1/MPEG-2
Windows Media Video
asf, wmv
AVI
avi
DivX
divx , avi
DVR-MS
dvr-ms
Matroska
mkv
Quick Time Video
mov
NSA-220 Plus User’s Guide
Chapter 14 Product Specifications
Table 75 Supported Media Server Content Formats
CATEGORY FILE TYPE
EXTENSION
Music
MP3
mp3
MPEG-4
3g2, 3gp, aac, m4a, mp4
Ogg Vorbis
ogg
WAVE
wav
Windows Media Audio
wma
M3U (Playlist)
m3u
PLS (Playlist)
pls
Matroska
mka
Text to Speech
tts
Photo
Human Voice Band
lpcm, pcm
Bitmap
bmp
JPEG
jpeg, jpg
PNG
png
Note: Not all published file types can be viewed by all client applications.
14.5 Supported iTunes Server Content Formats
At the time of writing, the NSA’s supports iTunes 7.4.1.2, publishing AAC (MPEG4), MP3, AIFF, WAV, and Apple Lossless files.
14.6 Power Consumption
The NSA was tested using the specified power sources with the external power
adapter and with two hard drives installed.
Note: This table is a laboratory test of NSA power consumption for your reference
only.
Table 76 Power Consumption in Watts (W)
POWER
SOURCE
SYSTEM READ/
WRITE
SYSTEM IDLE
240V/50Hz
25.2W
11.9W
100V/60Hz
23.6W
11.7W
NSA-220 Plus User’s Guide
251
Chapter 14 Product Specifications
252
NSA-220 Plus User’s Guide
P ART VI
Appendices and
Index
Setting up Your Computer’s IP Address
(255)
Pop-up Windows, JavaScripts and Java
Permissions (271)
Common Services (281)
Importing Certificates (285)
Open Source Licences (317)
Legal Information (355)
Index (359)
253
254
APPENDIX
A
Setting up Your Computer’s IP
Address
All computers must have a 10M or 100M Ethernet adapter card and TCP/IP
installed.
Windows 95/98/Me/NT/2000/XP, Macintosh OS 7 and later operating systems and
all versions of UNIX/LINUX include the software components you need to install
and use TCP/IP on your computer. Windows 3.1 requires the purchase of a thirdparty TCP/IP application package.
TCP/IP should already be installed on computers using Windows NT/2000/XP,
Macintosh OS 7 and later operating systems.
After the appropriate TCP/IP components are installed, configure the TCP/IP
settings in order to “communicate” with your network.
NSA-220 Plus User’s Guide
255
Appendix A Setting up Your Computer’s IP Address
Windows 95/98/Me
Click Start, Settings, Control Panel and double-click the Network icon to open
the Network window.
Figure 92 WIndows 95/98/Me: Network: Configuration
Installing Components
The Network window Configuration tab displays a list of installed components.
You need a network adapter, the TCP/IP protocol and Client for Microsoft
Networks.
If you need the adapter:
1
In the Network window, click Add.
2
Select Adapter and then click Add.
3
Select the manufacturer and model of your network adapter and then click OK.
If you need TCP/IP:
256
1
In the Network window, click Add.
2
Select Protocol and then click Add.
NSA-220 Plus User’s Guide
Appendix A Setting up Your Computer’s IP Address
3
Select Microsoft from the list of manufacturers.
4
Select TCP/IP from the list of network protocols and then click OK.
If you need Client for Microsoft Networks:
1
Click Add.
2
Select Client and then click Add.
3
Select Microsoft from the list of manufacturers.
4
Select Client for Microsoft Networks from the list of network clients and then
click OK.
5
Restart your computer so the changes you made take effect.
Configuring
1
In the Network window Configuration tab, select your network adapter's TCP/IP
entry and click Properties
2
Click the IP Address tab.
• If your IP address is dynamic, select Obtain an IP address automatically.
• If you have a static IP address, select Specify an IP address and type your
information into the IP Address and Subnet Mask fields.
Figure 93 Windows 95/98/Me: TCP/IP Properties: IP Address
NSA-220 Plus User’s Guide
257
Appendix A Setting up Your Computer’s IP Address
3
Click the DNS Configuration tab.
• If you do not know your DNS information, select Disable DNS.
• If you know your DNS information, select Enable DNS and type the
information in the fields below (you may not need to fill them all in).
Figure 94 Windows 95/98/Me: TCP/IP Properties: DNS Configuration
4
Click the Gateway tab.
• If you do not know your gateway’s IP address, remove previously installed
gateways.
• If you have a gateway IP address, type it in the New gateway field and click
Add.
5
Click OK to save and close the TCP/IP Properties window.
6
Click OK to close the Network window. Insert the Windows CD if prompted.
7
Restart your computer when prompted.
Verifying Settings
258
1
Click Start and then Run.
2
In the Run window, type "winipcfg" and then click OK to open the IP
Configuration window.
3
Select your network adapter. You should see your computer's IP address, subnet
mask and default gateway.
NSA-220 Plus User’s Guide
Appendix A Setting up Your Computer’s IP Address
Windows 2000/NT/XP
The following example figures use the default Windows XP GUI theme.
1
Click start (Start in Windows 2000/NT), Settings, Control Panel.
Figure 95 Windows XP: Start Menu
2
In the Control Panel, double-click Network Connections (Network and Dialup Connections in Windows 2000/NT).
Figure 96 Windows XP: Control Panel
NSA-220 Plus User’s Guide
259
Appendix A Setting up Your Computer’s IP Address
3
Right-click Local Area Connection and then click Properties.
Figure 97 Windows XP: Control Panel: Network Connections: Properties
4
Select Internet Protocol (TCP/IP) (under the General tab in Win XP) and then
click Properties.
Figure 98 Windows XP: Local Area Connection Properties
5
260
The Internet Protocol TCP/IP Properties window opens (the General tab in
Windows XP).
NSA-220 Plus User’s Guide
Appendix A Setting up Your Computer’s IP Address
• If you have a dynamic IP address click Obtain an IP address
automatically.
• If you have a static IP address click Use the following IP Address and fill in
the IP address, Subnet mask, and Default gateway fields.
• Click Advanced.
Figure 99 Windows XP: Internet Protocol (TCP/IP) Properties
6
If you do not know your gateway's IP address, remove any previously installed
gateways in the IP Settings tab and click OK.
Do one or more of the following if you want to configure additional IP addresses:
• In the IP Settings tab, in IP addresses, click Add.
• In TCP/IP Address, type an IP address in IP address and a subnet mask in
Subnet mask, and then click Add.
• Repeat the above two steps for each IP address you want to add.
• Configure additional default gateways in the IP Settings tab by clicking Add
in Default gateways.
• In TCP/IP Gateway Address, type the IP address of the default gateway in
Gateway. To manually configure a default metric (the number of
transmission hops), clear the Automatic metric check box and type a metric
in Metric.
• Click Add.
• Repeat the previous three steps for each default gateway you want to add.
NSA-220 Plus User’s Guide
261
Appendix A Setting up Your Computer’s IP Address
• Click OK when finished.
Figure 100 Windows XP: Advanced TCP/IP Properties
7
In the Internet Protocol TCP/IP Properties window (the General tab in
Windows XP):
• Click Obtain DNS server address automatically if you do not know your
DNS server IP address(es).
• If you know your DNS server IP address(es), click Use the following DNS
server addresses, and type them in the Preferred DNS server and
Alternate DNS server fields.
262
NSA-220 Plus User’s Guide
Appendix A Setting up Your Computer’s IP Address
If you have previously configured DNS servers, click Advanced and then the
DNS tab to order them.
Figure 101 Windows XP: Internet Protocol (TCP/IP) Properties
8
Click OK to close the Internet Protocol (TCP/IP) Properties window.
9
Click Close (OK in Windows 2000/NT) to close the Local Area Connection
Properties window.
10
Close the Network Connections window (Network and Dial-up Connections
in Windows 2000/NT).
11 Restart your computer (if prompted).
Verifying Settings
1
Click Start, All Programs, Accessories and then Command Prompt.
2
In the Command Prompt window, type "ipconfig" and then press [ENTER]. You
can also open Network Connections, right-click a network connection, click
Status and then click the Support tab.
NSA-220 Plus User’s Guide
263
Appendix A Setting up Your Computer’s IP Address
Macintosh OS X
1
Click the Apple menu, and click System Preferences to open the System
Preferences window.
Figure 102 Macintosh OS X: Apple Menu
2
Click Network in the icon bar.
• Select Automatic from the Location list.
• Select Built-in Ethernet from the Show list.
• Click the TCP/IP tab.
3
For dynamically assigned settings, select Using DHCP from the Configure list.
Figure 103 Macintosh OS X: Network
264
NSA-220 Plus User’s Guide
Appendix A Setting up Your Computer’s IP Address
4
For statically assigned settings, do the following:
• From the Configure box, select Manually.
• Type your IP address in the IP Address box.
• Type your subnet mask in the Subnet mask box.
• Type the IP address of your gateway in the Router address box.
5
Click Apply Now and close the window.
6
Restart your computer (if prompted).
Verifying Settings
Check your TCP/IP properties in the Network window.
Linux
This section shows you how to configure your computer’s TCP/IP settings in Red
Hat Linux 9.0. Procedure, screens and file location may vary depending on your
Linux distribution and release version.
Note: Make sure you are logged in as the root administrator.
Using the K Desktop Environment (KDE)
Follow the steps below to configure your computer IP address using the KDE.
1
Click the Red Hat button (located on the bottom left corner), select System
Setting and click Network.
Figure 104 Red Hat 9.0: KDE: Network Configuration: Devices
NSA-220 Plus User’s Guide
265
Appendix A Setting up Your Computer’s IP Address
2
Double-click on the profile of the network card you wish to configure. The
Ethernet Device General screen displays as shown.
Figure 105 Red Hat 9.0: KDE: Ethernet Device: General
• If you have a dynamic IP address, click Automatically obtain IP address
settings with and select dhcp from the drop down list.
• If you have a static IP address, click Statically set IP Addresses and fill in
the Address, Subnet mask, and Default Gateway Address fields.
3
Click OK to save the changes and close the Ethernet Device General screen.
4
If you know your DNS server IP address(es), click the DNS tab in the Network
Configuration screen. Enter the DNS server information in the fields provided.
Figure 106 Red Hat 9.0: KDE: Network Configuration: DNS
266
NSA-220 Plus User’s Guide
Appendix A Setting up Your Computer’s IP Address
5
Click the Devices tab.
6
Click the Activate button to apply the changes. The following screen displays.
Click Yes to save the changes in all screens.
Figure 107 Red Hat 9.0: KDE: Network Configuration: Activate
7
After the network card restart process is complete, make sure the Status is
Active in the Network Configuration screen.
Using Configuration Files
Follow the steps below to edit the network configuration files and set your
computer IP address.
1
Assuming that you have only one network card on the computer, locate the
ifconfig-eth0 configuration file (where eth0 is the name of the Ethernet card).
Open the configuration file with any plain text editor.
• If you have a dynamic IP address, enter dhcp in the BOOTPROTO= field. The
following figure shows an example.
Figure 108 Red Hat 9.0: Dynamic IP Address Setting in ifconfig-eth0
DEVICE=eth0
ONBOOT=yes
BOOTPROTO=dhcp
USERCTL=no
PEERDNS=yes
TYPE=Ethernet
NSA-220 Plus User’s Guide
267
Appendix A Setting up Your Computer’s IP Address
• If you have a static IP address, enter static in the BOOTPROTO= field. Type
IPADDR= followed by the IP address (in dotted decimal notation) and type
NETMASK= followed by the subnet mask. The following example shows an
example where the static IP address is 192.168.1.10 and the subnet mask is
255.255.255.0.
Figure 109 Red Hat 9.0: Static IP Address Setting in ifconfig-eth0
DEVICE=eth0
ONBOOT=yes
BOOTPROTO=static
IPADDR=192.168.1.10
NETMASK=255.255.255.0
USERCTL=no
PEERDNS=yes
TYPE=Ethernet
2
If you know your DNS server IP address(es), enter the DNS server information in
the resolv.conf file in the /etc directory. The following figure shows an example
where two DNS server IP addresses are specified.
Figure 110 Red Hat 9.0: DNS Settings in resolv.conf
nameserver 172.23.5.1
nameserver 172.23.5.2
3
After you edit and save the configuration files, you must restart the network card.
Enter./network restart in the /etc/rc.d/init.d directory. The following
figure shows an example.
Figure 111 Red Hat 9.0: Restart Ethernet Card
[root@localhost init.d]# network restart
Shutting down interface eth0:
Shutting down loopback interface:
Setting network parameters:
Bringing up loopback interface:
Bringing up interface eth0:
268
[OK]
[OK]
[OK]
[OK]
[OK]
NSA-220 Plus User’s Guide
Appendix A Setting up Your Computer’s IP Address
Verifying Settings
Enter ifconfig in a terminal screen to check your TCP/IP properties.
Figure 112 Red Hat 9.0: Checking TCP/IP Properties
[root@localhost]# ifconfig
eth0
Link encap:Ethernet HWaddr 00:50:BA:72:5B:44
inet addr:172.23.19.129 Bcast:172.23.19.255 Mask:255.255.255.0
UP BROADCAST RUNNING MULTICAST MTU:1500 Metric:1
RX packets:717 errors:0 dropped:0 overruns:0 frame:0
TX packets:13 errors:0 dropped:0 overruns:0 carrier:0
collisions:0 txqueuelen:100
RX bytes:730412 (713.2 Kb) TX bytes:1570 (1.5 Kb)
Interrupt:10 Base address:0x1000
[root@localhost]#
NSA-220 Plus User’s Guide
269
Appendix A Setting up Your Computer’s IP Address
270
NSA-220 Plus User’s Guide
APPENDIX
B
Pop-up Windows, JavaScripts
and Java Permissions
In order to use the web configurator you need to allow:
• Web browser pop-up windows from your device.
• JavaScripts (enabled by default).
• Java permissions (enabled by default).
Note: Internet Explorer 6 screens are used here. Screens for other Internet Explorer
versions may vary.
Internet Explorer Pop-up Blockers
You may have to disable pop-up blocking to log into your device.
Either disable pop-up blocking (enabled by default in Windows XP SP (Service
Pack) 2) or allow pop-up blocking and create an exception for your device’s IP
address.
Disable Pop-up Blockers
1
In Internet Explorer, select Tools, Pop-up Blocker and then select Turn Off
Pop-up Blocker.
Figure 113 Pop-up Blocker
You can also check if pop-up blocking is disabled in the Pop-up Blocker section in
the Privacy tab.
NSA-220 Plus User’s Guide
271
Appendix B Pop-up Windows, JavaScripts and Java Permissions
1
In Internet Explorer, select Tools, Internet Options, Privacy.
2
Clear the Block pop-ups check box in the Pop-up Blocker section of the screen.
This disables any web pop-up blockers you may have enabled.
Figure 114 Internet Options: Privacy
3
Click Apply to save this setting.
Enable Pop-up Blockers with Exceptions
Alternatively, if you only want to allow pop-up windows from your device, see the
following steps.
1
272
In Internet Explorer, select Tools, Internet Options and then the Privacy tab.
NSA-220 Plus User’s Guide
Appendix B Pop-up Windows, JavaScripts and Java Permissions
2
Select Settings…to open the Pop-up Blocker Settings screen.
Figure 115 Internet Options: Privacy
3
Type the IP address of your device (the web page that you do not want to have
blocked) with the prefix “http://”. For example, http://192.168.167.1.
NSA-220 Plus User’s Guide
273
Appendix B Pop-up Windows, JavaScripts and Java Permissions
4
Click Add to move the IP address to the list of Allowed sites.
Figure 116 Pop-up Blocker Settings
5
Click Close to return to the Privacy screen.
6
Click Apply to save this setting.
JavaScripts
If pages of the web configurator do not display properly in Internet Explorer,
check that JavaScripts are allowed.
274
NSA-220 Plus User’s Guide
Appendix B Pop-up Windows, JavaScripts and Java Permissions
1
In Internet Explorer, click Tools, Internet Options and then the Security tab.
Figure 117 Internet Options: Security
2
Click the Custom Level... button.
3
Scroll down to Scripting.
4
Under Active scripting make sure that Enable is selected (the default).
5
Under Scripting of Java applets make sure that Enable is selected (the
default).
NSA-220 Plus User’s Guide
275
Appendix B Pop-up Windows, JavaScripts and Java Permissions
6
Click OK to close the window.
Figure 118 Security Settings - Java Scripting
Java Permissions
276
1
From Internet Explorer, click Tools, Internet Options and then the Security
tab.
2
Click the Custom Level... button.
3
Scroll down to Microsoft VM.
4
Under Java permissions make sure that a safety level is selected.
NSA-220 Plus User’s Guide
Appendix B Pop-up Windows, JavaScripts and Java Permissions
5
Click OK to close the window.
Figure 119 Security Settings - Java
JAVA (Sun)
1
From Internet Explorer, click Tools, Internet Options and then the Advanced
tab.
2
Make sure that Use Java 2 for <applet> under Java (Sun) is selected.
NSA-220 Plus User’s Guide
277
Appendix B Pop-up Windows, JavaScripts and Java Permissions
3
Click OK to close the window.
Figure 120 Java (Sun)
Mozilla Firefox
Mozilla Firefox 2.0 screens are used here. Screens for other versions may vary.
You can enable Java, Javascripts and pop-ups in one screen. Click Tools, then
click Options in the screen that appears.
Figure 121 Mozilla Firefox: Tools > Options
278
NSA-220 Plus User’s Guide
Appendix B Pop-up Windows, JavaScripts and Java Permissions
Click Content.to show the screen below. Select the check boxes as shown in the
following screen.
Figure 122 Mozilla Firefox Content Security
NSA-220 Plus User’s Guide
279
Appendix B Pop-up Windows, JavaScripts and Java Permissions
280
NSA-220 Plus User’s Guide
APPENDIX
C
Common Services
The following table lists some commonly-used services and their associated
protocols and port numbers. For a comprehensive list of port numbers, ICMP type/
code numbers and services, visit the IANA (Internet Assigned Number Authority)
web site.
• Name: This is a short, descriptive name for the service. You can use this one or
create a different one, if you like.
• Protocol: This is the type of IP protocol used by the service. If this is TCP/
UDP, then the service uses the same port number with TCP and UDP. If this is
USER-DEFINED, the Port(s) is the IP protocol number, not the port number.
• Port(s): This value depends on the Protocol. Please refer to RFC 1700 for
further information about port numbers.
• If the Protocol is TCP, UDP, or TCP/UDP, this is the IP port number.
• If the Protocol is USER, this is the IP protocol number.
• Description: This is a brief explanation of the applications that use this service
or the situations in which this service is used.
Table 77 Commonly Used Services
NAME
PROTOCOL
PORT(S)
DESCRIPTION
AH
(IPSEC_TUNNEL)
User-Defined
51
The IPSEC AH (Authentication
Header) tunneling protocol uses this
service.
AIM/New-ICQ
TCP
5190
AOL’s Internet Messenger service. It
is also used as a listening port by
ICQ.
AUTH
TCP
113
Authentication protocol used by some
servers.
BGP
TCP
179
Border Gateway Protocol.
BOOTP_CLIENT
UDP
68
DHCP Client.
BOOTP_SERVER
UDP
67
DHCP Server.
CU-SEEME
TCP
7648
UDP
24032
A popular videoconferencing solution
from White Pines Software.
TCP/UDP
53
DNS
NSA-220 Plus User’s Guide
Domain Name Server, a service that
matches web names (for example
www.zyxel.com) to IP numbers.
281
Appendix C Common Services
Table 77 Commonly Used Services (continued)
282
NAME
PROTOCOL
PORT(S)
DESCRIPTION
ESP
(IPSEC_TUNNEL)
User-Defined
50
The IPSEC ESP (Encapsulation
Security Protocol) tunneling protocol
uses this service.
FINGER
TCP
79
Finger is a UNIX or Internet related
command that can be used to find out
if a user is logged on.
FTP
TCP
20
TCP
21
File Transfer Program, a program to
enable fast transfer of files, including
large files that may not be possible by
e-mail.
H.323
TCP
1720
NetMeeting uses this protocol.
HTTP
TCP
80
Hyper Text Transfer Protocol - a
client/server protocol for the world
wide web.
HTTPS
TCP
443
HTTPS is a secured http session often
used in e-commerce.
ICMP
User-Defined
1
Internet Control Message Protocol is
often used for diagnostic or routing
purposes.
ICQ
UDP
4000
This is a popular Internet chat
program.
IGMP
(MULTICAST)
User-Defined
2
Internet Group Management Protocol
is used when sending packets to a
specific group of hosts.
IKE
UDP
500
The Internet Key Exchange algorithm
is used for key distribution and
management.
IRC
TCP/UDP
6667
This is another popular Internet chat
program.
MSN Messenger
TCP
1863
Microsoft Networks’ messenger
service uses this protocol.
NEW-ICQ
TCP
5190
An Internet chat program.
NEWS
TCP
144
A protocol for news groups.
NFS
UDP
2049
Network File System - NFS is a client/
server distributed file service that
provides transparent file sharing for
network environments.
NNTP
TCP
119
Network News Transport Protocol is
the delivery mechanism for the
USENET newsgroup service.
PING
User-Defined
1
Packet INternet Groper is a protocol
that sends out ICMP echo requests to
test whether or not a remote host is
reachable.
POP3
TCP
110
Post Office Protocol version 3 lets a
client computer get e-mail from a
POP3 server through a temporary
connection (TCP/IP or other).
NSA-220 Plus User’s Guide
Appendix C Common Services
Table 77 Commonly Used Services (continued)
NAME
PROTOCOL
PORT(S)
DESCRIPTION
PPTP
TCP
1723
Point-to-Point Tunneling Protocol
enables secure transfer of data over
public networks. This is the control
channel.
PPTP_TUNNEL
(GRE)
User-Defined
47
PPTP (Point-to-Point Tunneling
Protocol) enables secure transfer of
data over public networks. This is the
data channel.
RCMD
TCP
512
Remote Command Service.
REAL_AUDIO
TCP
7070
A streaming audio service that
enables real time sound over the
web.
REXEC
TCP
514
Remote Execution Daemon.
RLOGIN
TCP
513
Remote Login.
RTELNET
TCP
107
Remote Telnet.
RTSP
TCP/UDP
554
The Real Time Streaming (media
control) Protocol (RTSP) is a remote
control for multimedia on the
Internet.
SFTP
TCP
115
Simple File Transfer Protocol.
SMTP
TCP
25
Simple Mail Transfer Protocol is the
message-exchange standard for the
Internet. SMTP enables you to move
messages from one e-mail server to
another.
SNMP
TCP/UDP
161
Simple Network Management
Program.
SNMP-TRAPS
TCP/UDP
162
Traps for use with the SNMP
(RFC:1215).
SQL-NET
TCP
1521
Structured Query Language is an
interface to access data on many
different types of database systems,
including mainframes, midrange
systems, UNIX systems and network
servers.
SSH
TCP/UDP
22
Secure Shell Remote Login Program.
STRM WORKS
UDP
1558
Stream Works Protocol.
SYSLOG
UDP
514
Syslog allows you to send system logs
to a UNIX server.
TACACS
UDP
49
Login Host Protocol used for
(Terminal Access Controller Access
Control System).
TELNET
TCP
23
Telnet is the login and terminal
emulation protocol common on the
Internet and in UNIX environments. It
operates over TCP/IP networks. Its
primary function is to allow users to
log into remote host systems.
NSA-220 Plus User’s Guide
283
Appendix C Common Services
Table 77 Commonly Used Services (continued)
284
NAME
PROTOCOL
PORT(S)
DESCRIPTION
TFTP
UDP
69
Trivial File Transfer Protocol is an
Internet file transfer protocol similar
to FTP, but uses the UDP (User
Datagram Protocol) rather than TCP
(Transmission Control Protocol).
VDOLIVE
TCP
7000
Another videoconferencing solution.
NSA-220 Plus User’s Guide
APPENDIX
D
Importing Certificates
This appendix shows you how to import public key certificates into your web
browser.
Public key certificates are used by web browsers to ensure that a secure web site
is legitimate. When a certificate authority such as VeriSign, Comodo, or Network
Solutions, to name a few, receives a certificate request from a website operator,
they confirm that the web domain and contact information in the request match
those on public record with a domain name registrar. If they match, then the
certificate is issued to the website operator, who then places it on the site to be
issued to all visiting web browsers to let them know that the site is legitimate.
Many ZyXEL products, such as the NSA-2401, issue their own public key
certificates. These can be used by web browsers on a LAN or WAN to verify that
they are in fact connecting to the legitimate device and not one masquerading as
it. However, because the certificates were not issued by one of the several
organizations officially recognized by the most common web browsers, you will
need to import the ZyXEL-created certificate into your web browser and flag that
certificate as a trusted authority.
Note: You can see if you are browsing on a secure website if the URL in your web
browser’s address bar begins with https:// or there is a sealed padlock
icon (
) somewhere in the main browser window (not all browsers show the
padlock in the same location.)
In this appendix, you can import a public key certificate for:
• Internet Explorer on page 286
• Firefox on page 296
• Opera on page 302
• Konqueror on page 310
NSA-2401 User’s Guide
285
Appendix D Importing Certificates
Internet Explorer
The following example uses Microsoft Internet Explorer 7 on Windows XP
Professional; however, they can also apply to Internet Explorer on Windows Vista.
1
If your device’s Web Configurator is set to use SSL certification, then the first time
you browse to it you are presented with a certification error.
Figure 123 Internet Explorer 7: Certification Error
2
Click Continue to this website (not recommended).
Figure 124 Internet Explorer 7: Certification Error
286
NSA-2401 User’s Guide
Appendix D Importing Certificates
3
In the Address Bar, click Certificate Error > View certificates.
Figure 125 Internet Explorer 7: Certificate Error
4
In the Certificate dialog box, click Install Certificate.
Figure 126 Internet Explorer 7: Certificate
NSA-2401 User’s Guide
287
Appendix D Importing Certificates
5
In the Certificate Import Wizard, click Next.
Figure 127 Internet Explorer 7: Certificate Import Wizard
6
If you want Internet Explorer to Automatically select certificate store based
on the type of certificate, click Next again and then go to step 9.
Figure 128 Internet Explorer 7: Certificate Import Wizard
288
NSA-2401 User’s Guide
Appendix D Importing Certificates
7
Otherwise, select Place all certificates in the following store and then click
Browse.
Figure 129 Internet Explorer 7: Certificate Import Wizard
8
In the Select Certificate Store dialog box, choose a location in which to save the
certificate and then click OK.
Figure 130 Internet Explorer 7: Select Certificate Store
NSA-2401 User’s Guide
289
Appendix D Importing Certificates
9
In the Completing the Certificate Import Wizard screen, click Finish.
Figure 131 Internet Explorer 7: Certificate Import Wizard
10 If you are presented with another Security Warning, click Yes.
Figure 132 Internet Explorer 7: Security Warning
290
NSA-2401 User’s Guide
Appendix D Importing Certificates
11 Finally, click OK when presented with the successful certificate installation
message.
Figure 133 Internet Explorer 7: Certificate Import Wizard
12 The next time you start Internet Explorer and go to a ZyXEL Web Configurator
page, a sealed padlock icon appears in the address bar. Click it to view the page’s
Website Identification information.
Figure 134 Internet Explorer 7: Website Identification
NSA-2401 User’s Guide
291
Appendix D Importing Certificates
Installing a Stand-Alone Certificate File in Internet Explorer
Rather than browsing to a ZyXEL Web Configurator and installing a public key
certificate when prompted, you can install a stand-alone certificate file if one has
been issued to you.
1
Double-click the public key certificate file.
Figure 135 Internet Explorer 7: Public Key Certificate File
2
In the security warning dialog box, click Open.
Figure 136 Internet Explorer 7: Open File - Security Warning
3
292
Refer to steps 4-12 in the Internet Explorer procedure beginning on page 286 to
complete the installation process.
NSA-2401 User’s Guide
Appendix D Importing Certificates
Removing a Certificate in Internet Explorer
This section shows you how to remove a public key certificate in Internet Explorer
7.
1
Open Internet Explorer and click Tools > Internet Options.
Figure 137 Internet Explorer 7: Tools Menu
2
In the Internet Options dialog box, click Content > Certificates.
Figure 138 Internet Explorer 7: Internet Options
NSA-2401 User’s Guide
293
Appendix D Importing Certificates
3
In the Certificates dialog box, click the Trusted Root Certificates Authorities
tab, select the certificate that you want to delete, and then click Remove.
Figure 139 Internet Explorer 7: Certificates
4
In the Certificates confirmation, click Yes.
Figure 140 Internet Explorer 7: Certificates
5
In the Root Certificate Store dialog box, click Yes.
Figure 141 Internet Explorer 7: Root Certificate Store
294
NSA-2401 User’s Guide
Appendix D Importing Certificates
6
The next time you go to the web site that issued the public key certificate you just
removed, a certification error appears.
NSA-2401 User’s Guide
295
Appendix D Importing Certificates
Firefox
The following example uses Mozilla Firefox 2 on Windows XP Professional;
however, the screens can also apply to Firefox 2 on all platforms.
1
If your device’s Web Configurator is set to use SSL certification, then the first time
you browse to it you are presented with a certification error.
2
Select Accept this certificate permanently and click OK.
Figure 142 Firefox 2: Website Certified by an Unknown Authority
296
NSA-2401 User’s Guide
Appendix D Importing Certificates
3
The certificate is stored and you can now connect securely to the Web
Configurator. A sealed padlock appears in the address bar, which you can click to
open the Page Info > Security window to view the web page’s security
information.
Figure 143 Firefox 2: Page Info
NSA-2401 User’s Guide
297
Appendix D Importing Certificates
Installing a Stand-Alone Certificate File in Firefox
Rather than browsing to a ZyXEL Web Configurator and installing a public key
certificate when prompted, you can install a stand-alone certificate file if one has
been issued to you.
1
Open Firefox and click Tools > Options.
Figure 144 Firefox 2: Tools Menu
2
In the Options dialog box, click Advanced > Encryption > View Certificates.
Figure 145 Firefox 2: Options
298
NSA-2401 User’s Guide
Appendix D Importing Certificates
3
In the Certificate Manager dialog box, click Web Sites > Import.
Figure 146
4
Use the Select File dialog box to locate the certificate and then click Open.
Figure 147
5
Firefox 2: Certificate Manager
Firefox 2: Select File
The next time you visit the web site, click the padlock in the address bar to open
the Page Info > Security window to see the web page’s security information.
NSA-2401 User’s Guide
299
Appendix D Importing Certificates
Removing a Certificate in Firefox
This section shows you how to remove a public key certificate in Firefox 2.
1
Open Firefox and click Tools > Options.
Figure 148 Firefox 2: Tools Menu
2
In the Options dialog box, click Advanced > Encryption > View Certificates.
Figure 149 Firefox 2: Options
300
NSA-2401 User’s Guide
Appendix D Importing Certificates
3
In the Certificate Manager dialog box, select the Web Sites tab, select the
certificate that you want to remove, and then click Delete.
Figure 150
4
Firefox 2: Certificate Manager
In the Delete Web Site Certificates dialog box, click OK.
Figure 151 Firefox 2: Delete Web Site Certificates
5
The next time you go to the web site that issued the public key certificate you just
removed, a certification error appears.
NSA-2401 User’s Guide
301
Appendix D Importing Certificates
Opera
The following example uses Opera 9 on Windows XP Professional; however, the
screens can apply to Opera 9 on all platforms.
1
If your device’s Web Configurator is set to use SSL certification, then the first time
you browse to it you are presented with a certification error.
2
Click Install to accept the certificate.
Figure 152 Opera 9: Certificate signer not found
302
NSA-2401 User’s Guide
Appendix D Importing Certificates
3
The next time you visit the web site, click the padlock in the address bar to open
the Security information window to view the web page’s security details.
Figure 153 Opera 9: Security information
NSA-2401 User’s Guide
303
Appendix D Importing Certificates
Installing a Stand-Alone Certificate File in Opera
Rather than browsing to a ZyXEL Web Configurator and installing a public key
certificate when prompted, you can install a stand-alone certificate file if one has
been issued to you.
1
Open Opera and click Tools > Preferences.
Figure 154 Opera 9: Tools Menu
304
NSA-2401 User’s Guide
Appendix D Importing Certificates
2
In Preferences, click Advanced > Security > Manage certificates.
Figure 155 Opera 9: Preferences
NSA-2401 User’s Guide
305
Appendix D Importing Certificates
3
In the Certificates Manager, click Authorities > Import.
Figure 156
4
Use the Import certificate dialog box to locate the certificate and then click
Open.
Figure 157
306
Opera 9: Certificate manager
Opera 9: Import certificate
NSA-2401 User’s Guide
Appendix D Importing Certificates
5
In the Install authority certificate dialog box, click Install.
Figure 158
6
Next, click OK.
Figure 159
7
Opera 9: Install authority certificate
Opera 9: Install authority certificate
The next time you visit the web site, click the padlock in the address bar to open
the Security information window to view the web page’s security details.
NSA-2401 User’s Guide
307
Appendix D Importing Certificates
Removing a Certificate in Opera
This section shows you how to remove a public key certificate in Opera 9.
1
Open Opera and click Tools > Preferences.
Figure 160 Opera 9: Tools Menu
2
In Preferences, Advanced > Security > Manage certificates.
Figure 161 Opera 9: Preferences
308
NSA-2401 User’s Guide
Appendix D Importing Certificates
3
In the Certificates manager, select the Authorities tab, select the certificate
that you want to remove, and then click Delete.
Figure 162
4
Opera 9: Certificate manager
The next time you go to the web site that issued the public key certificate you just
removed, a certification error appears.
Note: There is no confirmation when you delete a certificate authority, so be
absolutely certain that you want to go through with it before clicking the button.
NSA-2401 User’s Guide
309
Appendix D Importing Certificates
Konqueror
The following example uses Konqueror 3.5 on openSUSE 10.3, however the
screens apply to Konqueror 3.5 on all Linux KDE distributions.
1
If your device’s Web Configurator is set to use SSL certification, then the first time
you browse to it you are presented with a certification error.
2
Click Continue.
Figure 163 Konqueror 3.5: Server Authentication
3
Click Forever when prompted to accept the certificate.
Figure 164 Konqueror 3.5: Server Authentication
310
NSA-2401 User’s Guide
Appendix D Importing Certificates
4
Click the padlock in the address bar to open the KDE SSL Information window
and view the web page’s security details.
Figure 165 Konqueror 3.5: KDE SSL Information
NSA-2401 User’s Guide
311
Appendix D Importing Certificates
Installing a Stand-Alone Certificate File in Konqueror
Rather than browsing to a ZyXEL Web Configurator and installing a public key
certificate when prompted, you can install a stand-alone certificate file if one has
been issued to you.
1
Double-click the public key certificate file.
Figure 166 Konqueror 3.5: Public Key Certificate File
2
In the Certificate Import Result - Kleopatra dialog box, click OK.
Figure 167 Konqueror 3.5: Certificate Import Result
The public key certificate appears in the KDE certificate manager, Kleopatra.
Figure 168 Konqueror 3.5: Kleopatra
312
NSA-2401 User’s Guide
Appendix D Importing Certificates
3
The next time you visit the web site, click the padlock in the address bar to open
the KDE SSL Information window to view the web page’s security details.
NSA-2401 User’s Guide
313
Appendix D Importing Certificates
Removing a Certificate in Konqueror
This section shows you how to remove a public key certificate in Konqueror 3.5.
1
Open Konqueror and click Settings > Configure Konqueror.
Figure 169 Konqueror 3.5: Settings Menu
2
In the Configure dialog box, select Crypto.
3
On the Peer SSL Certificates tab, select the certificate you want to delete and
then click Remove.
Figure 170 Konqueror 3.5: Configure
4
314
The next time you go to the web site that issued the public key certificate you just
removed, a certification error appears.
NSA-2401 User’s Guide
Appendix D Importing Certificates
Note: There is no confirmation when you remove a certificate authority, so be
absolutely certain you want to go through with it before clicking the button.
NSA-2401 User’s Guide
315
Appendix D Importing Certificates
316
NSA-2401 User’s Guide
APPENDIX
E
Open Source Licences
Notice
Information herein is subject to change without notice. Companies, names, and
data used in examples herein are fictitious unless otherwise noted. No part may
be reproduced or transmitted in any form or by any means, electronic or
mechanical, for any purpose, except the express written permission of ZyXEL
Communications Corporation.
This Product includes software developed by the Apache Software Foundation under Apache License.
Apache License
Version 2.0, January 2004
http://www.apache.org/licenses/
TERMS AND CONDITIONS FOR USE, REPRODUCTION, AND DISTRIBUTION
1. Definitions.
“License” shall mean the terms and conditions for use, reproduction, and
distribution as defined by Sections 1 through 9 of this document.
“Licensor” shall mean the copyright owner or entity authorized by the copyright
owner that is granting the License.
“Legal Entity” shall mean the union of the acting entity and all other entities that
control, are controlled by, or are under common control with that entity. For the
purposes of this definition,
“control” means (i) the power, direct or indirect, to cause the direction or
management of such entity, whether by contract or otherwise, or (ii) ownership of
fifty percent (50%) or more of the outstanding shares, or (iii) beneficial ownership
of such entity.
NSA-220 Plus User’s Guide
317
Appendix E Open Source Licences
“You” (or “Your”) shall mean an individual or Legal Entity exercising permissions
granted by this License.
“Source” form shall mean the preferred form for making modifications, including
but not limited to software source code, documentation source, and configuration
files.
“Object” form shall mean any form resulting from mechanical transformation or
translation of a Source form, including but not limited to compiled object code,
generated documentation, and conversions to other media types.
“Work” shall mean the work of authorship, whether in Source or Object form,
made available under the License, as indicated by a copyright notice that is
included in or attached to the work (an example is provided in the Appendix
below).
“Derivative Works” shall mean any work, whether in Source or Object form, that is
based on (or derived from) the Work and for which the editorial revisions,
annotations, elaborations, or other modifications represent, as a whole, an
original work of authorship. For the purposes of this License, Derivative Works
shall not include works that remain separable from, or merely link (or bind by
name) to the interfaces of, the Work and Derivative Works thereof.
“Contribution” shall mean any work of authorship, including the original version of
the Work and any modifications or additions to that Work or Derivative Works
thereof, that is intentionally submitted to Licensor for inclusion in the Work by the
copyright owner or by an individual or Legal Entity authorized to submit on behalf
of the copyright owner. For the purposes of this definition, “submitted” means any
form of electronic, verbal, or written communication sent to the Licensor or its
representatives, including but not limited to communication on electronic mailing
lists, source code control systems, and issue tracking systems that are managed
by, or on behalf of, the Licensor for the purpose of discussing and improving the
Work, but excluding communication that is conspicuously marked or otherwise
designated in writing by the copyright owner as “Not a Contribution.”
“Contributor” shall mean Licensor and any individual or Legal Entity on behalf of
whom a Contribution has been received by Licensor and subsequently
incorporated within the Work.
2. Grant of Copyright License. Subject to the terms and conditions of this License,
each Contributor hereby grants to You a perpetual, worldwide, non-exclusive, nocharge, royalty-free, irrevocable copyright license to reproduce, prepare
Derivative Works of, publicly display, publicly perform, sublicense, and distribute
the Work and such Derivative Works in Source or Object form.
3. Grant of Patent License. Subject to the terms and conditions of this License,
each Contributor hereby grants to You a perpetual, worldwide, non-exclusive, no-
318
NSA-220 Plus User’s Guide
Appendix E Open Source Licences
charge, royalty-free, irrevocable (except as stated in this section) patent license
to make, have made, use, offer to sell import, and otherwise transfer the Work,
where such license applies only to those patent claims licensable by such
Contributor that are necessarily infringed by their Contribution(s) alone or by
combination of their Contribution(s) with the Work to which such Contribution(s)
was submitted. If You institute patent litigation against any entity (including a
cross-claim or counterclaim in a lawsuit) alleging that the Work or a Contribution
incorporated within the Work constitutes direct or contributory patent
infringement, then any patent licenses granted to You under this License for that
Work shall terminate as of the date such litigation is filed.
4. Redistribution. You may reproduce and distribute copies of the Work or
Derivative Works hereof in any medium, with or without modifications, and in
Source or Object form, provided that You meet the following conditions:
(a) You must give any other recipients of the Work or Derivative Works a copy of
this License; and
(b) You must cause any modified files to carry prominent notices stating that You
changed the files; and
(c) You must retain, in the Source form of any Derivative Works that You
distribute, all copyright, patent, trademark, and attribution notices from the
Source form of the Work, excluding those notices that do not pertain to any part
of the Derivative Works; and
(d) If the Work includes a “NOTICE” text file as part of its distribution, then any
Derivative Works that You distribute must include a readable copy of the
attribution notices contained within such NOTICE file, excluding those notices that
do not pertain to any part of the Derivative Works, in at least one of the following
places: within a NOTICE text file distributed as part of the Derivative Works;
within the Source form or documentation, if provided along with the Derivative
Works; or, within a display generated by the Derivative Works, if and wherever
such third-party notices normally appear. The contents of the NOTICE file are for
informational purposes only and do not modify the License. You may add Your
own attribution notices within Derivative Works that You distribute, alongside or
as an addendum to the NOTICE text from the Work, provided that such additional
attribution notices cannot be construed as modifying the License. You may add
Your own copyright statement to Your modifications and may provide additional or
different license terms and conditions for use, reproduction, or distribution of Your
modifications, or for any such Derivative Works as a whole, provided Your use,
reproduction, and distribution of the Work otherwise complies with the conditions
stated in this License.
5. Submission of Contributions. Unless You explicitly state otherwise, any
Contribution intentionally submitted for inclusion in the Work by You to the
Licensor shall be under the terms and conditions of this License, without any
NSA-220 Plus User’s Guide
319
Appendix E Open Source Licences
additional terms or conditions. Notwithstanding the above, nothing herein shall
supersede or modify the terms of any separate license agreement you may have
executed with Licensor regarding such Contributions.
6. Trademarks. This License does not grant permission to use the trade names,
trademarks, service marks, or product names of the Licensor, except as required
for reasonable and customary use in describing the origin of the Work and
reproducing the content of the NOTICE file.
7. Disclaimer of Warranty. Unless required by applicable law or agreed to in
writing, Licensor provides the Work (and each Contributor provides its
Contributions) on an “AS IS” BASIS, WITHOUT WARRANTIES OR CONDITIONS OF
ANY KIND, either express or implied, including, without limitation, any warranties
or conditions of TITLE, NON-INFRINGEMENT, MERCHANTABILITY, or FITNESS FOR
A PARTICULAR PURPOSE. You are solely responsible for determining the
appropriateness of using or redistributing the Work and assume any risks
associated with Your exercise of permissions under this License.
8. Limitation of Liability. In no event and under no legal theory, whether in tort
(including negligence), contract, or otherwise, unless required by applicable law
(such as deliberate and grossly negligent acts) or agreed to in writing, shall any
Contributor be liable to You for damages, including any direct, indirect, special,
incidental, or consequential damages of any character arising as a result of this
License or out of the use or inability to use the Work (including but not limited to
damages for loss of goodwill, work stoppage, computer failure or malfunction, or
any and all other commercial damages or losses), even if such Contributor has
been advised of the possibility of such damages.
9. Accepting Warranty or Additional Liability. While redistributing the Work or
Derivative Works thereof, You may choose to offer, and charge a fee for,
acceptance of support, warranty, indemnity, or other liability obligations and/or
rights consistent with this License. However, in accepting such obligations, You
may act only on Your own behalf and on Your sole responsibility, not on behalf of
any other Contributor, and only if You agree to indemnify, defend, and hold each
Contributor harmless for any liability incurred by, or claims asserted against, such
Contributor by reason of your accepting any such warranty or additional liability.
END OF TERMS AND CONDITIONS
Version 1.1
Copyright (c) 1999-2003 The Apache Software Foundation. All rights reserved.
Redistribution and use in source and binary forms, with or without modification,
are permitted provided that the following conditions are met:
320
NSA-220 Plus User’s Guide
Appendix E Open Source Licences
Redistributions of source code must retain the above copyright notice, this list of
conditions and the following disclaimer.
Redistributions in binary form must reproduce the above copyright notice, this list
of conditions and the following disclaimer in the documentation and/or other
materials provided with the distribution.
The end-user documentation included with the redistribution, if any, must include
the following acknowledgment: “This product includes software developed by the
Apache Software Foundation (http://www.apache.org/).” Alternately, this
acknowledgment may appear in the software itself, if and wherever such thirdparty acknowledgments normally appear.
The names “Apache” and “Apache Software Foundation” must not be used to
endorse or promote products derived from this software without prior written
permission. For written permission, please contact [email protected].
Products derived from this software may not be called “Apache”, nor may
“Apache” appear in their name, without prior written permission of the Apache
Software Foundation.
THIS SOFTWARE IS PROVIDED ``AS IS'' AND ANY EXPRESSED OR IMPLIED
WARRANTIES, INCLUDING, BUT NOT LIMITED TO, THE IMPLIED WARRANTIES OF
MERCHANTABILITY AND FITNESS FOR A PARTICULAR PURPOSE ARE
DISCLAIMED. IN NO EVENT SHALL THE APACHE SOFTWARE FOUNDATION OR ITS
CONTRIBUTORS BE LIABLE FOR ANY DIRECT, INDIRECT, INCIDENTAL, SPECIAL,
EXEMPLARY, OR CONSEQUENTIAL DAMAGES (INCLUDING, BUT NOT LIMITED TO,
PROCUREMENT OF SUBSTITUTE GOODS OR SERVICES; LOSS OF USE, DATA, OR
PROFITS; OR BUSINESS INTERRUPTION) HOWEVER CAUSED AND ON ANY
THEORY OF LIABILITY, WHETHER IN CONTRACT, STRICT LIABILITY, OR TORT
(INCLUDING NEGLIGENCE OR OTHERWISE) ARISING IN ANY WAY OUT OF THE
USE OF THIS SOFTWARE, EVEN IF ADVISED OF THE POSSIBILITY OF SUCH
DAMAGE.
This software consists of voluntary contributions made by many individuals on
behalf of the Apache Software Foundation. For more information on the Apache
Software Foundation, please see <http://www.apache.org/>.
Portions of this software are based upon public domain software originally written
at the National Center for Supercomputing Applications, University of Illinois,
Urbana-Champaign.
This Product includes phpmvc software under LGPL license.
GNU LESSER GENERAL PUBLIC LICENSE
Version 2.1, February 1999
NSA-220 Plus User’s Guide
321
Appendix E Open Source Licences
Copyright (C) 1991, 1999 Free Software Foundation, Inc.
59 Temple Place, Suite 330, Boston, MA 02111-1307 USA
Everyone is permitted to copy and distribute verbatim copies of this license
document, but changing it is not allowed. [This is the first released version of the
Lesser GPL. It also counts
as the successor of the GNU Library Public License, version 2, hence the version
number 2.1.
Preamble
The licenses for most software are designed to take away your freedom to share
and change it. By contrast, the GNU General Public Licenses are intended to
guarantee your freedom to share and change free software--to make sure the
software is free for all its users.
This license, the Lesser General Public License, applies to some specially
designated software packages--typically libraries--of the Free Software
Foundation and other authors who decide to use it. You can use it too, but we
suggest you first think carefully about whether this license or the ordinary General
Public License is the better strategy to use in any particular case, based on the
explanations below.
When we speak of free software, we are referring to freedom of use, not price.
Our General Public Licenses are designed to make sure that you have the freedom
to distribute copies of free software (and charge for this service if you wish); that
you receive source code or can get
it if you want it; that you can change the software and use pieces of it in new free
programs; and that you are informed that you can do these things.
To protect your rights, we need to make restrictions that forbid distributors to
deny you these rights or to ask you to surrender these rights. These restrictions
translate to certain responsibilities for you if you distribute copies of the library or
if you modify it.
For example, if you distribute copies of the library, whether gratis or for a fee, you
must give the recipients all the rights that we gave you. You must make sure that
they, too, receive or can get the source code. If you link other code with the
library, you must provide complete object files to the recipients, so that they can
re-link them with the library after making changes to the library and recompiling
it. And you must show them these terms so they know their rights.
We protect your rights with a two-step method: (1) we copyright the library, and
(2) we offer you this license, which gives you legal permission to copy, distribute
and/or modify the library.
322
NSA-220 Plus User’s Guide
Appendix E Open Source Licences
To protect each distributor, we want to make it very clear that there is no
warranty for the free library. Also, if the library is modified by someone else and
passed on, the recipients should know that what they have is not the original
version, so that the original author's reputation will not be affected by problems
that might be introduced by others.
Finally, software patents pose a constant threat to the existence of any free
program. We wish to make sure that a company cannot effectively restrict the
users of a free program by obtaining a restrictive license from a patent holder.
Therefore, we insist that any patent license obtained for a version of the library
must be consistent with the full freedom of use specified in this license.
Most GNU software, including some libraries, is covered by the ordinary GNU
General Public License. This license, the GNU Lesser General Public License,
applies to certain designated libraries, and is quite different from the ordinary
General Public License. We use this license for certain libraries in order to permit
linking those libraries into non-free programs.
When a program is linked with a library, whether statically or using a shared
library, the combination of the two is legally speaking a combined work, a
derivative of the original library. The ordinary General Public License therefore
permits such linking only if the entire combination fits its criteria of freedom. The
Lesser General Public License permits more lax criteria for linking other code with
the library.
We call this license the “Lesser” General Public License because it does Less to
protect the user's freedom than the ordinary General Public License. It also
provides other free software developers Less of an advantage over competing
non-free programs. These disadvantages are the reason we use the ordinary
General Public License for many libraries. However, the Lesser license provides
advantages in certain special circumstances.
For example, on rare occasions, there may be a special need to encourage the
widest possible use of a certain library, so that it becomes a de-facto standard. To
achieve this, non-free programs must be allowed to use the library. A more
frequent case is that a free library does the same job as widely used non-free
libraries. In this case, there is little to gain by limiting the free library to free
software only, so we use the Lesser General Public License. In other cases,
permission to use a particular library in non-free programs enables a greater
number of people to use a large body of free software. For example, permission to
use the GNU C Library in non-free programs enables many more people to use the
whole GNU operating system, as well as its variant, the GNU/Linux operating
system.
Although the Lesser General Public License is Less protective of the users'
freedom, it does ensure that the user of a program that is linked with the Library
NSA-220 Plus User’s Guide
323
Appendix E Open Source Licences
has the freedom and the wherewithal to run that program using a modified
version of the Library.
The precise terms and conditions for copying, distribution and modification follow.
Pay close attention to the difference between a “work based on the library” and a
“work that uses the library”. The former contains code derived from the library,
whereas the latter must be combined with the library in order to run.
GNU LESSER GENERAL PUBLIC LICENSE TERMS AND CONDITIONS FOR COPYING,
DISTRIBUTION AND MODIFICATION
0. This License Agreement applies to any software library or other program which
contains a notice placed by the copyright holder or other authorized party saying it
may be distributed under the terms of this Lesser General Public License (also
called “this License”).
Each licensee is addressed as “you”.
A “library” means a collection of software functions and/or data prepared so as to
be conveniently linked with application programs (which use some of those
functions and data) to form executables. The “Library”, below, refers to any such
software library or work which has been distributed under these terms. A “work
based on the Library” means either the Library or any derivative work under
copyright law: that is to say, a work containing the Library or a portion of it, either
verbatim or with modifications and/or translated straightforwardly into another
language. (Hereinafter, translation is included without limitation in the term
“modification”.)
“Source code” for a work means the preferred form of the work for making
modifications to it. For a library, complete source code means all the source code
for all modules it contains, plus any associated interface definition files, plus the
scripts used to control compilation and installation of the library. Activities other
than copying, distribution and modification are not covered by this License; they
are outside its scope. The act of running a program using the Library is not
restricted, and output from such a program is covered only if its contents
constitute a work based on the Library (independent of the use of the Library in a
tool for writing it). Whether that is true depends on what the Library does and
what the program that uses the Library does.
1. You may copy and distribute verbatim copies of the Library's complete source
code as you receive it, in any medium, provided that you conspicuously and
appropriately publish on each copy an appropriate copyright notice and disclaimer
of warranty; keep intact all the notices that refer to this License and to the
absence of any warranty; and distribute a copy of this License along with the
Library. You may charge a fee for the physical act of transferring a copy, and you
may at your option offer warranty protection in exchange for a fee.
324
NSA-220 Plus User’s Guide
Appendix E Open Source Licences
2. You may modify your copy or copies of the Library or any portion of it, thus
forming a work based on the Library, and copy and distribute such modifications
or work under the terms of Section 1 above, provided that you also meet all of
these conditions: a) The modified work must itself be a software library. b) You
must cause the files modified to carry prominent notices stating that you changed
the files and the date of any change. c) You must cause the whole of the work to
be licensed at no charge to all third parties under the terms of this License. d) If a
facility in the modified Library refers to a function or a table of data to be supplied
by an application program that uses the facility, other than as an argument
passed when the facility is invoked, then you must make a good faith effort to
ensure that, in the event an application does not supply such function or table, the
facility still operates, and performs whatever part of its purpose remains
meaningful. (For example, a function in a library to compute square roots has a
purpose that is entirely well-defined independent of the application. Therefore,
Subsection 2d requires that any application-supplied function or table used by this
function must be optional: if the application does not supply it, the square root
function must still compute square roots.) These requirements apply to the
modified work as a whole. If identifiable sections of that work are not derived from
the Library, and can be reasonably considered independent and separate works in
themselves, then this License, and its terms, do not apply to those sections when
you distribute them as separate works. But when you distribute the same sections
as part of a whole which is a work based on the Library, the distribution of the
whole must be on the terms of this License, whose permissions for other licensees
extend to the entire whole, and thus to each and every part regardless of who
wrote
it. Thus, it is not the intent of this section to claim rights or contest your rights to
work written entirely by you; rather, the intent is to exercise the right to control
the distribution of derivative or collective works based on the Library. In addition,
mere aggregation of another work not based on the Library with the Library (or
with a work based on the Library) on a volume of a storage or distribution medium
does not bring the other work under the scope of this License.
3. You may opt to apply the terms of the ordinary GNU General Public License
instead of this License to a given copy of the Library. To do this, you must alter all
the notices that refer to this License, so that they refer to the ordinary GNU
General Public License, version 2, instead of to this License. (If a newer version
than version 2 of the ordinary GNU General Public License has appeared, then you
can specify that version instead if you wish.) Do not make any other change in
these notices. Once this change is made in a given copy, it is irreversible for that
copy, so the ordinary GNU General Public License applies to all subsequent copies
and derivative works made from that copy. This option is useful when you wish to
copy part of the code of the Library into a program that is not a library.
4. You may copy and distribute the Library (or a portion or derivative of it, under
Section 2) in object code or executable form under the terms of Sections 1 and 2
above provided that you accompany it with the complete corresponding machine-
NSA-220 Plus User’s Guide
325
Appendix E Open Source Licences
readable source code, which must be distributed under the terms of Sections 1
and 2 above on a medium customarily used for software interchange. If
distribution of object code is made by offering access to copy from a designated
place, then offering equivalent access to copy the source code from the same
place satisfies the requirement to distribute the source code, even though third
parties are not
compelled to copy the source along with the object code.
5. A program that contains no derivative of any portion of the Library, but is
designed to work with the Library by being compiled or linked with it, is called a
“work that uses the Library”. Such a work, in isolation, is not a derivative work of
the Library, and therefore falls outside the scope of this License.
However, linking a “work that uses the Library” with the Library creates an
executable that is a derivative of the Library (because it contains portions of the
Library), rather than a “work that uses the library”. The executable is therefore
covered by this License. Section 6 states terms for distribution of such
executables. When a “work that uses the Library” uses material from a header file
that is part of the Library, the object code for the work may be a derivative work
of the Library even though the source code is not. Whether this is true is
especially significant if the work can be linked without the Library, or if the work is
itself a library. The threshold for this to be true is not precisely defined by law. If
such an object file uses only numerical parameters, data structure layouts and
accessories, and small macros and small inline functions (ten lines or less in
length), then the use of the object file is unrestricted, regardless of whether it is
legally a derivative work. (Executables containing this object code plus portions of
the Library will still fall under Section 6.) Otherwise, if the work is a derivative of
the Library, you may distribute the object code for the work under the terms of
Section 6. Any executables containing that work also fall under Section 6, whether
or not they are linked directly with the Library itself.
6. As an exception to the Sections above, you may also combine or link a “work
that uses the Library” with the Library to produce a work containing portions of
the Library, and distribute that work under terms of your choice, provided that the
terms permit modification of the work for the customer's own use and reverse
engineering for debugging such modifications. You must give prominent notice
with each copy of the work that the Library is used in it and that the Library and
its use are covered by this License. You must supply a copy of this License. If the
work during execution displays copyright notices, you must include the copyright
notice for the Library among them, as well as a reference directing the user to the
copy of this License. Also, you must do one of these things: a) Accompany the
work with the complete corresponding
machine-readable source code for the Library including whatever changes were
used in the work (which must be distributed under Sections 1 and 2 above); and,
if the work is an executable linked with the Library, with the complete machine-
326
NSA-220 Plus User’s Guide
Appendix E Open Source Licences
readable “work that uses the Library”, as object code and/or source code, so that
the user can modify the Library and then relent to produce a modified executable
containing the modified Library. (It is understood that the user who changes the
contents of definitions files in the Library will not necessarily be able to recompile
the application to use the modified definitions.) b) Use a suitable shared library
mechanism for linking with the Library. A suitable mechanism is one that (1) uses
at run time a
copy of the library already present on the user's computer system, rather than
copying library functions into the executable, and (2) will operate properly with a
modified version of the library, if the user installs one, as long as the modified
version is interface-compatible with the version that the work was made with. c)
Accompany the work with a written offer, valid for at least three years, to give the
same user the materials specified in Subsection 6a, above, for a charge no more
than the cost of performing this distribution. d) If distribution of the work is made
by offering access to copy from a designated place, offer equivalent access to copy
the above specified materials from the same place. e) Verify that the user has
already received a copy of these materials or that you have already sent this user
a copy. For an executable, the required form of the “work that uses the Library”
must include any data and utility programs needed for reproducing the executable
from it. However, as a special exception, the materials to be distributed need not
include anything that is normally distributed (in either source or binary form) with
the major components (compiler, kernel, and so on) of the operating system on
which the executable runs, unless that component itself accompanies the
executable.
It may happen that this requirement contradicts the license restrictions of other
proprietary libraries that do not normally accompany the operating system. Such
a contradiction means you cannot use both them and the Library together in an
executable that you distribute.
7. You may place library facilities that are a work based on the Library side-byside in a single library together with other library facilities not covered by this
License, and distribute such a combined library, provided that the separate
distribution of the work based on the Library and of the other library facilities is
otherwise permitted, and provided that you do these two things: a) Accompany
the combined library with a copy of the same work based on the Library,
uncombined with any other library facilities. This must be distributed under the
terms of the Sections above. b) Give prominent notice with the combined library
of the fact that part of it is a work based on the Library, and explaining where to
find the accompanying uncombined form of the same work.
8. You may not copy, modify, sublicense, link with, or distribute the Library except
as expressly provided under this License. Any attempt otherwise to copy, modify,
sublicense, link with, or distribute the Library is void, and will automatically
terminate your rights under this License. However, parties who have received
NSA-220 Plus User’s Guide
327
Appendix E Open Source Licences
copies, or rights, from you under this License will not have their licenses
terminated so long as such parties remain in full compliance.
9. You are not required to accept this License, since you have not signed it.
However, nothing else grants you permission to modify or distribute the Library or
its derivative works. These actions are prohibited by law if you do not accept this
License. Therefore, by modifying or distributing the Library (or any work based on
the Library), you indicate your acceptance of this License to do so, and all its
terms and conditions for copying, distributing or modifying the Library or works
based on it.
10. Each time you redistribute the Library (or any work based on the Library), the
recipient automatically receives a license from the original licensor to copy,
distribute, link with or modify the Library subject to these terms and conditions.
You may not impose any further restrictions on the recipients' exercise of the
rights granted herein. You are not responsible for enforcing compliance by third
parties with this License.
11. If, as a consequence of a court judgment or allegation of patent infringement
or for any other reason (not limited to patent issues), conditions are imposed on
you (whether by court order, agreement or otherwise) that contradict the
conditions of this License, they do not excuse you from the conditions of this
License. If you cannot distribute so as to satisfy simultaneously your obligations
under this License and any other pertinent obligations, then as a consequence you
may not distribute the Library at all. For example, if a patent license would not
permit royalty-free redistribution of the Library by all those who receive copies
directly or indirectly through you, then the only way you could satisfy both it and
this License would be to
refrain entirely from distribution of the Library. If any portion of this section is
held invalid or unenforceable under any particular circumstance, the balance of
the section is intended to apply, and the section as a whole is intended to apply in
other circumstances. It is not the purpose of this section to induce you to infringe
any patents or other property right claims or to contest validity of any such
claims; this section has the sole purpose of protecting the integrity of the free
software distribution system which is implemented by public license practices.
Many people have made generous contributions to the wide range of software
distributed through that system in reliance on consistent application of that
system; it is up to the author/donor to decide if he or she is willing to distribute
software through any other system and a licensee cannot impose that choice. This
section is intended to make thoroughly clear what is believed to be a consequence
of the rest of this License.
12. If the distribution and/or use of the Library is restricted in certain countries
either by patents or by copyrighted interfaces, the original copyright holder who
places the Library under this License may add an explicit geographical distribution
limitation excluding those countries, so that distribution is permitted only in or
328
NSA-220 Plus User’s Guide
Appendix E Open Source Licences
among countries not thus excluded. In such case, this License incorporates the
limitation as if written in the body of this License.
13. The Free Software Foundation may publish revised and/or new versions of the
Lesser General Public License from time to time. Such new versions will be similar
in spirit to the present version, but may differ in detail to address new problems or
concerns. Each version is given a distinguishing version number. If the Library
specifies a version number of this License which applies to it and “any later
version”, you have the option of following the terms and conditions either of that
version or of any later version published by the Free Software Foundation. If the
Library does not specify a license version number, you may choose any version
ever published by the Free Software Foundation.
14. If you wish to incorporate parts of the Library into other free programs whose
distribution conditions are incompatible with these, write to the author to ask for
permission. For software which is copyrighted by the Free Software Foundation,
write to the Free Software Foundation; we sometimes make exceptions for this.
Our decision will be guided by the two goals of preserving the free status of all
derivatives of our free software and of promoting the sharing
and reuse of software generally.
NO WARRANTY
15. BECAUSE THE LIBRARY IS LICENSED FREE OF CHARGE, THERE IS NO
WARRANTY FOR THE LIBRARY, TO THE EXTENT PERMITTED BY APPLICABLE LAW.
EXCEPT WHEN OTHERWISE STATED IN WRITING THE COPYRIGHT HOLDERS AND/
OR OTHER PARTIES PROVIDE THE LIBRARY “AS IS” WITHOUT WARRANTY OF ANY
KIND, EITHER EXPRESSED OR IMPLIED, INCLUDING, BUT NOT LIMITED TO, THE
IMPLIED WARRANTIES OF MERCHANTABILITY AND FITNESS FOR A PARTICULAR
PURPOSE. THE ENTIRE RISK AS TO THE QUALITY AND PERFORMANCE OF THE
LIBRARY IS WITH YOU. SHOULD THE LIBRARY PROVE DEFECTIVE, YOU ASSUME
THE COST OF ALL NECESSARY SERVICING, REPAIR OR CORRECTION.
16. IN NO EVENT UNLESS REQUIRED BY APPLICABLE LAW OR AGREED TO IN
WRITING WILL ANY COPYRIGHT HOLDER, OR ANY OTHER PARTY WHO MAY
MODIFY AND/OR REDISTRIBUTE THE LIBRARY AS PERMITTED ABOVE, BE LIABLE
TO YOU FOR DAMAGES, INCLUDING ANY GENERAL, SPECIAL, INCIDENTAL OR
CONSEQUENTIAL DAMAGES ARISING OUT OF THE USE OR INABILITY TO USE THE
LIBRARY (INCLUDING BUT NOT LIMITED TO LOSS OF DATA OR DATA BEING
RENDERED INACCURATE OR LOSSES SUSTAINED BY YOU OR THIRD PARTIES OR
A FAILURE OF THE LIBRARY TO OPERATE WITH ANY OTHER SOFTWARE), EVEN IF
SUCH HOLDER OR OTHER PARTY HAS BEEN ADVISED OF THE POSSIBILITY OF
SUCHDAMAGES.
END OF TERMS AND CONDITIONS.
NSA-220 Plus User’s Guide
329
Appendix E Open Source Licences
This Product includes apcid, apcupsd, autofs, device-mapper, evms, exim.
Lm_sensors, mdadm, pam_mount, raidtools, samba, sg_utils, smartmontools,
vsftpd, xfsprogs and Linux kernel software under GPL license.
GNU GENERAL PUBLIC LICENSE
Version 2, June 1991
Copyright (C) 1989, 1991 Free Software Foundation, Inc.
59 Temple Place - Suite 330, Boston, MA 02111-1307, USA
Everyone is permitted to copy and distribute verbatim copies of this license
document, but changing it is not allowed.
Preamble
The licenses for most software are designed to take away your freedom to share
and change it. By contrast, the GNU General Public License is intended to
guarantee your freedom to share and change free software--to make sure the
software is free for all its users. This General Public License applies to most of the
Free Software Foundation's software and to any other program whose authors
commit to using it. (Some other Free Software Foundation software is covered by
the GNU Library General Public License instead.) You can apply it to your
programs, too.
When we speak of free software, we are referring to freedom, not price. Our
General Public Licenses are designed to make sure that you have the freedom to
distribute copies of free software (and charge for this service if you wish), that you
receive source code or can get it if you want it, that you can change the software
or use pieces of it in new free programs; and that you know you can do these
things.
To protect your rights, we need to make restrictions that forbid anyone to deny
you these rights or to ask you to surrender the rights. These restrictions translate
to certain responsibilities for you if you distribute copies of the software, or if you
modify it. For example, if you distribute copies of such a program, whether gratis
or for a fee, you must give the recipients all the rights that you have. You must
make sure that they, too, receive or can get the source code. And you must show
them these terms so they know their rights.
We protect your rights with two steps: (1) copyright the software, and (2) offer
you this license which gives you legal permission to copy, distribute and/or modify
the software. Also, for each author's protection and ours, we want to make certain
that everyone understands that there is no warranty for this free software. If the
software is modified by someone else and passed on, we want its recipients to
330
NSA-220 Plus User’s Guide
Appendix E Open Source Licences
know that what they have is not the original, so that any problems introduced by
others will not reflect on the original authors' reputations.
Finally, any free program is threatened constantly by software patents. We wish to
avoid the danger that re-distributors of a free program will individually obtain
patent licenses, in effect making the program proprietary. To prevent this, we
have made it clear that any patent must be licensed for everyone's free use or not
licensed at all.
The precise terms and conditions for copying, distribution and modification follow.
TERMS AND CONDITIONS FOR COPYING, DISTRIBUTION AND MODIFICATION
0. This License applies to any program or other work which contains a notice
placed by the copyright holder saying it may be distributed under the terms of this
General Public License. The “Program”, below, refers to any such program or
work, and a “work based on the Program” means either the Program or any
derivative work under copyright law: that is to say, a work containing the Program
or a portion of it, either verbatim or with modifications and/or translated into
another language. (Hereinafter, translation is included without limitation in the
term “modification”.) Each licensee is addressed as “you”. Activities other than
copying, distribution and modification are not covered by this License; they are
outside its scope. The act of running the Program is not restricted, and the output
from the Program is covered only if its contents constitute a work based on the
Program (independent of having been made by running the Program). Whether
that is true depends on what the Program does.
1. You may copy and distribute verbatim copies of the Program's source code as
you receive it, in any medium, provided that you conspicuously and appropriately
publish on each copy an appropriate copyright notice and disclaimer of warranty;
keep intact all the notices that refer to this License and to the absence of any
warranty; and give any other recipients of the Program a copy of this License
along with the Program. You may charge a fee for the physical act of transferring
a copy, and you may at your option offer warranty protection in exchange for a
fee.
2. You may modify your copy or copies of the Program or any portion of it, thus
forming a work based on the Program, and copy and distribute such modifications
or work under the terms of Section 1 above, provided that you also meet all of
these conditions:
a) You must cause the modified files to carry prominent notices stating that you
changed the files and the date of any change.
b) You must cause any work that you distribute or publish, that in whole or in part
contains or is derived from the Program or any part thereof, to be licensed as a
whole at no charge to all third parties under the terms of this License.
NSA-220 Plus User’s Guide
331
Appendix E Open Source Licences
c) If the modified program normally reads commands interactively when run, you
must cause it, when started running for such interactive use in the most ordinary
way, to print or display an announcement including an appropriate copyright
notice and a notice that there is no warranty (or else, saying that you provide a
warranty) and that users may redistribute the program under these conditions,
and telling the user how to view a copy of this License. (Exception: if the Program
itself is interactive but does not normally print such an announcement, your work
based on the Program is not required to print an announcement.)
These requirements apply to the modified work as a whole. If identifiable sections
of that work are not derived from the Program, and can be reasonably considered
independent and separate works in themselves, then this License, and its terms,
do not apply to those sections when you distribute them as separate works. But
when you distribute the same sections as part of a whole which is a work based on
the Program, the distribution of the whole must be on the terms of this License,
whose permissions for other licensees extend to the entire whole, and thus to
each and every part regardless of who wrote it. Thus, it is not the intent of this
section to claim rights or contest your rights to work written entirely by you;
rather, the intent is to exercise the right to control the distribution of derivative or
collective works based on the Program. In addition, mere aggregation of another
work not based on the Program with the Program (or with a work based on the
Program) on a volume of a storage or distribution medium does not bring the
other work under the scope of this License.
3. You may copy and distribute the Program (or a work based on it, under Section
2) in object code or executable form under the terms of Sections 1 and 2 above
provided that you also do one of the following:
a) Accompany it with the complete corresponding machine-readable source code,
which must be distributed under the terms of Sections 1 and 2 above on a
medium customarily used for software interchange; or,
b) Accompany it with a written offer, valid for at least three years, to give any
third party, for a charge no more than your cost of physically performing source
distribution, a complete machine-readable copy of the corresponding source code,
to be distributed under the terms of Sections 1 and 2 above on a medium
customarily used for software interchange; or, c) Accompany it with the
information you received as to the offer to distribute corresponding source code.
(This alternative is allowed only for noncommercial distribution and only if you
received the program in object code or executable form with such an offer, in
accord with Subsection b above.) The source code for a work means the preferred
form of the work for making modifications to it. For an executable work, complete
source code means all the source code for all modules it contains, plus any
associated interface definition files, plus the scripts used to control compilation
and installation of the executable. However, as a special exception, the source
code distributed need not include anything that is normally distributed (in either
source or binary form) with the major components (compiler, kernel, and so on)
332
NSA-220 Plus User’s Guide
Appendix E Open Source Licences
of the operating system on which the executable runs, unless that component
itself accompanies the executable. If distribution of executable or object code is
made by offering access to copy from a designated place, then offering equivalent
access to copy the source code from the same place counts as distribution of the
source code, even though third parties are not compelled to copy the source along
with the object code.
4. You may not copy, modify, sublicense, or distribute the Program except as
expressly provided under this License. Any attempt otherwise to copy, modify,
sublicense or distribute the Program is void, and will automatically terminate your
rights under this License. However, parties who have received copies, or rights,
from you under this License will not have their licenses terminated so long as such
parties remain in full compliance.
5. You are not required to accept this License, since you have not signed it.
However, nothing else grants you permission to modify or distribute the Program
or its derivative works. These actions are prohibited by law if you do not accept
this License. Therefore, by modifying or distributing the Program (or any work
based on the Program), you indicate your acceptance of this License to do so, and
all its terms and conditions for copying, distributing or modifying the Program or
works based on it.
6. Each time you redistribute the Program (or any work based on the Program),
the recipient automatically receives a license from the original licensor to copy,
distribute or modify the Program subject to these terms and conditions. You may
not impose any further restrictions on the recipients' exercise of the rights granted
herein. You are not responsible for enforcing compliance by third parties to this
License.
7. If, as a consequence of a court judgment or allegation of patent infringement or
for any other reason (not limited to patent issues), conditions are imposed on you
(whether by court order, agreement or otherwise) that contradict the conditions of
this License, they do not excuse you from the conditions of this License. If you
cannot distribute so as to satisfy simultaneously your obligations under this
License and any other pertinent obligations, then as a consequence you may not
distribute the Program at all. For example, if a patent license would not permit
royalty-free redistribution of the Program by all those who receive copies directly
or indirectly through you, then the only way you could satisfy both it and this
License would be to refrain entirely from distribution of the Program. If any
portion of this section is held invalid or unenforceable under any particular
circumstance, the balance of the section is intended to apply and the section as a
whole is intended to apply in other circumstances. It is not the purpose of this
section to induce you to infringe any patents or other property right claims or to
contest validity of any such claims; this section has the sole purpose of protecting
the integrity of the free software distribution system, which is implemented by
public license practices. Many people have made generous contributions to the
wide range of software distributed through that system in reliance on consistent
NSA-220 Plus User’s Guide
333
Appendix E Open Source Licences
application of that system; it is up to the author/donor to decide if he or she is
willing to distribute software through any other system and a licensee cannot
impose that choice. This section is intended to make thoroughly clear what is
believed to be a consequence of the rest of this License.
8. If the distribution and/or use of the Program is restricted in certain countries
either by patents or by copyrighted interfaces, the original copyright holder who
places the Program under this License may add an explicit geographical
distribution limitation excluding those countries, so that distribution is permitted
only in or among countries not thus excluded. In such case, this License
incorporates the limitation as if written in the body of this License.
9. The Free Software Foundation may publish revised and/or new versions of the
General Public License from time to time. Such new versions will be similar in
spirit to the present version, but may differ in detail to address new problems or
concerns. Each version is given a distinguishing version number. If the Program
specifies a version number of this License which applies to it and “any later
version”, you have the option of following the terms and conditions either of that
version or of any later version published by the Free Software Foundation. If the
Program does not specify a version number of this License, you may choose any
version ever published by the Free Software Foundation.
10. If you wish to incorporate parts of the Program into other free programs
whose distribution conditions are different, write to the author to ask for
permission. For software which is copyrighted by the Free Software Foundation,
write to the Free Software Foundation; we sometimes make exceptions for this.
Our decision will be guided by the two goals of preserving the free status of all
derivatives of our free software and of promoting the sharing and reuse of
software generally.
NO WARRANTY
11. BECAUSE THE PROGRAM IS LICENSED FREE OF CHARGE, THERE IS NO
WARRANTY FOR THE PROGRAM, TO THE EXTENT PERMITTED BY APPLICABLE
LAW. EXCEPT WHEN OTHERWISE STATED IN WRITING THE COPYRIGHT HOLDERS
AND/OR OTHER PARTIES PROVIDE THE PROGRAM “AS IS” WITHOUT WARRANTY
OF ANY KIND, EITHER EXPRESSED OR IMPLIED, INCLUDING, BUT NOT LIMITED
TO, THE IMPLIED WARRANTIES OF MERCHANTABILITY AND FITNESS FOR A
PARTICULAR PURPOSE. THE ENTIRE RISK AS TO THE QUALITY AND
PERFORMANCE OF THE PROGRAM IS WITH YOU. SHOULD THE PROGRAM PROVE
DEFECTIVE, YOU ASSUME THE COST OF ALL NECESSARY SERVICING, REPAIR OR
CORRECTION.
12. IN NO EVENT UNLESS REQUIRED BY APPLICABLE LAW OR AGREED TO IN
WRITING WILL ANY COPYRIGHT HOLDER, OR ANY OTHER PARTY WHO MAY
MODIFY AND/OR REDISTRIBUTE THE PROGRAM AS PERMITTED ABOVE, BE
LIABLE TO YOU FOR DAMAGES, INCLUDING ANY GENERAL, SPECIAL, INCIDENTAL
334
NSA-220 Plus User’s Guide
Appendix E Open Source Licences
OR CONSEQUENTIAL DAMAGES ARISING OUT OF THE USE OR INABILITY TO USE
THE PROGRAM (INCLUDING BUT NOT LIMITED TO LOSS OF DATA OR DATA BEING
RENDERED INACCURATE OR LOSSES SUSTAINED BY YOU OR THIRD PARTIES OR
A FAILURE OF THE PROGRAM TO OPERATE WITH ANY OTHER PROGRAMS), EVEN
IF SUCH HOLDER OR OTHER PARTY HAS BEEN ADVISED OF THE POSSIBILITY OF
SUCH DAMAGES.
END OF TERMS AND CONDITIONS
All other trademarks or trade names mentioned herein, if any, are the property of
their respective owners.
This Product includes OpenLDAP software under the OpenLDAP Public License
The OpenLDAP Public License
Version 2.8, 17 August 2003
Redistribution and use of this software and associated documentation
(“Software”), with or without modification, are permitted provided that the
following conditions are met:
1. Redistributions in source form must retain copyright statements
and notices,
2. Redistributions in binary form must reproduce applicable copyright statements
and notices, this list of conditions, and the following disclaimer in the
documentation and/or other materials provided with the distribution, and
3. Redistributions must contain a verbatim copy of this document.
The OpenLDAP Foundation may revise this license from time to time. Each revision
is distinguished by a version number. You may use this Software under terms of
this license revision or under the terms of any subsequent revision of the license.
THIS SOFTWARE IS PROVIDED BY THE OPENLDAP FOUNDATION AND ITS
CONTRIBUTORS ``AS IS'' AND ANY EXPRESSED OR IMPLIED WARRANTIES,
INCLUDING, BUT NOT LIMITED TO, THE IMPLIED WARRANTIES OF
MERCHANTABILITY AND FITNESS FOR A PARTICULAR PURPOSE ARE
DISCLAIMED. IN NO EVENT SHALL THE OPENLDAP FOUNDATION, ITS
CONTRIBUTORS, OR THE AUTHOR(S) OR OWNER(S) OF THE SOFTWARE BE
LIABLE FOR ANY DIRECT, INDIRECT, INCIDENTAL, SPECIAL, EXEMPLARY, OR
CONSEQUENTIAL DAMAGES (INCLUDING, BUT NOT LIMITED TO, PROCUREMENT
OF SUBSTITUTE GOODS OR SERVICES; LOSS OF USE, DATA, OR PROFITS; OR
BUSINESS INTERRUPTION) HOWEVER CAUSED AND ON ANY THEORY OF
LIABILITY, WHETHER IN CONTRACT, STRICT LIABILITY, OR TORT (INCLUDING
NEGLIGENCE OR OTHERWISE) ARISING IN ANY WAY OUT OF THE USE OF THIS
SOFTWARE, EVEN IF ADVISED OF THE POSSIBILITY OF SUCH DAMAGE.
NSA-220 Plus User’s Guide
335
Appendix E Open Source Licences
The names of the authors and copyright holders must not be used in advertising
or otherwise to promote the sale, use or other dealing in this Software without
specific, written prior permission. Title to copyright in this Software shall at all
times remain with copyright holders.
OpenLDAP is a registered trademark of the OpenLDAP Foundation.
Copyright 1999-2003 The OpenLDAP Foundation, Redwood City, California, USA.
All Rights Reserved. Permission to copy and distribute verbatim copies of this
document is granted
This Product includes open SSL under the Open SSL License
Open SSL License
LICENSE ISSUES
===============
The OpenSSL toolkit stays under a dual license, i.e. both the conditions of the
OpenSSL License and the original SSLeay license apply to the toolkit. See below
for the actual license texts. Actually both licenses are BSD-style Open Source
licenses. In case of any license issues related to OpenSSL please contact [email protected].
OpenSSL License
========
Copyright (c) 1998-2004 The OpenSSL Project. All rights reserved.
Redistribution and use in source and binary forms, with or without modification,
are permitted provided that the following conditions are met:
Redistributions of source code must retain the above copyright notice, this list of
conditions and the following disclaimer.
Redistributions in binary form must reproduce the above copyright notice, this list
of conditions and the following disclaimer in the documentation and/or other
materials provided with the distribution.
All advertising materials mentioning features or use of this software must display
the following acknowledgment: “This product includes software developed by the
OpenSSL Project for use in the OpenSSL Toolkit. (http://www.openssl.org/)”
The names “OpenSSL Toolkit” and “OpenSSL Project” must not be used to endorse
or promote products derived from this software without prior written permission.
For written permission, please contact [email protected].
336
NSA-220 Plus User’s Guide
Appendix E Open Source Licences
Products derived from this software may not be called “OpenSSL” nor may
“OpenSSL” appear in their names without prior written permission of the OpenSSL
Project.
Redistributions of any form whatsoever must retain the following
acknowledgment:
“This product includes software developed by the OpenSSL Project for use in the
OpenSSL Toolkit (http://www.openssl.org/)”
THIS SOFTWARE IS PROVIDED BY THE OpenSSL PROJECT ``AS IS'' AND ANY
EXPRESSED OR IMPLIED WARRANTIES, INCLUDING, BUT NOT LIMITED TO, THE
IMPLIED WARRANTIES OF MERCHANTABILITY AND FITNESS FOR A PARTICULAR
PURPOSE ARE DISCLAIMED. IN NO EVENT SHALL THE OpenSSL PROJECT OR ITS
CONTRIBUTORS BE LIABLE FOR ANY DIRECT, INDIRECT, INCIDENTAL, SPECIAL,
EXEMPLARY, OR CONSEQUENTIAL DAMAGES (INCLUDING, BUT NOT LIMITED TO,
PROCUREMENT OF SUBSTITUTE GOODS OR SERVICES; LOSS OF USE, DATA, OR
PROFITS; OR BUSINESS INTERRUPTION) HOWEVER CAUSED AND ON ANY
THEORY OF LIABILITY, WHETHER IN CONTRACT, STRICT LIABILITY, OR TORT
(INCLUDING NEGLIGENCE OR OTHERWISE) ARISING IN ANY WAY OUT OF THE
USE OF THIS SOFTWARE, EVEN IF ADVISED OF THE POSSIBILITY OF SUCH
DAMAGE.
==================
This product includes cryptographic software written by Eric Young
([email protected]). This product includes software written by Tim Hudson
([email protected]).
Original SSLeay License
-------------------------------Copyright (C) 1995-1998 Eric Young ([email protected]) All rights reserved.
This package is an SSL implementation written by Eric Young
([email protected]). The implementation was written so as to conform with
Netscape’s SSL.
This library is free for commercial and non-commercial use as long as the
following conditions are adhered to. The following conditions apply to all code
found in this distribution, be it the RC4, RSA, lhash, DES, etc., code; not just the
SSL code. The SSL documentation included with this distribution is covered by the
same copyright terms except that the holder is Tim Hudson ([email protected]).
Copyright remains Eric Young's, and as such any Copyright notices in the code are
not to be removed. If this package is used in a product, Eric Young should be
given attribution as the author of the parts of the library used. This can be in the
form of a textual message at program startup or in documentation (online or
textual) provided with the package.
NSA-220 Plus User’s Guide
337
Appendix E Open Source Licences
Redistribution and use in source and binary forms, with or without modification,
are permitted provided that the following conditions are met:
Redistributions of source code must retain the copyright notice, this list of
conditions and the following disclaimer.
Redistributions in binary form must reproduce the above copyright notice, this list
of conditions and the following disclaimer in the documentation and/or other
materials provided with the distribution.
All advertising materials mentioning features or use of this software must display
the following acknowledgement:
“This product includes cryptographic software written by Eric Young
([email protected])”
The word 'cryptographic' can be left out if the routines from the library being used
are not cryptographic related:-).
If you include any Windows specific code (or a derivative thereof) from the apps
directory (application code) you must include an acknowledgement:
“This product includes software written by Tim Hudson ([email protected])”
THIS SOFTWARE IS PROVIDED BY ERIC YOUNG ``AS IS'' AND ANY EXPRESS OR
IMPLIED WARRANTIES, INCLUDING, BUT NOT LIMITED TO, THE IMPLIED
WARRANTIES OF MERCHANTABILITY AND FITNESS FOR A PARTICULAR PURPOSE
ARE DISCLAIMED. IN NO EVENT SHALL THE AUTHOR OR CONTRIBUTORS BE
LIABLE FOR ANY DIRECT, INDIRECT, INCIDENTAL, SPECIAL, EXEMPLARY, OR
CONSEQUENTIAL DAMAGES (INCLUDING, BUT NOT LIMITED TO, PROCUREMENT
OF SUBSTITUTE GOODS OR SERVICES; LOSS OF USE, DATA, OR PROFITS; OR
BUSINESS INTERRUPTION) HOWEVER CAUSED AND ON ANY THEORY OF
LIABILITY, WHETHER IN CONTRACT, STRICT LIABILITY, OR TORT (INCLUDING
NEGLIGENCE OR OTHERWISE) ARISING IN ANY WAY OUT OF THE USE OF THIS
SOFTWARE, EVEN IF ADVISED OF THE POSSIBILITY OF SUCH DAMAGE.
The licence and distribution terms for any publicly available version or derivative
of this code cannot be changed. i.e. this code cannot simply be copied and put
under another distribution licence [including the GNU Public Licence.]
This Product include mod_ssl software under BSD license
BSD
Copyright (c) [dates as appropriate to package]
338
NSA-220 Plus User’s Guide
Appendix E Open Source Licences
The Regents of the University of California. All rights reserved. Redistribution and
use in source and binary forms, with or without modification, are permitted
provided that the following conditions are met:
Redistributions of source code must retain the above copyright notice, this list of
conditions and the following disclaimer.
Redistributions in binary form must reproduce the above copyright notice, this list
of conditions and the following disclaimer in the documentation and/or other
materials provided with the distribution.
Neither the name of the University nor of the Laboratory may be used to endorse
or promote products derived from this software without specific prior written
permission.
THIS SOFTWARE IS PROVIDED BY THE REGENTS AND CONTRIBUTORS ``AS IS''
AND ANY EXPRESS OR IMPLIED WARRANTIES, INCLUDING, BUT NOT LIMITED
TO, THE IMPLIED WARRANTIES OF MERCHANTABILITY AND FITNESS FOR A
PARTICULAR PURPOSE ARE DISCLAIMED. IN NO EVENT SHALL THE REGENTS OR
CONTRIBUTORS BE LIABLE FOR ANY DIRECT, INDIRECT, INCIDENTAL, SPECIAL,
EXEMPLARY, OR CONSEQUENTIAL DAMAGES (INCLUDING, BUT NOT LIMITED TO,
PROCUREMENT OF SUBSTITUTE GOODS OR SERVICES; LOSS OF USE, DATA, OR
PROFITS; OR BUSINESS INTERRUPTION) HOWEVER CAUSED AND ON ANY
THEORY OF LIABILITY, WHETHER IN CONTRACT, STRICT LIABILITY, OR TORT
(INCLUDING NEGLIGENCE OR OTHERWISE) ARISING IN ANY WAY OUT OF THE
USE OF THIS SOFTWARE, EVEN IF ADVISED OF THE POSSIBILITY OF SUCH
DAMAGE.
This Product includes php software under the PHP License
The PHP License, version 3.0
Copyright (c) 1999 - 2006 The PHP Group. All rights reserved.
Redistribution and use in source and binary forms, with or without modification, is
permitted provided that the following conditions are met:
1. Redistributions of source code must retain the above copyright notice, this list
of conditions and the following disclaimer.
2. Redistributions in binary form must reproduce the above copyright notice, this
list of conditions and the following disclaimer in the documentation and/or other
materials provided with the distribution.
3. The name “PHP” must not be used to endorse or promote products derived from
this software without prior written permission. For written permission, please
contact [email protected].
NSA-220 Plus User’s Guide
339
Appendix E Open Source Licences
4. Products derived from this software may not be called “PHP”, nor may “PHP”
appear in their name, without prior written permission from [email protected]. You
may indicate that your software works in conjunction with PHP by saying “Foo for
PHP” instead of calling
it “PHP Foo” or “phpfoo”
5. The PHP Group may publish revised and/or new versions of the license from
time to time. Each version will be given a distinguishing version number. Once
covered code has been published under a particular version of the license, you
may always continue to use it under the terms of that version. You may also
choose to use such covered code under the terms of any subsequent version of
the license published by the PHP Group. No one other than the PHP Group has the
right to modify the terms applicable to covered code created under this License.
6. Redistributions of any form whatsoever must retain the following
acknowledgment:
“This product includes PHP, freely available from <http://www.php.net/>”.
THIS SOFTWARE IS PROVIDED BY THE PHP DEVELOPMENT TEAM ``AS IS'' AND
ANY EXPRESSED OR IMPLIED WARRANTIES, INCLUDING, BUT NOT LIMITED TO,
THE IMPLIED WARRANTIES OF MERCHANTABILITY AND FITNESS FOR A
PARTICULAR PURPOSE ARE DISCLAIMED. IN NO EVENT SHALL THE PHP
DEVELOPMENT TEAM OR ITS CONTRIBUTORS BE LIABLE FOR ANY DIRECT,
INDIRECT, INCIDENTAL, SPECIAL, EXEMPLARY, OR CONSEQUENTIAL DAMAGES
(INCLUDING, BUT NOT LIMITED TO, PROCUREMENT OF SUBSTITUTE GOODS OR
SERVICES; LOSS OF USE, DATA, OR PROFITS; OR BUSINESS INTERRUPTION)
HOWEVER CAUSED AND ON ANY THEORY OF LIABILITY, WHETHER IN CONTRACT,
STRICT LIABILITY, OR TORT (INCLUDING NEGLIGENCE OR OTHERWISE) ARISING
IN ANY WAY OUT OF THE USE OF THIS SOFTWARE, EVEN IF ADVISED OF THE
POSSIBILITY OF SUCH DAMAGE.
This software consists of voluntary contributions made by many individuals on
behalf of the PHP Group.
The PHP Group can be contacted via E-mail at [email protected]. For more
information on the PHP Group and the PHP project, please see <http://
www.php.net>.
This product includes the Zend Engine, freely available at <http://
www.zend.com>.
The above copyright notice and this permission notice shall be included in all
copies or substantial portions of the Software.
THE SOFTWARE IS PROVIDED “AS IS”, WITHOUT WARRANTY OF ANY KIND,
EXPRESS OR IMPLIED, INCLUDING BUT NOT LIMITED TO THE WARRANTIES OF
MERCHANTABILITY, FITNESS FOR A PARTICULAR PURPOSE AND
340
NSA-220 Plus User’s Guide
Appendix E Open Source Licences
NONINFRINGEMENT. IN NO EVENT SHALL THE AUTHORS OR COPYRIGHT
HOLDERS BE LIABLE FOR ANY CLAIM, DAMAGES OR OTHER LIABILITY, WHETHER
IN AN ACTION OF CONTRACT, TORT OR OTHERWISE, ARISING FROM, OUT OF OR
IN CONNECTION WITH THE SOFTWARE OR THE USE OR OTHER DEALINGS IN THE
SOFTWARE.
This Product includes Sablotron software under MPL License
Mozilla Public License Version 1.1
1. Definitions.
1.0.1. “Commercial Use” means distribution or otherwise making the Covered
Code available to a third party.
1.1. “Contributor” means each entity that creates or contributes to the creation of
Modifications.
1.2. “Contributor Version” means the combination of the Original Code, prior
Modifications used by a Contributor, and the Modifications made by that particular
Contributor.
1.3. “Covered Code” means the Original Code or Modifications or the combination
of the Original Code and Modifications, in each case including portions thereof.
1.4. “Electronic Distribution Mechanism” means a mechanism generally accepted
in the software development community for the electronic transfer of data.
1.5. “Executable” means Covered Code in any form other than Source Code.
1.6. “Initial Developer” means the individual or entity identified as the Initial
Developer in the Source Code notice required by Exhibit A.
1.7. “Larger Work” means a work which combines Covered Code or portions
thereof with code not governed by the terms of this License.
1.8. “License” means this document.
1.8.1. “Licensable” means having the right to grant, to the maximum extent
possible, whether at the time of the initial grant or subsequently acquired, any
and all of the rights conveyed herein.
1.9. “Modifications” means any addition to or deletion from the substance or
structure of either the Original Code or any previous Modifications. When Covered
Code is released as a series of files, a Modification is:
Any addition to or deletion from the contents of a file containing Original Code or
previous Modifications.
NSA-220 Plus User’s Guide
341
Appendix E Open Source Licences
Any new file that contains any part of the Original Code or previous Modifications.
1.10. “Original Code” means Source Code of computer software code which is
described in the Source Code notice required by Exhibit A as Original Code, and
which, at the time of its release under this License is not already Covered Code
governed by this License.
1.10.1. “Patent Claims” means any patent claim(s), now owned or hereafter
acquired, including without limitation, method, process, and apparatus claims, in
any patent Licensable by grantor.
1.11. “Source Code” means the preferred form of the Covered Code for making
modifications to it, including all modules it contains, plus any associated interface
definition files, scripts used to control compilation and installation of an
Executable, or source code differential comparisons against either the Original
Code or another well known, available Covered Code of the Contributor's choice.
The Source Code can be in a compressed or archival form, provided the
appropriate decompression or de-archiving software is widely available for no
charge.
1.12. “You” (or “Your”) means an individual or a legal entity exercising rights
under, and complying with all of the terms of, this License or a future version of
this License issued under Section 6.1. For legal entities, “You” includes any entity
which controls, is controlled by, or is under common control with You. For
purposes of this definition, “control” means (a) the power, direct or indirect, to
cause the direction or management of such entity, whether by contract or
otherwise, or (b) ownership of more than fifty percent (50%) of the outstanding
shares or beneficial ownership of such entity.
2. Source Code License.
2.1. The Initial Developer Grant.
The Initial Developer hereby grants You a world-wide, royalty-free, non-exclusive
license, subject to third party intellectual property claims under intellectual
property rights (other than patent or trademark) Licensable by Initial Developer to
use, reproduce, modify, display, perform, sublicense and distribute the Original
Code (or portions thereof) with or without Modifications, and/or as part of a Larger
Work; and under Patents Claims infringed by the making, using or selling of
Original Code, to make, have made, use, practice, sell, and offer for sale, and/or
otherwise dispose of the Original Code (or portions thereof) the licenses granted
in this Section 2.1 (a) and (b) are effective on the date Initial Developer first
distributes Original Code under the terms of this License.
Notwithstanding Section 2.1 (b) above, no patent license is granted: 1) for code
that You delete from the Original Code; 2) separate from the Original Code; or 3)
342
NSA-220 Plus User’s Guide
Appendix E Open Source Licences
for infringements caused by: i) the modification of the Original Code or ii) the
combination of the Original Code with other software or devices.
2.2. Contributor Grant.
Subject to third party intellectual property claims, each Contributor hereby grants
You a world-wide, royalty-free, non-exclusive license under intellectual property
rights (other than patent or trademark) Licensable by Contributor, to use,
reproduce, modify, display, perform, sublicense and distribute the Modifications
created by such Contributor (or portions thereof) either on an unmodified basis,
with other Modifications, as Covered Code and/or as part of a Larger Work; and
under Patent Claims infringed by the making, using, or selling of Modifications
made by that Contributor either alone and/or in combination with its Contributor
Version (or portions of such combination), to make, use, sell, offer for sale, have
made, and/or otherwise dispose of: 1) Modifications made by that Contributor (or
portions thereof); and 2) the combination of Modifications made by that
Contributor with its Contributor Version (or portions of such combination) the
licenses granted in Sections 2.2 (a) and 2.2 (b) are effective on the date
Contributor first makes Commercial Use of the Covered Code.
Notwithstanding Section 2.2 (b) above, no patent license is granted: 1) for any
code that Contributor has deleted from the Contributor Version; 2) separate from
the Contributor Version; 3) for infringements caused by: i) third party
modifications of Contributor Version or ii) the combination of Modifications made
by that Contributor with other software (except as part of the Contributor Version)
or other devices; or 4) under Patent Claims infringed by Covered Code in the
absence of Modifications made by that Contributor.
3. Distribution Obligations.
3.1. Application of License.
The Modifications which You create or to which You contribute are governed by the
terms of this License, including without limitation Section 2.2. The Source Code
version of Covered Code may be distributed only under the terms of this License
or a future version of this License released under Section 6.1, and You must
include a copy of this License with every copy of the Source Code You distribute.
You may not offer or impose any terms on any Source Code version that alters or
restricts the applicable version of this License or the recipients' rights hereunder.
However, You may include an additional document offering the additional rights
described in Section 3.5.
3.2. Availability of Source Code.
Any Modification which You create or to which You contribute must be made
available in Source Code form under the terms of this License either on the same
media as an Executable version or via an accepted Electronic Distribution
NSA-220 Plus User’s Guide
343
Appendix E Open Source Licences
Mechanism to anyone to whom you made an Executable version available; and if
made available via Electronic Distribution Mechanism, must remain available for at
least twelve (12) months after the date it initially became available, or at least six
(6) months after a subsequent version of that particular Modification has been
made available to such recipients. You are responsible for ensuring that the
Source Code version remains available even if the Electronic Distribution
Mechanism is maintained by a third party.
3.3. Description of Modifications.
You must cause all Covered Code to which You contribute to contain a file
documenting the changes You made to create that Covered Code and the date of
any change. You must include a prominent statement that the Modification is
derived, directly or indirectly, from Original Code provided by the Initial Developer
and including the name of the Initial Developer in (a) the Source Code, and (b) in
any notice in an Executable version or related documentation in which You
describe the origin or ownership of the Covered Code.
3.4. Intellectual Property Matters
(a) Third Party Claims
If Contributor has knowledge that a license under a third party's intellectual
property rights is required to exercise the rights granted by such Contributor
under Sections 2.1 or 2.2, Contributor must include a text file with the Source
Code distribution titled “LEGAL” which describes the claim and the party making
the claim in sufficient detail that a recipient will know whom to contact. If
Contributor obtains such knowledge after the Modification is made available as
described in Section 3.2, Contributor shall promptly modify the LEGAL file in all
copies Contributor makes available thereafter and shall take other steps (such as
notifying appropriate mailing lists or unscrupulous) reasonably calculated to
inform those who received the Covered Code that new knowledge has been
obtained.
(b) Contributor Apes
If Contributor's Modifications include an application programming interface and
Contributor has knowledge of patent licenses which are reasonably necessary to
implement that API, Contributor must also include this information in the legal file.
(c) Representations.
Contributor represents that, except as disclosed pursuant to Section 3.4 (a)
above, Contributor believes that Contributor's Modifications are Contributor's
original creation(s) and/or Contributor has sufficient rights to grant the rights
conveyed by this License.
344
NSA-220 Plus User’s Guide
Appendix E Open Source Licences
3.5. Required Notices.
You must duplicate the notice in Exhibit A in each file of the Source Code. If it is
not possible to put such notice in a particular Source Code file due to its structure,
then You must include such notice in a location (such as a relevant directory)
where a user would be likely to look for such a notice. If You created one or more
Modification(s) You may add your name as a Contributor to the notice described in
Exhibit A. You must also duplicate this License in any documentation for the
Source Code where You describe recipients' rights or ownership rights relating to
Covered Code. You may choose to offer, and to charge a fee for, warranty,
support, indemnity or liability obligations to one or more recipients of Covered
Code. However, You may do so only on Your own behalf, and not on behalf of the
Initial Developer or any Contributor. You must make it absolutely clear than any
such warranty, support, indemnity or liability obligation is offered by You alone,
and You hereby agree to indemnify the Initial Developer and every Contributor for
any liability incurred by the Initial Developer or such Contributor as a result of
warranty, support, indemnity or liability terms You offer.
3.6. Distribution of Executable Versions.
You may distribute Covered Code in Executable form only if the requirements of
Sections 3.1, 3.2, 3.3, 3.4 and 3.5 have been met for that Covered Code, and if
You include a notice stating that the Source Code version of the Covered Code is
available under the terms of this License, including a description of how and where
You have fulfilled the obligations of Section 3.2. The notice must be conspicuously
included in any notice in an Executable version, related documentation or
collateral in which You describe recipients' rights relating to the Covered Code.
You may distribute the Executable version of Covered Code or ownership rights
under a license of Your choice, which may contain terms different from this
License, provided that You are in compliance with the terms of this License and
that the license for the Executable version does not attempt to limit or alter the
recipient's rights in the Source Code version from the rights set forth in this
License. If You distribute the Executable version under a different license You
must make it absolutely clear that any terms which differ from this License are
offered by You alone, not by the Initial Developer or any Contributor. You hereby
agree to indemnify the Initial Developer and every Contributor for any liability
incurred by the Initial Developer or such Contributor as a result of any such terms
You offer.
3.7. Larger Works.
You may create a Larger Work by combining Covered Code with other code not
governed by the terms of this License and distribute the Larger Work as a single
product. In such a case, You must make sure the requirements of this License are
fulfilled for the Covered Code.
4. Inability to Comply Due to Statute or Regulation.
NSA-220 Plus User’s Guide
345
Appendix E Open Source Licences
If it is impossible for You to comply with any of the terms of this License with
respect to some or all of the Covered Code due to statute, judicial order, or
regulation then You must: (a) comply with the terms of this License to the
maximum extent possible; and (b) describe the limitations and the code they
affect. Such description must be included in the legal file described in Section 3.4
and must be included with all distributions of the Source Code. Except to the
extent prohibited by statute or regulation, such description must be sufficiently
detailed for a recipient of ordinary skill to be able to understand it.
5. Application of this License.
This License applies to code to which the Initial Developer has attached the notice
in Exhibit A and to related Covered Code.
6. Versions of the License.
6.1. New Versions
Netscape Communications Corporation (“Netscape”) may publish revised and/or
new versions of the License from time to time. Each version will be given a
distinguishing version number.
6.2. Effect of New Versions
Once Covered Code has been published under a particular version of the License,
You may always continue to use it under the terms of that version. You may also
choose to use such Covered Code under the terms of any subsequent version of
the License published by Netscape. No one other than Netscape has the right to
modify the terms applicable to Covered Code created under this License.
6.3. Derivative Works
If You create or use a modified version of this License (which you may only do in
order to apply it to code which is not already Covered Code governed by this
License), You must (a) rename Your license so that the phrases “Mozilla”,
“MOZILLAPL”, “MOZPL”, “Netscape”, “MPL”, “NPL” or any confusingly similar
phrase do not appear in your license (except to note that your license differs from
this License) and (b) otherwise make it clear that Your version of the license
contains terms which differ from the Mozilla Public License and Netscape Public
License. (Filling in the name of the Initial Developer, Original Code or Contributor
in the notice described in Exhibit A shall not of themselves be deemed to be
modifications of this License.)
7. Disclaimer of warranty
Covered code is provided under this license on an “as is” basis, without warranty
of any kind, either expressed or implied, including, without limitation, warranties
that the covered code is free of defects, merchantable, fit for a particular purpose
346
NSA-220 Plus User’s Guide
Appendix E Open Source Licences
or non-infringing. The entire risk as to the quality and performance of the covered
code is with you. Should any covered code prove defective in any respect, you
(not the initial developer or any other contributor) assume the cost of any
necessary servicing, repair or correction. This disclaimer of warranty constitutes
an essential part of this license. No use of any covered code is authorized
hereunder except under this disclaimer.
8. Termination
8.1. This License and the rights granted hereunder will terminate automatically if
You fail to comply with terms herein and fail to cure such breach within 30 days of
becoming aware of the breach. All sublicenses to the Covered Code which are
properly granted shall survive any termination of this License. Provisions which,
by their nature, must remain in effect beyond the termination of this License shall
survive.
8.2. If You initiate litigation by asserting a patent infringement claim (excluding
declaratory judgment actions) against Initial Developer or a Contributor (the
Initial Developer or Contributor against whom You file such action is referred to as
“Participant”) alleging that:
such Participant's Contributor Version directly or indirectly infringes any patent,
then any and all rights granted by such Participant to You under Sections 2.1 and/
or 2.2 of this License shall, upon 60 days notice from Participant terminate
prospectively, unless if within 60 days after receipt of notice You either: (i) agree
in writing to pay Participant a mutually agreeable reasonable royalty for Your past
and future use of Modifications made by such Participant, or (ii) withdraw Your
litigation claim with respect to the Contributor Version against such Participant. If
within 60 days of notice, a reasonable royalty and payment arrangement are not
mutually agreed upon in writing by the parties or the litigation claim is not
withdrawn, the rights granted by Participant to You under Sections 2.1 and/or 2.2
automatically terminate at the expiration of the 60 day notice period specified
above.
any software, hardware, or device, other than such Participant's Contributor
Version, directly or indirectly infringes any patent, then any rights granted to You
by such Participant under Sections 2.1(b) and 2.2(b) are revoked effective as of
the date You first made, used, sold, distributed, or had made, Modifications made
by that Participant.
8.3. If You assert a patent infringement claim against Participant alleging that
such Participant's Contributor Version directly or indirectly infringes any patent
where such claim is resolved (such as by license or settlement) prior to the
initiation of patent infringement litigation, then the reasonable value of the
licenses granted by such Participant under Sections 2.1 or 2.2 shall be taken into
account in determining the amount or value of any payment or license.
NSA-220 Plus User’s Guide
347
Appendix E Open Source Licences
8.4. In the event of termination under Sections 8.1 or 8.2 above, all end user
license agreements (excluding distributors and resellers) which have been validly
granted by You or any distributor hereunder prior to termination shall survive
termination.
9. Limitation of liability
Under no circumstances and under no legal theory, whether tort (including
negligence), contract, or otherwise, shall you, the initial developer, any other
contributor, or any distributor of covered code, or any supplier of any of such
parties, be liable to any person for any indirect, special, incidental, or
consequential damages of any character including, without limitation, damages for
loss of goodwill, work stoppage, computer failure or malfunction, or any and all
other commercial damages or losses, even if such party shall have been informed
of the possibility of such damages. This limitation of liability shall not apply to
liability for death or personal injury resulting from such party's negligence to the
extent applicable law prohibits such limitation. Some jurisdictions do not allow the
exclusion or limitation of incidental or consequential damages, so this exclusion
and limitation may not apply to you.
10. U.S. government end users
The Covered Code is a “commercial item,” as that term is defined in 48 C.F.R.
2.101 (Oct. 1995), consisting of “commercial computer software” and
“commercial computer software documentation,” as such terms are used in 48
C.F.R. 12.212 (Sept. 1995). Consistent with 48 C.F.R. 12.212 and 48 C.F.R.
227.7202-1 through 227.7202-4 (June 1995), all U.S. Government End Users
acquire Covered Code with only those rights set forth herein.
11. Miscellaneous
This License represents the complete agreement concerning subject matter
hereof. If any provision of this License is held to be unenforceable, such provision
shall be reformed only to the extent necessary to make it enforceable. This
License shall be governed by California law provisions (except to the extent
applicable law, if any, provides otherwise), excluding its conflict-of-law provisions.
With respect to disputes in which at least one party is a citizen of, or an entity
chartered or registered to do business in the United States of America, any
litigation relating to this License shall be subject to the jurisdiction of the Federal
Courts of the Northern District of California, with venue lying in Santa Clara
County, California, with the losing party responsible for costs, including without
limitation, court costs and reasonable attorneys' fees and expenses. The
application of the United Nations Convention on Contracts for the International
Sale of Goods is expressly excluded. Any law or regulation which provides that the
language of a contract shall be construed against the drafter shall not apply to this
License.
348
NSA-220 Plus User’s Guide
Appendix E Open Source Licences
12. Responsibility for claims
As between Initial Developer and the Contributors, each party is responsible for
claims and damages arising, directly or indirectly, out of its utilization of rights
under this License and You agree to work with Initial Developer and Contributors
to distribute such responsibility on an equitable basis. Nothing herein is intended
or shall be deemed to constitute any admission of liability.
13. Multiple-licensed code
Initial Developer may designate portions of the Covered Code as “MultipleLicensed”. “Multiple-Licensed” means that the Initial Developer permits you to
utilize portions of the Covered Code under Your choice of the MPL or the
alternative licenses, if any, specified by the Initial Developer in the file described
in Exhibit A.
Exhibit A - Mozilla Public License.
“The contents of this file are subject to the Mozilla Public License Version 1.1 (the
“License”); you may not use this file except in compliance with the License. You
may obtain a copy of the License at http://www.mozilla.org/MPL/
Software distributed under the License is distributed on an “AS IS” basis,
WITHOUT WARRANTY OF ANY KIND, either express or implied. See the License for
the specific language governing rights and limitations under the License.
The Original Code is ______________________________________.
The Initial Developer of the Original Code is ________________________.
Portions created by ______________________ are Copyright (C) ______
_______________________. All Rights Reserved.
Contributor(s): ______________________________________.
Alternatively, the contents of this file may be used under the terms of the _____
license (the “[___] License”), in which case the provisions of [______] License are
applicable instead of those above. If you wish to allow use of your version of this
file only under the terms of the [____] License and not to allow others to use your
version of this file under the MPL, indicate your decision by deleting the provisions
above and replace them with the notice and other provisions required by the
[___] License. If you do not delete the provisions above, a recipient may use your
version of this file under either the MPL or the [___] License.”
NOTE: The text of this Exhibit A may differ slightly from the text of the notices in
the Source Code files of the Original Code. You should use the text of this Exhibit
NSA-220 Plus User’s Guide
349
Appendix E Open Source Licences
A rather than the text found in the Original Code Source Code for Your
Modifications.
This Product includes expiate and krb5 software under the MIT License
The MIT License
Copyright (c) <year> <copyright holders>
Permission is hereby granted, free of charge, to any person obtaining a copy of
this software and associated documentation files (the “Software”), to deal in the
Software without restriction, including without limitation the rights to use, copy,
modify, merge, publish, distribute, sublicense, and/or sell copies of the Software,
and to permit persons to whom the Software is furnished to do so, subject to the
following conditions:
The above copyright notice and this permission notice shall be included in all
copies or substantial portions of the Software.
THE SOFTWARE IS PROVIDED “AS IS”, WITHOUT WARRANTY OF ANY KIND,
EXPRESS OR IMPLIED, INCLUDING BUT NOT LIMITED TO THE WARRANTIES OF
MERCHANTABILITY, FITNESS FOR A PARTICULAR PURPOSE AND
NONINFRINGEMENT. IN NO EVENT SHALL THE AUTHORS OR COPYRIGHT
HOLDERS BE LIABLE FOR ANY CLAIM, DAMAGES OR OTHER LIABILITY, WHETHER
IN AN ACTION OF CONTRACT, TORT OR OTHERWISE, ARISING FROM, OUT OF OR
IN CONNECTION WITH THE SOFTWARE OR THE USE OR OTHER DEALINGS IN THE
SOFTWARE.
NOTE: Some components of the NSA incorporate source code covered under the
Apache License, GPL License, LGPL License, BSD License, Open SSL License,
OpenLDAP License, PHP License and MIT License. To obtain the source code
covered under those Licenses, please contact ZyXEL Communications Corporation
at: ZyXEL Technical Support.
End-User License Agreement for “NSA”
WARNING: ZyXEL Communications Corp. IS WILLING TO LICENSE THE
ENCLOSED SOFTWARE TO YOU ONLY UPON THE CONDITION THAT YOU ACCEPT
ALL OF THE TERMS CONTAINED IN THIS LICENSE AGREEMENT. PLEASE READ
THE TERMS CAREFULLY BEFORE COMPLETING THE INSTALLATION PROCESS AS
INSTALLING THE SOFTWARE WILL INDICATE YOUR ASSENT TO THEM. IF YOU DO
NOT AGREE TO THESE TERMS, THEN ZyXEL, INC. IS UNWILLING TO LICENSE THE
SOFTWARE TO YOU, IN WHICH EVENT YOU SHOULD RETURN THE UNINSTALLED
SOFTWARE AND PACKAGING TO THE PLACE FROM WHICH IT WAS ACQUIRED,
AND YOUR MONEY WILL BE REFUNDED.
350
NSA-220 Plus User’s Guide
Appendix E Open Source Licences
1.Grant of License for Personal Use
ZyXEL Communications Corp. (“ZyXEL”) grants you a non-exclusive, nonsublicense, non-transferable license to use the program with which this license is
distributed (the “Software”), including any documentation files accompanying the
Software (“Documentation”), for internal business use only, for up to the number
of users specified in sales order and invoice. You have the right to make one
backup copy of the Software and Documentation solely for archival, back-up or
disaster recovery purposes. You shall not exceed the scope of the license granted
hereunder. Any rights not expressly granted by ZyXEL to you are reserved by
ZyXEL, and all implied licenses are disclaimed.
2.Ownership
You have no ownership rights in the Software. Rather, you have a license to use
the Software as long as this License Agreement remains in full force and effect.
Ownership of the Software, Documentation and all intellectual property rights
therein shall remain at all times with ZyXEL. Any other use of the Software by any
other entity is strictly forbidden and is a violation of this License Agreement.
3.Copyright
The Software and Documentation contain material that is protected by United
States Copyright Law and trade secret law, and by international treaty provisions.
All rights not granted to you herein are expressly reserved by ZyXEL. You may not
remove any proprietary notice of ZyXEL or any of its licensors from any copy of
the Software or Documentation.
4.Restrictions
You may not publish, display, disclose, sell, rent, lease, modify, store, loan,
distribute, or create derivative works of the Software, or any part thereof. You
may not assign, sublicense, convey or otherwise transfer, pledge as security or
otherwise encumber the rights and licenses granted hereunder with respect to the
Software. You may not copy, reverse engineer, decompile, reverse compile,
translate, adapt, or disassemble the Software, or any part thereof, nor shall you
attempt to create the source code from the object code for the Software. You may
not market, co-brand, private label or otherwise permit third parties to link to the
Software, or any part thereof. You may not use the Software, or any part thereof,
in the operation of a service bureau or for the benefit of any other person or
entity. You may not cause, assist or permit any third party to do any of the
foregoing.
5.Confidentiality
You acknowledge that the Software contains proprietary trade secrets of ZyXEL
and you hereby agree to maintain the confidentiality of the Software using at least
NSA-220 Plus User’s Guide
351
Appendix E Open Source Licences
as great a degree of care as you use to maintain the confidentiality of your own
most confidential information. You agree to reasonably communicate the terms
and conditions of this License Agreement to those persons employed by you who
come into contact with the Software, and to use reasonable best efforts to ensure
their compliance with such terms and conditions, including, without limitation, not
knowingly permitting such persons to use any portion of the Software for the
purpose of deriving the source code of the Software.
6.No Warranty
THE SOFTWARE IS PROVIDED “AS IS.” TO THE MAXIMUM EXTENT PERMITTED BY
LAW, ZyXEL DISCLAIMS ALL WARRANTIES OF ANY KIND, EITHER EXPRESSED OR
IMPLIED, INCLUDING, WITHOUT LIMITATION, IMPLIED WARRANTIES OF
MERCHANTABILITY AND FITNESS FOR A PARTICULAR PURPOSE. ZyXEL DOES
NOT WARRANT THAT THE FUNCTIONS CONTAINED IN THE SOFTWARE WILL MEET
ANY REQUIREMENTS OR NEEDS YOU MAY HAVE, OR THAT THE SOFTWARE WILL
OPERATE ERROR FREE, OR IN AN UNINTERUPTED FASHION, OR THAT ANY
DEFECTS OR ERRORS IN THE SOFTWARE WILL BE CORRECTED, OR THAT THE
SOFTWARE IS COMPATIBLE WITH ANY PARTICULAR PLATFORM. SOME
JURISDICTIONS DO NOT ALLOW THE WAIVER OR EXCLUSION OF IMPLIED
WARRANTIES SO THEY MAY NOT APPLY TO YOU. IF THIS EXCLUSION IS HELD TO
BE UNENFORCEABLE BY A COURT OF COMPETENT JURISDICTION, THEN ALL
EXPRESS AND IMPLIED WARRANTIES SHALL BE LIMITED IN DURATION TO A
PERIOD OF THIRTY (30) DAYS FROM THE DATE OF PURCHASE OF THE
SOFTWARE, AND NO WARRANTIES SHALL APPLY AFTER THAT PERIOD.
7.Limitation of Liability
IN NO EVENT WILL ZyXEL BE LIABLE TO YOU OR ANY THIRD PARTY FOR ANY
INCIDENTAL OR CONSEQUENTIAL DAMAGES (INCLUDING, WITHOUT
LIMITATION, INDIRECT, SPECIAL, PUNITIVE, OR EXEMPLARY DAMAGES FOR
LOSS OF BUSINESS, LOSS OF PROFITS, BUSINESS INTERRUPTION, OR LOSS OF
BUSINESS INFORMATION) ARISING OUT OF THE USE OF OR INABILITY TO USE
THE PROGRAM, OR FOR ANY CLAIM BY ANY OTHER PARTY, EVEN IF ZyXEL HAS
BEEN ADVISED OF THE POSSIBILITY OF SUCH DAMAGES. ZyXEL'S AGGREGATE
LIABILITY WITH RESPECT TO ITS OBLIGATIONS UNDER THIS AGREEMENT OR
OTHERWISE WITH RESPECT TO THE SOFTWARE AND DOCUMENTATION OR
OTHERWISE SHALL BE EQUAL TO THE PURCHASE PRICE, BUT SHALL IN NO
EVENT EXCEED $1,000. BECAUSE SOME STATES/COUNTRIES DO NOT ALLOW
THE EXCLUSION OR LIMITATION OF LIABILITY FOR CONSEQUENTIAL OR
INCIDENTAL DAMAGES, THE ABOVE LIMITATION MAY NOT APPLY TO YOU.
8.Export Restrictions
THIS LICENSE AGREEMENT IS EXPRESSLY MADE SUBJECT TO ANY APPLICABLE
LAWS, REGULATIONS, ORDERS, OR OTHER RESTRICTIONS ON THE EXPORT OF
THE SOFTWARE OR INFORMATION ABOUT SUCH SOFTWARE WHICH MAY BE
352
NSA-220 Plus User’s Guide
Appendix E Open Source Licences
IMPOSED FROM TIME TO TIME. YOU SHALL NOT EXPORT THE SOFTWARE,
DOCUMENTATION OR INFORMATION ABOUT THE SOFTWARE AND
DOCUMENTATION WITHOUT COMPLYING WITH SUCH LAWS, REGULATIONS,
ORDERS, OR OTHER RESTRICTIONS. YOU AGREE TO INDEMNIFY ZyXEL AGAINST
ALL CLAIMS, LOSSES, DAMAGES, LIABILITIES, COSTS AND EXPENSES,
INCLUDING REASONABLE ATTORNEYS' FEES, TO THE EXTENT SUCH CLAIMS
ARISE OUT OF ANY BREACH OF THIS SECTION 8.
9.Audit Rights
ZyXEL SHALL HAVE THE RIGHT, AT ITS OWN EXPENSE, UPON REASONABLE
PRIOR NOTICE, TO PERIODICALLY INSPECT AND AUDIT YOUR RECORDS TO
ENSURE YOUR COMPLIANCE WITH THE TERMS AND CONDITIONS OF THIS
LICENSE AGREEMENT.
10.Termination
This License Agreement is effective until it is terminated. You may terminate this
License Agreement at any time by destroying or returning to ZyXEL all copies of
the Software and Documentation in your possession or under your control. ZyXEL
may terminate this License Agreement for any reason, including, but not limited
to, if ZyXEL finds that you have violated any of the terms of this License
Agreement. Upon notification of termination, you agree to destroy or return to
ZyXEL all copies of the Software and Documentation and to certify in writing that
all known copies, including backup copies, have been destroyed. All provisions
relating to confidentiality, proprietary rights, and non-disclosure shall survive the
termination of this Software License Agreement.
12.General
This License Agreement shall be construed, interpreted and governed by the laws
of Republic of China without regard to conflicts of laws provisions thereof. The
exclusive forum for any disputes arising out of or relating to this License
Agreement shall be an appropriate court or Commercial Arbitration Association
sitting in ROC, Taiwan. This License Agreement shall constitute the entire
Agreement between the parties hereto. This License Agreement, the rights
granted hereunder, the Software and Documentation shall not be assigned by you
without the prior written consent of ZyXEL. Any waiver or modification of this
License Agreement shall only be effective if it is in writing and signed by both
parties hereto. If any part of this License Agreement is found invalid or
unenforceable by a court of competent jurisdiction, the remainder of this License
Agreement shall be interpreted so as to reasonably effect the intention of the
parties.
NSA-220 Plus User’s Guide
353
Appendix E Open Source Licences
354
NSA-220 Plus User’s Guide
APPENDIX
F
Legal Information
Copyright
Copyright © 2009 by ZyXEL Communications Corporation.
The contents of this publication may not be reproduced in any part or as a whole,
transcribed, stored in a retrieval system, translated into any language, or
transmitted in any form or by any means, electronic, mechanical, magnetic,
optical, chemical, photocopying, manual, or otherwise, without the prior written
permission of ZyXEL Communications Corporation.
Published by ZyXEL Communications Corporation. All rights reserved.
Disclaimers
ZyXEL does not assume any liability arising out of the application or use of any
products, or software described herein. Neither does it convey any license under
its patent rights nor the patent rights of others. ZyXEL further reserves the right
to make changes in any products described herein without notice. This publication
is subject to change without notice.
Do not use the NSA for illegal purposes. Illegal downloading or sharing of files can
result in severe civil and criminal penalties. You are subject to the restrictions of
copyright laws and any other applicable laws and will bear the consequences of
any infringements thereof. ZyXEL bears NO responsibility or liability for your use
of the download service feature.
Make sure all data and programs on the NSA are also stored elsewhere. ZyXEL is
not responsible for any loss of or damage to any data, programs, or storage media
resulting from the use, misuse, or disuse of this or any other ZyXEL product.
Certifications
Federal Communications Commission (FCC) Interference Statement
The device complies with Part 15 of FCC rules. Operation is subject to the
following two conditions:
NSA-220 Plus User’s Guide
355
Appendix F Legal Information
• This device may not cause harmful interference.
• This device must accept any interference received, including interference that
may cause undesired operations.
This device has been tested and found to comply with the limits for a Class B
digital device pursuant to Part 15 of the FCC Rules. These limits are designed to
provide reasonable protection against harmful interference in a residential
installation. This device generates, uses, and can radiate radio frequency energy,
and if not installed and used in accordance with the instructions, may cause
harmful interference to radio communications. However, there is no guarantee
that interference will not occur in a particular installation.
Notices
Changes or modifications not expressly approved by the party responsible for
compliance could void the user's authority to operate the equipment.
This Class B digital apparatus complies with Canadian ICES-003.
Cet appareil numérique de la classe B est conforme à la norme NMB-003 du
Canada.
Viewing Certifications
1
Go to http://www.zyxel.com.
2
Select your product on the ZyXEL home page to go to that product's page.
3
Select the certification you wish to view from this page.
ZyXEL warrants to the original end user (purchaser) that this product is free from
any defects in materials or workmanship for a period of up to two years from the
date of purchase. During the warranty period, and upon proof of purchase, should
the product have indications of failure due to faulty workmanship and/or
materials, ZyXEL will, at its discretion, repair or replace the defective products or
components without charge for either parts or labor, and to whatever extent it
shall deem necessary to restore the product or components to proper operating
condition. Any replacement will consist of a new or re-manufactured functionally
equivalent product of equal or higher value, and will be solely at the discretion of
ZyXEL. This warranty shall not apply if the product has been modified, misused,
tampered with, damaged by an act of God, or subjected to abnormal working
conditions.
Note
Repair or replacement, as provided under this warranty, is the exclusive remedy
of the purchaser. This warranty is in lieu of all other warranties, express or
356
NSA-220 Plus User’s Guide
Appendix F Legal Information
implied, including any implied warranty of merchantability or fitness for a
particular use or purpose. ZyXEL shall in no event be held liable for indirect or
consequential damages of any kind to the purchaser.
To obtain the services of this warranty, contact your vendor. You may also refer to
the warranty policy for the region in which you bought the device at http://
www.zyxel.com/web/support_warranty_info.php.
Registration
Register your product online to receive e-mail notices of firmware upgrades and
information at www.zyxel.com for global products, or at www.us.zyxel.com for
North American products.
NSA-220 Plus User’s Guide
357
Appendix F Legal Information
358
NSA-220 Plus User’s Guide
Index
Index
A
activation 137
configuration 136
iTunes server 132, 135, 136
rebuilding database 137
print server 162
configuration 163
name 163
web publishing 132, 152, 155
activation 153
example 153
port number 156
access rights 38
Flickr 174
shares 199, 200
YouTube 178
activation
download service 139
Flickr/YouTube 169
FTP 134
FTP Uploadr 179
media server 137
recycle bins 37, 198
web publishing 153
anonymous FTP access 134
applications 131
auto upload
Flickr/YouTube 169
FTP Uploadr 178
broadcatching 133, 158
adding channels 158, 160
channel guides 161
RSS 133
COPY/SYNC button 164
configuration 167
example 164
synchronization 165
download service 132, 138
activation 139
adding a task 142
BitTorrent 132, 138, 142
configuration 139
link capture browser plugin 143
notifications 144
preferences 145
protection 150, 151
status 140
URL 142
FTP 131, 133
activation 134
anonymous access 134
passive mode transfer 134
media server 132, 135
NSA-220 Plus User’s Guide
authorization
Flickr 170, 171
YouTube 175
auto upload
Flickr/YouTube 169
activation 169
authorization 170, 175
configuration 173, 175
FTP Uploadr 178
activation 179
bandwidth limit 182
configuration 181
server entry 180
grace period 174, 178, 182
B
backup settings 220
bandwidth limit 182
BitTorrent 132
IP filtering 148
protection 150, 151
re-seeding 140
settings 146
torrent files 138, 142
health 149
info-hash 150
trackers 150
broadcatching 133, 158
adding channels 158, 160
channel guides 161
359
Index
RSS 133
disk replacement 112
browser plugin, capturing link 143
displaying user information 190
browsing shares 32
DLNA 132, 135
DNS 125, 128
Domain Name System, see DNS
C
capturing download links 143
certificate 222
editing 223
tutorial 86
verifying 96
changing password 29, 30
channel guides 161
CIFS 105
configuration
COPY/SYNC button 167
download service 139
Flickr 173
FTP Uploadr 181
print server 163
recycle bins 201
shares 36, 37
YouTube 175, 176
download period control 145
download service 132, 138
activation 139
adding a task 142
BitTorrent 132
IP filtering 148
protection 150, 151
re-seeding 140
settings 146
torrent files 138, 142
configuration 139
download period control 145
link capture browser plugin 143
notifications 144
activation 139
preferences 145
status 140
URL, download service 142
duplexing 122
COPY/SYNC button 25, 164
configuration 167
example 164
synchronization 165
E
copying contents 34, 35, 204
explicit TLS/SSL 98
CPU
temperature 47
usage 47
external volumes 118
creating
groups 192, 193
shares 33, 196, 198
users 186, 188
volumes 115, 118
F
fan speed 47
File Transfer Protocol over TLS, see FTPS
files, uploading 33
FileZilla 98
D
data protection 124
database, rebuilding 137
date 107
deleting shares 34
diagnostic tools 128
360
fingerprint 96
firmware, upgrading 224
Flickr 169
access rights 174
activation 169
authorization 170, 171
grace period 174
safety level 174
NSA-220 Plus User’s Guide
Index
FTP 98, 131, 133
activation 134
anonymous access 134
over TLS 98
passive mode transfer 134
FTP Uploadr 178
activation 179
bandwidth limit 182
configuration 181
grace period 182
server entry 180
FTPES - FTP over explicit TLS/SSL 98
FTPS 98, 132
J
JBOD 116, 120, 121, 122
jumbo frames 125, 126, 128
L
lag, time 105
language selection 30
LEDs 23
link capture browser plugin 143
login 29
G
global icons 30, 41
GMT 108
grace period 174, 178, 182
groups 191
adding 192, 193
editing 193
membership 188, 193
names 194
searching 192
H
HTTP port 128
HTTPS 92, 221
I
icons 30, 41, 44
global 30, 41
shares 32
users 187
IP address 125
IP filtering 148
iTunes server 132, 135, 136
NSA-220 Plus User’s Guide
logs 212
M
maintenance 207
backup settings 220
logs 212
power management 208
failure 209
resume 209
schedule 210
UPS 209
reset 220
restoring settings 220
shutdown 225
upgrading firmware 224
master browser 106
media server 132, 135
activation 137
configuration 136
iTunes server 132, 136
rebuilding database 137
membership 188
groups 188, 193
mirroring 122
moving contents 34, 35, 204
My NSA 30, 31
configuring shares 36, 37
creating shares 33
icons 30
language selection 30
share browser 32
361
Index
N
R
naming
server 106
shares 38
volumes 117
workgroup 106
navigation panel 42
RAID 116, 120
degraded 117
RAID 0 121, 123
RAID 1 121, 123, 124
recovering 112
replacing disks 112
resynchronization 112
NDU 28
rebuilding database 137
network 125
diagnostic tools 128
DNS 125, 128
HTTP port 128
IP address 125
jumbo frames 125, 126, 128
PPPoE 126, 129
activation 129
TCP/IP 126, 127
recycle bins 201
activation 37, 198
configuration 196, 201
NAS Discovery Utility, see NDU
notifications
download service
activation 139
replacing disks 112
reset 25, 220
restoring settings 220
RSS 133
download service notifications 144
S
notifications, download service 144
safety level, Flickr 174
schedule, power management 210
P
parity 122
passive mode transfer 134
password 29, 30, 40
port, HTTP 128
power management 208
failure 209
resume 209
schedule 210
UPS 209
PPPoE 126, 129
activation 129
preferences, download service 145
print server 162
configuration 163
name 163
protection, download service 150, 151
public key certificate 222
editing 223
362
scheduling, download service 145
secure connections 92
selecting language 30
server entry, FTP Uploadr 180
server name 106
setup
BitTorrent 146
COPY/SYNC button 167
download service 139
Flickr 173
FTP Uploadr 181
media server 136
print server 163
YouTube 175, 176
shares 31, 195
access rights 38, 199, 200
adding 196, 198
browser 32
configuration 36, 37
copying contents 34, 35, 204
creation 33
deletion 34
NSA-220 Plus User’s Guide
Index
editing 198
icons 32
moving contents 34, 35, 204
names 38
paths 39
recycle bins 196, 201
activation 198
configuration 201
share browser 196, 202
status 197
types 197
uploading files 33, 202
shutdown 225
master browser 106
password 29, 30, 40
reset 25
server name 106
settings 105
status 46
time lag 105
workgroup name 106
T
TCP/IP 126, 127
SSL 98, 221
certificate 222
editing 223
tutorial 86
thumbprint 96
status 41, 46
download service 140
shares 197
volume 113, 116
time 107
lag 105
server 108
zone 108
storage 111
creating volumes 115
disk replacement 112
JBOD 111, 116, 120, 121, 122
methods 121
duplexing 122
mirroring 122
parity 122
striping 122
naming volumes 117
RAID 111, 116, 120
degraded 117
RAID 0 121, 123
RAID 1 121, 123, 124
recovering 112
resynchronization 112
status 113, 116
USB devices 118, 119
volumes 111, 120
TLS 98, 132
striping 122
synchronization 164, 165
configuration 167
directions 168
single direction 165
two directions 166
system
date/time 107
login 29
NSA-220 Plus User’s Guide
temperature
CPU 47
torrent files 138, 142
health 149
info-hash 150
trackers 150
Transport Layer Security, see TLS
troubleshooting
external disks 238
forgot password 233, 234
LED indicators 231
LAN 233
login 237
media files 239
NDU discovery 235
overview 231
user share access 238
web configurator access 234
U
upgrading firmware 224
uploading files 33, 202
UPS 209
URL 142
USB devices 118, 119
363
Index
usernames 189
web security 92
users 185
adding an account 186, 188
displaying information 187, 190
editing an account 188
group membership 188, 193
icons 187
search 186
usernames 189
workgroup name 106
V
Y
YouTube 169
access rights 178
activation 169
authorization 175
configuration 175, 176
grace period 178
video category 178
video category, YouTube 178
volumes 111, 120
creation 115, 118
JBOD 111, 116, 121, 122
names 117
RAID 111, 116, 120
degraded 117
RAID 0 121, 123
RAID 1 121, 123, 124
recovering 112
resynchronization 112
status 113, 116
storage methods 121
duplexing 122
mirroring 122
parity 122
striping 122
W
web configurator 27
icons 30
language selection 30
login 29
My NSA 30, 31
navigation panel 42
password 29, 30, 40
status 41
web publishing 132, 152, 155
activation 153
example 153
port number 156
troubleshooting 242
364
NSA-220 Plus User’s Guide