1
http://biz.lgservice.com
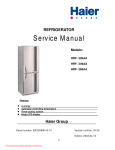
REFRIGERATOR
SERVICE MANUAL
CAUTION
BEFORE SERVICING THE UNIT, READ
THE "SAFETY PRECAUTIONS" IN THIS MANUAL.
Ref.No.
GR-154
MODEL: GR-154***
COLOR : SUPER WHITE
CONTENTS
(Page)
SAFETY PRECAUTIONS .............................................................................................................................................. 2
SERVICING PRECAUTIONS ......................................................................................................................................... 3
SPECIFICATIONS ...........................................................................................................................................................4
PARTS IDENTIFICATION ...............................................................................................................................................4
DISASSEMBLY ......................................................................................................................................................... 5 - 6
DOOR .......................................................................................................................................................................... 5
FREEZER DOOR .........................................................................................................................................................5
TOP TABLE ................................................................................................................................................................. 6
FREEZER DOOR, HANDLE ....................................................................................................................................... 6
THERMOSTAT ............................................................................................................................................................6
COMPONENTS ...........................................................................................................................................................7-8
CIRCUIT DIAGRAM ...................................................................................................................................................... 8
TROUBLESHOOTING ............................................................................................................................................ 9 - 10
ANOTHER ELECTRIC COMPONENTS........................................................................................................................11
REFRIGERATING CYCLE .....................................................................................................................................12 - 13
EXPLODED VIEW . ................................................................................................................................................15 - 16
REPLACEMENT PARTS LIST .....................................................................................................................................17
SAFETY PRECAUTIONS
Please read the following instructions before servicing your
refrigerator.
1. Check the set for electric losses.
2. Unplug prior to servicing to prevent electric shock.
3. Whenever testing with power on, wear rubber gloves to
prevent electric shock.
4. If you use any kind of appliance, check regular current,
voltage and capacity.
5. Don't touch deep-frozen products in the freezer with wet
hands. This may cause frostbite.
6. Prevent water from following onto electric elements in the
mechanical parts.
7. When tilting the set, remove any materials on the set,
especially the thin plates(ex. Glass shelf or books.)
8. Leave the disassembly of the refrigerating cycle to a
specialized service center. The gas inside the circuit may
pollute the environment.
9. When you discharge the refrigerant, wear the protective
safety glasses or goggle for eye safety.
10. When you repair the cycle system in refrigerator, the work
area is well ventilated.
Especially if the refrigerant is R600a, there are no fire or
heat sources. (No smoking)
-2-
SERVICING PRECAUTIONS
After the refrigerant (R600a) is completely discharged, repair any
defective parts and replace the dryer. At any case you must use the
LOKRING for connecting or replacing any part in the cycle (No Fire,
No Welding). Connect the Schrader valve to pump with the coupler.
And then turn the pump on for vacuum state (Figure 3). Let the
pump run until the low-pressure gauge indicates the vacuum (gauge
pressure 0, absolute pressure -1atm or -760mmHg). Recommended
vacuum time is 30 min. Charge the N2 gas in order to check for
leakage from welding points and the LOKRING. If leakages are
found, repair the defects and repeat the vacuum process.
Features of refrigerant (R600a)
• Achromatic and odor less gas.
• Flammable gas and the ignition (explosion) at 494°C.
• Upper/lower explosion limit: 1.8%~8.4%/Vol.
Features of the R600a refrigerator
• Charging of 60% refrigerant compared with a R134a model
• The suction pressure is below 1bar (abs) during the operation.
• Because of its low suction pressure, the external air may flow in the cycle
system when the refrigerant leak, and it causes malfunction in the compressor.
• The displacement of compressor using R600a must be at least 1.7 times larger
than that of R134a.
• Drier type is XH-9.
• The EVAPORATOR or any other cycle part that has welding joint is hidden in
the foam. (If not hidden inside, the whole electric parts must be tested with the
LEAKAGE TEST according to the IEC Standard.)
• The compressor has label of the refrigerant R600a.
• Only the Service man must have an access to the system.
Installation place
• Must be well ventilated.
• Must be 20 m 3 or larger.
• Must be no-smoking area.
• No ignitable factors must be present.
Utilities
• Refrigerant cylinder (MAX NET 300g)
• Manometer
• Vacuum pump (600L/min)
• Piercing Clamp
• Quick coupler
• Hoses (5m-1EA, 1m-3EA)
• LOKRING
• Portable Leakage detector (3g/year¯)
• Nitrogen cylinder (for leakage test)
• Concentration gauge
Make sure before Servicing
• Refrigerant
Confirm the refrigerant by checking Name Plate on innerliner and the label on
the compressor.
• If the refrigerant is R600a, you must not weld or apply a heat source.
Air Recharging in Compressor
Before refilling the refrigerant, you must perform the test according to Chapter 5
(TROUBLESHOOTING CHART). When the defects are found, you must
discharge the residual refrigerant (R600a) in the outdoor. For discharging the
refrigerant R600a, break the narrow portion of tube extension by hand or with a
pipe cutter as shown in Figure 1. Leave it for 30min in outside to stabilize the
pressure with ambient. Then, check the pressure by piercing the dryer part with
piercing pliers. If the refrigerant is not completely discharged, let the refrigerator
alone for more 30min in outside.
POINT TO BE
BROKEN
SERVICE TUBE
EXTENSION
Figure 1
TO THE
VACUUM
PUMP
PRESSURE
GAUGE
Figure 3
After the system is completely vacuumed, fill it with the refrigerant
R600a up to what has been specified at your refrigerator Name
Plate. The amount of refrigerant (R600a) must be precisely
measured within the error of ±1g by an electron scale (Figure 4).
If you use the manifold connected with both the refrigerant
(R600a) cylinder and the vacuum pump simultaneously,
make sure the pump valve is closed (Figure 5).
REFRIGERANT
(R600a)
CHARGING HOSE
COUPLE
THROTTLE
VALVE
WEIGH SCALE
Figure 4
FILLING OR
CHARGE TUBE
VALVE TO BE OPENED
WHEN REFILLING
TO THE
REFRIGERATION
SYSTEM
TO THE CHARGE
CYLINDER
VALVE TO BE CLOSED
AFTER VACUUM
TO THE VACUUM PUMP
Figure 5
Connect the charging hose (that is connected to the refrigerant (R600a) cylinder) to
the Schrader valve installed on the service tube. Then, charge the refrigerant (R600a)
by controlling the Throttle valve. When you do so, do not fully open the Throttle valve
because it may make damage to the compressor. Gradually charge the refrigerant
(R600a) by changing open and close the Throttle Valve (5g at each time). The
charging hose must use a one-way valve to prevent the refrigerant refluence. Close
the Schrader valve cap after the refrigerant (R600a) is completely recharged.
CHARGE TUBE
EXTENSION
SCHRADER VALVE
(ONE-WAY VALVE)
LOKRING
After you completely recharge the refrigerant (R600a), perform the leakage test by
using a portable leakage detector or soapy water.
Test the low pressure (suction) parts in compressor off time and high pressure parts
in compressor on time. If the leakages are found, restart from the refrigerant (R600a)
discharging process and repairs defects of leaks.
Figure 2
Attach the service tube installed with a Schrader valve (one-way
valve) by using the LOKRING (Figure 2). Then, connect the
Schrader valve (one-way valve) to the pump that is connected to
the discharging hose leading to the outside. When discharging the
residual refrigerant, repeat 3 cycle that includes 3min of the pump
running->pump off->30sec of the compressor running.
After the leakage test, check the temperature of each parts of the cycle. Check with
hands if the CONDENSER and the case (HOT-LINE pipe) that is contacted to the
door gasket are warm. Confirm that frost is uniform distributed on the surface of
the freezer room and the back wall of fridge room.
-3-
1. SPECIFICATIONS
1-1 GR-154
ITEMS
STORAGE CAPACITY
ITEMS
SPECIFICATIONS
FREEZER
100
DRAWER
4EA
TOTAL
100
ICE TRAY
YES
DIMENSIONS (mm)
NET WHIGHT(kg)
TEMPERATURE CONTROL
DEFROSTING SYSTEM
OUT CASE
SPECIFICATIONS
550 (W) X 600 (D) X 850 (H)
COMPRESSOR
40
CONDENSER
BUTTON
MANUAL
ABS
INSULATION
CYCLOPENTANE
REFRIGERANT
R600a (40g)
HTS 60 MT(210cc)
2. PARTS IDENTIFICATION
NOTE : This is a basic model. The shape of refrigerator is subject to change.
-4-
Wire Condenser
LUBRICANT OIL
Coated Steel sheet
INNER CASE
P.T.C Starting Type
3. DISASSEMBLY
PRECAUTION
1. First unplug the appliance.
2. Remove foods and accessories like shelves or trays
which are not fixed in the refrigerator.
3. Carefully lay the appliance on a cushion like packing
material to avoid the damage of refrigeration circuit.
4. Use ‘+’ driver or spanner to fix or remove the bolts.
2. Remove the LEG ③.
▶ Reversible
4. Before refitting the door, swap the Hinge Cap ④ by pulling it
out from its current location and repositioning it on the other
side of the door. Care should be taken not to damage the
adjacent surfaces when removing the Hinge Cap.
5. Unscrew the Upper Hinge pin (U) ⑤ and screw it into the
opposite side hole.
6. After refitting the door, fix the Lower Hinge(L) in the
opposite side by using 2xBOLTS.
7. Fix the Leg.
Figure 6
8. Carefully place the appliance in an upright position.
Adjust the Leveling screw to make sure the appliance is
steady and check that the door opens and closes
properly.
-5-
4. COMPONENTS
3) PTC-Applied Circuit Diagram
According to Starting Method for the Motor
1. COMPRESSOR
1) Role
The compressor intakes low temperature and low
pressure gas evaporated from Evaporator of the
Refrigerator, and condenses this gas to high temperature
and high pressure gas, and then plays delivering role to
Condenser.
2) Composition
The Compressor is Composed of Compressor Apparatus
compressing gas, Compressor Motor moving Compressor
Apparatus and Case protecting Compressor Apparatus
and Motor. There are PTC-Starter, and Over Load
Protector (OLP) in the Compressor outside. On the other
hand, because the Compressor consists of 1/1000mm
processing precision components and is sealed after
production in absence of dust or humidity, deal and repair
with care.
3) Note for Usage
(1) Be careful not to allow over-voltage and over current.
(2) No Strike
If applying forcible power or strike (dropping or
careless dealing), poor operation and noise may occur
(3) Use proper electric components appropriate to the
Compressor.
(4) Note to Keep Compressor.
If Compressor gets wet in the rain and rust in the pin of
Hermetic Terminal, the result may be poor operation
and poor contact may cause.
(5) Be careful that dust, humidity, and flux welding don't
inflow in the Compressor inside in replacing the
Compressor. Dust, humidity, and flux due to welding
which inflows to Cylinder may cause lockage and
noise.
OVERLOAD PROTECTOR(O.L.P)
C
PTC
5
S
3
6
PTC STARTER
COMPRESSOR
MOTOR
M
M
S
HERMETIC
TERMINAL
Figure 11
4) Motor Restarting and PTC Cooling
(1) For restarting after power off during normal
Compressor Motor operation, plug the power cord
after 5 min. for pressure balance of Refrigerating Cycle
and PTC cooling.
(2) During normal operation of the Compressor Motor,
PTC elements generate heat continuously. Therefore,
if PTC isn't cooled for a while after the power has been
shut off, Motor can't operate again.
5) Relation of PTC-Starter and OLP
(1) If the power is off during operation of Compressor and the
power is on before the PTC is cooled, (instant shut- off within
2 min. or reconnect a power plug due to misconnecting), the
PTC isn't cooled and a resistance value grows. As a result,
current can't flow to the sub- coil and the Motor can't operate
and the OLP operates by flowing over current in only in the
main-coil.
(2) While the OLP repeats on and off operation about 3-5 times,
PTC is cooled and Compressor Motor performs normal
operation.
If OLP doesn't operate when PTC is not cooled,
Compressor Motor is worn away and causes circuitshort and
fire. Therefore, use a properly fixed OLP without fail.
6) Note to Use PTC-Starter
(1) Be careful not to allow over-voltage and over-current.
(2) No Strike
Don't apply a forcible power or strike.
(3) Keep apart from any liquid.
If liquid such as oil or water away enter the PTC,
PTC materials it may break due to insulation
breakdown of the material itself.
(4) Don't change PTC at your convenience.
Don't disassemble PTC and mold. If the exterior to the
PTC-starter is damaged, resistance value is altered
and it may cause poor starting of the compressor
motor may cause.
(5) Use a properly fixed PTC.
2. PTC-STARTER
1) Composition of PTC-Starter
(1) PTC (Positive Temperature Coefficient) is a no-contact
semiconductor starting device which uses ceramic
material and this material consists of BaTiO3.
(2) The higher the temperature is, the higher becomes the
resistance value. These features are used as starting
device for the Motor.
2) Role of PTC-Starter
(1) PTC is attached to Hermetic Compressor used for
Refrigerator, Show Case and starts Motor.
(2) Compressor for household refrigerator applies to
single-phase induction Motor.
For normal operation of the single-phase induction motor, in
the starting operation flows in both main coil and sub-coil.
After the starting is over, the current in subcoil is cut off. The
proper features of PTC play all the above roles. So, PTC is
used as a motor starting device.
-7-
3. OLP (OVER LOAD PROTECTOR)
1) Definition of OLP
(1) OLP (OVER LOAD PROTECTOR) is attached to the
Hermetic Compressor and protects the Motor by
cutting off current in Compressor Motor in case of
over-rising temperature by Bimetal in the OLP.
(2) When over-voltage flows to Compressor motor, the
Bimetal works by heating the heater inside the OLP,
and the OLP protects Motor by cutting off current
which flows to the Compressor Motor.
2) Role of the OLP
(1) The OLP is attached to the Hermetic Compressor
used for the Refrigerator and Show Case and prevents
the Motor Coil from being started in the Compressor.
(2) Do not turn the Adjust Screw of the OLP in any way for
normal operation of the OLP.(Composition and
connection Diagram of OLP)
CONTACTING:
POINT
COVER
BIMETAL
CONTACTING:
POINT
HEATER
TERMINALS
BIMETAL
ADJUST:
SCREW
Figure 12
4. CIRCUIT DIAGRAM
-8-
HEATER
TROBLESHOOTING
COMPRESSOR AND ELECTRIC COMPONENTS
1:
2
Power Source
Check the
resistance of the
Compressor Motor.
Separate the PTC-STARTER from the
Compressor and measure the voltage
between M and C of the Compressor.
Equal to the applied
voltage. (Rating
voltage ± 10%)
The applied voltage is not in the range
of Rating Voltage ± 10%.
Advice the customer to
use in the specified
range.
4
Test the resistance among
M-C, S-C, and M-S.
If not 0 or ∞
3
YES
2
NO
3
Check the
resistance of
the PTC.
Replace the Compressor.
3
Test the resistance of the both
terminals in the PTC-STARTER.
4
Replace the
PTC-STARTER.
NO
4
Check OLP.
Check if applying a
regular OLP.
4
YES
YES
Advice the customer to use
in the specified range.
5
NO
Replace OLP.
NO
5
Check the starting
state.
Measure minimum starting voltage
after checking steps 1-3 above.
Measure the pressure balance of the
PTC at the interval of more than 5 min.
Starts at the voltage
of 85% below.
Starts at the voltage of more
than 90%.
Check the starting
state at the regular
voltage above.
Normal.
YES
Normal.
NO
Replace the PTC.
-9-
5
PTC
Poor starting or no
operating of the
Compressor.
First, separate the PTC from the
Compressor and check the voltage
between NO 5 and 6 in the PTC
with a multitester or Wheatstone
Bridge.
Observation value is
220~240V/50Hz :
33Ω±20%
Normal
Check another
electric
components.
The value is 0.
Abnormal
Replace the PTC.
The value is ∞.
Abnormal
Replace the PTC.
YES
Separate the OLP from the
Compressor and check
resistance value between two
terminals of OLP with Tester. NO
-10-
Check other electric
components.
Replace OLP.
ANOTHER ELECTRIC COMPONENTS
▼ No Cooling
The Compressor
doesn't run.
Check if the current flows
at the contacting point of
the Thermostat.
Poor contacting point
Replace the
Thermostat.
Check the current flowing
of starting system.
Shorted or Broken
Replace the device.
Check if the current flows
at the main coil of the
Comprossor.
Coil shorted
Replace the
Compressor.
Check the components
on the main circuit.
Poor running of the
Compressor.
Compressor runs.
Replace the
components.
Measure the starting
voltage.
Low voltage
Increase the voltage.
Check if the current flows
at the contacting point of
the starting system.
Shorted Poor contacting
point and broken
Replace the device.
Frost doesn't form on the
back wall of freezer and
fridge room when operating
set for more than 30 min.
Refrigerant leaks. Poor
compressing.
Repair the Compressor.
-11-
REFRIGERATING CYCLE
▼ Troubleshooting chart
DEFECT
EFFECT
CAUSE
REMEDY
Freezer and fridge room do
not frost even though motorcompressor runs continually.
An empty refrigerant system indicates
a leakage of isobutane (R600a). This
loss is generally to be looked for at the
soldering points connecting the
various components or in an eventual
hole in the evaporator made by the
user.
Leakage must be eliminated by
resoldering the defective point .
EXCESSIVELY
FULL
This defect is indicated by the
presence of water outside the
refrigerator near the motor caused by
formations of ice on the return tube.
If in the refrigerant system a quantity
of R600a is introduced which is
greater than that indicated, the excess
gas does not terminate its expansion
in the evaporator but proceeds into the
return tube.
The system must be emptied and
subsequently refilled introducing the
correct quantity of R600a.
HUMIDITY IN THE
SYSTEM
This defect is indicated by the partial
frosting of the freezer room and by
continual defrosting cycles determined
by the interruption of the flow of gas
on the evaporator. The motor
compressor keeps running.
The refrigerant system is humid when
there is a small percentage of water
present, which, not completely
retained by the dehydrator filter, enters
into circulation with isobutane and
freezes at the capillary exit in the
evaporator.
The system must be emptied and then
refilled after eliminating the humidity.
PRESENCE OF AIR
IN THE SYSTEM
Poor performance of the refrigerant
system which is indicated on the
evaporator with a slight frost which
does not freeze and an excessive
overheating of the condenser and
motor-compressor.
There is air in the refrigerating system
when during the filling phase vacuum
is not effected or it is not adequately
done.
Group must be drained and
subsequently refilled after carefully
creating vacuum.
Because of the lack of circulation
isobutane in the system, there is no
frosting of the evaporator, while a
slight overheating of the first spiral of
the condenser is noted.
Impurities contained in isobutane or
in the components of the refrigeration
system before assembly and not
retained by the filter can obstruct the
capillary.
Do away with the refrigerator.
MOTORCOMPRESSOR
DOSE NOT
COMPRESS
No frost forms on the evaporator, even
if the motor-compressor is running.
In this case there is a mechanical
failure in the diaphram valves which
remaining continually open, do not
permit the compressor to operate.
Consequentely, isobutane does not
circulate in the system.
The motor-comprossor must be
replaced and then proceed with
refilling.
NOISY MOTORCOMPRESSOR
In case of mechanical failure in the
motor-compressor there in an
excessive noise when the system is
functioning. In case a suspension
spring is unhooked, banging will be
heard and there will be especially
strong vibrations when the system
starts up and stops.
The cause of the excessive noise is
normally to be sought for in a
mechanical breakdown, and only
rarely in the unhooking of one of the
suspension springs.
The motor-compressor must be
replaced and then proceed with the
refilling.
SYSTEM
PARTIALLY OR
COMPLETELY OUT
OF REFRIGERANT
CHARGE
BLOCKED
CAPILLARY
-12-
▼ General Control of Refrigerating Cycle
NO.
ITEMS
CONTENTS AND SPECIFICATIONS
WELDING
ROD
(1) H 30
(1) • Chemical Ingredients
(1) • Ag: 30%, Cu: 27%, Zn: 23%, Cd: 20%
(1) • Brazing Temperature: 710~840°C
(2) Bcup-2
(1) • Chemical Ingredients
(1) • Cu: About 93%
(1) • P: 6.8~7.5%
(1) • The rest: within 0.2%
(1) • Brazing Temperature: 735~840°C
FLUX
(1) • Ingredients and how to make
(1) ••Borax 30%
(1) ••Borax 35%
(1) • Fluoridation kalium: 35%
(1) • Water: 4%
(1) • Mix the above ingredients and boil until
(1) • they are transformed into liquid.
1
2
3
4
7
8
• Recommend H34 containing 34% Ag in the
• Service Center.
• Make amount for only day.
(1)
• Holding period: 1 day
• Close the cover of container to prevent dust
• putting in the FLUX.
• Keep it in a stainless steel container.
LOKRING
(1) Both of the tube is inserted up to the stop.
(Figure 15, 16) (2) Both of the LOKRING is pushed up to the stop
(3) The bending point is not too close to the
joint ending.
(4) During the assembly it is important that
both ends remain completely within the
joint.
• For a hermetically sealed metal/metal
connection, the tube ends have to be clean.
• LOKPREP is distributed all of out-surface of
• the tube ends.
DRIER
ASM
(1) Assemble the drier within 30min.
(1) after unpacking.
(2) Keep the unpacked drier at the temperature
of 80~100°C.
• Don't keep the drier in a outdoors because
• humidity damages to it.
VACUUM
(1) When measuring with pirant Vacuum
(1 )gauge the charging M/C, vacuum
(1 )degree is within 1 Torr.
(2) If the vacuum degree of the cycle inside is
(2) 10 Torr. below for low pressure and 20 Torr.
(2) for high pressure, it says no vacuum
(2) leakage state.
(3) Vacuum degree of vacuum pump must be
(3) 0.05 Torr. below after 5 min.
(4) Vacuum degree must be same to the
value described item (2) above for more than
20 min.
• Apply M/C Vacuum Gauge without fail.
• Perform vacuum operation until a proper
• vacuum degree is built up.
• If a proper vacuum degree isn't built up,•
• check the leakage from
• the Cycle Pipe line part and
• Quick Coupler Connecting part.
DRY AND
AIR
NITROGEN
GAS
(1) The pressure of dry air must be more
han 12~16kg/cm2
(2) Temperature must be more than
-20~-70°C.
(3) Keep the pressure at 12~6kg/cm2 also
when substituting dry air for Nitrogen Gas.
NIPPLE
AND
COUPLER
(1) Check if gas leaks with soapy water.
(2) Replace Quick Coupler in case of leakage.
PIPE
(1)• Put all Joint Pipes in a clean box and
(1)• cover tightly with the lid so that dust or
(1)• humidity is not inserted.
5
6
REMARKS
-13-
• Check if gas leaks from joint of the
• Coupler.
TUBE
LOKRING
LOKRING
Figure 15. LOKRING
ASSEMBLY JAWS
BOLT
TOOL
Figure 16. LOKRING TOOL
-14-
JOINT
501A
*
136D
P/NO:3828JD8401A