1
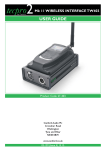
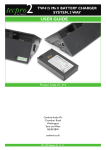
tecpro2
Wireless Beltpack TW401
by Canford
USER GUIDE
Product Code 27-401
Canford Audio Plc
Crowther Road
Washington
Tyne and Wear
NE38 0BW
canford.co.uk
02-127 (Issue 5) 12.12.11.
CONTENTS
Section 1.0 Introduction
Section 2.0 Basic Operation
2.1 Keypad
2.2 Turning On and Off
2.3 Locking and Unlocking The Keypad
2.4 Display Illumination
2.5 Screen Information
2.6 First Time Switch On
2.7 CE and Non-CE Channels
2.8 Setting the Radio Channel for a Conference Group
2.9 Setting a Conference Group
2.10 Assigning an Identifier Number
2.11 Enabling a Conference
2.12 Using the Listener Only Mode
2.13 Headset Volume
Section 3.0 Operational Features
3.1 Setting the Side Tone Level
3.2 Setting the Push To Talk (PTT) Mode
3.3 Using PTT Mode
3.4 Quick Channel Setting - 'Fast Channel'
3.5 Using Fast Channel Mode
3.6 Quick Volume Setting - 'Fast Volume'
3.7 Using Fast Volume Mode
3.8 Group Selection
3.9 Example of Group Setting
Section 4.0Advanced Settings
4.1 Using Advanced Settings
4.2 Filter Type
4.3 User Menu Locked Feature
4.4 Disabling The Encryption Setting
4.5 Microphone Gain Settings
4.6 AEC Filter
Section 5.0 Headsets
5.1 Tecpro SMH214
5.2 Tecpro DMH224
Section 6.0 Batteries and Charger
6.1 Batteries
6.2 Charger
6.3 Battery Charger Operation
6.4 LED Indicators
6.5 Battery Charger Specification
Section 7.0Troubleshooting
7.1 Cannot communicate with other Belt-Packs
7.2 The Belt-Pack cannot enter a Conference
7.3 The Belt-Pack will not switch on
7.4 Communication Inteference
7.5 Crackling Noises
7.6 Echo Sounds
7.7 The keys are not working properly
Section 8.0 Accessories
Section 8.0 Technical Specifications
9.1 27-401 TW401 Wireless Belt-Pack
9.2 27-214 SMH214 Single Muff Closed Headset
9.3 27-224 DMH224 Dual Muff Closed Headset
Page 1
1.0 INTRODUCTION
The Tecpro TW401 Mk11 wireless belt-pack system can be used to establish a full duplex wireless conference
group of up to 6 personnel. The group can simultaneously talk and listen to all the other users within the
same group. In addition, an un-limited number of listener only belt-packs can be added to the system, useful
for personnel who only need to monitor conversation within the group.
The system operates primarily on an EU licence exempt UHF frequency of 869.525 MHz with two alternative
EU licence exempt frequencies provided within the 863 – 865 MHz band. Encrypted digital transmission
technology is used for secure communication. Additional non EU frequencies are available for use in many
countries worldwide. Approximate operational coverage is 300 - 400m depending on the environment and
the frequency selected. Please see the full specifications in Section 9.0
Major applications are in the theatre, conference, live performance and broadcast markets, though new
applications are constantly emerging.
Please note that the latest Mk II versions are not backwards compatible with the previous Mk I
versions – because a different coding system is used.
2.0 BASIC OPERATION
There are 5 front panel keys that enable the selection and viewing of the various menu functions and their
options. Please see Figure 1 below
Keys
Start/Stop
Description
Power ON/OFF
Menu
The menu key allows access to the configuration menu of the belt-pack.
Also allows direct access to group selection.
+/-
Allows direct access to volume control or channel selection.
In the setup menu of the belt-pack these keys adjust various parameters.
OK
Allows locking / unlocking of the keypad.
In the setup menu of the belt-pack this button also allows you to accept the
selected option, or exit the device configuration.
Tecpro
Allows opening / closing of the microphone when “Push-To-Mute” is enabled.
Figure 1 - Key Functions
2.1 Keypad
The wireless belt-pack keypad is a touch sensitive type.
2.2 Turning On and Off
Insert a charged battery into the rear compartment on the wireless belt-pack.
Ensure the battery is inserted correctly.
To turn the belt-pack on, press and hold the
ON/OFF key for 2 seconds.
To turn the belt-pack off, press and hold the
ON/OFF key for 2 seconds.
2.3 Locking and Unlocking the Keypad
Press and hold the OK key for 2 seconds until the key symbol
appears on the screen.
The keypad buttons are now locked to prevent accidental operation (except the ON/OFF key operation
as described in Section 2.2 and the - and + keys when the functions Fast Volume or Fast Channel are
enabled, as described in Sections 3.4 and 3.6.
To unlock the keypad, press and hold the OK key for 2 seconds until the key symbol
N.B. The keypad is automatically locked each time the belt-pack is switched on.
Page 2
disappears.
2.4 Display Illumination
If none of the keys are pressed the blue LCD display will dim after 1 minute to save battery power.
2.5 Screen Information
The screen displays the belt-pack status, battery level and various other settings.
Please see Figures 2 and 3 below.
1.2.3.♀.5.6
CE1
01
Gr01
Figure 2 - The Main Screen Icons
Icon
Description
Belt-Pack Identifier Number
Indicates the belt-pack number in the conference group or if it is in listener mode.
System Status
The
icon indicates the location of the belt-pack in the conference group and the
numbers indicate the other belt-packs in the same conference.
A dash over the number indicates the particular belt-pack is in listener mode.
Radio Channel Number
Indicates the selected radio channel number.
Battery Level
Provides information on the battery level with 5 levels.
Volume Control
Indicates the headset volume level with 9 levels.
Group Mode
Indicates the parent group of the belt-pack.
Push To Talk Function
Indicates the microphone status - open or closed.
Keypad Locked / Unlocked
(N.B. The power ON/OFF function still operates).
Figure 3 - Screen Icon Information
Page 3
2.6 First Time Swith On
When switching on for the first time, you must validate that you are authorised to use the channel you
are going to use. Full details are in Section 2.7
Please see Figure 4 below.
Figure 4 - Authorisation Screen
N.B. If a channel selection has already been carried out during a previous switch on, you simply confirm
your choice. Select Confirm using the + or - keys, then press OK.
2.7 CE and Non-CE Channels
Up to 10 different channels are stored in the TW401 - they have been separated into two distinct
groups:
CE channels
Allowed in all countries of the European Community.
Non-CE channels
Not authorised for use within the EU. These channels are intended for use in
some countries outside the European Community.
N.B. It is the responsibility of the user to first determine which channel is allowed with the
relevant authorities of the country where the system will be used – before switching to
these channels.
CE channels:
CE 1
CE 2
CE 3
869.525 MHz
864.5 MHz (power limited to 10 dBm)
863.5 MHz (power limited to 10 dBm)
Non-CE channels:
Russia
Ukraine
SE1
SE2
SE3
SE4
SE5
859.5
868.3
866.5
864.5
863.5
861.5
860.5
MHz (frequency available for events only in Russia)
MHz (frequency available for events only in Ukraine)
MHz
MHz
MHz
MHz
MHz
Page 4
2.8 Setting the Radio Channel for a Conference Group
To communicate, the belt-packs must be set to the same radio channel number. The primary channel is
CE 1 - however alternative channels CE 2 and CE 3 are also available.
Procedure:
From the main screen, press and hold the Menu key
for 2 seconds to access the user menu.
Use the + or - keys to access the sub-menu 'Channel'.
Press OK to confirm.
In the Channel sub-menu, select the appropriate group (CE or Non-CE) by using the + or - keys.
Please see Figure 5.
Figure 5 - Channel Group Selection
Press OK then confirm your choice by pressing OK again (or select Cancel by using the + or - keys to
choose another group).
Select the channel by using the + or - keys. Please see Figure 6.
Figure 6 - Channel Group Selection
Press OK to confirm.
Press
to return to the main screen.
2.9 Setting a Conference Group
To set up a conference group, each belt-pack needs to be configured as follows:
(i) Assign an identifier number to each belt-pack that will take part in the conference.
(ii) Enable the belt-packs to enter the conference.
N.B. Once these parameters are stored in the memory, they will remain the same, even if the belt-pack
is switched off or the battery removed.
Page 5
2.10 Assigning an Indentifier Number
To set up a conference group first decide the number of belt-packs that will take part in + the
conference and assign a unique number to each of them. There may be between 2 to 6 belt-packs in a
conference group, with identifier numbers 01 to 06. Make sure each device has a unique identifier –
don’t assign several devices with the same identifier as this will prevent communication.
N.B. One of the belt-packs must be set with identifier number 01. Please see figure 7.
Figure 7 - Role Setting Screen
Procedure:
From the main screen, press and hold the menu key
for 2 seconds to access the user menu.
Press the + or - keys to access the sub-menu 'Role Setting'.
Press OK to confirm.
Press the + or - keys to select the required belt-pack ID.
Press OK to confirm.
Press
to return to the main screen.
2.11 Enabling a Conference
To enable a conference group of belt-packs, they must communicate and memorise an encryption key
transmitted by belt-pack 01. This operation is necessary to enable all the belt-packs to enter a
conference or to add an additional belt-pack to a conference that has already been setup.
N.B. The devices can only communicate if this procedure, known as the ‘encryption process’, is
performed. First make sure all belt-packs have a unique identifier number and that one has the
identifier 01.
Procedure:
From the main screen on belt-pack 01 press and hold the menu key
for 2 seconds to access the
user menu.
Press the + or - keys to access the sub-menu 'Network'.
Press OK to confirm.
Press the + or - keys until the sub-menu 'Start' appears. Please see Figures 8 and 9.
Press OK to confirm.
Figure 8 - Network Encryption
Page 6
Figure 9 - Network Encryption - in Progress
Belt-pack 01 is now transmitting an an encryption key signal and displays the message ‘Sending key.'
Please wait until process has succeeded’.
Then, on all the other belt-packs in the conference group follow the same procedure and
*SUCCEEDED** will appear on the other screens.
Then press OK to confirm on all the other belt-packs in the conference group.
Finally, when all the belt-packs have been enabled into the conference group, press OK on belt-pack 01
to end the procedure.
2.12 Using The Listener Only Mode.
A belt-pack can be used as a listener only. In the listener only mode the belt-pack can only hear other
belt-packs in the conference but it cannot talk as well.
N.B. The listener only mode can only work if the belt-pack has been encrypted first and also if at least
2 belt-packs (01 and another) are in the conference first.
Procedure:
From the main screen, press and hold the menu key
Press the + or - keys to access the sub-menu 'Role'.
Press OK to confirm.
Press the + or - keys to select 'listener' from the list.
Press OK to confirm.
Press
to return to the main screen.
for 2 seconds to access the user menu.
2.13 Headset Volume
To set the headset volume make sure that you are on the main screen and the keyboard is un-locked,
then press and hold the + or - key for 2 seconds. You will hear a 'beep' in the headset.
There are 9 possible levels indicated by the screen icon
Press OK to confirm.
N.B. if there is a 'double beep' in the headset, it indicates the maximum or minimum level has been
reached.
Page 7
3.0 OPERATIONAL FEATURES
3.1
Setting the Side-Tone Level
Side-tone is the amount of mic. signal that is fed to the users own headset earphones to give
confidence and aid clear speech. It can be set at a level that is comfortable for the individual user.
Procedure:
From the main screen, press and hold the menu key
for 2 seconds to access the main menu.
Press the + or - keys to access the sub-menu 'Side Tone'.
Press OK to confirm.
Press the + or - keys to adjust the side-tone level up or down.
Please see Figure 10.
Figure 10 - Side-Tone Level Adjustment
Press OK to confirm.
Press
to return to the main screen
3.2
Setting the Push To talk (PTT) Mode
The belt-pack normally operates using hands free 'open mic communication'. However, it may be
necessary, in some instances, to use the PTT mode - where the mic is normally muted and a switch is
used to open the mic circuit to talk.
Procedure:
From the main screen, press and hold the menu key
for 2 seconds to access the user menu.
Press the + or - keys to access the sub-menu 'Options'
Press the + or - keys to access the sub-menu 'PTT-Mute Mic'.
Press OK to confirm.
Press the + or - keys to select Activated.
Please see Figure 11.
Figure 11 - PTT Adjustment
Press OK to confirm.
Press
to return to the main screen.
Once the PTT-Mute Mic mode is activated, the
i.e. the mic is normally muted.
Page 8
icon appears in the home screen.
3.3
Using (PTT) Mode
The PTT key is under the Tecpro logo. A momentary press (less than 1 sec) latches the mic to be
either ON or OFF.
Alternatively, if the Tecpro key is pressed down and held, the mic circuit will open for the duration of
the key press and is muted again when the key is released. Please see Figure 12.
Means that the PTT mode is enabled - and the microphone of your headset is open.
Means that the PTT mode is enabled - and the microphone of your headset is closed.
Figure 12 - PTT Icon
3.4
Quick Channel Setting - 'Fast Channel'
If several Tecpro Wireless conference groups are used on the same site by using different radio
channels, then it is possible – providing the encryption process is disabled, please see section 5.0 – to
use the Fast Channel feature to switch from one radio channel to another. This may be the case, for
example, if a team leader or director needs to move from one conference group to another within a
venue.
N.B.
(i) This feature can only be used on CE channels - not Non-CE channels.
(ii) Do not assign the ID 01 to a belt-pack that will then subsequently change radio channels, as this
will disrupt communication between the remaining members of that conference group.
Each conference group must retain a belt-pack on ID 01 to enable continuous group
communication. Please see figure 13.
Figure 13 - Fast Channel Adjustment
Procedure:
From the main screen, press and hold the menu key
for 2 seconds to access the user menu.
Press the + or - keys to access the sub-menu 'Fast Mode'.
Press OK to confirm.
Press the + or - keys to select 'Fast Channel'. Please see Figure 12.
Press OK to confirm.
Press
to return to the main screen.
3.5
Using Fast Channel Mode
The use of Fast Channel can now be done directly via the + or - keys.
Procedure:
A short press of less than 1 sec - on the + or - keys will allow direct access to the channel choice.
Then select CE 01, Ce 02 or CE 03 using the + or - keys.
Press OK to confirm.
N.B. It is only possible to activate one fast mode at a time. Fast Channel mode cannot be activated
at the same time as the Fast Volume mode.
To stop the Fast Channel mode, go back to the dedicated Fast Mode menu and choose the option
'None'.
Page 9
3.6
Quick Volume Setting - 'Fast Volume'
Normally, access to the volume control is done by unlocking the keypad (see section 2.3) and then
pressing the + or - keys.
The Fast volume mode overcomes this procedure by allowing immediate access to volume control
setting. Please see figure 14
Figure 14 - Fast Volume Adjustment
Procedure:
From the main screen, press and hold the menu key
for 2 seconds to access the user menu.
Press the + or - keys to access the 'Fast Mode' menu
Press OK to confirm.
In the Fast Mode menu press the + or - keys to select the sub menu Fast Volume'.
Press OK to confirm.
Press
to return to the main screen.
3.7
Using Fast Volume Mode
The use of Fast volume is now done by direct access using the + or - keys.
N.B. It is only possible to activate one fast mode at a time. Fast Volume mode cannot be activated at
the same time as the Fast Channel mode.
To stop the Fast Volume mode, go back to the dedicated Fast Mode menu and choose the option
'None'.
3.8
Group Selection
The group function allows you to determine which group a belt-pack belongs to.
Up to 8 different groups can be created. Each group has its own rules - listening and or speaking within the network. Please see figure 15. The function allows a maximum of 6 belt-packs in full-duplex
mode per group and an un-limited numbers of belt-packs in listener mode.
N.B. The group function is directly accessible via the keyboard - it does not have to be enabled or
disabled via the menu. Please see figure 15.
Figure 15 - Group Selection Screen
Page 10
Procedure:
From the main screen, momentarily press the menu key
Group Selection screen.
Press the + or - keys to select the required group.
Press OK to confirm.
(less than a second) to access the
Gr00
hears and is heard from all groups.
Gr01
hears all groups but is only heard by Gr01, Gr00 and Gr04
Gr02
hears Gr02 and Gr00 and is only heard by Gr02, Gr01 and Gr04
Gr03
hears Gr03 and Gr00 and is only heard by Gr03, Gr00, Gr01 and Gr04
Gr04
hears all groups and is only heard by Gr04, Gr00 and Gr01
Gr05
hears Gr05 and Gr00 and is only heard by Gr05, Gr00, Gr01 and Gr04
Gr06
hears Gr06 and Gr00 and is only heard by Gr06, Gr00, Gr01 and Gr04
Gr07
hears Gr07 and Gr00 and is only heard by Gr07, Gr00, Gr01 and Gr04
Figure 16 - Group Table Showing The Available Combinations
Groupe 01
Groupe 02
Groupe 00
Groupe 03
Groupe 05
Groupe 06
Groupe 07
Groupe 04
Figure 17 - Schematic Showing Available Combinations
3.9
Example of Group Setting.
Consider a director in overall charge of a stage production that could consist of a lighting crew and a
sound crew.
The director would be in Gr00, the lighting crew in Gr02 and the sound crew in Gr03.
In this scenario, group Gr02 and Gr03 can work independently of each other – only communicating
with fellow members of their respective groups, without disturbing the other group.
The director has the ability to fully communicate with both groups – but he can also choose to
communicate with either Gr02 or Gr03 privately to discuss an operational requirement with the
respective group.
To do this he would simply switch his belt-pack to group Gr02 or Gr03.
4.0 ADVANCED SETTINGS
N.B. The following menu would only normally made available to certain types of users Technical Managers etc. Access to it requires a PIN access code available on request
from
Tech Support, Canford Audio Plc. Please be aware that it is possible to prevent the
belt-packs communicating if the configuration is set incorrectly.
Tel +44 191 418 1144, Email: [email protected]
Page 11
The Advanced Settings menu allows access to the following 4 sub-menus.
(i) Filter type.
(ii) User Menu Locked.
(iii) Encryption mode.
(iv) Microphone settings.
(v) AEC Filter
4.1
Using Advanced Settings.
Entry of a PIN code is required. Please see Figure 18.
Figure 18 - Entering the PIN Code
Procedure:
From the main screen, press and hold the menu key
for 2 seconds to access the user menu.
Press the + or - keys to access the sub menu 'Adv Settings'.
Press OK to confirm.
The belt-pack will now prompt you to enter a PIN code.
Enter the value of each digit using the + and - keys. Moving to the next digit is done by briefly pressing
the ON/OFF key.
Once the full PIN code has been entered, press OK.
4.2
Filter Type.
Depending on the environment and the individual users preference, the filter can be changed.
Please see Figures 19 and 20 for the current choices available.
Filter Type
Applications / Designation
Generic
Specific
No Filter
No Filter
Sport w/o (without) mute
Other w/o mute
No F w/o mute
No filter, without mute
Figure 19 - Filter Settings Table
Page 12
Figure 20 - Filter Settings Screen
Procedure:
From the main screen, press and hold the menu key
for 2 seconds to access the user menu.
Press the + or - keys to access the sub menu 'Adv Settings'.
Press OK to confirm.
Press the + and - keys in the sub-menu to select the required filter i.e. 'Genericf'.
Press OK to confirm.
Press
to return to the main screen.
4.3
User Menu Locked Feature.
This feature allows you to lock access to the main menu - if you do not want users to change the
settings of the belt-packs. Please see figure 21.
N.B. If this feature is enabled, access to the main menu will only be authorised by inserting the PIN
code.
Figure 21 - User Menu Locked Screen
Procedure:
From the main screen, press and hold the menu key
for 2 seconds to access the user menu.
Press the + or - keys to access the sub menu 'Adv Settings'.
Press OK to confirm.
Press the + and - keys in the sub-menu 'User Menu Locked'.
Press OK to confirm.
Press the + or - keys to select 'Activated'.
Press OK to confirm.
Press
to return to the main screen.
Page 13
4.4
Disabling the Encryption Setting.
In some instances it may be desirable to disable the encryption procedure. For example, when adding
new belt-packs into a conference group - but without having to go through the encryption procedure
as described in section 2.11.
Typically, this would be where the different belt-packs are located a long distance apart from each
other and it’s not practical to bring them back together again for encryption and the introduction of
additional belt-packs.
If encryption is disabled then simply an available ID needs to be chosen and the same radio channel as
the existing conference used. Please see figure 22.
Figure 22 - Encryption Activation Screen
4.5
Procedure:
From the main screen, press and hold the menu key
for 2 seconds to access the user menu.
Press the + or - keys to access the sub menu 'Adv Settings'.
Press OK to confirm.
Press the + and - keys in the sub-menu 'User Encryption Mode'.
Press OK to confirm.
Press the + or - keys to select 'Inactivated'.
Press OK to confirm.
Press
to return to the main screen.
N.B. If the encryption procedure is disabled, you cannot ensure the security or confidentiality of your
communications.
Microphone Gain Settings.
The belt-pack has an embedded AGC on the microphone circuit – that allows the use of many types
of headsets. However, it is possible to manually set both the DC polarisation and gain of the micro
phone in manual mode.
Polarisation settings: 0R, 680R, 2.7k, 5.4k
Gain values:
0dB, 12dB, 24dB
Please see figures 23, 24 and 25.
Procedure:
From the main screen, press and hold the menu key
for 2 seconds to access the user menu.
Press the + or - keys to access the sub menu 'Adv Settings'.
Press OK to confirm.
Press the + and - keys in the sub-menu 'Micro Settings'.
Press OK to confirm.
Press the + or - keys to select 'Manual'.
Press OK to confirm.
Select the required Polarisation value and press OK to confirm.
Select the required Gain value and press OK to confirm.
Press
to return to the main screen.
Page 14
Figure 23 - Micro Settings Screen
Figure 24 - Mic Polarisation Screen
Figure 25 - Mic Gain Screen
4.6
AEC Filter.
The acoustic echo cancellation or AEC function helps minimise the ‘echo’ phenomenon associated with
the acoustic pickup of an adjacent users mic to be reduced - and so enables the operation of
numerous types of headsets and earphones with a microphone to be optimised.
Levels AEC OFF, AEC 1, AEC 2 and AEC 3 are available.
Procedure:
From the main screen, press and hold the menu key
for 2 seconds to access the user menu.
Press the + or - keys to access the sub menu 'Adv Settings'.
Press OK to confirm.
Press the + and - keys in the sub-menu 'AEC'.
Press OK to confirm.
Press the + or - keys to set the desired level of AEC.
Press OK to confirm.
Select the required Polarisation value and press OK to confirm.
Select the required Gain value and press OK to confirm.
Press
to return to the main screen.
Page 15
5.0 HEADSETS
There are two closed type headsets available. Simply plug the required headset into the belt-pack and
orientate the boom mic close to the mouth to talk. There is a MIC CUT switch on the ear-cup to turn the
mic off if required.
N.B. When plugging the headset connector in, please ensure the red dot on the barrel of the connector is
pointing directly to the rear of the belt-pack.
5.1 Tecpro SMH214
This is a single muff headset Canford product code 27-214 that is ready terminated with a Fischer 102 Series
7-pin plug. The headset incorporates a MIC CUT toggle switch on the outside of the ear-cup.
5.2 Tecpro DMH224
This is a double muff headset Canford product code 27-224 that is ready terminated with a Fischer 102
Series 7-pin plug. The headset incorporates a MIC CUT toggle switch on the outside of the ear-cup.
Page 16
6.0 BATTERIES AND CHARGER
6.1 Batteries
The batteries are Lithium Polymer VARTA EasyPack 3.7V 2600mAh re-chargeable types.
You can re-charge the batteries before they are fully discharged. The batteries are fully re-charged in about 5
hours.
Battery autonomy is about 16 hours. (Average consumption is 200mA – peak consumption is 600mA).
N.B. When a belt-pack is stored unused, the batteries keep discharging due to a very small current consumption in the OFF mode. Remove the battery from the belt-pack when you stop using it – and check the battery level before re-using.
Only use VARTA Easypack 3.7V 2600mAh batteries. Use of another battery or charger may present a risk of
fire, explosion, leakage, or other hazard.
After use, the batteries should be disposed of in an appropriate recycling centre. They should not be disposed
of into the environment.
Do not short-circuit the contacts.
Do not open the batteries.
Do not expose the batteries to temperatures above 100°C.
6.2 Charger
The charger is used for re-charging the batteries of the Canford Tecpro TW401 wireless belt-pack system.
Each charger can simultaneously re-charge up to 3 batteries. This charger must only be used with VARTA
Easypack Lithium-Polymer, 3.7V re-chargeable batteries.
If the charger is used with any other battery, it could cause that battery to explode.
This charger has been designed for indoor use. The surrounding temperature when re-charging should be
between 5°C and 45°C If the temperature is not within this range, re-charging is suspended until the correct
temperature has been reached.
Don’t use any other power supply for the charger than the external AC/DC converter unit provided with the
product.
Place the charger on any flat surface.
6.3 Battery Charger Operation
Connect the power supply unit to the socket found on the side of the case. Connect the power supply unit
to a mains supply. When plugged in, the 3 status LEDs at the front of the charger will first turn AMBER, then
they will turn off one after another and finally simultaneously flash GREEN.
Place the batteries in the charger (gold contact side down). When the battery has been detected, the
corresponding LED turns RED. If the LED does not turn RED, please check that the battery has been
correctly positioned (gold contact side down at the back of the compartment).
Charging duration is approximately 5 hours for a 2600 mAh battery. Once the battery is fully charged, the
corresponding LED turns GREEN.
N.B. A battery can be left in the charger - even after it has been completely charged.
6.4 LED Indicators
Steady RED
Charging.
Steady GREEN
Battery charged.
Flashing RED
Flashing GREEN
Battery defect, charge has stopped, replace the battery.
No battery installed.
Flashing GREEN and RED alternating
Battery temperature is outside the authorised range, charging is
suspended until the correct temperature has been reached.
Flashing ORANGE
Unrecognised battery, check the battery type.
Page 17
6.5 Battery Charger Specification
AC/DC power unit electrical supply
100 - 240V AC ~ 1.5A 50 to 60Hz
Operating Temperature
5°C to 45 °C
Charge duration
5 hours (2600 mAh battery)
Battery lifetime
> 500 charge cycles
7.0 TROUBLESHOOTING
Below is a list of typical problems that may occur:
7.1
Cannot Communicate With Other Belt-Packs
Check all belt-packs are using the same radio channel number.
Check that one belt-pack is identified with the number 01 and that a conference group has been
created. N.B. Do not assign the same identifier number to several belt-packs.
7.2
The Belt-Pack Cannot Enter A Conference
Check all belt-packs are using the same radio channel number.
Make sure all the belt-packs have been encrypted to enter the conference - especially if an extra
belt-pack has been added to an existing conference.
7.3
The Belt-Pack Will Not Switch On
Check that the battery is charged and correctly inserted the right way round.
7.4
Communication Interference
Another conference system may be in use close to yours. Use the primary CE 01 radio channel - or switch to the alternative channels CE 02 or CE 03.
Make sure there is no contact between the belt-pack antenna and the headset cable
7.5
Crackling Noises
The microphone of one of the belt-packs is probably damaged. Replace the headset or re- terminate
the connector.
7.6
Echo Sounds
Check there is at least 10m between the belt-packs to prevent your voice being picked up on another
headset boom mic.
7.7
The Keys Are Not Working Properly
Press the keys in the centre. Some functions require a key to be pressed and held for 3 seconds.
Avoid pressing more than one key simultaneously.
Page 18
8.0 ACCESSORIES
27-401
Tecpro TW401 wireless belt-pack
27-403
Tecpro TW403 wireless interface
27-405
Tecpro TW405 Battery charger 5-way
27-406
Tecpro TW406 Lightweight earpiece with boom mic
27-407
Tecpro TW407 Lightweight earpiece with boom mic and on/off switch
27-214
Tecpro SMH214 Single muff headset
27-224
Tecpro DMH224 Dual muff headset
27-408
Tecpro Spare 2600mAh rechargeable battery
27-409
Tecpro Spare belt clip for TW401
27-415
Tecpro TW415 Battery charger, 3 way, complete with power supply
27-416
Tecpro TW416 Battery charger, 3 way extension unit for TW415
27-417
Tecpro TW417 Battery charger, spare power supply for TW415
(Additional accessories will be made available - as they are developed)
9.0 TECHNICAL SPECIFICATIONS
9.1
27-401 TW401 Wireless Belt-pack
Harmonised Standards
Radio EN300-220
EMC
EN301-489
Frequencies
CE01 869.525 MHz, CE02 864.500 MHz, CE03 863.500 MHz
ModulationGFSK
Data rate115 kbits/sec “air-rate”
RF Power
200mW erp maximum - depending on channel selected
Useable distance
300 to 400m maximum - depending on the environment
Duty Cycle< 10%
Conference Group
Up to 6 personnel
Listen Only
Unlimited number of listeners
Protection Class
IP54 rated
Dimensions
60(w) X 22(d) X 120(h)mm
Weight180g
9.2
27-214 SMH214 Single muff closed headset
Impedance35 ohm
Microphone
Electret mic (2-10V DC)
9.3
27-224 DMH224 Dual muff closed headset
Impedance
2 X 35 ohm
Microphone
Electret mic (2-10V DC)
Page 19