1
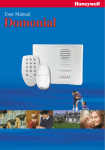
User Manual
Congratulations on the purchase of your DOMONIAL
security system.
This system is designed to operate on an authorised
radio frequency and will in no way endanger the user.
To make the best out of your system we advise you to
read this manual carefully. This manual has been
written for your special attention and integrates
remarks and suggestions of existing users.
Zone 1 :
Zone 2 :
Zone 3 :
Zone 4 :
Zone 5 :
Zone 6 :
Zone 7 :
Zone 8 :
Zone 9 :
Zone 10 :
Zone 11 :
Zone 12 :
Zone 13 :
Zone 14 :
Zone 15 :
Zone 16 :
Zone 17 :
Zone 18 :
Zone 19 :
Zone 20 :
2
INDEX
① Introduction to the security system
4
② Understanding the system tones
6
③ How to use the wireless keypad with display*
8
④ How to use the wireless keypad with prox reader*
9
⑤
How to use the keyfob*
⑥ Understanding detectors* operation
14
16
⑦
How to control your system over the phone
17
⑧
Maintenance and recommendations
19
*Optional device: your installation may include one or more controlling equipments, one or more detectors.
3
①
Introduction to the security system
The Domonial control panel/communicator unit is the brain of your security system. It
exchanges information with the associated wireless peripherals. The control panel
centralises the data sent by the detectors, records the arming and disarming operations
and communicates with the Alarm Receiving Centre. The control panel also includes a
speaker for alarm signalling and audio verification.
CHARACTERISTICS
Radio
● Narrow band frequency modulation
● Identification code specific to each
component (no possible interference
between neighbouring systems)
● Protection against attempted jamming
● Radio monitoring of the system detectors and sirens
Electrical
● 240V mains with battery backup
● Built-in voltage surge protection
● System supply monitoring
Transmission
● Built-in telephone transmission
● Telephone line loss detection
● Transmission monitoring by periodical tests
● Optional GSM transmitter
Operational
● Up to 3 protected sets : total set, part set, annex set
● Up to 30 detectors
● Alert functions
● Control panel and detectors protected against tampering
4
Indicator lights
The front cover of the control panel features
LED indicators which show the status of
your security system.
Indicators 2, 3, 4 and 5 show the faults, which are occurring or in memory for one set at a time.
Indicators are only active when the system is unset and during the arming and disarming phases.
When the system is set, LEDs turn off after a few seconds.
1- LED INDICATOR “SYSTEM ARMED”
On : Total set is being armed
Flashing slowly: Part set is being armed
Flashing quickly: Annex set is being armed
Off : The system is disarmed
2- LED INDICATOR “SET OF FAULT”
On : Faults indicated on LEDs 3, 4, and 5 correspond to the total set
Flashing slowly: Faults indicated on LEDs 3, 4, and 5 correspond to the part set
Flashing quickly: Faults indicated on LEDs 3, 4, and 5 correspond to the annex set
OFF : Faults indicated on LEDs 3, 4, and 5 correspond to the entire system
3- LED INDICATOR “SYSTEM FAULT”
On : A system fault is occurring on set indicated on LED 2
System faults include battery or power failure, supervision fault, phone line failure or radio
Jamming. Please contact your alarm company if this indication persists.
Flashing slowly: A system fault is in memory on set indicated on LED 2 and requires a reset
Off: No system fault on set indicated on LED 2
4- LED INDICATOR “TAMPER ALARM”
On : A tamper alarm is occurring on set indicated on LED 2
Flashing slowly: A tamper alarm is in memory on set indicated on LED 2 and requires a reset
Off: No tamper alarm on set indicated on LED 2
5- LED INDICATOR “INTRUDER ALARM”
On : An intruder alarm is occurring or a detector is triggered on set indicated on LED 2
This includes open door-contact, movement detection or smoke detection.
Flashing slowly: An intruder alarm is in memory on set indicated on LED 2 and requires a reset
Flashing quickly: A confirmed alarm is in memory and requires a remote reset
Off: No intruder alarm on set indicated on LED 2
5
② Understanding the system tones
SIRENS
A siren is an effective deterrent due to its power and very irrating tone. The system has a
siren built in the control panel. An optional remote siren can be added.
In addition, the panel built-in siren emits an audible confirmation tone when
arming and disarming the security system and a fire tone when a smoke detector is
triggered. The volume levels can be adjusted by the installer.
6
SYSTEM TONES
Sequence of 3 modulated sounds
TOTAL SET
ARMING
Duration : 4 seconds
PART SET
ARMING
ANNEX SET
ARMING
Sequence of 2 modulated sounds
Duration : 2,5 seconds
Upon arming...
When arming, total set, confirms that the
control panel has received a valid code or
TAG and is preparing to arm total set.
When arming the part set, confirms that the
control panel has received a valid code or
TAG and is preparing to arm part set.
Total set arming: beeps continue until final exit
door is closed
Part set arming: beeps continue for 30s* until
part set is armed
EXIT DELAY
one beep every second
After closing the final door
ARMING
COMPLETE
When closing the final exit door, confirms that
the system is armed.
Three fast beeps
Upon entry...
This entry tone sounds for 30 seconds* after
you open the entry door. You should disarm
your system within this time.
ENTRY DELAY
one beep every second
Long and continuous beep
When Disarming, confirms that the control
panel has been successfully disarmed.
DISARMING
Duration : 2,5 seconds
2 times 7 fast beeps
This signal indicates a fault in the system
FAULT
4 beeps in case of alert...
Confirms the transmission of an alert to the
Alarm Receiving Centre
ALERT
sent via the keypad
* Defined by user during the installation
7
③
How to use the wireless keypad with display*
The wireless keypad with display offers a complete range of tools to manage your alarm
system, from normal operation to dedicated user functions.
The keypad is used to arm and to disarm your security systemusing a valid access code
or key TAG.
The master code or TAG is required to modify other users’ codes and TAGs, and to
authorise the alarm company to access the system for maintenance.
Other user functions include remote control of electrical equipment**, manual bypass of
detectors, setup of beeps and equipment testing.
This keypad will also provide all indications on the system status,with display icons,
messages, and beeps emitted by the keypad. You can also view the history of events of
the alarm system.
Please refer to the keypad’s user guide for more details.
* The system may include 0 to 4 keypads of this type.
** This function re q u i res an optional X10 extension with X10 modules.
8
④ How to use the wireless keypad with prox reader*
The keypad is used to arm and to disarm your security
system using a valid access code or key TAG.
To use all the functions of the keypad you must have the master code
chosen during the installation or have the master key TAG.
Your system is equipped with a TAG prox reader: you can present
the TAG in front of the keypad in place of entering your code.
● ARMING USING YOUR CODE OR TAG
✔ Press an arming key on the keypad and enter valid code
or present a programmed TAG.
4 Digit code
Arms the total set
4 Digit code
Arms the part set (See description p.13)
4 Digit code
Arms the annex set
✔ A flashing red light on the keypad confirms that code is valid.
- The arming tone
siren followed by the exit delay beeps.
is emitted by the panel
✔ Total set arming is completed after you close the final exit door. After the door is closed, exit
delay beeps stop and the arming complete tone is emitted by the panel siren.
✔ Part set or annex set arming is completed automatically at the end of the delay.
(Depends on site configuration)
Note:
✔Always make sure that your arming request is followed by the arming tone.
✔Always disarm the system when re-entering the premises.
NB: on some keypad models, presenting the TAG more than 2 seconds will arm the system without
pressing the Arm key.
* The system may include 0 to 4 keypads of this type.
9
● ARMING WITH FAULT
If the system diagnoses a fault on arming, arming is prevented. Faults include system faults, tampering and triggering of detectors.
✔ A tone indicating a fault is emitted by the panel siren after the arming request, instead of the
arming tone.
✔ You can override prevention of arming by requesting arming a second time within 2 minutes
after the first request. This will bypass faults.
✔ The arming process restarts: the arming tone is emitted by the panel siren followed by the exit
delay beeps. Completion of arming remains the same.
● DISARMING USING CODE OR TAG
To enable you to get to the keypad without triggering an alarm, your installer has programmed an
entry delay of 30 seconds. (Depends on site configuration)
✔ Enter a valid code or present a programmed TAG,
✔ A green light on the keypad confirms that the code is valid,
- The disarming tone is
panel siren.
emitted by the
✔ Disarming the system will also stop the sirens if an alarm is triggered.
Stopping the siren does not interrupt the transmission of the alarm to the ARC.
Note: Depending on your keypad’s configuration, this will disarm the total set or the entire
system. In the latter case, the annex set might need to be re-armed.
10
18
● RESETTING THE SYSTEM AFTER AN ALARM
If LED 3, 4 or 5
is flashing slowly on your control panel, this indicates an alarm
has occurred and restored. When an alarm is in memory, the system will not arm until it has been
reset.
To reset the system, simply disarm the system using a valid code or programmed key TAG.
If there is more than one alarm in memory, repeat this operation for each alarm in memory until
LED 3, 4 and 5 stop flashing slowly.
If LED 5
is flashing quickly on your alarm panel, this indicates a confirmed alarm has
occurred and a remote reset is required. In this case the system will not operate. To remotely reset
your system call your alarm company :
● DURESS CODE
✔ A duress code can be used if you are forced to disarm your security system under duress.
Your duress code is +1 to your code (1234 => 1235, 6789 => 6780).
The system will disarm as normal however a silent alert signal is transmitted to your Alarm
Receiving Centre.
● WRONG CODE PROTECTION
If your enter 5 successive wrong codes, the keypad is blocked for 5 minutes.
● SENDING A PANIC SIGNAL
You can send an instant panic alarm whenever you feel threatened whilst at home:
+
✔ Press and hold the “SOS” key simultaneously :
✔ The siren is triggered (depending on configuration),
✔ The Alarm Receiving Centre is alerted.
The “PANIC” function is operative even when your system is not armed.
11
● CHANGING OR SETTING ADDITIONAL CODES
The keypad can have up to 10 users. User 1 has the master code or master TAG.
To change or set additional user codes, you need to enter programming mode
✔ Press key :
+
simultaneously
✔ The red light will flash slowly
✔ Enter the master code or present the master TAG (user 1)
✔ Select and enter an existing or new single digit user ID (0-9)
(N.B. : User 1 is always the master)
✔ Enter the new code for this user
✔ A double beep on the keypad will confirm acceptance of the new code.
✔ You must confirm the new code by re entering it.
✔ A double beep on the keypad will confirm acceptance of the new code.
Exit programming mode by pressing
key.
● CHANGING OR SETTING ADDITIONAL KEY TAGS
A key TAG can only be programmed for a user who already has a code.
To change or set additional key TAGs, you need to enter programming mode
✔ Press key :
+
simultaneously
✔ The red light will flash slowly
12
✔ Enter the master code or present the master TAG (user 1)
✔ Select and enter an existing single digit user ID (0-9)
✔ Present the new key TAG
✔ A double beep on the keypad will confirm that the new TAG is programmed and replace the
previous TAG if any.
Exit programming mode by pressing
key.
WARNING : The system will automatically exit programming mode after 15 seconds if no
keys have been pressed and the red light will be timed off. If this occurs you must start this
process again from the beginning.
● ADJUSTING BEEP LEVEL
The level of system tones emitted by the panel siren can be adjusted using the keypad.
To change the beep level of the panel siren, you need to enter programming mode
✔ Press key:
+
simultaneously
✔ The red light will flash slowly
✔ Press key
✔ Press
key
✔ Enter beep level: 1 to 7
✔ A double beep on the keypad will confirm that the beep level is changed.
Exit programming mode by pressing
key.
13
How to use the keyfob*
⑤
The keyfob can be used to arm or disarm your security system to trigger an
audible or silent alert as well as control electrical equipment remotely**
● ARMING***
✔ Press key :
✔ The indicator light on the keyfob comes on briefly when you release
the button
- The arming tone
is emitted by the panel siren.
Always make sure that your arming request is followed by tone.
If, upon arming, a door or window contact is in the "open" position (e.g. window not properly
shut), a FAULT signal will inform you. Disarm the system, shut the corresponding window
and repeat arming.
● PART SET ARMING***
Provided that this function has been programmed by the installer, you can choose to protect
only a part of your premises whilst you are in the other part. For instance, you can protect the
ground floor while you are sleeping upstairs.
✔ Press key
✔ The indicator light on the keyfob comes on when you release the button.
- The part set arming tone
is emitted by the signaling equipment.
* The system may include 0 to 10 keyfobs of this type.
** This function re q u i res an optional X10 extension with X10 modules.
14
● DISARMING ***
✔ Press key :
✔ The indicator light on the keyfob comes on briefly when you release the button.
- The disarming tone
panel siren.
is emitted by the
● PANIC ALARM
These keys enable you to send an instant alarm if you need urgent assistance at home.
✔ Press and hold the two “SOS” keys simultaneously for two seconds.
+
✔ The indicator light comes on.
✔ The siren is triggered
✔ The ARC is alerted.
The “PANIC” function is operative even when your system is not armed. If configured, the siren stops
by itself after 30 seconds but you can stop it manually by pressing
Stopping the siren does not interrupt the transmission to the ARC station.
● SPECIFIC KEY
The action of the
key depends on your configuration.
As an assistance key, it will enables you to call for assistance. In this case, press the key, pause
to see the indicator light come on, then press again.
As a remote control for electrical equipment*, pressing the key will turn the equipment on and
off successively.
*** Arming and disarming can only be operated whilst inside the premises
15
Understanding detectors operation
⑥
3
4
2
1
1 Pir detector
A PIR DETECTO R is a motion detector, which reacts to the temperature fluctuations caused by a person in motion
If the detector’s light indicator is setup, it will flash when movement is detected. In
order to save the batteries of the wireless detectors, the next detection will be delayed
for a few minutes. So the indicator will flash again only after a few minutes of rest.
2 Door-contact
A DOOR CONTACT is a magnetic contact, which two parts are fitted one on a door
frame and the other on the door itself.
When the door, or window, is open, the detector is triggered.
Before leaving the premises, always make sure that all openings are properly closed.
When arming your security system, triggering of a detector will be indicated if one
or more contacts outside the exit route are not secured.
3 Glass break detector
A GLASS BREAK DETECTOR analyses the various frequencies emitted by glass
being broken.
4 Smoke detector
A SMOKE DETECTOR mounted on the ceiling ensures the coverage of about 50
square metres. Refrain from smoking in the vicinity of this detector.
16
⑦ How to control your system over the phone ?
Control of your system over the phone is only possible from a multi-frequency phone
(tone dialling) or from your cellular phone. This function must be configured by the
installer.
Remote control is authorised only after you have entered a valid code.
The Domonial control panel picks up your call after the number of rings configured
by the installer or after it has been called twice successively.
ACCESS TO YOUR SECURITY SYSTEM
• Dial the phone number of your
security system.
• A 2-second beep sounds followed
by the "Arpeggio" invitation tune.
• You then have 30 seconds to enter
your secret code.
• A high-pitch beep confirms that the
code is valid. You are then connected
to your security system.
● REMOTE ARMING
Over a phone you can arm a set if it has no final door set up.
• Press keys
for total set arming.
• Press keys
for part set arming
17
• Press keys
for annex set arming
Arming is confirmed as soon as you can hear a melody.
● REMOTE CONTROL OF ELECTRIC EQUIPMENT*
• Select the No of the equipment (101 to 112) by
pressing keys
• One short beep informs you that you
equipment is active.
• Two beeps inform you that your equipment is
not active
• To turn your equipment on, press key
• To turn your equipment off, press key
● REMOTE AUDIO VERIFICATION
Hearing
Talking
Depending on the configuration of your system, it is
possible to listen and talk through the microphone
and speaker of the control panel
• Push the
• Push the
key to talk
key to listen
● TERMINATE THE COMMUNICATION
• To terminate the communication, press keys
and
• You security system ends the call.
* This function re q u i res an optional X10 extension with X10 modules.
18
of your telephone set.
⑧
Maintenance and recommendations
● Check regularly your system (once a month or follow your operator’s
specifications)
● Avoid shocks for all the components and more especially
avoid dropping the remote keyfob.
● Do not immerse.
● To clean the components use a damp rag only (no detergent).
● Keep in a clean, dry place at the ambient temperature.
● Dispose of old batteries in containers for this purpose.
● Avoid exposing yourself to prolonged siren emission.
● Do not hide motion detectors behind curtains, furniture, etc.
● Do not paint or paper the components
● Do not try to open or move the components.
They are tamper-protected and some of them can
present electric shock hazards.
19