1
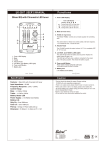
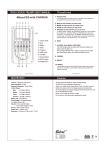
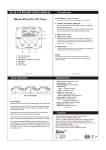
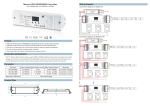
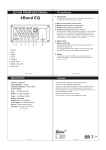
Mercedes C navigation upgrade solution[5inch screen] Installation manual This Mercedes C‐specific interface can insert RGB navi video or CVBS video into Mercedes C screen[5 –inch screen which has 280*100 resolution]. This car has no original navigation. This interface can insert RGB‐NTSC map onto the screen, and people can control the navi by original knob and keys. It also has the following advantages: ¾ Two display mode: one full screen mode and one high resolution mode. ¾ Original keys can be used to control navi very conveniently. ¾ ACC is generated by the interface box[ACC=12V when panel is working] ¾ Plug and play installation without hurting original PCB and soldering. AV [iPod]displayÆ RGB‐NTSC high resolution display [only the center 80% of the NTSC‐RGB is display, text is very clear ] Rotate the knob to select the part RGB‐NTSC full screen display [Press C for full display]: C key Short Press = “OK”key on the navi controller C keyLONG press = Complete picture display or high 1. Control with original keys: resolution display switch。 Press this key to switch to car video z
z
z
1 / 4 z
The knob Press:no function in any interface input to
avoid car operations in the background. UP/DOWN/LEFT/RIGHT PUSH : =“UP/DOWN /LEFT/
RIGHT”operation to the navi. DOWN Push for 3 seconds : input switching
RGBÆAV1ÆAV2ÆCar。 LEFT/RIGHT rotation :showing left/right portion of the
video displayed in High resolution mode, and jump to high
resolution automatically when in RGB input. First: remove the air output part[no screws, only
2. Installation: hooks.], then we can see four screw holes, 2 for
monitor, 2 for CD.
SECOND: remove the 2 screws of the
monitor, then the whole monitor can be taken
out, it is not necessary to touch the CD. Then we can see two connector: 10P video connector to monitor,
8P CAN/power connector. The video is inserted on that 10P connector, the CAN/POWER are sharing the 8P connector. 8P
8P CAN connection: Name Color in connector CAN ‐ BLACK CAN + BLACK/WHITE GND BROWN [2 are the same]
RED /Blue BATT [13.8V] Car Color in interface‐CAN‐BOX BROWN with orange BROWN with BLUE BLACK YELLOW with 2A FUSE [note: CAN wrong connection is not hurting device, the LED
will be blinking when connected correctly。]
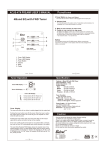
The installation location for the interface and navigation box.Æ 2 / 4 Open this drawer, then 4 screws can be seen, which will release the drawer when removed. There is enough space behind. Attention to the AUX socket should be paid, since there are wires connected to it. Attention: the hook should be in the direction away from the box. 3. Interface connection: CAR LVDS RGB‐NAVI 3 keys for color tuning. AV1/2 CAM‐AV 2X5 LVDS wire for inserting back to the monitor. There is a nose to prevent wrong pluging. CAN/POWER CAN box’s 4P should be connected to car’s 8P connector. When not using the can box, the video is always full screen. The white wire Pin6=12V will switch the input. The 6P connector ‘s signal definition YELLOW: 12V battery,[can also be ACC] RED:ACC:when=12V the unit works. BLACK:Ground for chassis。 GREEN:reverse wire[=12V]。 white: switch signal when =12V.[max 25V] GRAY: specific control signal from the CAN box. DIP switch setting:
DIP
=ON
=OFF
1
RGB enabled
RGB disabled.
2,3
AV1/2 enabled
AV1/2 disabled
5
Reverse go to AV4 [Green wire=
12V]
Reverse go to car video
[Green wire= 12V]
6
Mercedes C or S big screen.
[not 5-inch]
Mercedes C small screen.
[ 5-inch]
4
3 / 4 4. Touch screen connection[Optional accessory]: When in RGB input, the original keys can be used for navi control, it is not necessary to add
touch screen.
The user may also use touch screen, then handwriting on navi is possible.
The ribbon cable should be in this direction. With the converter socket, the 4P touch can be extended to the outside. 5. Accessories: (1)
(2)
(3)
(4)
(5)
4 / 4 [ ] Interface box.
[ ] CAN box with input/output wires
[ ] LVDS cable
[ ] AV input wire 2PCs + CAM+AVout wire 1PC + RGB wire 1PC.
[ ] optional touch screen + extended ribbon