1
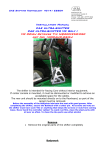
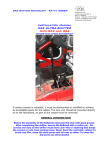
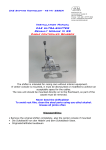
CAE Shifting Technology 45141 ESSEN Christian Au Leimkugelstrasse 3 45141 Essen Phone +49 201 8777 802 e-mail: [email protected] www.cae-racing.de Installation Manual CAE ULTRA-SHIFTER VW Golf MK I Gearbox Type 02a The shifter is intended for racing cars without interior equipment. If center console is mounted, it must be dismounted or modified to achieve an acceptable space for the cables. The new unit should be mounted directly on to the floorboard, so part of the carpet must be removed. Before assembling the Balljoints lubricate them with good grease. After completing the shifter, secure each ballstud with a cotter pin. All screws and nuts on the shifter must have Lock-Tite or anything that keeps the screws or nuts from coming loose. Never bend the shift cables! To avoid rust film, clean the steel parts with oil ever so often. To clean the Alu-parts use ethyl alcohol. Reinstall all stock shifter parts Preparing for installation : Extend the stock hole in the frame triangle/frontboard to get enough space for the cables. The position of this holes is shown in the next picture Before drilling you must check if the cables have enough space. If not, change position of holes as far as necessary. Mounting the shifter and shifter cables Mount both of the cables at the unit. The cable has to stand out as much as possible of the shifter housing, inside there is no thread to see. The mounted cables now have to be fed through the holes and the unit can be mounted on the middle tunnel. For sealing use the delivered rubber stripe. Mount shift and select cable in the holder plate. Installation of shortshift lever: Before mounting the Shift cable install the shortshift lever as shown. Please note: The cables are going overcross from Lever to gearbox 2 Tune the shifting range 5 Speed Pull off 1 Pan the connection rod; R/L moving is without function now Select the 3rd gear manually. To select it, pull the gearshift-lever easy forwards. Now select the wanted middle position of the gearshift and adjust the lower spring stop under the unit with Allen wrench. In middle position the gearshift should be slightly turned to the left. Now push the Pan back the connection rod, adjust it for perfect fitting and lock the nuts; 3 / 4 have to be changed clearly now Select level 1 / 2 by gearlever and adjust the fitting stop screw until gears 1 / 2 can be selected well. Do the same for 5th gear with the other screw Pull rear stop mechanism and enter reverse gear and turn stop screw until the rear gear can be selected clearly. Attention !! Protect shiftcables against thermic overheat by delivered blue heat resistant tube. Protected cables must not contact the exhaust system. After installation, check all the essential functions of the Shifter while driving and adjust if necessary. Wrong adjustment will destroy your gearbox If you experience any problems or questions, please contact us absolutely, we need YOUR feedback to improve our products CAE Shifting Technology wishes you having a good trip! 3