1
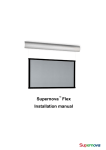
Supernova™ Core
Installation manual
Warnings
Follow all assembly instructions. Incorrect assembly can lead to screen damage and invalidate
the dnp warranty.
Be careful not to kink the film during handling as it could make permanent marks in the film.
Keep sharp objects away from the film as they can scratch the film and destroy the optical
properties.
Please note that the backside of the film is more sensitive than the frontside and should thus
be handled more carefully.
Do not apply pressure to the screen material once it is mounted on the frame.
Required tools and materials
Phillips screwdriver
M6 Allen key
Rubber hammer
Level
Tape measure
2 appropriate mounting screws (and wall plugs)
Box contents
Check box for:
Installation manual (this document)
Rolled-up screen film (image area facing out)
Left/right frame pieces (short)
Top/bottom frame pieces (long)
Inner corner brackets
Adjustment pieces (fixture+bolt+hook)
Metal rods
Wall mounts
Corner covers (rear)
Cover strips (rear)
M6 nuts
M6x20 bolts (for wall mounts)
M6x20 Allen bolts (for inner corner brackets)
Assembly procedure
See illustration on last page
1.
Prepare a clean, flat surface to assemble the screen. Use a protective covering if
necessary. Determine how much space is needed for your size of screen.
2.
Unpack everything but the film roll and arrange the items nearby. Be careful not to
scratch the film when taking everything else out of the box.
3.
Place the frame pieces with the front side facing down. Note that if the working surface is
not properly cleaned or covered before use, particles can stick to the frame surface
material and in worst case damage it.
4.
Assemble the adjustment pieces (fixture+bolt+hook, see illustration on last page)
5.
Mount the adjustment pieces in the frame pieces by sliding the fixture into the groove of
the frame piece and orientate the hook-end toward the middle of the screen. Mount the
same number of adjustment pieces as there are eyelets in the screen material. Do the
same for each top/bottom piece and in each side frame piece. If your screen has vertical
support(s) remember to slide in the square M6 nut(s) in between the fixtures at correct
place. Example: If there is one vertical support and eight eyelets, the square M6 nut for
the vertical support must have four fixtures at each side.
6.
For the wall mounts: Mount two M6 nuts in each side of the top frame piece (outside the
adjustment pieces) by sliding them into the groove. Mount one M6 nut in the top of each
side frame piece (above the adjustment pieces).
7.
Slide an inner corner bracket into each end of the side frame pieces; four in total.
8.
Assemble the frame by sliding the inner corner brackets from the side pieces into the topand bottom frame pieces. Do one side at a time. Mount loosely first, then affix by
tightening the M6x20 Allen bolts.
9.
Distribute the adjustment pieces evenly along the top, bottom and sides.
10.
Take out carefully the screen roll from the box – do not unroll it!
11.
Make sure that the image area is facing out (a serial number label is placed in the upper
right corner on the rear side, not visible from the front). If the screen has been rolled
incorrectly, contact your Supernova dealer before you proceed.
12.
Open the film roll carefully until the top or side metal rod is accessible (depending on the
screen size the film is rolled either horizontally or vertically)
13.
Mount the top or the side of the film by placing the metal rod in the hooks at each eyelet
in the film. Tighten slightly.
14.
Unroll the film carefully without kinking or scratching the front- or backside surface,
15.
Mount the bottom or opposite side of the film by placing that metal rod in the hooks at
each eyelet in the film. Tighten slightly.
16.
Slide the missing metal rods into the unused rod pockets of the film.
17.
Mount the hooks in the frame pieces to the metal rods at each eyelet in the film. Do one
side at a time.
18.
Adjust the adjustment pieces around the screen until the film is in correct position.
19.
Tighten the adjustment pieces around the screen to make a perfect flat image area.
20.
Snap the cover strips onto the back of the frame pieces (a small rubber hammer is
recommended but is not imperative). Remember to make space for the cover corners.
21.
Snap the cover corners onto the back of the frame corners (a small rubber hammer is
recommended but is not imperative).
22.
Attach the wall mounts onto the rear side of the frame in both top corners by screwing the
M6x20 bolts into the M6 nuts previously inserted in the frame pieces (section 6).
23.
The screen is now assembled and ready to be mounted on the wall.
Rev. 1.2
Screen installation
Planning screen location
1. Determine the space requirements for your installation.
2. Measure the required distance between two mounting screws for your size of screen.
3. Level out and drill two mounting screws into the wall. Use appropriate screws that are
strong enough and that fit in the bracket slots. Use wall plugs if needed.
Planning projector location
The projector can be positioned freely on a vertical centerline, perpendicular to the screen, up to
5% above or 5% below the image area. Projection distance must be based on the manufacturer’s
specifications for the exact model and lens choice.
Illustration: Supernova™ Core frame assembly guide
www.dnp.dk
dnp denmark as – Skruegangen 2 – DK – 2690 Karlslunde – Denmark – Tel: +45 46 16 51 00 – Fax: +45 46 16 52 00 – [email protected]