1
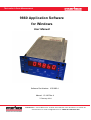
The Leader in Force Measurement
9860 Application Software
for Windows
User Manual
Software Part Number: ICS-9860-1
Manual: 15-190 Rev A
7 February 2014
Interface Inc. • 7401 East Butherus Drive • Scottsdale, Arizona 85260 USA • Phone: 480.948.5555 • Fax: 480.948.1924
www.interfaceforce.com • Email: [email protected] • ORDER TOLL-FREE 800.947.5598
Contents
Overview................................................................................................................................................. 3
Installing the Software............................................................................................................................. 3
Main Screen ............................................................................................................................................ 4
USB/COM Port..................................................................................................................................... 4
Information Area ................................................................................................................................. 5
Decimal Point ...................................................................................................................................... 6
Meter Settings..................................................................................................................................... 6
Fetch from instrument..................................................................................................................... 7
Send to Instrument.......................................................................................................................... 8
Set Defaults ..................................................................................................................................... 8
Done................................................................................................................................................ 8
Main Measurement Digits ................................................................................................................... 9
Secondary Measurement Digits ........................................................................................................... 9
Digital Filter....................................................................................................................................... 10
Data Logging...................................................................................................................................... 10
Graphing ........................................................................................................................................... 11
Tare................................................................................................................................................... 12
Display Mode .................................................................................................................................... 13
Exit .................................................................................................................................................... 13
Page 2 of 13
Interface, Inc. 9860 Application Software User Manual
ICS-9860-1 Rev A
Overview
The Windows-based 9860 Application Sofware is a Graphical User Interface software application that
provides a near hands-off hardware experience for all aspects of configuration, data collection, and visual
interpretation of your measurement application utilizing the Interface 9860 TEDS strain gage indicator.
Note that all of these settings and values shown on the 9860 GUI are also available on the actual 9860
hardware. The 9860 software provides easy access to the most commonly used features, plus adds
features including a secondary display, data logging, and visual data graphing, all in real time.
There are only two user dialog boxes that form the GUI application, the main screen and the Settings
dialog. The main screen depicts real time information from the 9860, while the Settings dialog provides a
one-screen view into the 9860 internal configuration register settings.
Note that the main screen is a visual copy of the 9860 front panel. If you are a new user to the 9860, note
that the 9860 GUI main display is simply a real time mirror of the main 9860 display.
The application is compatible with WinXP, Vista, Win7, and Win8. The 9860 supports an RS-232c serial
port, if your computer does not have a serial port you may use a USB –to-serial dongle, readily available
from computer stores online.
Refer to the 9860 instrument user manual for the proper connections to the serial port. Specific meter
settings, their operation, and their affect on the measurement process are important to understand.
Installing the Software
The software can be downloaded from the Interface web site located at:
http://www.interfaceforce.com/index.php?9860-Load-Cell-Indicator-Digital-TEDS-HighSpeed&mod=product&show=157
The installation file set is located inside the zip file, “Interface 9860 GUI Installation 1.00.zip”. Run
“setup.exe” from inside the zip file, all files are copied to their correct locations.
You must obtain a 20 character (four 5-digit codes) serial number from Interface at the time of your
purchase. This is entered when the software is first run, and is tied to individual computers. You must
purchase a new license for each computer where the software resides.
The 9860 GUI software is available from your Start menu in the folder “Interface 9860 Serial 1.00”, launch
the application by double clicking on the “Interface 9860 Serial 1.00” icon. The main screen will open
now, and you are ready to go.
Page 3 of 13
Interface, Inc. 9860 Application Software User Manual
ICS-9860-1 Rev A
Main Screen
The 9860 Software main screen hosts a number of controls that are easy to access and use. These are
all located on the main screen so that user control can be as simply as a single click of the mouse. The
following user controls are available.
Note that all of the user controls are not active until a “connection” is made to the 9860 strain gage
instrument via a serial port. The first step is to “connect” to a 9860 piece of hardware using the
USB/COM port drop down list, which the top right control on the 9860 Software main screen.
USB/COM Port
This is a drop down list of all available serial or USB-to-serial ports available on the computer where the
9860 Software is active. If there are none available in the drop down list, close the application and install
a COM interface, then restart the 9860 Software application.
Once the 9860 Sofrtware is connected to hardware, the user software controls will become active. Note
that all of the buttons and drop down lists are now available for use. All of the same buttons are shown
on the face of the main screen, but only the TARE button works. The buttons that are not on the 9860
hardware however are operable, and are located on the left side of the main screen.
Page 4 of 13
Interface, Inc. 9860 Application Software User Manual
ICS-9860-1 Rev A
Note that the main display will now start to reflect the current measurement, and all of the user controls
are now enabled. The main display will reflect the current measurement, and default to
“lbf” as the units for that displayed value.
Information Area
The bottom line of the main screen is always active, showing communications with the 9860 hardware
with a visual left and right arrow indicator. All user messages will be shown here. If there is anytime an
error or confusing as to what is happening with the 9860 Software, take a look at the bottom of the main
screen, there could be some useful information displayed there.
Page 5 of 13
Interface, Inc. 9860 Application Software User Manual
ICS-9860-1 Rev A
Decimal Point
One of the most important settings/controls of the 9860 GUI is the decimal point position. All of
the data collection and graphing is relative to the scale of the display, so the proper selection of
this setting is essential. All subsequent data values are referenced from this factor. There are
six distinct selections shown in the Decimal Point drop down, from no decimal point to a far left
decimal point.
Note that the Decimal Point setting sets the tone for all mathematical measurements in the 9860
GUI. The selection of the proper decimal point position is essential to the proper metric or
scaled readings on the 9806 GUI screens.
CAL must be set to OFF for the decimal point can be successfully changed via this
control, and for all latter displayed 9860 GUI values to be accurate. You can turn that off
from the 9860 hardware control menu, or use the Meter Settings dialog to turn that off. If the
9860 hardware is in CAL mode, ALL settings may not be shown correctly! Note that if you make
Decimal Point changes, a dialog box will pop up to remind you of this.
Meter Settings
This is activated via the push of the button marked “Meter Settings.” This will open a
subsequent dialog that depicts the current meter settings. Note that the reading of the data
form the 9860 hareware is performed a setting at a time.
Page 6 of 13
Interface, Inc. 9860 Application Software User Manual
ICS-9860-1 Rev A
Once the readings have been “pulled” from the 9860, you may edit them at will. Note that all
values are checked for data integrity. The values can be “sent” back to the 9860 with the push
of a button. Note that there are four buttons at the bottom of the Meter Internal Settings dialog
box.
The Decimal Point value cannot be changed from this dialog, and is shown at the top to remind
you what scale you are utilizing at the moment. All data values on this dialog are all based on
the meter decimal point setting, so please be aware that all settings are checked for valid data
entry based on the decimal point setting.
Fetch from instrument
This allows you to pull the values again from the 9860 hardware. This is useful to allow for you
to validate that the settings are correct after changing settings. You may also exit the Meter
Settings dialog and open it again, the settings will be pulled from the 9860 hardware again.
Page 7 of 13
Interface, Inc. 9860 Application Software User Manual
ICS-9860-1 Rev A
Send to Instrument
This is the most common used control, since normally you would be here to make 9860
hardware settings changes. Note that once this button is pushed, you will be asked if this is
really what you want to do. Note that the buttons at the bottom of the dialog are disabled during
this action.
You can choose Yes, which will now allow the 9860 GUI to show you exactly what is being
changed by coloring the changed items to red, and the following dialog box shows to be certain
that these are the items that you wish to change. Choose No if you do not wish to continue this
option.
Pressing Yes will send the new values to the 9860 hardware, while No will simply take you back
to the settings dialog.
Note that the serial communications to the 9860 meter is secure and can take a few seconds to
complete the transfer of data. When this is complete, the buttons at the bottom will be enabled
again.
Set Defaults
This button allows you to set the 9860 meter to its default settings.
This performs two actions: places the default values in each of the settings, and asks you if you
really want to do this. Note that this will write all of the data values in the list of settings to the
values currently shown, so be sure that this is what you want.
Done
This exits the settings dialog and takes you back to the main screen.
NOTE: Refer to the 9860 user manual for the actual use of these settings or parameters.
Page 8 of 13
Interface, Inc. 9860 Application Software User Manual
ICS-9860-1 Rev A
Main Measurement Digits
The main measurement digit display is simply a real time read from the 9860 hardware showing
the current measured value, not necessarily tied to a metric like force or torque. The 9860 GUI
brings that intelligence to the readings by allowing you to assign a metric to the value in either
force or torque units. Note that these are simply arbitrary user defined selections, since the
9860 hardware itself does not have the feature to define the measurement in terms of force or
sense, or units of each.
Use the drop down to the right of the display to select the metrics. This does nothing to the
measurement except provide you with a visual clue to perhaps what the measurement is
providing. Note that the default is pound-force; simply use the drop down to select from the
available metrics.
The real use of applying a metric is in the conversion to another metric, seen in the secondary
display.
Secondary Measurement Digits
Activate the secondary display with the “Enable” check box, located to the bottom right of the
secondary display. Note that the secondary display immediately begins to covert from the main
display metric to another that you may select at will.
Page 9 of 13
Interface, Inc. 9860 Application Software User Manual
ICS-9860-1 Rev A
Note that the identical set of measurement metrics is available on the second display.
Digital Filter
The digital filter allows for selecting a buffer size to collect and average readings, and display
the results in the main and secondary display. In essence this slows down the visual indicator
response as the DigFilter value is increased, since more samples are held and used in the
averaging of the new display value. Note that a value of 1 is the same as no filter. The
maximum sampled value is 250.
Note that it takes the filter a few seconds to fill up and start to display accurate readings once a
new DigFIlter value is selected that is larger than the current DigFilter value. This is also a great
indicator that the filter is operational.
Data Logging
Sampled values can be stored in a Comma Separated Value file (CSV) using a sample timer.
Both controls are located to the bottom left of the main display.
Press the Log On/Off button to open a file dialog that allows you to select where to save the file
on disk. A default file name of “9860_Log_Output.csv” is shown, you may change the file name
at this time.
Note that if the file is already on disk, a message dialog will show that asks if you would like to
append (continue storing new data to the end of this file). Select Yes to allow appending the
Page 10 of 13
Interface, Inc. 9860 Application Software User Manual
ICS-9860-1 Rev A
current file, No to not. If you select No, press the Log On/Off button again and use a different
file name or file storage path.
The saved data file can be opened in Excel or any other spreadsheet type of application. Three
columns are stored, the day, the time and the value. Note that the time stamps are relative to
the time that is shown in the Log Rate (ms) (ms = milliseconds, or 0.001 seconds) entry box.
The fastest save time is 100ms (1/10th of a second), and the longest is 999,999 milliseconds or
999.999 minutes.
Note that the Log On/Off button turns green to show that the logging mode is active. To stop
logging, simply press the Log On/Off button again.
Graphing
Graphing is simply enabled with the push of the Graphing button, located at the bottom left of
the main screen. Note that when this is pushed, the main screen grows the bottom to show the
graphing real time. Likewise, turning off Graphing will shorten the main screen to its original
size.
Page 11 of 13
Interface, Inc. 9860 Application Software User Manual
ICS-9860-1 Rev A
The display rate of the graph is also controlled with a rate data value, which is editable while the
graph is active. Note that the fastest display rate is 10ms, and the slowest is 9999ms, or 9.99
seconds.
The graph will roll to the right, and then start again from the left side, overwriting data from the
previous sample period. This data is not saved unless the Log feature is also active. Note that
both positive and negative values are shown.
As a reference, a Graph mV Scale is shown to value the top and bottom maximum values
drawn on the graph. This is strictly tied into the Decimal Point setting, so this can vary
depending on many factors inside the 9860 hardware. Use this as a validity check to the data
displayed.
Tare
The Tare button is the only bottom row buttons that are active and will send the Tare command
to the 9860 instrument. Press the Tare button to “zero out” the display and to start displaying
measurement readings relative to the time point where the Tare was stated. Press Tare again
Page 12 of 13
Interface, Inc. 9860 Application Software User Manual
ICS-9860-1 Rev A
to remove this feature. Note that the Tare mode is shown on the text to the middle right of the
main display, with a red colored TARE depicting that you are in Tare mode.
Display Mode
The 9860 has four display modes to the main screen data. Refer to the 9860 instrument user
manual for how these affect the data displayed. This is a simple drop down dialog box that
allows all modes to be utilized.
Note that when the 9860 GUI software first connects to the 9860 hardware, it will issue a
Display Mode = Immediate, and overrides whatever mode was previously selected.
Exit
Use this button to exit the 9860 GUI application.
Page 13 of 13
Interface, Inc. 9860 Application Software User Manual
ICS-9860-1 Rev A