1
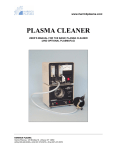
© Klaus Binder - Labortechnik
D-85241 Hebertshausen
Flurstraße 7
www.binder-labortechnik.de
TPS 316 Plasma Cleaner User Guide
Topics signed with ** also applicable for TS 316 Drying Station
1.0 Installation Procedure**
Remove the packaging from main recipient and from the head of the plasma source. After
unpacking, set the device on a vibration-free surface. Fit the reception tubes for the sample
holders to the corresponding chambers (A to A) or B , C, D . In doing so, keep the O-rings perfectly
clean. Check the fit of the sight glass.The sample holder can now be inserted into one of the
reception tubes.
1.1 Transport Locking Devices**
Connectors and cable attachments within the pumping unit may have come loose during transport.
Therefore, disconnect the device from the electrical supply (safety). Remove the side plates
(loosen the screws and gently lift the plates). First remove the earth connection cables and check
all cables and connectors inside the pump unit.
Loosen the knurled-head screw in that way that the base plate of the pumping unit can move freely
on the dampers.
Reconnect the earth connection cables to the side plates and put the plates back in reverse order.
1
© Klaus Binder - Labortechnik
D-85241 Hebertshausen
Flurstraße 7
www.binder-labortechnik.de
1.3 Nitrogen Gas Supply**
Connect the 'N2 IN' inlet (upper right, rear) to a nitrogen bottle. Set the pressure at ca 0.1 bar to
use with the plasma cleaner. The plasma cleaner can also be flooded with air. In this case, the
inlet remains open.
1.4 Working Gas Supply**
Connect the 'AR-O2 IN' inlet (upper right, rear) with a flexible tube to the compressed gas cylinder
(Ar + 20% oxygen) or leave the connection open if you intend to use air as your working gas.
1.5 Operating Instructions**
Using the Working Chambers:
The vacuum unit has two inlets from the pump stand: one directly connected via A + B to the
plasma chamber, the other via magnetic valve C (or D, optional) to the drying chamber. From
outside, each chamber is accessible via horizontal tubes A, B, C or D into which the specimen
holder needs to be inserted.
TPS 316 Plasma Cleaner User Guide V 1.0 2013
2
© Klaus Binder - Labortechnik
D-85241 Hebertshausen
Flurstraße 7
www.binder-labortechnik.de
2.0 Safety Instructions**
NEVER open the pumping unit or the plasma source power supply before unplugging the mains
plug.
Working on mains voltage may cause life-threatening injuries or death.
The plasma source is sealed and cannot be opened by the customer. Any attempt to open the
source voids the warranty.
Any damaged parts can be removed or re-installed under the instruction of the manufacturer after
lodging a query.
Installation and Removal of the Plasma Source Power Supply:
To be done only after contacting the manufacturer.
Please switch off the pumping unit and disconnect the device from the 230V mains voltage.
Open the right side of the pumping unit with a Philips screwdriver. The power supply is mounted on
an aluminium frame.
Remove the plugs at the front side of the power supply. Detach the power supply from the frame of
the pumping unit (fixed with two screws). Mail back the defective one.
Re-install new unit in reverse order.
Removing the Control Unit:
Before proceeding carefully read the safety instructions above.
Loosen the four screws at the control panel.
Before removing all connected cables note carefully the colours and position
of the connections or better make some images of the situation. Mail back the defective panel.
3
© Klaus Binder - Labortechnik
D-85241 Hebertshausen
Flurstraße 7
www.binder-labortechnik.de
Cleaning the Penning Gauge:**
First, follow the previous instructions printed in bold letters (Safety instructions).
To detach the Penning gauge control cable, unfasten small screw. Open KF flange. The inner
parts of the Penning tube can be cleaned mechanically (ultrasonic cleaner). If available, follow the
instructions of the Penning manufacturer. Never put magnetic parts into the ultrasonic cleaner !
Install in reverse order after cleaning.
O-rings:**
Clean O-rings in ethanol only, dry them thoroughly and do not lubricate them if possible. Only Orings on movable parts should be slightly lubricated. Inspect with a magnifier before install that no
dust, hairs or other particles are on the O-ring.
If needed, use Fomblin vacuum grease only.
2.1 Handling the sample holder adapters:**
Never use silicone grease on the adapters. Watch the cleanliness of the sample holders,
especially of the O-rings.
Clean the O-rings with ethanol and lubricate the ring slightly with Fomblin.
If required, the adapters may be cleaned in an ultrasonic acetone bath.
If possible, bake-out afterwards at approximately 80 °C.
Philips, Jeol 2000x, Jeol 4000x and Hitachi will be screwed into the adapter.
Zeiss, Jeol 2010 are connected to the KF flange. For this purpose, the dummy flange is removed.
In both cases, verify for a proper fit and vacuum-tight connection.
Always vacuum-seal unused openings before pumping down.
2.2 Plasma Source:
For plasma etching times longer than 15 minutes use Argon and 20% Oxygen as working-gas.
Longer treatments with air plasma might not help to remove more hydrocarbons.
TPS 316 Plasma Cleaner User Guide V 1.0 2013
4
© Klaus Binder - Labortechnik
D-85241 Hebertshausen
Flurstraße 7
www.binder-labortechnik.de
2.3 Top-entry Adapter and Plasma Source
When working with the plasma cleaner please consider the following advices:
Check all o-rings for cleanliness.
Top Entry Adapter:
For intense cleaning loosen the KF flange above the plasma source and carefully insert the
specimen holder.
Close the side-entry-ports with dummy plugs or flanges. Check for cleanliness of the o-rings before
mounting. Use a VERY small amount of FOMBLIN grease on the o-rings.
NEVER use silicone-based grease !
We recommend FOMBLIN.
Keep the unused plasma source under vacuum or store it at the gray storage shelf near the needle
valve (SP).
Use the plasma source only when working vacuum is sufficient !
Normally the cleaning time should not be longer than 15 minutes.
Up to now no negative effect if ion bombardment on the specimen holders is known.
Because of the complex possibilities to use the plasma cleaner we decline any liability on
specimen and / or specimen holders when used in the plasma cleaner !
5
© Klaus Binder - Labortechnik
D-85241 Hebertshausen
Flurstraße 7
www.binder-labortechnik.de
2.4 How to Use the SEM Tool Kit
Caution !
Before you re-install the plasma source check for correct height setting. Otherwise the specimen or
the specimen holder might get damaged!
Adjust the height:
Use the adjustment gauge and put it across the specimen chamber. Now adjust the height of the
mounted specimen until it nearly touches the lower side of the gauge.
For a better contact and less vibrations use the Allen screw to fix the specimen within the SEM
specimen holder.
TPS 316 Plasma Cleaner User Guide V 1.0 2013
6
© Klaus Binder - Labortechnik
D-85241 Hebertshausen
Flurstraße 7
www.binder-labortechnik.de
3.0 Instructions for Use / Switching On**
Turn the device on with the green toggle switch (at the rear panel, above the power connector).
Push the ON switch on the front panel.
Follow the informations on the touchscreen:
Please close all recipients either with specimen holders or with dummy flanges. Attach the plasma
source on the working chamber and fix it with the bayonet lock.
The image below shows adaptors at the main recipients A and B and also at the sub-recipients C
and D, plasma source and Penning gauge.
The plasma recipient is sealed on top
with a dummy flange that can be
replaced as required by a Top-entry
tube (option). This option is provided
for
especially
intense
plasma
treatments. A vertical reception tube
for sample holders and another one
for cleaning aperture discs are
available.
7
© Klaus Binder - Labortechnik
D-85241 Hebertshausen
Flurstraße 7
www.binder-labortechnik.de
3.1 Creating Operating Vacuum:**
Insert the sample holder into one of the reception tubes. Place the plasma source on the plasma
chamber and close the main recipient with specimen holder (or dummy), also the drying
chamber(s) recipient 2 ( or recipient 3 option).
Touch „READY“
Check the flowchart color on the touchscreen:
Grey: Working chamber on atmospheric pressure.
Dark blue: Turbo molecular pump below 700 Hz.
Bright blue: Turbo molecular pump above 700 Hz.
Cyan: The plasma source is ready for work.
The status monitor (below in the middle of the screen) shows you the actual situation.
Grey: Recipient on atmospheric pressure
Dark blue: Turbo molecular pump below 700 Hz
Bright blue:Turbo molecular pump above 700 Hz
After the flowchart changes to Cyan, the plasma cleaner is ready for use.
The status window mid-screen shows the actual process stat
TPS 316 Plasma Cleaner User Guide V 1.0 2013
8
© Klaus Binder - Labortechnik
D-85241 Hebertshausen
Flurstraße 7
www.binder-labortechnik.de
4.0 Plasma-Cleaning Procedure
4.1 Preparing the Working Chamber:
For better results wait until the vacuum read out is 1x10⁻³ mbar or all bar graphs are turning green.
4.2 Setting the Timer:
Use UP and / or DOWN key for timer setting.
If you want store the time use one of the QUICK KEYS.
For starting the plasma cleaning process press READY
4.3 Adjustment of Parameters:
Use the needle valve (NV) to adjust the plasma to maximum brightness, as observed by the
maximum deflection on the bar graph or by visual inspection in the sight glass (SG) on the plasma
source. This will happen at working chamber pressures between ca 0.1 and 0.5 mbar. The
pressure shown on the gauge, however, is the pressure at the exhaust point, which should read
between 1.5 and 1.9x10⁻³ mbar during the cleaning cycle.
After elapse of the programmed time, the plasma cleaner shuts off. The needle valve will be
disconnected and recipients B and C activated, depending on the pre-set sequence.
9
© Klaus Binder - Labortechnik
D-85241 Hebertshausen
Flurstraße 7
www.binder-labortechnik.de
4.4 Cleaning the Specimen Holder
The time to clean the sample holder with your sample needs to be determined by trial. Start first
with a five minutes run. The sample in the holder should not directly be touched by the plasma.
Better tilt the holder perpendicularly to the source, thus allowing the plasma to stream past.
To initially clean the sample holder we recommend ca 10 minutes from each side, of course
without specimen!
Attention:
Carbon support films and perforated films:
Exposure time for these specimen should be less than three minutes. Longer exposures can
damage the films. Precise values can be determined by tests.
If you don’t use the plasma source please store the source in the place of deposit (SP).
4.5 Vent the Main Recipient
Use the START / STOP button to vent the main recipient.
Please follow the instructions on the display.
5.0 Drying / Venting Recipients 2 and 3**
Method 1:
Choose recipient 2 or 3 or both by touching the recipient on the display. For venting the recipient
the valve on the touch screen must indicate in green color.
Push the ON / OFF (oder START / STOP?) button on the panel and wait until the turbo molecular
pump speed comes down to 0 Hertz and the recipient is on atmospheric pressure. Insert specimen
holder and check for cleanliness of O-rings.
If you don’t use the recipient close all ports with a dummy connector.
Push the START / STOP button and follow the instructions on the display.
Caution!
Specimen holder loaded with sensitive specimen should be brought back to atmospheric pressure
according to method 1.
The reason is that if you break the vacuum according to method 2 the specimen can be damaged
by differential pressure.
TPS 316 Plasma Cleaner User Guide V 1.0 2013
10
© Klaus Binder - Labortechnik
D-85241 Hebertshausen
Flurstraße 7
www.binder-labortechnik.de
Method 2:
Close the appropriate valve of recipient 2 or 3 or both and break the vacuum by pulling out the
specimen holder or opening one of the unused flanges. If you don’t use the recipient please keep it
closed with the dummy connectors.
Push the START / STOP button and follow the instructions on the display.
With the pumping unit on atmospheric pressure, insert the sample holder into the reception tube(A
or B, C, D). Make sure all vacuum connections are clean and tight.
Activate Recipient 2 (C) or recipient 3 (D Option).
Start the pump by pressing the button (1) on the vacuum control panel and wait for the vacuum to
stabilize below 1x10⁻⁵ mbar.
All pump sequences are pre-programmed to run automatically.
5.1 Shutting Down:**
To shut down the plasma cleaner push START / STOP on the touchscreen and wait until the
recipient reaches atmospheric pressure. Turn off green toggle switch at the back.
11
© Klaus Binder - Labortechnik
D-85241 Hebertshausen
Flurstraße 7
www.binder-labortechnik.de
5.3 Error Messages**
Whenever inserting the specimen holders, all recipients must always be closed to prevent an
inrush of air into the turbo pump. If air gets into the pumping unit by a flawed operation, an error
message appears on the touchscreen (the red info field gives you further advice after the
automatic venting of the pumping unit, pressing the key „?“ on the left of the display.
After correcting your settings touch READY
5.4 Adjustment of Vacuum Read Out (activate menu by ferrite magnet)**
Adjustment windows 15 – 17 will only be visible after activating the menu by touching a ferrite
magnet to the right side on the panel.
The vacuum read out calibration is done by manufacturer of the gauge. Changes in the values
above might lead to huge changes of the vacuum read out values. If you need to make own
adjustments please follow the instructions from Pfeiffer PKR 251 active penning gauge.
5.5 Adjustment of Plasma Read Out
(activate with ferrite magnet during plasma run)
TPS 316 Plasma Cleaner User Guide V 1.0 2013
12
© Klaus Binder - Labortechnik
D-85241 Hebertshausen
Flurstraße 7
www.binder-labortechnik.de
Switch on Plasma application and adjust needle valve until brightness on the sight glass is on
maximum. Adjust plasma power read out value from 86 to 94 % by moving offset and gain sliders.
5.6 Adjustment of Recipient Switch-On**
(activate with ferrite magnet during plasma run)
This is done by the manufacturer. Please record the values before changing anything on this page.
for more information at http://www.binder-labortechnik.de
or
Klaus Binder Labortechnik
Flurstraße 7
Check
Email:
[email protected]
D - 85241 Hebertshausen
Telefon
+49 (0)8131 - 255 49
Mobile
+49 (0)172 - 563 52 46
Fax
+49 (0)8131 - 255 49
13