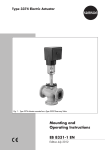
1
Series 3730 Type 3730-5 Electropneumatic Positioner With FOUNDATION™ fieldbus communication FF device rev. 2 Mounting and Operating Instructions EB 8384-5 EN (1300-1619) Firmware version 1.56 Edition February 2015 EB + CD Definition of signal words DANGER! Hazardous situations which, if not avoided, will result in death or serious injury WARNING! Hazardous situations which, if not avoided, could result in death or serious injury 2 NOTICE Property damage message or malfunction Note: Additional information Tip: Recommended action EB 8384-5 EN Contents 1 Important safety instructions...........................................................................7 2 Article code....................................................................................................8 3 Design and principle of operation...................................................................9 3.1 Additional equipment....................................................................................10 3.2 3.2.1 3.2.2 Communication............................................................................................11 Configuration using the TROVIS-VIEW software..............................................11 Configuration using the NI-FBUS™ configurator..............................................12 3.3 Technical data..............................................................................................13 4 Attachment to the control valve – Mounting parts and accessories..................16 4.1 4.1.1 4.1.2 Direct attachment..........................................................................................18 Type 3277-5 Actuator...................................................................................18 Type 3277 Actuator......................................................................................20 4.2 Attachment according to IEC 60534-6............................................................22 4.3 Attachment according to VDI/VDE 3847........................................................24 4.4 Attachment to Type 3510 Micro-flow Valve.....................................................30 4.5 4.5.1 Attachment to rotary actuators.......................................................................30 Heavy-duty version.......................................................................................32 4.6 4.6.1 Reversing amplifier for double-acting actuators...............................................34 Reversing amplifier (1079-1118 or 1079-1119).............................................36 4.7 4.7.1 4.7.2 4.7.3 4.7.4 Attachment of external position sensor............................................................38 Mounting the position sensor with direct attachment.........................................39 Mounting the position sensor with attachment according to IEC 60534-6..........41 Mounting the position sensor to Type 3510 Micro-flow Valve............................42 Mounting on rotary actuators.........................................................................43 4.8 Mounting the leakage sensor.........................................................................44 4.9 Attaching positioners with stainless steel housings............................................45 4.10 Air purging function for single-acting actuators...............................................45 4.11 Required mounting parts and accessories........................................................46 5 Connections.................................................................................................51 5.1 5.1.1 5.1.2 5.1.3 Pneumatic connections..................................................................................51 Signal pressure gauges.................................................................................51 Supply pressure............................................................................................51 Signal pressure (output).................................................................................52 EB 8384-5 EN 3 Contents 5.2 5.2.1 Electrical connections....................................................................................52 Establishing communication...........................................................................56 6 Operating controls and readings...................................................................57 7 Start-up and settings....................................................................................60 7.1 Defining the valve closed position...................................................................60 7.2 Adjusting the volume restriction Q..................................................................61 7.3 Adapting the display direction.......................................................................61 7.4 Limiting the signal pressure............................................................................62 7.5 Checking the operating range of the positioner...............................................62 7.6 7.6.1 7.6.2 7.6.3 7.6.4 Initialization.................................................................................................63 MAX – Initialization based on maximum range...............................................65 NOM – Initialization based on nominal range................................................66 MAN – Initialization based on a manually selected range................................67 SUb – Substitute calibration...........................................................................68 7.7 Zero calibration............................................................................................71 7.8 Reset to default settings..................................................................................72 8 Operation....................................................................................................73 8.1 Enabling and selecting parameters.................................................................73 8.2 8.2.1 8.2.2 Operating modes..........................................................................................73 Automatic and manual modes.......................................................................73 Fail-safe position (SAFE)................................................................................74 8.3 8.3.1 Fault/malfunction..........................................................................................75 Confirming error messages............................................................................76 9 Adjusting the limit switch..............................................................................77 9.1 Retrofitting an inductive limit switch................................................................78 10 Maintenance................................................................................................80 11 Servicing explosion-protected devices...........................................................80 12 Firmware update (serial interface).................................................................80 13 Maintenance, calibration and work on equipment.........................................81 14 Code list......................................................................................................82 14.1 Decimal values of the modes in the FOUNDATION™ fieldbus blocks (Code 48)....................................................................................................96 4 EB 8384-5 EN Contents 14.2 Decimal values of the states in the FOUNDATION™ fieldbus blocks (Code 48)....................................................................................................96 15 Dimensions in mm........................................................................................98 15.1 Fixing levels according to VDI/VDE 3845 (September 2010).........................101 16 Valve characteristic selection.......................................................................102 Test certificates...........................................................................................104 Note: −−Configuration and operation over FOUNDATION™ fieldbus are described in the Configuration Manual u KH 8384-5 EN. This Manual is included on the enclosed CDROM and is available on our website. −−The functions of the EXPERTplus Valve Diagnostics are described in the Operating Instructions u EB 8389 EN. These Instructions included on the enclosed CD-ROM and is available on our website. EB 8384-5 EN 5 Firmware revisions (Control R) Control R 1.43 R 1.44 to 1.46 Internal revisions R 1.52 Diagnostics All EXPERTplus diagnostic functions are available without having to activate them in the positioner (u EB 8389 EN on EXPERTplus Valve Diagnostics). Additional function blocks – 2x DO (Discrete Output) – 1x IS (Input Selector) – 1x MAI (Multiple Analog Input) – 1x MAO (Multiple Analog Output) Configuration Manual u KH 8384-5 EN New functions In the DO Function Block (Discrete Output), new functions are implemented. Configuration Manual u KH 8384-5 EN Action on fault detection If the AO Transducer Block is in O/S mode and the condensed state changes to "Maintenance alarm", the following actions can be started: – Hold the last value – Move valve to fail-safe position – Move to a predefined fault state value Configuration Manual u KH 8384-5 EN Code 48 extended The following subitems have been added to Code 48 (see section 14): h0: Activation/deactivation reference test h1: Reference test completed (YES/No) h3: Automatic reset of diagnosis after this time h4: Remaining time until diagnosis reset R 1.54 to 1.56 Internal revisions Revisions to the communication firmware are listed in the Configuration Manual u KH 8384-5 EN. This Manual is included on the enclosed CD-ROM and is available on our website. 6 EB 8384-5 EN Important safety instructions 1 Important safety instructions For your own safety, follow these instructions concerning the mounting, start-up and operation of the positioner: −− The positioner is to be mounted, started up or operated only by trained and experienced personnel familiar with the product. According to these mounting and operating instructions, trained personnel is referred to as individuals who are able to judge the work they are assigned to and recognize possible dangers due to their specialized training, their knowledge and experience as well as their knowledge of the applicable standards. −− Explosion-protected versions of this positioner are to be operated only by personnel who has undergone special training or instructions or who is authorized to work on explosion-protected devices in hazardous areas. Refer to section 11. −− Any hazards that could be caused in the valve by the process medium, the signal pressure or by moving parts are to be prevented by taking appropriate precautions. −− If inadmissible motions or forces are produced in the pneumatic actuator as a result of the supply pressure level, it must be restricted using a suitable supply pressure reducing station. To avoid damage to any equipment, the following also applies: −− Do not operate the positioner with the back of the positioner/vent opening facing upwards.The vent opening must not be sealed when the positioner is installed on site. Vent opening −− Proper shipping and storage are assumed. −− Do not ground electric welding equipment near to the positioner. Note: The device with a CE marking fulfills the requirements of the Directive 94/9/EC and the Directive 2004/108/EC. The declaration of conformity is included on the enclosed CD-ROM. EB 8384-5 7 Article code 2 Article code Positioner Type 3730-5 x x x 0x x x x 0x 00x 0x x With LCD and autotune, FOUNDATION™ fieldbus Explosion protection Without 0 ATEX II 2G Ex ia IIC T6; II 2D Ex tb IIIC T80°C IP66 1 CSA Ex ia IIC T6; Class I , II, Div.1, Groups A, B, C, D, E, F, G; Ex nA II T6; Ex nL IIC T6; Class I, II, Div.2, Groups A, B, C, D, E, F, G; Class II, Div.1, Groups E, F, D 3 FM Class I, Zone 0 AEx ia IIC; Class I, II, III, Div.1, Groups A, B, C, D, E, F, G; Class I, Div.2, Groups A, B, C, D; Class II, Div.2, Groups F, G ATEX II 3G Ex nA II T6; II 3G Ex ic IIC T6; II 3D tc IIIC T80°C IP66 8 Additional equipment Inductive limit switch Solenoid valve External position sensor Without 0 SJ2-SN (NC contact) 1 SJ2-S1N (NO contact) 2 Without 0 With, 24 V DC 4 Without 0 With Leakage sensor Binary input 0 1 0 Without 0 With 1 Without 0 0 Floating contact 0 1 Diagnostics EXPERTplus 4 Housing material Aluminum (standard) 0 Stainless steel 1.4581 0 1 Special application Without 0 Version compatible with paint 1 Exhaust air port with ¼-18 NPT thread, back of positioner sealed 00 0 0 2 Attachment according to VDI/VDE 3847 including interface 6 Attachment according to VDI/VDE 3847 prepared for interface 7 Special version Without 000 NEPSI Ex ia IIC T6 1 009 NEPSI Ex nA II T6, Ex nL IIC T6 8 010 IECEx Ex ia IIC T6 1 012 GOST 1Ex ia IIC T6; Ex tb IIIC T80°C Db X, IP66 1 014 GOST 2Ex nA ic IIC T6/T5/T4 Gc X; Ex tc IIIC T80°C Db X, IP66 8 8 020 EB 8384-5 Design and principle of operation 3 Design and principle of operation When a system deviation occurs, the actuator is either vented or filled with air. If necessary, the signal pressure change can be slowed down by a volume restriction. The signal pressure supplied to the actuator can be limited by software or on site to 1.4, 2.4 or 3.7 bar. The positioner is mounted on pneumatic control valves and is used to assign the valve position (controlled variable x) to the control signal (set point w). The positioner compares the control signal of a control system to the travel or rotational angle of the control valve and issues a signal pressure (output variable y) for the pneumatic actuator. The fixed flow regulator ensures a constant air flow to the atmosphere, which is used to flush the inside of the positioner housing and to optimize the air capacity booster. The i/p converter is supplied with a constant upstream pressure by the pressure regulator to compensate for any fluctuations in the supply pressure. The positioner mainly consists of an electric travel sensor system, an analog i/p converter with a downstream air capacity booster and the electronics with the microcontroller. 20 Serial Interface 13 16 mm S 5 4 % 15 19 14 w 24V DC 17 18 x PD 2 3 11 G G 12 6 9 8 7 Q 10 y 1 x 1 2 3 4 BE2 5 6 BE1 7 8 9 10 11* 12* 13 Control valve Travel sensor PD controller A/D converter Microcontroller i/p converter Air capacity booster Pressure regulator Flow regulator Volume restriction Inductive limit switch Solenoid valve IEC 61158-2 interface module 14 Binary input BI1 (passive) 15* Binary input BI2 (active) 16 Display 17* Actuation of solenoid valve 18* Electrical insulation 19 D/A converter 20 Communication interface * Options Fig. 1: Functional diagram EB 8384-5 9 Design and principle of operation The positioner communicates and is powered using IEC 61158-2 transmission technology conforming to FOUNDATION™ fieldbus specification. As a standard feature, the positioner comes with a binary input used to signalize process information over the FOUNDATION™ fieldbus network. The extended EXPERTplus diagnostics are integrated into the positioner. They provide information on the positioner and generate diagnostic and status messages, which allow faults to be pinpointed quickly. The positioner is suitable for the following types of attachment using the corresponding accessories: −− Direct attachment to SAMSON Type 3277 Actuator: section 4.1 −− Attachment to actuators according to IEC 60534-6 (NAMUR): section 4.2 −− Attachment according to VDI/VDE 3847: section 4.3 −− Attachment to Type 3510 Micro-flow Valve: section 4.4 −− Attachment to rotary actuators acc. to VDI/VDE 3845: section 4.5 3.1 Additional equipment Solenoid valve If the operating voltage for the solenoid valve (12) fails, the supply pressure for the i/p converter is vented to the atmosphere. The positioner can no longer operate and the control valve moves to the fail-safe position determined by the actuator, regardless of the set point. NOTICE The manual set point is also reset to 0 % after the solenoid valve is activated! A different manual set point must be entered again (Code 1). Inductive limit switch In this version, the rotary shaft of the positioner carries an adjustable tag which actuates the built-in proximity switch. External position sensor In this version, only the sensor is mounted to the control valve. The positioner is located separately from the valve. The connection of x and y signals to the valve is established by cable and piping for air (only without inductive limit switch). Leakage sensor By upgrading the positioner with a leakage sensor, it is possible to detect seat leakage when the valve is in the closed position. 10 EB 8384-5 Design and principle of operation Binary input BI1 (14) As a standard feature, the positioner comes with a binary input used to signalize process information over the FOUNDATION™ fieldbus network. Binary input BI2 (15) This binary input BI2 is optional. It is an active input which is powered by the positioner to connect a floating contact. The switching state of the floating contact can be indicated over the FOUNDATION™ fieldbus network. Note: The binary inputs are configured in the DI Function Blocks. Refer to Configuration Manual u KH 8384-5 EN. 3.2 Communication The positioner is controlled completely by digital signal transmission according to FOUNDATION™ fieldbus specification. Data are transmitted over the bus using digital, bit-synchronous Manchester coding at a baud rate of 31.25 kbit/s over twisted-pair wires according to IEC 61158-2. Note: If complex functions are started in the positioner, which require a long calculation time or lead to a large quantity of data being saved in the volatile memory of the positioner, the alert 'busy' is issued over the DD. This alert is not an error message and can be simply confirmed. EB 8384-5 Configuration and operation of the positioner over FOUNDATION™ fieldbus are described in the Configuration Manual u KH 8384-5 EN. 3.2.1 Configuration using the TROVIS-VIEW software The positioner can be configured with SAMSON's TROVIS-VIEW Configuration and Operator Interface. The positioner has for this purpose a serial interface to allow the RS-232 or USB port of a computer to be connected to it over an adapter cable. The TROVIS-VIEW software enables the user to easily configure the positioner as well as view process parameters online. Note: TROVIS-VIEW provides a uniform user interface that allows users to configure and parameterize various SAMSON devices using device-specific database modules. The 3730-5 device module can be downloaded free of charge from our website (www. samson.de) at Services > Software > TROVIS-VIEW. Further information on TROVIS-VIEW (e.g. system requirements) is available on our website and in the Data Sheet u T 6661 EN. 11 Design and principle of operation 3.2.2 Configuration using the NI-FBUS™ configurator The positioner can also be configured over the NI-FBUS™ configurator from National Instruments. For this purpose, an interface card must be installed in a computer to connect it to the FOUNDATION™ fieldbus. The integrated function blocks are linked using the NI-FBUS™ configurator. 12 EB 8384-5 Design and principle of operation 3.3 Technical data Type 3730-5 Positioner (technical data in test certificates additionally apply to explosion-protected devices) Rated travel, adjustable Travel range, adjustable Bus connection Fieldbus Communication Execution times Local Direct attachment to Type 3277 Actuator: 3.6 to 30 mm Attachment according to IEC 60534-6 (NAMUR): 3.6 to 300 mm Attachment according to VDI/VDE 3847: 3.6 to 300 mm Attachment to rotary actuators (VDI/VDE 3845): 24 to 100° opening angle Within the initialized travel/angle of rotation; travel can be restricted to 1/5 at the maximum Fieldbus interface according to IEC 61158-2, bus-powered Physical Layer Class 113 (without expl. protection) and 111 (expl.-protected version) Field device according to FM 3610 entity, FISCO and FNICO Data transmission conforming to FOUNDATION™ fieldbus specification Communication Profile Class: 31 PS, 32 L Interoperability tested according to Interoperability Test System (ITK 5.2), revision 4.6 PID FB: 20 ms DI FB: 20 ms MAI FB: 50 ms AO FB: 30 ms DO FB: 30 ms MAO FB: 50 ms IS FB: 30 ms SAMSON SSP interface and serial interface adapter Software requirements: TROVIS-VIEW with database module 3730-5 Permissible operating voltage 9 to 32 V DC · Powered over bus line Observe the limits in the test certificate for explosion-protected versions. Maximum operating current 15 mA Add. current in case of error 0 mA 1.4 to 7 bar (20 to 105 psi) Supply air Air quality acc. to ISO 8573-1 Signal pressure (output) Max. particle size and density: Class 4 · Oil content: Class 3 Moisture and water: Class 3 · Pressure dew point: Class 3 or at least 10 K below the lowest ambient temperature to be expected 0 bar up to the capacity of the supply pressure · Can be limited to 1.4/2.4/3.7 bar ±0.2 bar over software Linear/equal percentage/reverse equal percentage User-defined (over operating software and communication) Butterfly valve, rotary plug valve or segmented ball valve: Linear/equal percentage Characteristic Deviation from characteristic ≤ 1 % Hysteresis ≤0.3 % Sensitivity ≤0.1 % Direction of action Reversible Air consumption Air output capacity Filled with air Vented Perm. ambient temperature EB 8384-5 Independent of supply air < 110 ln/h At ∆p = 6 bar: 8.5 mn³/h · At ∆p = 1.4 bar: 3.0 mn³/h · KVmax(20 °C) = 0.09 At ∆p = 6 bar: 14.0 mn³/h · At ∆p = 1.4 bar: 4.5 mn³/h · KVmax(20 °C) = 0.15 –20 to +80 °C for all versions –45 to +80 °C with metal cable gland –25 to +80 °C with inductive limit switch (SJ2-S1N) and metal cable gland Observe the limits in the test certificate for explosion-protected versions. 13 Design and principle of operation Type 3730-5 Positioner (technical data in test certificates additionally apply to explosion-protected devices) Influences Temperature ≤0.15 %/10 K Supply air None Effect of vibration ≤0.25 % up to 2000 Hz and 4 g according to IEC 770 Complying with EN 61000-6-2, EN 61000-6-3, EN 61326-1 and NAMUR Recommendation NE 21 EMC Type 3730-51 II 2G Ex ia IIC T6; II 2D Ex tb IIIC T80°C IP66 Type 3730-58 II 3G Ex nA II T6; II 3G Ex ic IIC T6; II 3D tc IIIC T80°C IP66 CSA Type 3730-53 Ex ia IIC T6; Class I , II, Div.1, Groups A, B, C, D, E, F, G; Ex nA II T6; Ex nL IIC T6; Class I, II, Div.2, Groups A, B, C, D, E, F, G; Class II, Div.1, Groups E, F, D FM Type 3730-53 Class I, Zone 0 AEx ia IIC; Class I, II, III, Div.1, Groups A, B, C, D, E, F, G; Class I, Div.2, Groups A, B, C, D; Class II, Div.2, Groups F, G Type 3730-51 1Ex ia IIC T6; Ex tb IIIC T80°C Db X, IP66 Type 3730-58 2Ex nA ic IIC T6/T5/T4 Gc X; Ex tc IIIC T80°C Db X, IP66 IECEx Type 3730-51 Ex ia IIC T6 CCoE Type 3730-5 Ex ia IIC T6 KCS Type 3730-51 Ex ia IIC T6/T5/T4 Type 3730-51 Ex ia IIC T6 Type 3730-58 Ex nA II T6, Ex nL IIC T6 Type 3730-5 0Ex ia IIC T6X; 2Ex s II T6X ATEX Explosion protection GOST NEPSI STCC CCoE, INMETRO On request Electrical connections One M20 x 1.5 cable gland for 6 to 12 mm clamping range · Second M20 x 1.5 threaded connection additionally exists · Screw terminals for 0.2 to 2.5 mm² wire cross-sections Degree of protection IP 66/NEMA 4X Use in safety-instrumented systems (SIL) Observing the requirements of IEC 61508, the systematic capability of the pilot valve for emergency venting as a component in safety-instrumented systems is given. Emergency venting at 0 V or over the optional solenoid valve Use is possible on observing the requirements of IEC 61511 and the required hardware fault tolerance in safety-instrumented systems up to SIL 2 (single device/HFT = 0) and SIL 3 (redundant configuration/HFT = 1). Binary input BI1 Input 0 to 30 V DC · Reverse polarity protection · Static destruction limit 40 V Current consumption 3.5 mA at 24 V, galvanic isolation Signal Signal ‘1’ at Ue > 5 V · Signal ‘0’ at Ue < 3 V 14 EB 8384-5 Design and principle of operation Materials Housing Die-cast aluminum EN AC-AlSi12(Fe) (EN AC-44300) acc. to DIN EN 1706 chromated and powder paint coated · Special version: stainless steel 1.4581 External parts Stainless steel 1.4571 and 1.4301 Cable gland M20x1.5, black polyamide Weight Approx. 1.0 kg Options for Type 3730-5 Binary input BI2 for floating contact Switching input R < 100 Ω · Contact load 100 mA · Static destruction limit 20 V/5.8 mA Galvanic isolation Solenoid valve · Approval according to IEC 61508/SIL 24 V DC · Reverse polarity protection · Static destruction limit 40 V Input Current consumption I = U – 5.7 V 3840 Ω Signal '0' (no response) <12 V (emergency venting at 0 V) Signal '1' (response) > 19 V Service life > 5 x 10⁶ switching cycles (corresponding to 4.8 mA at 24 V/114 mW) KV coefficient 0.15 Inductive limit switch For connection to switching amplifier acc. to EN 60947-5-6 SJ2-SN proximity switch NAMUR NC contact SJ2-S1N proximity switch NAMUR NO contact External position sensor Travel Same as positioner Cable 10 m · Flexible and durable · With M12x1 connector · Flame-retardant acc. to VDE 0472 · Resistant to oils, lubricants and coolants as well as other aggressive media Permissible ambient temperature –60 to +105 °C Immunity to vibration Up to 10 g in the range of 10 to 2000 Hz Degree of protection IP 67 Leakage sensor · Suitable for operation in hazardous areas Temperature range –40 to +130 °C Tightening torque 20 ±5 Nm EB 8384-5 15 Attachment to the control valve – Mounting parts and accessories 4 Attachment to the control valve – Mounting parts and accessories NOTICE Risk of malfunction due to incorrect sequence of mounting, installation and start-up! Keep the following sequence. 1.Remove the protective film from the pneumatic connections. 2.Mount the positioner on the control valve. 3.Connect the supply air. 4.Connect the electrical power. 5.Perform the start-up settings. The positioner is suitable for the following types of attachment: −− Direct attachment to SAMSON Type 3277 Actuator −− Attachment to actuators according to IEC 60534-6 (NAMUR) −− Attachment according to VDI/VDE 3847 −− Attachment to Type 3510 Micro-flow Valve −− Attachment to rotary actuators NOTICE Risk of malfunction due to incorrect mounting parts/accessories or incorrect assignment of lever and pin position. Attach the positioner to the control valve only using the mounting parts and accessories as specified in Table 1 to Table 6. Observe the type of attachment. 16 Observe the assignment between lever and pin position (see travel tables on page 17). Lever and pin position The positioner is adapted to the actuator and to the rated travel by the lever on the back of the positioner and the pin inserted into the lever. The travel tables on page 17 show the maximum adjustment range at the positioner. The travel that can be implemented at the valve is additionally restricted by the selected fail-safe position and the required compression of the actuator springs. The positioner is equipped with the M lever (pin position 35) as standard. Fig. 2: M lever with pin position 35 NOTICE Risk of malfunction because the newly mounted lever has not been adapted to the internal measuring lever. Move the newly mounted lever (1) once all the way as far as it will go in both directions. EB 8384-5 EN Attachment to the control valve – Mounting parts and accessories Travel tables Note: The M lever is included in the scope of delivery. S, L, XL levers for attachment according to IEC 60534-6 (NAMUR) are available as accessories (see Table 3). Direct attachment to Type 3277-5 and Type 3277 Actuators Actuator size Rated travel Adjustment range at positioner 1) [cm²] [mm] Travel [mm] 120 7.5 5.0 to 120/175/240/350 15 7.0 355/700/750 30 10.0 Required lever Assigned pin position 25.0 M 25 to 35.0 M 35 to 50.0 M 50 Attachment according to IEC 60534-6 (NAMUR) SAMSON valves with Type 3271 Actuator Adjustment range at positioner 1) Other control valves Rated travel [mm] Min. travel [mm] Max. travel [mm] Required lever Assigned pin position 60 and 120 with Type 3510 Valve 7.5 3.6 18.0 S 17 120 7.5 5.0 25.0 M 25 7.0 35.0 M 35 Actuator size [cm²] 120/175/240/350 15 700/750 7.5 355/700/750 15 and 30 10.0 50.0 M 50 30 14.0 70.0 L 70 60 20.0 100.0 L 100 120 40.0 200.0 XL 200 1000/1400/2800 1400/2800 Rotary actuators Opening angle 24 1) to 100° Required lever Assigned pin position M 90° The min./max. adjustment range is based on the NOM (nominal range) initialization mode EB 8384-5 EN 17 Attachment to the control valve – Mounting parts and accessories 4.1 Direct attachment 4.1.1 Type 3277-5 Actuator −− Required mounting parts and accessories: Table 1 on page 46 −− Observe the travel table on page 17. Actuator with 120 cm² (see Fig. 3) Depending on the type of positioner attachment, the signal pressure is routed either left or right of the yoke through a hole to the actuator diaphragm. Depending on the failsafe action of the actuator "actuator stem extends" or "actuator stem retracts" (valve closes or opens upon supply air failure), the switchover plate (9) must first be attached to the actuator yoke. Align the switchover plate with the corresponding symbol for left or right attachment according to the marking (view looking onto the switchover plate). 1. Mount connecting plate (6) or pressure gauge bracket (7) with pressure gauges on the positioner, making sure the two seals are seated properly. 2. Remove screw plug (4) on the back of the positioner and seal the signal pressure output (38) on the connecting plate (6) or on the pressure gauge bracket (7) with the stopper (5) included in the accessories. 3. Place follower clamp (3) on the actuator stem, align it and screw tight so that the mounting screw is located in the groove of the actuator stem. 4. Mount cover plate (10) with narrow side of the cut-out (Fig. 3, on the left) pointing towards the signal pressure connection. 18 Make sure that the gasket (14) points towards the actuator yoke. 5. 15 mm travel: Keep the follower pin (2) on the M lever (1) on the back of the positioner in the pin position 35 (delivered state). 7.5 mm travel: Remove the follower pin (2) from the pin position 35, reposition it in the hole for pin position 25 and screw tight. 6. Insert formed seal (15) into the groove of the positioner housing and insert the seal (10.1) on the back of the housing. 7. Place positioner on the cover plate (10) in such a manner that the follower pin (2) rests on the top of the follower clamp (3). Adjust the lever (1) correspondingly and open the positioner cover to hold the positioner shaft in position at the cap or rotary pushbutton. The lever (1) must rest on the follower clamp with spring force. Mount the positioner on the cover plate (10) using the two fixing screws. Note applying to all types of attachment except for direct attachment to Type 3277-5: The signal pressure output at the back must be sealed by the screw plug (4, order no. 0180-1254) and the associated O-ring (order no. 0520-0412). 8. Mount cover (11) on the other side. Make sure that the vent plug is located at the bottom when the control valve is installed to allow any condensed water that collects to drain off. EB 8384-5 EN Attachment to the control valve – Mounting parts and accessories Symbols 1 1.1 1.2 2 3 4 5 6 6.1 7 8 Switchover plate (9) Actuator stem extends Left attachment Right attachment Actuator stem retracts Signal pressure input for left attachment Marking Signal pressure input for right attachment 15 14 Lever Nut Disk spring Follower pin Follower clamp Screw plug Sealing plug Connecting plate Seals Pressure gauge bracket Pressure gauge mounting kit 9 Switchover plate (actuator) 10 Cover plate 10.1 Seal 11 Cover 14 Gasket 15 Molded seal M lever 1 2 3 1.1 1.2 Cut-out of cover plate 4 6.1 6 5 Supply 9 10.1 10 6 Output 38 7 8 9 11 NOTICE Only use the connecting plate (6) included in the accessories to connect supply and output! Never screw threaded parts directly into housing! Fig. 3: Direct attachment – Signal pressure connection for Type 3277-5 Actuator with 120 cm² EB 8384-5 EN 19 Attachment to the control valve – Mounting parts and accessories 4.1.2 Type 3277 Actuator −− Required mounting parts and accessories: Table 2 on page 47 −− Observe the travel table on page 17. Actuators with 175 to 750 cm² effective areas (see Fig. 4) Mount the positioner on the yoke. The signal pressure is routed to the actuator over the connection block (12), for actuators with failsafe action "actuator stem extends" internally through a hole in the valve yoke and for "actuator stem retracts" through an external pipe. 1. Place follower clamp (3) on the actuator stem, align it and screw tight so that the mounting screw is located in the groove of the actuator stem. 2. Mount cover plate (10) with narrow side of the cut-out (Fig. 4, on the left) pointing towards the signal pressure connection. Make sure that the gasket (14) points towards the actuator yoke. 3. For actuators with 355, 700 or 750 cm², remove the follower pin (2) on the M lever (1) on the back of the positioner from pin position 35, reposition it in the hole for pin position 50 and screw tight. For actuators 175, 240 and 350 cm² with 15 mm travel, keep the follower pin (2) in pin position 35. 4. Insert formed seal (15) into the groove of the positioner housing. Adjust the lever (1) correspondingly and open the positioner cover to hold the positioner shaft in position at the cap or rotary pushbutton. The lever (1) must rest on the follower clamp with spring force. Mount the positioner on the cover plate (10) using the two fixing screws. 6. Make sure that the tip of the gasket (16) projecting from the side of the connection block is positioned to match the actuator symbol for the actuator's fail-safe action "actuator stem extends" or "actuator stem retracts". If this is not the case, unscrew the three fastening screws and lift off the cover. Turn the gasket (16) by 180° and re-insert it. The old connection block version (Fig. 4, bottom) requires the switch plate (13) to be turned to align the actuator symbol with the arrow marking. 7. Place the connection block (12) with the associated seals against the positioner and the actuator yoke and fasten using the screw (12.1). For actuators with failsafe action "actuator stem retracts", additionally remove the stopper (12.2) and mount the external signal pressure pipe. 8. Mount cover (11) on the other side. Make sure that the vent plug is located at the bottom when the control valve is installed to allow any condensed water that collects to drain off. 5. Place positioner on the cover plate in such a manner that the follower pin (2) rests on the top of the follower clamp (3). 20 EB 8384-5 EN Attachment to the control valve – Mounting parts and accessories 1 1.1 1.2 2 3 10 11 11.1 12 12.1 12.2 13 14 15 16 Lever Nut Disk spring Follower pin Follower clamp Cover plate Cover Vent plug Connection block Screw Stopper or connection for external piping Switch plate 15 10 14 Gasket Formed seal Gasket 1 2 3 11 11.1 2 M lever 1.1 1.2 Cut-out of cover plate (10) View A 16 View C 16 G G 3/8 SUPPLY C Actuator stem Retracts Extends 16 12 SUPPLY 12.1 A 12.2 View B SUPPLY 13 12 Actuator stem retracts Connection block (old) with switch plate (13) B Actuator stem extends Marking 12 12.1 12.2 Fig. 4: Direct attachment – Signal pressure connection for Type 3277 Actuator with 175 to 750 cm² EB 8384-5 EN 21 Attachment to the control valve – Mounting parts and accessories 4.2 Attachment according to IEC 60534-6 −− Required mounting parts and accessories: Table 3 on page 48 −− Observe the travel table on page 17. Fig. 5 The positioner is attached to the control valve using a NAMUR bracket (10). 1. Screw the two bolts (14) to the bracket (9.1) of the stem connector (9), place the follower plate (3) on top and use the screws (14.1) for fastening. Actuator sizes 2800 cm² and 1400 cm² with 120 mm travel: −− For a travel of 60 mm or smaller, screw the longer follower plate (3.1) directly to the stem connector (9). −− For a travel exceeding 60 mm, mount the bracket (16) first and then the follower plate (3) to the bracket together with the bolts (14) and screws (14.1). 2. Mount NAMUR bracket (10) to the control valve as follows: −− For attachment to the NAMUR rib, use an M8 screw (11) and toothed lock washer directly in the yoke hole. −− For attachment to valves with rodtype yokes, use two U-bolts (15) around the yoke. Align the NAMUR bracket (10) according to the embossed scale so that the follower plate (3) is shifted by half the angle range to the NAMUR bracket (the slot of the follower plate is centrally 22 aligned with the NAMUR bracket at mid valve travel). 3. Mount connecting plate (6) or pressure gauge bracket (7) with pressure gauges on the positioner, making sure the two seals (6.1) are seated properly. 4. Select required lever size (1) M, L or XL and pin position according to the actuator size and valve travel listed in the travel table on page 17. Should a pin position other than position 35 with the standard M lever be required, or an L or XL lever size be required, proceed as follows: 5. Screw the follower pin (2) in the assigned lever hole (pin position as specified in the travel table). Only use the longer follower pin (2) included in the mounting kit. 6. Place the lever (1) on the shaft of the positioner and fasten it tight using the disk spring (1.2) and nut (1.1). Move lever once all the way as far as it will go in both directions. 7. Place positioner on the NAMUR bracket in such a manner that the follower pin (2) rests in the slot of the follower plate (3, 3.1). Adjust the lever (1) correspondingly. Screw the positioner to the NAMUR bracket using both its mounting screws. EB 8384-5 EN Attachment to the control valve – Mounting parts and accessories Attachment to rod-type yoke Rods with 20 to 35 mm diameter 15 11 10 9 Attachment to NAMUR rib 9.1 3.1 1 Additional bracket for 16 actuators with 2800 cm² and travel ≥60 mm Lever 1 XL and L lever Nut Disk spring 1 Follower pin Follower plate Follower plate 2 Connecting plate 1.1 6.1 6 7 Seals 1.2 Pressure gauge bracket 1 Pressure gauge mounting kit 9 Stem connector 9.1 Bracket 10 NAMUR bracket 11 Screw 14 Bolt 14.1 Screws 15 U-bolt NOTICE 16 Bracket Only use the connecting plate (6) included in the accessories to connect supply 1.1 1.2 2 3 3.1 6 6.1 7 8 14 3 14.1 8 and output! Never screw threaded parts directly into housing! Fig. 5: Attachment according to IEC 60534-6 (NAMUR) EB 8384-5 EN 23 Attachment to the control valve – Mounting parts and accessories 4.3 Attachment according to VDI/VDE 3847 Type 3730-5xxx0xxxx0x0060xx and Type 3730-5xxx0xxxx0x0070xx Positioners with air purging of the actuator's spring chamber can be attached according to VDI/ VDE 3847. Type 3730-5xxx0xxxx0x0000xx Positioner without air purging of the actuator's spring chamber can be attached according to VDI/ VDE 3847. This type of attachment allows the positioner to be replaced quickly while the process is running by blocking the air in the actuator. The signal pressure can be blocked in the actuator by unscrewing the red retaining screw (20) and then turning the air blocker (19) on the bottom of the adapter block. Attachment to Type 3277 Actuator (see Fig. 6) −− Required mounting parts and accessories: Table 4 on page 48 Mount the positioner on the yoke as shown in Fig. 6. The signal pressure is routed to the actuator over the connecting plate (12), for actuators with fail-safe action "actuator stem extends" internally through a bore in the valve yoke and for "actuator stem retracts" through external piping. Only the Y1 port is required for positioner attachment. The Y2 port can be used for air purging of the spring chamber. 1. Place follower clamp (3) on the actuator stem, align it and screw tight so that the 24 mounting screw is located in the groove of the actuator stem. 2. Place the adapter bracket (6) on the positioner and mount using the screws (6.1). Make sure that the seals are correctly seated. For positioners with air purging, remove the stopper (5) before mounting the positioner. For positioners without air purging, replace the screw plug (4) with a vent plug. 3. For actuators with 355, 700 or 750 cm², remove the follower pin (2) on the M lever (1) on the back of the positioner from pin position 35, reposition it in the hole for pin position 50 and screw tight. For actuators 175, 240 and 350 cm² with 15 mm travel, keep the follower pin (2) in pin position 35. 4. Insert the formed seal (6.2) in the groove of the adapter bracket (6). 5. Insert the formed seal (17.1) into the turnboard (17) and mount the turnboard to the adapter block (13) using the screws (17.2). 6. Mount the blank plate (18) to the turnboard (17) using the screws (18.1). Make sure that the seals are correctly seated. Note: A solenoid valve can also be mounted in place of the blank plate (18). The orientation of the turnboard (17) determines the mounting position of the solenoid valve. Alternatively, a restrictor plate can be mounted (u AB 11 EN). EB 8384-5 EN Attachment to the control valve – Mounting parts and accessories 1.1 1.2 13.1 17.1 17 17.2 18 18.1 13 11 1 11.1 3 12 12.1 Exh. 1 1.1 1.2 2 3 4 5 6 6.1 6.2 6.3 11 11.1 12 12.1 Lever Nut Disk spring Follower pin Follower clamp Screw plug Stopper Adapter bracket Screws Formed seal Screws Cover Vent plug Connecting plate Seal 20 2 19 1.1 1.2 6 1 6.2 6.1 4 5 13 13.1 17 17.1 17.2 18 18.1 19 20 Adapter block Screws Turnboard Formed seal Screws Blank plate Screws Air blocker Retaining screw 6.3 Fig. 6: Attachment according to VDI/VDE 3847 to Type 3277 Actuator EB 8384-5 EN 25 Attachment to the control valve – Mounting parts and accessories 7. Insert the screws (13.1) through the middle holes of the adapter block (13). 8. Place the connecting plate (12) together with the seal (12.1) onto the screws (13.1) corresponding to the fail-safe action "actuator stem extends" or "actuator stem retracts". The fail-safe action that applies is determined by aligning the groove of the adapter block (13) with the groove of the connecting plate (12) (Fig. 7). Actuator stem extends retracts 12 Connecting plate 13 Adapter block The lever (1) must rest on the follower clamp with spring force. Fasten the positioner to the adapter block (13) using the two fixing screws (6.3). Make sure the formed seal (6.2) is properly seated. 12.Mount cover (11) on the other side to the yoke. Make sure that the vent plug is located at the bottom when the control valve is installed to allow any condensed water that collects to drain off. Z 12 Place positioner on the adapter block (13) in such a manner that the follower pin (2) rests on the top of the follower clamp (3). Adjust the lever (1) correspondingly and open the positioner cover to hold the positioner shaft in position at the cap or rotary pushbutton. 13 Z Fig. 7: Fail-safe position 9. Mount the adapter block (13) together with the connecting plate (12) to the actuator using the screws (13.1). 10.Insert the vent plug (11.1) into the Exh. connection. 11.For fail-safe action "actuator stem extends", seal the Y1 port with a blanking plug. For fail-safe action "actuator stem retracts", connect the Y1 port to the signal pressure connection of the actuator. 26 EB 8384-5 EN Attachment to the control valve – Mounting parts and accessories Attachment to NAMUR rib (see Fig. 8) −− Required mounting parts and accessories: Table 4 on page 48 −− Observe the travel table on page 17. 1. Series 240 Valves, actuator size up to 1400-60 cm²: Screw the two bolts (14) to the bracket of the stem connector or directly to the stem connector (depending on the version), place the follower plate (3) on top and use the screws (14.1) to fasten it. Type 3251 Valve, 350 to 2800 cm²: Screw the longer follower plate (3.1) to the bracket of the stem connector or directly to the stem connector (depending on the version). Type 3254 Valve, 1400-120 to 2800 cm²: Screw the two bolts (14) to the bracket (16). Fasten the bracket (16) onto the stem connector, place the follower plate (3) on top and use the screws (14.1) to fasten it. Mount the positioner on the NAMUR rib as shown in Fig. 8. 2. For attachment to the NAMUR rib, fasten the NAMUR connection block (10) directly into the existing yoke bore using the screw and toothed lock washer (11). Align the marking on the NAMUR valve connection (on the side marked '1') to 50 % travel. washer (11). Align the marking on the NAMUR valve connection (on the side marked '1') to 50 % travel. 3. Place the adapter bracket (6) on the positioner and mount using the screws (6.1). Make sure that the seals are correctly seated. For positioners with air purging, remove the stopper (5) before mounting the positioner. For positioners without air purging, replace the screw plug (4) with a vent plug. 4. Select required lever size (1) M, L or XL and pin position according to the actuator size and valve travel listed in the travel table on page 17. Should a pin position other than position 35 with the standard M lever be required, or an L or XL lever size be required, proceed as follows: −− Screw the follower pin (2) in the assigned lever hole (pin position as specified in the travel table). Only use the longer follower pin (2) included in the mounting kit. −− Place the lever (1) on the shaft of the positioner and fasten it tight using the disk spring (1.2) and nut (1.1). −− Move lever once all the way as far as it will go in both directions. For attachment to valves with rod-type yokes, use the two U-bolts (15) around the yoke. Fasten the NAMUR connection block (10) directly into the existing yoke bore using the screw and toothed lock EB 8384-5 EN 27 Attachment to the control valve – Mounting parts and accessories 5. Insert the formed seal (6.2) in the groove of the adapter bracket. nection of the actuator. Seal the Y2 port with a blanking plug. 6. Insert the formed seal (17.1) into the turnboard (17) and mount the turnboard to the adapter block (13) using the screws (17.2). For double-acting actuators and actuators with air purging, connect the Y2 port of the adapter block to the signal pressure connection of the second actuator chamber or spring chamber of the actuator. 7. Mount the blank plate (18) to the turnboard using the screws (18.1). Make sure that the seals are correctly seated. Note: A solenoid valve can also be mounted in place of the blank plate (18). The orientation of the turnboard (17) determines the mounting position of the solenoid valve. Alternatively, a restrictor plate can be mounted (u AB 11 EN). 8. Fasten the adapter block (13) to the NAMUR connection block using the screws (13.1). 9. Insert the vent plug into the Exh. connection. 10.Place the positioner on the adapter block (13) in such a manner that the follower pin (2) rests on the top of the follower plate (3, 3.1). Adjust the lever (1) correspondingly. Fasten the positioner to the adapter block (13) using the two fixing screws (6.3). Make sure the formed seal (6.2) is properly seated. 11.For single-acting actuators without air purging, connect the Y1 port of the adapter block to the signal pressure con- 28 EB 8384-5 EN Attachment to the control valve – Mounting parts and accessories 13 13.1 17.1 17 17.2 18 18.1 11 10 3 16 Exh. 1 1.1 1.2 2 3 3.1 4 5 6 6.1 6.2 6.3 10 11 13 Lever Nut Disk spring Follower pin Follower plate Follower plate Blanking plug Stopper Adapter bracket Screws Formed seal Screws NAMUR connection block Screw with toothed lock washer Adapter block 20 15 3.1 14 19 14.1 3 1 13.1 14 14.1 15 16 17 17.1 17.2 18 18.1 19 20 Screws Bolt Screws U-bolt Bracket Turnboard Formed seal Screws Blank plate Screws Air blocker Retaining screw 1.1 1.2 2 6 6.2 6.1 4 5 6.3 Fig. 8: Attachment according to VDI/VDE 3847 to a NAMUR rib EB 8384-5 EN 29 Attachment to the control valve – Mounting parts and accessories 4.4 Attachment to Type 3510 Micro-flow Valve Fig. 9 −− Required mounting parts and accessories: Table 3 on page 48 −− Observe the travel table on page 17. The positioner is attached to the valve yoke using a bracket. 1. Fasten the bracket (9.1) to the stem connector. 9. Place the S lever on the positioner shaft and screw tight using the disk spring (1.2) and nut (1.1). Move lever once all the way as far as it will go in both directions. 10.Place positioner on the bracket (10) in such a manner that the follower pin slides into the groove of the follower pin (3). Adjust the lever (1) correspondingly. Screw the positioner to the bracket (10) using both its screws. 2. Screw the two bolts (9.2) to the bracket (9.1) of the stem connector (9), place the follower plate (3) on top and use the screws (9.3) for fastening. 4.5 Attachment to rotary actuators 3. Mount the travel indication scale (accessories) to the outer side of the yoke using the hex screws (12.1), ensuring that the scale is aligned with the stem connector. −− Required mounting parts and accessories: Table 5 on page 49 −− Observe the travel table on page 17. 4. Fasten the hex bar (11) onto the outer side of yoke by screwing the M8 screws (11.1) directly into the holes on the yoke. 5. Fasten the bracket (10) to the hex bar (11) using the hex screw (10.1), washer and tooth lock washer. 6. Mount connecting plate (6) or pressure gauge bracket (7) with pressure gauges on the positioner, making sure the two seals are seated properly. 7. Unscrew the standard M lever (1) including follower pin (2) from the positioner shaft. 8. Take the S lever (1) and screw the follower pin (2) in the hole for pin position 17. 30 Fig. 11 The positioner is mounted to the rotary actuator using two pairs of brackets. Prior to attaching the positioner to the SAMSON Type 3278 Rotary Actuator, mount the associated adapter (5) to the free end of the rotary actuator shaft. Note: On attaching the positioner as described below, it is imperative that the actuator's direction of rotation is observed. 1. Place follower clamp (3) on the slotted actuator shaft or adapter (5). EB 8384-5 EN Attachment to the control valve – Mounting parts and accessories 12.1 11 11.1 10 10.1 9 9.1 3 9.2 9.3 NOTICE Only use the connecting plate (6) included in the accessories to connect supply and output! Never screw threaded parts directly into housing! 6 1.1 2 1.2 S lever 1 1 1.1 1.2 2 3 6 6.1 7 9 9.1 Lever Nut Disk spring Follower pin Follower plate Connecting plate Seals Pressure gauge bracket Pressure gauge mounting kit Stem connector Bracket 9.2 9.3 10 10.1 11 11.1 12.1 Bolt Screws Bracket Screw Hexagon bar Screws Screws 8 6.1 7 8 Fig. 9: Attachment to Type 3510 Micro-flow Valve EB 8384-5 EN 31 Attachment to the control valve – Mounting parts and accessories 2. Place coupling wheel (4) with flat side facing the actuator on the follower clamp (3). Refer to Fig. 11 to align slot so that it matches the direction of rotation when the valve is in its closed position. 3. Fasten the coupling wheel (4) and follower clamp (3) tightly onto the actuator shaft using screw (4.1) and disk spring (4.2). 4. Fasten the bottom pair of brackets (10.1) with the bends pointing either facing to the inside or to the outside (depending on the actuator size) onto the actuator housing. Position the top pair of brackets (10) and fasten. 5. Mount connecting plate (6) or pressure gauge bracket (7) with pressure gauges on the positioner, making sure the two seals are seated properly. Double-acting springless rotary actuators require the use of a reversing amplifier on the connection side of the positioner housing (see section 4.6). 6. Unscrew the standard follower pin (2) from the positioner's M lever (1). Use the metal follower pin (Ø 5 mm) included in the mounting kit and screw tight into the hole for pin position 90°. 7. Place positioner on the top bracket (10) and fasten tight. Taking the actuator's direction of rotation into account, adjust lever (1) so that it engages in the slot of the coupling wheel (4) with its follower pin (Fig. 11). It must be guaranteed that the lever (1) is parallel to the long side of the positioner when the actuator is at half its angle of rotation. 8. Stick the scale plate (4.3) on the coupling wheel so that the arrow tip indicates the closed position and it can be easily read when the valve is installed. 4.5.1 Heavy-duty version Fig. 12 1 1.2 1.1 4.1 2 4.2 3 5 −− Required mounting parts and accessories: Table 5 on page 49 Both mounting kits contain all the necessary mounting parts. The parts for the actuator size used must be selected from the mounting kit. Prepare actuator, and mount required adapter supplied by the actuator manufacturer, if necessary. Fig. 10:Mounting the coupling wheel on Type 3278 32 1. Mount the housing (10) onto the rotary actuator. In case of VDI/VDE attachment, EB 8384-5 EN Attachment to the control valve – Mounting parts and accessories 6.1 1 1.2 1.1 2 4.3 10 10.1 6 (7, 8) 4 5 NOTICE Only use the connecting plate (6) included in the accessories to connect supply and output! Never screw threaded parts directly into housing! Legend for Fig. 10 and Fig. 11 1 Lever 1.1 Nut 1.2 Disk spring 2 Follower pin 3 Follower clamp (Fig. 10) 4 Coupling wheel 4.1 Screw 4.2 Disk spring 4.3 Scale plate 5 Actuator shaft Adapter for Type 3278 6 Connecting plate 6.1 Seals 7 Pressure gauge bracket 8 Pressure gauge mounting kit 10 Top pair of brackets 10.1 Bottom pair of brackets 80 mm 130 mm Slot Control valve opens counterclockwise Control valve opens clockwise Slot Fig. 11:Attachment to rotary actuators EB 8384-5 EN 33 Attachment to the control valve – Mounting parts and accessories place spacers (11) underneath, if necessary. 2. For SAMSON Type 3278 and VETEC S160 Rotary Actuators, screw the adapter (5) onto the free end of the shaft or place adapter (5.1) onto the shaft of the VETEC R Actuator. Place adapter (3) onto Type 3278, VETEC S160 and VETEC R Actuators. For VDI/VDE version, this step depends on the actuator size. 3. Stick adhesive label (4.3) onto the coupling in such a manner that the yellow part of the sticker is visible in the window of the housing when the valve is OPEN. Adhesive labels with explanatory symbols are enclosed and can be stuck on the housing, if required. 4. Fasten coupling (4) on the slotted actuator shaft or adapter (3) using screw (4.1) and disk spring (4.2). Counterclockwise 1 5. Unscrew the standard follower pin (2) from the positioner's M lever (1). Attach the follower pin (Ø 5 mm) included in the mounting kit to pin position 90°. 6. Mount connecting plate (6) for required G ¼ connecting thread or pressure gauge bracket (7) with pressure gauges on the positioner, making sure the two seals (6.1) are seated properly. Double-acting springless rotary actuators require the use of a reversing amplifier on the connection side of the positioner housing (refer to section 4.6). 7. For actuators with a volume of less than 300 cm³, fit the restriction (order no. 1400-6964) into the signal pressure output of the positioner (or the output of the pressure gauge bracket or connecting plate). 8. Place positioner on housing (10) and screw it tight. Taking the actuator's direction of rotation into account, adjust lever (1) so that it engages in the correct slot with its follower pin (Fig. 13). 4.6 Reversing amplifier for double-acting actuators 10 4 Clockwise Fig. 13:Direction of rotation 34 For the use with double-acting actuators, the positioner must be fitted with a reversing amplifier, e.g. the SAMSON Type 3710 Reversing Amplifier (see Mounting and Operating Instructions u EB 8392 EN). If a different reversing amplifier (item no. 1079-1118 or 1079-1119) is used, follow the mounting instructions described in section 4.6.1. EB 8384-5 EN Attachment to the control valve – Mounting parts and accessories 1 Lever 1.1 Nut 1.2 2 3 Disk spring Follower pin Adapter 4 4.1 4.2 Coupling Screw Disk spring 4.3 Adhesive label 5 Actuator shaft or adapter 5.1 Adapter 6 Connecting plate (only for G ¼) 6.1 7 Seals Pressure gauge bracket Pressure gauge mounting kit Adapter housing Screws Spacer 8 10 10.1 11 Fit restriction into signal pressure output for actuators with <300 cm³ volume 6 6.1 7 8 1 1.1 1.2 2 4.1 4.2 4 4.3 4.1 4.2 4 4.3 3 3 5.1 10.1 5 10.1 10 11 10 5 SAMSON Type 3278 VETEC S160, VETEC R Attachment acc. to VDE/VDI 3845 (Sept. 2010) fixing level 1, AA1 to AA4 size (see section 15.1) Fig. 12:Attachment to rotary actuators (heavy-duty version) EB 8384-5 EN 35 Attachment to the control valve – Mounting parts and accessories The following applies to all reversing amplifiers: The signal pressure of the positioner is supplied at the output 1 of the reversing amplifier. An opposing pressure, which equals the required supply pressure (Z) when added to the pressure at output 1, is applied at output 2. The following relationship applies: Output 1 + output 2 = Supply pressure (Z). Connect output 1 to the loading pressure connection on the actuator that causes the valve to open when the pressure rises. Connect output 2 to the loading pressure connection on the actuator that causes the valve to close when the pressure rises. 2. Thread the special nuts (1.3) from the accessories of the reversing amplifier into the boreholes of the connecting plate. 3. Insert the gasket (1.2) into the recess of the reversing amplifier and slide both the hollowed special screws (1.1) into the connecting boreholes A1 and Z. 4. Place the reversing amplifier onto the connecting plate (6) and screw tight using both the special screws (1.1). 5. Use a screwdriver (8 mm wide) to screw the enclosed filters (1.6) into the connection boreholes A1 and Z. NOTICE Air can escape uncontrolled from the signal pressure connection. Do not unscrew the sealing plug (1.5) out of the reversing amplifier. ÎÎ Set slide switch on positioner to AIR TO OPEN. Note: How the outputs are marked depends on the reversing amplifier used: −−Type 3710: Output 1/2 = Y1/Y2 −−1079-1118 and 1079-1119: Output 1/2 = A1/A2 4.6.1 Reversing amplifier (1079-1118 or 10791119) Fig. 14 1. Mount the connecting plate (6) from the accessories in Table 5 to the positioner. Make sure that both O-rings (6.1) are seated correctly. 36 Note: The rubber seal (1.4) is not required and can be removed when the sealing plug is used. 6. After initialization, set Code 16 (Pressure limit) to No. Pressure gauge attachment The mounting sequence shown in Fig. 14 remains unchanged. Screw a pressure gauge bracket onto the connections A1 and Z. Pressure gauge bracket G ¼ ¼ NPT 1400-7106 1400-7107 Pressure gauges for supply air Z and output A1 as listed in Table 1 to Table 7. EB 8384-5 EN Attachment to the control valve – Mounting parts and accessories From the positioner Output 38 A1 Supply 9 Z A2 Control signals to the actuator A1 1.3 A2 1.1 1.2 1 1.4 1.5 1.6 Reversing amplifier 6 Connecting plate 1.1 Special screws 6.1 O-rings 1.2 Gasket 6.2 Screws 1.3 Special nuts 6.1 6 6.2 1.4 Rubber seal 1.5 Sealing plug Supply 9 Z Output 38 1.6 Filter A1 1.3 1.2 1.1 1 1.6 Fig. 14:Mounting a reversing amplifier (1079-1118 or 1079-1119) EB 8384-5 EN 37 Attachment to the control valve – Mounting parts and accessories 4.7 Attachment of external position sensor Positioner unit with sensor mounted on a micro-flow valve Operation and setting are described in sections 7 and 8. −−Since 2009, the back of the position sensor (20) is fitted with two pins acting as mechanical stops for the lever (1). If this position sensor is mounted using old mounting parts, two corresponding Ø 8 mm holes must be drilled into the mounting plate/bracket (21). A template is available for this purpose. See Table 7. −− Required mounting parts and accessories: Table 7 on page 50 In the positioner version with an external position sensor, the sensor located in a separate housing is attached over a plate or bracket to the control valve. The travel pick-off corresponds to that of a standard device. The positioner can be mounted as required to a wall or a pipe. For the pneumatic connection either a connecting plate (6) or a pressure gauge bracket (7) must be fixed to the housing, depending on the accessory chosen. Make sure the seals (6.1) are correctly inserted (see Fig. 5, bottom right). For the electrical connection a 10 meter connecting lead with M12x1 connectors is included in the scope of delivery. 38 Note: −−In addition, the instructions in sections 5.1 and 5.2 apply for the pneumatic and electrical connection. EB 8384-5 EN Attachment to the control valve – Mounting parts and accessories 4.7.1 Mounting the position sensor with direct attachment retracts" is aligned with the marking (Fig. 15, below). −− Make absolutely sure that the gasket for the connecting plate (9) is correctly inserted. Type 3277-5 Actuator with 120 cm² (Fig. 15) −− The connecting plate has threaded holes with NPT and G threads. Seal the threaded connection that is not used with the rubber seal and square plug. The signal pressure from the positioner is routed over the signal pressure connection of the connecting plate (9, Fig. 15 left) to the actuator diaphragm chamber. To proceed, first screw the connecting plate (9) included in the accessories onto the actuator yoke. Type 3277 Actuator with 175 to 750 cm²: The signal pressure is routed to the connection at the side of the actuator yoke for the version with "actuator stem extends" fail-safe −− Turn the connecting plate (9) so that the correct symbol for the fail-safe action "actuator stem extends" or "actuator stem 1 2 3 11 1.1 1.2 20 21 Signal pressure 9 Vent plug Signal pressure Symbol Marking Actuator stem extends retracts 1 1.1 1.2 2 3 9 11 20 21 Lever Nut Disk spring Follower pin Follower clamp Connecting plate Cover Position sensor Mounting plate Fig. 15:Mounting for Type 3277-5 Actuator (left) and Type 3277 Actuator (right) EB 8384-5 EN 39 Attachment to the control valve – Mounting parts and accessories action. For the fail-safe action "actuator stem retracts" the connection on the top diaphragm case is used. The connection at the side of the yoke must be fitted with a venting plug (accessories). Mounting the position sensor 1. Place the lever (1) on the sensor in mid-position and hold it in place. Unthread the nut (1.1) and remove the lever together with the disk spring (1.2) from the sensor shaft. (21) onto the actuator yoke using both fixing screws. 7. Mount cover (11) on the other side. Make sure that the vent plug is located at the bottom when the control valve is installed to allow any condensed water that collects to drain off. 2. Screw the position sensor (20) onto the mounting plate (21). 3. Depending on the actuator size and rated valve travel, determine which lever and position of the follower pin (2) is to be used from the travel table on page 17. The positioner is delivered with the M lever in pin position 35 on the sensor. If necessary, remove the follower pin (2) from its pin position and move it to the hole for the recommended pin position and screw tight. 4. Place the lever (1) and disk spring (1.2) on the sensor shaft. Place the lever in mid-position and hold it in place. Screw on the nut (1.1). 5. Place follower clamp (3) on the actuator stem, align it and screw tight so that the mounting screw is located in the groove of the actuator stem. 6. Place the mounting plate together with the sensor onto the actuator yoke so that the follower pin (2) rests on the top of the follower clamp (3). It must rest on it with spring force. Fasten the mounting plate 40 EB 8384-5 EN Attachment to the control valve – Mounting parts and accessories 4.7.2 Mounting the position sensor with attachment according to IEC 60534-6 120 to 350 cm² actuators with 15 mm rated travel. For other actuator sizes or travels, select the lever and pin position from the travel table on page 17. L and XL levers are included in the mounting kit. −− Required mounting parts and accessories: Table 7 on page 50 3. Place the lever (1) and disk spring (1.2) on the sensor shaft. Place the lever in mid-position and hold it in place. Screw on the nut (1.1). Fig. 16 1. Place the lever (1) on the position sensor in mid-position and hold it in place. Unthread the nut (1.1) and remove the lever together with the disk spring (1.2) from the sensor shaft. 2. Screw the position sensor (20) onto the bracket (21). The standard attached M lever with the follower pin (2) at position 35 is designed for 20 21 1.1, 1.2 14.1 3 14 9.1 4. Screw the two bolts (14) to the bracket (9.1) of the stem connector (9), place the follower plate (3) on top and use the screws (14.1) for fastening. 5. Place the bracket with the sensor at the NAMUR rib in such a manner that the follower pin (2) rests in the slot of the follower plate (3), then screw the bracket using its fixing screws onto the valve. 9 1 1.1 1.2 2 3 9 9.1 14 14.1 20 21 Lever Nut Disk spring Follower pin Follower plate Stem connector Bracket Pin Screws Position sensor Bracket 2 Fig. 16:Mounting according to IEC 60534-6 (NAMUR) EB 8384-5 EN 41 Attachment to the control valve – Mounting parts and accessories 4.7.3 Mounting the position sensor to Type 3510 Micro-flow Valve −− Required mounting parts and accessories: Table 7 on page 50 Fig. 17 1. Place the lever (1) on the position sensor in mid-position and hold it in place. Unscrew the nut (1.1) and remove the standard attached M lever (1) together with the disk spring (1.2) from the sensor shaft. hole for pin position 17. Place the lever (1) and disk spring (1.2) on the sensor shaft. Place the lever in mid-position and hold it in place. Screw on the nut (1.1). 4. Place follower clamp (3) on the valve stem connector, align at a right angle and screw tight. 5. Position the bracket (21) with the position sensor on the valve yoke and screw tight, making sure the follower pin (2) slides into the groove of the follower clamp (3). 2. Screw the position sensor (20) onto the bracket (21). 3. Select the S lever (1) from the accessories and screw the follower pin (2) into the 20 21 1.1 1.2 1 2 3 1 1.1 1.2 2 3 20 21 Lever Nut Disk spring Follower pin Follower clamp Position sensor Bracket Fig. 17:Mounting on a micro-flow valve 42 EB 8384-5 EN Attachment to the control valve – Mounting parts and accessories 4.7.4 Mounting on rotary actuators −− Required mounting parts and accessories: Table 7 on page 50 Fig. 18 1. Place the lever (1) on the position sensor in mid-position and hold it in place. Unthread the nut (1.1) and remove the lever together with the disk spring (1.2) from the sensor shaft. 4. Place the lever (1) and disk spring (1.2) on the sensor shaft. Place the lever in mid-position and hold it in place. Screw on the nut (1.1). Follow the instructions describing attachment to the standard positioner in section 4.5. Instead of the positioner, attach the position sensor (20) with its mounting plate (21). 2. Screw the position sensor (20) onto the mounting plate (21). 3. Replace the follower pin (2) normally attached to the lever (1) with the metal follower pin (Ø 5 mm) from the accessories and screw it into the hole for pin position 90°. 20 21 1 1.1 1.2 2 20 21 2 1 Lever Nut Disk spring Follower pin Position sensor Mounting plate 1.1, 1.2 Fig. 18:Mounting on rotary actuators EB 8384-5 EN 43 Attachment to the control valve – Mounting parts and accessories 4.8 Mounting the leakage sensor Fig. 19 Normally, the control valve is delivered with positioner and leakage sensor already mounted. If the leakage sensor is mounted after the valve has been installed or it is mounted onto another control valve, proceed as described in following. NOTICE Risk of malfunction due to incorrect fastening! Fasten the leakage sensor using a torque of 20 ±5 Nm. 3 2 The M8 threaded connection on the NAMUR rib should preferably be used to mount the sensor (Fig. 19). Tip: If the positioner was mounted directly onto the actuator (integral attachment), the NAMUR interfaces on either side of the valve yoke can be used to mount the leakage sensor. The start-up of the leakage sensor is described in detail in the Operating Instructions for EXPERTplus Valve Diagnostics u EB 8389 EN. 1 1 Leakage sensor 2 Screw 3 Plug connection Fig. 19:Mounting the leakage sensor 44 EB 8384-5 EN Attachment to the control valve – Mounting parts and accessories 4.9 Attaching positioners with stainless steel housings Positioners with stainless steel housings require mounting parts that are completely made of stainless steel or free of aluminum. Note: The pneumatic connecting plate and pressure gauge bracket are available in stainless steel (order numbers listed below). The Type 3710 Pneumatic Reversing Amplifier is also available in stainless steel. Attachment to rotary actuators All mounting kits from Table 5 can be used except for the heavy-duty version. Connecting plate in stainless steel. 4.10Air purging function for single-acting actuators The instrument air leaving from the positioner is diverted to the actuator spring chamber to provide corrosion protection inside the actuator. The following must be observed: Direct attachment to Type 3277-5 (stem extends FA/stem retracts FE) Connecting plate (stainless steel) G ¼ ¼ NPT 1400-7476 1400-7477 The air purging function is automatically provided. Pressure gauge bracket (stainless steel) G ¼ ¼ NPT 1402-0265 1400-7108 Direct attachment to Type 3277, 175 to 750 cm² Table 1 to Table 6 apply for attaching positioners with stainless steel housings with the following restrictions: Direct attachment All mounting kits from Table 1 and Table 2 can be used. The connection block is not required. The stainless steel version of the pneumatic connecting plate routes the air internally to the actuator. Attachment according to IEC 60534-6 (NAMUR rib or attachment to rod-type yokes) All mounting kits from Table 3 can be used. Connecting plate in stainless steel. EB 8384-5 EN FA: Remove the stopper (12.2, Fig. 4) at the black connection block and make a pneumatic connection to the spring chamber on the vented side. NOTICE Mounting possibly incorrect when old powder-paint-coated aluminum connection blocks are used. Mount old powder-paint-coated aluminum connection blocks as described in sections on„Attachment according to IEC 60534-6 (NAMUR rib or attachment to rod-type yokes)“ and „Attachment to rotary actuators“. FE: The air purging function is automatically provided. 45 Attachment to the control valve – Mounting parts and accessories Attachment according to IEC 60534-6 (NAMUR rib or attachment to rod-type yokes) and to rotary actuators The positioner requires an additional port for the exhaust air that can be connected over piping. An adapter available as an accessory is used for this purpose: Threaded bushing (M20 x 1.5) G ¼ 0310-2619 ¼ NPT 0310-2550 Note: The adapter uses one of the M20 x 1.5 connections in the housing which means only one cable gland can be installed. Should other valve accessories be used which vent the actuator (e.g. solenoid valve, volume booster, quick exhaust valve), this exhaust air must also be included in the purging function. The connection over the adapter at the positioner must be protected with a check valve (e.g. check valve G ¼, order no. 8502-0597) mounted in the piping. Otherwise the pressure in the positioner housing would rise above the ambient pressure and damage the positioner when the exhausting components respond suddenly. 4.11Required mounting parts and accessories Table 1: Direct attachment to Type 3277-5 Actuator (Fig. 3) Mounting parts Order no. Standard version for actuators 120 cm² or smaller 1400-7452 Version compatible with paint for actuators 120 cm² or smaller 1402-0940 Old switchover plate for Type 3277-5xxxxxx.00 Actuator (old) 1400-6819 New switchover plate for Type 3277-5xxxxxx.01 Actuator (new) 1) 1400-6822 Accessories for New connecting plate for Type 3277-5xxxxxx.01 Actuator (new) 1), G 1/8 and 1/8 NPT actuator Old connecting plate for Type 3277-5xxxxxx.00 Actuator (old): G 1/8 1400-6820 Old connecting plate for Type 3277-5xxxxxx.00 (old): 1/8 NPT 1400-6821 Connecting plate (6) Accessories for Pressure gauge bracket (7) positioner Pressure gauge mounting kit (8) up to max. 6 bar (output/supply) 1) 1400-6823 G ¼ 1400-7461 ¼ NPT 1400-7462 G ¼ 1400-7458 ¼ NPT 1400-7459 St. steel/brass 1400-6950 St. steel/st. steel 1400-6951 Only new switchover and connecting plates can be used with new actuators (Index 01). Old and new plates are not interchangeable. 46 EB 8384-5 EN Attachment to the control valve – Mounting parts and accessories Table 2: Direct attachment to Type 3277 Actuator (Fig. 4) Mounting parts Order no. Standard version for actuators 175, 240, 350, 355, 700, 750 cm² 1400-7453 Version compatible with paint for actuators 175, 240, 350, 355, 700, 750 cm² Steel 175 cm² St. steel Steel 240 cm² St. steel Steel 350 cm² St. steel Piping with screw fittings – for "actuator stem retracts" fail-safe action – with air purging of the top diaphragm chamber Accessories Steel 355 cm² St. steel Steel 700 cm² St. steel Steel 750 cm² St. steel Connection block with seals and screw Pressure gauge mounting kit up to max. 6 bar (output/ supply) EB 8384-5 EN 1402-0941 G ¼/ G 3/8 1402-0970 ¼ NPT/ 3/8 NPT 1402-0976 G ¼ / G 3/8 1402-0971 ¼ NPT/ 3/8 NPT 1402-0978 G ¼ / G 3/8 1400-6444 ¼ NPT/ 3/8 NPT 1402-0911 G ¼ / G 3/8 1400-6445 ¼ NPT/ 3/8 NPT 1402-0912 G ¼ / G 3/8 1400-6446 ¼ NPT/ 3/8 NPT 1402-0913 G ¼ / G 3/8 1400-6447 ¼ NPT/ 3/8 NPT 1402-0914 G ¼ / G 3/8 1402-0972 ¼ NPT/ 3/8 NPT 1402-0979 G ¼ / G 3/8 1402-0973 ¼ NPT/ 3/8 NPT 1402-0980 G ¼ / G 3/8 1400-6448 ¼ NPT/ 3/8 NPT 1402-0915 G ¼ / G 3/8 1400-6449 ¼ NPT/ 3/8 NPT 1402-0916 G ¼ / G 3/8 1402-0974 ¼ NPT/ 3/8 NPT 1402-0981 G ¼ / G 3/8 1402-0975 ¼ NPT/ 3/8 NPT 1402-0982 G ¼ 1400-8819 ¼ NPT 1402-0901 Stainless steel/brass 1400-6950 St. steel/st. steel 1400-6951 47 Attachment to the control valve – Mounting parts and accessories Table 3: Attachment to NAMUR ribs or control valves with rod-type yokes (20 to 35 mm rod diameter) according to IEC 60534-6 (Fig. 5 and Fig. 9) Travel in mm Lever For actuator 7.5 Type 3271-5 with 60/120 cm² on Type 3510 Micro-flow Valve (Fig. 9) 1402-0478 Actuators from other manufacturers and Type 3271 with 120 to 750 cm² effective areas 1400-7454 S 5 to 50 M 1) Order no. 14 to 100 L Actuators from other manufacturers and Type 3271 with 1000 and 140060 cm² 1400-7455 40 to 200 XL Actuators from other manufacturers and Type 3271 with 1400-120 and 2800 cm² and with 120 mm travel 1400-7456 Type 3271 with 1400-120 and 2800 cm² with 30/60 mm travel 1400-7466 Mounting brackets for Emerson and Masoneilan linear actuators (in addition, a mounting kit according to IEC 60534-6 is required depending on the travel). See rows above. 1400-6771 Valtek Type 25/50 1400-9554 30 or 60 L Connecting plate (6) Accessories Pressure gauge bracket (7) Pressure gauge mounting kit up to max. 6 bar (output/supply) 1) G ¼ 1400-7461 ¼ NPT 1400-7462 G ¼ 1400-7458 ¼ NPT 1400-7459 Stainless steel/brass 1400-6950 St. steel/st. steel 1400-6951 M lever is mounted on basic device (included in the scope of delivery) Table 4: Attachment according to VDI/VDE 3847 (Fig. 6 and Fig. 8) Electropneumatic positioners with VDI/VDE 3847 interface (Type 3730-5xxx0xxxx0x0070xx) Mounting parts 48 Order no. Interface adapter 1402-0257 Mounting kit for attachment to SAMSON Type 3277 Actuator 1402-0868 Mounting kit for attachment to SAMSON Type 3271 Actuator or non-SAMSON actuators 1402-0869 Travel pick-off for valve travel up to 100 mm 1402-0177 Travel pick-off for 100 to 200 mm valve travel (SAMSON Type 3271 Actuator only) 1402-0178 EB 8384-5 EN Attachment to the control valve – Mounting parts and accessories Table 5: Attachment to rotary actuators (Fig. 10 and Fig. 11) Order no. Attachment acc. to VDI/VDE 3845 (September 2010), see section 15.1 for details Actuator surface corresponds to fixing level 1 Mounting parts Size AA1 to AA4, version with CrNiMo steel bracket 1400-7448 Size AA1 to AA4, heavy-duty version 1400-9244 Size AA5, heavy-duty version (e.g. Air Torque 10 000) 1400-9542 Bracket surface corresponds to fixing level 2, heavy-duty version 1400-9526 Attachment for rotary actuators with max. 180° opening angle, fixing level 2 1400-8815 and 1400-9873 Attachment to SAMSON Type 3278 with 160/320 cm², CrNiMo steel bracket 1400-7614 Attachment to SAMSON Type 3278 with 160 cm² and to VETEC Type S160, Type R and Type M, heavy-duty version 1400-9245 Attachment to SAMSON Type 3278 with 320 cm² and to VETEC Type S320, heavy-duty version 1400-5891 and 1400-9526 Attachment to Camflex II 1400-9120 G ¼ Connecting plate (6) Accessories Pressure gauge bracket (7) Pressure gauge mounting kit up to max. 6 bar (output/supply) 1400-7461 ¼ NPT 1400-7462 G ¼ 1400-7458 ¼ NPT 1400-7459 St. steel/brass 1400-6950 St. steel/brass 1400-6951 Table 6: General accessories Order no. Reversing amplifier for double-acting actuators Type 3710 Cable gland M20 x 1.5, Adapter M20x1.5 to ½ NPT Black plastic (6 to 12 mm clamping range) 8808-1011 Blue plastic (6 to 12 mm clamping range) 8808-1012 Nickel-plated brass (6 to 12 mm clamping range) 1890-4875 Nickel-plated brass (10 to 14 mm clamping range) 1922-8395 Stainless steel 1.4305 (8 to 14.5 mm clamping range) 8808-0160 Powder-coated aluminum 0310-2149 Stainless steel 1400-4114 Retrofit kit for inductive limit switch 1 x SJ2-SN Cover plate with list of parameters and operating instructions 1400-7460 DE/EN (delivered state) 1990-0761 EN/ES 1990-3100 EN/FR 1990-3142 TROVIS-VIEW 6661 with device module Type 3730-5 EB 8384-5 EN 49 Attachment to the control valve – Mounting parts and accessories Table 6: General accessories Order no. Serial interface adapter (SAMSON SSP interface to RS-232 port on a PC) 1400-7700 Isolated USB interface adapter (SAMSON SSP interface to USB port on a PC) including TROVIS-VIEW CD-ROM 1400-9740 Table 7: Attachment of external position sensor Order no. Template for mounting position sensor on older mounting parts. See note on page 38 1060-0784 Mounting parts for actuators with 120 cm². See Fig. 15 (left). Direct attachment 1400-7472 1400-6820 G 1/8 Connecting plate (9, old) with Type 3277-5xxxxxx.00 Actuator NPT 1400-6821 1/8 Connecting plate (new) with Type 3277-5xxxxxx.01 Actuator (new) 1) 1400-6823 Mounting parts for actuators with 175, 240, 350, 355 and 700 cm². See Fig. 15 (right). 1400-7471 NAMUR attachment Mounting parts for attachment to NAMUR rib using L or XL lever. See Fig. 16. 1400-7468 Attachment to Type 3510 Microflow Valve Mounting parts for Type 3271 Actuator with 60 cm². See Fig. 17. 1400-7469 VDI/VDE 3845 (September 2010), see section 15.1 for details. Actuator surface corresponds to fixing level 1 Attachment to rotary actuators Size AA1 to AA4 with follower clamp and coupling wheel, version with CrNiMo steel bracket. See Fig. 18. 1400-7473 Size AA1 to AA4, heavy-duty version 1400-9384 Size AA5, heavy-duty version (e.g. Air Torque 10 000) 1400-9992 Bracket surface corresponds to fixing level 2, heavy-duty version 1400-9385 SAMSON Type 3278 with 320 cm² and VETEC Type S320, heavy-duty version 1400-5891 and 1400-9974 Connecting plate (6) Accessories for positioner 1400-9974 SAMSON Type 3278 with 160 cm² and VETEC Type S160 and Type R, heavy-duty version Pressure gauge bracket (7) Pressure gauge mounting kit up to max. 6 bar (output/supply) 1400-7461 G ¼ ¼ NPT 1400-7462 G ¼ 1400-7458 ¼ NPT 1400-7459 Stainless steel/brass 1400-6950 Stainless steel/stainless steel 1400-6951 Bracket to mount the positioner on a wall (Note: The other fastening parts are to be provided at the site of installation as wall foundations vary from site to site). 1) 0309-0111 Only new connecting plates can be used with new actuators (Index 01). Old and new plates are not interchangeable. 50 EB 8384-5 EN Connections 5 Connections WARNING! Risk of injury due to the actuator stem extending or retracting. Do not touch or block the actuator stem. NOTICE Risk of malfunction due to incorrect sequence of mounting, installation and start-up. Keep the following sequence. 1.Remove the protective film from the pneumatic connections. 2.Mount the positioner on the control valve. 3.Connect the supply air. 4.Connect the electrical power. 5.Perform the start-up settings. 5.1 Pneumatic connections NOTICE Risk of malfunction due to incorrect connection of the supply air. Do not connect the compressed air directly to the threaded connections in the positioner housing. Screw the screw fittings into the connecting plate, pressure gauge mounting block or connection block from the accessories. The pneumatic connections in the connecting plate, pressure gauge mounting block and connection block are optionally designed as EB 8384-5 EN a bore with ¼ NPT or G ¼ thread. Customary fittings for metal or copper tubing or plastic hoses can be used. NOTICE Risk of malfunction due to failure to comply with required air quality. Only use supply air that is dry and free of oil and dust. Read the maintenance instructions for upstream pressure reducing stations. Blow through all air pipes and hoses thoroughly before connecting them. If the positioner is attached directly to the Type 3277 Actuator, the connection of the positioner's output pressure to the actuator is fixed. For attachment according to IEC 60534-6 (NAMUR), the signal pressure can be routed to either the top or bottom diaphragm chamber of the actuator, depending on the actuator's fail-safe action "actuator stem extends" or "actuator stem retracts". For rotary actuators, the manufacturer's specifications for connection apply. 5.1.1 Signal pressure gauges To monitor the supply air (supply) and signal pressure (output), we recommend mounting pressure gauges (see accessories in Table 1to Table 6). 5.1.2 Supply pressure The required supply air pressure depends on the bench range and the actuator's operating direction (fail-safe action). 51 Connections The bench range is written on the nameplate either as the spring range or signal pressure range depending on the actuator. The direction of action is marked FA or FE, or by a symbol. Actuator stem extends FA (AIR TO OPEN) Fail-close (for globe and angle valves): Required supply pressure = Upper bench range value + 0.2 bar, at least 1.4 bar. Actuator stem retracts FE (AIR TO CLOSE) Fail-open (for globe and angle valves): For tight-closing valves, the maximum signal pressure pstmax is roughly estimated as follows: pstmax = F + d² · π · ∆p 4·A [bar] d = Seat diameter [cm] 5.2 Electrical connections DANGER! Risk of electric shock and/or the formation of an explosive atmosphere. For electrical installation, observe the relevant electrotechnical regulations and the accident prevention regulations that apply in the country of use. In Germany, these are the VDE regulations and the accident prevention regulations of the employers’ liability insurance. The following regulations apply to installation in hazardous areas: EN 60079-14: 2008 (VDE 0165, Part 1) Explosive Atmospheres – Electrical Installations Design, Selection and Erection. ∆p = Differential pressure across the valve [bar] A = Actuator diaphragm area [cm²] F = Upper bench range value of the actuator [bar] If there are no specifications, calculate as follows: Required supply pressure = Upper bench range value + 1 bar 5.1.3 Signal pressure (output) The signal pressure at the output (38) of the positioner can be restricted to 1.4 bar, 2.4 bar or 3.7 bar in Code 16. The limitation is not activated [No] by default. 52 WARNING! Incorrect electrical connection will render the explosion protection unsafe. Adhere to the terminal assignment. Do not undo the enameled screws in or on the housing. Do not exceed the maximum permissible values specified in the EC type examination certificates when interconnecting intrinsically safe electrical equipment (Ui or U0, li or I0, Pi or P0, Ci or C0 and Li or L0). EB 8384-5 EN Connections Selecting cables and wires Equipment for use in zone 2/zone 22 Observe clause 12 of EN 60079-14: 2008 (VDE 0165, Part 1) for installation of the intrinsically safe circuits. In equipment operated according to type of protection Ex nA II (non-sparking equipment) according to EN 60079-15: 2003, circuits may be connected, interrupted or switched while energized only during installation, maintenance or repair. Equipment connected to energy-limited circuits with type of protection Ex nL (energy-limited equipment) according to EN 60079-15: 2003 may be switched under normal operating conditions. The maximum permissible values specified in the statement of conformity and its addenda apply when interconnecting the equipment with energy-limited circuits in type of protection Ex nL IIC. Clause 12.2.2.7 applies when running multicore cables and wires with more than one intrinsically safe circuit. The radial thickness of the insulation of a conductor for common insulating materials (e.g. polyethylene) must not be smaller than 0.2 mm. The diameter of an individual wire in a fine-stranded conductor must not be smaller than 0.1 mm. Protect the conductor ends against splicing, e.g. by using wire-end ferrules. When two separate cables or wires are used for connection, an additional cable gland can be installed. Seal cable entries left unused with plugs. Fit equipment used in ambient temperatures below –20 °C with metal cable entries. G Cable entry Cable entry with M20 x 1.5 cable gland. See section on Accessories for clamping range. u Option +81 -82 IEC 1158-2 +87 -88 +85 -86 +41 -42 A B Leakage sensor 24 V DC Forced venting func- Bus line tion with solenoid valve (optional) BE1 BE2 (optional) Binary contacts Switching amplifier EN 60947-5-6 Inductive limit switch (optional) Fig. 20:Electrical connections EB 8384-5 EN 53 Connections There is a second M20 x 1.5 threaded hole in the housing that can be used for additional connection, when required. The screw terminals are designed for wire cross-sections of 0.2 to 2.5 mm². Tighten by at least 0.5 Nm. Note: The power supply for the positioner can be supplied either over the connection to the fieldbus segment or over a DC voltage source (9 to 32 V) connected to the bus terminals in the positioner. Observe the relevant regulations for installation in hazardous areas. Accessories Cable glands M20 x 1.5 8808-1011 Blue plastic (6 to 12 mm clamping range) 8808-1012 Nickel-plated brass (6 to 12 mm clamping range) 1890-4875 Nickel-plated brass (10 to 14 mm clamping range) 1922-8395 Stainless steel 1.4305 (8 to 14.5 mm clamping range) 8808-0160 EMC cable gland M20 x 1.5: 8808-0143 Adapter M20x1.5 to ½ NPT Powder-coated aluminum 0310-2149 Stainless steel 1400-7114 54 Route the two-wire bus line to the screw terminals marked "IEC 1158-2", whereby no polarity needs to be observed. To connect the limit switch, binary inputs, and forced venting, an additional cable gland that needs to be fitted in place of the existing blanking plug is necessary. NOTICE Degree of protection may be impaired. Do not use the positioner with open cable glands. Seal cable glands left unused with blanking plugs. Limit switch Order no. Black plastic (6 to 12 mm clamping range) Nickel-plated brass (7 to 12 mm clamping range) Bus line The operation of the limit switch requires a switching amplifier to be connected in the output circuit. Its function is to control the limit values of the control circuit according to EN 60947-5-6, thus ensuring operational reliability of the positioner. Observe the relevant regulations for installation in hazardous areas. Binary input BI1 An active contact can be operated at binary input 1. The positioner can report the switching state over the bus protocol. Binary input BI2 A passive, floating contact can be operated at binary input 2. The positioner can report the switching state over the bus protocol. EB 8384-5 EN Connections Power Conditioner Supply unit Process control system FOUNDATION™ fieldbus IEC 61158-2 Bus termination 3730-50 FOUNDATION™ fieldbus IEC 61158-2 3730-50 3730-50 3730-50 Power Conditioner Supply unit Process control system FOUNDATION™ fieldbus IEC 61158-2 Ex fieldbus barrier/isolator FOUNDATION™ fieldbus IEC 61158-2 Hazardous area Bus termination 3730-51 3730-51 3730-51 3730-51 Fig. 21:Connection acc. to FOUNDATION™ fieldbus, for safe areas (top) and for hazardous areas (bottom) EB 8384-5 EN 55 Connections Solenoid valve (forced venting function) For positioners fitted with the optional solenoid valve for the forced venting function, a voltage of 24 V DC must be connected to the relevant terminals +81 and –82. If there is no voltage connected for the solenoid valve at terminals +81 and –82 or when the voltage signal is interrupted, the positioner vents the actuator. NOTICE The actuator does not respond to the set point when the voltage is too low. Observe the switching thresholds specified in the technical data. Bus parameters: u KH 8384-5 EN −−FEATURES_SEL (RES) > FAULTSTATE −−XD_FSTATE_OPT (AO TRD): Action on fault detection −−XD_FSTATE_VAL (AO FB): Fault state value TROVIS-VIEW: The parameters can be found in the folder [Settings > Positioner (AO, TRD) > Fail-safe action]. The action selected only takes effect if the positioner is powered. Should a power failure occur at the same time, the actuator is vented and the valve moves to the fail-safe position. 5.2.1 Establishing communication The communication structure between the controller, logic solvers (PLC) or automation system, or between a PC or work station and the positioner(s) is implemented to conform with IEC 61158-2. 56 Note: The action of the positioner upon failure of the FOUNDATION™ fieldbus communication can be determined over the bus parameters or over the SAMSON TROVIS-VIEW software: −−The valve remains in its last position. −−The valve moves to the fail-safe position. −−The valve moves to a defined fault state value. EB 8384-5 EN Operating controls and readings 6 Operating controls and readings Rotary pushbutton The rotary pushbutton is located underneath the front protective cover. The positioner is operated on site using the rotary pushbutton: Turn Press : Select codes and values : Confirm setting AIR TO OPEN/AIR TO CLOSE slide switch −− AIR TO OPEN applies to a valve opening as the signal pressure increases. −− AIR TO CLOSE applies to a valve closing as the signal pressure increases. AIR TO OPEN always applies to positioners with a mounted reversing amplifier for double-acting rotary actuators (connections according to section 4.6). Volume restriction Q The volume restriction serves to adapt the air output capacity to the size of the actuator. Depending on the air passage at the actuator, two fixed settings are available. −− For actuators smaller than 240 cm² and with a loading pressure connection at the side (Type 3271-5), set restriction to MIN SIDE. −− For a connection at the back (Type 32775), set restriction to MIN BACK. % The signal pressure is the pneumatic pressure mm −− For actuators 240 cm² and larger, set to at the output of the positioner applied to the % MAX SIDE for a side connection and to actuator. S MAX BACK for a connection at the back. mm Initialization key Cap and rotary switch Metal tag of proximity switch SSP interface CLOSE AIR TO OPEN SERIAL INTERFACE CAUTION VALVE ACTUATES INIT Switch for AIR TO OPEN/AIR TO CLOSE % mm mm S % Volume restriction Q MAX BACK MIN SIDE MIN BACK MAX SIDE Rotary pushbutton Fig. 22:Operating elements EB 8384-5 EN 57 Operating controls and readings Readings Status messages Icons assigned to certain codes, parameters and functions are indicated on the display. −− −− Operating modes: −− Manual mode (see section 8.2.1) The positioner follows the manual set point (Code 1) instead of the set point of the Analog Output Block. blinks: The positioner is not initialized. Operation only possible over manual set point (Code 1). −− Automatic mode (see section 8.2.1) The positioner is in closed-loop operation and follows the set point of the Analog Output Block. −− S SAFE (see section 8.2.2) The positioner vents the output. The valve moves to the mechanical fail-safe position. Maintenance alarm Maintenance demanded/ Maintenance required −− blinks: Out of specification These icons indicate that an error has occurred. A classified status can be assigned to each error. Classifications include “No message”, “Maintenance required”, “Maintenance demanded” and “Maintenance alarm” (see section 8.3). Enable configuration This indicates that the codes marked with an asterisk (*) in the code list (section 14) are enabled for configuration (see section 8.1). Bar graph: In manual and automatic modes, the bars indicate the set point deviation that depends on the sign (+/–) and the value. One bar element appears per 1 % set point deviation. If the positioner has not been initialized, ( blinks on the display), the bar graph indicates the lever position in degrees in relation to the mid-axis. One bar element corresponds to approximately a 5° angle of rotation. The fifth bar element blinks (reading >30°) if the permissible angle of rotation has been exceeded. Lever and pin position must be checked. 58 EB 8384-5 EN Operating controls and readings Manual mode Closed-loop operation mm S Enable Configuration MAX Maximum range No Not available/not active NOM Rated travel RES Reset RUN Start SAFE Fail-safe position SUb Substitute calibration TunE Initialization in progress YES Available/active ZP Zero calibration tEStinG Test function active Increasing/increasing Increasing/decreasing mm Manual setting % w too low MAN S % and together: AO Transducer Block is in the MAN mode u KH 8384-5 EN Q LOW S blinking: Valve in mechanical fail-safe position (see SET_FAIL_SAFE_POS parameter in the AO Transducer Block (AO TRD) mm u KH 8384-5 EN MAX BACK MIN SIDE Cancel MIN BACK MAX SIDE Error ESC AIR TO OPEN Err blinking: positioner not initialized CLOSE Counterclockwise Binary contact 2 SERIAL INTERFACE CCL CAUTION VALVE ACTUATES Automatic Clockwise % Maintenance demanded Fail-safe position active Maintenance required Blinking icon: out of specification INIT AUtO CL Units mm Binary contact 1 Code Bar graph for set point deviation or lever position Designation Position Parameters % Malfunction/fault and S both blinking: The positioner is manual mode while the mechanical fail-safe position (SET_FAIL_SAFE_POS) has been demanded over the fieldbus. After exiting the manual position, the valve moves to the fail-safe position. blinking: emergency mode (see error code 62 on page 92) Fig. 23:Display EB 8384-5 EN 59 Start-up and settings 7 Start-up and settings NOTICE Risk of malfunction due to incorrect sequence of mounting, installation and start-up. Keep the following sequence. 1.Remove the protective film from the pneumatic connections. 2.Mount the positioner on the control valve. 3.Connect the supply air. 4.Connect the electrical power. 5.Perform the start-up settings. Reading after connecting the electrical power supply: tEStinG runs across the display and then the fault alarm icon appears and blinks on the display when the positioner has not been initialized. The reading indicates the lever position in degrees in relation to the mid-axis. Reading when the positioner has not yet been initialized Code 0 appears on the display when a positioner has been initialized. The positioner is in the last active operating mode. WARNING! Risk of injury due to the actuator stem extending or retracting. 60 Do not touch or block the actuator stem. Note: The positioner performs a test in the start-up phase while following its automation task at the same time. During the start-up phase, operation on site is unrestricted, yet write access is limited. Perform the start-up settings in the same sequence as described (section 7.1 to section 7.6). 7.1 Defining the valve closed position Define the closed position of the valve (0 %) taking the valve type and the actuator's direction of action into account. Position the AIR TO OPEN/AIR TO CLOSE slide switch accordingly: −− AIR TO OPEN setting Signal pressure opens the valve e.g. for a fail-close valve The AIR TO OPEN (AtO) setting always applies to double-acting actuators. −− AIR TO CLOSE setting Signal pressure closes the valve e.g. for a fail-open valve For checking purposes: After successfully completing initialization, the positioner display must read 0 % when the valve is closed and 100 % when the valve is open. If this is EB 8384-5 EN Start-up and settings not the case, change the slide switch position and re-initialize the positioner. Note: The switch position is prompted prior to an initialization. After an initialization has been completed, changing the switch position does not have any effect on the operation of the positioner. 7.2 Adjusting the volume restriction Q MAX BACK MIN SIDE MIN BACK MAX SIDE Q −− The SIDE position applies for actuators with a loading pressure connection at the side, e.g. Type 3271-5. −− The BACK position applies for actuators with a loading pressure connection at the back, e.g. Type 3277-5. −− The SIDE restriction position always applies for actuators from other manufacturers. Overview · Position of the volume restriction Q* Signal pressure Transit time <1 s ≥1 s Connection at the side MIN SIDE MAX SIDE Connection at the back MIN BACK MAX BACK * Intermediate settings are not permitted. The volume restriction Q serves to adapt the air output capacity to the size of the actuator: NOTICE Malfunction due to changed start-up settings. Initialize an initialized positioner again after the position of the volume restriction has been changed. −− Actuators with a transit time < 1 s, e.g. linear actuators with an effective area smaller than 240 cm², require a restricted air flow rate (MIN). 7.3 Adapting the display direction −− Actuators with a transit time ≥ 1 s do not require the air flow rate to be restricted (MAX). To adapt the reading on the display to the mounting situation of the actuator, the display contents can be turned by 180°. Fig. 24:Volume restriction Q MAX BACK/MIN SIDE setting The position of volume restriction Q also depends on how the signal pressure is routed at the actuator in SAMSON actuators: EB 8384-5 EN 61 Start-up and settings Turn Reading direction for right attachment of pneumatic connections g Code 3, display: No Press , Code 3 blinks. Turn YES Press , display: Limit the signal pressure: Reading direction for left attachment of pneumatic connections If the displayed data appear upside down, proceed as follows: Turn Code 2 Press , Code 2 blinks. Turn Required reading direction Press to confirm reading direction. 7.4 Limiting the signal pressure If the maximum actuator force may cause damage to the valve, the signal pressure must be limited. Enable configuration at the positioner before limiting the signal pressure: Note: If no settings are entered within 120 seconds, the enabled configuration function becomes invalid. Enable configuration Default: No 62 Pressure limit Default: No Turn Code 16 Press , Code 16 blinks. Turn until the required pressure limit (1.4/2.4/3.7 bar) appears. Press to confirm the pressure limit setting. 7.5 Checking the operating range of the positioner To check the mechanical attachment and the proper functioning, the valve should be moved through the operating range of the positioner in the manual mode with the manual set point. Select manual mode: Operating mode Default MAN Turn Code 0 Press , Code 0 blinks. Turn MAN EB 8384-5 EN Start-up and settings Press . The positioner changes to the manual mode ( ). Check the operating range: Manual set point w (current angle of rotation is indicated) Turn Code 1 Press , Code 1 and WARNING! Risk of injury due to the actuator stem extending or retracting. Before exchanging the lever or changing the pin position, disconnect the supply air and electrical auxiliary power. 7.6 Initialization blink. until the pressure in the positioner Turn builds up, and the control valve moves to its final positions so that the travel/angle can be checked. The angle of rotation of the lever on the back of the positioner is indicated. A horizontal lever (mid position) is equal to 0°. To ensure the positioner is working properly, the outer bar elements must not blink while the valve is moving through the operating range. Exit Code 1 by pressing the rotary pushbutton ( ). The permissible range has been exceeded when the displayed angle is more than 30° and the outer right or left bar element blinks. The positioner goes to the fail-safe position (SAFE). After canceling the fail-safe position (SAFE) (see section 8.2.2) it is absolutely essential that you check the lever and pin position as described in section 4. NOTICE The process is disturbed by the movement of the actuator stem. Do not initialize the positioner while the process is running; only perform an initialization during start-up with the shut-off valves closed. A signal pressure above the maximum permissible limit will damage the valve. Check the maximum permissible signal pressure of the control valve before starting initialization. If necessary, limit the signal pressure by connecting an upstream pressure reducing valve. Malfunction due to changed mounting or installation circumstances. Reset the positioner to its default settings and re-initialize it after the positioner has been mounted on to another actuator or its mounting location has been changed. During initialization the positioner adapts itself optimally to the friction conditions and EB 8384-5 EN 63 Start-up and settings the signal pressure required by the control valve. The type and extent of auto tuning depends on the initialization mode selected: Bar graph display indicating the progress of the initialization −− Maximum range (MAX) (standard range) Initialization mode for simple start-up of valves with two clearly defined mechanical end positions, e.g. three-way valves (see section 7.6.1) −− Nominal range (NOM) Initialization mode for all globe valves (see section 7.6.2) −− Manually selected range (MAN) Initialization mode for globe valves with an unknown nominal range (see section 7.6.3) −− Substitute calibration (SUb) This mode allows a positioner to be replaced while the plant is running, with the least amount of disruption to the plant (see section 7.6.4). Note: For normal operation, simply start initialization by pressing the INIT key after mounting the positioner on the valve and defining the fail-safe position and setting the volume restriction. The positioner only needs to work with its default settings. If necessary, perform a reset (see section 7.8). Alternating readings Initialization in progress Icon depending on initialization mode selected 64 % Initialization successfully completed. Positioner in automatic mode ( ) The time required for the initialization procedure depends on the actuator transit time and can take a few minutes. After a successful initialization, the positioner runs in closed-loop operation indicated by the closed-loop operation icon. A malfunctioning leads to the process being canceled. The initialization error appears on the display according to how it has been classified by the condensed state. Refer to section 8.3. Note: When Code 48 - h0 = YES, the diagnostics automatically start to plot the reference graphs (drive signal steadystate d1 and hysteresis d2) after initialization has been completed. This is indicated by tESt and d1 or d2 appearing on the display in alternating sequence. An error during the plotting of the reference graphs is indicated on the display over Code 48 - h1 and Code 81. The reference graphs do not have any effect on closed-loop operation. EB 8384-5 EN Start-up and settings Closed position AIR TO CLOSE If the slide switch is set to AIR TO CLOSE, the positioner automatically switches to the direction of action increasing/decreasing (äæ) after initialization has been completed. This results in the following assignment between set point and valve position: Set point Closed position Direction of action Actuator stem extends (FA) Valve CLOSED at OPEN at 0 % 100 % 100 % 0 % AIR TO OPEN Actuator stem retracts (FE) 7.6.1 MAX – Initialization based on maximum range The positioner determines travel/angle of rotation of the closing member from the CLOSED position to the opposite travel stop and adopts this travel/angle of rotation as the operating range from 0 to 100 %. Enable configuration: Note: If no settings are entered within 120 seconds, the enabled configuration function becomes invalid. AIR TO CLOSE The tight-closing function has been activated. Default: No Set Code 15 (final position w>) to 99 % for three-way valves. Canceling an initialization process An initialization procedure in progress can be canceled by pressing the rotary pushbutton ( ). STOP appears for three seconds on the display and the positioner then changes to the fail-safe position. Exit the fail-safe position again over Code 0 (see section 8.2.2). Turn g Code 3, display: No Press , Code 3 blinks. Turn YES Press , display: Select the initialization mode: Default MAX EB 8384-5 EN Turn Code 6 Press . Turn MAX 65 Start-up and settings Press to confirm the MAX as the initialization mode. Start initialization: ÎÎ Press INIT key. The nominal travel/angle of rotation is indicated in % after initialization. Code 5 (nominal range) remains locked. The parameters for travel/angle range start (Code 8) and travel/angle range end (Code 9) can also only be displayed and modified in %. out collision. If this is the case, the indicated nominal range is adopted with the limits of travel/angle range start (Code 8) and travel/angle range end (Code 9) as the operating range. For a reading in mm/°, enter the pin position (Code 4). Enter the pin position: mm Pin position Default: No Turn Code 4 Press , Code 4 blinks. Note: The maximum possible travel must always be greater than the nominal travel entered. If this is not the case, initialization is automatically canceled (error message Code 52) because the nominal travel could not be achieved. Enable configuration: Note: If no settings are entered within 120 seconds, the enabled configuration function becomes invalid. Pin position on lever (see relevant Turn section on attachment) Press . The reading of the nominal range appears in mm/°. 7.6.2 NOM – Initialization based on nominal range Default: No Turn g Code 3, display: No Press , Code 3 blinks. Turn YES Press , display: The calibrated sensor allows the effective valve travel to be set very accurately. During initialization, the positioner checks whether the control valve can move through the indicated nominal range (travel or angle) with- 66 EB 8384-5 EN Start-up and settings Enter the pin position and nominal range: mm Pin position Default: No mm Nominal range (locked when Code 4 = No) ÎÎ After initialization, check the direction of action (Code 7) and, if necessary, change it. 7.6.3 MAN – Initialization based on a manually selected range Press , Code 5 blinks. Before starting initialization, move the control valve manually to the OPEN position. Turn the rotary pushbutton ( ) clockwise in small steps. The valve must be moved with a monotonically increasing signal pressure. The positioner calculates the differential travel/angle from the OPEN and CLOSED positions and adopts it as the operating range with limits of lower travel/angle range value (Code 8) and upper travel/angle range value (Code 9). Turn Nominal travel of the valve Enable configuration: Press . Turn Code 4 Press , Code 4 blinks. Pin position on lever (see relevant Turn section on attachment) Press . Turn Code 5 Select the initialization mode: Note: If no settings are entered within 120 seconds, the enabled configuration function becomes invalid. Init mode Default MAX Turn Code 6 Press , Code 6 blinks. Turn NOM Enable configuration Default: No Turn g Code 3, display: No to confirm the NOM as the initialPress ization mode. Press , Code 3 blinks. Turn YES Start initialization: Press , display: ÎÎ Press INIT key. EB 8384-5 EN 67 Start-up and settings Enter the pin position: mm Pin position Default: No Code 4 Press , Code 4 blinks. Pin position on lever (see relevant Turn section on attachment) . Select the initialization mode: Init mode Default MAX Turn Code 6 Press , Code 6 blinks. Turn MAN to confirm the MAN as the initialPress ization mode. Enter OPEN position: Manual set point (current angle of rotation is indicated) Turn Code 0 Press , Code 0 blinks. Turn MAN Press . Turn Code 1 68 , Code 1 blinks. Turn sition. until the valve reaches its OPEN po- Press to confirm the OPEN position. Start initialization: Turn Press Press ÎÎ Press INIT key. 7.6.4 SUb – Substitute calibration A complete initialization procedure takes several minutes and requires the valve to move through its entire travel range several times. This initialization mode, however, is an emergency mode, in which the control parameters are estimated and not determined by an initialization procedure. As a result, a high level of accuracy cannot be expected. You should always select a different initialization mode if the plant allows it. The substitute calibration is used to replace a positioner while the process is running. For this purpose, the control valve is usually fixed mechanically in a certain position, or pneumatically by means of a pressure signal which is routed to the actuator externally. The blocking position ensures that the plant continues to operate with this valve position. By entering the blocking position (Code 35), closing direction (Code 34), pin position (Code 4), nominal range (Code 5) and direction of action (Code 7), the positioner can calculate the positioner configuration. EB 8384-5 EN Start-up and settings NOTICE Perform a reset before re-initializing the positioner if the substitute positioner has already been initialized. Refer to section 7.8. Enable configuration: Note: If no settings are entered within 120 seconds, the enabled configuration function becomes invalid. Enable configuration Default: No Turn g Code 3, display: No Press , Code 3 blinks. Turn YES Press , display: Pin position on lever (see relevant Turn section on attachment) Press . Turn Code 5 Press , Code 5 blinks. Turn Nominal travel of the valve Press . Select the initialization mode: Init mode Default MAX Turn Code 6 Press . Turn SUb to confirm the SUb as the initializaPress tion mode. Enter the direction of action: Enter the pin position and nominal range: mm mm Pin position Default: No Nominal range (locked when Code 4 = No) Turn Code 4 Press , Code 4 blinks. EB 8384-5 EN Direction of action Default ÖÖ Turn Code 7 Press , Code 7 blinks. Turn Direction of action (ää/äæ) Press . 69 Start-up and settings Deactivate travel limit: Travel limit Default: No Press , Code 16/17/18 blinks. Turn ed. to set the control parameter select- Press to confirm the setting. Enter closing direction and blocking position: Turn Code 11 Press , Code 11 blinks. Turn g No Press . Closing direction (direction of rotation causing the valve to move to the CLOSED position (view onto positioner display) Default: CCL (counterclockwise) Change pressure limit and control parameters: mm Note: Do not change the pressure limit (Code 16). Only change the control parameters KP (Code 17) and TV (Code 18) if the settings of the the replaced positioner are known. Pressure limit Default: No KP level Default 7 TV level Default 2 Turn 70 Code 16/17/18 Blocking position Default 0 Turn Code 34 Press , Code 34 blinks. Closing direction (CCL = counterTurn clockwise/CL = clockwise) Press . Turn Code 35 Press , Code 35 blinks. Blocking position, e.g. 5 mm Turn (read off at travel indicator scale of the blocked valve or measure with a ruler). Set the fail-safe position: ÎÎ Set switch for closed position AIR TO OPEN or AIR TO CLOSE according to section 7.1. ÎÎ Set volume restriction as described in section 7.2. Start initialization: ÎÎ Press INIT key. EB 8384-5 EN Start-up and settings The positioner switches to MAN mode. The blocking position is indicated. Note: Since initialization has not been completed, the error code 76 (no emergency mode) and possibly also error code 57 (control loop) may appear on the display. These alarms do not influence the positioner’s readiness for operation. Cancel the blocking position and change to automatic mode (AUTO): For the positioner to follow its set point again, the blocking position must be canceled and the positioner must be set to automatic mode as follows: Turn Code 1 Press , Code 1 and If the positioner still oscillates, the gain KP (Code 17) must be decreased until the positioner shows a stable behavior. Zero point calibration Finally, if process operations allow it, the zero point must be calibrated according to section 7.7. 7.7 Zero calibration In case of inconsistencies in the closed position of the valve, e.g. with soft-seated plugs, it might be necessary to recalibrate zero. NOTICE The process is disturbed by the movement of the actuator stem. Do not perform zero calibration while the process is running. First isolate the plant by closing the shut-off valves. blink. in order to move the valve slightly Turn past the blocking position. Press to cancel mechanical blocking. Turn Code 0 Press , Code 0 blinks. Turn AUtO Press . The positioner switches to automatic mode. The current valve position is indicated in %. Note: If the positioner shows a tendency to oscillate in automatic mode, the parameters KP and TV must be slightly corrected. Proceed as follows: Set TV (Code 18) to 4. EB 8384-5 EN Note: The positioner must be connected to the supply air to perform the zero calibration. Enable configuration: Turn g Code 3, display: No Press , Code 3 blinks. Turn YES Press , display: 71 Start-up and settings Perform zero calibration: Init mode Default MAX Turn Code 6 Press , Code 6 blinks. Turn ZP Press . All start-up parameters as well as the diagnosis are reset to their default values. Note: Code 36 - diAG allows just the diagnosis data (EXPERTplus) to be reset. Refer to the Operating Instructions for EXPERTplus valve diagnostics u EB 8389 EN. ÎÎ Press INIT key. Zero calibration starts. The positioner moves the valve to the CLOSED position and recalibrates the internal electrical zero point. 7.8 Reset to default settings This function resets all start-up parameters as well as the diagnosis to the factory default settings (see code list in section 14). Enable configuration: Turn g Code 3, display: No Press , Code 3 blinks. Turn YES Press , display: Reset start-up parameters: Reset Default: No Turn g Code 36, display: ••–••– Press , Code 36 blinks. Turn Std 72 EB 8384-5 EN Operation 8 Operation Turn WARNING! Risk of injury due to the actuator stem extending or retracting. Do not touch or block the actuator stem. Press to activate the selected code. The code number starts to blink. Turn Press 8.1 Enabling and selecting parameters All codes and their meaning and default settings are listed in the code list in section 14. to select the required code. to select the setting. to confirm the selected setting. Note: If no settings are entered within 120 seconds, the enabled configuration function becomes invalid and the display returns to Code 0. Cancel the setting: Codes which are marked with an asterisk must be enabled with Code 3 before the associated parameters can be configured as described below. Code 3 Configuration not enabled Canceling the reading To cancel a value before it is confirmed (by pressing ) proceed as follows: Turn g ESC . Press The entered value is not adopted. Configuration enabled Turn g Code 3, display: No , Code 3 blinks. Press Change the setting in Code 3. Turn YES , display: Press Configuration is enabled. 8.2 Operating modes 8.2.1 Automatic and manual modes After initialization has been completed successfully, the positioner is in automatic mode (AUTO). You can now configure codes one after the other: EB 8384-5 EN 73 Operation Automatic mode % Switching to manual mode (MAN) Note: The positioner automatically returns to Code 0 if no settings are made within 120 seconds, but remains in the manual mode. Switch to automatic mode Turn Code 0 Press , Code 0 blinks. Turn AUtO . The positioner switches to automatPress ic mode. Turn Code 0 Press , display: AUtO, Code 0 blinks. Turn MAN . The positioner changes to the manPress ual mode ( ). The manual mode starts using the last set point of the automatic mode, ensuring a bumpless changeover. The current position is displayed in %. 8.2.2 Fail-safe position (SAFE) If you want to move the valve to the fail-safe position determined during start-up (see section 7.1), proceed as follows: Adjust the manual set point Turn % % , display: current operating mode Press (AUTO or MAN), Code 0 blinks. Turn Turn Code 1 Press , Code 1 blinks. until sufficient pressure has been Turn built up in the positioner and the control valve moves to the required position. 74 Code 0 SAFE , display: S Press The valve moves to the fail-safe position. If the positioner has been initialized, the current valve position in % is indicated on the display. EB 8384-5 EN Operation Exit the fail-safe position Turn Code 0 Press , Code 0 blinks. and select the required operating Turn mode (AUtO or MAN). Press . The positioner switches to the operating mode selected. 8.3 Fault/malfunction A status classification is assigned to all status and fault alarms in the positioner. The default settings of the status classification are listed in the code list. Note: The assignment of the status classification can be changed in TROVIS-VIEW and over the FOUNDATION™ fieldbus parameters. Refer to the Operating Instructions on the valve diagnostics u EB 8389 EN and the Configuration Manual u KH 8384-5 EN on the enclosed CD-ROM for more details. To provide a better overview, the classified messages are summarized in a condensed state for the positioner according to the NAMUR Recommendation NE 107. The status messages are divided into the following categories: −− Maintenance alarm The positioner cannot perform its control task due to a functional fault in the positioner itself or in one of its peripherals or EB 8384-5 EN an initialization has not yet been successfully completed. −− Maintenance required The positioner still performs its control task (with restrictions). A maintenance demand or above average wear has been determined. The wear tolerance will soon be exhausted or is reducing at a faster rate than expected. Maintenance is necessary in the medium term. −− Maintenance demanded The positioner still performs its control task (with restrictions). A maintenance demand or above average wear has been determined. The wear tolerance will soon be exhausted or is reducing at a faster rate than expected. Maintenance is necessary in the short term. −− Out of specification The positioner is running outside the specified operating conditions. −− Function check Test or calibration procedures are performed in the positioner. The positioner is temporarily unable to perform its control task as long as the procedure is taking place. Note: If an event is classified as “No message”, this event does not have any affect on the condensed state. The condensed state appears on the display represented by the following icons: 75 Operation Condensed state Positioner display Maintenance alarm Text e.g. tESting, TunE or tESt Function check Maintenance required/ maintenance demanded Out of specification Turn YES Press , display: Confirming error message: Select the error code that you Turn want to confirm. Press blinking . The error message is confirmed. If the positioner has not been initialized, the maintenance alarm icon ( ) appears on the display as the positioner cannot follow its set point. If fault alarms exist, the possible source of error is displayed in Code 49 onwards. In this case, Err appears on the display. Example: Error caused by pin position S Refer to the code list (section 14) for possible causes and the recommended action. 8.3.1 Confirming error messages Enable configuration: Note: If no settings are entered within 120 seconds, the enabled configuration function becomes invalid. Turn g Code 3, display: No Press , Code 3 blinks. 76 EB 8384-5 EN Adjusting the limit switch 9 Adjusting the limit switch The positioner version with an inductive limit switch has an adjustable tag (1) mounted on the axis of rotation, which operates the proximity switch (3). For operation of the inductive limit switch, the corresponding switching amplifier (see section 5.2.1) must be connected to the output circuit. Adjustment screw (2) When the tag (1) is located in the inductive field of the switch, the switch assumes a high resistance. When it moves outside the field, the switch assumes a low resistance. Normally, the limit switch is adjusted in such a way that it will provide a signal in both end positions of the valve. The switch, however, can also be adjusted to indicate intermediate valve positions. Metal tag (1) Proximity switch (3) Fig. 25:Adjusting the limit switch EB 8384-5 EN 77 Adjusting the limit switch The required switching function, i.e. whether the output relay is to be picked up or released when the tag enters the field, must be selected at the switching amplifier, if required. Adjusting the switching point: Note: During adjustment or testing, the switching point must always be approached from mid-position (50 %). To guarantee the switching under all ambient conditions, adjust the switching point approx. 5 % before the mechanical stop (OPEN – CLOSED). 2. Move the valve to 95 % in the MAN mode (see display). 3. Adjust the tag (1) at the yellow adjustment screw (2) until the tag enters or leaves the field of the proximity switch (3). You can measure the switching voltage as an indicator. Contact function: −− Tag leaving the field > contact is closed. −− Tag entering the field > contact is opened. For CLOSED position: 9.1 Retrofitting an inductive limit switch 1. Initialize the positioner. Required retrofit kit: 2. Move the valve to 5 % in the MAN mode (see display). 3. Adjust the tag at the yellow adjustment screw (2) until the tag enters or leaves the field and the switching amplifier responds. You can measure the switching voltage as an indicator. Contact function: −− Tag leaving the field > contact is closed. −− Tag entering the field > contact is opened. For OPEN position: 1. Initialize the positioner. 78 Limit switch Order no. 1400-7460 Note: The same requirements apply to retrofitting an inductive limit switch as to servicing the positioner. For explosion-protected positioners, the requirements in section 11(Servicing explosion-protected devices) need to be kept. Check the "Limit switch, inductive" box on the nameplate after installing the limit switch. 1. Take off the rotary pushbutton (3) and cap (1), unthread the five fastening screws (2) and lift off the plastic cover (9) together with the display, taking care not to dam- EB 8384-5 EN Adjusting the limit switch age the ribbon cable (between PCB and display). 1 2. Use a knife to cut an opening at the marked location (4). 2 3. Push the connector (11) with cable through the opening and secure the proximity switch (7) on the cover with a dot of glue. 4 3 4. Remove the jumper (8801-2267) at the socket X7 of the top board and insert the cable connector (11). 5 5. Guide the cable in such a manner that the plastic cover can be placed back onto the positioner. Insert the fixing screws (2) and screw tight. Attach the clamping plate (8) onto the proximity switch. 8 7 6 6. Attach the rotary switch (5). Make sure the flattened side of the positioner shaft is turned so that the rotary switch (5) can be attached with the metal tag next to the proximity switch. 7 9 7. On start-up of the positioner, set the option inductive alarm under Code 38 from No to YES. Socket X7 (11) 1 Cap 6 Metal tag 2 Screw 7 Proximity switch 3 Rotary pushbutton 8 Clamping plate 4 5 Marking Rotary switch 9 Plastic cover 11 Connector Fig. 26:Retrofitting an inductive limit switch EB 8384-5 EN 79 Maintenance 10Maintenance The positioner does not require any maintenance. There are filters with a 100 µm mesh size in the pneumatic connections for supply and output which can be removed and cleaned, if required. inside hazardous areas, test the devices according to the specifications for servicing explosion-protected devices. Read section 13 for maintenance, calibration and adjustment work inside and outside hazardous areas. The maintenance instructions of any upstream supply air pressure reducing stations must be observed. 11Servicing explosion-protected devices If a part of the device on which the explosion protection is based needs to be serviced, the device must not be put back into operation until a qualified inspector has assessed it according to explosion protection requirements, has issued an inspection certificate or given the device a mark of conformity. Inspection by a qualified inspector is not required if the manufacturer performs a routine test on the device before putting it back into operation. Document the passing of the routine test by attaching a mark of conformity to the device. Replace explosion-protected components only with original, routine-tested components from the manufacturer. Devices that have already been operated outside hazardous areas and are intended for future use inside hazardous areas must comply with the safety requirements placed on serviced devices. Before being operated 80 12Firmware update (serial interface) Firmware updates on positioners currently in operation can be performed as follows: When updates are performed by a service employee appointed by SAMSON, the update is confirmed on the device by the test mark assigned by SAMSON’s Quality Assurance. In all other cases, only plant operator personnel with written approval may perform updates. Updates are to be confirmed by approved personnel on the device. Laptops and PCs connected to the power supply must not be used without an additional protective circuit. This does not apply to laptops in battery operation. In this case, it is assumed that a battery-powered laptop runs briefly for software programming or testing purposes. EB 8384-5 EN Maintenance, calibration and work on equipment a) Updates outside the hazardous area: Remove the positioners from the plant. Update them outside the hazardous area. b) Updates on site: Updates on site are only permitted after the plant operator presented a signed hot work permit. After updating has been completed, add the current firmware to the nameplate; this can be done using labels. 13Maintenance, calibration and work on equipment Interconnection with intrinsically safe circuits to check or calibrate the equipment inside or outside hazardous areas is to be performed only with intrinsically safe current/voltage calibrators and measuring instruments to rule out any damage to components relevant to explosion protection. Observe the maximum permissible values specified in the certificates for intrinsically safe circuits. EB 8384-5 EN 81 Code list 14Code list Code Parameter – Readings/ no. values [default setting] Description Note: Codes with marked with an asterisk (*) must be enabled with Code 3 prior to configuration. 0 Operating mode [MAN] Manual mode AUtO Automatic mode 1 SAFE Fail-safe position ESC Cancel Manual w [0] to 100 % of the nominal range Switchover from automatic to manual mode is bumpless. In fail-safe position, the S icon appears on the display. In MAN and AUtO mode, the system deviation is represented by the bar graph elements. The reading indicates the valve position or angle of rotation in % when the positioner is initialized. If the positioner is not initialized, the position of the lever in relation to the longitudinal axis is displayed in degrees (°). Adjust the manual set point with the rotary pushbutton. The current travel/angle is displayed in % when the positioner is initialized. If the positioner is not initialized, the position of the lever in relation to the longitudinal axis is indicated in degrees (°). Note: It can only be selected when Code 0 = MAN Reading direction 1234, 3 , ESC Enable configuration [No], YES, ESC 4* Enables changing of data (automatically deactivated when the rotary pushbutton has not been operated for 120 s). FF blinks on the display when the on-site operation is locked. Codes marked with an asterisk (*) can only be read and not overwritten. Similarly, codes can only read over the SSP interface. Pin position Follower pin must be mounted in the proper position depending on [No], 17, 25, 35, 50, 70, the valve travel/opening angle. Pin position must be entered for nominal (NOM) or substitute (SUb) 100, 200 mm, 90° with initialization. rotary actuators, ESC Pin position Standard Adjustment range Note: If you select a pin Code 4 Code 5 Code 5 position in Code 4 that is too small, the positioner switches to SAFE mode for reasons of safety. 82 The reading direction of the display is turned by 180°. 1234 2 17 7.5 3.6 to 17.7 25 7.5 5.0 to 25.0 35 15.0 7.0 to 35.4 50 30.0 10.0 to 50.0 70 40.0 14.0 to 70.7 100 60.0 20.0 to 100.0 200 120.0 40.0 to 200.0 90° 90.0 24.0 to 100.0 EB 8384-5 EN Code list Code Parameter – Readings/ no. values [default setting] 5* Nominal range mm or angle °, ESC 6* Nominal valve travel or opening angle must be entered for nominal (NOM) or substitute (SUb) initialization. The possible adjustment range depends on the pin position from the table for Code 4. Code 5 is generally locked until Code 4 is set to No, i.e. after a pin position has been entered, Code 5 can be configured. Indicates maximum travel/angle reached during initialization after initialization has been successfully completed. Init mode Select the initialization mode [MAX] Maximum range MAX: NOM Nominal range MAN Manual setting 7* Description SUb Emergency mode ZP Zero calibration ESC Cancel w/x Travel/angle of the closure member from the CLOSED position to the opposite stop in the actuator. NOM: Travel/angle of the closure member measured from the CLOSED position to the indicated OPEN position. MAN: Manually selected range SUb: Substitute calibration (without initialization) Direction of action of the set point w in relation to the travel/angle x [ää] Increasing/increas- Automatic adaptation: AIR TO On completing initialization, the direction of action remains ing äæ Increasing/decreas- OPEN: increasing/ increasing (ää). A globe valve opens as the set point increases. ing AIR TO On completing initialization, the direction of action changes ESC CLOSE: to increasing/decreasing (äæ ). A globe valve closes as the set point increases. 8* Travel/angle range start (lower x-range value) Lower range value for travel/angle in nominal or operating range The operating range is the actual travel/angle of the valve and is limited by the lower travel/angle range value (Code 8) and the upper travel/angle range value (Code 9). Note: Specified in mm or Usually, the operating range and the nominal range are identical. angle ° provided Code 4 is The nominal range can be limited to the operating range by the lower and upper x-range values. The value is displayed or must be enactivated. tered. The characteristic is adapted. See also the example in Code 9. [0.0] to 80.0 % of the nominal range, ESC EB 8384-5 EN 83 Code list Code Parameter – Readings/ no. values [default setting] 9* Travel/angle range end (upper x-range value) 20.0 to [100.0 %] of the nominal range, ESC Description Upper range value for travel/angle in nominal or operating range The value is displayed or must be entered. The characteristic is adapted. Example: The operating range is modified, for example, to limit the Note: Specified in mm or range of a control valve which has been sized too large. For this angle ° provided Code 4 is function, the entire resolution range of the set point is converted to activated. the new limits. 0 % on the display corresponds to the adjusted lower limit and 100 % to the adjusted upper limit. 10* Travel/angle lower limit (lower x-limit) Limits travel/opening angle to the entered value (lower limit). The characteristic is not adapted. 0.0 to 49.9 % of the oper- The characteristic is not adapted to the reduced range. See also exating range, [No], ESC ample in Code 11. 11* Travel/angle upper limit (upper x-limit) Limits travel/angle to the entered value (upper limit). The characteristic is not adapted. 50.0 to 120.0 %, [100 %] Example: In some applications, it is better to limit the valve travel, of the operating range, e.g. if a certain minimum medium flow is required or a maximum No, ESC flow must not be reached. The lower limit must be adjusted with Code 10 and the upper limit with Code 11. If a tight-closing function has been set up, it has priority over the travel limitation. When set to No, the valve can be opened past the nominal travel with a set point outside of the 0 to 100 % range. 14* Reference variable range start (w-start) 0.0 to 49.9 %, [1.0 %] of the span adjusted in Code 12/13, No, ESC If the set point w reaches up to the entered percentage at the final value that causes the valve to close, the actuator is immediately completely vented (with AIR TO OPEN) or filled with air (with AIR TO CLOSE). This action always lead to maximum tight-closing of the valve. Codes 14/15 have priority over Codes 8/9/10/11. Codes 21/22 have priority over Codes 14/15. 84 EB 8384-5 EN Code list Code Parameter – Readings/ no. values [default setting] 15* Reference variable range end (w-end) 50.0 to 100.0 % of the span adjusted in Code 12/13, [No], ESC Description If the set point w reaches up to the entered percentage at the final value that causes the valve to open, the actuator is immediately filled with air (with AIR TO OPEN) or completely vented (with AIR TO CLOSE). This action always lead to the valve being completely opened. The signal pressure can be limited in Code 16. Codes 14/15 have priority over Codes 8/9/10/11. Codes 21/22 have priority over Codes 14/15. Example: Set the end position w > to 99 % for three-way valves. 16* Pressure limit 1.4, 2.4, 3.7 bar, [No], ESC The signal pressure to the actuator can be limited in stages. After changing a pressure limit already set, the actuator must be vented once (e.g. by selecting the fail-safe position (SAFE) over Code 0). NOTICE Do not activate pressure limitation for double-acting actuators (with closed position AIR TO OPEN). 17* Proportional-action coeffi- Read or change KP cient KP (level) Note concerning changing the KP and TV levels: During positioner 0 to 17, [7], ESC initialization, the values for KP and TV are optimally set. If the positioner tends to overshoot impermissibly due to other disturbances, the KP and TV levels can be adapted accordingly after initialization. Increment TV level until desired behavior is reached or when the maximum value of 4 is reached, the KP level can be decreased in increments. KP level changes affect the set point deviation. 18* Derivative-action time TV (level) 1, [2], 3, 4, No, ESC 19* Tolerance band 0.1 to 10.0 %, [5.0 %] of the operating range, ESC EB 8384-5 EN Read or change TV (see KP level) A change of the TV level has no effect on the system deviation. Used for error monitoring. Determination of the tolerance band in relation to the operating range. Associated lag time (30 s) is a reset criterion. If a transit time is determined during initialization which is six times longer than 30 s, the six-fold transit time is accepted as the lag time. 85 Code list Code Parameter – Readings/ no. values [default setting] 20* Characteristic [0] to 9, ESC Description Select characteristic 0 Linear 1 Equal percentage 2 Reverse equal percentage 3 SAMSON butterfly valve, linear 4 SAMSON butterfly valve, equal percentage 5 VETEC rotary plug valve, linear 6 VETEC rotary plug valve, equal percentage 7 Segmented ball valve, linear 8 Segmented ball valve, equal percentage 9 User-defined (defined over operator software) Note: The various characteristics are listed in the Appendix (section 16). 21* Required transit time OPEN (w ramp open) Time required to move through the operating range when the valve opens. [0] to 240 s, ESC Limitation of the transit time (Code 21 and 22): For some applications it is recommendable to limit the transit time of the actuator to prevent it from engaging too fast in the running process. Code 21 has priority over Code 15. NOTICE The function is not activated when the fail-safe function or solenoid valve is triggered nor upon failure of the auxiliary power. 22* Required transit time CLOSED (w ramp closed) [0] to 240 s, ESC Time required to move through the operating range when the valve closes. Code 22 has priority over Code 14. NOTICE The function is not activated when the fail-safe function or solenoid valve is triggered nor upon failure of the auxiliary power. 23* Total valve travel [0] to 99 · 107, YES, ESC Exponential reading from 9999 travel cycles onwards 86 Totaled full valve travel cycle Can be reset to 0 by selecting ESC. Note: The total valve travel is saved in a non-volatile memory after every 1000 full valve travel cycle. EB 8384-5 EN Code list Code Parameter – Readings/ no. values [default setting] 24* LV total valve travel 1000 to 99 · 107 [1.000000], ESC Description Limit value of total valve travel. If the limit is exceeded, the error message and the icon corresponding to the condensed state appear. Exponential reading from 9999 travel cycles onwards 34* Closing direction CL, [CCL], ESC CL: Clockwise CCL: Counterclockwise Direction of rotation to reach the valve's CLOSED position (view onto rotary switch with positioner cover open). Needs only be entered in SUb initialization mode (Code 6). 35* Blocking position [0.0] mm/° /%, ESC 36* Reset [----], Std, diAG, ESC Enter the blocking position (distance to CLOSED position) Only necessary with SUb initialization mode. Std: Resets all parameters and diagnosis data to their default settings. After a reset, the positioner must be re-initialized. diAG: Resets diagnosis data only. Plotted reference graphs and logs remain saved. The positioner does not need to be re-initialized. 38* Inductive alarm Indicates whether the inductive limit switch option is installed or not. [No], YES, ESC 39 40 41 42 Set point deviation e info Read only –99.9 to 99.9 % Indicates the deviation from the target position. Transit time Open info Read only [0] to 240 s Minimum opening time determined during initialization. Transit time Closed info Read only [0] to 240 s Minimum closing time determined during initialization. Auto-w/manual-w info Read only 0.0 to 100.0 % of the span Auto mode: Indicates the applied automatic set point. Man mode: Indicates the applied manual set point. EB 8384-5 EN 87 Code list Code Parameter – Readings/ no. values [default setting] 43 Firmware info control Description Read only Indicates the positioner type and current firmware version in alternating sequence. 44 y info Read only [0] to 100 %, 0P, MAX, – – Indicates the control signal y in % in relation to the travel range de– termined during initialization. 45 MAX: The positioner builds up its maximum output pressure, see description in Code 14 and 15. 0P: The positioner vents completely, see description in Code 14 and 15. – – –: The positioner is not initialized. Solenoid valve info Read only YES, HIGH/LOW, No Indicates whether a solenoid valve is installed or not. If a voltage supply is connected at the terminals of the installed solenoid valve, YES and HIGH appear on the display in alternating sequence. If a voltage supply is not connected (actuator vented, failsafe position indicated on the display by the S icon), YES and LOW appear on the display in alternating sequence. 46* Bus address 16 to 251, ESC Bus address 16 to 247: Positioners with fixed bus address 248 to 251: Positioners without fixed bus address (new or decommissioned positioners) 47* Write protection FF YES, [No], ESC 48* 49* 88 When write protection is active, device data can be read using FF communication but not overwritten. Diagnostic parameters u EB 8389 EN EB 8384-5 EN Code list Note: The error codes listed in following appear in the display corresponding to their status classification set over the condensed state (Maintenance required/Maintenance demanded: , Out of specification: blinking, Maintenance alarm: ). If “No message” is assigned to the error code as the status classification, the error is not included in the condensed state. A status classification is assigned to every error code in the default setting. The status classification of error codes can also be changed as required using an operator software (e.g. TROVIS-VIEW). Initialization errors Error codes – Recommended action Condensed state message active. When prompted, Err appears. When fault alarms exist, they are displayed here. 50 Value of measuring signal too high or too low; the lever operates near its mechanical stops. x > permissible range • Pin not mounted properly • Bracket slipped in case of NAMUR attachment or positioner is off center. Follower plate not mounted properly. Status classification [Maintenance required] Recommended Check attachment and pin position, set operating mode from SAFE to MAN action and re-initialize the positioner. 51 Δx < permissible range Insufficient measuring span of the lever. • Pin not mounted properly • Wrong lever An angle of rotation smaller than 16° at the positioner shaft only generates an alarm. An angle below 9° leads to the initialization being canceled. Status classification [Maintenance required] Recommended Check attachment and re-initialize the positioner. action EB 8384-5 EN 89 Code list Error codes – Recommended action Condensed state message active. When prompted, Err appears. When fault alarms exist, they are displayed here. 52 • Invalid positioner attachment. Attachment • Nominal travel/angle (Code 5) could not be achieved during NOM initialization (no tolerance downwards permissible). • Mechanical or pneumatic fault, e.g. wrong lever selected or supply pressure too low to move to the required position. Status classification [Maintenance required] Recommended Check attachment and supply pressure. Re-initialize the positioner. action Under certain circumstances, it may be possible to check the maximum travel/ angle by entering the actual pin position and then performing a MAX initialization. After initialization has been completed, the Code 5 indicates the maximum achieved travel or angle. 53 Initialization time exceeded (Init time >) Initialization takes too long. The positioner returns to the previous operating mode. • No pressure in supply line or pneumatic leakage • Supply air failure during initialization Status classification [Maintenance required] Recommended Check attachment and supply air line. Re-initialize the positioner. action 54 Initialization – solenoid valve 1) A solenoid valve is installed (Code 45 = YES) and has not been connected or not properly. As a result, actuator pressure cannot build up. The alarm is generated when you attempt to initialize the positioner. 2) If you attempt to initialize the positioner from the fail-safe position (SAFE). Status classification [Maintenance required] Recommended action 55 1) Check connection and supply voltage of the solenoid valve (Code 45 High/Low). 2) Set the MAN mode in Code 0. Then initialize the positioner. Transit time too Actuator transit times detected during initialization are so short that optimal short (transit time positioner tuning is impossible. <) Status classification [Maintenance required] Recommended Check the volume restriction setting as described in section 7.2. Re-initialize action the positioner. 90 EB 8384-5 EN Code list Error codes – Recommended action Condensed state message active. When prompted, Err appears. When fault alarms exist, they are displayed here. 56 Initialization canceled because selected NOM and SUB initialization modes require the pin position to be entered. Pin position Status classification [Maintenance required] Recommended Enter pin position over Code 4 and nominal travel/angle over Code 5. Re-iniaction tialize the positioner. Operational error Error codes – Recommended action Condensed state message active. When prompted, Err appears. When fault alarms exist, they are displayed here. 57 Control loop error, the valve no longer follows the controlled variable within tolerable times (tolerance band alarm Code 19). Control loop • Actuator blocked • Positioner attachment shifted subsequently • Supply pressure no longer suffices. Status classification [Maintenance required] Recommended Check attachment. action 58 Zero Zero point incorrect Error can occur when the positioner's attachment position is shifted or when the valve trim is worn, particularly with soft-sealed plugs. Status classification [Maintenance required] Recommended Check valve and attachment of the positioner. If OK, perform a zero calibraaction tion over Code 6 (see section 7.7). We recommend to re-initialize the positioner if zero deviates by more than 5 %. 59 Auto-correction Errors in the positioner's data section are detected detected by automatic monitoring and corrected automatically. Status classification [No message] Recommended Automatic action EB 8384-5 EN 91 Code list Error codes – Recommended action Condensed state message active. When prompted, Err appears. When fault alarms exist, they are displayed here. 60 Error in safety-relevant data that cannot be corrected automatically. Possible cause: EMC disturbances. Fatal error The valve is moved to fail-safe position. Status classification Maintenance alarm (cannot be classified) Recommended Reset over Code 36. Re-initialize the positioner. action Hardware error Error codes – Recommended action Condensed state message active. When prompted, Err appears. When fault alarms exist, they are displayed here. 62 Actuator's measured value recording failed. The conductive plastic element is defective. The device continues functioning in emergency mode but it must be replaced as quickly as possible. The emergency mode on the display is indicated by a blinking closed-loop operation icon and 4 dashes instead of the position reading. x signal Note on the open-loop operation: If the measuring system has failed, the positioner is still in a reliable state. The positioner switches to emergency mode where the position cannot be accurately controlled anymore. However, the positioner continues operation according to its set point so that the process remains in a safe state. Status classification [Maintenance demanded] Recommended Return positioner to SAMSON AG for repair. action 64 i/p converter (y) Current circuit of i/p converter interrupted. Status classification Maintenance alarm (cannot be classified) Recommended Cannot be remedied. Return positioner to SAMSON AG for repair. action 92 EB 8384-5 EN Code list Error appendix Error codes – Recommended Condensed state message active, when prompted, Err appears. action When fault alarms exist, they are displayed here. 65 Hardware Initialization key jammed (firmware version R 1.51 and higher) A hardware error has occurred. The positioner changes to the fail-safe position (SAFE). Status classification Maintenance alarm (cannot be classified) Recommended action Confirm error and return to automatic mode, or perform a reset and re-initialize the positioner. If this is not successful, return positioner to SAMSON AG for repair. 66 Data memory No more data can be written to the memory, e.g. because written data deviate from read data. The valve moves to the fail-safe position. Status classification Maintenance alarm (cannot be classified) Recommended action Return positioner to SAMSON AG for repair. 67 Check calculation Hardware controller monitored by test calculation. Status classification Maintenance alarm (cannot be classified) Recommended action Confirm error. If this is not possible, return positioner to SAMSON AG for repair. Data error Error codes – Recommended Condensed state message active. When prompted, Err appears. action When fault alarms exist, they are displayed here. 68 Control parameters Error in control parameters. Status classification [Maintenance required] Recommended action Confirm error, perform a reset and re-initialize the positioner. 69 Potentiometer parameters Error in digital potentiometer parameters Status classification [Maintenance required] Recommended action Confirm error, perform a reset and re-initialize the positioner. EB 8384-5 EN 93 Code list Error codes – Recommended Condensed state message active. When prompted, Err appears. action When fault alarms exist, they are displayed here. 70 Calibration Error in data from production calibration. The positioner continues operation with cold start values. Status classification [Maintenance required] Recommended action Return positioner to SAMSON AG for repair. 71 General parameters Error in parameters not critical to control operation. Status classification [Maintenance required] Recommended action Confirm error. Check and, if necessary, change the settings of the require parameters. 73 Internal device error 1 Internal device error Status classification [Maintenance required] Recommended action Return positioner to SAMSON AG for repair. 74 FF parameters Error in parameters not critical to control operation. Status classification [Maintenance required] Recommended action Confirm error and perform a reset. 76 No emergency mode The travel measuring system of the positioner has a self-monitoring function (see Code 62). An emergency mode (open-loop control) is not available for certain actuators, such as double-acting actuators. In case of a travel sensing error, the positioner vents the output (Output 38) or A1 in double-acting actuators. During the initialization, the positioner automatically checks whether the actuator has such a function or not. Status classification [No message] Recommended action Merely information, confirm, if necessary. No further action required. 94 EB 8384-5 EN Code list Error codes – Recommended Condensed state message active. When prompted, Err appears. action When fault alarms exist, they are displayed here. 77 78 Software loading error When the positioner starts operation for the first time after the FF signal has been applied, it carries out a self-test (tEStinG runs across the display). If the positioner loads the wrong software, the valve moves to the failsafe position. It is not possible to make the valve leave this fail-safe position again. Status classification Maintenance alarm (cannot be classified) Recommended action Interrupt fieldbus signal and restart the positioner. If not successful, return positioner to SAMSON AG for repair. Option parameters Error in option parameters. Status classification [Maintenance required] Recommended action Return positioner to SAMSON AG for repair. Diagnosis errors Error codes – Recommended Condensed state message active. When prompted, Err appears. action When fault alarms exist, they are displayed here. 79 80 Diagnostic messages Messages generated by the extended diagnostics Status classification Maintenance required (cannot be classified) Diagnostic parameters Error in parameters not critical to control operation. Status classification Maintenance required (cannot be classified) Recommended action Confirm error. Check and, if necessary, perform a new reference test. 81 Reference graphs Error occurred during plotting the reference graphs for drive signal y steady-state or drive signal y hysteresis. • Reference test canceled • Reference line for drive signal y steady-state or drive signal y hysteresis was not adopted. Status classification [No message] Recommended action Check and, if necessary, perform a new reference test. EB 8384-5 EN 95 Code list 14.1Decimal values of the modes in the FOUNDATION™ fieldbus blocks (Code 48) Mode Decimal value AUTO 8 AUTO/CAS 12 AUTO/RCAS 134 O/S 128 MAN 16 14.2Decimal values of the states in the FOUNDATION™ fieldbus blocks (Code 48) Status Decimal value Good (NC) – Non-specific 128 Good (NC) – Active block alarm 132 Good (NC) – Active advisory alarm 136 Good (NC) – Active critical alarm 140 Good (NC) – Unack block alarm 144 Good (NC) – Unack advisory alarm 148 Good (NC) – Unack critical alarm 152 Uncertain – Non-specific 64 Uncertain – Last usable value 68 Uncertain – Substitute/manual entry 72 Uncertain – Initial value 76 Uncertain – Sensor conversion not accurate 80 Uncertain – Engineering unit range violation 84 Uncertain – Sub-normal 88 Good (C) – Non-specific 192 Good (C) – Initialization acknowledge 196 Good (C) – Initialization request 200 96 EB 8384-5 EN Code list Status Decimal value Good (C) – Not invited 204 Good (C) – Not selected 208 Good (C) – Local override 216 Good (C) – Fault state active 220 Bad – Non-specific 0 Bad – Configuration error 4 Bad – Not connected 8 Bad – Device failure 12 Bad – Sensor failure 16 Bad – No comm., with last usable value 20 Bad – No comm., no last usable value 24 Bad – Out of service 28 EB 8384-5 EN 97 Dimensions in mm 15Dimensions in mm Attachment according to IEC 60534-6 Pressure gauge or connecting plate bracket Lever mm S = 17 External position sensor M = 50 = 100 Schild 28 L XL = 200 58 46 70 70 15 34 70 210 Direct attachment 14 34 80 M20 x 1.5 40 28 164 Output (38) Supply (9) 86 58 Fig. 27:NAMUR and direct attachment 98 EB 8384-5 EN Dimensions in mm Attachment according to VDI/VDE 3847 to Type 3277 13 Lever mm M = 50 L = 100 62 24 164 200 XL = 200 164 Attachment according to VDI/VDE 3847 to a NAMUR rib 62 83 164 Fig. 28:Attachment according to VDI/VDE 3847 EB 8384-5 EN 99 Dimensions in mm Heavy-duty version Output Y1 Output Y1 Supply (9) 86 56 80 52 Output Y2 80 130 166 30 86 Ø 101 Reversing amplifier (optional)* Output Y2 Light version Output A1 Supply (9) 50 Z 76 A1 79 59 49 A2 50 Connecting plate G ¼ or ¼ NPT 58 Reversing amplifier (optional)* 80 130 150 Output A2 * Reversing amplifier −− Type 3710 (see drawing of heavy-duty version for dimensions) −− 1079-1118/1079-1119, no longer available (see drawing of light version for dimensions) Fig. 29:Attachment to rotary actuators acc. to VDI/VDE 3845 (Sept. 2010), fixing level 1, AA1 to AA4 size 100 EB 8384-5 EN Dimensions in mm 15.1Fixing levels according to VDI/VDE 3845 (September 2010) Mmin Fixing level 2 (bracket surface) 25 M6 C Fixing level 1 (actuator surface) Actuator Ød B ØD A Dimensions in mm Size A B C Ød Mmin D* AA0 50 25 15 5.5 for M5 66 50 AA1 80 30 20 5.5 for M5 96 50 AA2 80 30 30 5.5 for M5 96 50 AA3 130 30 30 5.5 for M5 146 50 AA4 130 30 50 5.5 for M5 146 50 AA5 200 50 80 6.5 for M6 220 50 * Flange type F05 according to DIN EN ISO 5211 EB 8384-5 EN 101 Valve characteristic selection 16Valve characteristic selection The characteristics that can be selected in Code 20 are shown in following in graph form. Note: A characteristic can only be defined (user-defined characteristic) using a workstation/operating software (e.g. TROVIS-VIEW). Linear (select characteristic: 0) Travel/ angle of rotation [%] 100 50 Reference variable [%] 0 0 50 100 Equal percentage (select characteristic: 1) Travel/ angle of rotation [%] Reverse equal percentage (select characteristic: 2) Travel/ angle of rotation [%] 100 100 50 50 Reference variable [%] 0 0 102 50 100 Reference variable [%] 0 0 50 100 EB 8384-5 EN SAMSON butterfly valve linear (select characteristic: 3) Travel/ angle of rotation [%] Travel/ angle of rotation [%] 100 100 50 50 Reference variable [%] 0 SAMSON butterfly valve equal percentage (select characteristic: 4) 0 50 Reference variable [%] 0 0 100 VETEC rotary plug valve linear (select characteristic: 5) 50 VETEC rotary plug valve equal percentage (select characteristic: 6) Travel/ angle of rotation [%] Travel/ angle of rotation [%] 100 100 50 50 Reference variable [%] 0 0 50 100 Segmented valve ball linear (select characteristic: 7) Travel/ angle of rotation [%] 100 Reference variable [%] 0 0 50 100 Segmented valve ball equal percentage (select characteristic: 8) Travel/ angle of rotation [%] 100 100 50 50 Reference variable [%] 0 0 50 100 Reference variable [%] 0 0 50 100 104 EB 8384-5 EN EB 8384-5 EN 105 106 EB 8384-5 EN EB 8384-5 EN 107 108 EB 8384-5 EN EB 8384-5 EN 109 110 EB 8384-5 EN EB 8384-5 EN 111 112 EB 8384-5 EN EB 8384-5 EN 113 114 EB 8384-5 EN EB 8384-5 EN 115 116 EB 8384-5 EN EB 8384-5 EN 117 118 EB 8384-5 EN EB 8384-5 EN 119 120 EB 8384-5 EN EB 8384-5 EN 121 122 EB 8384-5 EN EB 8384-5 EN 123 124 EB 8384-5 EN EB 8384-5 EN 125 126 EB 8384-5 EN EB 8384-5 EN 127 Weismüllerstraße 3 · 60314 Frankfurt am Main, Germany Phone: +49 69 4009-0 · Fax: +49 69 4009-1507 [email protected] · www.samson.de EB 8384-5 EN 2015-02-23 · English SAMSON AG · MESS- UND REGELTECHNIK