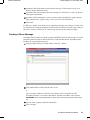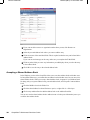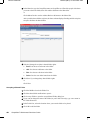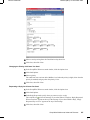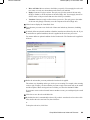
1
Novell Confidential Manual (ENU) 21 December 2004 Novell GroupWise ® www.novell.com 7 WEBACCESS CLIENT USER GUIDE August 15, 2005 Novell Confidential Manual (ENU) 21 December 2004 Legal Notices Novell, Inc. makes no representations or warranties with respect to the contents or use of this documentation, and specifically disclaims any express or implied warranties of merchantability or fitness for any particular purpose. Further, Novell, Inc. reserves the right to revise this publication and to make changes to its content, at any time, without obligation to notify any person or entity of such revisions or changes. Further, Novell, Inc. makes no representations or warranties with respect to any software, and specifically disclaims any express or implied warranties of merchantability or fitness for any particular purpose. Further, Novell, Inc. reserves the right to make changes to any and all parts of Novell software, at any time, without any obligation to notify any person or entity of such changes. Any products or technical information provided under this Agreement may be subject to U.S. export controls and the trade laws of other countries. You agree to comply with all export control regulations and to obtain any required licenses or classification to export, re-export, or import deliverables. You agree not to export or re-export to entities on the current U.S. export exclusion lists or to any embargoed or terrorist countries as specified in the U.S. export laws. You agree to not use deliverables for prohibited nuclear, missile, or chemical biological weaponry end uses. Please refer to www.novell.com/info/exports/ for more information on exporting Novell software. Novell assumes no responsibility for your failure to obtain any necessary export approvals. Copyright © 2005 Novell, Inc. All rights reserved. No part of this publication may be reproduced, photocopied, stored on a retrieval system, or transmitted without the express written consent of the publisher. Novell, Inc. has intellectual property rights relating to technology embodied in the product that is described in this document. In particular, and without limitation, these intellectual property rights may include one or more of the U.S. patents listed at http://www.novell.com/company/legal/patents/ and one or more additional patents or pending patent applications in the U.S. and in other countries. Novell, Inc. 404 Wyman Street, Suite 500 Waltham, MA 02451 U.S.A. www.novell.com GroupWise 7 WebAccess Client User Guide Aug 15, 2005 Online Documentation: To access the online documentation for this and other Novell products, and to get updates, see www.novell.com/documentation. Novell Confidential Novell Trademarks GroupWise is a registered trademark of Novell, Inc. in the United States and other countries. Novell is a registered trademark of Novell, Inc. in the United States and other countries. Third-Party Materials All third-party trademarks are the property of their respective owners. Manual (ENU) 21 December 2004 Novell Confidential Manual (ENU) 21 December 2004 Novell Confidential Manual (ENU) 21 December 2004 Contents 1 About This Guide 7 Understanding GroupWise WebAccess 9 Starting GroupWise WebAccess . . . . . . . . . . . . . . Understanding the GroupWise WebAccess Main Window . Understanding the Folder List. . . . . . . . . . . . . . Understanding the Item List . . . . . . . . . . . . . . . Understanding Timing Out from GroupWise WebAccess . 2 . . . . . . . . . . . . . . . . . . . . . . . . . . . . . . . . . . . . . . . . . . . . . . . . . . . . . . . . . . . . . . . . . . . . . . . . . . . . . . . . . . . . . . . . . . . . . . . . . . . . . . . . . . . . . . . . . . . . . . . . . . . . . . . . . . . . . . . . . . . . . . . . . . . . . . GroupWise WebAccess Basics Composing Items . . . . . . . . . . . . . . . Sending a Mail Message . . . . . . . . . Sending a Phone Message . . . . . . . . Scheduling an Appointment . . . . . . . . Assigning a Task . . . . . . . . . . . . . Writing a Note . . . . . . . . . . . . . . . Sending or Receiving an Internet Location Managing Items You Receive . . . . . . . . Opening an Item in Your Mailbox . . . . . Searching for an Item . . . . . . . . . . . Replying to an Item You Receive . . . . . Deleting an Item You Receive . . . . . . Undeleting an Item . . . . . . . . . . . . Marking an Item Unread (Read Later) . . Marking an Item Read . . . . . . . . . . Forwarding a Mail or Phone Message . . Accepting an Appointment, Note, or Task Declining an Appointment, Note, or Task . Delegating an Appointment, Note, or Task Marking a Task Complete . . . . . . . . . Moving an Item to a Folder . . . . . . . . Managing Items You Send . . . . . . . . . . Checking the Status of an Item You Send Deleting or Retracting an Item You Send . Moving an Item to a Folder . . . . . . . . 3 . . . . . . 9 . 9 10 11 13 15 . . . . . . . . . . . . . . . . . . . . . . . . . . . . . . . . . . . . . . . . . . . . . . . . . . . . . . . . . . . . . . . . . . . . . . . . . . . . . . . . . . . . . . . . . . . . . . . . . . . . . . . . . . . . . . . . . . . . . . . . . . . . . . . . . . . . . . . . . . . . . . . . . . . . . . . . . . . . . . . . . . . . . . . . . . . . . . . . . . . . . . . . . . . . . . . . . . . . . . . . . . . . . . . . . . . . . . . . . . . . . . . . . . . . . . . . . . . . . . . . . . . . . . . . . . . . . . . . . . . . . . . . . . . . . . . . . . . . . . . . . . . . . . . . . . . . . . . . . . . . . . . . . . . . . . . . . . . . . . . . . . . . . . . . . . . . . . . . . . . . . . . . . . . . . . . . . . . . . . . . . . . . . . . . . . . . . . . . . . . . . . . . . . . . . . . . . . . . . . . . . . . . . . . . . . . . . . . . . . . . . . . . . . . . . . . . . . . . . . . . . . . . . . . . . . . . . . . . . . . . . . . . . . . . . . . . . . . . . . . . . . . . . . . . . . . . . . . . . . . . . . . . . . . . . . . . . . . . . . . . . . . . . . . . . . . . . . . . . . . . . . . . . . . . . . . . . . . . . . . . . . . . . . . . . . . . . . . . . . . . . . . . . . . . . . . . . . . . . . . . . . . . . . . . . . . . . . . . . . . . . . . . . . . . . . . . . . . . . . . . . . . . . . . . . . . . . . . . . . . . . . . . . . . . . . . . . . . . . . . . . . . . . . . . . . . . . . . . . . . . . . . . . . . . . . . . . . . . . . . . . . . . . . . . . . . . . . . . . . . . . . . . . . . . . . . . . . . . . . . . . . . . . . . . . . . . . . . . . . . . . . . . . . . . . . . . . . . . . . . . . . . . . . . . . . . . . . . . . . . . . . . . . . . . . . . . . . . . . . . . . . . . . . . . . . . . . . . . . . . . . . . . . . . . . . . . . . . . . . . . . . . . . . . . . . . . . . . . . . . . . . . . . . . . . . . . . . . . . . . . . . . . . . . . . . . . . . . . . . . . . . . . . . . . . . . . . . . . . . . . . . . . . . . . . . . . . . . . . . . . . . . . . . . . . . . . . . . . . . . . . . . . . . . . . . . . . . . . . . . . . . . . . . . . . . . . . . . . . . . . . . . . . . . . . . . . . . . . . . . . . . . . . . . . . . . . . . . . . . . . . . . . . . . . . . . . . . . . . . . . . . . . . . . . . . . . . . . . . . . . . . . . . . . . . . . . . . . . . . . . . . . . . . . . . . . . . . . . . . . . . . . . . . . . . . . . . . . . . . . . . . . . . . . . . . . . . . . . . . . . . . . . . . . . . . . . . . . . . . . . . . . . . . . . . . . . . . . . . . . . . . . . . . . . . . . . . . . . GroupWise WebAccess Advanced Features Using Spell Checker . . . . . . . . . . . . . . Using the Address Book . . . . . . . . . . . . Searching for an Entry in the Address Book Addressing an Item . . . . . . . . . . . . . Managing a Personal Address Book . . . . Accepting a Shared Address Book . . . . . Creating a Personal Group . . . . . . . . . Working with Attachments . . . . . . . . . . . Using the WebAccess Calendar . . . . . . . . . . . . . . . . . . . . . . . . . . . . . . . . . . . 15 16 17 18 19 21 21 22 22 22 23 23 24 24 25 25 25 26 27 27 28 29 29 30 30 33 Contents 33 34 35 36 37 38 39 40 40 5 Novell Confidential Using the HTML Version of the Calendar . . . . . . . Working with Folders . . . . . . . . . . . . . . . . . . . Creating a Folder . . . . . . . . . . . . . . . . . . . Deleting a Folder. . . . . . . . . . . . . . . . . . . . Moving an Item to Another Folder . . . . . . . . . . . Viewing Items in a Find Results Folder . . . . . . . . Using the Checklist Folder . . . . . . . . . . . . . . . Working with Shared Folders . . . . . . . . . . . . . Undeleting Items in the Trash . . . . . . . . . . . . . . . Using Proxy to Manage Other Mailboxes . . . . . . . . . Proxying Another User’s Mailbox . . . . . . . . . . . Granting Proxy Access to Your Mailbox . . . . . . . . Granting Default Proxy Access to Your Mailbox . . . . Using GroupWise Libraries . . . . . . . . . . . . . . . . Modifying WebAccess Options . . . . . . . . . . . . . . Changing Your GroupWise Password . . . . . . . . . Specifying Send Options. . . . . . . . . . . . . . . . Setting the Default Number of Messages to Display. . Changing Your Time Zone . . . . . . . . . . . . . . . Automatically Adding A Signature to Items You Send . Using Rules . . . . . . . . . . . . . . . . . . . . . . Printing from WebAccess . . . . . . . . . . . . . . . . . 4 6 GroupWise Frequently Asked Questions WebAccess Client User Guide Manual (ENU) 21 December 2004 . . . . . . . . . . . . . . . . . . . . . . . . . . . . . . . . . . . . . . . . . . . . . . . . . . . . . . . . . . . . . . . . . . . . . . . . . . . . . . . . . . . . . . . . . . . . . . . . . . . . . . . . . . . . . . . . . . . . . . . . . . . . . . . . . . . . . . . . . . . . . . . . . . . . . . . . . . . . . . . . . . . . . . . . . . . . . . . . . . . . . . . . . . . . . . . . . . . . . . . . . . . . . . . . . . . . . . . . . . . . . . . . . . . . . . . . . . . . . . . . . . . . . . . . . . . . . . . . . . . . . . . . . . . . . . . . . . . . . . . . . . . . . . . . . . . . . . . . . . . . . . . . . . . . . . . . . . . . . . . . . . . . . . . . . . . . . . . . . . . . . . . . . . . . . . . . . . . . . . . . . . . . . . . . . . . . . . . . . . . . . . . . . . . . . . . . . . . . . . . . . . . . . . . . . . . . . . . . . . . . . . . . . . . . . . . . . . . . . . . . . . . . . . . . . . . . . . . . . . . . . . . . . . . . . . . . . . . . . . . . . . . . . . . . . . . . . . . . . . . . . . . . . . . . . . . . . . . . . . . . . . . . . . . . . . . . . . . . . . . . . . . . . . . . . . . . . . . . . . . . . . . . . . . . . . . . . . . . . . . . . . . . . . . . . . . . . . . . . . . . . . . . . . . . . . . . . . . . . . . . . . . . . . . . . . . . . . . . . . . . . . . . . . . . . . . . . . . . . . . . . . . . . . . . . . . . . . . . . . . . . . . . . . . . . . . . . . . . . . . . . . . . 41 43 44 44 44 45 45 47 49 50 51 51 53 53 54 55 55 58 58 59 59 62 63 Novell Confidential Manual (ENU) 21 December 2004 About This Guide This Novell® GroupWise® 7.0 WebAccess Client User Guide explains how to use the GroupWise WebAccess client. The guide is divided into the following sections: “Understanding GroupWise WebAccess” on page 9 “GroupWise WebAccess Basics” on page 15 “GroupWise WebAccess Advanced Features” on page 33 “GroupWise Frequently Asked Questions” on page 63 Additional Documentation For additional GroupWise documentation, see the following guides at the Novell GroupWise 7.0 documentation Web site (http://www.novell.com/documentation/lg/gw65): Installation Guide Administration Guide Multi-System Administration Guide Interoperability Guide Troubleshooting Guides GroupWise Windows Client User Guide GroupWise Cross-Platform User Guide GroupWise Client Frequently Asked Questions (FAQ) Documentation Updates For the most recent version of the GroupWise 7.0 WebAccess Client User Guide, visit the Novell GroupWise 7.0 documentation Web site (http://www.novell.com/documentation/lg/gw7). Documentation Conventions In Novell documentation, a greater-than symbol (>) is used to separate actions within a step and items in a cross-reference path. A trademark symbol (®, TM, etc.) denotes a Novell trademark. An asterisk (*) denotes a third-party trademark. User Comments We want to hear your comments and suggestions about this manual and the other documentation included with GroupWise. To contact us, use the User Comments feature at the bottom of any page in the online documentation. About This Guide 7 Novell Confidential 8 GroupWise 7 WebAccess Client User Guide Manual (ENU) 21 December 2004 Novell Confidential 1 Manual (ENU) 21 December 2004 Understanding GroupWise WebAccess This section of the GroupWise® WebAccess User Guide contains the following topics: “Starting GroupWise WebAccess” on page 9 “Understanding the GroupWise WebAccess Main Window” on page 9 “Understanding Timing Out from GroupWise WebAccess” on page 13 Starting GroupWise WebAccess You start GroupWise WebAccess as you would any other home page on the Internet. Use your Web browser to go to the URL your administrator gives you, such as http://server/gw/webacc, or an IP address such as 155.155.11.22. From the WebAccess login page, enter your username and password just as you would for the Windows* client. After you type in your username and password, click Login. Understanding the GroupWise WebAccess Main Window When you open GroupWise WebAccess, you see the main window, shown below. The main window is the starting point for many of the tasks you can accomplish with GroupWise WebAccess. Understanding GroupWise WebAccess 9 Novell Confidential Manual (ENU) 21 December 2004 The main window has different components to help you accomplish your daily tasks. The following sections describe the various components you can use from the main window: “Understanding the Folder List” on page 10 “Understanding the Item List” on page 11 Understanding the Folder List The Folder List displays the folders used to organize the items you send and receive. You can add additional folders to further help you organize your items. The Mailbox folder is the default folder that is opened when you first log in. The following folders are displayed in the Folder List. You can open a folder by clicking the icon. Icon Description Lists items you receive. The Mailbox is a system folder. Mailbox Lists received items you have not yet opened. Unopened Items Sent Items Calendar Checklist 10 Lists items you send from the Mailbox and Calendar. The Sent Items folder is a system folder. After you move a sent item from the Sent Items folder to another folder, it no longer displays in the Sent Items folder. (In the previous version of GroupWise WebAccess, the Sent Items folder was a query folder that listed sent items from all folders.) Lists all appointments, tasks, and notes in your Calendar. The Calendar is a system folder. Lists items you have moved to this folder. Use the Checklist folder to create a task list. The Checklist folder is a system folder. (In the previous version of GroupWise WebAccess, a Task List folder listed all the task items in your Mailbox and Calendar. The Task List folder was a query folder.) For more information, see “Using the Checklist Folder” on page 45. GroupWise 7 WebAccess Client User Guide Novell Confidential Manual (ENU) 21 December 2004 Icon Description Lists folders you've created. The Cabinet is a system folder. Cabinet Work in Progress Lists items that have been saved to be sent later. The Work in Progress is a system folder. Trash Lists deleted items that have not yet been purged. The Trash is a system folder. System Folders The folders listed in the table are system folders, which are created by GroupWise and cannot be deleted. For additional information about using folders, see “Working with Folders” on page 43. Personal Folders You can add additional folders to further organize your items. For example, you could add a folder to your Cabinet to store all messages you receive regarding a specific project you are working on. Shared Folders You can share personal folders with other users. Recipients of the shared folder receive a notification explaining that you have shared the folder with them. They can then accept the folder or decline the folder. Find Results Folders In the Windows version of GroupWise, you can save the results of an item or document search in a folder. You cannot do this in GroupWise WebAccess. However, GroupWise WebAccess lets you view any Find Results folders you create in another version of GroupWise. Understanding the Item List The Item List displays the contents of the folder that is currently open. By default, the most recent 20 items in the folder are displayed. If the folder contains more than 20 messages, a Display Next button appears at the bottom of the list. You can use it to display the next 20 messages, or you can choose to select more or less than 20 messages. The icon next to each item indicates the item type, status, and priority. You click an item to open it. You can drag and drop items to move them. When you open an item, all actions you can perform on that item type are displayed at the top of the item view. For easy access, actions that you commonly perform on items are also displayed at the top of the Item List. You can select multiple items by clicking the boxes to the left of the items. Whenever you select items in the Item List and perform an action on them, WebAccess updates the Item List. To refresh the list manually, open the folder again or click Update at the top of the list. The following icons can be displayed in the Item List: Understanding GroupWise WebAccess 11 Novell Confidential Manual (ENU) 21 December 2004 Icon Message Type, Status, and Priority Unopened mail message (high, normal, low priority) Opened mail message (high, normal, low priority) Unopened appointment (high, normal, low priority) Opened appointment (high, normal, low priority) Unopened task (high, normal, low priority) Opened task (high, normal, low priority) Unopened note (high, normal, low priority) Opened note (high, normal, low priority) Unopened phone message (high, normal, low priority) Opened phone message (high, normal, low priority) Reply requested (high, normal, low priority) Unopened document reference Opened document reference One or more attachments included with the item Shared folder notification Shared address book notification Sent item Unopened posted item (shared folder) Opened posted item (shared folder) 12 GroupWise 7 WebAccess Client User Guide Novell Confidential Manual (ENU) 21 December 2004 Understanding Timing Out from GroupWise WebAccess Specific actions, such as opening or sending an item, generate a call to the Web server. Other actions, such as scrolling through items in the Item List, composing a message without sending it, or reading Help topics, do not generate a call to the Web server. If, for a period of time, you leave GroupWise WebAccess alone or perform actions that do not generate a call, WebAccess logs you out. Doing so not only provides security for your e-mail but also ensures that the Web server and GroupWise WebAccess run efficiently. The time-out period is determined by your GroupWise system administrator. If you try to perform an action after you have been logged out, you are prompted to log in again. Understanding GroupWise WebAccess 13 Novell Confidential 14 GroupWise 7 WebAccess Client User Guide Manual (ENU) 21 December 2004 Novell Confidential 2 Manual (ENU) 21 December 2004 GroupWise WebAccess Basics This section of the GroupWise® WebAccess User Guide provides basic information to get you started using GroupWise WebAccess. This section contains the following topics: “Composing Items” on page 15 “Managing Items You Receive” on page 22 “Managing Items You Send” on page 29 Composing Items GroupWise WebAccess has five different item types: mail message, phone message, appointment, note, and task. You address all item types in the same way, using the Address Book to add recipients’ addresses to the To, CC, and BC boxes. You can also attach files to each item type and include Web site locations (URLs) in the Subject and Message box of each item type. These five item types fit into three categories: unscheduled, scheduled, and posted items. Unscheduled Items: Unscheduled items include mail messages and phone messages. Both types of messages let you send a messages that are not scheduled for a particular time or date. Mail Message: Lets you specify a subject and message. Phone Message: Similar to mail messages, except that phone messages have boxes for caller, company, and phone number information. Scheduled Items: Appointments, tasks, and notes are scheduled items, meaning that they appear in the recipient’s Calendar as well as the Mailbox. The recipient of an appointment, task, or note has the option of accepting or declining it. Accepted items are removed from the recipient’s Mailbox and stored in the recipient’s Calendar. Declined items are removed from both the recipient’s Mailbox and the Calendar. If you are the sender, you can see what action recipients have taken by checking the status information for the scheduled item. Appointment: Lets you include the time, date, and place of the appointment. You can use Busy Search to find times when all recipients are free. Task: Lets you indicate which day you want the task to appear in the recipient’s Calendar and which day you want the task completed. You can also assign a priority to the task. Note: Lets you indicate which day you want the note to appear on the recipient’s Calendar. Because notes are posted in the recipient’s Calendar, they are frequently used as reminders of specific events, such as days off, project deadlines, or birthdays. Posted Items: Posted items are scheduled items you create for yourself. They function like regularly scheduled items, but are placed directly in your calendar. This section contains the following topics: GroupWise WebAccess Basics 15 Novell Confidential Manual (ENU) 21 December 2004 “Sending a Mail Message” on page 16 “Sending a Phone Message” on page 17 “Scheduling an Appointment” on page 18 “Assigning a Task” on page 19 “Writing a Note” on page 21 “Sending or Receiving an Internet Location” on page 21 Sending a Mail Message 1 In the GroupWise WebAccess main window, click New > Mail. 2 Click Address Book to add recipients in the To, CC, and BC boxes. or Type a recipient’s address in the To, CC, or BC box. The address can be a GroupWise user ID, GroupWise full name, or external e-mail address. Separate each address with a comma. When you begin typing a name in the To, CC, or BC boxes of an item you are creating, Name Completion tries to complete the name for you. If Name Completion finds the name you are looking for, you can stop typing. If Name Completion doesn't find it, continue typing: Name Completion searches again after each new character you type. If Name Completion finds a name that is close to but doesn't exactly match the one you are looking for, you can use the Up- or Down-arrow to scroll to adjacent names in the address book. IMPORTANT: Name-completed addresses for all item types come from the Frequent Contacts book only. 3 Type a subject and message. You can include Web site locations or addresses (URLs) in both the Subject and Message boxes. 16 GroupWise 7 WebAccess Client User Guide Novell Confidential Manual (ENU) 21 December 2004 4 (Optional) Click Spell Check to spell check the message. For this feature to work, your browser must be enabled for Java*. 5 (Optional) Click Attach to attach files to the message. For this feature to work, your browser must support attachments. 6 (Optional) Click Send Options to select a security setting (classification), assign a priority (high, standard, low), request a reply, or select to receive return notification. 7 Click Send. If a Web server outage occurs while you are composing a message, your message is not lost when you click Send. It is captured and appears at the bottom of the WebAccess Login page so that you can retrieve it when your Web server comes back up and you log into WebAccess again. Sending a Phone Message GroupWise phone messages are similar to paper-based While You Were Out messages. You send GroupWise phone messages to inform other users of calls and their details. GroupWise phone messages do not send spoken messages. 1 In the GroupWise WebAccess main window, click New > Phone. 2 Click Address Book to add recipients in the To box. or Type a recipient’s address in the To box. The address can be a GroupWise user ID, GroupWise full name, or external e-mail address. Separate each address with a comma. IMPORTANT: Name-completed addresses for all item types come from the Frequent Contacts book only. 3 Type the caller, company, and phone information. 4 Type a message. GroupWise WebAccess Basics 17 Novell Confidential Manual (ENU) 21 December 2004 You can include Web site locations or addresses (URLs) in the Message box. 5 (Optional) Click Spell Check to spell check the message. For this feature to work, your browser must be enabled for Java. 6 (Optional) Click Attach to attach files to the message. For this feature to work, your browser must support attachments. 7 (Optional) Click Send Options to select a security setting (classification), assign a priority (high, standard, low), request a reply, or select to receive return notification. 8 Click Send. Scheduling an Appointment 1 In the GroupWise WebAccess main window, click New > Appointment to display an appointment dialog. or In the Calendar, click New > Appointment. or In the Calendar, right-click a day and select New Appointment. 2 Click Address Book to add recipients in the To, CC, and BC boxes. If you want to create a personal appointment that displays only in your own Calendar, send the message to yourself, or create a posted appointment. or Type a recipient’s address in the To, CC, or BC box. The address can be a GroupWise user ID, GroupWise full name, or external e-mail address. Separate each address with a comma. To schedule a resource, such as a conference room, that is available in the address book, add the resource to the To box. 18 GroupWise 7 WebAccess Client User Guide Novell Confidential Manual (ENU) 21 December 2004 3 Type a location for the meeting. If you added a resource to the To box, the location may be filled in automatically. 4 Specify the month, day, year, and beginning time for the appointment, then skip to Step 5. or Click Busy Search to find and insert an appointment time when all the recipients are available. When you use Busy Search, GroupWise lists times when the users whose schedules were checked are available for an appointment. The time blocks listed might be longer than the duration specified. For example, 8am through 1pm might be listed as an available time. If your meeting has a duration of two hours, you could select from a number of available times, including 8am-10am, 9am-11am, and 11am- 1pm. You can decide on an appointment time from the available times listed or use the first available time, which GroupWise selects for you. To schedule the appointment for one of the times listed, click the time, then skip to Step 6. 5 To set the duration, type a number, then select Hours, Minutes, or Days. You can use whole numbers or decimal numbers, such as 90 minutes or 1.5 hours. 6 Type a subject and message. You can include Web site locations or addresses (URLs) in both the Subject and Message boxes. 7 (Optional) Click Spell Check to spell check the message. For this feature to work, your browser must be enabled for Java. 8 (Optional) Click Attach to attach files to the appointment. For this feature to work, your browser must support attachments. 9 (Optional) Click Send Options to select a security setting (classification), assign a priority (high, standard, low), request a reply, or select to receive return notification. 10 Click Send or click Post. Assigning a Task 1 In the GroupWise WebAccess main window, click New > Task. or In the HTML Calendar, click New > Task. or In the Calendar, right-click a day and select New Task. GroupWise WebAccess Basics 19 Novell Confidential Manual (ENU) 21 December 2004 2 Click Address Book to add recipients in the To, CC, and BC boxes. or Type a recipient’s address in the To, CC, or BC box. The address can be a GroupWise user ID, GroupWise full name, or external e-mail address. Separate each address with a comma. To create a personal task that displays only in your Calendar, add only your name or switch to posted task. 3 For the start date, specify the month, day, and year you want the task to first appear on the recipient’s Calendar. 4 Type a priority. You can type a letter (such as A), a number (such as 1), or a letter-number combination with the letter first (such as A1). 5 For the due date, specify the month, day, and year when you want the task to be completed. 6 Type a subject and message. You can include Web site locations or addresses (URLs) in both the Subject and Message boxes. 7 (Optional) Click Spell Check to spell check the message. For this feature to work, your browser must be enabled for Java. 8 (Optional) Click Attach to attach files to the message. For this feature to work, your browser must support attachments. 9 (Optional) Click Send Options to select a security setting (classification), assign a priority (high, standard, low), request a reply, or select to receive return notification. 10 Click Send or click Post. 20 GroupWise 7 WebAccess Client User Guide Novell Confidential Manual (ENU) 21 December 2004 Writing a Note 1 In the GroupWise WebAccess main window, click New > Note. 2 Click Address Book to add recipients in the To, CC, and BC boxes. or Type a recipient’s address in the To, CC, or BC box. The address can be a GroupWise user ID, GroupWise full name, or external e-mail address. Separate each address with a comma. To create a personal note that displays only in your Calendar, add only your name or switch to a posted note. 3 Specify the month, day, and year you want the note to appear on the recipient's Calendar. 4 Type a subject and message. You can include Web site locations or addresses (URLs) in both the Subject and Message boxes. 5 (Optional) Click Spell Check to spell check the message. For this feature to work, your browser must be enabled for Java. 6 (Optional) Click Attach to attach files to the note. For this feature to work, your browser must support attachments. 7 (Optional) Click Send Options to select a security setting (classification), assign a priority (high, standard, low), request a reply, or select to receive return notification. 8 Click Send. Sending or Receiving an Internet Location WebAccess allows you to send a Web site location, or URL, to another user. WebAccess formats any URL in the Message box into a shortcut to the Web site. The recipient who opens your message in WebAccess can click the shortcut to open a second browser window that displays the Web site. GroupWise WebAccess Basics 21 Novell Confidential Manual (ENU) 21 December 2004 Managing Items You Receive Reading and managing mail messages, appointments, tasks, or notes in WebAccess is as simple as clicking your mouse to open the item. This section contains the following topics: “Opening an Item in Your Mailbox” on page 22 “Searching for an Item” on page 22 “Replying to an Item You Receive” on page 23 “Deleting an Item You Receive” on page 23 “Undeleting an Item” on page 24 “Marking an Item Unread (Read Later)” on page 24 “Forwarding a Mail or Phone Message” on page 25 “Accepting an Appointment, Note, or Task” on page 25 “Declining an Appointment, Note, or Task” on page 26 “Delegating an Appointment, Note, or Task” on page 27 “Marking a Task Complete” on page 27 “Moving an Item to a Folder” on page 28 Opening an Item in Your Mailbox In WebAccess, all GroupWise items are opened the same way: in the Item List, click the subject of the item, or right-click it > click Open. The available buttons vary depending on the item type you have open. Appointments, tasks, and notes can be accepted, declined, or delegated; right-click an item > click Accept, Decline, or Delegate. You can also click Accept, Decline, or Delegate on the toolbar. Searching for an Item To perform a search for a specific item, you can either use the Find tool on the main window, or you can use the Search tool. Using Find 1 Type the word you want to search for in the Find field. 2 Click Find. The results are displayed in the message list. Using the Search Tool 1 From the GroupWise WebAccess main window, click the icon. 2 To search for specific text, click Full Text or Subject, then type the words you are looking for in the text box. 3 To search for a name, click From or To/CC, then type the name in the text box. 4 Select each item type you are looking for. 22 GroupWise 7 WebAccess Client User Guide Novell Confidential Manual (ENU) 21 December 2004 If you select Document, Find searches your Mailbox for document references. If you want to search GroupWise libraries for documents, see “Using GroupWise Libraries” on page 53. 5 Select each item source you are looking for. 6 In the Search In list, click the folders you want to search in. If you are searching in a folder in the Cabinet, you might need to click the plus sign next to the Cabinet to display the Cabinet folders. If you select Mailbox, your Sent Items folder is included in the search. If you do not select a folder, all listed folders are included in the search. 7 Click Find. Replying to an Item You Receive You can reply to an item you receive. You can reply to the item’s author or to everybody who originally received the item. 1 Click the Mailbox icon in the Folder List or Toolbar or Click the Calendar icon in the Folder List, then go to the date of the appointment, task, or note. 2 Click the message, appointment, task, or note to open it. or Right-click the item > click Reply. 3 Click Reply to Sender or Reply All to open a Reply form. Reply to Sender sends a reply to the sender only. Reply All sends a reply to the sender and all recipients of the original item. Choose whether to include the original message in your reply. 4 Type your message. You can include Web site locations or addresses (URLs) in the Message box. 5 Click Send. Deleting an Item You Receive You can delete an Item you receive and place it in the Trash. 1 Click the Mailbox icon in the Folder List. or To delete an item you have moved to a folder, click the folder in the Folder List. or To delete an appointment, task, or note you already accepted, click the Calendar icon in the Folder List or Tab Bar. 2 Locate the item in the Item List. 3 Select the item, then click Delete at the top of the Item List. or Click the item to open it, then click Delete. GroupWise WebAccess Basics 23 Novell Confidential Manual (ENU) 21 December 2004 or Select the items and drag them to the Trash or Select an item, right-click it > click Delete. The item is removed from your Mailbox or Calendar. The status of the item is also updated in the sender's Mailbox or Calendar to show you deleted the item. As long as the item remains in your Trash, you can undelete it. Undeleting an Item You can undelete an item you deleted unless you have emptied the Trash. An item emptied from the Trash cannot be undeleted. 1 Click the Trash icon in the Folder List. 2 Select the item, then click Undelete at the top of the Item List. or Click the item to open it, then click Undelete. or Right-click the item > click Undelete or Drag the item out of the Trash folder and drop it onto another folder icon. The item is moved from your Trash to the folder from which it was originally deleted. Marking an Item Unread (Read Later) If you have opened and read an item, you can mark it as unread. This will change the item’s icon in the Item List back to that of an unopened item. You might want to mark an item as unread if that item requires further action or if you don’t want that item to get lost among the other opened items in you Item List. 1 Click the Mailbox icon in the Folder List. 2 Locate the item in the Item List. 3 Select the item, then click Read Later at the top of the Item List. or Right-click the item > click Read Later or Click the item to open it, then click Read Later. Marking an item as Read does not change the status of the item in Properties. For example, if you have opened an item, then marked the item unread, the sender of the item sees the item status as opened in Properties. 24 GroupWise 7 WebAccess Client User Guide Novell Confidential Manual (ENU) 21 December 2004 Marking an Item Read 1 Click the Mailbox icon in the Folder List. 2 Locate the item in the Item List. 3 Select the item, then click Mark Read at the top of the Item List. or Right-click on the item and choose Mark Read or Click the item to open it, then click Mark Read. Marking an item Read Later changes the status of the item in Properties. For example, if you have not opened an item, but you marked the item unread, the sender of the item sees the item status as opened in Properties. Forwarding a Mail or Phone Message 1 Click the Mailbox in the Folder List. 2 Click the mail or phone message to open it. 3 Click Forward. or Right-click the item > click Forward. The original message is included as an attachment to the new message. 4 Click Address Book to add recipients in the To, CC, and BC boxes. or Type a recipient’s address in the To, CC, or BC box. The address can be a GroupWise user ID, GroupWise full name, or external e-mail address. Separate each address with a comma. 5 Type a message. You can include Web site locations or addresses (URLs) in the Message box. 6 (Optional) Click Spell Check to spell check the message. For this feature to work, your browser must be enabled for Java. 7 (Optional) Click Attach to attach files to the message. For this feature to work, your browser must support attachments. 8 Click Send. Accepting an Appointment, Note, or Task 1 Click the Mailbox in the Folder List. or Click the Calendar icon in the Folder List or on the Calendar Tab Bar, then go to the date of the appointment, task, or note. 2 Click the appointment, task, or note to open it, then click Accept. or Right-click the item > click Accept. You are not prompted for comments. GroupWise WebAccess Basics 25 Novell Confidential Manual (ENU) 21 December 2004 The appointment, task, or note is removed from the Item List in your Mailbox and appears in your Calendar only. The sender can tell you accepted the item by checking its status information. Declining an Appointment, Note, or Task 1 Click the Mailbox icon in the Folder List. or If you have already accepted the appointment, task, or note, click the Calendar icon in the Folder List or on the Calendar tab bar to open the Calendar, then go to the date of the appointment, task, or note. 2 Click the appointment, task, or note to open it. 3 Click Decline. or Right-click on the item and choose Decline. 4 (Optional) Type a message in the Comments to Sender box. 5 Click Decline. The appointment, task, or note is removed from your Calendar and Mailbox. The status of the item is updated in the sender’s Mailbox to show that you have declined the item. If you commented when you declined the item, the sender can read your comments by checking the status information. 26 GroupWise 7 WebAccess Client User Guide Novell Confidential Manual (ENU) 21 December 2004 Delegating an Appointment, Note, or Task 1 Click the Mailbox icon in the Folder List. or If you have already accepted the appointment, task, or note, click the Calendar icon in the Folder List or on the Calendar tab bar to open the Calendar, then go to the date of the appointment, task, or note. 2 Click the appointment, task, or note to open it. 3 Click Delegate to open a Delegate form. or Right-click an item > click Delegate. 4 Click Address Book to add recipients in the To box. or Type a recipient’s address in the To box. The address can be a GroupWise user ID, GroupWise full name, or external e-mail address. Separate each address with a comma. 5 Type a message. You can include Web site locations or addresses (URLs) in the Message box. 6 (Optional) Click Spell Check to spell check the message. For this feature to work, your browser must be enabled for Java. 7 (Optional) Click Attach to attach files to the appointment, task, or note. For this feature to work, your browser must support attachments. 8 Click Send. The original sender can see that you delegated the appointment, task, or note by checking the status information for the item. You can also see whether the delegated item was accepted or declined by opening your Sent Items folder and checking the status information for the delegated item. Marking a Task Complete 1 Click the Calendar icon in the Folder List or on the Calendar tab bar to open the Calendar, then go to the date of the task. or If you have not yet accepted the task, click the Mailbox icon in the Folder List. 2 Click the task to open it. GroupWise WebAccess Basics 27 Novell Confidential Manual (ENU) 21 December 2004 3 Click Complete to display the Complete form. 4 Click Complete. or Right-click the item > click Complete or Select the item from the Message List and click Complete on the toolbar. The sender of the task can see that you completed the task by checking its status information. Moving an Item to a Folder 1 To move an item you received, click the Mailbox icon in the Folder List. or To move an appointment, task, or note you already accepted, click the Calendar icon in the Folder List or on the Tab Bar. 2 Locate the item in the Item List. 3 Select the item, then click Move at the top of the Item List. or Click the item to open it, then click Move. or Right-click the item > click Move. 4 Click the folder where you want to move the item. If you are moving the item to a folder in the Cabinet, you might need to click the arrow next to the Cabinet to display the Cabinet folders. You can also move items to the Checklist folder to create a checklist. For more information, see “Using the Checklist Folder” on page 45. 28 GroupWise 7 WebAccess Client User Guide Novell Confidential Manual (ENU) 21 December 2004 Managing Items You Send After you send an item, you can check its status to see if it has been delivered, read, deleted, and so forth. You can also retract a message, if it has not been opened. You can also move items into different folders to keep your GroupWise Mailbox organized. This section contains the following topics: “Checking the Status of an Item You Send” on page 29 “Deleting or Retracting an Item You Send” on page 30 “Moving an Item to a Folder” on page 30 Checking the Status of an Item You Send 1 Click the Sent Items icon in the Folder List. 2 Click the item in the Item List, or right-click it > click Open. 3 Click the Properties tab. 4 For more detailed status information, click Advanced Properties. GroupWise WebAccess Basics 29 Novell Confidential Manual (ENU) 21 December 2004 Deleting or Retracting an Item You Send 1 Click the Sent Items icon in the Folder List. 2 Click the item in the Item List to open it. or Right-click the item > click Delete. 3 To delete the item from your Mailbox only, click Delete from This Mailbox. or To retract the item from your Mailbox and from all recipients’ Mailboxes, click Delete from All Mailboxes. A mail message or phone message is retracted only if the recipient has not yet opened it. An appointment, note, or task is retracted even if the recipient has already opened and accepted it. Moving an Item to a Folder 1 To move an item you sent, click the Sent Items icon in the Folder List. or To move an appointment, task, or note you already accepted, click the Calendar icon in the Folder List or click the Calendar Tab Bar. 2 Locate the item in the Item List. 3 Select the item, then click Move at the top of the Item List. or Right-click the item > click Move. or 30 GroupWise 7 WebAccess Client User Guide Novell Confidential Manual (ENU) 21 December 2004 Click the item to open it, then click Move. or Drag the items to the new folder. 4 Click the folder where you want to move the item. If you are moving the item to a folder in the Cabinet, you might need to click the arrow next to the Cabinet to display the Cabinet folders. You can also move items to the Checklist folder to create a checklist. For more information, see “Using the Checklist Folder” on page 45. GroupWise WebAccess Basics 31 Novell Confidential 32 GroupWise 7 WebAccess Client User Guide Manual (ENU) 21 December 2004 Novell Confidential 3 Manual (ENU) 21 December 2004 GroupWise WebAccess Advanced Features GroupWise® WebAccess lets you use advanced features to help you read and send messages, use the WebAccess calendar, organize messages in folders, print messages, use Proxy to access other mailboxes, and more. The section contains the following topics: “Using Spell Checker” on page 33 “Using the Address Book” on page 34 “Working with Attachments” on page 40 “Using the WebAccess Calendar” on page 40 “Working with Folders” on page 43 “Undeleting Items in the Trash” on page 49 “Using Proxy to Manage Other Mailboxes” on page 50 “Using GroupWise Libraries” on page 53 “Modifying WebAccess Options” on page 54 “Printing from WebAccess” on page 62 Using Spell Checker Spell Checker lets you check for misspelled words in the messages you create . The WebAccess Spell Checker is a Java Applet. That means that to use the Spell Checker, your browser must be enabled for Java. 1 In a message you are creating, click Spell Check. GroupWise WebAccess Advanced Features 33 Novell Confidential Manual (ENU) 21 December 2004 2 When Spell Checker stops on a word and suggests replacements, click the word you want in the Suggestions box, then click Replace. or Edit the word in the Replace With box, then click Replace. or If you don’t want to change the word, click Skip. Sometimes Spell Checker offers no replacement words. If this happens, click Skip, or edit the text manually in the Replace With box. The WebAccess dictionary and word lists cannot be modified. 3 When there are no more words to check, click Close. Using the Address Book The Address Book stores information about users, resources, and organizations. You can use the Address Book to search for information or to add e-mail addresses to an item you are composing. The Address Book consists of the GroupWise system address book, one or more personal address books, the Frequent Contacts address book, and possibly shared address books and LDAP address books. GroupWise System Address Book: You have one GroupWise system address book. The system address book includes all users who have a GroupWise Mailbox in your organization. You cannot modify the system address book. Personal Address Books: You can have multiple personal address books. By default, GroupWise WebAccess provides one predefined personal address book with your name as the title. You can use your personal address book to add e-mail addresses and information for users, resources, or organizations not defined in the system address book. 34 GroupWise 7 WebAccess Client User Guide Novell Confidential Manual (ENU) 21 December 2004 Shared Address Books: In the Windows version of the GroupWise client, users can share address books with other users. In GroupWise WebAccess, you cannot share an address book with other users, but you can receive shared address books. When you accept a shared address book, it appears in your Address Book list along with your system address book, personal address book, and Frequent Contacts address book. This section contains the following topics: “Searching for an Entry in the Address Book” on page 35 “Addressing an Item” on page 36 “Managing a Personal Address Book” on page 37 “Accepting a Shared Address Book” on page 38 “Creating a Personal Group” on page 39 Searching for an Entry in the Address Book 1 In the GroupWise WebAccess main window, click Address Book to open the Address Book. By default, the Address Book opens to the GroupWise address books. 2 In the Address Books list, select the address book you want to search. For GroupWise, you can choose from the GroupWise address book, the Frequent Contacts address book, or a personal address book. 3 Select the number of entries you want displayed at one time. The default displays 15 entries at one time. 4 To list the first entries (15 by default) in the selected address book, leave the search conditions boxes empty. or To search for a specific entry, click the icon to show another set of search condition boxes and the icon to hide all search conditions boxes. These boxes let you define the Address Book fields and information you want to search. GroupWise WebAccess supports the * (asterisk) and ? (question mark) wildcards. When searching a field, you can use * to represent multiple characters and ? to represent one character. If you define a “Last Name contains s?n” condition, the search returns all entries whose last names contain S and N separated by one character (Sanders, Johannson, Larsen, and so forth). GroupWise WebAccess Advanced Features 35 Novell Confidential Manual (ENU) 21 December 2004 5 Click Search Address Book (or Search) to display a list of entries that match your search conditions. If you decide to send an item to a user you found, you can select a user, click To, CC, or BC to add the name to the recipient list, then click Mail to open a new item. NOTE: Double-clicking a user will add it to the To: list. Addressing an Item 1 Open a new item. 2 Click Address Book to open the Address Book. By default, the Address Book opens to the GroupWise address books. 3 In the Address Books list, select the address book you want to search. For GroupWise, you can choose from the GroupWise address book, the Frequent Contacts address book, or a personal address book. 4 Select the number of entries you want displayed at one time. The default displays 15 entries at one time. 5 To list the first entries (15 by default) in the selected address book, leave the search conditions boxes empty. or To search for a specific entry, use the search conditions boxes to define the Address Book fields and information you want to search. GroupWise WebAccess supports the * (asterisk) and ? (question mark) wildcards. When searching a field, you can use * to represent multiple characters and ? to represent one character. For example, if you define a “First Name begins with jo*” condition, the search returns all entries whose first names start with JO (John, Joel, Jose, and so forth). If you define a “Last Name contains s?n” condition, the search returns all entries whose last names contain S and N separated by one character (Sanders, Johannson, Larsen, and so forth). 36 GroupWise 7 WebAccess Client User Guide Novell Confidential Manual (ENU) 21 December 2004 6 Click Search to display a list of entries that match your search conditions. 7 Select the entry you want to add to the item’s recipient list, then click To, CC, or BC to indicate the recipient type. NOTE: You can double-click the name to add it to the To: list. 8 After you finish selecting the item’s recipients, click OK to add them to the item. Managing a Personal Address Book You can have multiple personal address books. By default, GroupWise WebAccess provides one predefined personal address book with your name as the title. You can use your personal address book to add e-mail addresses and information for users, resources, or organizations not defined in the system address book. These addresses can be for people inside or outside of your organization. This section contains the following topics: “Creating a Personal Address Book” on page 37 “Adding Entries to a Personal Address Book” on page 37 Creating a Personal Address Book 1 In the GroupWise WebAccess main window, click Address Book to open the Address Book. 2 Click Address Book Options. 3 Click Create to display the Create Address Book form. 4 In the Address Book Name box, type the name you want to use for the personal address book. 5 If desired, type a description in the Description box. The description is for your use only. It appears only when viewing the address books in the Address Books Options form. 6 Click OK to add the new address book to the Personal Address Book list. 7 Click Close to return to the Address Book. Adding Entries to a Personal Address Book 1 From the GroupWise WebAccess main window, click Address Book to open the Address Book. 2 In the Address Book, click Add Entry to display the Add Address Book Entry form. GroupWise WebAccess Advanced Features 37 Novell Confidential Manual (ENU) 21 December 2004 3 If you want to add a resource or organization rather than a person, click Resource or Organization. 4 Select the personal address book where you want to add the entry. 5 Fill in at least one of the asterisked fields. This is required so that the entry can be listed in the Address Book. If you want to send messages to the entry, make sure you complete the E-Mail field. 6 Fill in any other fields you want. Any information you add displays when you select the entry in the Address Book. 7 Click OK to save the entry to the selected address book. Accepting a Shared Address Book In the Windows version of the GroupWise client, users can share address books with other users. In GroupWise WebAccess, you cannot share an address book with other users, but you can receive shared address books. When you accept a shared address book, it appears in your Address Book list along with your system address book, personal address book, and Frequent Contacts address book. 1 Click the Mailbox icon in the Folder List. 2 Click the shared address book notification to open it, or right-click it > click Open. 3 Click Accept Address Book to add the address book to the Address Book list. You can now use the shared address book to address items or look up user information just as you would in other address books. 38 GroupWise 7 WebAccess Client User Guide Novell Confidential Manual (ENU) 21 December 2004 Creating a Personal Group 1 In the GroupWise WebAccess main window, click Address Book to open the Address Book. By default, the Address Book opens to the GroupWise address books. 2 In the Address Books list, select the address book that contains the entries you want to add to the group. For GroupWise, you can choose from the GroupWise address book, the Frequent Contacts address book, or a personal address book. 3 Select the number of entries you want displayed at one time. The default displays 15 entries at one time. 4 To list the first entries (15 by default) in the selected address book, leave the search conditions boxes empty. or To search for a specific entry, click the icon to show another set of search condition boxes and the icon to hide all search conditions boxes. These boxes let you define the Address Book fields and information you want to search. GroupWise WebAccess supports the * (asterisk) and ? (question mark) wildcards. When searching a field, you can use * to represent multiple characters and ? to represent one character. For example, if you define a “First Name begins with jo*” condition, the search returns all entries whose first names start with JO (John, Joel, Jose, and so forth). If you define a “Last Name contains s?n” condition, the search returns all entries whose last names contain S and N separated by one character (Sanders, Johannson, Larsen, and so forth). 5 Click Search to display a list of entries that match your search conditions. 6 Select the entry you want to add to the group, then click To, CC, or BC to indicate the recipient type. You can also double-click the user icon to add it to the To: list. If you are using the HTML Address Book, you can add multiple recipients at one time by selecting the check boxes in front of the recipients' entries. 7 After you select the entries you want to add to the group, click Save Group to display the Save Group dialog box. 8 In the Personal Address Book list, select the personal address book where you want to save the group. 9 Type a name and description (optional) for the group, then click Save. The group is added to the personal address book. When addressing items, you can type the group name in the To, CC, or BC box, or you can use the Address Book to include it. The item is sent to each member of the group. GroupWise WebAccess Advanced Features 39 Novell Confidential Manual (ENU) 21 December 2004 Working with Attachments All GroupWise items you send or receive can include attachments of any file type (for example, text, audio, image, video, and application). Attaching Files You can attach one or more files to an item to send to other users. For example, you might want to send an expense report to another user or attach an agenda to an appointment. For you to attach files to an item, your browser must support attachments. Viewing Attachments When you view an attached file, GroupWise WebAccess attempts to convert the file to HTML and display it in your browser. If GroupWise WebAccess cannot convert the file, you can try to have your browser display the file. Depending on how your browser is configured to handle the file, the browser might display the file, launch an application to view the file in its native format, or save the file. Opening Attachments When you open an attached file, the file is opened in your browser in its native format if your browser supports the file format and if your browser is set up with the correct association for the file format. In addition, you might be able to edit the file if you have the appropriate plug-in (for example, the MSWord plug-in allows you to edit a .doc file in the browser). If you try to open a file with a format that is not supported in your browser or that does not have an association in your browser, you are prompted to save the file to disk. Saving Attachments You can save attachments in their native format. Attached Documents Users of the Windows version of GroupWise can attach library documents to a message. The attachment includes both a document snapshot and a document reference. The document snapshot is the actual document attached to the message; the document reference is a link to the document in the library. When you receive the message, you have the option of using the document reference to view, open, or save the actual library document, or using the document snapshot to view, open, or save the document attached to the message. Using the WebAccess Calendar The Calendar lets you view appointments, tasks, or notes you receive from others or created for yourself. You can view one day, one week, or one month at a time. You open the Calendar from the toolbar, the tab bar, or from the Calendar folder in the GroupWise WebAccess main window. The Calendar displays any appointments, tasks, and notes you received whether you have accepted them or not. You can perform the same actions on an item in the Calendar that you can on an item in the Mailbox, such as accepting, declining, delegating, or moving the item. In addition, you can also decline, delegate, or move items you have accepted that no longer appear in your Mailbox. While you have the Calendar open, you can also schedule appointments, assign tasks, post items, and write notes to other users. 40 GroupWise 7 WebAccess Client User Guide Novell Confidential Manual (ENU) 21 December 2004 This section contains the following topics: “Using the HTML Version of the Calendar” on page 41 Using the HTML Version of the Calendar You open the Calendar from the toolbar in the GroupWise WebAccess main window. When you open the Calendar, the HTML version is displayed. This section contains the following topics: “Using the Day View Calendar” on page 41 “Using the Week View Calendar” on page 42 “Using the Month View Calendar” on page 42 Using the Day View Calendar 1 Click the Calendar tab in the main window. 2 Click Day in the top-right corner of the Calendar view. The Day View calendar displays the current date. To change dates within the current month, click the desired date in the monthly calendar. To move forward or backward one month, click the arrow buttons next to the month header in the monthly calendar. To return to the current day’s calendar, click Today. You can also use the Month, Day, and Year drop-down lists to display a calendar for a different date. GroupWise WebAccess Advanced Features 41 Novell Confidential Manual (ENU) 21 December 2004 Using the Week View Calendar 1 Click the Calendar tab in the main window. 2 Click Week in the top-right corner of the Calendar view. The Week View calendar displays the current week’s calendar. To change the view to display another week’s calendar, click any date from the desired week in the monthly calendar. To move forward or backward one month, click the arrow buttons next to the month header in the monthly calendar. To view the current date’s Day View calendar, click Today. Using the Month View Calendar 1 Click the Calendar tab in the main window. 2 Click Month in the top-right corner of the Calendar view. 42 GroupWise 7 WebAccess Client User Guide Novell Confidential Manual (ENU) 21 December 2004 The Month View calendar displays the current month’s calendar. To change the view to display another month’s calendar, click the month in the yearly calendar. To move forward or backward one month, click the arrow buttons next to the year header in the yearly calendar. To view the current date’s Day View calendar, click Today. Working with Folders GroupWise WebAccess provides folders to help organize the items you send and receive. The Folder List lets you select which folder you want open. The contents of the currently opened folder are displayed in the Item List. For more information about the folders in your Folder List, see “Understanding the Folder List” on page 10. This section contains the following topics: “Creating a Folder” on page 44 “Deleting a Folder” on page 44 “Moving an Item to Another Folder” on page 44 “Viewing Items in a Find Results Folder” on page 45 “Using the Checklist Folder” on page 45 “Working with Shared Folders” on page 47 GroupWise WebAccess Advanced Features 43 Novell Confidential Manual (ENU) 21 December 2004 Creating a Folder 1 In the Folder List click Manage Folders, or right-click on a folder and choose Add Folder. 2 Type a name for your new folder in the Folder Name box. 3 Select the place in the Folder List where you want to add the folder. By default, the folder is added as the first folder in the Cabinet. For example, to add a folder at the same level as the Mailbox folder, select the Down button next to the Mailbox folder. To add a folder to the Mailbox folder, select the Right button next to the Mailbox folder. 4 Click OK. Deleting a Folder You cannot delete system folders, which include: your user folder, the Mailbox, the Cabinet, and the Trash. 1 In the Folder List, click Manage Folders, or right-click a folder > choose Delete Folder. 2 Click the folder you want to delete, then click Delete to confirm that you want to delete the folder and all its contents. For more information, see “Understanding the Folder List” on page 10. Moving an Item to Another Folder You can drag and drop items from folder to folder. You can select more than one item at a time. 1 To move an item you received, click the Mailbox icon in the Folder List or Tab Bar. or 44 GroupWise 7 WebAccess Client User Guide Novell Confidential Manual (ENU) 21 December 2004 To move an appointment, task, or note you have already accepted, then click the Calendar icon in the Folder List or Tab Bar. or To move an item you sent, click the Sent Items icon in the Folder List. 2 Locate the item in the Item List. 3 Select the item, then click Move at the top of the Item List. or Click the item to open it, then click Move. or Right-click an item > click Move. 4 Click the folder where you want to move the item. If you are moving the item to a folder in the Cabinet, you might need to click the arrow next to the Cabinet to display the Cabinet folders. Viewing Items in a Find Results Folder A Find Results folder is a folder that displays the results of a query. When the folder is opened, GroupWise examines the search criteria defined for the folder, searches for everything specified, then displays everything it finds in the Item List. You can act on items in a Find Results folder the same way you act on items in any folder, such as opening, forwarding, printing, copying, moving, or deleting them, but the original item remains stored in the folder where the search found it. This means that if you move or delete an item from a Find Results folder, the item is deleted from the Item List, but not from the original location. The next time you open the Find Results folder, the search is performed again and the item is once again displayed. Although you cannot create new Find Results folders using WebAccess, you can use folders you created using the GroupWise Client for Windows. However, to ensure that you are viewing the most recent information in the folder and not a cached copy, you should click Update before opening a Find Results folder. Using the Checklist Folder Use the Checklist folder to create a task list. You can move any items (mail messages, phone messages, notes, tasks, or appointments) to this folder and arrange them in the order you want. You can mark items Complete. You can assign items a due date, but the items do not display in your Calendar. The Checklist folder is a system folder. In the Windows version of GroupWise, you can mark items to display in the Checklist folder without actually moving them. You cannot do this in GroupWise WebAccess. However, if you marked items to display in the Checklist folder from the Windows version of GroupWise, GroupWise WebAccess lets you view the items in the Checklist folder. In the Windows version of GroupWise, you can create a checklist area at the top of any folder if you have selected the Checklist display setting for the folder. This checklist displays in its original folder and in the Checklist folder. You cannot do this in GroupWise WebAccess. However, if you have created checklists in multiple folders from the Windows version of GroupWise, GroupWise WebAccess lets you view the items in the Checklist folder. GroupWise WebAccess Advanced Features 45 Novell Confidential Manual (ENU) 21 December 2004 In the previous version of GroupWise WebAccess, a Task List folder listed all the task items in your Mailbox and Calendar. The Task List folder was a query folder. The Checklist folder replaces the Task List folder. This section contains the following topics: “Creating a Checklist in the Checklist Folder” on page 46 “Moving an Item to the Checklist Folder” on page 46 “Assigning a Due Date to an Item in the Checklist Folder” on page 46 “Marking or Unmarking a Checklist Item Complete” on page 47 Creating a Checklist in the Checklist Folder 1 Move items to the Checklist folder. For information, see “Moving an Item to the Checklist Folder” on page 46. 2 To arrange the items in the order you want, click an item, then click the toolbar icons to move the item up, down, or to the top or bottom of the checklist. 3 To assign a due date to an item, open the item, click Checklist, click Activate Checklist Due Date, select a due date, click Save, then click Close. The due date displays in the Due Date column in the Item List. Moving an Item to the Checklist Folder 1 To move an item you received, click the Mailbox icon in the Folder List or Tab Bar. or To move an appointment, task, or note you have already accepted, click the Calendar icon in the Folder List. 2 Locate the item in the Item List. 3 Select the item, then click Move at the top of the Item List. or Click the item to open it, then click Move. or Drag the item and drop it on the Checklist folder. or Right-click the item > click Move. 4 Click the Checklist folder. Assigning a Due Date to an Item in the Checklist Folder 1 Click the Checklist icon in the Folder List. 2 Locate the item in the Item List. 3 Click the item to open it, or right-click the item > click Open, then click Checklist. 4 Click Activate Checklist Due Date, select a due date, click Save, then click Close. 46 GroupWise 7 WebAccess Client User Guide Novell Confidential Manual (ENU) 21 December 2004 Marking or Unmarking a Checklist Item Complete 1 Click the Checklist icon in the Folder List. 2 Locate the item in the Item List. 3 Click the check box to the left of the item, then click Complete at the top of the Item List. or Right-click the item and choose Complete. Items that have been marked Complete have a check mark next to them. To unmark an item, click the item to open it, click Checklist, deselect Complete, click Save, then click Close. Working with Shared Folders You can share personal folders with other users. Recipients of the shared folder receive a notification explaining that you have shared the folder with them. They can then accept the folder or decline the folder. This section contains the following topics: “Sharing a Folder” on page 47 “Accepting a Shared Folder” on page 48 “Posting an Item to a Shared Folder” on page 49 Sharing a Folder 1 Click Manage Folders, then click the Share Folders tab. 2 Select the folder you want to share or modify permissions for. Folders available for sharing are underlined. GroupWise WebAccess Advanced Features 47 Novell Confidential Manual (ENU) 21 December 2004 3 In the Name box, type the GroupWise names or GroupWise user IDs of the people with whom you want to share the folder, then click Add to add them to the Shared list. or Click Address Book to use the Address Book to add names to the Shared list. After you add a shared folder recipient, the Status column displays Pending until the recipient accepts or declines the shared folder. 4 If desired, change the recipient’s shared folder rights. Read: Lets the user read items in the folder. Add: Lets the user add items to the folder. Edit: Lets the user edit items in the folder. Delete: Lets the user delete items from the folder. 5 Click Save if you changed any shared folder rights. or Click Close. Accepting a Shared Folder 1 Click the Mailbox icon in the Folder List. 2 Click the shared folder notification to open it. 3 Click Accept Folder to open the Accept Shared Folder dialog box. 4 If you want to change the name of the folder (in your Folder List only), type a new name in the Folder Name box. 5 In the Folder List, select the location where you want the folder to be placed. 6 Click OK to add the folder. 48 GroupWise 7 WebAccess Client User Guide Novell Confidential Manual (ENU) 21 December 2004 Posting an Item to a Shared Folder 1 In the Folder List, open the shared folder you want to post the item to. 2 At the top of the Item List, click Post Item to This Folder to display a Message form. 3 Type a subject and message. You can include Web site locations or addresses (URLs) in both the Subject and Message boxes. 4 (Optional) Click Spell Check to spell check the message. For this feature to work, your browser must be enabled for Java. 5 (Optional) Click Attach to attach files to the message. For this feature to work, your browser must support attachments. 6 Click Post to add the message to the shared folder. Undeleting Items in the Trash When you delete an item, the item is moved to the Trash. The item remains in the Trash until you purge the item from the Trash or purge all items by emptying the Trash. The Trash works like other folders in your Folder List, which means you can list the items in the Trash as well as open and view item contents. You can also undelete items in the Trash. Undeleted items return to the folders from which they were deleted. The Windows version of GroupWise includes an option for automatically emptying the Trash after a specified number of days. If this option has been set, either by you or by the GroupWise system administrator, items in the Trash are automatically purged after the specified number of days. To undelete items in your Trash folder, 1 Click Trash in the Folder List. 2 Select the item, then click Undelete at the top of the Item List. GroupWise WebAccess Advanced Features 49 Novell Confidential Manual (ENU) 21 December 2004 or Click the item to open it, then click Undelete. The item is moved from your Trash to the folder from which it was originally deleted. Using Proxy to Manage Other Mailboxes Proxy lets a GroupWise user access another GroupWise user’s Mailbox to perform various actions, such as reading, sending, accepting, and declining items, on behalf of the user. This means that you can manage another user's Mailbox (including the Calendar), or you can allow another user to manage your Mailbox. IMPORTANT: You can proxy for a user in a different post office or domain, as long as that person is in the same GroupWise system. You cannot proxy for a user in a different GroupWise system. Before you can use Proxy to manage another user’s Mailbox, that person must grant you proxy access to his or her Mailbox. The same is true if you want someone to act as your proxy; you must give that person proxy access to your Mailbox. Proxy access enables the proxy to open the other person’s Mailbox, while logged in to his or her own Mailbox, without knowing the person’s GroupWise user ID and Mailbox password. It also establishes the rights the proxy has to the Mailbox. A proxy’s rights determine the extent to which the proxy can manage the person’s Mailbox. For example, the proxy might be given rights to read and write (send) all item types or only be given rights to read Calendar items (appointments, tasks, and notes). In addition to providing specific users with proxy access to your Mailbox, you can establish a default level of proxy access. The default level of proxy access is given to all GroupWise users to whom you haven’t explicitly given proxy access. You establish the default level of proxy access by modifying the <All User Access> entry in your Proxy Access list. For example, if you want to enable all GroupWise users to view your Calendar, you can modify the <All User Access> entry to give Read rights to your appointments, tasks, and notes. By default, the <All User Access> does not allow any access to your Mailbox. This section contains the following topics: “Proxying Another User’s Mailbox” on page 51 “Granting Proxy Access to Your Mailbox” on page 51 “Granting Default Proxy Access to Your Mailbox” on page 53 50 GroupWise 7 WebAccess Client User Guide Novell Confidential Manual (ENU) 21 December 2004 Proxying Another User’s Mailbox 1 In the GroupWise WebAccess main window, click the Proxy icon. The Proxy list contains the names of all users whose Mailboxes you've previously proxied. 2 If the user’s whose Mailbox you want to proxy is listed in the Proxy list, click the user. Otherwise, continue with the next step. 3 Click Address Book to open the GroupWise Address Book. or If you know the full GroupWise address (userID.post_office.domain) of the person whose Mailbox you want to proxy, type the address in the Name field, then click Login. 4 Specify the search criteria needed to find the user whom you want to be a proxy, then click Search. In the list of users that is displayed as a result of the search, select the user, click Select (at the top of the list of users), then click Login to close the Address Book and display the user’s Mailbox. 5 When you are finished proxying, click Logout in the user’s main window. Granting Proxy Access to Your Mailbox 1 From the GroupWise WebAccess main window, click the Options icon on the toolbar. 2 Click Proxy Access. For a user to have proxy rights to your Mailbox, you must add the user to the Proxy Access list. 3 Click Add Entry to display the Add Proxy Access page. GroupWise WebAccess Advanced Features 51 Novell Confidential Manual (ENU) 21 December 2004 4 Click Address Book to open the GroupWise Address Book. or If you know the GroupWise user ID of the person you want to assign as a proxy, enter the user ID in the Name field, then skip to step 6. 5 Enter the search criteria needed to find the user whom you want to be a proxy, then click Search. In the list of users that is displayed as a result of the search, select the user, click Select (at the top of the list of users), then click OK to close the Address Book and display the user in the Name field. 6 Select the rights you want to give the proxy: Mail/Phone: Select Read to enable the proxy to read mail and phone messages. Select Write to enable the proxy to create and send mail and phone messages. Appointments: Select Read to enable the proxy to read appointments. Select Write to enable the proxy to create and send appointments. Reminder Notes: Select Read to enable the proxy to read notes. Select Write to enable the proxy to create and send notes. Tasks: Select Read to enable the proxy to read tasks. Select Write to enable the proxy to create and send tasks. Subscribe to My Alarms: This applies only if the proxy is using the GroupWise client for Windows. Receiving alarms is not supported in GroupWise WebAccess. It enables the proxy to receive any appointment alarms you set. Subscribe to My Notifications: This applies only if the proxy is using the GroupWise client for Windows. Receiving notifications is not supported in GroupWise WebAccess. This option enables the proxy to receive notifications through GroupWise Notify. Modify Options/Rules/Folders: Select this option to enable the proxy to change the options in your Mailbox and to add, delete, or modify folders. The proxy can edit any of your Options settings except for the Proxy Access settings. Read Items Marked Private: Select this option to enable the proxy to see any items that are marked Private. If you don’t give the proxy this right, all items marked Private in your Mailbox are hidden from that proxy. 7 Click Save to add the proxy to the Proxy Access list. 8 Repeat steps 3 through 7 to add additional proxies. or Click Close to close the Proxy Access list. 52 GroupWise 7 WebAccess Client User Guide Novell Confidential Manual (ENU) 21 December 2004 Granting Default Proxy Access to Your Mailbox 1 From the GroupWise WebAccess main window, click the Options icon on the toolbar. 2 Click Proxy Access. The Proxy Access list contains an entry called <All User Access>. This entry applies to any GroupWise users who you have not explicitly added to the Proxy Access list. 3 Click <All User Access> to display the proxy rights assigned to this entry. By default, the <All User Access> entry has no proxy rights to your Mailbox. 4 Select the rights you want to give the <All User Access> entry: Mail/Phone: Select Read to enable all users to read mail and phone messages. Select Write to enable all users to create and send mail and phone messages. Appointments: Select Read to enable all users to read appointments. Select Write to enable all users to create and send appointments. Reminder Notes: Select Read to enable all users to read notes. Select Write to enable all users to create and send notes. Tasks: Select Read to enable all users to read tasks. Select Write to enable all users to create and send tasks. Subscribe to My Alarms: This applies only if proxies are using the GroupWise client for Windows. Receiving alarms is not supported in GroupWise WebAccess. This enables all users to receive any appointment alarms you set. Subscribe to My Notifications: This applies only if proxies are using the GroupWise client for Windows. Receiving notifications is not supported in GroupWise WebAccess. This option enables all users to receive notifications given through GroupWise Notify. Modify Options/Rules/Folders: Select this option to enable all users to change the options in your Mailbox and to add, delete, or modify folders. Users can edit any of your Options settings except for the Proxy Access settings. Read Items Marked Private: Select this option to enable all users to see any items that are marked Private. If you don’t give the users this right, all items marked Private in your Mailbox are hidden from the users. 5 Click Save to save the changes to the <All User Access> entry. 6 Click Close to close the Proxy Access list. Using GroupWise Libraries GroupWise libraries store documents created by GroupWise users. GroupWise WebAccess lets you search GroupWise libraries for documents that you have created or that other users have created and shared with you. After you have found the document you want, you can view it as an HTML document or save it to your local drive and then view or edit it in its native application. If you have the appropriate plug-in for your browser, you might also be able to open the document and edit it in your browser. For example, the MSWord plug-in allows you to edit a .doc file in the browser. You cannot use GroupWise WebAccess to save documents to a library. This includes any new documents you create or any existing library documents you save to your local drive to view or edit. To save a document to a library, use the Windows version of GroupWise. GroupWise WebAccess Advanced Features 53 Novell Confidential Manual (ENU) 21 December 2004 To search for a document: 1 From the GroupWise WebAccess main window, click the Documents tab. 2 Type the words you want to search for. A default search action occurs when you click on the documents tab. 3 Select whether you want to search the Subject field, the Author field, or all fields (anywhere) in the document. 4 Select the libraries to search. 5 Click Search to display documents that meet the search criteria. 6 Click the document to view it as an HTML document. or Click Open to open the document in your browser in its native format. You can do this if your browser supports the file format and if your browser is set up with the correct association for the file format. If you have the appropriate plug-in, you might be able to edit the document in your browser. For example, the MSWord plug-in allows you to edit a .doc file in the browser. or Click Save As to save the document to in its native format to a local drive. or Click Properties to display information about the document. You can also search for items in your Mailbox. For more information, see “Searching for an Item” on page 22. Modifying WebAccess Options You can use GroupWise WebAccess to modify options to change your password, change your send options, change your time zone, create rules, and more. This section contains the following topics: “Changing Your GroupWise Password” on page 55 “Specifying Send Options” on page 55 54 GroupWise 7 WebAccess Client User Guide Novell Confidential Manual (ENU) 21 December 2004 “Setting the Default Number of Messages to Display” on page 58 “Changing Your Time Zone” on page 58 “Automatically Adding A Signature to Items You Send” on page 59 “Using Rules” on page 59 Changing Your GroupWise Password If your system administrator has turned on LDAP authentication, your LDAP password is used instead of your GroupWise password to access GroupWise WebAccess. If LDAP authentication is turned on, the following procedure changes your LDAP password: 1 In the GroupWise WebAccess main window, click Options. 2 Click Password. 3 Type your old password. 4 Type your new password, then retype the new password to confirm it. Remember that your password is case sensitive. 5 Click OK. When you change your password in GroupWise WebAccess, you change it for your GroupWise Mailbox. That means that you always use the same password to log in to your GroupWise Mailbox whether you are using GroupWise WebAccess or another version of the GroupWise client. Specifying Send Options You can specify send options for different types of items (mail, appointment, task, note, phone message) you send, and you can specify global send options that affect every item you send. Send options include the following: GroupWise WebAccess Advanced Features 55 Novell Confidential Manual (ENU) 21 December 2004 Classification A classification is a security setting that lets the recipient know if the item is confidential, top secret, and so forth. This information appears at the top of the item. A classification does not provide any encryption or additional security. It is meant to alert the recipient to the relative sensitivity of the item. Priority Recipients can see the priority of an item by looking at the color of the icon next to the item in the Item List. High priority items are red, normal priority items are white, and low priority items are gray. Reply Requested When you request a reply to an item, the recipient of the item sees next to the item in the Item List. If you select When Convenient, “Reply Requested: When convenient” appears at the top of the item. If you select Within x Days, “Reply Requested: By xx/xx/xx” appears at the top of the item. If the recipient attempts to delete an item without replying, he or she is reminded that the item requested a reply. (The recipient can still delete the item without replying.) Return Notification Return notification lets you know information such as when the recipient opens or deletes an item, declines an appointment, or completes a task. If you select to receive Notify, this will apply only when you are using the GroupWise client for Windows. Receiving notifications through Notify is not supported in GroupWise WebAccess. Changing the Security Setting (Classification) of All Items You Send 1 In the GroupWise WebAccess main window, click the Options icon. 2 Click Send Options. 56 GroupWise 7 WebAccess Client User Guide Novell Confidential Manual (ENU) 21 December 2004 3 Select a security setting from the Classification drop-down list. 4 Click Save, then click Close. Changing the Priority of All Items You Send 1 In the GroupWise WebAccess main window, click the Options icon. 2 Click Send Options. 3 Select a priority. The small icon next to an item in the Mailbox is red when the priority is high, white when the priority is standard, and gray when the priority is low. 4 Click Save, then click Close. Requesting a Reply for All Items You Send 1 In the GroupWise WebAccess main window, click the Options icon. 2 Click Send Options. 3 Under Reply Requested, specify when you want to receive a reply. The recipient sees next to the message. If you select When Convenient, “Reply Requested: When convenient” appears at the top of the message. If you select Within x Days, “Reply Requested: By xx/xx/xx” appears at the top of the message. 4 Click Save, then click Close. GroupWise WebAccess Advanced Features 57 Novell Confidential Manual (ENU) 21 December 2004 Getting a Return Receipt for All Items You Send 1 In the GroupWise WebAccess main window, click the Options icon. 2 Click Send Options. 3 In the Return Notification group box, specify the type of return receipt you want. If you select to receive Notify, this applies only when you are using the GroupWise client for Windows. Receiving notifications through Notify is not supported in GroupWise WebAccess. 4 Click Save, then click Close. Setting the Default Number of Messages to Display 1 In the GroupWise WebAccess main window, click the Options icon. 2 Click Send Options. 3 Click General. 4 Select the default number of messages you want to display in your Item List. 5 Click Save, then click Close. Changing Your Time Zone To ensure that dates and times are correct in messages, appointments, and other time-relevant information, GroupWise WebAccess must know the time zone in which you are located. GroupWise WebAccess automatically adjusts the time for appointments sent between people in different time zones. For example, if you are located in New York and schedule a conference call with people in Los Angeles for 4:00 p.m. your time, the appointment received by the Los Angeles recipients will show the conference call at 1:00 p.m. their time. By default, GroupWise WebAccess uses the time zone established for your GroupWise post office. However, if you are using GroupWise WebAccess in a time zone other than your post office’s time zone, you should change your time zone setting. For example, if your post office is located in New York but you are working in Chicago, you would need to change your time zone setting from Eastern Time to Central Time. The GroupWise WebAccess time zone setting applies only to GroupWise WebAccess. If you have access to the Windows version of the GroupWise client, that client will use the time zone configured through the Windows operating system, not the time zone you set in GroupWise WebAccess. 1 In the GroupWise WebAccess main window, click the Options icon. 2 Click Time Zone. 58 GroupWise 7 WebAccess Client User Guide Novell Confidential Manual (ENU) 21 December 2004 3 Select the time zone you want your GroupWise WebAccess messages and appointments based on. 4 Click Save. Automatically Adding A Signature to Items You Send You can create an electronic signature that contains your name, title, phone number, and so forth. You can then choose to automatically add the signature to items you send or to prompt you before adding it. 1 In the GroupWise WebAccess main window, click the Options icon. 2 Click Signature. 3 Click Activate Signature. 4 Type your signature text in the box. 5 Click Automatically Add Signature to have GroupWise WebAccess add the signature when you send the item. 6 Click Save. When you create a signature, GroupWise WebAccess stores it in your GroupWise Mailbox at your post office. Whether you log in to your Mailbox through GroupWise WebAccess or another version of the GroupWise client, you always have the same signature. Using Rules You can use rules to define actions that you want to be performed on items you receive. For example, you can forward or reply to messages or move messages to folders. Rules can help you organize your Mailbox, automate your Mailbox while you are away, or delete unwanted items. Requirements for Creating a Rule When you create a rule, you must do the following: Select the type of action you want performed. The available actions are forward, reply to, delete, move to a folder, and vacation. Vacation is simply a predefined type of reply. GroupWise WebAccess Advanced Features 59 Novell Confidential Manual (ENU) 21 December 2004 Name the rule. By naming the rules, you can have more than one rule that uses the same action. Define any optional conditions. For example, you might want to move all items you receive from your supervisor to a specific folder. You can define a condition so that only messages with your supervisor’s name on the From line are moved to the folder. All other items will remain in your main Mailbox folder. Fill in the information required to carry out the action. For example, you might need to specify the folder where you want to move the messages. Save the rule. Using Rules Created with Another GroupWise Client Rules are stored in your GroupWise Mailbox at your post office. Because of this, rules you define in other versions of the GroupWise client also appear in the Rules list and apply when you use GroupWise WebAccess. Editing Rules You can edit any rules you create in GroupWise WebAccess. If you create rules using another version of the GroupWise client, you can edit those rules provided they do not contain more capabilities than GroupWise WebAccess allows you to set. For example, the Windows version of the GroupWise client lets you create rules to apply to items you are sending. Because the Rules feature in GroupWise WebAccess does not include this capability, you couldn’t edit that rule. Creating a Rule 1 From the GroupWise WebAccess main window, click the Options icon. 2 Click Rules. 3 Select the type of rule you want to create: 60 Delete: Moves an item to the Trash. You can apply the rule to all new items or only new items that meet the criteria you establish. Forward: Forwards an item to the recipients you specify. You can apply the rule to all new items or only new items that meet the criteria you establish. GroupWise 7 WebAccess Client User Guide Novell Confidential Manual (ENU) 21 December 2004 Move to Folder: Moves an item to the folder you specify. You can apply the rule to all new items or to only new items that meet the criteria you establish. Reply: Generates a reply to an item. The reply can go to the sender of the item only (Reply to Sender) or to all recipients of the item (Reply All). You can apply the rule to all new items or only new items that meet the criteria you establish. Vacation: Generates a reply to all new items you receive. The reply goes to the sender of the item only (Reply to Sender), not to all recipients of the item (Reply All). 4 Click Create to display the Create Rule form. 5 Type the name you want to use for the rule. Names can include any characters, including spaces. 6 If desired, define an optional condition to limit the items that are affected by the rule. If you do not define an optional condition, the rule is applied to all new items you receive. You cannot define an optional condition for the Vacation rule. The Vacation rule is applied to all items. 7 Define the actions that you want performed when the rule is applied. The actions vary depending on the type of rule you are creating. For example, when creating a rule to reply to items, you select whether you want to reply to the sender only or the sender and all recipients. When moving an item to a folder, you select the destination folder. If you want to create a rule to forward items to another account, you would specify the e-mail address. 8 Click Save to save the rule to the Rules list. 9 By default, the rule is automatically activated. If you don’t want the rule to be active at this time, deselect the rule’s Activate box, then click Save. or To keep the rule active, click Close. GroupWise WebAccess Advanced Features 61 Novell Confidential Manual (ENU) 21 December 2004 When you create a rule, GroupWise WebAccess stores it in your GroupWise Mailbox at your post office. Whether you log in to your Mailbox through GroupWise WebAccess or another version of the GroupWise client, you always have the same rules. Activating or Deactivating Rules By default, when you save a rule that you have just created, it is automatically activated. GroupWise WebAccess executes the rule for any new items you receive. It does not execute the rule for any items you have already received. 1 From the GroupWise WebAccess main window, click the Options icon. 2 Click Rules. 3 In the list of active rules, click the rule’s check box to activate it or deactivate it. A check mark indicates that the rule is active. 4 Click Save to save the changes. Printing from WebAccess Printing from WebAccess depends on the printing capabilities of your Web browser. 1 Click any message in the Item List to open it. 2 Click in the message text. 3 Use your browser’s print feature to print the message. For example, to print using Mozilla* Firefox*, click File, then click Print. If your browser’s print feature prints the message in a format that loses information, click Print View to display a printer-friendly version of the message in a new browser window, then print the message from the new window. 62 GroupWise 7 WebAccess Client User Guide Novell Confidential 4 Manual (ENU) 21 December 2004 GroupWise Frequently Asked Questions The Novell® GroupWise® 7 Client Frequently Asked Questions (FAQ) is intended to help GroupWise client users who have not found the information they need in the GroupWise client online help or User Guides. The Novell® GroupWise® 7 Client Frequently Asked Questions (FAQ) contains the following sections: “How Do I Find What I Need in the GroupWise Client Documentation?” “GroupWise Windows Client FAQ” “GroupWise Cross-Platform Client FAQ” “GroupWise WebAccess Client FAQ” “Non-GroupWise Clients FAQ” “GroupWise Client Comparison” “Where Do I Go for More Help?” GroupWise Frequently Asked Questions 63 Novell Confidential 64 GroupWise 7 WebAccess Client User Guide Manual (ENU) 21 December 2004