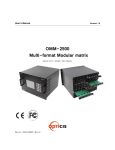
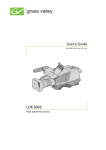
1
User’s Guide 3922 496 30771 August 2011 v6.1 HD(( )( () WIRELESS HD Wireless HD Digital Wireless camera system (v1.3) Declaration of conformity We, Grass Valley Nederland B.V., Kapittelweg 10, 4827 HG Breda, The Netherlands, declare under our sole responsibility that the LDK 4453/20, LDK 4453/22, LDK 4453/25, LDK 4454/60, LDK 5455/X0, LDK 4460/XX, LDK 4470/XX, LDK 5464/XX, LDK 5465/20, LDK5466/00, LDK 5466/22 and LDK 5466/25 are in compliance with the following standards: - EN 60950: Safety - EN 301489-3: EMC for Radio Devices - EN 302 064: Radio (Wireless Video links) - ETS 300 220: Radio (Radio Equipment) following the provisions of: - RTT&E Directive 1999/5/CE We, Grass Valley Nederland B.V., Kapittelweg 10, 4827 HG Breda, The Netherlands, declare under our sole responsibility that the remainder of the components used in this product is in compliance with the following standards: - EN 60065: Safety - EN 55103-1: EMC (Emission) - EN 55103-2: EMC (Immunity) following the provisions of: a. the Low Voltage directive 2006/95/EC b. the EMC directive 2004/108/EC Copyright Copyright Grass Valley Nederland B.V. 2011. Copying of this document and giving it to others, and the use or communication of the contents thereof, are forbidden without express authority. Offenders are liable to the payment of damages. All rights are reserved in the event of the grant of a patent or the registration of a utility model or design. Liable to technical alterations in the course of further development. Website Visit the Grass Valley public website to download the latest user’s guide updates and additional information about your broadcast product: www.grassvalley.com Table of contents Chapter 1 – Introduction 1.1 1.2 1.3 1.4 Technology. . . . . . . . . . . . . . . . . . . . . . . . . . . . . . . . . . . . . . . . . . . . . . . . . . . . . . . . . . 15 1.1.1 System configuration . . . . . . . . . . . . . . . . . . . . . . . . . . . . . . . . . . . . . . . . . . . . . 15 1.1.2 Shooting range. . . . . . . . . . . . . . . . . . . . . . . . . . . . . . . . . . . . . . . . . . . . . . . . . . 15 Features . . . . . . . . . . . . . . . . . . . . . . . . . . . . . . . . . . . . . . . . . . . . . . . . . . . . . . . . . . . . 16 System composition . . . . . . . . . . . . . . . . . . . . . . . . . . . . . . . . . . . . . . . . . . . . . . . . . . 17 Unit identification . . . . . . . . . . . . . . . . . . . . . . . . . . . . . . . . . . . . . . . . . . . . . . . . . . . . 18 Chapter 2 – Installation 2.1 2.2 2.3 2.4 Configurations . . . . . . . . . . . . . . . . . . . . . . . . . . . . . . . . . . . . . . . . . . . . . . . . . . . . . . . 19 Wireless camera adapter (WCA) . . . . . . . . . . . . . . . . . . . . . . . . . . . . . . . . . . . . . . . . 21 2.2.1 Attaching an adapter . . . . . . . . . . . . . . . . . . . . . . . . . . . . . . . . . . . . . . . . . . . . . 21 2.2.2 Attaching antennas to the adapter. . . . . . . . . . . . . . . . . . . . . . . . . . . . . . . . . . . 22 2.2.3 Attaching a battery to the camera adapter . . . . . . . . . . . . . . . . . . . . . . . . . . . . 23 Antenna Management Unit (AMU) . . . . . . . . . . . . . . . . . . . . . . . . . . . . . . . . . . . . . . 24 2.3.1 Antenna positioning . . . . . . . . . . . . . . . . . . . . . . . . . . . . . . . . . . . . . . . . . . . . . . 24 2.3.2 Antenna unit assembly . . . . . . . . . . . . . . . . . . . . . . . . . . . . . . . . . . . . . . . . . . . 24 Wireless Control Unit (WCU) . . . . . . . . . . . . . . . . . . . . . . . . . . . . . . . . . . . . . . . . . . . 26 2.4.1 Connecting the studio intercom system . . . . . . . . . . . . . . . . . . . . . . . . . . . . . . 27 2.4.2 Connecting the studio signalling . . . . . . . . . . . . . . . . . . . . . . . . . . . . . . . . . . . . 28 2.4.3 Audio gain (external) . . . . . . . . . . . . . . . . . . . . . . . . . . . . . . . . . . . . . . . . . . . . . 31 Chapter 3 – Using menus 3.1 3.2 3.3 Menus . . . . . . . . . . . . . . . . . . . . . . . . . . . . . . . . . . . . . . . . . . . . . . . . . . . . . . . . . . . . . . 33 Setting up the WCU menu . . . . . . . . . . . . . . . . . . . . . . . . . . . . . . . . . . . . . . . . . . . . . 33 3.2.1 Using the rotary/push button to set up the WCU . . . . . . . . . . . . . . . . . . . . . . . 33 3.2.2 Using an OCP 400 to set up the WCU . . . . . . . . . . . . . . . . . . . . . . . . . . . . . . . 34 Navigating the WCU menus . . . . . . . . . . . . . . . . . . . . . . . . . . . . . . . . . . . . . . . . . . . . 35 3.3.1 Entering the system menu . . . . . . . . . . . . . . . . . . . . . . . . . . . . . . . . . . . . . . . . 35 3.3.2 Finding your way . . . . . . . . . . . . . . . . . . . . . . . . . . . . . . . . . . . . . . . . . . . . . . . . 35 3.3.3 Leaving the Systems Menu . . . . . . . . . . . . . . . . . . . . . . . . . . . . . . . . . . . . . . . . 36 3.3.4 Making changes. . . . . . . . . . . . . . . . . . . . . . . . . . . . . . . . . . . . . . . . . . . . . . . . . 36 3.3.5 Using the Recall File to undo changes. . . . . . . . . . . . . . . . . . . . . . . . . . . . . . . . 37 Chapter 4 – Setting up 4.1 Wireless Insight . . . . . . . . . . . . . . . . . . . . . . . . . . . . . . . . . . . . . . . . . . . . . . . . . . . . . . 39 HD Wireless User’s Guide (v6.1) 3 4.2 4.3 4.4 Wireless Camera Adapter (WCA) . . . . . . . . . . . . . . . . . . . . . . . . . . . . . . . . . . . . . . . . 39 4.2.1 Select video frequency channel . . . . . . . . . . . . . . . . . . . . . . . . . . . . . . . . . . . . . 40 4.2.2 Select data frequency channel. . . . . . . . . . . . . . . . . . . . . . . . . . . . . . . . . . . . . . 40 4.2.3 Select transmission profiles. . . . . . . . . . . . . . . . . . . . . . . . . . . . . . . . . . . . . . . . 40 4.2.4 Select camera number. . . . . . . . . . . . . . . . . . . . . . . . . . . . . . . . . . . . . . . . . . . . 41 4.2.5 Camera head audio . . . . . . . . . . . . . . . . . . . . . . . . . . . . . . . . . . . . . . . . . . . . . . 41 4.2.6 Intercom. . . . . . . . . . . . . . . . . . . . . . . . . . . . . . . . . . . . . . . . . . . . . . . . . . . . . . . 43 4.2.7 Viewfinder indications . . . . . . . . . . . . . . . . . . . . . . . . . . . . . . . . . . . . . . . . . . . . 44 Antenna Management Unit (AMU) . . . . . . . . . . . . . . . . . . . . . . . . . . . . . . . . . . . . . . 45 4.3.1 AMU indicators . . . . . . . . . . . . . . . . . . . . . . . . . . . . . . . . . . . . . . . . . . . . . . . . . 45 4.3.2 Selecting AMU identifier . . . . . . . . . . . . . . . . . . . . . . . . . . . . . . . . . . . . . . . . . . 46 Wireless Control Unit (WCU) . . . . . . . . . . . . . . . . . . . . . . . . . . . . . . . . . . . . . . . . . . . 47 4.4.1 Select a video scanning mode . . . . . . . . . . . . . . . . . . . . . . . . . . . . . . . . . . . . . . 47 4.4.2 Set transmission frequencies . . . . . . . . . . . . . . . . . . . . . . . . . . . . . . . . . . . . . . 47 4.4.3 Set transmission profiles . . . . . . . . . . . . . . . . . . . . . . . . . . . . . . . . . . . . . . . . . . 47 4.4.4 Select camera number. . . . . . . . . . . . . . . . . . . . . . . . . . . . . . . . . . . . . . . . . . . . 47 4.4.5 WCU audio menu. . . . . . . . . . . . . . . . . . . . . . . . . . . . . . . . . . . . . . . . . . . . . . . . 48 4.4.6 WCU intercom menu . . . . . . . . . . . . . . . . . . . . . . . . . . . . . . . . . . . . . . . . . . . . . 48 4.4.7 Signalling . . . . . . . . . . . . . . . . . . . . . . . . . . . . . . . . . . . . . . . . . . . . . . . . . . . . . . 49 4.4.8 WCU controls and indicators . . . . . . . . . . . . . . . . . . . . . . . . . . . . . . . . . . . . . . . 49 Chapter 5 – Menu contents 5.1 5.2 5.3 Wireless Control Unit menu structure . . . . . . . . . . . . . . . . . . . . . . . . . . . . . . . . . . . . 53 5.1.1 WCU user levels . . . . . . . . . . . . . . . . . . . . . . . . . . . . . . . . . . . . . . . . . . . . . . . . 54 WCU menu contents . . . . . . . . . . . . . . . . . . . . . . . . . . . . . . . . . . . . . . . . . . . . . . . . . . 55 5.2.1 WCU Video menu . . . . . . . . . . . . . . . . . . . . . . . . . . . . . . . . . . . . . . . . . . . . . . . 55 5.2.2 WCU Monitoring menu . . . . . . . . . . . . . . . . . . . . . . . . . . . . . . . . . . . . . . . . . . . 55 5.2.3 WCU Audio/Intercom menu. . . . . . . . . . . . . . . . . . . . . . . . . . . . . . . . . . . . . . . . 56 5.2.4 WCU SDTV menu . . . . . . . . . . . . . . . . . . . . . . . . . . . . . . . . . . . . . . . . . . . . . . . 57 5.2.5 WCU System menu . . . . . . . . . . . . . . . . . . . . . . . . . . . . . . . . . . . . . . . . . . . . . . 58 5.2.6 WCU Files menu . . . . . . . . . . . . . . . . . . . . . . . . . . . . . . . . . . . . . . . . . . . . . . . . 59 5.2.7 WCU Diagnostics menu. . . . . . . . . . . . . . . . . . . . . . . . . . . . . . . . . . . . . . . . . . . 61 Camera install menu for WCA . . . . . . . . . . . . . . . . . . . . . . . . . . . . . . . . . . . . . . . . . . 63 Chapter 6 – Connectors 6.1 6.2 4 WCA connectors . . . . . . . . . . . . . . . . . . . . . . . . . . . . . . . . . . . . . . . . . . . . . . . . . . . . . 65 6.1.1 Viewfinder video output connector . . . . . . . . . . . . . . . . . . . . . . . . . . . . . . . . . . 66 6.1.2 HD-SDI connector . . . . . . . . . . . . . . . . . . . . . . . . . . . . . . . . . . . . . . . . . . . . . . . 66 6.1.3 Audio microphone 1 + 2 connectors . . . . . . . . . . . . . . . . . . . . . . . . . . . . . . . . . 66 6.1.4 Intercom headset connector . . . . . . . . . . . . . . . . . . . . . . . . . . . . . . . . . . . . . . . 66 6.1.5 Power input connector. . . . . . . . . . . . . . . . . . . . . . . . . . . . . . . . . . . . . . . . . . . . 67 6.1.6 DC power and tally output connector . . . . . . . . . . . . . . . . . . . . . . . . . . . . . . . . 67 AMU connectors . . . . . . . . . . . . . . . . . . . . . . . . . . . . . . . . . . . . . . . . . . . . . . . . . . . . . 68 6.2.1 Triax connector . . . . . . . . . . . . . . . . . . . . . . . . . . . . . . . . . . . . . . . . . . . . . . . . . 68 6.2.2 Data emitter socket (DATA) . . . . . . . . . . . . . . . . . . . . . . . . . . . . . . . . . . . . . . . . 69 6.2.3 RF receiver / UHF input connectors (3x) . . . . . . . . . . . . . . . . . . . . . . . . . . . . . . 69 6.2.4 RF receiver / UHF output connectors (3x) . . . . . . . . . . . . . . . . . . . . . . . . . . . . . 69 HD Wireless User’s Guide (v6.1) 6.3 WCU connectors . . . . . . . . . . . . . . . . . . . . . . . . . . . . . . . . . . . . . . . . . . . . . . . . . . . . . 70 6.3.1 Triax connector 1+2 . . . . . . . . . . . . . . . . . . . . . . . . . . . . . . . . . . . . . . . . . . . . . . 70 6.3.2 Mains power connector . . . . . . . . . . . . . . . . . . . . . . . . . . . . . . . . . . . . . . . . . . . 71 6.3.3 Intercom connector . . . . . . . . . . . . . . . . . . . . . . . . . . . . . . . . . . . . . . . . . . . . . . 71 6.3.4 Signalling connector. . . . . . . . . . . . . . . . . . . . . . . . . . . . . . . . . . . . . . . . . . . . . . 71 6.3.5 Audio output connectors 1+2 . . . . . . . . . . . . . . . . . . . . . . . . . . . . . . . . . . . . . . 72 6.3.6 Data / S9000 connector . . . . . . . . . . . . . . . . . . . . . . . . . . . . . . . . . . . . . . . . . . . 72 6.3.7 Network connector . . . . . . . . . . . . . . . . . . . . . . . . . . . . . . . . . . . . . . . . . . . . . . 72 6.3.8 Reference input connectors (2x) . . . . . . . . . . . . . . . . . . . . . . . . . . . . . . . . . . . . 72 6.3.9 CVBS output connectors (2x). . . . . . . . . . . . . . . . . . . . . . . . . . . . . . . . . . . . . . . 73 6.3.10 SDI output connectors 1 + 2 . . . . . . . . . . . . . . . . . . . . . . . . . . . . . . . . . . . . . . . 73 6.3.11 SDI output connector 3 . . . . . . . . . . . . . . . . . . . . . . . . . . . . . . . . . . . . . . . . . . . 73 Chapter 7 – Specifications 7.1 7.2 7.3 7.4 Wireless Camera Adapter (WCA) . . . . . . . . . . . . . . . . . . . . . . . . . . . . . . . . . . . . . . . . 75 7.1.1 Wireless RF module (LDK 5466/xx, attached to WCA) . . . . . . . . . . . . . . . . . . . 76 7.1.2 HD RF DATA CAM MODULE (LDK 5465/20, attached to WCA) . . . . . . . . . . . . 76 Antenna Management Unit (AMU) . . . . . . . . . . . . . . . . . . . . . . . . . . . . . . . . . . . . . . 77 7.2.1 RF receiver units (attached to AMU) . . . . . . . . . . . . . . . . . . . . . . . . . . . . . . . . . 77 7.2.2 RF data emitter unit (LDK 4454/x0 - HD RF DATA TRANSMITTER) . . . . . . . . . 77 Wireless Control Unit (WCU) . . . . . . . . . . . . . . . . . . . . . . . . . . . . . . . . . . . . . . . . . . . 78 LDK 5455 Video Booster (optional) . . . . . . . . . . . . . . . . . . . . . . . . . . . . . . . . . . . . . . 78 Chapter 8 – Exchanging the RF module Chapter 9 – Installing the Video booster 9.1 9.2 9.3 Introduction . . . . . . . . . . . . . . . . . . . . . . . . . . . . . . . . . . . . . . . . . . . . . . . . . . . . . . . . . 83 9.1.1 Package contents . . . . . . . . . . . . . . . . . . . . . . . . . . . . . . . . . . . . . . . . . . . . . . . 83 Assembly . . . . . . . . . . . . . . . . . . . . . . . . . . . . . . . . . . . . . . . . . . . . . . . . . . . . . . . . . . . 84 Output power . . . . . . . . . . . . . . . . . . . . . . . . . . . . . . . . . . . . . . . . . . . . . . . . . . . . . . . . 85 HD Wireless User’s Guide (v6.1) 5 End-of-life product recycling Grass Valley’s innovation and excellence in product design also extends to the programs we’ve established to manage the recycling of our products. Grass Valley has developed a comprehensive end-of-life product take back program for recycle or disposal of end-of-life products. Our program meets the requirements of the European Union’s WEEE Directive and in the United States from the Environmental Protection Agency, individual state or local agencies. Grass Valley’s end-of-life product take back program assures proper disposal by use of Best Available Technology. This program accepts any Grass Valley branded equipment. Upon request, a Certificate of Recycling or a Certificate of Destruction, depending on the ultimate disposition of the product, can be sent to the requester. Grass Valley will be responsible for all costs associated with recycling and disposal, including freight, however you are responsible for the removal of the equipment from your facility and packing the equipment ready for pickup. For further information on the Grass Valley product take back system please contact Grass Valley at + 800 80 80 20 20 or +33 1 48 25 20 20 from most other countries. In the US and Canada please call 800-547-8949 or 530-478-4148. Ask to be connected to the EH&S Department. In addition, information concerning Grass Valley’s environmental policy can be found at: www.grassvalley.com/about/environmental-policy Packing/unpacking Inspect the shipping container for evidence of damage immediately after receipt. If the shipping container or cushioning material is damaged, it should be kept until the contents of the shipment have been checked for completeness and the units have been checked mechanically and electrically. The shipping container should be placed upright and opened from the top. Remove the cushioning material and lift out the contents. The contents of the shipment should be checked against the packing list. If the contents are incomplete, if there is mechanical damage or defect, or if the units do not perform correctly when unpacked, notify your Grass Valley sales or service centre within eight days. If the shipping container shows signs of damage or stress, notify the carrier as well. If a unit is being returned to Grass Valley for servicing, try to use the containers and materials of the original packaging. Attach a tag indicating the type of service required, return address, model number, full serial number and the return number which will be supplied by your Grass Valley service centre. If the original packing can no longer be used, the following general instructions should be used for repacking with commercially available materials: 6 1. Wrap unit in heavy paper or plastic. 2. Use strong shipping container. 3. Use a layer of shock-absorbing material around all sides of the unit to provide firm cushioning and prevent movement inside container. 4. Seal shipping container securely. 5. Mark shipping container FRAGILE to ensure careful handling. HD Wireless User’s Guide (v6.1) Important information Read these instructions carefully and retain them for future reference. Safety Summary This information is intended as a guide for trained and qualified personnel who are aware of the dangers involved in handling potentially hazardous electrical/electronic equipment. It is not intended to contain a complete list of all safety precautions which should be observed by personnel in using this or other electronic equipment. The installation, maintenance and service of this equipment involves risks both to personnel and equipment and must be performed only by qualified personnel exercising due care. Personnel engaged in the installation, operation, maintenance or servicing of this equipment are urged to become familiar with First Aid theory and practises. During installation and operation of this equipment, local building safety and fire protection standards must be observed. Before connecting the equipment to the power supply of the installation, verify the proper functioning of the protective earth lead. Whenever it is likely that safe operation is impaired, the apparatus must be made inoperative and secured against any unintended operation. The appropriate servicing authority must then be informed. For example, safety is likely to be impaired if the apparatus fails to perform the intended function or shows visible damage. Any changes or modifications not expressly approved in this manual could void your authority to operate this equipment. Attention The radio frequency channels used by this equipment may be constrained or restricted by law in the country where you are operating this equipment. Check before using this equipment that all applicable licenses or authorizations have been obtained. Any modifications shall void the warrantee and could make the user liable for any disturbances caused by the modified equipment. Read and comply with the warning and caution notices that appear in the manual. • Warnings indicate danger that requires correct procedures or practices to prevent death or injury to personnel. • Cautions indicate procedures or practices that should be followed to prevent damage or destruction to equipment or property. HD Wireless User’s Guide (v6.1) 7 Warnings • Do not modify this equipment. • Do not use this equipment in areas where it may endanger safety such as hospitals or airports. • This equipment generates electromagnetic radio frequencies. Installation must conform to the instructions given in this manual. • Installation of this equipment must only be performed by qualified personnel. • Do not use any accessories other than those recommended by the manufacturer. • The current and voltages present in this equipment are dangerous. Personnel must at all times follow the safety regulations. • Always disconnect power before removing covers or panels. • Always discharge high voltage points before servicing. • Never make internal adjustments, perform maintenance or service when alone or when fatigued. • In case of an emergency ensure that the power is disconnected. • Mount equipment so that power lead can be accessed to disconnect power. • The power lead of the WCU must always be connected to a power socket with a protective earth. • Any interruption of the protection conductor inside or outside the apparatus, or disconnection of the protective earth terminal, is likely to make the apparatus dangerous. Intentional interruption is prohibited. • Use only the antennas supplied. Do not use the camera without antennas. Switch off power to the units before detaching antennas. • Avoid contact with the right side cover of the camera during operation as it may become hot. • To prevent risk of overheating, ventilate the product correctly. • Connect the product only to a power source with the specified voltage rating. • Always switch off the camera before changing the battery or changing the power supply. • Any cables connected to the camera must be less than 3 m (10 ft) to avoid interference. Cautions 8 HD Wireless User’s Guide (v6.1) Triax cable systems • Only connect a Triax cable from the same LDK camera family to the unit. • Do not allow system earth currents to exceed 1.5 A in the outer shield of the Triax cable or 0.2 A in other cable shields. • To avoid excessive earth currents in a Triax system, galvanically separate the power earth connection of equipment connected to the AMU from the AMU earth. • It is strictly prohibited to short circuit the inner and outer shields of a Triax cable used to connect an AMU to a WCU. Galvanic separation Because of the nature of Triax systems, with long distances between AMU and WCU, the risk of earth currents flowing is greater. These earth currents can result in damage to the equipment. To prevent earth currents from flowing in the Triax system, we recommend galvanic separation of earthed equipment connected to the AMU. This separation can be achieved by using an isolation transformer between the local power outlet and the equipment connected to the AMU. Alternatively, use equipment that has a double insulation and therefore does not require an earth connection. Precautions To ensure continual high performance from the camera take the following precautions into consideration: • Avoid very damp places. If the environment is wet or damp a rain cover must be used to protect the unit. • Do not subject the unit to severe shocks or vibration. • Do not expose the camera to extreme temperatures. • Do not leave the unit in direct sunlight or close to heating appliances for extended periods. • Do not allow sunlight to shine into the viewfinder. • Do not allow LASER beams to shine into the lens as this could damage the CCD sensors. • Avoid extreme highlights as these can cause various kinds of optical reflections. • Be careful when connecting and disconnecting triax cables. – Do not mix triax units from different types of camera systems (HD with SD, RGB triax with digital triax). – Make connections swiftly and firmly to avoid false error messages. HD Wireless User’s Guide (v6.1) 9 Mains lead wiring for UK users The wires in the mains lead are colored in accordance with the following code: GREEN and YELLOW- EARTH BLUE- NEUTRAL BROWN- LIVE As the colors of the wires in the mains lead of this apparatus may not correspond with the colored markings identifying the terminals in your plug proceed as follows: • The wire colored GREEN and YELLOW must be connected to the terminal on the plug marked with the letter E or by the safety earth symbol or colored GREEN or GREEN and YELLOW. • The wire colored BROWN must be connected to the terminal marked with the letter L or colored RED. • The wire colored BLUE must be connected to the terminal marked with the letter N or colored BLACK. Ensure that your equipment is connected correctly - if you are in any doubt consult a qualified electrician. 10 HD Wireless User’s Guide (v6.1) Sicherheit Diese Informationen sind als Leitfaden für qualifiziertes Fachpersonal gedacht, das die Gefahren beim Umgang mit potenziell gefährlicher elektrischer/elektronischer Ausrüstung kennt. Es handelt sich dabei nicht um eine vollständige Zusammenstellung aller Sicherheitsvorkehrungen, die beim Gebrauch dieser oder anderer elektronischer Geräte zu beachten sind. Die Montage, Wartung und Instandsetzung dieser Ausrüstung ist mit Risiken für Personal und Ausrüstung verbunden und darf nur von qualifiziertem Personal vorgenommen werden, wobei mit der nötigen Sorgfalt vorzugehen ist. Mit der Montage, Bedienung, Instandhaltung oder Instandsetzung dieser Ausrüstung betrauten Personen wird dringend geraten, sich mit der Theorie und Praxis der Ersten Hilfe vertraut zu machen. Beim Einbau und Betrieb dieser Ausrüstung müssen die örtlichen Gebäudesicherheits- und Brandschutzvorschriften beachtet werden. Vor dem Anschluss der Ausrüstung an die Stromversorgung der Anlage muss überprüft werden, ob der Schutzleiter intakt ist. Wenn eine Beeinträchtigung des sicheren Betriebs wahrscheinlich ist, muss das Gerät außer Betrieb gesetzt und gegen ungewollten Betrieb gesichert werden. Dann muss der zuständige Kundendienst benachrichtigt werden. Eine Beeinträchtigung der Sicherheit ist zum Beispiel dann wahrscheinlich, wenn das Gerät nicht wie vorgesehen funktioniert oder einen sichtbaren Schaden aufweist. Wichtig Die für diese Ausrüstung verwendeten Funkfrequenzkanäle können in dem Land, in dem diese Ausrüstung betrieben wird, gesetzlichen Beschränkungen unterliegen. Prüfen Sie vor dem Einsatz dieser Ausrüstung nach, ob alle relevanten Zulassungen bzw. Genehmigungen vorliegen. Änderungen haben zur Folge, dass die Garantie ungültig wird und der Benutzer für etwaige durch die veränderte Ausrüstung verursachte Störungen haftbar gemacht werden könnte. Bei der Durchführung von Servicearbeiten sind die mit "Achtung" und "Vorsicht" gekennzeichneten Warnhinweise in den Handbüchern zu lesen und zu beachten. • Mit "Vorsicht" wird auf eine Gefahr hingewiesen, die korrekte Arbeits- oder Verfahrensweisen erfordert, um Tod oder Verletzung zu verhindern. • Mit "Achtung" werden Arbeitsanweisungen gekennzeichnet, die zu befolgen sind, um eine Beschädigung oder Zerstörung der Ausrüstung bzw. von Eigentum zu verhindern. • An dieser Ausrüstung dürfen keine Änderungen vorgenommen werden. • Diese Ausrüstung darf nicht in Bereichen eingesetzt werden, in denen Sie die Sicherheit gefährden könnte (z.b. krankenhäuser oder flughäfen). • Diese Ausrüstung erzeugt elektromagnetische Funkfrequenzen. Die Montage muss gemäss den Anweisungen in diesem Handbuch erfolgen. • Diese Informationen vor der Montage oder Wartung und Instandsetzung dieser Ausrüstung genau durchlesen Vorsicht HD Wireless User’s Guide (v6.1) 11 • Die Montage dieser Ausrüstung darf nur von Fachpersonal vorgenommen werden. • Es darf nur das vom Hersteller empfohlene Zubehör verwendet werden. • Die Stromstärke und Spannungen in dieser Ausrüstung sind gefährlich. Die Sicherheitsvorschriften sind vom Personal stets einzuhalten. • Vor dem Abnehmen von Abdeckungen oder Verkleidungen ist stets die Stromzufuhr abzuschalten. • Vor der Ausführung von Wartungs- un Instandsetzungsarbeiten sind Hochspannungspunkte stets elektrisch zu entladen. • Nehmen Sie nie interne Einstellungen vor und führen Sie nie Wartungs- oder Instandsetzungsarbeiten aus, wenn Sie allein oder ermüdet sind. • Bei Eintreten eines Notfalls unbedingt die Stromzufuhr abschalten. • Ausrüstung so montieren, dass das Netzkabel zum Abschalten der Stromzufuhr zugänglich ist. • Das Netzkabel des WCU muss immer an eine Netzdose mit einer Schutzerdung angeschlossen werden. • Jede Unterbrechung des Schutzleiters innerhalb oder ausserhalb des Geräts oder Trennung der Schutzleiter-anschlussklemme könnte das Gerät gefährlich machen. Eine absichtliche Unterbrechung ist untersagt. • Es dürfen nur Sicherungen des vorgeschriebenen Typs und Nennwerts verwendet werden. • Es dürfen nur die mitgelieferten Antennen verwendet werden. Die Kamera darf nicht ohne Antennen betrieben werden. Vor dem Antennen-abbau muss die Stromzufuhr zu den Geräten abgeschaltet werden. • Die rechtsseitige Abdeckung der Kameragehaüse nicht anrühren weil das Oberflach heiß werden kann. • Um einer Überhitzungsgefahr vorzubeugen, ist das Produkt korrekt zu belüften. • Das Produkt darf nur an eine Stromquelle mit der vorgeschriebenen Nennspannung angeschlossen werden. • Niemals ein analoges Triax-System an ein digitales Triax-System anschließen. • System-Erdströme dürfen 1,5 A in der äußeren Abschirmung des Triax-Kabels bzw. 0,2 A in anderen Kabelschirmen nicht übersteigen. • Die innere und äußere Abschirmung des Triax-Kabels nicht kurzschließen. • Die Kamera vor dem Wechsel der Batterie oder dem Wechsel der Stromversorgung immer ausschalten. • Alle an die Kamera angeschlossenen Kabel müssen weniger als 3 m lang sein, um Störungen zu vermeiden. Achtung 12 HD Wireless User’s Guide (v6.1) Zusammenstellung von in diesem Handbuch verwendeten Warnhinweisen: • Immer von der Netzversorgung trennen, bevor der Adapter geöffnet wird. • Stecker zwischen Kamerakopf und Adapter mit äußerster Vorsicht handhaben. Darauf achten, dass die Steckerstifte nicht durch die Führungsstifte beschädigt werden. • Diese Schritte in der angegebenen Reihenfolge ausführen. • Das Anziehen der Schrauben in der falschen Reihenfolge kann zu mechanischen Schäden an der Kamera führen. • Das Lösen der Schrauben in der falschen Reihenfolge kann zu mechanischen Schäden an der Kamera führen. • Niemals einem Adapter Strom zuführen, ohne sich zuerst zu vergewissern, dass die Antennen angebracht sind. • Es dürfen nur die mitgelieferten Antennen verwendet werden. • Vor dem Abnehmen der Antennen muss die Stromzufuhr zu den Geräten abgeschaltet werden. • Die Eingangsspannung darf nie +17 VDC überschreiten. • Vor dem Öffnen des AMU muss die Stromzufuhr zum WCU abgeschaltet werden. HD Wireless User’s Guide (v6.1) 13 14 HD Wireless User’s Guide (v6.1) Chapter 1 - Introduction Chapter 1 Introduction 1.1 Technology 1.1.1 System configuration The HD wireless system docks to the Grass Valley cameras LDK 6000, LDK 4000 (Elite) and LDK 8000 (Elite) to form an HD Digital Wireless Camera System. It supports 1080i50/59.94, 720p50/59.94 and 1080psF25/29.97 acquisition while using an innovative approach both to compression and transmission. For compression, the HD wireless system uses state-of-the-art JPEG 2000 compression technology with a 10-bit, end-to-end signal. You can use intra-field or spatial/temporal compression. What's more, there is no MPEG-style ‘Group of Pictures (GoP)’. Consequently every frame is of the same high quality for postprocessing and editing. For transmission, this bi-directional system provides genlock and full control of the camera in the same way as with a triax cable system. Coupled with a high bit-rate protocol (based on the 802.16 physical layer), it features low latency, enabling you to integrate wireless shots into your production with imperceptible video-to-audio delay. To fulfill specific requirements in different environments a set of profiles allow you to balance between the robustness of the wireless transmission and its bit-rate. The high-performance digital transmission means that the system is omnidirectional with no adverse effects from multi-path reflections. 1.1.2 Shooting range The HD wireless system features a three-antenna diversity set. This receiving unit, when suitably placed, together with a video output power of 60 mW, offers you a shooting range of up to 150 m (500 ft). This shooting area can be extended to up to 400 m (1,300 ft) using the optionally available LDK 5455/50 or LDK 5455/60 Video Booster. The built-in data booster provides coverage of up to 1,000 m (3,280 ft) for the data link. Adding a second antenna set can readily extend the coverage area, letting you move, for example, from a stadium to a dressing room. The system switches automatically and seamless between the two antenna sets. The connection between a base station and the wireless system's antenna set uses conventional Triax cable, enabling you to locate an antenna up to 600 m (1,970 ft) from the base station using 11 mm (7/16”) Triax cable. The HD wireless camera system is fully compatible with studio production facilities, the Grass Valley C2IP camera control system, and HD Wireless User’s Guide (v6.1) 15 Chapter 1 - Introduction utilizes the same operational control panels as other Grass Valley LDK series cameras using the C2IP system. The HD Wireless camera system integrates perfectly into your existing set-up. It is a flexible camera system that is equally at home in the studio or out on location in an outside broadcast environment. 1.2 16 Features • Excellent HD picture quality using powerful JPEG 2000-based compression • Supports 1080i50/59.94, 720p50/59.94 and 1080psF25/29.97 formats • Robust and reliable transmission based on a modified 802.16 physical layer. • Coverage area up to 150 m (500 ft). • Three-antenna diversity system for transmission reliability • Omni-directional antenna system for maximum flexibility • Low latency performance and genlock features • Easy integration in studio and stadium environment with standard triax cameras • Choice of transmission profiles to fulfill specific production needs • Supports C2IP control systems and OCP 400 control panels • Dockable with Grass Valley HD camera heads • On-screen display selection of video and data transmission frequencies • End-to-end digital processing with 10-bit quality level • Support of roaming when using two antenna sets for increased coverage • Freeze frame in the case of interrupted video link • Optional video booster available for long-transmission applications HD Wireless User’s Guide (v6.1) Chapter 1 - Introduction 1.3 System composition A typical wireless transmission system includes: • An LDK 5464 wireless camera adapter (WCA) must be combined with: – An LDK5466/xx HD camera RF module (right adapter cover) for Video Downlink transmission and – An LDK 5465/20 HD RF data camera module wireless adapter for data Up link reception. • An LDK 4460 antenna management unit (HD AMU). The HD AMU is delivered with an RF Data Booster mounted in the antenna bracket. • An LDK 4453 RF Receiver antenna set with three matching video antennas. • An LDK 4454/60 Data emitter. • An antenna bracket to mount RF receiver, a data emitter with data booster and antennas. • A 15 m (50 ft) antenna cable set consisting of three coax cables with BNC connectors and an RS 422 screened cable with a 9-pin D-sub connector. • An LDK 4470 wireless control unit (WCU). • A cable (ordering code 47233914AB) for use with Grass Valley’s Wireless Insight software. For a complete Digital Wireless Camera system the following elements must be added: • An HD LDK camera head and viewfinder • A broadcast lens • Triax and network cables For full remote control: • An Operational Control Panel (OCP 400) or • A Multiple Control Panel (MCP 400) To expand the operating range of the camera an additional AMU with antenna set can be added to the system. ☞ Note The camera head, lens, viewfinder, control panels, Triax cables and network cables are not included with an HD wireless system. HD Wireless User’s Guide (v6.1) 17 Chapter 1 - Introduction 1.4 18 Unit identification Unit Type number HD Wireless Control Unit (Fischer) LDK 4470/10 HD Wireless Control Unit (Trilock) LDK 4470/20 HD Wireless Control Unit (ARD) LDK 4470/30 HD Wireless Control Unit (Lemo/4E) LDK 4470/40 HD Wireless Control Unit (Lemo/BBC) LDK 4470/50 HD Wireless Control Unit (Lemo/3T) LDK 4470/60 HD Antenna Management Unit (Fischer) LDK 4460/10 HD Antenna Management Unit (Trilock) LDK 4460/20 HD Antenna Management Unit (ARD) LDK 4460/30 HD Antenna Management Unit (Lemo/4E) LDK 4460/40 HD Antenna Management Unit (Lemo/BBC) LDK 4460/50 HD Antenna Management Unit (Lemo/3T) LDK 4460/60 RF Receiver antenna set (3x) for 2.0 - 2.2 GHz LDK 4453/20 RF Receiver antenna set (3x) for 2.2 - 2.4 GHz LDK 4453/22 RF Receiver antenna set (3x) for 2.5 - 2.7 GHz LDK 4453/25 RF Data emitter 456 MHz LDK 4454/60 HD Wireless Camera Adapter (Anton Bauer battery plate) LDK 5464/00 HD Wireless Camera Adapter (IDX battery plate) LDK 5464/10 HD RF Data Module Wireless adapter 456 MHz LDK 5465/20 (plugged in LDK 5464/xx adaptor) HD RF Module Wireless adapter for 2.0 - 2.2 GHz LDK 5466/20 HD RF Module Wireless adapter for 2.2 - 2.4 GHz LDK 5466/22 HD RF Module Wireless adapter for 2.5 - 2.7 GHz LDK 5466/25 COFDM Video Booster 500 mW (Anton Bauer batt. plate) LDK 5455/50 COFDM Video Booster 500 mW (IDX batt. plate) LDK 5455/60 HD Antenna N-type for 2.0 - 2.2 GHz LDK 5457/20 HD Antenna N-type for 2.2 - 2.4 GHz LDK 5457/22 HD Antenna N-type for 2.5 - 2.7 GHz LDK 5457/25 19-inch rack mounting kit for one WCU BDT05701AA Coupling kit for two WCUs BDT05700AA HD Wireless User’s Guide (v6.1) Chapter 2 - Installation Chapter 2 Installation 2.1 Configurations This wireless transmission system combines with an HD LDK camera head to form a HD Digital Wireless Camera system. The camera head with the attached Wireless Camera Adapter (WCA), communicates wirelessly with the Antenna Management Unit (AMU). The AMU is connected to the Wireless Control Unit (WCU) via a Triax cable. For different RF frequency ranges, different wide band RF modules are available which cover the ranges 2.2 to 2.4 GHz, 2.0 to 2.2 GHz or 2.5 to 2.7 GHz using 18 MHz bandwidth. Output video signals The WCU delivers three SDI video signals for the studio system. Each group (1&2/3) of signals can be selected in the WCU Video menu to be HD or SD signals. SDI outputs 1 and 2 are always the same (HD or SD) but SDI output 3 can be set independently. Two analog CVBS and a digital monitoring signal (SDI output 3) are available from the WCU. When used in HD mode, SDI1 & 2 group never contain OSD and when used in SD mode, SDI1 & 2 group may contain OSD. SDI3 always contains OSD (in either SD or HD mode) The OSD can be automatically switched off when Tally signal is active. This setting can be done in the MONITORING > MENU > MENU ONAIR Control Remote control of the camera is achieved through the C2IP network that can be connected to the WCU. Control panels such as the OCP 400 can be used to gain full access to the camera. Set the parameters for the control network in the WCU System menu. Increased range To expand the operating range of the camera an additional AMU with antenna set can be added to the system. The WCU selects automatically between the two receiving sets without a picture break (roaming). HD Wireless User’s Guide (v6.1) 19 Chapter 2 - Installation Figure 2-1. Camera wireless system Digital wireless data link RF Data Emitter to camera LDK 4454 RF Data Emitter Digital wireless video link Camera to RF Receiver LDK 4460 Antenna Management Unit (AMU) LDK 4453 RF Receiver Triax 600 m with 11 mm Cable typical range 150 m (or 400 m with optional video booster) LDK 4470 Wireless Control Unit (WCU) SDI video output to studio system Triax 600 m with 11 mm Cable Optional second receiving set to extend the operating area C2IP Network LDK 4454 RF Data Emitter LDK 4453 RF Receiver LDK 4460 Antenna Management Unit (AMU) OCP 400 The power supply is applied to the WCU and via the Triax cable to the AMU. The camera is battery (DC) powered using high-density batteries. The OCP 400 operational control panel is connected to the WCU using a Ethernet connection. If the OCP is connected directly to the WCU, use a crossover cable. Triax cable The AMU is connected to the WCU using a Triax cable. The maximum length of cable that can be used is 600 m (1,970 ft) for a 11mm Triax cable. The approximate maximum cable lengths between an AMU and a WCU are given in the table below. Digital transmission will generate increasing bit errors and video may be lost when these lengths are exceeded. The maximum length is given for cables of the highest quality. The quality of poorer cables and the interconnections can adversely affect this maximum length. Table 2-1. Triax cable length guide 20 Cable diameter Maximum length 8 mm (5/16”) 400 m (1,300 ft) 11 mm (7/16”) 600 m (1,970 ft) 14 mm (9/16”) 800 m (2,600 ft) HD Wireless User’s Guide (v6.1) Chapter 2 - Installation 2.2 Wireless camera adapter (WCA) If you decide to change frequency bands, then refer to the Appendix - Exchanging the frequency module. Carry out the following steps to prepare the camera for use: • Attach the adapter to the camera. • Attach the antennas to the adapter. • Power the camera via the adapter. 2.2.1 Attaching an adapter Caution Be extremely careful with the connectors between the camera head and the adapter. Do not allow the guide pins to damage the pins of the connector. Follow these steps in the order given. Tightening or loosening the screws in the wrong order could result in mechanical damage to the camera. To attach an adapter to the camera proceed as follow: 1. Fit the guide pin at the top rear of the camera head and the guide pins on either side of the camera connector into the corresponding slots and of the adapter. 2. First, tighten the two horizontal screws on the top of camera. 3. Next, tighten the two horizontal screws at the front of the camera. 4. Lastly, tighten the vertical screw in the handle of the camera. To detach an adapter from the camera head follow the steps for attaching it in the reverse order. Figure 2-2. Attaching the adapter 5 1 3 4 2 HD Wireless User’s Guide (v6.1) 21 Chapter 2 - Installation 2.2.2 Attaching antennas to the adapter The wireless camera adapter uses two different antennas: a Data link antenna and a Video link antenna. Attach both antennas securely to the wireless adapter. Figure 2-3. Attaching the antennas Data RF antenna Video RF antenna Video RF antenna Identification ring The following tables show which antenna to use for the chosen frequency ranges. Video frequency Identification ring 2.0 to 2.2 GHz Black ring + code ‘0’ 2.2 to 2.4 GHz Red ring + code ‘2’ 2.5 to 2.7 GHz Green ring + code ‘5’ Data frequency Antenna type 456 MHz 3922 407 56351 (length: 160 mm / 6.3”) Caution Never supply power to an adapter without first ensuring that the antennas are attached. Always use the antenna that was supplied with the frequency module. Using the wrong antenna will result in poor coverage. Always switch off the power to the units before detaching the antennas. 22 HD Wireless User’s Guide (v6.1) Chapter 2 - Installation 2.2.3 Attaching a battery to the camera adapter Attach a battery pack to the rear of the camera adapter or supply a +12 VDC nominal voltage to the DC in connector on the rear of the adapter. Due to possible high power consumption a high-density battery pack is recommended. Caution The input voltage at the DC in connector must stay between +11 VDC and +17 VDC. Always switch off the camera before removing the battery. Figure 2-4. Camera power supply DC in power supply socket Viewfinder battery indicator The BATT indicator in the viewfinder flashes when battery voltage is low. It lights continuously when battery voltage is less than 11VDC. Figure 2-5. Battery indicator Battery indicator - + ++ REC MEDIA BATT 3.2 4.7 5.6 7.5 AWFL AW1 HD Wireless User’s Guide (v6.1) ND/RE AW2 FOC+ ! 23 Chapter 2 - Installation 2.3 Antenna Management Unit (AMU) 2.3.1 Antenna positioning To get the best benefits from reflections the receiving set is equipped with a three-antenna diversity system. The AMU uses the MRC (Maximum Ratio Combining) system for optimal transmission robustness. Both transmitting and receiving antennas are omni-directional, so there’s no need for alignment or tracking. Position the AMU strategically in the area you wish to cover. Preferably, mount the antenna assembly on a mast or attach it to a raised structure. Caution Always ensure that the antennas are vertical. This ensures best reception. If required, a second AMU can be used to extend the covered area. To cover a typical stage area, it might be a good idea to place antenna assemblies upside-down at a high point on either side of the stage. A good rule of thumb is to keep a line of sight from the camera standpoint towards the receiving antennas. Caution Always use the antennas that were supplied with the modules. Using the wrong antennas will result in poor coverage. 2.3.2 Antenna unit assembly Set up the antenna support assembly close to the AMU as follows: ☞ 24 1. Unfold the antenna support assembly. 2. Attach the three antenna receiver units to the ends of the arms. 3. Attach the data emitter unit including the data booster to the centre of the assembly. 4. Screw the three antennas with SMA connector onto the antenna receiver units. 5. Connect the data antenna with BNC connector onto the data booster unit. 6. Connect the data booster SMA input to the data emitter BNC output with the supplied coaxial cable. 7. Connect the three BNC coaxial connectors of the supplied cable to the antenna receiver units. 8. Connect the 9-pin sub-D connector to the data emitter unit. 9. Connect the 2-pin LEMO connector to the data booster unit. Note Steps 2,3,5 6 are for reference only and already carried out in the factory. HD Wireless User’s Guide (v6.1) Chapter 2 - Installation AMU connectors 1. Connect the three coaxial cables from the antennas to the upper row of BNC video connectors on the AMU. 2. Connect the cable from the data emitter unit to the 9-pin sub-D connector on the AMU. 3. Connect the Triax cable to the Triax output of the AMU (TRIAX output). Figure 2-6. AMU connections Data connector Video antenna connectors (BNC) Video antenna connectors (BNC) HD Wireless User’s Guide (v6.1) Video antenna connectors (BNC) 25 Chapter 2 - Installation 2.4 Wireless Control Unit (WCU) An optional mounting kit is available for mounting the WCU into a standard 19-inch rack. Connection steps: 1. Connect the triax cable from the AMU to the Triax input 1 second AMU, connect it to Triax input 2 of the WCU. 2. Connect the OCP to the C2IP network 3. Connect a digital monitor (SD or HD) to the SDI3 (OSD) output 4. Connect the SDI1 and SDI2 outputs 5. If required, provide a reference signal to the Genlock input of the WCU (SD black-burst, CBVS and HD-TLS are supported). Terminate the looped-through connector with 75 . 6. Connect an analog (SD) monitor to CVBS output connector 1 (OSD) or 2 7. Connect the intercom system (see below). 8. Connect the signalling system (see below). 9. Connect the audio 10. Connect the WCU power socket of the WCU. If you use a . . of the WCU to the studio system. . to the mains power supply. Figure 2-7. WCU connections 1 2 3 4 5 6 TRIAX GENLOCK Audio out 1 Data1 N 1 Aux Network 1 2 2 C.V.B.S. Sign RS232 1 I / Com (OSD) 2 SERIAL DIGITAL OUTPUT 2 1 12 26 11 2 10 3 9 8 7 HD Wireless User’s Guide (v6.1) Chapter 2 - Installation 2.4.1 Connecting the studio intercom system Connect the studio intercom system to the I/Com connector on the rear of the WCU. The wiring of the panel connector is shown below for two-wire and four-wire systems. Figure 2-8. Intercom connection - two-wire system Housing 15 8 Housing PROG + - ENG in/out + 9 PROD in/out + 1 Figure 2-9. Intercom connection - four-wire system Housing 15 8 PROG in ret. PROG in Housing - ENG out + ENG in ret. ENG in PROD in ret. PROD in 9 1 PROD out + Table 2-10. Intercom signal specifications Function Value 4-wire Output signal level +6 dBu nominal into 10 K (adjustable range: +12 dBu) Output impedance 600 (max), symmetrical Input signal reference level +6 dBu or 0 dBu selectable Input impedance 9 K (min), symmetrical 2-wire Signal level 0 dBu Load impedance > 200 DC level 10 VDC maximum HD Wireless User’s Guide (v6.1) 27 Chapter 2 - Installation 2.4.2 Connecting the studio signalling Connect the studio signalling system to the Sign. connector on the rear of the WCU. The wiring of the panel connector is shown. Figure 2-11. Signalling connection 9 1 Call out Call out ret. Preview out Preview out ret. ISO in ISO in ret. On-air in On-air in ret. Call in Call in ret. Audio 1 level Audio 2 level +5 Vdc Ground 15 8 Housing Call, On-air and Iso signals There are four connection methods for the Call, On-air and Iso (On-air yellow) signalling functions: 1. Dry contact 2. Common ground 3. Voltage level Send lead 4. Open / voltage level Send lead A selection in the SYSTEM > SIGNALLING menu allows you to make the state of the function (on or off) correspond to a particular input signal. There are two leads for each connection Send and Return. Table 2-12. Signalling send and return pins Function Send pin Return pin Call 2 10 Iso 3 11 On-air 4 12 The following tables show the selectable states for each of the four connection methods. The states are Open/High (OH); High/Open (HO); Low/High (LH) or High/Low (HL). Refer to Chapter 5 to see how to set these menu settings. 28 HD Wireless User’s Guide (v6.1) Chapter 2 - Installation Dry contact Table 2-13. Dry contact (no ground, no voltage)* Menu setting Input shorted Input open LH Function ON Function OFF HL Function OFF Function ON * a common return (not ground!) can be used for the three functions. Figure 2-14. Dry contact signalling base station signaling connector External signaling dry contact Common ground Table 2-15. Common ground (connect one lead only to ground)* Menu setting Input grounded Input open LH Function ON Function OFF HL Function OFF Function ON * use either Send or Return only, do not mix. Figure 2-16. Common ground signalling Signal 1 Signal 2 Base Station signalling connector Signal n Common External On-Air signaling with common contact HD Wireless User’s Guide (v6.1) 29 Chapter 2 - Installation Voltage level send lead Table 2-17. Voltage level Send lead (0 to 2.5 VDC, 4 to 24 VDC)* Menu setting Input 0 to 2.5 V Input 4 to 24 V LH Function ON Function OFF HL Function OFF Function ON * isolated from ground. Open / Voltage level send lead Table 2-18. Open / voltage level Send lead (open, 4 to 24 VDC)* Menu setting Input open Input 4 to 24 V OH Function ON Function OFF HO Function OFF Function ON * isolated from ground. Figure 2-19. Voltage level signalling +5 - 24 VDC + External signaling with DC output voltage 30 Base Station signalling connector HD Wireless User’s Guide (v6.1) Chapter 2 - Installation 2.4.3 Audio gain (external) To control the audio gain externally via the WCU: 1. In the camera system menu, set the menu item INSTALL > AUDIO > AUDIO GAIN MODE to EXT. 2. Apply a DC voltage to pins 6 and 14 of the signalling connector to control the levels of audio channels 1 and 2 respectively, as shown in the figure below. Figure 2-20. Audio level control Audio 1 level (pin 6) Audio 2 level (pin 14) +5 Vdc (pin 7) -22 dBu 1k -28 dBu 1k -34 dBu 1k -40 dBu 1k -46 dBu 1k -52 dBu 1k -58 dBu 1k -64 dBu 1k +4.3V +3.7 V +3.1 V +2.5 V +1.9 V +1.3 V +0.7 V 0V GND (pin 15) To control the audio gain locally at the camera via the camera system menu: ☞ 1. Set the menu item INSTALL > AUDIO > AUDIO GAIN MODE to LOC. 2. Select the audio sources in the INSTALL > AUDIO > AUDIO SOURCE menu items. 3. Select the levels of audio channels 1 and 2 respectively, in the INSTALL > AUDIO > AUDIO LEVEL menu items. Note Switching AUDIO 1 (2) SOURCE to Line overrules AUDIO 1 (2) LEVEL setting and selects Audio Gain to accept 0 dBu signals (reference level). Line level applies ONLY to the connectors at the rear of the adapter (not to the front-right connector of the camera) Line level automatically disables phantom power on the connectors at the rear of the adapter. Line level CANNOT be selected in EXT mode. HD Wireless User’s Guide (v6.1) 31 Chapter 2 - Installation 32 HD Wireless User’s Guide (v6.1) Chapter 3 - Using menus Chapter 3 Using menus 3.1 Menus Use the camera and WCU menus to set up the wireless system. The menu of the WCU can be viewed by connecting a video monitor to the unit. Refer to section 5.2 for the complete contents of the WCU menu. Refer to the User’s Guide of the camera head to find out how to change the menu in your camera. Section 5.3 contains further information on the Install menu for the camera head when a wireless camera adapter is attached. 3.2 Setting up the WCU menu To view the WCU menu you need to connect a digital monitor connect to the SDI (3) video output or an analog CVBS monitor to the CVBS (1) or (2) output. The text menu is superimposed on the video signal. 3.2.1 Using the rotary/push button to set up the WCU To navigate through the WCU menu proceed as follows: 1. Loosen (manually) the two screws of the front panel marked DATA BOARD and remove the front plate. 2. Reach into the opening, push the rotary/push button at the front of the data board and then rotate it. 3. Rotate the button up or down to select the required item. The display shows the abbreviation of the current item (CA or NN). There are two settings that can be accessed via the set-up rotary/push button on the data board: Camera Number (CA) When CA is displayed, push the rotary/push button to enter the selection mode. Rotate the button up or down to select an available camera number. Push the rotary/push button again to set the new camera number. The WCU automatically resets and the new camera number is shown in the display. HD Wireless User’s Guide (v6.1) 33 Chapter 3 - Using menus System Menu (NN) When NN is displayed, push the rotary/push button twice to enter the System Menu. The rotary/push button can be used to navigate through the menu system which is displayed on the attached video monitor. 3.2.2 Using an OCP 400 to set up the WCU An operational control panel (OCP 400) can be used to set up the WCU instead of the rotary/ push button. ☞ Note The WCU in the Wireless system is equivalent to the Base Station (BS). 1. Push the Setup button on the OCP to open the setup menu. 2. Push the selection button to choose the BS (=WCU) submenu. Panel White Bars Call Files Recall Auto Setup Exit 1 Toggle Diag OCP BS Cam Prev Next 2 The internal menu appears on the WCU video text outputs. Table 3-1. WCU internal menu Menu Selections Function Level WCU internal menu UP* UP menu S DOWN* DOWN menu S SELECT Select item S - * Or use the rotary control on the OCP to move up or down through the menu. 34 HD Wireless User’s Guide (v6.1) Chapter 3 - Using menus 3.3 Navigating the WCU menus The menu system is used for configuring the WCU. As there are a number of functions and set-up options available, it may require some time for you to become familiar with them all. 3.3.1 Entering the system menu The system functions of the WCU are grouped into menus and sub-menus. Rotate the rotary/ push button up or down to select the systems menu. The display shows the abbreviation NN. Push the rotary/push button twice to enter. The Main menu appears on the monitor. Figure 3-2. Main menu MENU OFF Video Monitoring Audio/Intercom SDTV System Root Files Diagnostics The main menu screen shows five items and the name of the menu. One more item is hidden but becomes visible when you scroll down. A cursor shows your position in the menu. The rotary/push button moves the cursor up and down. 3.3.2 Finding your way Use the rotary/push button on the WCU to move the cursor through the menu items. If a double arrow (>>) is visible, then pressing the rotary/push button brings you one level lower in the menu system. Only five items are visible in each menu. Scroll up or down to see any additional items. ☞ Note If you are using the OCP to navigate through the menu, use the UP, DOWN and SELECT buttons or the rotary control on the OCP instead of the rotary/push button on the WCU. When you first enter a menu (other than the main menu) the cursor is positioned next to the first item. The TOP and PREVIOUS entries are not immediately visible but are located above the first item. Use the Rotary control to scroll up to them. • Select TOP to bring you back to the MAIN menu. • Select PREVIOUS to go back to the menu that you were in before the current one. HD Wireless User’s Guide (v6.1) 35 Chapter 3 - Using menus Figure 3-3. System menu TOP PREVIOUS Camera Number Camera Power MCP Available Yellow On Air Timing 1 On Yes Std System Clock Video Mode Teleprompter 10i59 Off The SYSTEM menu above shows the items displayed when you first enter the menu and the other items that are available by scrolling up or down with the Rotary control. 3.3.3 Leaving the Systems Menu If you are deep within the menu structure, follow these steps to leave: • If necessary move the cursor to the left most column with the rotary/push button. • Scroll upwards until the cursor points to TOP (this is the main menu). • Press the rotary/push button. The cursor now points to the Menu Off item of the MAIN menu. • Press the rotary/push button to leave the system menu. This is the recommended way of leaving the system menu. The menu system disappears after a few seconds when you stop navigating. (This delay can be set in the MONITORING / MENU menu.) However, when you enter the system menu again you enter at the last position of the cursor and not at the top of main menu. To prevent confusion the next time you enter the system menu, it is advisable to leave the system menu by returning to the main menu (TOP) and selecting MENU OFF. 3.3.4 Making changes To find out where to change a function, consult the List of System Menu Functions at the end of this section to find out under which menu group or subgroup the function is located. If the cursor points to an item (and there are no double arrows to indicate a sub-menu) then the item pointed to has a value. The value can be: • a toggle value (only two values) • a list value (more than two values) • an analogue value (variable from 0 to 99) • or unavailable (- - - -). If the value is unavailable it cannot be changed. This is indicated by three dashes (---). This can occur, for example, when a function is switched off. The analogue values associated with that function are then unavailable. 36 HD Wireless User’s Guide (v6.1) Chapter 3 - Using menus If there are only two values associated with the function, then pressing the rotary/push button toggles between these two values. If a value is displayed next to a function that is one of several possible values, then pressing the rotary/push button places the cursor in a list menu indicating the value currently selected. Use the rotary/push button to point to a new value. Press the rotary/push button to return the cursor to the function list. If an analogue value is displayed next to a function name, then pressing the rotary/push button places the cursor in front of the value and the rotary/push button is used to change the analogue value. Press the rotary/push button to return the cursor to the function list. 3.3.5 Using the Recall File to undo changes If you make changes to the settings in the Systems menu and you decide not to keep them, use the Recall File function to recall a standard or stored set of values for the parameters. These files are available in the FILES menu. HD Wireless User’s Guide (v6.1) 37 Chapter 3 - Using menus 38 HD Wireless User’s Guide (v6.1) Chapter 4 - Setting up Chapter 4 Setting up 4.1 Wireless Insight The software package Wireless Insight can be used on a notebook (personal) computer to monitor the wireless’ system performance during operation. The software package can be obtained from the Grass Valley customer support organization. Refer to the help included in the software package for more details. 4.2 Wireless Camera Adapter (WCA) The transmission frequencies for the video link and the data link must both be set for the Wireless Camera Adapter (WCA) and then the corresponding selections must be set on the Wireless Connection Unit (WCU). The transmission profiles must also be matched on the WCA and the WCU. Carry out the following steps to prepare the camera for use: 1. Select the video frequency via the camera menu. 2. Select the data frequency via the camera menu. 3. Select the transmission profiles. 4. Select the camera number via the camera menu. 5. Set up audio on the camera. 6. Set up intercom on the camera. 7. Set viewfinder wireless indicators. HD Wireless User’s Guide (v6.1) 39 Chapter 4 - Setting up 4.2.1 Select video frequency channel 1. Decide which (center) frequencies you wish to use. If two cameras are used at the same time, keep the largest possible distance (and at least one channel, ie. 20 MHz) between the selected video frequencies. 2. The video transmission frequency is selected in the camera system menu. In the Install menu go to the Wireless submenu where you can select the desired frequency. Menu path: INSTALL > WIRELESS > VIDEOFREQ(GHZ) 4.2.2 Select data frequency channel 1. Decide which frequencies you wish to use If two cameras are used at the same time, keep the largest possible distance between the selected data channels. 2. The data transmission frequency is selected in the system menu of the camera. In the Install menu go to the Wireless submenu where you can select the desired frequency. Menu path: INSTALL > WIRELESS > DATAFREQ(MHZ) 4.2.3 Select transmission profiles Three profiles are available to obtain the best possible balance between picture quality, robustness and latency. The menu paths for setting the parameters of the three profiles are: Menu path: INSTALL > WIRELESS > TX PROFILE > IN_OUTDOOR Menu path: INSTALL > WIRELESS > TX PROFILE > Q_ROBUSTNESS Menu path: INSTALL > WIRELESS > TX PROFILE > Q_LATENCY These profiles should be chosen for the current operating conditions and your preferences. The Indoor/Outdoor and Q_Robustness profiles influence the COFDM Transmission parameters. Select the Indoor or Outdoor profile as appropriate. Unless very long echoes occur, Indoor settings are in most cases the best choice even for outdoor operation. The Q_Robustness profile allows you to balance the picture quality and the robustness of the transmission. It changes the transmission parameters (constellation, code rate) and thus the bit rate of the compression engine. In_Outdoor profile Q_Robustness profile Description Modulation scheme Bit rate (Mbit/s) Indoor HiQ High quality QAM-64 66.4 Std Standard QAM-64 49.7 (default) HiR High robustness QAM-16 37.2 HiQ High quality QAM-64 55.7 Std Standard QAM-64 47 (default) HiR High robustness QAM-16 31.5 Outdoor ☞ 40 Note When the Q_Latency settings are changed, the WCU is automatically updated. HD Wireless User’s Guide (v6.1) Chapter 4 - Setting up The Q_Latency profile allows you to balance the picture quality and the latency of the transmission. It takes advantage of temporal redundancy between consecutive fields. It has no influence on the transmission parameters. Q_Latency profile Description Latency Std Standard 3 fields (default) medium latency 5 fields high latency 6 fields (720p modes) or 7 fields (1080i modes) Q+(H) Q+(V) Q+(T) 4.2.4 Select camera number The camera number is selected in the system menu of the camera head. In the Install menu go to the Wireless submenu where you can select this number. Menu path: INSTALL > WIRELESS > CAMERA NUMBER 4.2.5 Camera head audio Select 1 or 2 audio channels 1. The number of audio channels is selected in the system menu of the camera. In the Install menu go to the Audio submenu where you can select either 1 or 2. Menu path: INSTALL > AUDIO > AUDIO IP MODE Select audio channel 1 1. In the Install menu go to the Audio submenu where you can select: – The audio source : select either the XLR socket at the front-right of the camera or the Mic 1 audio channel 1 XLR socket at the rear of the adapter. – The level Range : Select either Line level (0 dBu rear of the adapter ONLY) or microphone levels (-22 dBu to -64 dBu for both sources). – The phantom Power: Enable/Disable Phantom Power on rear of the adapter ONLY (always On for Front source. Menu path: INSTALL > AUDIO > AUDIO 1(2) SOURCE HD Wireless User’s Guide (v6.1) 41 Chapter 4 - Setting up The following table summarizes supported choices: Adapter XLR socket Camera XLR socket AUDIO 1(2) SOURCE Source Level range Phantom power Source Level range Phantom power Line Enabled Fixed 0 dBu No Disabled N/A No Mic Enabled Variable (Mic levels) No Disabled Variable (Mic levels) No Mic48 Enabled Variable (Mic levels) Yes (48 V) Disabled Variable (Mic levels) No Front Disabled N/A No Enabled Variable (Mic levels) Yes (48 V) Select audio gain mode Audio gain control can be achieved in two ways: either locally through the system menu of the camera head or by an externally applied voltage applied to the back panel of the WCU (signalling connector, see Audio gain (external) on page 31.) 1. The source of control can be selected in the system menu of the camera head. 2. Menu path: INSTALL > AUDIO > AUDIO GAIN MODE Select audio gain (locally) 1. The local audio gain is set in the system menu of the camera. In the Install menu go to the Audio submenu where you can set the gain for both channels. Menu path: INSTALL > AUDIO > AUDIO 1(2) LEVEL 42 HD Wireless User’s Guide (v6.1) Chapter 4 - Setting up 4.2.6 Intercom Three intercom channels – production (PROD), programme sound (PROG) and engineering (ENG) – are sent to the camera operator's headset. Intercom volume controls are on the back of the adapter.The camera operator's intercom microphone signal is sent back to the WCU. Figure 4-1. Intercom controls on the wireless adapter 1 2 3 4 DC out VF SDI Eng Off Prod DC in CH1 Audio in CH2 I/Com 5 Intercom headset controls Prod Adjusts the volume of the production signal to the camera headset (when PROD VOLUME is set to REAR in the install menu). The location of the production volume control is set in the install menu of the camera. Select either Front or Rear. Menu path:INSTALL > INTERCOM > PROD VOLUME Prog Adjusts the volume of the programme signal to the camera headset. Eng Adjusts the volume of the engineering intercom signal to the camera headset. Intercom microphone switch Sends the camera operators intercom signal to either engineering (Eng) or production (Prod), or turns it off (center position). Only operates if CAM MIC is set to SWITCH in the install menu and other assigned routing switches (on the camera head and/or lens) are released. If CAM MIC is set to SWITCH in the install menu and other assigned routing switches are pressed they override the Back panel hardware switch; If CAM MIC is set to OFF in the install menu it overrides other assigned routing switches (whatever their state is) and switches off the downlink intercom; HD Wireless User’s Guide (v6.1) 43 Chapter 4 - Setting up If CAM MIC is set to PROD in the install menu it overrides other assigned routing switches (whatever their state is) and switches off the downlink intercom to PROD; Intercom headset socket Connect the intercom headset to this XLR-5 socket. Camera intercom menu The Intercom section of the Install menu contains various settings for the intercom channels. Intercom microphone amplification levels, phantom power supply and microphone on/off switches are also available in this menu. Intercom microphone routing Assignable buttons on the camera can also be set to select either ENG or PROD. These buttons override the Intercom Microphone switch on the back of the WCA. 4.2.7 Viewfinder indications Check QoS LED (data) 1. In the camera viewfinder check the ! indicator that indicates the Quality of Service (QoS) of the data signal: Off is OK, flashing is critical. Select cell number for display 1. In a dual AMU system it can be useful to see which AMU is being used by the camera. The cell number of the AMU currently in use can be displayed in the bottom right corner of the viewfinder. 2. The display of the cell number in the viewfinder is selected in the camera menu. In the camera system menu, go to the Box DownRight item and select CELL. Menu path: VF > BOX DOWNRIGHT 44 HD Wireless User’s Guide (v6.1) Chapter 4 - Setting up 4.3 Antenna Management Unit (AMU) 4.3.1 AMU indicators AMU IDENTIFIER lock error ANT 1 Check video link 3 Profile mismatch 1 POWER All unlocked 2 2 3 4 AMU IDENTIFIER The display shows the cell number of the AMU (to identify AMUs when there are two AMUs in a system). This number also appears in the viewfinder at the bottom right. Lock LEDs These three green indicators, whose numbers correspond to the three transmission antennas, light to indicate that there is a good synchronization between camera and the specific AMU antenna. At least one of these indicators must be lit to have a connection. If all three are lit, the RF link is at its strongest. If all three indicators are not lit then none of the three antennas received a signal that could allow synchronization. Possible causes are: – camera signal is absent, or – an incorrect frequency is being used, or – a transmission profile mismatch occurs (see below). Error LEDs These three red indicators light to indicate different problems in the connection between the camera and a specific AMU antenna. Check video link: even if one antenna picks up a signal, the digital demodulation process could not correct all transmissions errors. Video loss will occur. Possible causes are: – camera signal is too weak, or – signal is polluted by strong interference Profile mismatch: this occurs when the transmission profile of the camera and the WCU do not match. all unlocked: none of the signals picked up by the 3 antennas can be used for synchronization. Possible causes are: – camera signal is absent, or – a profile mismatch occurs. HD Wireless User’s Guide (v6.1) 45 Chapter 4 - Setting up POWER LED This indicator lights when power from the WCU is supplied to the AMU via the triax cable. 4.3.2 Selecting AMU identifier If more than one AMU is used in a dual AMU system, each AMU must be given a unique identification number. The AMU identification number is shown on the upper display on the side of the AMU. Proceed as follows: Caution Switch off power before proceeding. Open the AMU by removing the four screws underneath the sun cover and tilt open the lid of the case. 2. Find the row of three rotary switches on the main print panel. 3. Set the rotary switch CW1 to the cell number you want for the AMU. 4. Close the cover. Tighten the screws bit by bit counterclockwise and one after the other to ensure steady pressure on the waterproof gasket. This will avoid damaging the sealing. RESET 1. CELL NUMBER CW1 CW2 CW3 CW1: Cell number switch 46 HD Wireless User’s Guide (v6.1) Chapter 4 - Setting up 4.4 Wireless Control Unit (WCU) 4.4.1 Select a video scanning mode The video mode for the camera is set in the WCU System menu. The mode set here overrides the mode set in the camera when a connection is established. Menu path: SYSTEM > VIDEOMODE ☞ Note The video mode menu item is only shown when there is no connection with the camera. However, scanning mode can also be controlled by OCP 400. 4.4.2 Set transmission frequencies ☞ 1. Select video transmission frequency in steps of 1 MHz. Menu path: SYSTEM > WIRELESS > VIDEO FREQUENCY 2. Select data transmission frequency in steps of 50 kHz. Menu path: SYSTEM > WIRELESS > DATA FREQUENCY Note The frequencies selected must be the same as those selected in the camera. 4.4.3 Set transmission profiles In the WCU System menu, set the same transmission parameters that you selected for the three profiles in the camera: Menu path: SYSTEM > WIRELESS > RX PARAM > IN_OUTDOOR Menu path: SYSTEM > WIRELESS > RX PARAM > Q_ROBUST Menu path: SYSTEM > WIRELESS > RX PARAM > Q_LATENCY ☞ Note The selected IN_OUTDOOR and Q_ROBUST parameters must be the same as those selected in the camera head. When you change Q_LATENCY in the WCU the WCA is automatically updated. 4.4.4 Select camera number The camera number selected must be the same as that selected in the camera. In the System menu go to the Camera number submenu where you can select the number. Menu path: SYSTEM > CAMERA NUMBER HD Wireless User’s Guide (v6.1) 47 Chapter 4 - Setting up 4.4.5 WCU audio menu Select 1 or 2 audio channels, audio output level and delay 1. The number of audio channels can be selected in the menu of the WCU: Menu path: AUDIO_INTERCOM > AUDIO > AUDIO MODE 2. Set the audio output level to enable (+6 dB) or to disable (0 dB): Menu path: AUDIO_INTERCOM > AUDIO > AUDIO LEVEL 1(2) 3. The audio delay function delays the audio signal so that it is synchronised with the video signal. Menu path: AUDIO_INTERCOM > AUDIO > DELAY 4.4.6 WCU intercom menu Select a 2-wire or a 4-wire system 1. Depending on the intercom wiring set the wire mode for the Eng and Prod intercom channels to 2wires or 4wires. Menu path: AUDIO_INTERCOM > INTERCOM > ENG > WIRE MODE Menu path: AUDIO_INTERCOM > INTERCOM > PROD > WIRE MODE Select channel input level 1. For each intercom channel you can enable (+6 dBU) or disable (0 dBU) the level. Menu path: AUDIO_INTERCOM > INTERCOM > ENG > LEVEL Menu path: AUDIO_INTERCOM > INTERCOM > PROD > LEVEL Menu path: AUDIO_INTERCOM > INTERCOM > PROG > LEVEL Select intercom output level 1. Adjust the output level as required. Menu path: AUDIO_INTERCOM > INTERCOM > ENG (PROD) > OUT REF LEVEL Adjust 2-wire balance 1. Set local side tone in the camera to zero. Camera system menu path: INSTALL > INTERCOM > SIDE TONE 2. Adjust the output level to minimize the feedback from the headset microphone to the headset muff. WCU menu path: AUDIO_INTERCOM > INTERCOM > ENG (PROD) > 2W BALANCE 3. 48 Reset the local side tone in the camera to a comfortable value. HD Wireless User’s Guide (v6.1) Chapter 4 - Setting up Isolate the Intercom system from the studio 1. The intercom I/O can be isolated from the studio intercom network: Menu path: AUDIO_INTERCOM > INTERCOM > ISOLATE Generating 1 kHz test-tone 1. In order to test the data link, a 1 kHz test-tone can be generated internally: Menu path: AUDIO_INTERCOM > INTERCOM > 1 KHZ TONE Enable compander 1. An internal audio compander optimizes the dynamic range of the intercom inputs to the intercom voice encoder which enhances the audibility of the intercom from the WCU to the WCA: Menu path: AUDIO_INTERCOM > INTERCOM > COMPANDER 4.4.7 Signalling Set the On Air and Call signalling configuration in the WCU according to the section “Connecting the studio signalling” on page 28 using the following menu paths: WCU menu path: SYSTEM > SIGNALLING > YELLOW ON AIR WCU menu path: SYSTEM > SIGNALLING > YELLOW ON/OFF WCU menu path: SYSTEM > SIGNALLING > ONAIR ON/OFF WCU menu path: SYSTEM > SIGNALLING > CALL ON/OFF 4.4.8 WCU controls and indicators 1 2 3 7 8 12 9 13 ON AIR PC COM 14 I MAINS CAMERA CAM LOCK ON TRIAX 1 SELECTED TRIAX 1 OK TRIAX 2 SELECTED TRIAX 2 OK EXT. REF. OFF 0 CABLE OPEN PC OK FREEZE VIDEO CHANNEL COARSE DATA CHANNEL VIDEO PARAMS FINE AUDIO HD TRIAX HD 4 5 HD Wireless User’s Guide (v6.1) 6 GENLOCK VIDEO HD DATA BOARD CCU POWER 11 10 49 Chapter 4 - Setting up PC OK When a remote PC is connected to the front plug of the WCU Audio Board, this LED lights to indicate the status of the connection. When no PC is connected, it lights to indicate an internal fault. : PC OK (Green) PC connected Message Off No Internal switch configuration is OK. Flashing No Internal switch configuration is not OK. On Yes PC <> WCU dialog is running TRIAX 1 SELECTED Reflects the status of roaming (AMU1/AMU2) and AMU under control of WCU. Triax Sel. (Orange) Message On This triax input is selected by the roaming. Flashing (~5/s) AMU is not acknowledging control data sent by WCU. Off AMU is not connected, or not selected by roaming. TRIAX 1 OK Reflects the status of the Triax link (AMU -> WCU) and checks for video content. 50 Triax OK. (Green) Message On Triax link (AMU -> WCU) is OK, video content delivered by AMU is OK. Flashing (~1/s) Triax link (AMU -> WCU) is OK, no video content delivered by AMU. Off Triax link (AMU -> WCU) is not OK or AMU is not connected. Triax Sel. (Orange) Triax OK (Green) Message On On Triax input is selected. Video transmission in Triax is OK. Off On Triax input is not selected. Video transmission in Triax is OK. Flashing (~5/s) - AMU is not acknowledging control data sent by WCU. Check Triax or AMU’s internal coax cable to Triax. Triax 1 and Triax2 Sel. both flashing (~5/s) Triax 1 and Triax2 Sel. both flashing (~5/s) The down-converts connected to the AMU(s) are not suited for the same frequency range. Note: disconnected down-converters are not reported even if the other connected converters are coherent. - Flashing (~1/s) Triax link (AMU -> WCU) is OK, no video content delivered by AMU. On Off Video transmission in Triax is not OK. HD Wireless User’s Guide (v6.1) Chapter 4 - Setting up TRIAX 2 OK / SELECTED These indicators operate in the same way as for Triax input 1 above. VIDEO CHANNEL (rotary switch not used) DATA CHANNEL (rotary switch not used) VIDEO PARAMS (rotary switch not used) PC COM Connector for attaching a PC to the WCU. CAM LOCK Reflects the status of the internal genlock (Camera/WCU). ☞ Note The camera must be locked to the WCU even if the WCU is not locked to the studio reference signal. Cam Lock (Green) Message On Camera is locked on WCU. Off Camera is not locked on WCU (check data link). EXT REF. When ON this light indicates the presence of a correct external sync signal on the GEN LOCK connector of the WCU. Otherwise it is off or flashing. Reflects the status of the internal genlock (Camera/WCU). Cam Lock (Green) Message On Studio reference signal is detected and is consistent with the selected video mode. Off Studio reference signal is not detected (WCU is free running). Flashing (~5/s) Studio reference signal is detected but is not consistent with the selected video mode (WCU is not locked on studio). FREEZE When ON, this light indicates that Freeze is activated due to an interrupted video connection. This means that the latest correct image that was received is stored into memory and is output until the video connection is restored. HD Wireless User’s Guide (v6.1) 51 Chapter 4 - Setting up HORIZONTAL PHASE (not used) CAMERA ON Normally and permanently ON, this light indicates that the WCU is powered. This indicator flashes to indicate excessive consumption at the WCU. OFF This indicator lights when the AMU is not drawing power. This indicator flashes to indicate that the AMU power consumption is excessively low (< 26 W). CABLE OPEN This normally OFF indicator lights if there is no Digital Triax Rack in the WCU. 13 ON AIR When ON, this light indicates that the camera signal is on air (ON AIR1). 13 MAINS The equipment master on/off switch: «I»: The equipment is operating. «O»: The equipment is not operating. 52 HD Wireless User’s Guide (v6.1) Chapter 5 - Menu contents Chapter 5 Menu contents 5.1 Wireless Control Unit menu structure Access to the functions in the menus can be restricted according to the user level that has been set. The menus are as follows: Video menu The video menu contains functions for configuring video outputs and freeze mode. Monitoring menu This menu contains the functions which determine how items in the menus are displayed on the monitoring outputs. Audio/Intercom menu The functions contained under this menu control various aspects of audio and intercom. SDTV menu The functions contained under this menu are used for the SDTV outputs. System menu This menu contains the functions that are used to set up the general configuration and for carrying out adjustments and calibrations of the WCU. Files menu This menu allows values to be stored in System and operator files, and allows these files to be recalled as required. Diagnostic menu The diagnostic menu is designed to provide information on the current status of the WCU. HD Wireless User’s Guide (v6.1) 53 Chapter 5 - Menu contents 5.1.1 WCU user levels Access to the functions on these menus is determined by the user level that has been set. The menu items are divided into two user levels. The operator level Oper is default accessible. Menu items with user level Install are only accessible if the menu level is set to Install. To enter the Install level proceed as follows: 1. Enter the menu. 2. Navigate to the MONITORING > MENU > MENU LEVEL item. 3. Set the Menu level to Install. The purpose of the user levels is to restrict the set of functions which can be changed by whoever is using the WCU. In this way the danger of the operator accidentally changing critical functions while shooting is reduced. The user level automatically reverts to Oper when menu Off is executed (either after time out or user’s choice. 54 HD Wireless User’s Guide (v6.1) Chapter 5 - Menu contents 5.2 WCU menu contents In the values column, the default value of the item is shown in bold. 5.2.1 WCU Video menu Menu item Values Description Level File SDI 1 & 2 SD, HD Select video standard for SDI outputs 1 and 2. When SD is selected, the menu text is superimposed on SDI 1 and SDI 2 signals unless MONITORING > MENU > MENU ONAIR is disabled and On Air signal is active. Install - SDI 3 SD, HD Select the video standard for SDI 3. The menu text is superimposed on the video signal unless MONITORING > MENU > MENU ONAIR is disabled and On Air signal is active. Install - Freeze Mode No, Field Selects freeze frame mode when loss of signal occurs. Install - Colour bar On, Off Turns colour bar in the camera on or off. Oper - Level File 5.2.2 WCU Monitoring menu Menu item Values Description Oper Menu Display On, Time Selects menu display time: On = permanently displayed; Time = menu switches off after a set time. Oper - Menu Time 5..99 (10) Sets the length of time the menu is displayed. Oper - Menu OnAir Ena, Dis When Enabled, the WCU menu can be visible on the video outputs, even when the system is On Air. When Disabled, the WCU menu will never be shown on the video outputs when the system is On Air. Install - Menu Level Oper, Inst Selects the menu access level. Oper - Service mode exec Confirms and enters the service level. Install - Oper - Oper - Statusbar Studio Studio On, Off Displays the studio name in the status bar Oper - Name <Text> Edit the studio name Oper - Oper - Operator Studio On, Off Displays the camera operator’s name in the status bar Oper - Name <Text> Edit the camera operator’s name Oper - HD Wireless User’s Guide (v6.1) 55 Chapter 5 - Menu contents Menu item Cam number 5.2.3 Values Description Level On, Off Displays the camera number in the status bar Oper File - WCU Audio/Intercom menu Menu item Values Description Level File Delay On. Off Switches audio delay on or off. On: a delay is added to the Audio down link signal which compensates for the Video delay. Install - Audio Out1 Level 0dB, +6dB Selects audio 1 output level Install - Audio Out2 Level 0dB, +6dB Selects audio 2 output level Install - Mode Single, Dual Dual: Audio channels 1&2 are used. Single: Only Audio channel 1 is used in the WCA. Audio Channel 1 is duplicated on Audio Channel 2 as well. Note: this menu is the same as the camera system menu INSTALL > AUDIO > AUDIO IP MODE. Install - Wire Mode 2wires, 4wires Selects studio intercom wiring mode for Engineering channel Install - 2w_Balance 0..99 (50) Sets 2-wire intercom balance Install - Level 0dBu, +6dBu Selects intercom channel input level Install - Out Ref Level 0..99 (50) Sets output reference level Install - Wire Mode 2wires, 4wires Selects studio intercom wiring mode for Production channel Install - 2w_Balance 0..99 (50) Set 2-wire intercom balance Install - Level 0dBu, +6dBu Selects intercom channel input level Install - Out Ref Level 0..99 (50) Selects output reference level Install - Level 0dBu, +6dBu Selects intercom channel input level Install - Isolate Isolate, System Isolate = isolate Prog and Prod intercom channels from Eng, System = isolate Off Install - 1kHz Tone On, Off Switches test tone on or off Install - Compander On, Off Switches compander on or off Install - Audio InterCom Eng Prod Prog 56 HD Wireless User’s Guide (v6.1) Chapter 5 - Menu contents 5.2.4 WCU SDTV menu Menu item Values Description Level File Detail On, Off Switches horizontal detail on SDTV outputs on or off. Oper - Level 0..99 (50) Sets horizontal detail level on SDTV outputs. Oper - Detail HD Wireless User’s Guide (v6.1) 57 Chapter 5 - Menu contents 5.2.5 WCU System menu Menu item Values Description Level File Camera Number 0..99 (1) Selects camera number Oper - ControlMode C2IP, S9000 Selects camera control system Oper - IP Config Mode Auto, Manual Oper - IP Digit 1 0..255 Oper - IP Digit 2 0..255 Oper - IP Digit 3 0..255 Oper - IP Digit 4 0..255 Oper - Subnet mask 0..255 - - Apply IP settings exec - - IP address Sets IP address configuration Ethernet Ethernet Speed 10Mb, 100Mb, Auto Selects the Ethernet network speed. install - Ethernet Duplex Half, Full, Auto Selects the Ethernet duplex mode. install - Yellow On Air Standard, Independent Standard: use to switch off the yellow on-air signal (ISO) when a red On Air tally signal is active. Independent: use to leave the yellow On Air signal (ISO) unchanged when a red On Air tally signal is active. oper - Yellow On/Off Low/High, High/Low, Open/High, High/Open Selects switching behavior for the yellow On Air (ISO) signalling inputs. oper - OnAir On/Off Low/High, High/Low, Open/High, High/Open Selects switching behavior for the red On Air (Tally) signalling inputs. oper - Call On/Off Low/High, High/Low, Open/High, High/Open Selects switching behavior for the Call signalling inputs. oper - H Phase Coarse -6 .. +1uS (1uS steps) Sets coarse horizontal phase for all SD and HD outputs oper - HD H Phase Fine 0..99 (50) HD pixel steps Sets fine horizontal phase for all HD outputs. Note: although this setting can be adjusted in HD pixel steps, the values displayed have less resolution. oper - SD H Phase Fine 0..99 (50) SD pixel steps Sets Fine horizontal phase for all SD outputs. Note: although this setting can be adjusted in SD pixel steps, the values displayed have less resolution. install - Day 1..31 Sets the value for Day install - Month 1..12 Sets the value for Month install - Year 0..99 Sets the value for Year install - Hours 0..23 Sets the value for Hour install - Minutes 0..59 Sets the value for Minutes install - Signalling Timing Clock 58 HD Wireless User’s Guide (v6.1) Chapter 5 - Menu contents Menu item Values Description VideoMode 720p50, 720p59, 1080i50, Selects video mode if the camera is not 1080i59 connected. Level File install - service - Wireless MOD802.16 Test On, Off Turns MOD802.16 test on or off. Warning: this mode is for service purposes only! VideoFreqRangeSelect Auto, Manual Auto: frequency range is taken from detected down-converters. Manual: frequency range is forced. install VideoFreqRange 2.0-2.2, 2.2-2.4, 2.5-2.7 Allow to impose video frequency range when VideoFreqRangeSelect = Manual. Otherwise (Auto) it displays the detected Frequency Range. install Video Frequency 2.030 .. 2.195 GHz or 2.203 .. 2.398 GHz or 2.503 .. 2.683 GHz Selects video frequency (within the selected video range) in 1 MHz steps. install DataFreqRange 454-462 MHz Selects data frequency range. Note: this setting is fixed to 454-462 MHz Data Frequency 454.00 .. 462.00 MHz Selects data frequency in 50 kHz steps. install In/Outdoor Indoor, Outdoor Selects environment profile. Tip: try Indoor setting first (even in outdoor situations). Switch to Outdoor if the RF link is still weak even in HiR mode. install - Q_Robustness HiQ, Std, HiR Selects quality/robustness trade-off HiQ = high quality; Std = standard; HiR = high robustness. install - Q_Latency Std, Q+(H)/Q+(V), Q+(T) Selects quality/latency trade-off. Std = standard low latency; Q+(H), Q+(V) = medium latency; Q+(T) = high latency. install - C, F Temperature indication unit install - Values Description Level File Operator File 1..4 (1) Selects user operator file to use. Oper - Recall exec Recalls the selected user operator file. Oper - Store exec Stores the selected user operator file. Oper - Operator File Cust, Fact Selects standard operator file to use: customer or factory. Oper - Recall exec Recalls the selected standard operator file. Oper - Rx Profile TempUnit 5.2.6 WCU Files menu Menu item User Operator Files Std. Operator Files HD Wireless User’s Guide (v6.1) 59 Chapter 5 - Menu contents Menu item Values Description Level exec Stores the selected standard operator file. Oper - System File 1..4 (1) Selects user system file to use. Install - Recall exec Recalls the selected user system file. Install - Store exec Stores the selected user system file. Install - System File Cust, Fact Selects standard system file to use: customer or factory. Install - Recall exec Recalls the selected standard system file. Install - Store exec Stores the selected standard system file. Install - Store File User System Files Std. System Files 60 HD Wireless User’s Guide (v6.1) Chapter 5 - Menu contents 5.2.7 WCU Diagnostics menu Menu item Values Description Level File Data Board [ID] Displays board 12nc, date, S/N ... Oper - AudioIcom Board [ID] Displays board 12nc, date, S/N ... Oper - TriaxRack Board [ID] Displays board 12nc, date, S/N ... Oper - GenLock Board [ID] Displays board 12nc, date, S/N ... Oper - AudioIcom [value] Displays firmware status (not board status) Oper Genlock [value] Displays firmware status (not board status) Oper Genlock GX [value] Displays firmware status (not board status) Oper TriaxRack [value] Displays firmware status (not board status) Oper AMU 1 [value] Displays firmware status (not board status) Oper AMU 2 [value] Displays firmware status (not board status) Oper Board ID Firmware Status Board Diagnostics Data Board GenLock Board [value] Oper - Install - Video QOS 0..4 4: optimal signal quality, 0:close to video breakdown. This figure is also the number of arrows (>) displayed in the VF. Install - Data QOS 0..127 Values above 90 are excellent conditions. Below 80, the bottom green LED inside the VF starts blinking. This indicator is not affected by Received Power but will help to detect same or adjacent channel interferer (C/I Typical value : ~12 dB @ 0kHz, ~0 dB @±50 kHz, <-40 dB@±100 kHz) Install - Install AMU Diagnostics AutoRange 2.0-2.2 | 2.2-2.4 | 2.4-2.5 | 2.5-2.7 | 2.7-2.9 Detected Frequency Range Install AMU 1(2) Ok, Incomplete, Inconsistent, Not connected OK : 3 DCs of same Frequency range are connected Incomplete : LESS than3 DCs of same Frequency range are connected Inconsistent : 3 DCs are connected BUT NOT of same Frequency range Not connected : There is no AMU connected on that triax input AMU 1(2) DCs menu allows to refine the diagnostics (see below) Install AMU 1(2) DCs AMU 1(2) DC1 HD Wireless User’s Guide (v6.1) unknown | 2.0-2.2 | 2.2-2.4 Detected frequency range of down| 2.4-2.5 | 2.5-2.7 | 2.7-2.9 converter 3 of AMU 1(2) Disconnected DC will be reported as unknown. Install 61 Chapter 5 - Menu contents Menu item Values Level AMU 1(2) DC2 unknown | 2.0-2.2 | 2.2-2.4 Detected frequency range of down| 2.4-2.5 | 2.5-2.7 | 2.7-2.9 converter 2 of AMU 1(2) Disconnected DC will be reported as unknown. Install AMU 1(2) DC3 unknown | 2.0-2.2 | 2.2-2.4 Detected frequency range of down| 2.4-2.5 | 2.5-2.7 | 2.7-2.9 converter 3 of AMU 1(2) Disconnected DC will be reported as unknown. Install File Install Communication Diag 62 Description Camera connected exec Oper - OCP connected exec Oper - MCP connected exec Oper - C2IP Panels exec Oper - HD Wireless User’s Guide (v6.1) Chapter 5 - Menu contents 5.3 Camera install menu for WCA Only the WCA install menus are expanded in this table. Refer to the user’s guide of your HD camera for detailed information on the other menu items. Install Values Description Level File [...] User 3 Wireless Camera number 0..99 (1) Selects camera number. User 1 Oper Data Freq (MHz) 454.00 .. 462.00 MHz Selects data frequency in 50 kHz steps. User 3 - Video Freq (GHz) 2.030 .. 2.198 GHz, 2.203 .. 2.398 GHz or 2.503 .. 2.683 GHz Selects video frequency (within the selected range) in 1 MHz steps. User 3 - Ext. Boost Adjust 0..12 (0) Sets the RF power attenuation for the external video booster. With each increment of 2, power level is decreased by 1 dB. User 3 - In/Outdoor Indoor, Outdoor Selects environment profile. Tip: try Indoor setting first (even in outdoor situations). Switch to Outdoor if the RF link is still weak even in HiR mode. User 3 Q_Robustness HiQ, Std, HiR Selects quality/rubustness trade-off HiQ = high quality; Std = standard; HiR = high robustness. User 3 Q_Latency Std, Q+(H)/Q+(V), Q+(T) Selects quality/latency trade-off. Std = standard low latency; Q+(H), Q+(V) = medium latency; Q+(T) = high latency. User 3 Tx Profile HD Wireless User’s Guide (v6.1) 63 Chapter 5 - Menu contents 64 HD Wireless User’s Guide (v6.1) Chapter 6 - Connectors Chapter 6 Connectors 6.1 WCA connectors Figure 6-1. WCA connector location DC power and Tally output socket or SDTV analog return video input DC out VF SDI Eng Off Prod Viewfinder video output connector (BNC) (HD-)SDI output connector (BNC) DC power input socket 11V-17V DC in CH1 Audio in CH2 Audio connectors for channel 1 and 2 HD Wireless User’s Guide (v6.1) I/Com Intercom connector 65 Chapter 6 - Connectors 6.1.1 Viewfinder video output connector This socket provides an analog 1.0 Vpp output viewfinder HD video signal from the WCA. Text overlay is provided on this output signal. BNC connector 6.1.2 HD-SDI connector This socket is used to output the camera HD-SDI video signal according to SMPTE 292M. No text overlay available. BNC connector 6.1.3 Audio microphone 1 + 2 connectors Pin Description 1 3 1 Audio shield 2 Audio In (+) 3 Audio Return (-) Input impedance > 10 K Phantom power +48V switchable Sensitivity range microphone: -64 to 22 dBu (or 0 dBu for line) 2 XLR 3-pin female 6.1.4 Intercom headset connector 1 2 Pin Description 3 5 4 XLR 5-pin female 66 1 Microphone return 2 Microphone 3 Telephone return 4 Telephone left 5 Telephone right Microphone level: -44 dBu / -24 dBu (switchable) Microphone input impedance: >10 K phantom power +12V (switchable) Output level: +12 dBu max Output impedance: <50 HD Wireless User’s Guide (v6.1) Chapter 6 - Connectors 6.1.5 Power input connector 1 Pin Description 2 3 4 1 GND 2 Not connected 3 Not connected 4 11.5 to 17 V This socket accepts a DC voltage of 15 V nominal. XLR 4-pin male Caution The input voltage must not exceed 17 V. 6.1.6 DC power and tally output connector 5 4 Pin Description 6 3 1 2 Hirose 6-pin female 1 GND (video) 2 CVBS input (1.0 Vpp) 3 DC output (11 to 17 VDC) 1.5 A max. 4 GND (DC) 5 Tally signal (max. 10 mA) 6 Not connected Shield of cable directly to the connector housing. The socket provides access to an internal tally switch. When the camera is On Air, a logic high level (LVT typ. 2.2 V) will source current into an external tally indicator connected between pin 4 (GND) and pin 5 (Tally). Manufacturer part numbers: chassis: Hirose HR10A-7R-6S (female) cable: Hirose HR10A-7P-6P (male) Caution Tally signal current on pin 5 must be limited to 10 mA max. HD Wireless User’s Guide (v6.1) 67 Chapter 6 - Connectors 6.2 AMU connectors Data emitter socket TRIAX OUTPUT DATA IF1 Triax connector IF2 IF3 IN IN OUT OUT RF input connectors RF output connectors (only for measurment purposes) 6.2.1 Triax connector 3 Pin Description 2 1 Inner pin: Signals + power 2 Inner shield: Return 3 Outer shield: Base station housing This socket is used to connect the triax cable to the triax input of the WCU. Various types of Triax connector are available by request 1 68 HD Wireless User’s Guide (v6.1) Chapter 6 - Connectors 6.2.2 Data emitter socket (DATA) 5 4 9 3 8 2 7 1 6 SubD 9-pin female connector Pin Description Pin Description 1 GND 6 SPI_SS Output 2 GND 7 Data Output 3 SPI_SCK Output 8 12 V 4 SPI_MOSI Output 9 12 V 5 SPI_MISO Output This socket is used to connect the AMU to the data emitter unit of the antenna assembly. Data emitter configuration SPI bus: RS 232 levels ~ ±10V; Data emitter Tx Data: RS 232 levels ~ ± 10 V 6.2.3 RF receiver / UHF input connectors (3x) These sockets are used to connect the AMU to the antenna receiver units of the antenna assembly. Always use 75 cables. Phantom power of +9 V is always switched on. BNC connectors 6.2.4 RF receiver / UHF output connectors (3x) These sockets are for measurement purposes only. Use short 75 cables only for measuring equipment. Caution: The RF gain between UHF In and UHF out depends on UHF In power: BNC connectors HD Wireless User’s Guide (v6.1) ~ +3 dB for UHF In power < ~ -45 dBm ~ -15 dB for UHF In power > ~ -45 dBm 69 Chapter 6 - Connectors 6.3 WCU connectors Power Data Audio outputs Reference Ethernet Triax 1 TRIAX GENLOCK Audio out 1 Data1 1 Aux Network 1 2 2 CVBS Sign RS232 1 I / Com (OSD) 2 SERIAL DIGITAL OUTPUT 2 1 Auxiliary 2 3 intercom Signalling connector CVBS outputs SDI outputs 1+2+3 Triax 2 6.3.1 Triax connector 1+2 3 Pin Description 2 1 Inner pin: Signals + power 2 Inner shield: Return 3 Outer shield: Base station housing This socket is used to connect the triax cable from the triax output of the AMU. Various types of Triax connector are available by request 1 70 HD Wireless User’s Guide (v6.1) Chapter 6 - Connectors 6.3.2 Mains power connector 1 2 Pin Description 1 Neutral 2 Line 3 Earth Connect a 100-125 VAC 60Hz or a 200240 VAC 50Hz power supply to this connector (internal automatic switching). Fuse type: T6.3 AH250V (remove power supply plug to access the fuse and the spare fuse.) 3 IEC style 3-pin male 6.3.3 Intercom connector 15 14 13 12 11 Pin Description Pin Description 1 Prod out (4-wire out, 2-wire in/out) 8 Housing 9 4 2 Prod in (4-wire only) Prod out return (4-wire out, 2wire in/out) 3 3 Prod in shield (4-wire only) 10 Prod in return (4-wire only) 2 4 Eng in (4-wire only) 11 Eng in shield (4-wire only) 5 Eng out (4-wire out, 2-wire in/ out) 12 Eng in return (4-wire only) 13 6 Prog in (4-wire only) Eng out return (4-wire out, 2wire in/out) 7 Prog in shield (4-wire only) 14 Prog in return (4-wire only) 15 Housing 8 7 6 5 10 9 1 SubD 15-pin female Shield of cable to the pin marked housing. 6.3.4 Signalling connector 9 10 11 12 13 14 15 Pin Description Pin Description 1 Preview output ext. (relay contact < 10 ) 8 Housing 9 Preview output ext. return 2 Call output ext. (relay contact < 10 ) 10 Call output ext. return 3 ISO input ext. (dry contact) 11 ISO input ext. return 7 8 4 On Air input ext. (dry contact) 12 On Air input ext. return 5 Call input ext. (dry contact) 13 Call input ext. return 6 Audio 1 level (analog input voltage from 0 to 5 V) 14 Audio 2 level (analog input voltage from 0 to 5 V) 7 5 V (Operating Control Panel) 15 GND 1 2 3 4 5 6 SubD 15-pin male Microphone impedance >200 Sensitivity range: -70 to -28 dBm Signal at pin 2 of audio input is in phase with signal at pin 2 of the audio output. Shield of cable to the pin marked housing. HD Wireless User’s Guide (v6.1) 71 Chapter 6 - Connectors 6.3.5 Audio output connectors 1+2 Pin Description 1 2 1 Audio shield 2 Audio output (+) 3 Audio return (-) 3 XLR 3-pin male Nominal level 0dBu (+6dBu selectable) Shield of cable directly to the connector housing. If the same signal is applied at pin2 of Audio input 1 and 2 (WCA), then Signal at pin 2 of audio output 1 is in phase with signal at pin 2 of audio output 2. 6.3.6 Data / S9000 connector A D C B 4-pin souriau connector Pin Description A S9000 Data B Data Not C Not connected D Shield Shield of cable to the pin marked housing. Note: a legacy Series 9000 control panel can be connected using a 4-pin souriau cable. 6.3.7 Network connector Pin Description 8-pin standard RJ-45 ethernet connector 1 Transmit data + (TX+ ) 2 Transmit data - (TX-) 3 Receive data+ (RX+) 4 no connection 5 no connection 6 Receive data - (RX-) 7 no connection 8 no connection Ethernet 10Base-T, 100Base-TX compliant with IEEE-802.3 (edition 2000) 6.3.8 Reference input connectors (2x) BNC connectors 72 This BNC connector accepts either a 1.0 Vpp CVBS SDTV composite or a 1.0 Vpp TLS-HDTV reference (should include H and V synchronization) signal to the camera for genlocking. Note: The second connector should be terminated with 75 if the signal is not looped through. HD Wireless User’s Guide (v6.1) Chapter 6 - Connectors 6.3.9 CVBS output connectors (2x) These two BNC connectors provide an analog 1 Vpp CVBS output signal for monitoring purposes. The menu text is superimposed on this signal when the menu is switched on. BNC connectors 6.3.10 SDI output connectors 1 + 2 BNC connectors These two BNC connectors provide a 0.8 Vpp SDI (SD or HD) output video signal according to SMPTE 259M-C or SMPTE 292M. When used in SD mode, the menu text (OSD) is superimposed on these signals when the menu is switched on. However it is possible to switch off automatically the OSD when Tally signal is active. Setting in WCU menu: MONITORING > MENU > MENU ON AIR 6.3.11 SDI output connector 3 BNC connector HD Wireless User’s Guide (v6.1) This BNC connector provides a 0.8 Vpp SDI (SD or HD) output video signal according to SMPTE 259M-C or SMPTE 292M. When used in SD mode, the menu text (OSD) is superimposed on these signals when the menu is switched on. However it is possible to switch off automatically the OSD when Tally signal is active. Setting in WCU menu: MONITORING > MENU > MENU ON AIR. 73 Chapter 6 - Connectors 74 HD Wireless User’s Guide (v6.1) Chapter 7 - Specifications Chapter 7 Specifications 7.1 Wireless Camera Adapter (WCA) ☞ Note An RF Module (LDK 5466/xx) and an RF DATA CAM MODULE (LDK 5465/20) must be attached to the WCA. Item Value Dimensions (H x W x L) 180 x 120 x 191 mm (7.1 x 4.7 x 7.5 in) Weight 2.2 kg (4.9 lbs) Operating temperature -20 to +45 °C (0 to +113 °F) Storage temperature -20 to +60 °C (0t o +140 °F) Power (system) 58 W (typ.) including LDK 8000 Elite camera head and 2-inch viewfinder Power (WCA, RF module and Data Camera Module only) < 28 W Battery plate Anton Bauer or IDX type DC input 12 V (11 to 17 V); 3.5A (excluding DC out); XLR-4 DC output 11 to 17 VDC (battery voltage) 1.5 A; 6-pin Hirose Video SDI monitoring quality output VF signal B&W video 1.0 Vpp, 75 output Antennas RX antenna; BNC connector, RF signal input TX antenna; SMA connector, RF signal output Modulation COFDM (based on modified 802.16 layer) Frequency ranges 2.030 .. 2.198 GHz for 2.0 - 2.2 GHz module, 2.203 .. 2.398 GHz for 2.2 - 2.4 GHz module, 2.503 .. 2.683 GHz for for 2.5 - 2.7 GHz module Number of channels 181 (in steps of 1 MHz) Emitted power 18 dBm ± 1.5 dBm (conducted) measured at Tambient = 20° C Bandwidth 18 MHz per channel (at -3 dB) HD Wireless User’s Guide (v6.1) 75 Chapter 7 - Specifications Item Value Bitrate (depending on selected profile) Out / Q_R = HiR : 31.4 Mb/s Out / Q_R = Std : 47.0 Mb/s Out / Q_R = HiQ : 55.8 Mb/s In / Q_R = HiR : 37.2 Mb/s In / Q_R = Std : 49.7 Mb/s In / Q_R = HiQ : 66.4 Mb/s Intercom Speech quality; latency to camera 100 ms Microphone level -44 to -24 dBu switchable Input impedance > 10 k Telephone level +12 dBu nominal Telephone output impedance < 50 Audio 1 channel full bandwidth (22 kHz, S/N 63 dB typical) or 2 channels reduced bandwidth (15 kHz, S/N 60 dB typical) Input impedance > 10K Sensitivity range: -64 to -22 dBu or line (0 dBu) Tally out On: +2.2 VDC; Off: 0 VDC (LVTTL levels). User MUST limit the current to 10 mA. max. Applicable standards Radio: ETS 300 440 External video 1.0 Vpp (C)VBS input 7.1.1 Wireless RF module (LDK 5466/xx, attached to WCA) Item Value Antenna TX antenna, SMA connector, RF signal output Frequency ranges depending on module: LDK 5466/20 : 2.030 .. 2.195 GHz or LDK 5466/22 : 2.203 .. 2.398 GHz or LDK 5466/25 : 2.503 .. 2.683 GHz Emitted power (Video mode = 50 Hz) 16 dBm < P < 18.5 dBm (conducted) measured at Tambient = 20° C; ACP > 37.5 dB Emitted power (Video mode = 59.94 Hz) 14 dBm < P < 16.5 dBm (conducted) measured at Tambient = 20° C; ACP > 43.5 dB Applicable standards Radio: ETSI EN 300 440, EN 302 064 7.1.2 HD RF DATA CAM MODULE (LDK 5465/20, attached to WCA) 76 Item Value Antenna RX antenna, BNC connector, RF signal output Modulation FSK Sensitivity < -93 dBm Saturation > 10 dBm HD Wireless User’s Guide (v6.1) Chapter 7 - Specifications 7.2 Antenna Management Unit (AMU) Item Value Dimensions (H x W x L) 250 x 200 x 480 mm (9.8 in 7.8 x 18.9 in) Weight (approx.) 7.5 kg (16.5 lbs) Operating temperature -20 to +45 °C (0 to +113 °F) Storage temperature -20 to +60 °C (0 to +140 °F) Environment IP54 compliant Data output 9-pin, D-connector female UHF inputs 3 x BNC connectors with active loop-through Triax output Triax connector, towards WCU 7.2.1 RF receiver units (attached to AMU) Item Value Dimensions (H x W x L) 64 x 34 x 98 mm (2.5 x 1.3 x 3.9 in) Weight (approx.) 0.3 kg (0.66 lbs) per unit Operating temperature -20 to +45 °C (0 to +113 °F) Storage temperature -20 to +60 °C (0 to +140 °F) Environment IP54 compliant Frequency range 2.0 - 2.2 GHz, 2.2 - 2.4 GHz or 2.5 - 2.7 GHz (depending on module) RF antenna SMA connector VHF output BNC connector 7.2.2 RF data emitter unit (LDK 4454/x0 - HD RF DATA TRANSMITTER) ☞ Note The AMU is delivered with a Data Booster (46072229AA - Data amplifier assembly) mounted on the delivered antenna bracket (46072187AB - Aerial support assembly). The RF specification below applies when the data emitter is connected to the Data Booster). Item Value Dimensions (H x W x L) 64 x 34 x 98 mm (2.5 x 1.3 x 3.9 in) Weight (approx.) 0.3 kg (0.66 lbs) per unit Operating temperature -20 to +45 °C (0 to +113 °F) Storage temperature -20 to +60 °C (0 to +140 °F) Environment IP54 compliant Modulation FSK modulation Frequency range 454.000 - 462.000 MHz Number of channels 161 (in steps of 50 kHz) HD Wireless User’s Guide (v6.1) 77 Chapter 7 - Specifications 7.3 7.4 78 Item Value Bandwidth < 100 kHz (@250 nW max. (according to EN 300 220) < 50 kHz (@-26dBc Baud rate 28,800 baud Emitted power 24 dBm ± 2 dBm (conducted) Applicable standards Radio: ETS 300 220 RF antenna BNC connector Data input 9-pin, D-connector female Wireless Control Unit (WCU) Item Value Weight (approx.) 7.0 kg (15.4 lbs) Operating temperature 0 to +45 °C (32 to +113 °F) Storage temperature -20 to +60 °C (0 to +140 °F) Power 100-125 VAC 60 Hz (3A) or 200-240 VAC 50 Hz (1.5A) max. 150 W depending on system configuration Triax cable length (max.) 400 m (1,300 ft) for 8 mm (5/16”) cable; 600 m (1,970 ft) for 11 mm (7/16”) cable; 800 m (2,600 ft) for 14 mm (9/16”) cable. Video (3x) SDI SMPTE 259M; HD or SD selectable, BNC-connector CVBS CVBS output monitoring quality; BNC-connector Genlock in SD (Black Burst) or HD-TLS; BNC-connector Power in IEC type, 3-pin male Intercom Full speech quality Intercom input level 0 or +6 dBu selectable Intercom output level +6 dBu nominal (adjustable +/- 12 dB in 100 steps) Audio level Output level 0 or +6 dBu selectable Applicable standards EMC: EN 301489-3 Safety: EN 60950 LDK 5455 Video Booster (optional) Item Value Dimensions (H x W x L) 210 x 130 x 45 mm (8.3 x 5.1 x 1.8 in) excluding battery socket Weight 1.4 kg (3.1 lbs) Operating temperature -20 to +45 °C (0 to +113 °F) Storage temperature -20 to +60 °C (0 to +140 °F) Environment IPX2 (drip proof) Application COFDM Video Booster 500 mW HD Wireless User’s Guide (v6.1) Chapter 7 - Specifications Item Value Frequency range 2.0 to 2.7 GHz Power consumption 25 W (typ.) Battery types LDK 5455/50 (Anton Bauer version); LDK 5455/60 (IDX version) Battery input voltage 10.5 VDC to 17 VDC Battery input current 3 A max. RF input level +18 dBm input for 0.5 W (+27 dBm) typical output RF input Return loss < -15 dB RF input connector SMA-type (female) 50 RF output level 500 mW typical (+27 dBm) for + 18 dBm input RF output accuracy +1 / -2 dBm RF output Return loss < -10 dB RF output connector N-type (female) 50 HD Wireless User’s Guide (v6.1) 79 Chapter 7 - Specifications 80 HD Wireless User’s Guide (v6.1) Chapter 8 - Exchanging the RF module Chapter 8 Exchanging the RF module In some situations you may choose to use a different frequency band. To use a different band, you need to exchange the right side cover (= camera RF module) of the wireless camera adapter. Caution Exchange of the camera RF Module must only be performed by qualified personnel. Choose the frequency module for your frequency band: – LDK 5466/20: Camera RF module 2.0 - 2.2 GHz – LDK 5466/22: Camera RF module 2.2 - 2.4 GHz – LDK 5466/25: Camera RF module 2.5 - 2.7 GHz To install the module you need to exchange the entire right side cover of the wireless camera adapter as follows: Caution Do not immediately remove the panel from the adapter after unscrewing; it is connected by two cables to the adapter. 1. Unscrew the five screws securing the right side cover of the adapter and carefully open the unit. 2. Disconnect the coaxial cable from the adapter side and the flat cable from the RF module side. 3. Connect the cables between the new RF module and the adapter. HD Wireless User’s Guide (v6.1) 81 Chapter 8 - Exchanging the RF module 4. Fold the cable into the space between the printed circuit board and the upper guiding rail to make sure that it will not get stuck. 5. Mount the module on the adapter and secure it with the five screws. 6. Change the RF receivers on the antenna bracket accordingly. Remove five screws flatcable coax cable 82 HD Wireless User’s Guide (v6.1) Chapter 9 - Installing the Video booster Chapter 9 Installing the Video booster 9.1 Introduction The Video Booster for wireless cameras is a highly linear RF amplifier designed to be used as an accessory to the HD Wireless Camera Adapter. The Video Booster operates over a range from 2,000 to 2,700 MHz and delivers up to 500 mW of conducted power. The Video booster is mounted between the back panel of the Wireless Camera Adapter and the battery. It can be delivered for two types of battery systems: IDX (LDK5455/60) or Anton Bauer (LDK5455/50) to be specified when ordered. 9.1.1 Package contents • Video RF booster unit (equipped with either a IDX or Anton Bauer battery interface). • RF coaxial cable (with SMA right-angled connector to SMA right-angled connector). • Flexible antennas (with N-type male connector). Use only the antenna that matches your RF module: – LDK 5457/20 for 2.0 - 2.2 GHz range; – LDK 5457/22 for 2.2 - 2.4 GHz range; – LDK 5457/25 for 2.5 - 2.7 GHz range. LDK 5455 Video Booster unit Flexible antenna RF coaxial cable HD Wireless User’s Guide (v6.1) 83 Chapter 9 - Installing the Video booster 9.2 Assembly 1. Switch off the camera. 2. Remove the battery from the camera adapter. 3. Plug the booster onto the camera adapter battery plate. RF coaxial cable Flexible antenna XLR-4 Power cable 4. Plug the XLR-4 power cable from the booster in the XLR-4 power receptacle on the camera adapter. 5. Connect the RF coaxial cable between the output of the camera adapter and the input of the booster. 6. Screw the correct flexible antenna on the booster according to your RF module: – use the LDK5457/20 antenna with LDK5466/20 RF module (2.0 to 2.2 GHz) – use the LDK5457/22 antenna with LDK5466/22 RF module (2.2 to 2.4 GHz) – use the LDK5457/25 antenna with LDK5466/25 RF module (2.5 to 2.7 GHz) 84 7. Install the battery onto the back panel of the booster. 8. Switch on the camera. HD Wireless User’s Guide (v6.1) Chapter 9 - Installing the Video booster 9.3 Output power The HD Wireless Camera Adapter has an internal digital attenuator. It allows you to reduce RF output power to a value that is sufficient for your particular operating conditions. Maximum power is not always needed and it is good practice to reduce output power to the minimum required to reduce exposure and possible interaction between adjacent cameras. To reduce the RF output power level set the EXT. BOOST ADJUST in the INSTALL > WIRELESS menu of the camera to a value greater than 0. Each time this parameter is increased by 2, the RF output power level is decreased by 1 dB with respect to its nominal value. HD Wireless User’s Guide (v6.1) 85 Chapter 9 - Installing the Video booster 86 HD Wireless User’s Guide (v6.1)