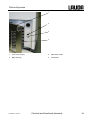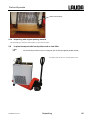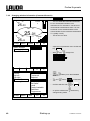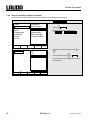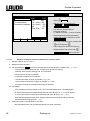
1
Operating Instructions PROLINE Kryomats Low-temperature Thermostats with SmartCool System RP 3050 C, RP 3050 CW RP 4050 C, RP 4050 CW RP 3090 C, RP 3090 CW RP 4090 C, RP 4090 CW YAUE0007 / release 03/2013 replaces release 01/09, 06/08 Translation of the original Operating Instructions Valid: from software version of Control system (Master) 2.08 from software version of Protection system (Master) 2.03 from software version of Operating system (Command) 3.20 from software version of Cooling system 2.03 from software version of Analogue interface 3.01 from software version of RS232/485-Module 3.03 from software version of contact I/0 module 3.00 from software version of solenoid valve 3.00 LAUDA DR. R. WOBSER GMBH & CO. KG P.O. Box 1251 97912 Lauda-Koenigshofen Germany Phone: 0049 9343/ 503-0 Fax: 0049 9343/ 503-222 E-Mail [email protected] Internet http://www.lauda.de Proline Kryomats Prefixed safety notes Before operating the equipment, please read carefully all the instructions and safety notes in Section 1. If you have any questions, please phone us! Follow the instructions on setting up, operation etc. This is the only way to avoid incorrect operation of the equipment and to ensure full warranty protection. • The master head is supplied with power via the lower section of the unit. After switching off the head using the switch at the front of the head and/or using the switch at the back of the head, mains voltage (230 volts) is still present on the master head. Switch off the unit by using the rotary switch on the front panel. • Switch off the equipment and pull out the mains plug: − for servicing or repair, − moving the equipment! • Transport the equipment with care! The unit may NEVER be overturned nor put upside down! • Equipment and its internal parts can be damaged: − by dropping, − by shock. • Technically qualified personnel must only operate the equipment! • Never operate the equipment without the heat transfer liquid! • Do not start up the equipment if ... − it is damaged or leaking, − cable (not only supply cable) is damaged. • Drain the bath before moving the equipment! • Do not carry out any technical changes on the device! • Have the equipment serviced or repaired by properly qualified personnel only! The Operating Instructions include additional safety notes, which are identified by a triangle with an exclamation mark. Carefully read the instructions and follow them accurately! Disregarding the instructions may have serious consequences, such as damage to the equipment, damage to property or injury to personnel! We reserve the right to make technical alterations! YAUE0007 / 3/7/2013 Prefixed safety notes 3 Proline Kryomats Contents Prefixed safety notes ................................................................................................................................... 3 1 SAFETY INFORMATION ................................................................................................................................ 7 1.1 1.2 2 GENERAL SAFETY INFORMATION .................................................................................................................. 7 OTHER SAFETY INFORMATION ...................................................................................................................... 7 BRIEF OPERATING INSTRUCTIONS ........................................................................................................... 9 2.1 2.2 MENU STRUCTURE: MASTER ..................................................................................................................... 10 MENU STRUCTURE: COMMAND REMOTE CONTROL ..................................................................................... 11 3 CONTROLS AND FUNCTIONAL ELEMENTS ............................................................................................ 12 4 UNIT DESCRIPTION ..................................................................................................................................... 17 4.1 4.2 4.3 4.4 4.5 4.6 4.7 4.8 4.9 4.10 4.11 5 ENVIRONMENTAL CONDITIONS ................................................................................................................... 17 TYPES OF UNIT ......................................................................................................................................... 17 VARIOFLEX PUMP ..................................................................................................................................... 17 MATERIALS............................................................................................................................................... 18 TEMPERATURE DISPLAY, CONTROL AND SAFETY CIRCUIT ............................................................................. 18 PROGRAMMER AND RAMP FUNCTION .......................................................................................................... 19 INTERFACES ............................................................................................................................................. 19 INTERFACE MODULES (ACCESSORIES) ........................................................................................................ 19 REFRIGERATING UNIT ................................................................................................................................ 20 AVOIDANCE OF DEWING ......................................................................................................................... 20 HEATER RATING AND POWER CONSUMPTION FROM THE MAINS ................................................................. 20 UNPACKING ................................................................................................................................................. 21 5.1 AFTER UNPACKING.................................................................................................................................... 21 5.2 STANDARD ACCESSORIES ......................................................................................................................... 21 5.3 PACKING AND UNPACKING WITH ORIGINAL PACKAGING MATERIAL ................................................................. 21 5.3.1 Background ..................................................................................................................................... 21 5.3.2 Requirements .................................................................................................................................. 21 5.3.3 Unpacking the device ...................................................................................................................... 22 5.3.3.1 Outer cardboard box ................................................................................................................ 22 5.3.3.2 Lift device from the pallet ......................................................................................................... 24 5.3.4 Repacking with original packing material ........................................................................................ 25 5.4 IN-PLANT TRANSPORT WITH HAND PELLET TRUCK OR FORK LIFTER ............................................................... 25 5.5 BEFORE PREPARATION ............................................................................................................................. 26 6 PREPARATION ............................................................................................................................................ 27 6.1 6.2 6.3 6.4 6.5 7 ASSEMBLY AND SITING .............................................................................................................................. 27 FILLING AND DRAINING .............................................................................................................................. 28 CONNECTION OF THE COOLING WATER ....................................................................................................... 29 HEAT TRANSFER LIQUIDS, COOLING WATER AND HOSES .............................................................................. 30 CONNECTING EXTERNAL LOADS ................................................................................................................. 33 STARTING UP .............................................................................................................................................. 34 7.1 MAINS CONNECTION.................................................................................................................................. 34 7.2 SWITCHING ON ......................................................................................................................................... 34 7.3 SWITCHING OFF / STANDBY ........................................................................................................................ 36 7.4 KEY FUNCTIONS........................................................................................................................................ 37 7.4.1 General key functions and pilot lamps ............................................................................................ 37 7.4.2 Changing window information (Command Console) ...................................................................... 40 7.4.3 Locking the keyboard ...................................................................................................................... 41 7.5 IMPORTANT SETTINGS ............................................................................................................................... 43 7.5.1 Temperature setpoint setting .......................................................................................................... 43 4 Contents YAUE0007/ 3/7/2013 Proline Kryomats 7.5.2 Displaying the actual external temperature .....................................................................................45 7.5.3 Setting pump power or standby .......................................................................................................46 7.5.4 Activate external pump ....................................................................................................................48 7.5.5 Activating external control................................................................................................................48 7.5.6 Current consumption from the mains...............................................................................................50 7.5.7 Setting the date and time (Command).............................................................................................51 7.5.8 Display resolution setting (Command).............................................................................................52 7.6 SPECIAL SETTINGS ....................................................................................................................................53 7.6.1 Defining the type of start mode ........................................................................................................53 7.6.2 Defining temperature limits ..............................................................................................................54 7.6.3 Setpoint offset operating mode........................................................................................................55 7.6.4 Restoring works settings..................................................................................................................56 7.6.5 Setting the volume of the acoustic signals.......................................................................................57 7.6.6 Entering the offset of the internal temperature probe ......................................................................57 7.6.7 Restoring the works setting of the internal temperature-probe offset..............................................58 7.6.8 Entering the offset of the external temperature probe .....................................................................59 7.6.9 Restoring the works setting of the external temperature-probe offset.............................................59 7.7 GRAPHICAL DISPLAY OF TEMPERATURE MEASUREMENTS (COMMAND) ..........................................................60 7.8 PROGRAMMER (PGM ONLY COMMAND) ......................................................................................................62 7.8.1 Program example.............................................................................................................................62 7.8.2 Selecting and starting the program (Start, Hold, Stop)....................................................................64 7.8.3 Interrupting, continuing or terminating the program (Hold, Continue, Stop)....................................65 7.8.4 Creating or modifying a program (Edit)............................................................................................66 7.8.5 Defining the number of program loops (Loops) ...............................................................................70 7.8.6 Viewing the program sequence as a graph (Graph)........................................................................70 7.8.7 Obtaining information on a program (Info).......................................................................................71 7.9 RAMP FUNCTION ........................................................................................................................................72 7.10 TIMER FUNCTION (COMMAND).................................................................................................................73 7.11 CONTROL PARAMETERS .........................................................................................................................74 7.11.1 Internal control variable (integral measurement probe)...................................................................75 7.11.1.1 Proven settings for control parameters and pump (integral measurement probe)...................75 7.11.2 External control variable (External measurement probe) ................................................................75 7.11.2.1 Steps for setting the control parameters for external control....................................................76 7.11.3 Internal and external control parameter sets ...................................................................................77 7.11.4 Self Adaption....................................................................................................................................79 7.12 ALARMS, WARNINGS AND ERRORS .........................................................................................................81 7.12.1 Overtemperature protection and checking.......................................................................................81 7.12.2 Low-level alarm and low-level checking ..........................................................................................82 7.12.3 High-level settings............................................................................................................................83 7.12.4 High-level warning or alarm .............................................................................................................84 7.12.5 Pump-motor supervision: Overload or blockage..............................................................................85 7.12.6 Pump-motor supervision: Dry running .............................................................................................85 7.12.7 Compressor Overtemp.....................................................................................................................86 7.12.8 Three-phase current ........................................................................................................................86 7.12.9 Fault list „Alarms and Warnings“......................................................................................................87 7.13 RS 232/ RS 485 INTERFACE ..................................................................................................................90 7.13.1 Connecting cables and interface test RS 232..................................................................................90 7.13.2 Protocol RS 232...............................................................................................................................90 7.13.3 Connecting cable RS 485 ................................................................................................................91 7.13.4 Protocol RS 485...............................................................................................................................91 7.13.5 Write commands (Data commands to the thermostat) ....................................................................92 7.13.6 Read commands (Data requested from the thermostat) .................................................................93 7.13.7 Error messages................................................................................................................................95 7.13.8 Driver software for LABVIEW®........................................................................................................95 8 INTERFACE MODULES................................................................................................................................96 8.1 8.2 INSTALLING OF MODULES...........................................................................................................................96 MENU STRUCTURE FOR ALL MODULES (ONLY COMMAND) .............................................................................97 YAUE0007 / 3/7/2013 Contents 5 Proline Kryomats 8.3 SERIAL INTERFACES RS232/ 485 .............................................................................................................. 98 8.4 ANALOGUE MODULE .................................................................................................................................. 98 8.5 CONTACT MODULE .................................................................................................................................... 99 8.5.1 Contact module LRZ 915 with three inputs and three outputs ....................................................... 99 8.5.2 Namur-Contact module LRZ 914 with only one input and one output .......................................... 100 9 MAINTENANCE .......................................................................................................................................... 101 9.1 DEVICE STATUS ...................................................................................................................................... 101 9.1.1 Interrogating the device type ......................................................................................................... 101 9.1.2 Software version ........................................................................................................................... 101 9.1.3 Serial numbers .............................................................................................................................. 101 9.1.4 Device data ................................................................................................................................... 101 9.1.5 Fault memory (Command) ............................................................................................................ 102 9.2 CLEANING .............................................................................................................................................. 102 9.2.1 Cleaning the surface of the device................................................................................................ 102 9.2.2 Draining the water-cooled condenser ........................................................................................... 103 9.3 SERVICING, CLEANING, REPAIR AND DISPOSAL INFORMATION ..................................................................... 103 9.3.1 Servicing ....................................................................................................................................... 103 9.3.2 Service intervals according to VDI 3033 ....................................................................................... 104 9.3.3 Testing the heat transfer liquid...................................................................................................... 104 9.3.4 Cleaning the condenser ................................................................................................................ 105 9.3.4.1 Air-cooled condenser ............................................................................................................. 105 9.3.4.2 Water-cooled condenser ........................................................................................................ 105 9.3.4.2.1 Cleaning the dirt trap .......................................................................................................... 105 9.3.4.2.2 Decalcifying the water cooling circuit ................................................................................. 106 9.3.5 Repair information ......................................................................................................................... 106 9.3.6 Remedying faults .......................................................................................................................... 107 9.4 DISPOSAL INFORMATION ......................................................................................................................... 108 9.4.1 Disposal of the refrigerant ............................................................................................................. 108 9.4.2 Disposal of the packaging ............................................................................................................. 108 9.5 HELP DESK AND ORDERING REPLACEMENT PARTS .................................................................................... 109 10 ACCESSORIES ....................................................................................................................................... 110 11 TECHNICAL DATA AND DIAGRAMS.................................................................................................... 111 12 INDEX ...................................................................................................................................................... 119 CONFIRMATION......................................................................................................................................121 Explanation of signs: 6 Danger: This sign is used where there may be injury to personnel if a recommendation is not followed accurately or is disregarded. Note: Here special attention is drawn to some aspect. It may include reference to danger. Reference It refers to other information in different sections. Contents YAUE0007/ 3/7/2013 Proline Kryomats 1 Safety information 1.1 General safety information A heating and cooling thermostat heats or cools and circulates heat transfer liquids according to specified parameters. This involves hazards due to high or low temperatures, fire and general hazards due to the application of electrical energy. The user is largely protected by the application of relevant standards. Further hazard sources may arise due to the type of tempering medium, e.g. by exceeding or undercutting certain temperature thresholds or by the breakage of the container and reaction with the heat transfer liquid. It is not possible to consider all eventualities. They remain largely subject to the judgment and responsibility of the operator. The equipment must only be used as prescribed and as described in these operating instructions. This includes operation by instructed specialist personnel. The equipment is not rated for use under medical conditions according to DIN EN 60601-1 or IEC 601-1. For Europe: The equipment fulfills the following classes of the EMC (electromagnetic compatibility) standard EN 61326-1 VDE 0843-20-1:2006-10: Class A: Operation only on networks without connected domestic areas. Class B: Equipment for operation on networks with connected domestic areas. Class B*: Equipment fulfills Class B when a house connection > 100 A is involved. With unfavorable network conditions disturbing voltage variations may otherwise occur. Only for the USA: Instructions for Class A digital devices “This equipment has been tested and found to comply with the limits for Class A digital device, pursuant to Part 15 of the FCC (Federal Communication Commission) Rules. These limits are designed to provide reasonable protection against harmful interference when the equipment is operated in a commercial environment. This equipment generates, uses, and can radiate radio frequency energy and, if not installed and used in accordance with the instruction manual, may cause harmful interference to radio communications. Operation of this equipment in a residential area is likely to cause harmful interference in which case the user will be required to correct the interference at his own expense.” “This device complies with Part 15 of the FCC (Federal Communication Commission) Rules. Operation is subject to the following two conditions: (1) This device may not cause harmful interference, and (2) this device must accept any interference received, including interference that may cause undesired operation.” Only for Canada: “This Class A digital apparatus complies with Canadian ICES-003” (ICES = Interference Causing Equipment Standards). « Cet appareil numérique de la Classe A est conforme à la norme NMB-003 du Canada ». 1.2 Other safety information • Only connect equipment to PE grounded mains sockets. • At higher operating temperatures, parts of the bath cover can reach surface temperatures exceeding 70 °C. Be careful when touching it! Danger of burning! • Use suitable hoses 6.3. • Secure hose against slippage with the aid of hose clips. Avoid kinks in the hoses. • Check hoses from time to time for any possible material fatigue. • Thermal medium hoses and other hot parts must not come into contact with the mains cable. YAUE0007/ 3/7/2013 Safety information 7 Proline Kryomats • With the use of thermostats as circulating thermostats hot or cold liquid can be emitted when the hose breaks, presenting a hazard to persons and material. • If no external load is connected, the pump outflow must be closed (use screw plugs) and the bypass valve must be set to "internal" 4.3. • Take into account the thermal expansion of the heat transfer oils with increasing bath temperature. • Depending on the heat transfer liquid used and the type of operation, toxic vapors can arise. Ensure suitable extraction. • By changing the heat transfer liquid from aqueous heat transfer liquid to a thermal transfer liquid for temperatures above 100°C, carefully remove all water residues, including from the hoses and loads. When doing this, also open the blanking caps of the pump outputs and inputs and blow compressed air through all the pump outputs and inputs. Danger of scald due to delay in boiling! • Withdraw the mains plug before cleaning, maintenance or moving the thermostat. • Specialist personnel must only carry out repairs in the control section. • The following action may start the thermostat unintentionally from the standby mode: Previously activated timer mode ( 7.10), "Start" command via interfaces ( 8). • Figures of temperature constancy and display accuracy apply under normal conditions according to DIN 12876. Electromagnetic high frequency fields may in special cases lead to unfavorable values. Safety is not impaired. Only water-cooled devices: 8 • The return hose of the water-cooling must be securely fixed on the outlet port in order to prevent the hose sliding off uncontrollably, also during pressure surges. • The return hose of the water-cooling must be fixed on the outlet port that hot cooling water cannot splash out. • It is essential to prevent kinking or squashing of the return hose for the water cooling. Excessive pressure can cause the cooling water hoses to tear and hot water to escape. • To prevent damages by a leakage of the cooling water system its recommended to use a leak-water detector with shut-off valve (Aqua Stop). Safety information YAUE0007 / 3/7/2013 Proline Kryomats 2 Brief operating instructions These brief instructions shall give you the possibility to operate the unit quickly. For safe operation of the unit, it is necessary to read carefully all the instructions and safety notes! 1. Assemble unit and add items as appropriate ( 6.1). The unit may NEVER be overturned nor put upside down! Take care of the hose tubing connections ( 6.3 and 6.4). 2. Fill the unit with corresponding heat transfer liquid ( 6.3). The units are designed for operation with non-flammable and flammable liquids to DIN EN 61010-2-010. Take care of the level of the heat transfer liquid! ( 6.2). 3. Compare the information on the rating label with the supply details. 4. Connect the unit only to a socket with a protective earth (PE) connection. 5. Check whether the switch the "ON = –" position. 6. Check whether the switch position. 7. Set the rotary switch operating. at the back of the master control element is in at the front of the master control element is in the "ON = l" on the front panel to "ON = l". The unit starts set the overtemperature cut-off point to a value clearly above room temperature 8. With ( 7.12.1). 9. Now you see the current bath temperature in the Bath-temperature display, for example: 02%32 °C If instead, a warning or error message is displayed, then refer to Section 7.12. YAUE0007 / 3/7/2013 Brief operating instructions 9 Proline Kryomats 2.1 Menu structure: Master Display flashes. Set setpoint Setpoint Bath temperature 2%32 °C External temperature 2%02 °C EXT SEt or . Display is accepted after 4 sec. or proceed immediately with the key: Pump power.5-8/Standby.0 Pu with °C 8 °C ⇒ 7.5.1 Display flashes. Set value with Control Intern / Extern Con 1 °C Further settings MNEmv °C Configure modules MNpfv °C or . Display is accepted after 4 sec. or proceed immediately with the key: ⇒ 7.5.3 ⇒ 7.5.4 Control parameters, setpoint resolution, setpoint-source input, calibration, etc. Protection system, Command, cooling system, analog and RS232 digital module, etc. End End °C These settings and configurations can be entered more easily and in a more clear manner via the Command control element. Therefore, for the Master control element they are not explained in more detail in this operating manual. 10 Brief operating instructions YAUE0007 / 3/7/2013 Proline Kryomats 2.2 Menu structure: Command Remote Control Menu Pump Level 0, 5…8 External pump Start unfill condense. Calibration Works settings Resolution Device status Display data Basic settings Overlevel handling Pump Settings Clock Graph Programmer 1 Interfaces Control Limits 1 8.2 2 no menu in Command Set time Set data Timer 1 Timer 2 Format of date Settings Program 1 Program 2 Program 3 Program 4 Program 5 Ramp function Serial Command 2 serial Master / Profibus Analog interfaces Switching contact Smart Cool off on automatic internal external Pt100 Analog interface RS232/485 Control variable Control parameters Setpoint offset Max. Fan [%] 60 T il (min) T ih (max) YAUE0007 / 3/7/2013 intern Pt100 extern Pt100 Calibration Default All Modules Master Command Cool Other connected modules all default Device type Software Version Serial numbers Device data Error store Basic window Standard window Super window Display Sounds Master Sounds Command Language Master-Mode Autostart Current Consumpt. Mode Displayed value Legend Sample Time Time axis Time base Temp. scale Temp. limits Status Edit Loops Graph Info Status Temp. Change Time Time unit Mode Baud rate RS485 address All default Only control par. int. Only control par. ext. Only miscellaneous Display Edit Default Brightness Contrast Alarm Warning English Deutsch Français Español on off on none Warning Warn. + Heater off Alarm Start / Stop Hold / continue Modify Erase Show chart Xp Tn Tv (auto) Td (auto) Kpe Tne Tve (auto) Tde (auto) Xpf Prop_E(a) Control parameters Control para. sets Tv manual/auto Self Adaption Correction limitation Automatic Manual Offset source Setpoint offset off external Pt100 RS 232 Brief operating instructions Status Setpoint Identification Actual Parameters 11 Proline Kryomats 3 Controls and functional elements 1 2 3 and 4 5 6 7 8 9 1 Mobile Command control element (see page 15) 5 Bath cover 2 Master control element 6 Rotary switch for power supply 3 Pump connection on the side: Pump outflow or pressure output Suction nozzle (return to bath) 7 Front cover (closed) 8 Grille (on both sides) 9 Four steering transport rollers, two off them with stoppers 4 Bypass valve (see illustration on this page). 1 2 3 Pump connection on the side: 1 12 Suction nozzle (return to bath) Pump outflow or pressure output (closed off with screw plug) refer to housing for label 2 Bypass valve (in "external" position) 3 Pump outflow, pressure output Suction nozzle (return to bath) (closed off with screw plug) refer to housing for label Controls and functional elements YAUE0007 / 3/7/2013 Proline Kryomats 1 2 3 4 1 Front cover (open) 3 Bath drain nozzle 2 Bath drain tap 4 Condenser YAUE0007 / 3/7/2013 Controls and functional elements 13 Proline Kryomats 1 2 3 4 5 6 1 Bath bridge heating 4 Connection cable LiBus 2 Nameplate 5 3 Connection cable for control head Cooling water connections (at water-cooled devices W only) 6 Mains cable 14 Controls and functional elements YAUE0007 / 3/7/2013 Proline Kryomats 1 2 3 4 5 6 7 8 9 1 Mobile Command Console (see next page) 6 Connection socket 51H 2 Covers for the two module slots 7 Air intake for electronic head 3 Connection socket 10S for the external Pt100 temperature probe 8 4 Connection socket 70S (LAUDA internal bus (LiBus)) for bus suitable for unit and to which the refrigerating lower section and Command Console are connected Pump connection rear and on the side: Suction nozzle (return to bath) & pump outflow or pressure output refer to housing for label 9 Mains connecting lead 5 Mains switch YAUE0007 / 3/7/2013 Controls and functional elements 15 Proline Kryomats Error signal (red LED is blinking) Control element: Master Bath controlled by external temperature source (green LED is lit) The temperature of an external source is displayed (EXT is lit green) EXT Cooler active (blue LED is lit) Heater active (yellow LED is lit) Select and Enter keys Overtemperature set point to check or set Tmax Mains On (green LED is lit) Graphical display, here in the standard window displaying the values: Control element: Command • Actual temperature Tint of internal bath temperature probe • Setpoint temperature Tset • Actual temperature Text of the external temperature probe • Bath level • Pump level Enter key Cursor key Decimal point or "-" symbol Escape key to quit a window without any changes Standby key, brings the thermostat into the idle mode. Heater, Yellow Stand-By LED RS 232-socket (hidden on the back of Command) 16 Controls and functional elements Five soft-key duo-keys – their associated functions are shown in the display. YAUE0007 / 3/7/2013 Proline Kryomats 4 Unit description 4.1 Environmental conditions The operation of the thermostats is only allowed under the following conditions as specified in DIN EN 61010-2-010:2003 and DIN EN 61010-1:2001: 4.2 − Indoor use only. − Altitude up to 2000 m above sea level. − Foundation must be dense, even, non-slippery and non-flammable. − Keep clear distance ( 6.1 Assembly and siting). − Ambient temperatures range ( 11 Technical data). Use only within this range for an undisturbed operation. − Mains supply voltage fluctuations ( 11 Technical data). − Relative humidity ( 11 Technical data). − Transient over voltage according to Installation Categories (Over voltage Categories) II. − Pollution degree: 2. Types of unit The type designation of the Proline Kryomats comprises the prefix R (to designate the refrigeration machine), a P for Proline, the bath volume in liters and the lowest bath temperature (guide figure without arithmetic sign). The designation is supplemented with a "C" which indicates the presence of the Command control element. For units with water-cooling, the type designation is supplemented with a "W". Examples: RP 4090 CW is a low-temperature thermostat with 40-liter bath and -90 °C lowest temperature. The unit has a Command control element and is water-cooled. 4.3 VarioFlex pump All units are fitted with a VarioFlex pump with a 4-stage variable drive (pump level 5 to 8). The pump power can therefore be optimally matched to the relevant task. In order to achieve optimum temperature homogeneity in the heat transfer liquid in the bath, it is recommended to select the pump level in dependence of the viscosity of the heat transfer liquid; therefore at higher viscosity to increase the pump level. Be cautious at higher bath levels to avoid liquid to slop over the bath edge. The user cannot set the pump levels 1 to 4, because there is no sufficient temperature homogeneity in the bath vessel. With pump level 0 the unit goes into the standby mode. It should be noted that the heat input of the pump into the bath increases with increasing pump level. With the VarioFlex pump, open containers can be operated at a constant level when a level controller (accessory LCZ 0660) is used. At the right-hand side and at the back of the unit outflow and inflow nozzles of the pump are fitted for external loads. This means that up to two external loads can be directly connected without a distributor. Pump connections, which are not required, must be closed off with the supplied caps and union nuts. A bypass valve can subdivide the total volume flow variably between the bath (internally) and the connected load (externally). Attention: the external application must not block the volume flow. If no load is connected to the pump connector, the bypass valve must be set to the “internal” position for the best bath circulation. All pump connections must be closed off with the supplied caps and union nuts. The pump connections on the unit are fitted with M16 x 1 thread. YAUE0007 / 3/7/2013 Unit description 17 Proline Kryomats The VarioFlex pump operates short-term up to viscosities of 150 mm²/s. In the closed-loop control mode 50 mm²/s should not be exceeded. The temperature control is the best with 30 mm²/s and lower viscosity. For operation as a circulating thermostat with an external load, the highest possible power level is practicable to maintain the temperature difference low, among other things also with higher temperatures in conjunction with oils as heat transfer liquid. Pump characteristics ( 11). 4.4 Materials All parts being exposed to the heat transfer liquid are made of high quality material appropriate to the operating temperature. Non-rusting stainless steel and high quality temperature-resistant, primarily solvent-resistant plastics are used. 4.5 Temperature display, control and safety circuit The Master control element is equipped with a 5-character green LED display, which is used for the display of the measurements and settings, as well as the operating status. The entry of setpoints and other settings occurs under menu guidance via four keys. The more comfortable and removable Command control element includes a backlit graphical display. The entry of the setpoint and other settings occurs under menu guidance via situation-dependent cursor keys and soft keys. A Pt100 temperature probe acquires the current temperature in the bath. A high-resolution A/D converter processes the measurement. Further measurement conditioning occurs using a special control algorithm for controlling the heater actuator, which has a low reactive effect on the mains, and the SmartCool refrigeration equipment together with further transducers. An external Pt100 temperature probe can be connected via a socket (10S) for the acquisition of an external temperature. This value can be displayed and, if required, used as the controlled variable with external control (Master) switched on. In this way, the system controls the external measurement and not the internal bath temperature ( 7.5.4). The safety system conforms to DIN EN 61010-2-010. The SelfCheck Assistant monitors about 50 unit parameters. A dual-channel system is used in which two microcontrollers monitor one another. Along with the bath temperature measurement and control probes, there are also two safety temperature probes (Pt100) for the safety circuit for the overtemperature cut-off and for monitoring the bath temperature probe. The overtemperature cut-off point is displayed on pressing the key on the Master. Changing the overtemperature cut-off point: ( 7.2 Switching on) on page 34. The bath level is acquired by the SelfCheck Assistant in 8 stages. If the minimum level is undercut, the pump, heater and the SmartCool System refrigerating machine are switched off. The reaction of the thermostat in case of overfill can be set to simply display a warning, to display a warning and switch off the heater or to switch off the unit completely with pump, heater and SmartCool System refrigerating machine. 18 Unit description YAUE0007 / 3/7/2013 Proline Kryomats When the level is too low, with overtemperature, or with other alarms the SelfCheck Assistant switches the heater off on all poles. The pump and the refrigerating machine are also switched off. This switch-off under fault conditions is retained, i.e. after the fault is rectified, the fault must be reset (released) on the Master operating panel with the key. Other unit functions are described in the appropriate sections and in Section 7. (Starting up). 4.6 Programmer and ramp function Master control element: No programmer provided. Command control element: The units are equipped with a programmer function, which enables five temperature/ time programs to be saved. Each program consists of a number of temperature/ time segments. These also include details of how often the program is to be executed. Up to 150 segments can be distributed amongst the five programs. With the ramp function, a rate of change can be directly entered in K/ unit time ( 7.8). 4.7 Interfaces The device is equipped in series with the following sockets: 4.8 • One socket (10S) for the connection of an external Pt100 temperature probe. • Two sockets (70S) for the connection of components via the LAUDA equipment bus (cooling section, Command control element, external solenoid valve, etc.). • An RS232/485 interface (65S) at the back of the Command control element. Interface modules (accessories) The Master control element can be supplemented with further interface modules, which are simply inserted into two module slots ( 3) at the back of the control head. The following modules are currently available: 1. RS232 / 485 Interface Module (Order No. LRZ 913) with 9-pole SUB-D socket. Electrically isolated through optocouplers. Command set largely compatible with the Ecoline, Integral XT and Integral T Series. The RS2323 interface can be directly connected to the PC with a cable wired 1:1 straight through (Order No. EKS 037). Further details can be found in section 8.3. 2. Analog Module (Order No. LRZ 912) with two inputs and two outputs on 6-pole DIN socket. The inputs and outputs can be set independently as 4...20 mA, 0...20 mA or 0...10 V interface. Further details can be found in section 8.4. 3. Contact Module (Order No. LRZ 915) on 15-pole SUB-D socket. With three relay contact outputs (changeover, max. 30V/ 0.2A) and three binary inputs for control via external voltage-free contacts. Plug 15-pole (Order No. EQM 030) and plug case (Order No. EQG 017). Further details can be found in section 8.5. YAUE0007 / 3/7/2013 Unit description 19 Proline Kryomats 4. Contact Module (Order No. LRZ 914) with connector to NAMUR NE28. Functionality as LRZ 915, but only one output and only one input on each of two DIN sockets. Coupling socket 3-pole (Order No. EQD 047) and coupling plug 3-pole (Order No. EQS 048). Further details can be found in section 8.5. 5. Profibus Modules (Order No. LRZ 917). Further details can be found in the operating instructions (Order No. YAAE0020) of the Profibus Modules. 4.9 Refrigerating unit The refrigerating machine mainly consists of one or two fully hermetically sealed compressors. The heat from the condensation process and the motor is dissipated via a lamellar condenser. Here, fresh air is drawn in at the front of the unit, heated in the unit and output at the back and the side. To ensure proper air circulation the ventilation slots must not be restricted respectively covered ( 6.1). The Proline Kryomats are equipped with the SmartCool technology, which makes optimum use of the compressor and only then cools when refrigerating capacity is demanded by the controller. To achieve this, a number of sensors in the cooling circuit monitor the operating conditions. The compressors are equipped with overtemperature cutouts, which respond to the compressor temperature and the compressor current consumption. In addition, the refrigeration system is backed up by a pressure control device against over pressure. The cooling unit is normally switched in automatically, but can be switched manually via the operating menu with Command control element ( 2.2) and with Master control element ( 2.1). When the fault circuit trips, the refrigerating unit is also switched off. Cooling curves ( 11). 4.10 Avoidance of dewing In order to avoid dewing on the edge of the bath when using the low temperatures of the thermostats, the devices are equipped with a bath bridge heating and a bath edge heating. 4.11 Heater rating and power consumption from the mains The Proline Kryomats has an extraordinarily high heater rating of 3.5 kW maximum. While the compressors are running the power consumption and therefore the heater power is reduced. 20 Unit description YAUE0007 / 3/7/2013 Proline Kryomats 5 Unpacking 5.1 After unpacking After unpacking, first check the device and accessories for any damage in transit. If, contrary to expectations, there is visible damage to the unit, the shippers or the postal service must be immediately informed, so that an investigation can be made. Please also inform the LAUDA Service Constant Temperature Equipment (Contact 9.3.7). 5.2 Standard Accessories Article number Quantity Article YAUE0007 1 Operating instructions for all Kryomats HDQ 120 1 Bath cover with grip for RP 4050 C, RP 4050 CW, RP 4090 C and RP 4090 CW HDQ 121 1 Bath cover with grip for RP 3050 C, RP 3050 CW, RP 3090 C and RP 3090 CW HKO 026 (UD 413) 2 Hose olive Ø 13 mm for all Kryomats HKM 032 4 Union nuts for olives (M16 x 1) already mounted, for all Kryomats HKN 065 4 Screw plugs (for M16 x 1) already mounted, for all Kryomats EOA 001 2 Threaded house coupling Nipple ½“; Nut G ¾“ for water-cooled devices only EZB 260 1 Warning label "Hot surface" for all Kryomats 5.3 Packing and unpacking with original packaging material 5.3.1 Background For the customer to allow a properly packaging, e.g. for further transport or return transport to LAUDA. 5.3.2 − To repack the unit carefully and properly, it is necessary to store the original package! Requirements You need a crane with two textiles round slings or lashings; or a fork lifter with adjustable fork. YAUE0007/ 07.03.13 Unpacking 21 Proline Kryomats 5.3.3 Unpacking the device 5.3.3.1 Outer cardboard box Open the cardboard box on top. Pallet Take out the filling material and the accessory parts. 22 Unpacking YAUE0007 / 3/7/2013 Proline Kryomats Draw out the four nails on the edge, which fix the cardboard box on the pallet. Remove the outer cardboard box vertically upwards. YAUE0007/ 07.03.13 Unpacking 23 Proline Kryomats 5.3.3.2 Lift device from the pallet Two textile round slings − Watch for center of gravity! Textile round slings Align the wheels on the device length. 24 Unpacking YAUE0007 / 3/7/2013 Proline Kryomats Textile round slings 5.3.4 Repacking with original packing material The packaging of a device takes place in the reverse order. 5.4 In-plant transport with hand pellet truck or fork lifter − Die Proline Kryomaten können nur diagonal auf die Transportgabel gestellt werden. Transport the device on a hand pellet truck. YAUE0007/ 07.03.13 Unpacking 25 Proline Kryomats Transport the device with a fork lifter. 5.5 Before Preparation Remove the protective foil. 26 Unpacking YAUE0007 / 3/7/2013 Proline Kryomats 6 Preparation 6.1 Assembly and siting − Site the unit on a flat surface − The unit must not be put into operation if its temperature during storage or transport has dropped below the dew point. Wait for about one hour. − The unit may NEVER be overturned nor put upside down! − Do not cover the ventilation openings at the back of the control head and on all sides of the lower section of the unit. − Leave at least 40 cm of free space on all sides. − For operation as bath thermostat, set the bypass valve to internal (operation without external loads) ( 3). − Plug the mains-cable from the Master control element to the refrigerator unit into the socket 52H on the back of the Kryomat. − Plug the LiBus connector of the Command control element into the 70S socket and secure it. − Plug the LiBus cable from the refrigerator unit also into the socket 70S on the back of the Master control element and secure it. Operation with external loads (Circulating thermostat) continue at 6.4. − Check whether the pump connectors at the side and back are fitted with sealing caps ( 3) or that hoses are fitted for external loads. − Using bath temperatures over 70 °C the supplied self-adhesive label should be applied on the bath at an easily visible point. − Do not carry out technical changes on the device! The edge of the bath must not be drilled! YAUE0007 / 3/7/2013 − It is essential to keep within the permissible ambient temperature range ( 11). − An increased ambient temperature or increased cooling water temperature reduces the cooling capacity. Preparation 27 Proline Kryomats 6.2 Filling and draining Filling − Close the drain cock. − Carefully remove all residues of the previous heat transfer liquid (blow dry and remove screw plugs!). − Maximum filling level is up to 10 mm below the top edge of the bath. Overfilling leads to the display of the warning (7.12.4). Changes in volume of the heat transfer liquid during temperature changes should be taken into account. WXArn103 − Best operation is with a level 30-80 mm below the top edge of the bath. − The cooling pipe of the evaporator should be covered. − Low-level cut-off occurs at about 95 mm below the top edge of the bath. − The units are designed for use with non-flammable and flammable liquids to DIN EN 61010-2-010. Flammable liquids must not be used higher than 25 °C below its fire point ( 6.3). − When using heat transfer oils note that they expand on heating (approx. 10%/ 100 K). With enclosed external loads, the overall expansion takes place in the bath of the Proline Kryomat. − Ensure that with the connection of an external load, the liquid level does not drop impermissibly due to filling the load top up with liquid if necessary. − Set the upper and lower temperature limits ( 7.6.2) in accordance with the limits of the heat transfer liquid in use. Draining − Switch off the thermostat on the mains switch (rotary switch) withdraw the mains plug. − The drain cock is located behind the front panel. − Unscrew the olive with union nut on the drain point (G3/8") and fit the hose onto the drain point. − Open the drain tap and run off the heat transfer liquid. − Close the drain tap. Drain cock − Follow the regulations for the disposal of used heat transfer liquids. Do not drain heat transfer liquid when it is hot or at bath temperatures below 0 °C! 28 Preparation YAUE0007 / 3/7/2013 Proline Kryomats 6.3 Connection of the cooling water Note that the following conditions apply for the connection of the cooling water supply: Cooling water pressure (feed - outlet) maximum 10 bar overpressure Differential pressure (feed - outlet) minimum 3.0 bar Cooling water temperature 10 to 15 °C recommended, 10 to 30 °C admissible (with power restrictions) Cooling water quantity see Technical Data ( 11) Cooling water hose for connection to the device minimum 13 mm YAUE0007 / 3/7/2013 Preparation 29 Proline Kryomats 6.4 Heat transfer liquids, cooling water and hoses a) Heat transfer liquids LAUDA designation Temperature range Chemical designation from °C to °C Viscosity (kin) Viscosity (kin) at temperature mm²/s at 20 °C mm²/s Fire point Packing drum Order number 5L 10 L 20 L Aqua 90 5...90 Decalcified water 1 -- -- LZB 120 LZB 220 LZB 320 Kryo 85 -85...30 Silicone oil 1.8 17 at -80 °C > 56 LZB 113 LZB 213 LZB 313 Kryo 60 -60...80 Silicone oil 3 25 at –60 °C > 110 LZB 102 LZB 202 LZB 302 Kryo 51 -50...120 Silicone oil 5 34 at -50 °C > 160 LZB 121 LZB 221 LZB 321 Kryo 40 -40...60 Hydrous alcalisalt solution 2.36 24 at –40 °C -- LZB 119 LZB 219 LZB 319 Kryo 30 -30...90 Monoethylene glycol/ water 4 50 at –25 °C -- LZB 109 LZB 209 LZB 309 Kryo 20 -20...180 Silicone oil 11 28 at -20 °C > 230 LZB 116 LZB 216 LZB 316 Therm 160 60...160 Polyalkylene glycol 141 28 at 60 °C > 273 LZB 106 LZB 206 LZB 306 Therm 180 0...180 Silicone oil 23 36 at 0 °C > 288 LZB 114 LZB 214 LZB 314 Therm 240 50...240 Silicone oil 130 45 at 50 °C > 378 LZB 122 LZB 222 LZB 322 At higher temperatures Evaporation losses Use bath covers. Only use distilled water or fully demineralized high purity water after adding 0.1 g of soda (Na2CO3 sodium carbonate)/ liter of water Risk of corrosion! Water content falls with longer operation at high temperatures Mixture becomes flammable (flash point 128 °C) Check the mixture ratio with a hydrometer. − The use of acidic, aqueous bath liquid or cleaning agents (pH value < 7) is not permissible. − With the selection of the heat transfer liquid, it should be noted that impairment of the properties is to be expected at the lower limit of the temperature range due to increasing viscosity. Therefore, only make maximum use of temperature ranges when essential. − Application ranges of heat transfer liquids and hoses are general figures, which may be restricted by the operating temperature range of the units. With silicone rubber, silicone oils lead to substantial swelling Never use silicone oil with silicone hoses. Safety data sheets can be ordered if required. 30 Preparation YAUE0007 / 3/7/2013 Proline Kryomats b) Cooling water Certain requirements are placed on the cooling water with regard to purity. Depending on the cooling water contamination, a suitable method of purification and/or treatment of the water must be employed. The condenser and the complete cooling water circuit can become blocked, damaged and leaky due to unsuitable cooling water. Extensive consequential damage may arise on the whole cooling circuit. The cooling water quality depends on local conditions. If a fault or damage occurs due to unsuitable water quality, it is not covered by our guarantee. Important: Danger of corrosion of the cooling water circuit due to water of unsuitable quality. • • • • • • • • Free chlorine (e.g. from disinfectants) and water containing chlorine lead to pitting in the cooling water circuit. Distilled, deionized or demineralized water is unsuitable due to its corrosive properties and leads to corrosion in the cooling water circuit. Seawater is unsuitable due to its corrosive properties and leads to corrosion in the cooling water circuit. Water containing iron or iron particles leads to rust formation in the cooling water circuit. Due to the high lime content hard water is not suitable for cooling and leads to calcification in the cooling water circuit. Cooling water with suspended matter is not suitable. Untreated and unpurified river or cooling tower water is not suitable due to its microbiological content (bacteria), which can become deposited in the cooling water circuit. Putrid water is not suitable. Suitable cooling water quality pH – value 7.5 – 9.0 2- Sulfates [SO4 ] < 70 mg/L Hydrocarbonates [HCO3-]/ sulfates [SO4 2-] > 1.0 Total hardness 4.0 – 8.5 °dH Hydrocarbonates [HCO3-] 70 – 300 mg/L Conductivity 10 - 500 μs/cm Chlorides (Cl-) 2- < 50 mg/L Sulfites [SO3 ] < 1 mg/L Free chlorine gas (Cl2) < 1 mg/L Nitrates (NO3 -) < 100 mg/L Ammonia (NH3) < 2 mg/L Iron (Fe), dissolved < 0.2 mg/L Manganese (Mn), dissolved < 0.1 mg/L Aluminum (Al), dissolved < 0.2 mg/L Free aggressive carbonic acid (CO2) < 5 mg/L Hydrogen sulfide (H2S) < 0.05 mg/L Algae growth Not permissible Suspended matter Not permissible YAUE0007 / 3/7/2013 Preparation 31 Proline Kryomats Risk to the environment due to oil contamination of the cooling water circuit With a leaky condenser there is the danger that refrigerating machine oil from the coolant circuit of the cooling thermostat can pass into the cooling water. Follow all the legal requirements and the regulations of the water supply utility, which apply at the point of use. Water pollution due to leakage To avoid pollution due to a leak in the cooling water system it is recommended that a leakagewater detector with a water cut-off is installed. Servicing intervals Follow the information for cleaning and decalcifying the cooling water circuit ( 9.3.2.2). c) Hoses Elastomer hoses Internal width Ø mm Temperature range °C EPDM hose uninsulated 12 EPDM hose insulated Field of application Order number 10...90 For all heat transfer liquids except Ultra 350 and mineral oils RKJ 112 12 External Ø. approx. 35mm -35…90 For all heat transfer liquids except Ultra 350 and mineral oils LZS 021 Silicone hose uninsulated 11 10...100 Water, Water/ glycol mixture RKJ 059 Silicone hose insulated 11 External Ø. approx. 35mm -60...100 Water, Water/ glycol mixture LZS 007 Viton 11 10...200 For all heat transfer liquids RKJ 091 Viton insulated 11 External Ø. approx. 32mm -20...150 For all heat transfer liquids LZS 018 Hose type − EPDM hose is not suitable for Ultra 350 and not suitable for mineral oils. − With silicone rubber, silicone oils lead to substantial swelling never use silicone oil with silicone hoses. − Secure hoses against slippage with hose clips. Metal hoses in non-rusting stainless steel with union nut M 16 x 1, internal width 10 mm. Recommended under certain circumstances. Length (cm) Temperature range °C Field of application Order number MK 50 50 -90…150 With foam insulation for refrigeration range, for all heat transfer liquids LZM 052 MK 100 100 -90…150 " LZM 053 MK 150 150 -90…150 " LZM 054 Type 32 Preparation YAUE0007 / 3/7/2013 Proline Kryomats 6.5 Connecting external loads Operation as circulating thermostat − When used as circulation thermostat, care for shortest hose connections with largest inner diameter as possible. This gives the best flow. − Push hose with 11-12 mm internal width onto hose olive (accessories) or connect metal hoses ( 6.3) to pump connectors. − Pump connectors at side: Inlet and outflow see labeling housing. − Pump connectors at back: Inlet and outflow see labeling housing. − Set bypass valve to "external" ( 3). − The external application must not have a hydraulically blocking effect. − If cross-sectional area of tube is too low temperature gradient between bath and external load due to low flow rate. − Always ensure the largest possible passages in the external circuit. − When tightening the union nuts on the pump nipple AF 19, use a wrench AF 14 to counter the tightening torque (see figure). − If external control is to be used, provide a Pt100 temperature probe in the external load ( 7.5.2 and 7.5.4). − With loads at a higher position and with stationary pump and ingress of air into the thermostatic circuit, the external volume can drain away, even with closed circuits Risk of thermostat overflowing! − Secure hoses against slippage with hose clips. − Unused pump connectors must be closed off. YAUE0007 / 3/7/2013 Preparation 33 Proline Kryomats 7 Starting up 7.1 Mains connection Compare the rating on the nameplate (back of control head and behind the front panel) with the mains voltage. For Europe: Model according to EMC (Electromagnetic Compatibility) directive DIN EN 61326-1 Class B (industrial and domestic areas), if the nominal current of the current feeding point is >100 A. Otherwise only according to Class A (industrial areas only).* * Notice only valid for EU countries Only for the USA: Instructions for Class A digital devices “This equipment has been tested and found to comply with the limits for Class A digital device, pursuant to Part 15 of the FCC (Federal Communication Commission) Rules. These limits are designed to provide reasonable protection against harmful interference when the equipment is operated in a commercial environment. This equipment generates, uses, and can radiate radio frequency energy and, if not installed and used in accordance with the instruction manual, may cause harmful interference to radio communications. Operation of this equipment in a residential area is likely to cause harmful interference in which case the user will be required to correct the interference at his own expense.” “This device complies with Part 15 of the FCC (Federal Communication Commission) Rules. Operation is subject to the following two conditions: (1) This device may not cause harmful interference, and (2) this device must accept any interference received, including interference that may cause undesired operation.” Only for Canada: “This Class A digital apparatus complies with Canadian ICES-003” (ICES = Interference Causing Equipment Standards). « Cet appareil numérique de la Classe A est conforme à la norme NMB-003 du Canada ». − Connect unit only to a socket with a protective earth conductor (PE). − No liability is accepted for incorrect mains connections. − Ensure that pump connectors without external loads are closed off. − Ensure that the unit is filled according to Section 6.2. 7.2 Switching on − Check whether the switch at the back of the master control element is in the "On = –" position. − Check whether the switch at the front of the master control element is in the "On = l" position. − Set the rotary switch on the front panel to "ON = l". The unit starts operating. − The green LED in the master control element for "Mains ON" is lit. 34 Starting up YAUE0007 / 3/7/2013 Proline Kryomats − An acoustic signal is emitted for about 1 second. 1s − It is quite normal if the refrigerating machine makes a rattling sound for a few seconds. − The unit starts its self-test. All display segments and symbols appear for about 1 second. Self-test 88((( °C EXT − The momentary bath temperature is displayed, Bath temperature − the pump starts provided "Standby" or "Manual start" ( 7.6.1) has not been programmed, 02%32 °C − all values are accepted which were active before switch-off. Check or set overtemperature cut-off point: Overtemp. cut-off − The switching point is shown in the LED display on pressing the key 90 °C . − Change overtemperature cut-off ( 7.12.1). Overtemperature protection and checking on page 81. Level alarm LEUEL °C − If necessary, top up heat transfer liquid, this has been pumped out by filling the external load. − Display for little liquid. − Red LED LEUEL (low level) appears when the bath has too above the fault triangle flashes. − Find cause of fault and, where necessary, top up missing heat transfer liquid ( 6.3). − Press the Enter key. − Also, press the key if unit has been switched off in the fault state. − No release is possible on Command control element! Command English Deutsch YAUE0007 / 3/7/2013 − Français Language − If the Command Console is being switched on for the first time, the illustrated window appears automatically, enabling you to select the dialog language with the appropriate soft key. Español Starting up 35 Proline Kryomats Display Sounds Master Sounds Command Language Master-Mode Autostart Current Consumpt. Pump 7.3 Menu − The dialog language also can be changed later via Settings Basic settings Language . English Deutsch Français Español End − Mark the required language with or . − Confirm the selection with Tset . Tfix Switching off / standby Switching off: Set the rotary switch on the front panel to "OFF = 0". When switching off only on the master head, using the switch at the front or back, there is still voltage present on the unit or head. ( 7.5.3) on the command control element. The pump, Standby operation: Use the key standby heating and cooling unit are switched off, but the operating display remains active, so that status displays can be viewed and settings carried out. However, a started timer ( 7.10) continues to run. Stop as required with Pause. 36 Starting up YAUE0007 / 3/7/2013 Proline Kryomats 7.4 Key functions Your Proline Thermostat is easy to operate. For the Command control element, you will most probably rarely need to use these operating instructions. 7.4.1 General key functions and pilot lamps Master Enter key: − From the actual-value display at the main menu level, − activates input, display flashes, − saves input, display ceases to flash and menu point is left, − press for approx. 3 seconds: Exit function and returns to bath temperature display. or − Paging with keys is possible within the relevant level, or setting of numerical values. Speeds up entry by moving the counting position to the left: a) Keys are pressed and held down or b) one of the two keys is pressed and held down, followed immediately by brief pressing of the other key. Moves counting position to the right: − Switching one place to the right occurs by briefly (1 second) releasing the key, followed by another pressing of the key. Useful additional information: − two dots in the Master display indicate that a submenu follows. ... °C − Three dots in the display indicate that a submenu for a module (interface...) or a component (thermostat, Command control element ....) follows. Module/ component-specific possible settings are only displayed when the hardware is connected. − The following always applies: After termination of the relevant settings, they are accepted automatically after approx. 4 s or − the setting is accepted immediately with the Enter key. and − Fault signal: Flashing red Alarm LED and acoustic signal. − An acoustic signal can only sound when it has not been intentionally deactivated! ( 7.6.5). − The bath control occurs via the external temperature probe when the green LED is lit. − Heating is active when the yellow LED is lit. − Cooling is active. When the setpoint temperature is lowered, it may take up to one minute before the blue LED is lit. EXT YAUE0007 / 3/7/2013 − The temperature of the external probe is displayed. Starting up 37 Proline Kryomats Command − Enter key ("Confirm selection") and go back one level. End − Soft key function, to confirm a selection or input and to return to the main display window. − Escape key to quit a window without changes and to go back one level. − Cursor keys for Up, Down, Left and Right. − Standby activation (pump, heater and refrigerating machine are deactivated when the yellow LED is lit). However, timer continues to run! Refer to safety information in 7.5.3. + Duo key: − Top: decimal-point key. − Bottom: key for arithmetical sign. − Soft keys: five duo-keys, which each have the function shown in display above them. Soft-key entries are shown framed in the operating instructions. Example: You would like to change the setpoint temperature then press the duo-key under Tset . − Brightness Display Contrast Sounds Master Sounds Command Language Master Mode Autostart Current Consumpt. Brightness Contrast − The brightness and contrast can be set on the Command Console: − The works setting can be changed via Settings Basic settings Display Brightness or Contrast . − The brightness of the LCD illumination can be selected from eight steps or switched off completely. − The contrast can be set in eight steps. Pump Menu End Tset Tfix − There are four different screen displays available. The screen is switched over with the soft key Screen : Screen 38 Starting up YAUE0007 / 3/7/2013 Proline Kryomats Tset °C 1. Basic window with the three most important items of information: 55.3 Y(%) 0.0 25.00 Tint °C 25.01 Standby − Tint, current bath temperature, − Tset, setpoint of the bath or external temperature, − Information: Heating/ cooling. Here, e.g. heating is taking place at 55.3% and 0.0% cooling. Soft keys: Pump Menu Screen Tset °C Menu Tset °C Text °C Pump Menu Screen − Tset: Changes setpoint temperature. − Tfix: Calling and setting of saved setpoints. − Pump level of the VarioFlex Pump. Tfix − Soft keys like above. 3. Super window with seven items of information: − Tint, current bath temperature. 0,0 Tint °C Tint Screen: Changes between basic, normal, super and graphics recorder windows. − Level of heat transfer liquid in cm above the minimum level, Pump 3 55,3 Y(%) 25,01 25,02 − − Text, current temperature on external probe (if connected), Tset 130 Control Var. Menu: Set unit parameters. − Tset, setpoint, Tmax °C 25,00 − − Tint, current bath temperature, Tint °C Screen Pump: Set pump level. 2. Standard window with five important items of information: 4 25.01 25.02 Pump Tfix Level 25.00 Text °C Tset − − Tset, setpoint. − Text, current temperature on external probe (if connected). − Overtemperature cut-off point Tmax. Pump 3 Tset − Pump level of the VarioFlex Pump. − Control variable to Tint or Text. Tfix − Information: Heating / cooling. Soft keys like above. 4. Graphical measurement display − All temperature values can be shown graphically against time 7.7. − Soft keys like above. YAUE0007 / 3/7/2013 Starting up 39 Proline Kryomats 7.4.2 Changing window information (Command Console) Command − Tset °C 25.00 Text 25.02 Pump Menu 4 Tint °C Screen Basic Window Standard Window Super Window Pump Menu Center Up left Up right Down left Down right Pump 40 Menu − You can adapt the information displayed by your Command Console to your requirements. For example, if you have not connected any temperature probe, you can exchange it in the standard setting of the normal window for the maximum temperature Tmax (safety cut-off). Level 25. 01 °C − This is how it is done: Pump 3 Tset Display data Tfix − Open the unit parameter menu via the soft key Menu . Edit Default − With and change from Settings Display Data Standard Window . Edit End Tset Tfix T internal T external Setpoint T max Pump step Set value Level Control variable Date/time Programmer End Tset − or window. − and takes you to the illustrated marks T max as illustrated. − Confirm selection with or End , − or quit the window with changes being made. without any Tfix Starting up YAUE0007 / 3/7/2013 Proline Kryomats 7.4.3 Locking the keyboard The keyboards of the Master and the Command control element can be locked independently of one another. This is especially advantageous when the thermostat is positioned in another room and the Command control element is used as a remote control device. Then the Master keyboard can be locked to prevent unintentional adjustment. Master − SAFE Locking: and hold pressed simultaneously for 3 s − SEt appears for 3 seconds, − then the segments of the first right-hand 0 are formed, − hold both keys pressed until this display is completely visible. 00000 °C − SAFE °C SAFE flashes briefly and the display returns to the actual temperature. − The Master keyboard is now locked. SAFE display signals the locked state when any Master key − The is pressed. Unlocking: and hold pressed simultaneously for 3 s Bath temperature 02%32 °C YAUE0007 / 3/7/2013 SAFE appears. Then the segments of the left-hand 0 are formed. − For three seconds, then − − The actual bath temperature appears again when all the been formed. Starting up 0s have 41 Proline Kryomats Command Locking: − Press and then and hold pressed simultaneously for three seconds. Locking keyboard − The locking window appears. − Hold both keys pressed until the progress bar is completely filled. − Then the display skips back to the previously set Screen mode. Pump Menu End Tset Tfix − The soft-key boxes are now blank, indicating that the keyboard is locked. − On pressing any Master key the display appears: Keyboard locked Unlocking: Unlocking keyboard − Press and then and hold pressed simultaneously for three seconds. − The unlocking window appears. − Hold both keys pressed until the progress bar is completely filled. Then the display skips back to the previously set Screen mode. 42 Starting up YAUE0007 / 3/7/2013 Proline Kryomats 7.5 Important settings 7.5.1 Temperature setpoint setting The setpoint is the temperature, which the thermostat should reach and maintain constant. Master (main level) − SEt − Press key until SEt (Setpoint) appears. − Press key, display flashes. or − Enter the setpoint with the two keys ( 7.4.1 General key functions and pilot lamps). Wait 4 seconds or − Display flashes 4 seconds new value is automatically accepted, or value is accepted immediately with Enter key. − For safety reasons the setpoint can only be set up to 2°C above upper limit of the operating temperature range for the relevant device type. − In the following cases, the manual setpoint entry is blocked: Setpoint is taken from the analog module, from the programmer in the Command Console or via the serial interface. − When the setpoint temperature is to be lowered, it may take up to one minute before the blue LED YAUE0007 / 3/7/2013 Starting up lights. 43 Proline Kryomats Command − − Tset or Tfix or the soft key setpoint window. Tset opens the − 123.45 is the setpoint, which is still active. The upper and lower limit temperatures are displayed (device-specific values). Enter new setpoint: − There are three different possible entry methods: 123,45 1. Change the value with the or keys. First, you vary the 1/10°C values. If you hold the key pressed longer, then full degrees change. Min: -40.00°C Max:202.00°C 1 2 3 4 5 Help 6 Menu 7 Screen 8 T9set T0fix 2. Enter the complete number with the numerical duo keys and the key for the negative sign and decimal point. 3. Using or , move the flashing cursor line to the decimal place which you would like to change and then change it with or . − Confirm the value with window with changes. Fixed settings 0.00°C 0.00°C 0.00°C 0.00°C 0.00°C 0.00°C 0.00°C 0.00°C Pump Menu Recent setpoints 80.00°C -35.50°C 20.00°C 38.00°C -35.70°C 0.00°C 0.00°C 0.00°C End Tset Edit or quit the without having made any Two other ways of entering the setpoint: − With the soft key Tfix window shown on the left. open the − The setpoints, which you last entered, are shown in the right-hand column. In the illustrated screen, the last setpoint was 80.0 °C. − To accept an earlier setpoint, enter the right-hand column with desired value with or cancel with and select the , then accept it with . − In the left-hand column setpoint temperatures, which are to be used frequently, can be defined as “fixed settings”. 44 Starting up YAUE0007 / 3/7/2013 Proline Kryomats − Select desired position with the cursor keys (black background). Enter new setpoint: − With the soft key Edit window shown on the left. 123.45 − Enter fixed temperature setpoint as described above and accept into the list Min: -40.00°C Max:202.00°C with 7.5.2 open the 1 2 3 4 5 Help 6 Menu 7 Screen 8 T9set T0fix or cancel with . − Select and accept values from the list of fixed settings as described above for the “Recent setpoints”. Displaying the actual external temperature With all Proline Thermostats an external temperature probe can be connected, which for example..... 1. ...can be used as an independent temperature measurement channel. 2. ...can be used as the controlled variable for the bath temperature in applications with a noticeable temperature gradient (between the internal bath temperature and an external load). The setup is described in Section 7.5.4. With the function described in the following, you only change over the display. − External actual temperatures can also be read in by interface modules 8. Connection of the external Pt100 to the Lemo socket 10S Contact on socket 10S 1 2 3 4 + I + U - U - I Current circuit Voltage circuit Voltage circuit Current circuit Pt100 DIN EN 60751 − Plug: 4-pole Lemosa for Pt100 connection (Order No. EQS 022). − Use screened connecting leads. Connect screen to plug case. YAUE0007 / 3/7/2013 Starting up 45 Proline Kryomats Master − EXT or − Switches to the actual-value display of the external temperature probe (or to the actual value received from an interface module 7.5.4). − EXT is lit in green next to the row of figures. 02%02 − If no external Pt100 probe is connected, is displayed. °C ----- EXT Command − Text Tset °C 25.00 Text Pump 7.5.3 4 Tint °C 25. 01 °C 25.02 Menu − Provided an external temperature probe is connected, its value is displayed in the lower left part of the standard and super windows (applies to the works setting for the window partitioning). Level Screen − External actual temperatures can also be read in via interface modules 8. Pump 3 Tset Tfix Setting pump power or standby With the Proline VarioFlex pump, four pump levels (level five till level eight) are available, with which the bath circulation, flow rate and pressure, the noise generated and the mechanical heat input can be optimized. Pump level eight gives the best bath circulation and temperature homogeneity. Master − Pu − Call pump power levels display Pu. and 1 x − The current pump level is displayed (here Pu 5). 5 °C − The pump levels display flashes. or − Select pump level (pump speed = pump power): − 46 5 to 8 for pump operation. Pump responds immediately! 0 activates the standby function (pump, heater and refrigerating machine are deactivated). Starting up YAUE0007 / 3/7/2013 Proline Kryomats Wait 4 seconds or − Display flashes 4 s new value is automatically accepted, or − value is immediately accepted with Enter key. Command − Pump Level − Open the device parameter menu via the Pump Level Level Level Level Level Level Level Level Level 8 7 6 5 4 3 2 1 soft key Menu . − Change from Pump Pump Level using . − With or you enter the illustrated window. Level 5 is active. − Select another pump level with and confirm with Pump Menu End Tset Tfix or or End , − or quit the window with any changes. without making − It is not possible to select the pump levels 1 to 4. Standby activation − Standby activation (Pump, heater and refrigerating machine are deactivated when the green LED in the lower part of the key is lit). + Please exercise caution when thermostat is in standby mode. The following settings/ actions may start the thermostat unintentionally from the standby mode: YAUE0007 / 3/7/2013 − a previously activated timer mode ( 7.10), because a started timer continues to run! − “Start” command via interfaces ( 8). Starting up 47 Proline Kryomats 7.5.4 Activate external pump As an option an external pump is available for the Proline Kryomats for external applications. This pump can be set on / off manually in the menu shown below. Another possibility is the automatic mode. In this case the pump is switched according to the unit status standby / running. Command Ext. Pump − Open the device parameter menu via the Ext. pump off on auto. soft key Menu . − Change from Pump Ext. pump using . − With or window. you enter the illustrated − Use or to switch the pump off, permanently on or to set the automatic Pump Menu End Tset Tfix mode. Confirm your selection with End , − or quit the window with any changes. or without making − Automatic mode means that the external pump is switched off while the unit is in standby mode or it is switched on while the unit is running. 7.5.5 Activating external control An external temperature probe can be connected to the Proline Thermostats. How this is done is explained in Section 7.5.2. If the bath temperature is to be controlled using this sensor instead of the internal sensor, the setting can be made here. Furthermore, control can also occur based on the signal from the analog or serial module ( 4.8). Master Con and 2 x − Call the source selection for the control Con . − The momentary setting for the source is displayed, Con 1 °C 1 for internal, because control takes place using the − here temperature signal from the internal temperature probe. − The source display flashes. 48 Starting up YAUE0007 / 3/7/2013 Proline Kryomats − Change temperature probe source: − or − − − Wait 4 seconds or 1 for the internal probe, EP only when an external probe is connected, EA only when an analog module is connected and configured, ES only when a serial module is connected and is continuously receiving actual values from a PC. − Display flashes 4 s new value is automatically accepted, or − value is immediately accepted with Enter key. − If 12!45 °C EP EA or ES has been selected, LED indicates that the control has regulated to then the green the external temperature signal. Command − Control Variable intern External Pt100 Analog module Digital module Control Variable − Open the device parameter menu with the soft key Menu . − With the cursor keys, change further to Control Control Variable . − intern is currently active. − Select other control variables (only displayed when present) with and confirm with Pump YAUE0007 / 3/7/2013 Menu End Tset Tfix Starting up or or End , − or quit the window with any changes. without making 49 Proline Kryomats 7.5.6 Current consumption from the mains It is not possible to reduce the power consumption of the Proline Kryomats! Command − Display Sounds Master Sounds Command Language Master Mode Autostart Current consumpt. Pump Menu Current Consumption − Open the device parameter menu via the 16.0 A soft key Menu . − With the cursor keys change further to Settings Basic settings Current Consumpt. . − End Tset 16.0 A is active. Tfix − Open the settings window with Max. current consumption (in A): − Changes are not accepted! 16.0 Min: 10.0 A 50 . − Quit the window with . Max: 16.0 A 1 2 3 4 5 Help 6 Menu 7 Screen 8 T9set T0fix Starting up YAUE0007 / 3/7/2013 Proline Kryomats 7.5.7 Setting the date and time (Command) Command − Pump Settings Graph Clock Programmer Interfaces Control Limits Pump Menu Tset Time Date − Open the device parameter menu via the Set time Set date Timer 1 Timer 2 Format of date End Clock soft key Menu . − With the cursor keys continue to: Clock Set time , − or to Set date . Tfix − Open the settings window with . − Change the time with cursor or soft keys Enter time: and accept with 15:38:12 , − or quit the window with changes. without making − The date is set just the same with Set date . 1 2 3 4 5 Help 6 Menu 7 Screen 8 T9set T0fix YAUE0007 / 3/7/2013 Starting up − The date format (Day Month Year or Month Day Year) can be set under Format of date . 51 Proline Kryomats 7.5.8 Display resolution setting (Command) The Command version allows for different resolutions of the displayed temperature. Command − Pump Settings Graph Clock Programmer Interfaces Control Limits Pump Menu Resolution Calibration Works settings Resolution Device status Display data Basic settings Overlevel handling End Tset Display resolution − Open the device parameter menu via the soft key Menu . − With the cursor keys continue to Settings Display resolution . Tfix − Select the desired resolution with 0,1 0,01 0,001 . − Accept selection with or quit the window with any changes. Pump 52 Menu End or Tset or End , without making Tfix Starting up YAUE0007 / 3/7/2013 Proline Kryomats 7.6 Special settings 7.6.1 Defining the type of start mode Usually it is desirable that the thermostat carries on operating again after an interruption in the voltage supply. However, if for safety reasons you do not wish this, you can insert an intervening manual activation step. Command − Auto start − Open the device parameter menu via the soft key Off Display Sounds Master On Sounds Command Language Master Mode Autostart Current consumpt. − With the cursor keys continue to: Settings Basic settings Auto start . − On is currently active. − If the standby mode is to be activated after a mains interruption, activate "Off" with Pump Menu YAUE0007 / 3/7/2013 End Menu . Tset Tfix or . − Accept the change with or End , − or quit the window with changes. without making − When the mains voltage has been restored after an interruption, you can quit the standby mode with . Starting up 53 Proline Kryomats 7.6.2 Defining temperature limits With this function, it is possible to define a minimum and a maximum temperature in which the thermostat controls. By reaching the temperature limits, a warning appears. In this way setpoint input can be prevented which may damage the heat transfer liquid or the apparatus. For example, if water were used as the heat transfer liquid, +95 °C would be practicable as the maximum temperature and +5 °C as the minimum temperature. Command − T il (min) -50.0 °C T ih (max)90.0 °C Pump Settings Graph Clock Programmer Interfaces Control Limits Limits − Open the device parameter menu via the soft key Menu . − With the cursor keys continue to Limits . − The minimum and maximum temperatures are displayed. − T il (min) is currently active. − Select the limit to be changed with and confirm with Pump Menu End Tset or . Tfix − Enter the desired limit temperature. − Accept the change with Lower limit (T il) -50.0 Min: -100.0 °C 54 − or quit the window with changes. , without making Max: 202.0 °C 1 2 3 4 5 Help 6 Menu 7 Screen 8 T9set T0fix Starting up YAUE0007 / 3/7/2013 Proline Kryomats 7.6.3 Setpoint offset operating mode With this function it is possible to apply an offset value to the temperature provided by the external temperature probe or a module and then to use it as the setpoint. The bath temperature can, for example, be operated at -25 °C below the temperature of a reactor, which is being measured by the external temperature probe. Command − Offset source Setpoint offset Offset source and Setpoint offset − Open the device parameter menu via the Off extern Pt100 RS232 soft key Menu . − With the cursor keys continue to Control Setpoint offset Offset source . − Off indicates that the setpoint offset is currently deactivated. − Select the setpoint source with and confirm with Pump Menu End Offset source Setpoint offset Pump Menu Tset Tfix . − Interfaces (e.g. RS232) are only displayed if a valid setpoint has already been transmitted. − With the cursor keys continue to Setpoint offset . 0.00 °C − The standard value is 0.00°C . End Tset Tfix − Open the left-hand window with . − Enter the desired temperature. Input Setpoint offset: 0.00 − Accept the change with − quit the window with changes. Min: -500.00°C Max: 500.00°C 1 2 3 4 5 Help 6 Menu 7 Screen 8 T9set T0fix YAUE0007 / 3/7/2013 or Starting up , without making 55 Proline Kryomats 7.6.4 Restoring works settings All works settings, apart from the control parameters and the sensor calibration, are restored. Command − all default only control par. int only control par. ext only miscellaneous All modules Master Command Cool Works settings − Open the device parameter menu via the soft key Menu . − With the cursor keys continue to Settings Works settings . − The window shown opposite appears. − Master and then only control par. int. is shown as a possible choice. There are however various possibilities, which can be selected with Pump Menu End Tset Tfix or : − Under All modules Master, Command and all connected modules are reset to the works setting with all default . − Under Master you have the choice between: Confirm input! − all default , then all Master settings are reset, − only control para. int. for the internal control parameters, − only control para. ext. similar for external, − only miscellaneous which resets setpoint, pump level, maximum current consumption, control to internal and auto start to "Auto". − Under Command all command settings are reset with All default . Enter key: Continue − Confirm selection with Escape key: Cancel . − Confirm the control dialog shown on the left with or cancel with . − Return to measurement window with Pump 56 Menu End Tset Tfix Starting up End or . YAUE0007 / 3/7/2013 Proline Kryomats 7.6.5 Setting the volume of the acoustic signals The LAUDA Proline Thermostats signal alarms as a dual-tone acoustic signal and warnings as a continuous tone. Command Sounds − − Open the device parameter menu via the soft key loud medium low off Alarm Menu . − With the cursor keys continue to Settings Basic Settings Sounds . − Select either Alarm or Warning . − Example on left: Alarm is set to loud. − Select the desired volume with or . − Accept selection with Pump 7.6.6 Menu End Tset Tfix quit the window with changes. or End or without making Entering the offset of the internal temperature probe If, during checking with a calibrated reference thermometer (e.g. from the LAUDA DigiCal Series) a deviation is found, then the offset (i.e. the additive part of the characteristic) of the internal measuring chain can be adjusted with the following function. The reference thermometer must be dipped into the bath according to the details on the calibration certificate. Command − intern Pt100 extern Pt100 Calibration − Open the device parameter menu via the Calibration Default soft key Menu . − With the cursor keys continue to Settings Calibration intern Pt100 Calibration . − The window shown on the left appears. − Confirm selection with Pump YAUE0007 / 3/7/2013 Menu End Tset . Tfix Starting up 57 Proline Kryomats − The temperature measurement device shows the true temperature value (with glass thermometers consider the correction where applicable!). Temperature value of the ref. temp. measurement device: 20.15 Min: -50.0°C 7.6.7 − Change the display in the adjacent window to the true value with cursor or soft keys and accept with Max: 302.00 1 2 3 4 5 Help 6 Menu 7 Screen 8 T9set T0fix − or quit the window with changes. or End , without making Restoring the works setting of the internal temperature-probe offset If the offset has been misadjusted unintentionally, the works setting can be restored with this function. Command − − Open the device parameter menu via Calibration Default intern Pt100 extern Pt100 Default the soft key Menu . − With the cursor keys continue to Settings Calibration intern Pt100 Default . − The window shown adjacent appears. − Confirm selection with Pump Menu End Tset . Tfix − Confirm the control dialog on the right with Confirm input! or cancel with . − Return to the measurement window with Enter key: Continue End or . Escape key: Cancel Pump 58 Menu End Tset Tfix Starting up YAUE0007 / 3/7/2013 Proline Kryomats 7.6.8 Entering the offset of the external temperature probe If a deviation is found during the check using a calibrated reference thermometer, e.g. from the LAUDA DigiCal Series, then the offset (the additive part of the characteristic) of the external measurement chain can be adjusted with the following function. The reference thermometer must be dipped nearly by the external temperature probe into the consumer bath according to the details on the calibration certificate. Command − intern Pt100 extern Pt100 Calibration − Open the device parameter menu via the Calibration Default soft key Menu . − With the cursor keys continue to Settings Calibration extern Pt100 Calibration . − The adjacent window appears. − Confirm selection with Pump 7.6.9 Menu End Tset Tfix . − Continue as described in 7.6.6 for the internal temperature probe. Restoring the works setting of the external temperature-probe offset If the offset has been misadjusted unintentionally, the works setting can be restored with this function. Command − intern Pt100 extern Pt100 Default − Open the device parameter menu via the Calibration Default soft key Menu . − With the cursor keys continue to Settings Calibration extern Pt100 Default . − The adjacent window appears. − Confirm selection with Pump YAUE0007 / 3/7/2013 Menu End Tset Tfix Starting up . − Continue as described in 7.6.7 for the internal temperature probe. 59 Proline Kryomats 7.7 Graphical display of temperature measurements (Command) Command − Tset25.00 Tint25.01 Text25.02 T °C 27.00 Rec 26.00 24.00 − 23.00 Pump 11:25:00 Menu Mode Displayed value Legend Sample Time Time axis Time base Temp. scale Temp. limits Pump − Press the soft key Screen a number of times as required until the graph recorder window appears. − With the soft key Graph you enter the menu for the configuration of the graph recorder. 25.00 11:22:00 Screen and Graph Menu Mode Displayed value Legend Sample time Time axis Time base Temp. scale Temp. limits 11:28:00 Screen 11:31:00 Tset Graph Online graph Start Record Mode defines, − whether the recording is to run continuously as Online graph , − or whether it is to be started with Start record and later terminated with Stop record . When this start/stop mode is active, Rec flashes at the top left of the display. − Displayed value defines, − which of the measurements Tint , Tset and/or Text is to be graphically displayed. In the menu all combinations are offered. − End Tset Tfix Tset Tint Text Tset Tint Tset Text Tint Text Tint Text Tset Legend defines, − whether the axis label is to be invisible or visible . − Sample time defines with which time interval the measurements are recorded. 5 possibilities are offered: − From 2s (max. 1h45min) up to 2min (max. 105h) . − Time axis defines over which time range the measurements are to be displayed. − With Automatic the program finds the optimum display. − Manual input from 9min up to 144h . Pump Menu End Tset Tfix − Time base defines whether scaling is to be carried out. − With Relative the start occurs at 00:00:00. − With Absolute the current time is displayed. 60 Starting up YAUE0007 / 3/7/2013 Proline Kryomats Mode Displayed value Legend Sample Time Time axis Time base Temp. scale Temp. limits Pump Menu Temp. min 22.00 Temp. max 27.00 − Temp. scale defines how the scaling is to be carried out: − − automatic , by the program, or manual in that you yourself define the limits with the next menu point. − The min. and max. values for the graphical display are manually entered with Temp. limits . End Tset Tfix − Temp. min 22.00°C is the momentary minimum value. − Temp. max 27.00°C is the momentary maximum value. − The highlighted value can in each case be y-axis Limit: changed with . Enter the desired new value in the changes window in the usual way. 22.00 − When setting the minimum value, the largest permissible value (here 26.90 °C, since the maximum value is 27 °C) is stated. Min: -150.00°C Max: 26.90 °C 1 2 3 4 5 Help 6 Menu 7 Screen 8 T9set T0fix − When setting the maximum value, it is conversely the minimum value, which is entered. − However, if a value is entered which exceeds the other corresponding limit, then this warning is issued: Warning: Value not in input range . YAUE0007 / 3/7/2013 Starting up 61 Proline Kryomats 7.8 Programmer (PGM only Command) Almost any temperature/time profile can be created with the programmer. A desired bath temperature can be approached as quickly as possible or via a defined ramp. Furthermore, the pump level and the behavior of the switching outputs can be defined. Five temperature/time programs are provided for free programming. Each program consists of a number of temperature/time segments. Also included are details of how often the program is to be executed (loops). The sum of all segments of all programs may be up to a maximum of 150. A warning is given if the creation of more than 150 segments is attempted. Typical segments are: Ramp: If a time is specified, then the segment is a ramp, which is described by the target temperature, i.e. the temperature at the end of the segment, and the duration from the start to the end of the segment. Step: Without any specified time the final temperature is approached as quickly as possible. Temperature hold phase: No temperature change (i.e. the temperatures at the start and end of a segment are the same). 7.8.1 The programmer can be controlled or changed via the RS 232 interface, the timer or switching contacts. Program example °C 80 70 60 50 40 30 Start 20 10 0 20 40 60 Pump 62 T end °C 30.00°C 30.00°C 50.00°C 70.00°C 70.00°C 60.00°C 30.00°C Menu Time [h:m] ------00:20 00:20 00:40 00:10 00:30 00:00 End 100 120 t/min Cooling time depends on type of device, load, etc. This is Segment No. 2 Real program example with 6 segments No Start 1 2 3 4 5 6 80 Tolerance 0.00°C 0.10°C 0.00°C 0.00°C 0.10°C 0.00°C 0.00°C Insert Delete No Start 1 2 3 4 5 6 Pump ------2 3 4 2 2 2 Pump Starting up Menu Out 1 Out 2 Out 3 ------------- ------------------- ------------------- ------------------- ------------------- ------------------- ------------------- ------- End Insert Delete YAUE0007 / 3/7/2013 Proline Kryomats Each program begins with the segment "Start". It defines at which temperature Segment 1 is to continue the program. It is not possible to specify a time for the Start segment. For thermostats without cooling ability, the start temperature must be selected higher than the bath temperature, which prevails before the program start. Without the Start segment, Segment 1 would be different depending on the bath temperature at the start of the program. Edited program example (see dashed curve in the graph on previous page). No Start 1 2 3 4 5 6 7 T end °C Time [h:m] 30.00°C ------30.00°C 00:20 50.00°C 00:20 50.00°C 00:20 70.00°C 00:20 70.00°C 00:10 60.00°C 00:30 30.00°C 00:00 Pump Menu End Tolerance 0.00°C 0.10°C 0.00°C 0.10°C 0.00°C 0.80°C 0.00°C 0.00°C Insert Delete No Start 1 2 3 4 5 6 7 Pump Pump ------2 2 2 2 2 2 2 Menu Out 1 Out 2 Out 3 ------- ------------------- ------------------- ------------------- ------------------- ------------------- ------------------- ------------------- ------------End Insert Delete Insert new segment ( Section 7.8.4) Change segment time or tolerance ( Section 7.8.4) The field tolerance (refer to the above program table and the graph below): − It facilitates exact conformance to the dwell time at a specified temperature. Segment 1 is not processed until the bath temperature is within the tolerance range , so that the ramp (Segment 2) starts delayed at . − A tolerance range which is too tight can however also cause undesired delays. In particular with external control the range should not be chosen too tightly. In Segment 5 a larger tolerance has been entered, so that the desired time of ten minutes is maintained even with settling action . − Only flat (slow) ramps should be programmed where necessary with a tolerance range. Steep ramps which lie close to the maximum possible heating or cooling rates of the thermostat may be severely delayed by a tolerance range that is too tight (here in Segment 2) . °C Example for the influence of the tolerance field input in case of external bath temperature control: 80 70 The setpoint temperature of the programmer is shown in grey. 60 50 The actual temperature in the external bath container is represented as a continuous line. 40 30 20 10 0 20 YAUE0007 / 3/7/2013 40 60 80 100 120 t/min Starting up 63 Proline Kryomats 7.8.2 Selecting and starting the program (Start, Hold, Stop) Here you will learn how to select and start a program that has already been created. If no program has been created 7.8.4 “Creating or modifying a program (Edit)”. Command − Pump Settings Graph Clock Programmer Interfaces Control Limits Pump Menu Tset soft key Menu . − With the cursor keys continue to: Programmer Program 1 . − Confirm with the key . Tfix − The submenu Status appears. Start Status Edit Loops Graph Info Program 1 − Open the device parameter menu via the Program 1 Program 2 Program 3 Program 4 Program 5 Ramp function End Programmer − Using the Status menu, the selected program can be: 1. started Start , 2. paused Hold , 3. continued Continue or 4. terminated Stop . Pump Menu 64 Tset Tfix In addition, the standby key stops the programmer! (Pause operation). After standby is deactivated, the programmer goes on! Commands, which, depending on the situation, cannot be executed, are not displayed. Continue therefore only appears when Hold has been activated. − Once the start has been confirmed with Hold Stop Status Edit Loops Graph Info Pump End Menu End , Prog. 1 running appears at the bottom. Prog.1 running Starting up YAUE0007 / 3/7/2013 Proline Kryomats 7.8.3 Interrupting, continuing or terminating the program (Hold, Continue, Stop) Command − Program 1 Status − After a program has been started by Hold Stop Status Edit Loops Graph Info Programmer pressing the key, the command options Hold or Stop are shown. − Here, with the aid of the keys or and the running program can be paused with Hold or terminated with Stop . − Once the program has been terminated, the device runs with the last setpoint setting. Pump Menu Prog.1running − Continuation of a program paused with Hold occurs using Continue which is Continue Stop Status Edit Loops Graph Info Pump End Menu End obtained with Prog.1Standby Continue Stop Status Edit Loops Graph Info . − In addition, the standby key stops the programmer. The pump, heater and cooling unit are switched off. Follow the safety information 7.5.3. − After pressing the standby key again, the programmer returns to the previously selected operating mode: Pause or active operation depending on what was previously selected. Pump YAUE0007 / 3/7/2013 Menu End Pr. 1 Standby Starting up 65 Proline Kryomats 7.8.4 Creating or modifying a program (Edit) Here, there are the following functions: • Entry of a program. • Display of the program data of a saved program and modification of the segment data. • Insertion or appending of a new segment. • Deletion of a segment. − In addition, when a program has just been executed, new segments can be inserted and existing ones modified, even the currently active segment. Furthermore, all segments, except the currently active one, can be deleted at any time. − Modifications to the currently running segment are possible. The segment then continues as though the modification had been applicable since the start of the segment. However: If the new segment time is shorter than the segment time that has already run, then the program skips to the next segment. − If a segment time >999h: 59min is required, then this time period must be shared over a number of consecutive segments. Program example ( 7.8.1) Entering a program: − Programmer Modify Command Edit − In the Edit menu one can Modify or Delete a program. Modify Delete Status Edit Loops Graph Info Program1 − Press the key. − Continue to Modify . with the key . − There is the possibility of modifying single segments, i.e. segments can be entered as new, changed and also deleted. Pump 66 Menu End Tset Tfix Starting up YAUE0007 / 3/7/2013 Proline Kryomats No. T end °C Start 30.00°C 1 30.00°C Time [h:m] Tolerance ------3.00°C 00:30 3.00°C − In the "Start" line enter in the field "T end °C" the temperature at which the sequence is to start (default value is 30 °C). A time entry is not possible in the "Start" segment, because the thermostat immediately executes Segment 1 on reaching the start temperature. − Delete single segments (rows) with Delete . Pump Menu End Insert Delete − For thermostats without cooling ability, the setpoint temperature must be obtainable, i.e. above the bath temperature displayed at the time of the program start. − Using the cursor keys move the black background to the field, which you would like to change. It can be edited by pressing the key (see following pages). − The soft key Insert inserts in the marked line a new segment that has a default value taken from the previous segment with the exception of the Tolerance field. The Tolerance is always specified as 0.00. All following segment lines will be moved one line downwards. − In the above window Segment 1 was created in this way. − Continue with to the fields “Time” “Tolerance”. See program example in 7.8.1. − If there is no entry in the “Time” field, the bath temperature is approached as quickly as possible. With a time entry the final temperature is obtained exactly after the time expires (ramp). − The entry in the field “Tolerance” field defines how accurately the final temperature is to be obtained before the next segment is processed. No. Start 1 Pump YAUE0007 / 3/7/2013 If the tolerance range has been selected too small, it may be that the program does not continue, because the required tolerance is never achieved. External temperature control: Especially with ramps, a too close tolerance range can cause undesired delays in the start phase of the ramp. Pump ------4 Menu Out 1 ------------- End Out 2 ------------- Insert Out 3 ------------- Delete Starting up − Then continue with signal output setting. to the pump and − The right-hand part of the entry table appears as shown on the left. − Here, in the "Pump" field, the pump level and, in the fields "Out 1" to "Out 3", the contact outputs of the contact mode (accessory) can be programmed. With the setting "-------" the starting value is retained which was either set before the program start or was defined by a previous segment in the running program. Further details are given on the following pages. 67 Proline Kryomats − A new segment is produced by moving the cell with the black background to a blank line with the cursor keys and then End of segment temperature: pressing the soft key Insert . The values of the cell located above it are automatically copied. 25.00 − If the field in the column T end °C has a black background, the entry mode "End of segment temperature" is obtained by Min: -150.00°C Max:450.00°C 1 2 3 4 5 Help 6 Menu 7 Screen 8 T9set T0fix pressing the key. Depending on the setting, that is the temperature, which the thermostat is to achieve on the internal or external temperature probe. − Enter the value, confirm with the key and continue to the "Time" entry field with . − If the field in the column Time " has a black background, the entry mode for the "Segment time" time setting is obtained by pressing the Input segment time: key. − If 0 is entered into the field "Time", “------” appears. Then the final temperature is approached as quickly as possible. With a time entry the final temperature is obtained exactly after the time expires (ramp). 003:00 Hours(max.999):Minutes − Enter the segment time and confirm with 1 2 3 4 5 Help 6 Menu 7 Screen 8 T9set T0fix the − Continue to the "Tolerance" entry field with . − If the field in the column "Tolerance" has a black background, the entry mode for the "Temperature tolerance" is obtained Temp. tolerance (0=off): by pressing the key. It defines how accurately the end of segment temperature is to be obtained before the next segment is processed. A tolerance which is selected too small can stop the next segment from being started according to plan. 10.00 Min: key. 0.00°C Max:450.00°C − Set the temperature tolerance and Help 6 Menu 7 Screen 8 T9set T0fix confirm with − Continue with "Pump". 68 Starting up . to the entry field YAUE0007 / 3/7/2013 Proline Kryomats Pump level Pump Menu Contact out Level Level Level Level Level Level Level Level ------End − If the field in the column "Pump" has a black background, the entry mode for the Pump level is obtained by pressing the 8 7 6 5 4 3 2 1 Tset key − With Tfix − The contact outputs of the contact module (if present, special accessory) are programmed here. ------open closed End select Pump Level 5 – 8 − Continue with to the field "Out 1", "Out 2" or "Out 3". − If the field in the column "Out 1" has a black background, the entry mode for the Contact output is obtained by pressing − With Menu or or “-------” and confirm with . “------” stands for "no change to previous segment", i.e. when “------” is present in all fields, the pump level always retains the start setting or the setting before the program start. the Pump . Tset Tfix key. or select ------- , Open or Closed and confirm with . ------- stands for no change with respect to the previous segment, i.e. if ------- is present in all fields, the contact setting of the start setting or that from the program start is retained. − If applicable, continue with and "Out 3". to "Out 2" − Programming is terminated with End . YAUE0007 / 3/7/2013 Starting up or 69 Proline Kryomats 7.8.5 Defining the number of program loops (Loops) Command − Pump − If required, programs can be looped many times. 1 Status Edit Loops Graph Info − With and Loops . Menu End Tset Tfix − Press the key, set the required number. Entering 0 causes the program to repeat continuously. 1 Min: 0 − Confirm the entry with the return to the display. Max:255 1 2 3 4 5 Help 6 Menu 7 Screen 8 T9set T0fix key and − You can quit the Edit mode with End . or Viewing the program sequence as a graph (Graph) Command − Pump − Show chart Status Edit Loops Graph Info 70 access the menu − Select the number of desired program loops. Loops (0=infinite) 7.8.6 Programmer Program1 Loops Programmer Program1 Graph takes you to the submenu Graph . − Press the key Show chart and . − The program sequence is shown. Menu End Tset Tfix Starting up YAUE0007 / 3/7/2013 Proline Kryomats − The display of the programmed T °C 27.00 temperature curve can be quit with End . 26.00 or 25.00 24.00 23.00 Pump 7.8.7 Menu End Tset Tfix Obtaining information on a program (Info) Command − Pump − Continue with Segments 2 Temp.min 20.00°C Temp.max 40.00°C Duration 01:00 Seg. free 145 Actual Seg. 5 Seg. Remain00:05 Loop actual 3 Status Edit Loops Graph Info Menu End Programmer Program1 Info to Info . − Here, all information is displayed about the entered program sequence. − Number of segments. − Minimum temperature in °C. − Maximum temperature in °C. − Program duration in hh: mm (without the time, which is necessary to process step changes in temperature). − Number of free segments. Prog.1 Standby − Segment, which is at present (currently) being processed. − Residual time of the current segment in hours and minutes. − Current pass; in the example the third of all passes is running. The last three points are only displayed when a program runs. − Quit the window with YAUE0007 / 3/7/2013 Starting up or End . 71 Proline Kryomats 7.9 Ramp function With the ramp function, temperature changes over any time period can be conveniently entered. This is especially advantageous with very low temperature changes (e.g. 0.1 °C/ day). Example: From the current outflow temperature (e.g. 242.4 °C) 200 °C of cooling is to occur over 5 days. Then 200 °C is entered as the temperature change, the time value 5 is entered for the time and day(s) selected as the time unit. The ramp function is executed until it is manually terminated or until the temperature limits Til (min) or Tih (max) described in Section 7.6.2 are attained. − Command Pump Settings Graph Clock Programmer Interfaces Control Limits Pump Menu Status Temp. change Time Time unit − Open the list of device parameters using Program 1 Program 2 Program 3 Program 4 Program 5 Ramp function End Tset Ramp function the soft key Menu . − With the cursor keys continue to Programmer Ramp function . − Confirm with the key . Tfix − Enter a positive or negative temperature value with Temp. change . Second(s) Minute(s) Hour(s) Day(s) − With Time enter a figure (without time unit). − With Time unit choose between Second(s) up to Day(s) . − Under Status the ramp is started Start or stopped Stop . Pump 72 Menu End Tset Tfix Starting up − When the ramp function is being executed, Ramp active appears in the window bar. − Without manual switch-off the ramp terminates at the latest at Til (min) or Tih (max). YAUE0007 / 3/7/2013 Proline Kryomats 7.10 Timer function (Command) Using the timer function, the thermostat can carry out an action at a certain time or after a certain waiting period. The actions are: switching on the thermostat, entering the standby mode or one of the 5 programs in the programmer. Command − Pump Settings Graph Clock Programmer Interfaces Control Limits Pump Menu Clock Timer 1 Timer 2 − Open the device parameter menu via the Set time Set date Timer 1 Timer 2 Format of date soft key Menu . − With the cursor keys continue to: Clock Timer 1 , − or to Timer 2 , − with the menu Status the selected timer is switched off or on . End Tset Tfix − The standby key timer! does not stop the Please exercise caution when thermostat is in standby mode. ( 7.5.3) A previously activated timer mode could unintentionally start the thermostat again from the standby mode. Status Function Action Set Time Set Date Pump Menu − The menu Function is used to define when an action is executed: Weekplan Time absolute Time relative End Tset − Similar to an electronic mains timer, Weekplan enables two switching events to be carried out each day. The cycle is repeated after 7 days. Tfix − Time absolute defines a time and a date on which a once-only action (switching event) occurs. The time point is set with Set time and with Set date . − Time relative defines a waiting period after which a once-only action occurs. With Set time up to 99h: 59min can be entered. ("Set date" is masked out with this function selection). − If the Weekplan is activated, in this window only Status , Function and Weekplan are displayed. YAUE0007 / 3/7/2013 Starting up 73 Proline Kryomats − Weekplan Time Action Time Action Monday 07:30 Start Tuesday 10:00 Prog.4 17:00 ------- − Using the cursor keys , field, which is to be filled in. Wednesday 08:00 ------- 17:00 ------- − Open the input dialog of the field with Thursday 08:00 ------- 17:00 ------- Friday 08:00 ------- 16:00 Standby Saturday 08:00 ------- 17:00 ------- Sunday 08:00 ------- 17:00 ------- Pump Menu End 17:00 ------- Weekplan Arrange takes you to the window shown on the left. Tset Tfix select the : Select a time in the time fields and an action in the action field. − In the example on the right, the thermostat is started on Monday at 7:30h, Program 4 is executed at 10:00h on Tuesday and the standby mode is switched in on Friday at 16:00h. Fields displaying ------ are passive. − Confirm each field selection with quit with Status Function Action Set time Set date Pump 7.11 End Tset without making changes. The menu Action is used to define what is to be carried out: Start Standby Program 1 Program 2 Program 3 Program 4 Program 5 Menu or − Start activates the thermostat from the standby mode. − Standby activates the standby mode (refrigerating unit, heater and pump are switched off). − Program X all actions of this program defined in the programmer are processed. Tfix Control parameters The control parameters are optimized ex-works for operation as a bath thermostat (with water as the bath medium) with internal control. The parameters are also preset for the operation of external containers with external control. Sometimes however, the operation of external containers requires adaptation. In addition, the thermal capacity and viscosity of the heat transfer liquid sometimes require adaptation. 74 − The intelligent menu guidance with the Master and Command control elements detects whether you have set the device (as described in Section 7.5.4), to internal or external control and only displays, the relevant dialog boxes in each case. − Your Proline Kryomat automatically optimizes some control parameters. This automatic mechanism should only be deactivated and manually optimized in exceptional cases. Starting up YAUE0007 / 3/7/2013 Proline Kryomats 7.11.1 Internal control variable (integral measurement probe) Only read further here, if you have no external temperature probe connected (and activated according to Section 7.5.4 as control variable). Command − Xp Control Parameters Control para. sets Tn Tv Tv manual/auto Td (auto) (auto) 6,0 30 21 3,5 Control Parameters − Open the device parameter menu via the soft key Menu . − With the cursor keys continue to Control Control Parameters Control Parameters . − The adjacent window appears. − Change parameters marked with (auto) where necessary to manual input with Tv manual/auto . Pump Menu End Tset Tfix − Select the parameters to be changed with and confirm with . − Then in the following settings window, change the value and confirm with . 7.11.1.1 Proven settings for control parameters and pump (integral measurement probe) Instrument Type Heat transfer liquid RP 4090 CW RP 4090 CW RP 4090 C RP 4090 C Water Ethanol Water Ethanol Xp Tn Tv Td _P tn tu td 9.0 9.0 9.0 9.0 60 60 60 60 42 42 42 42 6.3 6.3 6.3 6.3 Pump level 8 8 8 8 Technical changes reserved! 7.11.2 External control variable (External measurement probe) You only need to read further here if you have connected an external temperature probe or the actual temperature is read in from a module (and you have activated it as control variable according to Section 7.5.4). Only modify the control parameters if you have knowledge of control techniques. The control system for external actual values is implemented for improvement of the control behavior as a two-stage cascade controller. A "master controller" determines the "internal setpoint", from the temperature setpoint and the external temperature, passed to the slave controller. The control value of the slave controller controls the heating and cooling. When a setpoint step change is specified, it may be that the optimum control would set a bath temperature, which might significantly exceed the temperature desired on the external vessel. There is a correction limitation, which specifies the maximum permissible deviation between the temperature on the external load and the heat transfer liquid temperature. YAUE0007 / 3/7/2013 Starting up 75 Proline Kryomats Command Control Parameters Control para. sets Tv manual/auto Correction limitation Pump Control Parameters − Menu Kpe 0,50 Tne 100 Tve (auto) 83 Tde (auto) 8,3 Xpf 4,0 Prop_E(a) 30 End Tset Tfix − Open the device parameter menu via the soft key Menu . − With the cursor keys continue to: Control Control Parameters Control Parameters . − The adjacent window appears. Parameter endings: e = Master controller, f = Slave controller. − Where applicable change parameters marked with (auto) to manual input with Tv manual/auto . − Select the parameters to be changed with and confirm with . − Then change the value in the following settings window and confirm with − 7.11.2.1 . Correction limitation see introduction. Steps for setting the control parameters for external control 1. Activate external control 7.5.4. 2. Setting the slave controller: 2.1. Set parameters to auto ; Check for thermostat type and change when necessary (RP....) 9.1.1. − Choose heat transfer liquid with low viscosity and high thermal capacity. Ranking: water, ethanol, water-glycol, oil, Fluorinert®. − Set pump level as high as possible, − make bath circulation strong and fast, − choose hose length as short as possible, i.e. 2 x 1m, − choose hose cross section as large as possible, i.e. ½ inch, − throughput through the external load as large as possible. 2.2. Xpf setting: − when oscillating with short period occur (i.e. 30 seconds) Xpf lower, otherwise higher, − in case of bad thermal coupling and large thermal mass high (i.e. 2...5, or even higher), − in case of good thermal coupling and small thermal mass low (i.e. 0.2 ... 0.7), − when rapid temperature response is required simple internal control should be preferred. Otherwise select small Xpf (0.05 ... 0.1). 3. Setting the master controller (PIDT1-controller): − Start with setting Auto and proceed with Manual only when necessary. 76 Starting up YAUE0007 / 3/7/2013 Proline Kryomats 3.1. Kpe setting: − In case of oscillations with large period, i.e.10 min) Kpe higher, otherwise lower. 3.2. Tne/ Tve/ Tde setting: − Start with high numbers (Tne = 70s ... 200s; Tve = 50s ... 150s). − With lower numbers faster approach, otherwise slower approach with lower oscillations. − Tve: to reduce overshot Tve higher, otherwise lower. − Tde (damping for Tve): in general approximately 10% of Tve. 4. Correction limitation (or outflow temperature limitation) 7.11.2 and temperature limits (Til/Tih) 7.6.2: − Make settings in accordance with the boundary conditions. Examples: Heat transfer liquid Correction limitation Water depending on the external vessel size and the heat transfer liquid Ethanol Til Tih +2°C +95°C Minimum +40°C − Tools to watch the time behavior: Graph mode of the Command console, LAUDA Wintherm PCprogram. 7.11.3 Internal and external control parameter sets If a thermostat is used for a number of applications, which always leads to a change of the control parameters, these control parameters (up to 9 sets) can be saved in the thermostat and activated again as required. Also saving is useful for finding the best control parameters; in this way external management of the control parameters can be avoided. There are 9 sets (each for internal and external sets of control parameters) saved at the factory. In this menu the control parameters cannot be edited, they are only displayed. • With Activate the currently valid control parameters are used. • With Upload actual the actual ones are read in and saved (for later reuse). • With Default the set of control parameters saved at the works is loaded again (in this case the control parameters set by the customer are lost). YAUE0007 / 3/7/2013 Starting up 77 Proline Kryomats Command − Control Parameters Control para. sets Tv manual/auto Self Adaption Correction limitation Control parameter sets − Open the device parameter menu via the Set 1 Set 2 Set 3 Set 4 Set 5 Set 6 Set 7 Set 8 Set 9 soft key − With the cursor keys continue to: Control Control Parameters Control para. sets . − The adjacent window appears. Set 1 to Set 9. − Select the desired set with confirm with Pump Menu End Menu . Tset Tfix . − Select the desired set to be changed with and confirm with Pump Menu End Tset . − In the setting window (see left) the selected set is listed under internal or external in the display. Activate Upload actual Default Status intern extern and − Under Status the previously selected set: is activated, is read in and the set, which was saved at the factory, is restored. Tfix Editing the control parameter sets The change in the control parameters is explained in Section 7.11.1 / 7.11.2 (internal / external). Once the value has been changed and confirmed, the set number, e.g. Set 3 and Upload actual , the new value is accepted into the control parameter set to be changed (Set 3) via the command Control parameter sets . 78 Starting up YAUE0007 / 3/7/2013 Proline Kryomats 7.11.4 Self Adaption The function Self Adaption can be used to detect automatically the optimal control parameters for internal or external control. This function is available from software version 2.18 of Command. For thermostats with an older software version a software update is necessary. The Self Adaption determines the parameters by a test run of the thermostat. In this case the thermostat and, if applicable, the external application must be ready for operation. ( 6). The Self Adaption will be performed with the actually set pump step. Best results can be achieved with high pump steps. The test run must be performed at a passive system; this means that during the test run an exo- or endotherrmic reaction mustn’t take place. The test run takes depending on the external application about 30 minutes to 3 hours. The bath temperature will oscillate in this time less than about ±15 Kelvin around the set temperature. After the test run the detected control parameters will be taken over as control parameters automatically. Command Self Adaption − Open the device parameter menu via Control Parameters Settings Control para. sets Tv manual/auto Self Adaption Correction limitation the soft key Menu . − With the cursor keys continue to: Control Control Parameters Self Adaption Settings . − Confirm selection with Pump Menu End Tset . Tfix − The window shown adjacent appears. Start Status Setpoint Identification Actual Parameters − With the menu Status the test run of the Self Adaption can be started. When the Self Adaption is finished, the test run will be terminated automatically. − As soon as start is pressed, in the sofkey area the information Adaption on will be displayed followed by the actual status of the test run. Pump YAUE0007 / 3/7/2013 Menu End Tset Tfix Starting up 79 Proline Kryomats − With the menu Setpoint the set temperature for the test run can be set. The bath temperature will oscillate less than about ±15 Kelvin around the set temperature. 30,00°C Status Setpoint Identification Actual Parameters − Change the display in the adjacent window and accept with Pump Menu End Tset Tfix − With the menu Identification the optimal control parameters for internal control or for the internal control and the external control can be detected automatically. To detect the control parameters for the external application, a temperature probe must be connected to the thermostat. intern Status intern + extern Setpoint Identification Actual Parameters Pump Menu End Tset Tfix − With the menu Actual Parameters the actual set control parameters can be stored in parameter set 9. After the test run the detected control parameters will be taken over as control parameters automatically. If the parameters found do not fulfil your expectations, the before set parameters can be restored ( 7.15.5). Store in Set 9 Status Setpoint Identification Actual Parameters Pump 80 Menu End Tset . Tfix Starting up YAUE0007 / 3/7/2013 Proline Kryomats 7.12 Alarms, Warnings and Errors The SelfCheck Assistant of your Proline Kryomat monitors more than 50 device parameters and triggers alarms, warnings or errors as appropriate. All warnings and alarms are shown on the Command control element in plain text. Errors are shown in plain text on the Command control element, also, in an error list. Alarms: Alarms are safety relevant. Pump, heater and refrigerating unit will be shut off. Warnings: Warnings normally are not safety relevant. The device continues to operate. Errors: If an error occurs, the pump, heater and refrigerating unit switch off automatically. Switch of the unit at the rotary mains switch. If the error is always present after switching on the device, please give information to the LAUDA Service for Constant Temperature Equipment ( 9.3.7). on the Master keyboard in Find cause of alarm or warning and rectify where necessary. Then press order to remove the alarm message. Warning messages can be removed either on the Master keyboard with or on the Command board with . or on the Master keyboard or by activating the Screen Warnings may be ignored by pressing Softkey on the Command control element. Warnings will not be repeated periodically. 7.12.1 Overtemperature protection and checking The units are designed for operation with non-flammable and flammable liquids to DIN EN 61010-2-010. − Setting the overtemperature cut-off: Recommended setting: 5 °C above desired bath temperature. Overtemp. cut-off 90 °C − Caution!! The overheat switch-off point Tmax is controlled by a system functioning independently of the bath control. Setting of the nominal temperature, however, can be limited via the functions Tih and Til ( 7.6.2) independently of Tmax. − The cut-off point is displayed in the LED display on pressing the key . Changing the overtemperature cut-off point: − For safety, and to guard against unintentional adjustment, the key must be held pressed during all the following entries. Now, briefly press . The display flashes and the overtemperature cut- off can be set with the keys YAUE0007 / 3/7/2013 Starting up or . 81 Proline Kryomats − Quit the change mode by pressing for a few seconds or automatically after 5 seconds, while you keep pressed. − This somewhat complicated procedure is intended to prevent unintentional adjustment. − Not higher than 25 °C below the fire point of the heat transfer liquid used ( 6.2 and 6.3). − The setting range is restricted to 5 °C above the upper limit of the working temperature range (Tih 7.6.2). Overtemp. alarm tEMNP °C − If the bath temperature rises above the overtemperature cut-off: 1. Alarm sounds as dual-tone signal. 2. tEMNP for overtemperature appears in the display. above the fault triangle flashes. 3. The red LED Heater switches off on both poles, Pump and refrigerating unit are switched off electronically. − Rectify cause of fault. − Wait until the bath temperature has cooled below the cut-off point or set the cut-off point higher than the bath temperature. When is shown in the display: tEMNP − Unlock with the key. Unlocking is not possible on the Command control element! − Before longer periods of unsupervised operation, the overtemperature protection should be checked. To do this: − Slowly lower Tmax, as described above. Cut-off at the bath temperature should occur. − Step 1 – 2 (see above) must follow. − Set the overtemperature cut-off higher than the bath temperature again appears in the display. and wait until tEMNP − Unlock with the key. Unlocking is not possible on the Command control elemant! Command − − Overtemperature alarm! Overtemperature alarm! is shown in the display and signifies that unlocking is only possible on the Master control panel. 7.12.2 Low-level alarm and low-level checking 82 Starting up YAUE0007 / 3/7/2013 Proline Kryomats − If the liquid level falls so far that the heating element is no longer completely covered with liquid, an alarm is initiated: 1. The alarm sounds as a dual-tone signal. Level alarm LEUEL °C LEUEL 2. Display for (low level) is shown when the bath contains too little liquid. above the fault triangle flashes. 3. The red LED Heater switches off on both poles, VarioFlex pump and refrigerating unit are switched off. − Find the cause of the fault and, where necessary, top up for missing liquid 6.2 and 6.3. − Press the Enter key. − Also, press this key if the unit has been switched off in the fault state. − Checking the safety system at regular intervals by lowering the bath level. To do this, fit a hose to the drain point and slowly run off the heat transfer liquid into a suitable container via the drain-point tap at the front. − Step 1 – 2 must follow. − With this test, the bath temperature must not be below 0 °C or above 50 °C, otherwise there is a risk of injury! − If irregularities arise during the checking of the safety devices, switch off the unit immediately and pull out the mains plug. − Have the equipment checked by LAUDA Service for Constant Temperature Equipment. Command − − Low-level alarm! Low-level alarm! is shown in the display and signifies that unlocking is only possible on the Master control panel. 7.12.3 High-level settings Different reactions can be chosen when the level sensor detects the height of the heat transfer liquid level. Depending on the setup, heat transfer liquid or operation conditions, one of the following settings may be suitable: Setting Master settings No warning nHnon none Select only when no safety sensitive application. I.e. water as heat transfer liquid. Warning nHWX Warning Acoustic and optical warning as long as the level goes down. This is the factory setting. Warning and heater off nHWXH Warning + heater off Warning and additional heater off as long as the level goes down. Recommended for flammable heat transfer liquids with much higher flash point and temperatures above 100 °C. YAUE0007 / 3/7/2013 Command settings Reaction and application recommendation Starting up 83 Proline Kryomats Alarm nHALA Alarm Alarm switches off the pump and the heater until the on the Master alarm is removed by pressing keyboard. Recommended for external loads and flammable liquids. Command Over level handling − Over level handling none Warning Warn.+ Heater off Alarm − Open the device parameter menu via the soft key Menu . − With the cursor keys continue to Settings Over level handling . − The shown window appears − Select the preferred parameter with and confirm with or . − See introduction for details. Pump Menu End Tset Tfix 7.12.4 High-level warning or alarm 3 Sec. Level warning WX103 °C − Acoustic warning signal sounds for 3 seconds when the liquid level rises so far that the uppermost switching point of the level sensor has been reached. − Or in case the warning function as described in 7.12.3 was chosen: − The acoustic signal with dual-tone sounds. WXArn103 (high level) appears when the bath − Warning contains too much liquid. − The WXArn flashes by turns with the numeral. − In case the alarm function as described in 7.12.3 was chosen: Level alarm AL 84 6 °C − The acoustic signal with dual-tone sounds. above the fault triangle flashes. − The red LED Heater switches off on both poles, Pump and refrigerating unit are switched off electronically. Starting up YAUE0007 / 3/7/2013 Proline Kryomats − Find the cause of the fault. Possible causes may be: 1. Volume expansion on heating. 2. Feed to an external vessel may be interrupted so that only return suction is possible. 3. Heat transfer liquid taking up moisture. − If Alarm: Press Enter key. Warnings disappear automatically when the cause is gone. − Also, press this key if the unit has been switched off in the fault state. Warnings disappear automatically when the cause is gone. Command − High-level warning/alarm − The display shows Warning. To release press Enter key Security 3 Level too high or Alarm AL 6: Level too high is shown in the display and signifies that unlocking is only possible on the Master control panel. 7.12.5 Pump-motor supervision: Overload or blockage − The SelfCheck Assistant monitors the VarioFlex Pump: 1. Alarm sounds as dual-tone signal for pump-motor overload or blockage. Pump alarm bL0C °C 2. Display of bL0C signals blockage. above the fault triangle flashes. 3. The red LED Heater switches off on both poles, Pump and refrigerating unit are switched off electronically. − Find the cause of the fault. Perhaps the viscosity of the heat transfer liquid is too high or the pump is blocked. − Press the Enter key. − Also press this key if the unit has been switched off in the fault state. Command − − Pump-motor alarm! Pump-motor alarm is shown in the display and signifies that unlocking is only possible on the Master control panel. 7.12.6 Pump-motor supervision: Dry running YAUE0007 / 3/7/2013 − The SelfCheck Assistant monitors the VarioFlex pump: 1. Alarm sounds as dual-tone signal when the pump runs without liquid. This can only occur when the float level measurement has failed. Starting up 85 Proline Kryomats Pump alarm PuLEU °C PuLEU 2. The display of signals that the SelfCheck Assistant has detected a pump low level. above the fault triangle flashes. 3. The red LED Heater switches off on both poles, Pump and refrigerating unit are switched off electronically. − The cause of the failure of the level measurement with the floatation sensor must be found and rectified. Perhaps foreign bodies in the bath block it. − Press the Enter key. − Also press this key if the unit has been switched off in the fault state. Command − − Alarm! Low level (pump) Alarm! Low level (pump) is shown in the display and signifies that unlocking is only possible on the Master control panel. 7.12.7 Compressor Overtemp Command Error! Comp1 overtemp − Error! Comp1 overtemp is shown in the display. The cause may be a technical malfunction or an extremly situation in temperature control. Switch off the unit and wait min. 15 minutes to restart it again so that the compressor has time enough to cool down again. − This error may affect stage 1 (Error 68) or stage 2 (Error 69). If the error is always present after switching on the device, please give information to the LAUDA Service for Constant Temperature Equipment ( 9.3.7). 7.12.8 Three-phase current Command Error! Three-phase current − Error! Three-phase current is shown in the display, signed by number 70. The cause is the wrong direction of the current rotation field. It has to be clockwise! − Another reason may be the missing of one phase of the voltage supply. 86 Starting up YAUE0007 / 3/7/2013 Proline Kryomats 7.12.9 Fault list „Alarms and Warnings“ Alarms Message PuLEU LEUEL tEMNP bL0C CFA1L AL 1 AL 2 AL 3 AL 4 AL 5 AL 6 AL 7 AL 8 Meaning Pump too fast (low level) Low level alarm in the level sensor Overtemperature (t > tmax) Pump blocked (no rotation) Command control element connection interrupt Temperature signal of external Pt100 missing Temperature signal of analogue input missing Temperature signal of serial port missing Analogue module: Current input 1 interrupted Analogue module: Current input 2 interrupted Protection system: High bath level Error digital input Refill fail Warnings in the “Master-Display” Message Warnings in the “Safety system” Meaning Message WX WX WX WX 1 2 3 4 Overflow of CAN receipt WX 5 Heatsink temperature is superheated WX WX WX WX WX WX WX WX WX WX WX WX WX WX 11 12 13 14 15 16 17 18 19 20 21 22 23 24 Watchdog-Reset til-limitation active tih-limitation active Software version of protection system too old Software version of operating system too old Software version of heating system too old Software version of analogue Interface too old Software version of RS 232 too old Software version of contact I/0 module too old Software version of valve 0 too old Software version of valve 1 too old Software version of valve 2 too old Software version of valve 3 too old Software version of pump 0 too old Software version of pump 1 too old Software version of pump 2 too old Software version of pump 3 too old YAUE0007 / 3/7/2013 Meaning WX101 WX102 WX103 WX104 Overflow of CAN receipt WX105 WX106 WX107 WX110 WX112 WX113 WX114 WX115 WX116 WX117 WX118 WX119 WX120 WX121 WX122 WX123 WX124 Heater 1 break Starting up Watchdog-Reset Close to bath overflow Bath level is approaching switch off level or is out of optional range Heater 2 break Heater 3 break Software version of control system too old Software version of operating system too old Software version of heating system too old Software version of analogue interface too old Software version of RS 232 too old Software version of contact I/0 module too old Software version of valve 0 too old Software version of valve 1 too old Software version of valve 2 too old Software version of valve 3 too old Software version of pump 0 too old Software version of pump 1 too old Software version of pump 2 too old Software version of pump 3 too old 87 Proline Kryomats Warnings in the “Command-Display” Message WX201 WX202 WX203 WX210 WX211 WX213 WX214 WX215 WX216 WX217 WX218 WX219 WX220 WX221 WX222 WX223 WX224 Warnings from “Cooling system” Meaning Message Overflow of CAN receipt Watchdog-Reset RTC Voltage drop recognized: Battery failure Software version of control system too old Software version of protection system too old Software version of heating system too old Software version of analogue interface too old Software version of RS232 too old Software version of contact I/0 too old Software version of valve 0 too old Software version of valve 1 too old Software version of valve 2 too old Software version of valve 3 too old Software version of pump 0 too old Software version of pump 1 too old Software version of pump 2 too old Software version of pump 3 too old Warnings from “Analogue-Module” Message WX401 WX402 WX410 WX411 WX412 WX413 WX415 WX416 WX417 WX418 WX419 WX420 WX421 WX422 WX423 WX424 88 Watchdog-Reset Software version of control system too old Software version of protection system too old Software version of operation system Software version of heating system too old Software version of RS232 too old Software version of contact I/0 too old Software version of valve 2 too old Software version of valve 3 too old Software version of pump 0 too old Software version of pump 1 too old Software version of pump 2 too old Software version of pump 3 too old Watchdog-Reset sm.stell_min still not determined Adaption run necessary WX304 WX305 WX310 WX311 WX312 WX314 WX315 WX316 WX317 WX318 WX319 WX320 WX321 WX322 WX323 WX324 Pressure switch 1 operated Condenser dirty ( cleaning) Software version of control system too old Software version of protection system too old Software version of operation system Software version of analogue interface too old Software version of RS232 too old Software version of contact I/0 too old Software version of valve 0 too old Software version of valve 1 too old Software version of valve 2 too old Software version of valve 3 too old Software version of pump 0 too old Software version of pump 1 too old Software version of pump 2 too old Software version of pump 3 too old Message Overflow of CAN receipt Software version of valve 1 too old Overflow of CAN receipt Warnings from “RS232/485-Module” Meaning Software version of valve 0 too old WX301 WX302 WX303 Meaning WX501 WX502 WX510 WX511 WX512 WX513 WX514 WX516 WX517 WX518 WX519 WX520 WX521 WX522 WX523 WX524 Starting up Meaning Overflow of CAN receipt Watchdog-Reset Software version of control system too old Software version of protection system too old Software version of operation system Software version of heating system too old Software version of analogue interface too old Software version of contact I/0 too old Software version of valve 0 too old Software version of valve 1 too old Software version of valve 2 too old Software version of valve 3 too old Software version of pump 0 too old Software version of pump 1 too old Software version of pump 2 too old Software version of pump 3 too old YAUE0007 / 3/7/2013 Proline Kryomats Warnings from “Contact I/0-Module” Message WX601 WX602 WX610 WX611 WX612 WX613 WX614 WX615 WX617 WX618 WX619 WX620 WX621 WX622 WX623 WX624 Warnings from “Solenoid valve” Code 7, 8, 9XX) Meaning Message Overflow of CAN receipt Watchdog-Reset Software version of control system too old Software version of protection system too old Software version of operation system Software version of heating system too old Software version of analogue interface too old Software version of RS232 too old Software version of valve 0 too old Meaning WX701 WX702 WX710 WX711 WX712 WX713 WX714 WX715 WX716 Overflow of CAN receipt WX721 WX722 WX723 WX724 Software version of pump 0 too old Watchdog-Reset Software version of control system too old Software version of protection system too old Software version of operation system Software version of heating system too old Software version of analogue interface too old Software version of RS232 too old Software version of contact I/0 too old Software version of valve 1 too old Software version of valve 2 too old Software version of valve 3 too old Software version of pump 0 too old Software version of pump 1 too old Software version of pump 2 too old Software version of pump 3 too old YAUE0007 / 3/7/2013 Starting up Software version of pump 1 too old Software version of pump 2 too old Software version of pump 3 too old 89 Proline Kryomats 7.13 RS 232/ RS 485 Interface 7.13.1 Connecting cables and interface test RS 232 Computer Signal 9-pin sub-D-socket Thermostat 25-pin sub-D-socket 9-pin sub-D-socket Signal RxD 2 2 3 3 2 2 TxD TxD 3 3 2 2 3 3 RxD DTR 4 Signal Ground 5 DSR 6 6 6 DTR RTS 7 4 7 CTS CTS 8 5 8 RTS 20 5 7 4 7 5 DSR 5 Signal Ground with hardware handshake: For connecting a thermostat to the PC use 1:1 cable and not a nullmodem cable! without hardware handshake: the computer / PC must be set to the operating mode “without hard ware handshake”. − Use screened connecting cable. − Connect screen to connector case. − The connections are galvanically isolated from the rest of the electronics. − Any pins not in use must not be connected! When a PC is connected up the RS232 interface can easily be tested using the Microsoft Windows operating system. On Windows® 95/ 98/ NT/ XP with the “Hyper Terminal” program. 7.13.2 Protocol RS 232 − The interface operates with one stop bit, no parity bit and 8 data bits. − Transfer rate either 2400, 4800, 9600 (factory setting) or 19200 baud as selected. − The RS232 interface can be operated with or without hardware handshake, (RTS/CTS). − The command from the computer must be terminated with CR, CRLF, or LFCR. − The response of the thermostat is always terminated with CRLF. CR = Carriage Return (Hex: 0D) LF = Line Feed (Hex: 0A) 90 Starting up YAUE0007 / 3/7/2013 Proline Kryomats Example: Transfer of setpoint 30,5 °C to the thermostat Computer Thermostat “OUT_SP_00_30.5“CRLF “OK“CRLF 7.13.3 Connecting cable RS 485 Thermostat 9-pin sub-D-socket Pin Data 1 Data A (-) 5 SG (Signal Ground) optional 6 Data B (+) − Use screened connecting cables. − Connect screen to connector case. − The connections are galvanically isolated from the rest of the electronics. − Any pins not in use must not be connected! An RS 485 bus always requires bus termination in the form of a termination network which ensures a defined rest status in the high-resistance phases of bus operation. The bus termination is as follows: This termination network is usually incorporated on the PC plug-in card (RS 485). 7.13.4 Protocol RS 485 − The interface operates with one stop bit, no parity bit and 8 data bits. − Transfer rate either 2400, 4800, 9600 (Factory setting) or 19200 baud as selected. − The RS 485 commands are always preceded by the device address. There is provision for 127 addresses. The address must always have three digits. (A000_...to A127_...). − The command from the computer must be terminated with CR. − The response of the thermostat is always terminated with CR. CR = Carriage Return (Hex: 0D) YAUE0007 / 3/7/2013 Starting up 91 Proline Kryomats Transfer of setpoint 30.5 °C to the thermostat with address 15. Example: Computer Thermostat “A015_OUT_SP_00_30.5“CR “A015_OK“CR 7.13.5 Write commands (Data commands to the thermostat) Command Explanation OUT_PV_05_XXX.XX External temperature to be set through the interface. OUT_SP_00_XXX.XX Setpoint transfer with up to 3 places before the decimal point and up to 2 places behind. OUT_SP_01_XXX Pump output step 1 to 8. OUT_SP_02_XXX Operation mode cooling (0 = OFF / 1 = ON / 2 = AUTOMATIC). OUT_SP_04_XXX TiH outflow temperature high limit. OUT_SP_05_XXX TiL outflow temperature low limit. OUT_PAR_00_XXX.X Setting of control parameter Xp. OUT_PAR_01_XXX Setting of control parameter Tn (5...180s; 181 = Off). OUT_PAR_02_XXX Setting of control parameter Tv. OUT_PAR_03_XXX.X Setting of control parameter Td. OUT_PAR_04_XXX.XX Setting of control parameter KpE. OUT_PAR_05_XXX Setting of control parameter TnE (0...998s; 999 = Off). OUT_PAR_06_XXX Setting of control parameter TvE. OUT_PAR_07_XXX.X Setting of control parameter TdE. OUT_PAR_09_XXX.X Setting of the max. outflow temperature limit. OUT_PAR_10_XXX.X Setting of control parameter XpF. OUT_PAR_11_XXX Setting of control parameter TnF (5...180s; 181 = Off). OUT_PAR_12_XXX Setting of control parameter TvF. OUT_PAR_13_XXX.X Setting of control parameter TdF. OUT_PAR_14_XXX.X Setting of the setpoint offset. OUT_MODE_00_X Keys Master: 0 = free / 1 = inhibited (corresponds to “KEY”). OUT_MODE_01_X Control: 0 = internal / 1 = external Pt100 / 2 = external Analogue / 3 = external Serial. OUT_MODE_03_X Keys Command: 0 = free / 1 = inhibited. OUT_MODE_04_X Setpoint offset source: 0 = normal / 1 = ext. Pt / 2 = ext. analog / 3 = ext. serial. START Switches the unit on (after Standby). See safety information 7.5.3. STOP Switches the unit into Standby (pump, heater, cooling unit OFF). RMP_SELECT_X Selection of the program (1...5) to which the further instructions apply. When the unit is switched on, program 5 is selected automatically. 92 RMP_START Start the programmer. RMP_PAUSE Hold (pause) the programmer. RMP_CONT Restart the programmer after pause. RMP_STOP Terminate the program. RMP_RESET Delete the program (all Segments). RMP_OUT_00_XXX.XX_XXXXX_XXX.XX_ Set a programmer segment (temperature, time, tolerance and pump level). A X segment is added and appropriate values are applied to it. RMP_OUT_02_XXX Number of times the program runs: 0 = unlimited / 1...250. RMP_OUT_06_XXX.XX Programmer tolerance setting (0 = off / 0.01 °C...450.00 °C). All following Starting up YAUE0007 / 3/7/2013 Proline Kryomats Command Explanation segments receive this tolerance setting. − For ”_“ use also ” ” (blank character). − Response from thermostat ”OK“ or in case of error ” ERR_X“ (RS 485 interface e.g. “A015_OK” or in case of error ”A015_ERR_X”.). Permitted data formats: -XXX.XX -XXX.X -XXX. -XXX XXX.XX XXX.X XXX. XXX -XX.XX -XX.X -XX. -XX XX.XX XX.X XX. XX -X.XX -X.X -X. -X X.XX X.X X. X -.XX -.X .XX .X 7.13.6 Read commands (Data requested from the thermostat) Command Explanation IN_PV_00 Read bath temperature (outflow temperature). IN_PV_01 Indication of the controlled temperature (int./ ext. Pt/ ext. Analogue/ ext. Serial). IN_PV_03 Read external temperature TE (Pt100). IN_PV_04 Read external temperature TE (Analogue input). IN_PV_05 Read bath level. IN_PV_10 Read bath temperature (outflow temperature) in 0.001 °C. IN_PV_13 Read external temperature TE (Pt100) in 0.001 °C. IN_SP_00 Read temperature setpoint. IN_SP_01 Read current pump power stage. IN_SP_02 Read cooling operation mode (0 = OFF / 1 = ON / 2 = AUTOMATIC). IN_SP_03 Read current overtemperature switch-off point. IN_SP_04 Read current outflow temperature limit TiH. IN_SP_05 Read current outflow temperature limit TiL. IN_PAR_00 Read current value of Xp. IN_PAR_01 Read current value of Tn (181 = OFF). IN_PAR_02 Read current value of Tv. IN_PAR_03 Read current value of Td. IN_PAR_04 Read current value of KpE. IN_PAR_05 Read current value of TnE (999 = OFF). IN_PAR_06 Read current value of TvE. IN_PAR_07 Read current value of TdE. IN_PAR_09 Interrogation of the maximum outflow temperature limit. IN_PAR_10 Read current value of XpF. IN_PAR_11 Read current value of TnF (181 = OFF). IN_PAR_12 Read current value of TvF. IN_PAR_13 Read current value of TdF. IN_PAR_14 Interrogation of the setpoint offset. IN_DI_01 Status of contact input 1: 0 = open/ 1 = closed. IN_DI_02 Status of contact input 2: 0 = open/ 1 = closed. IN_DI_03 Status of contact input 3: 0 = open/ 1 = closed. IN_DO_01 State of Contact output 1: YAUE0007 / 3/7/2013 Starting up 93 Proline Kryomats Command Explanation 0 = make-contact open/ 1 = make-contact closed. IN_DO_02 State of Contact output 2: 0 = make-contact open/ 1 = make-contact closed. IN_DO_03 State of Contact output 3: 0 = make-contact open/ 1 = make-contact closed. IN_MODE_00 Keys Master: 0 = free / 1 = inhibited. IN_MODE_01 Control: 0 = int. / 1 = ext. Pt100 / 2 = ext. Analogue / 3 = ext. Serial. IN_MODE_02 Standby: 0 = Unit ON / 1 = Unit OFF. IN_MODE_03 Keys Command: 0 = free / 1 = inhibited. IN_MODE_04 Setpoint offset source: 0=normal/1=ext.Pt/2=ext.analogue/3=ext.serial. TYPE Read equipment type. VERSION_R Read software type of control system. VERSION_S Read software type of protection system. VERSION_B Read software type of Command. VERSION_T Read software type of cooling system. VERSION_A Read software type of analogue module. VERSION_V Read software type of RS232/485 module. VERSION_D Read software type of digital module. VERSION_M_0 Read software type of solenoid valve (Cooling water). VERSION_M_1 Read software type of solenoid valve (Automatic refill). VERSION_M_2 Read software type of solenoid valve (Level controller). STATUS Read equipment status 0 = OK, -1 = error. STAT Read error diagnosis response: XXXXXXX → X = 0 no error, X = 1 error. 1 Char = error. 2 Char = Alarm. 3 Char = Warning. 4 Char = over temperature. 5 Char = low-level error. 6 Char = high-level error (at adjustment alarm). 7 Char = no external control variable. RMP_IN_00_XXX Read a program segment XXX (response: e. g. 030.00_010.00 set point temperature 30.00°C, time = 10 min, tolerance = 5.00°C, pump level = 1). RMP_IN_01 Read the current segment number. RMP_IN_02 Read the set number of program runs. RMP_IN_03 Read the current program run. RMP_IN_04 Read the program to which further instructions apply. RMP_IN_05 Read which program is running now (0=none). LOG_IN_00_XXXX Query a measuring point XXXX from data logger (Reply: e. g. 020.00_021.23_030.50 => set point temperature = 20.00°C, bath temperature = 21.23°C, external temperature = 30.5°C). LOG_IN_01 Query all measuring points from data logger As a difference to the command “LOG_IN_00”, a tabulator is used here as separator instead of ,_’ . The measuring points are separated by CR and LF. The end is marked by CR LF CR LF. LOG_IN_02 Query the start time from the data logger (Reply: e.g. 20_14_12_20 day 20, 14:12:20). LOG_IN_03 94 Query the acquisition interval from the data logger (Reply in seconds). Starting up YAUE0007 / 3/7/2013 Proline Kryomats − For ”_“ use also ” ” (blank character). − The equipment response is always in the fixed decimal format ”XXX.XX“ or for negative values “-XXX.XX” or ” ERR_X“. (RS 485 interface e.g.. ”A015_ XXX.XX” or ”A015_-XXX.XX” or ”A015_ERR_X”). 7.13.7 Error messages Message Explanation ERR_2 Wrong input (e.g. buffer overflow) ERR_3 Wrong command ERR_5 Syntax error in value ERR_6 Illegal value ERR_8 Module (ext. temperature) not available ERR_30 Programmer, all segments occupied. ERR_31 Set point not possible, analogue set point input ON. ERR_32 TiH <= TiL. ERR_33 No external sensor ERR_34 Analogue value not available ERR_35 Auto is selected ERR_36 No set point input possible. Programmer is running or is pausing. ERR_37 No start from programmer possible, analogue setpoint input is switched on. 7.13.8 Driver software for LABVIEW® An individual, easy-to-use control and automation software for operating the PROLINE device can be programmed with the aid of the National Instruments program development tool LABVIEW® (http://sine.ni.com/apps/we/nioc.vp?cid=1381&lang=US). In order to make program operation possible on the RS 232/ RS 485 interface, LAUDA provides drivers specially designed for LABVIEW® which can be downloaded free of charge under www.lauda.de/spece.htm. YAUE0007 / 3/7/2013 Starting up 95 Proline Kryomats 8 Interface modules 8.1 Installing of modules When switching off only on the master head, using the switch at the front or back, there is still voltage present on the unit or head. Set the rotary switch on the front panel to "OFF = 0" and withdraw the mains plug. The master can be supplemented with further interface modules, which are simply inserted at the back of the master control head into two module slots. − Switch off the Kryomat at the rotary switch on the front panel and withdraw the mains plug. − Touch the earthed bath cover of the Proline thermostat to discharge any electrostatic charge. − Remove the module from its packaging. − Insert a screwdriver into the lower recess of the module cavity and prise up the plastic cover. The cover can then be pulled off downwards. − Pull out the plug of the bus connecting cable from the plastic cover. − Plug on the bus connecting cable (red plug onto red socket). − Insert the module and secure with the two crosshead screws. − Connect the mains plug again and switch on the thermostat. The plugs are protected against reverse polarity. The plugs have a ridge, which slides into a groove in the socket. 96 Interface modules YAUE0007 / 3/7/2013 Proline Kryomats 8.2 Menu structure for all modules (only Command) All existing menu points are illustrated. However, the Command Console masks out menu points, which cannot be executed. Further information can be found in the following sections. Menu Interfaces Off On 2400 4800 9600 19200 Setpoint temperature Ext. actual temp. Pump power Status Function Interface type Minimum value Mode Baud rate RS485 address Maximum value Calibration off on automatic serial Command SmartCool Analogue interfaces Switching contacts Refill valve Shut off device (none softwaremenu) RS232 RS485 Analogue Input 1 Analogue Input 2 Analogue Output 1 Analogue Output 2 Status Function Interface type Minimum value Maximum value Calibration Function Contact open Contact closed Input 1 Input 2 Input 3 Output 1 Output 2 Output 3 Lower step 1-8 Upper step 1-8 Only if setpoint temp. alternating mode is active: Input open-Temp. Input closed-Temp. Only if control type is active: Internal Pt100 External Pt100 External analogue External serial Function Diagnostic function Temperature range see safety information 7.5.3 YAUE0007 / 3/7/2013 Voltage 0-10V Current 0-20mA Current 4-20mA Off On Setpoint temperature Controlled temp. Internal temp. Temp.extern Pt100 Temp.extern analog Temp.extern serial Actuating signal Pump power Pump speed Voltage 0-10V Current 0-20mA Current 4-20mA Off Fault Standby Programmer Alternating mode Control type Off Fault diagnosis Standby Temperature range Programmer Refill Only if fault diagnosis is active: All messages Low level Overtemperature Only fault Only if temperature range is active: Input of range Interface modules 97 Proline Kryomats 8.3 Serial interfaces RS232/ 485 RS232/ 485 Interface Module (order no. LRZ 913) with 9-pole SUB-D socket. Electrically isolated by optocoupler. With the LAUDA instruction set essentially compatible to the Ecoline and Integral Series. The RS232 interface can be connected directly to the PC with a 1:1 through-contact cable (order no. EKS 037). Interface description and commands see chapter 7.13. 8.4 Analogue module The analogue module (order no. LRZ 912) has 2 inputs and 2 outputs, which are brought out on a 6pole DIN socket to Namur Recommendation (NE28). The inputs and outputs can be set independently as 4…20 mA, o…20 mA or 0…10V interface. Various functions can be selected for the inputs and outputs. Accordingly, the signal on the input is interpreted differently and different information is output via the output connection. In addition the interfaces can be scaled freely according to the set function. For measuring transducer are 24 V DC available. The following values can be specified via the inputs: - Setpoint temperature with function: MN tS or Set temperature . - External actual temperature with function: MN tE or ext. actual temperature . - Pump power with function: MN PP or Pump power . The following values can be specified via the outputs: - Setpoint temperature with function: Master: MN tS or Command: Set temperature . - The temperature source with which active control occurs: MN tC Controlled temp. . - Actual temperature (bath temperature): MN t1 or Internal Temp. . - External actual temperature from Pt100: MNtEP or Temp.external Pt100 . - External actual temperature from analogue input: MNtEA or Temp.external analogue . - External actual temperature from the serial interface: MNtES or Temp.external serial . - Actuating signal: MN Y or Actuating signal . - Pump power: MN PP or Pump power . - Pump speed: MNtEn or Pump speed . In addition the interfaces can be scaled freely with L =0 / H 10=0 in % or minimal value / maximal value according to the set function. For example: 4 mA corresponds to 0 °C and 20 mA corresponds to 100 °C. − Accuracy of the inputs and outputs after calibration better than 0.1% F.S. − Inputs, current Input resistance < 100 Ohm − Inputs, voltage Input resistance > 50 kOhm − Outputs, current Burden < 400 Ohm − Outputs, voltage Load > 10 kOhm Connection of the analogue inputs and outputs A 6-pole round connector with screw locking and contact arrangement according to DIN EN 60130-9 or IEC 130-9 is needed. A suitable coupling plug can be obtained under order no. EQS 057. 98 Interface modules YAUE0007 / 3/7/2013 Proline Kryomats View of the socket (front) or solder side of plug: Pin 1 Pin 2 Pin 3 Pin 4 Pin 5 Pin 6 Output 1 Output 2 0 V reference potential Input 1 +24 V (max. 0.1 A) Input 2 Use shielded lines. Connect shielding with connector housing! 8.5 Contact module 8.5.1 Contact module LRZ 915 with three inputs and three outputs Contact module Cat. no. LRZ 915) on 15 pole SUB-D socket. With three relay contact outputs (changeover, max. 30V/ 0.2A) and three binary inputs for control via external voltage-free contacts. The following functions are made available by the inputs: - Set fault with function: Master: F ALA or Command: Fault . - Set Stand by with function: F Stb or Stand by . - Control programmer (Input 1 activates programmer 1, input 2 activates programmer 2 etc. At the first “close” the programmer gets starting, “open” removes it in “pause”. The next “close” initiate “continue”) with function: F Pr6 or Programmer . - Control alternating mode (the switching state contact “open“ or “closed” allot to two different setpoint temperatures): F t2C or alternating mode . - Controller mode (the switching state input “open” or “closed” can allotted to two different control temperature sources. E. g. internal ↔ external control): F Con or type of control . The following functions are made available by the outputs: - Signal various fault states: F diA or fault diagnosis . - Signaling standby: F Stb or Standby . - Providing status of the window discriminators (inside ↔ outside): F WXi or temperature range . - Providing the programmer status: F Pr6 or Programmer . - Signaling refill of heat transfer liquid: F F1L or Refill . Contact module LRZ 915; SUB-D Output 1 2 3 Input 2 1 5V 12 YAUE0007 / 3/7/2013 4 5 6 13 14 15 7 8 1 3 5V 9 2 Interface modules 5V 10 3 11 99 Proline Kryomats Contact inputs and outputs − View of the socket from the plug side or of the plug on the solder side. − A suitable 15-pole Sub-D plug can be obtained together with a suitable housing: Order no. EQM 030 and plug housing order no. EQG 017. 8.5.2 Namur-Contact module LRZ 914 with only one input and one output Contact module (Cat. no. LRZ 914) with connector to NAMUR NE28. Functionality as LRZ 915, but only one output and one input on each of two DIN sockets. Contact module LRZ 914; DIN sockets 1 Output 1 Input 5V 2 1 3 1 2 Contact inputs and outputs: Output Input − View on flange plug (Front) or solder side coupler socket. − View on flange plug (Front) or solder side coupler socket. − Max. 30 V; 0.2 A. − Signal circa 5 V, 10 mA. Do not use pin 3! Coupler socket Catalogue number EQD 047. Coupling plug Catalogue number EQS 048. 1 = n.o. (make) 2 = common, 3 = n.c. (break) 100 − Use shielded lines. Connect shielding with connector housing. Cover unused plug connections with protecting caps! Interface modules YAUE0007 / 3/7/2013 Proline Kryomats 9 Maintenance 9.1 Device status The thermostat can be conveniently checked with the Command Console. 9.1.1 Interrogating the device type Settings Device status Device type 9.1.2 Software version Settings Device status Software version . The versions of the control system ( Control ), safety system ( Safety ), Command Console ( Command ), cooling system ( Cool ) and, where applicable, other connected modules are displayed. 9.1.3 Serial numbers Settings Device status Serial numbers . The serial number of the Master ( Master ), Command Console ( Command ), cooling system ( Cool ) and other connected modules are displayed. 9.1.4 Device data Command − T ext Pt T ext analog T ext serial T cont. head T heatsink Pump pow. Pump rpm Pumpe cur. Pump Menu 25.70 ---.----.-39.80 51.68 44.90 5460 1.68 Tint -8 Mains U(%)100.74 Mains frequ. 50 Level 4 Low voltage 27.90 5V supply 5.00 Fan voltage 7.0 Cur. cons. 2.84 End Tset Tfix Device data Settings Device status Device data Display − T ext shows various actual temperatures in °C from ext. Pt100 and the modules. − T cont. head and T heatsink are temperatures of electronics in the Master in °C. − Pump power in Watts, speed in rpm, current in ampere (A). − Tint indicates the current internal bath temperature in °C. − Mains voltage in percentage (%) of nominal and frequency in hertz (Hz). − Level indicates the liquid level in the internal bath. − Voltage of power transformer, 5V supply and fan voltage in Volt. − Cur. cons.: Mains current consumption in Ampere. YAUE0007 / 3/7/2013 Maintenance 101 Proline Kryomats 9.1.5 Fault memory (Command) For the analysis and localization of faults the Command version includes a fault memory in which up to 45 fault and alarm messages are saved. − Command No. Source Code Type Date 10 9 8 7 6 5 4 3 Safety Safety Contro. Contro. Contro. Contro. Contro. Contro. 2 4 32 3 9 3 4 5 Alarm Warn. Error Warn. Alarm Alarm Warn. Warn. Menu End Time ------------ ----------28.08.03 15:32:02 17.07.0310.:52:02 06.06.03 11:15:11 05.06.03 08:45:01 01.06.03 17:58:22 28.05.03 20:01:22 27.05.03 07:58:00 Low level Pump Tset 9.2 Cleaning 9.2.1 Cleaning the surface of the device Tfix Error store Settings Device status Error store Display . − The last message is at the top. − Each message line can be marked with the cursor keys. The message appears in plain text in the footer. − Under “Source”, the CAN node is displayed which signaled the fault. − Code is the number, which in the Master is shown in the display until the cause has been rectified. − Type: Alarm, Warning or Fault (Error). Withdraw the equipment mains plug before cleaning! Cleaning can be carried out with water to which a few drops of surfactant (washing-up liquid) have been added and using a damp cloth. No water must enter the control section! 102 Carry out appropriate decontamination if hazardous material is spilt on or in the equipment. The cleaning or decontamination method is determined by the user's specialist knowledge. In case of doubt, contact the manufacturer. Maintenance YAUE0007 / 3/7/2013 Proline Kryomats 9.2.2 Draining the water-cooled condenser Important: With the risk of frost (e.g. transport in winter), drain the condenser on water-cooled devices. Remove the water hose on the water tap. Than open the solenoid valve for the water as described below. Blow compressed air in the water return hose Continue until all water has flowed out of the device. Command Start unfill condenser − Open the device parameter menu via the Pump Level Ext.Pump Start unfill conden Pump Settings Graph Clock Programmer Interfaces Control Limits Pump 9.3 soft key Menu . − Change from Pump Start unfill conden. using . − Use to open the solenoid valve for the water. The display changes automatically to the overview window. Menu End Tset Tfix − To close the valve again selects this menu again. The item is called now End unfill conden. . Servicing, cleaning, repair and disposal information − Withdraw the mains plug before all service and repair work. − Only specialists must carry out repairs in the control section! 9.3.1 Servicing LAUDA Thermostats largely require no service. If the heat transfer liquid becomes contaminated, it should be replaced ( 6.2). − At the back of the Master head a main fuse switch is located which interrupts the mains connection when an overload occurs. It is then in the "O" position and can be set in the "–" position again. − If the fuse trips again, Service must locate the cause. − Additionally, a safety fuse, which protects the low voltages, is situated on the mains board. If a fuse fails ( mains lamp does not light) only replace with a fuse with the specified data (one x T (= slow-blow) 10 A, size 5 x 20 the Fuse is located in the unit as shown below). YAUE0007 / 3/7/2013 Maintenance 103 Proline Kryomats UL 533 9.3.2 Service intervals according to VDI 3033 System part Frequency Comment Each time of putting into operation and then Complete device External condition of the device Monthly Heat transfer liquid Analysis of the heat transfer liquid Half-yearly (and as required) ( 9.3.3) Daily External visual inspection Monthly External visual inspection Monthly ( 9.3.4) Over temperature protection Quarterly ( 7.12.1) Low level alarm/ warning Quarterly ( 7.12.2) Heat transfer system Sealing External hoses Material fatigue Cooling unit Condenser cleaning Electronics 9.3.3 Testing the heat transfer liquid If required, the heat transfer liquid should be checked for fitness for use (e.g. when changing the method of operation), or at least half-yearly. Further use of the heat transfer liquid is only permissible if the inspection indicates this. The test of the heat transfer liquid should takes place according to DIN 51529; Testing of mineral oils and related products - Testing and evaluation of used heat transfer fluids. Source: VDI 3033; DIN 51529. 104 Maintenance YAUE0007 / 3/7/2013 Proline Kryomats 9.3.4 Cleaning the condenser 9.3.4.1 Air-cooled condenser The SmartCool System refrigerating machine operates largely without servicing. So that the full cooling power is available, the heat exchanger (condenser) should cleaned of dust at intervals of one month or longer depending on the operating period and dust level in the ambient air. To do this, open the front grille, brush off the condenser and, where necessary, blow over with compressed air. Extreme contamination is detected by the Proline SelfCheck Assistant, which then issues a warning. 9.3.4.2 9.3.4.2.1 Water-cooled condenser Cleaning the dirt trap At regular intervals of one month or longer, the dirt trap must be cleaned, depending on the degree of soiling. Take off the water feed hose on the device and remove the filter. Clean the filter and insert it again into the cooling water feed. YAUE0007 / 3/7/2013 Maintenance 105 Proline Kryomats 9.3.4.2.2 Decalcifying the water cooling circuit At regular intervals of 3 months or longer, the water-cooled condenser must be decalcified or cleaned. This depends on the hardness of the cooling water and the degree of soiling. Drain according to ( 9.2.2). Required equipment: − Two containers of approx. 10 to 20 liters volume. − Use a suitable pump (drum pump) or a hose with funnel. Place the funnel as high as possible so that the device can fill quickly. − Fit connecting hoses between container, pump, cooling water inlet and between cooling water outlet and back to container. Standard & Alternative 9.3.5 Change containers when top one is empty. Acting time: Continue the pump stage until most of the foamy reaction, usually at the start, has decayed. Generally, this is achieved after about 15 to 30 minutes. Decalcifier: Water with LAUDA Decalcifier LZB 126. It is essential to follow the safety instructions when handling the chemicals. Flushing: Allow at least 30 liters of water to flow through. Repair information If you need to send in a unit for repair, it is essential to first contact the LAUDA Service Constant Temperature Equipment 9.3.7. 106 − When sending in the unit, ensure that it is carefully and properly packed. LAUDA cannot be held liable for any damage caused by improper packing. Maintenance YAUE0007 / 3/7/2013 Proline Kryomats 9.3.6 Remedying faults Before you contact the LAUDA Service Temperature Equipment ( 9.4), check whether the problem can be remedied with the following instructions: Fault Possible remedy Device does not cool or only very slowly. 1. The module "Smart Cool" is set to "off" Switch on "Smart Cool" module 8.2. 2. Dirty condenser Clean condenser 9.3.4. 3. Temperature limit Til too high Reduce temperature limit Til 7.6.2. Device does not heat up or only very slowly. Temperature limit Tih too low Increase temperature limit Tih 7.6.2.. The compressors are running although there is no necessity of cooling. Regular device function (protectiv function). Master: Alarm message tEMNP Command: Overtemperature protection. Wait until the outflow temperature has cooled below the overtemperature cut-off point or set the cut-off point higher than the outflow temperature. 7.12.1. Master: Warning message 1. Check hoses, connections and load for whether a leaky location is present. As applicable, rectify the leakage and top up the missing heat carrier liquid 6.2 and 6.3. WXArn 104 Command: Level very low (Imminent low level in the bath vessel). Master: Alarm message 2. Check the Proline Kryomat for whether a leaky location is present. If necessary, contact LAUDA Service Constant Temperature Equipment 9.4. LEUEL Command: Low level. 3. The liquid may drop due to cooling or degassing. If necessary, top up the missing heat transfer liquid 6.2 and 6.3. (Low level in the bath vessel) 7.12.2. Master: Warning message 1. Volume expansion of the heat transfer liquid during heating up. WXArn 103 2. Moisture absorption in the heat transfer liquid. Command: Level too high (Imminent excessive level in the bath vessel). Master: Alarm message AL 6 Command: Level too high (Excessive level in the expansion vessel) 7.12.4. Command: Pump blocked 1. The viscosity of the heat teransfer liquid is too high change heat carrier liquid or raise the setpoint temperature. (Pump motor monitoring: Overload, blockage). 2. The pump is blocked. Contact the LAUDA Service Constant Temperature Equipment 9.4. Master: Alarm message bl0C 7.12.5. Master: Alarm message YAUE0007 / 3/7/2013 PulEU 1. No liquid in the system. If this occurs, the level Maintenance 107 Proline Kryomats monitoring has failed. Check whether the float in the expansion vessel is blocked by foreign bodies. Otherwise, contact LAUDA Service Constant Temperature Equipment 9.4. Command: Low level (pump) (Pump motor monitoring: No load). 7.12.6. 2. With the option "open load" the device draws air out of the open load. Move the return to the load. Master: Alarm message Error 11 Command: Overpressure Pump level too high Select a lower pump level 7.5.3. (outflow pressure too high). 9.4 Compressor overtemperature 7.12.7 Three-phase current 7.12.8 Disposal information The following applies to Europe: Disposal of the device may only be carried out by qualified specialists according to EC Directive 303/2008/EC in conjunction with 842/2006/EC. The disposal is regulated by EC Directive 2002/96/EC. 9.4.1 Disposal of the refrigerant The refrigeration circuit is filled with CFC-free HFC refrigerant. The type and filling quantity can be read on the unit or on the rating plate. Repair and disposal only through a qualified refrigeration engineer! Global Warming Potentials GWP Refrigerant GWP(100a)* R-404A / HFC-404A 3922 R-508A / HFC-508A 13240 * Global Warming Potential (GWP) time horizon 100 years - according to IPCC IV (2007). Comparisons CO2 = 1.0. The following applies to Europe: The disposal of the coolant must be carried out according to EC Directive 303/2008/EC in conjunction with 842/2006/EC. 9.4.2 Disposal of the packaging The following applies to Europe: The disposal of the packaging must be carried out according to the EC Directive 94/62/EC. 108 Maintenance YAUE0007 / 3/7/2013 Proline Kryomats 9.5 Help desk and ordering replacement parts When ordering spares please quote instrument type and serial number from the nameplate l. This avoids queries and supply of incorrect items. Nameplate The serial number is combined like following, for example LUK248-13-0001 LUK 248 13 0001 = = = catalogue number, manufacturing year 2013, continuous numbering. Your contact for service and support: Service Constant Temperature Equipment Telephone: 0049 9343/ 503-236 (English and German) Fax: 0049 9343/ 503-283 E-mail [email protected] We are available any time for your queries, suggestions and criticism. LAUDA DR. R. WOBSER GMBH & CO. KG P.O. Box 1251 97912 Lauda-Koenigshofen Germany Telephone: 0049 9343/ 503-0 Fax: 0049 9343/ 503-222 E-mail [email protected] Internet http://www.lauda.de YAUE0007 / 3/7/2013 Maintenance 109 Proline Kryomats 10 Accessories Description Application LAUDA Catalogue number: LAUDA Wintherm Plus PC Program Control of the thermostat, online display of all values as a graph with free choice of time frame. Incl. RS 232 cable (2m) LDSM2002 RS232/ 485 Interface modules Digital Communication, operation of the LAUDA PC software Wintherm Plus 8.3 LRZ 913 RS 232 Cable (2m) Thermostat-PC Sub-D (9 pin. 9 pin) EKS 037 RS 232 Cable (5m) Thermostat-PC Sub-D (9 pin. 9 pin) EKS 057 Analogue module Current and voltage interface 8.4 LRZ 912 Relays module with 3 input and 3 output channels Import and export of thermostat signals 8.5.1 LRZ 915 Relays module with 1 input and 1 output channel NAMUR NE28 functionality 8.5.2 T-piece adapter cable for the LAUDA internal bus (LiBus) . For the connection of further LiBus components (with heating thermostats two LiBus connections are not occupied and one with cooling thermostats) Extension for LiBus 5m For LiBus components, but especially for remote operation with the command console. Extension for LiBus 25m LRZ 914 EKS 073 EKS 068 EKS 069 Automatic refill device with LiBus control. Evaporating heat transfer liquid is automatically topped up. LCZ 9661 Shut-off unit with LiBus control. Prevents the return of cooling liquid into the bath from external containers located above the bath. LCZ 9673 Level controller without reverse-flow protection, mechanical function. Keeps the liquid level in an open external bath at a constant level. Raising platforms, application frames etc. We will inform you about other accessories on request 9.3.7. Also, refer to our special and accessory broachers. LCZ 0660 LiBus = LAUDA internal BUS (based on CAN). 110 Accessories YAUE0007 / 3/7/2013 Proline Kryomats 11 Technical data and diagrams The figures have been determined according to DIN 12876. RP 3050 C Table 1 RP 3050 CW RP 4050 C Operating temp.- ACC range °C -50...200 Ambient temp. range °C 5...40 Relative humidity maximum relative humidity 80 % for temperatures up to 31 °C, decreasing linearly to 50 % relative humidity at 40 °C Device distance to the surroundings 50 Temperature range for storage °C Setting resolution °C Display resolution °C Display accuracy 20 50 20 -20…44 the condenser must be completely emptied by a water-cooled device ( 9.2.2) 0.1 / 0.01 (Master); Master: 0.01 0.01 (Command) Command: 0,1 / 0,01 / 0,001 ±0.2 °C can be calibrated additively ( Section 1.2 last Point) Temperature stability @ -10 °C with ethanol Safety equipment ±K 0.05 Class III, FL suitable for flammable and non-flammable liquids Cooling Air Maximum cooling water consumption: temperature 15 °C, pressure 3 bar Water L/h Water-cooling connections (DIN EN 10226-1) Air Water 700 700 G ¾” G ¾” Heater power 400 V kW maximum 3.5 Heater power 208 V kW maximum 3.0 Heater power 200 V kW maximum 2.8 Refrigerant Cooling power at 20 °C tamb @ bath temp. (Pump Level 6) RP 4050 CW R404A with heat transfer oil 200 °C kW 5.0 6.0 5.0 6.0 with ethanol 20 °C kW 5.0 6.0 5.0 6.0 0 °C kW 3.0 3.5 3.0 3.5 -20 °C kW 1.6 1.8 1.6 1.8 -30 °C kW 1.0 1.1 1.0 1.1 -40 °C kW 0.5 0.6 0.5 0.6 -50 °C kW 0.25 0.25 0.25 0.25 Pump type Pressure pump, 4 power levels (level 5 to 8) Discharge pressure max. bar 0.5 at pump power level 8 Flow rate max. (pressure) L/min 19 at pump power level 8 Hose connections Bath volume from...to YAUE0007 / 3/7/2013 Thread M 16 x 1; olives 13 mm external diameter L 23...31 Technical data 32...44 111 Proline Kryomats Table 1 RP 3050 C RP 3050 CW RP 4050 C Bath opening B x L mm 350 x 200 Bath depth / usable depth mm 250 / 230 Height to top of bath mm 905 Overall dims. B x L mm 600 x 700 Overall dim. H mm 1160 Weight kg 130 Power consumption 400 V kW 5.0 Power consumption 208 V kW 5.0 Power consumption 200 V kW 5.0 Ingress protection rating IP Code accord. to IEC 60529 Protection class EC Directives 350 x 350 IP 2 1 Protection class 1 according to DIN EN 61140 VDE 0140-1 The units are conformable to directives of the European Parliament and of the council: 2004/108/EC electromagnetic compatibility and 2006/95/EC electrical equipment designed for use within certain voltage limits. The units carry the CE mark. Class to EMC-standard DIN EN 61326-1 VDE 0843-201:2006-10 notice only valid for EUcountries) Class B ( 1.1) for Canada and the USA Class A ( 1.1) 112 RP 4050 CW Technical data YAUE0007 / 3/7/2013 Proline Kryomats RP 3090 C Table 2 RP 3090 CW RP 4090 C Operating temp.- ACC range °C -90...200 Ambient temp. range °C 5...40 Relative humidity maximum relative humidity 80 % for temperatures up to 31 °C, decreasing linearly to 50 % relative humidity at 40 °C Device distance to the surroundings 50 Temperature range for storage °C Setting resolution °C Display resolution °C Display accuracy 20 50 20 -20…44 the condenser must be completely emptied by a water-cooled device ( 9.2.2) 0.1 / 0.01 (Master); Master: 0.01 0.01 (Command) Command: 0,1 / 0,01 / 0,001 ±0.2 °C can be calibrated additively ( Section 1.2 last Point) Temperature stability @ -10 °C with ethanol Safety equipment ±K 0.05 Class III, FL suitable for flammable and non-flammable liquids Cooling Air Maximum cooling water consumption: temperature 15 °C, pressure 3 bar Water L/h Water-cooling connections (DIN EN 10226-1) Air Water 700 700 G ¾” G ¾” Heater power 400 V kW maximum 3.5 Heater power 208 V kW maximum 3.0 Heater power 200 V kW maximum 2.8 Refrigerant Cooling power at 20 °C tamb @ bath temp. (Pump Level 6) RP 4090 CW R404A and R508A with heat transfer oil 200 °C kW 3.0 4.0 3.0 4.0 with ethanol 20 °C kW 3.0 4.0 3.0 4.0 0 °C kW 2.9 3.7 2.9 3.7 -20 °C kW 2.5 3.1 2.5 3.1 -30 °C kW 2.3 2.7 2.3 2.7 -40 °C kW 2.0 2.3 2.0 2.3 -50 °C kW 1.6 1.8 1.6 1.8 -60 °C kW 1.3 1.4 1.3 1.4 -70 °C kW 0.8 0.9 0.8 0.9 -80 °C kW 0.5 0.5 0.5 0.5 -90 °C kW 0.15 0.15 0.15 0.15 Pump type Pressure pump, 4 power levels (level 5 to 8) Discharge pressure max. bar 0.5 at pump power level 8 Flow rate max. (pressure) L/min 19 at pump power level 8 YAUE0007 / 3/7/2013 Technical data 113 Proline Kryomats Table 2 RP 3090 C Hose connections Bath volume from...to RP 3090 CW RP 4090 C RP 4090 CW Thread M16 x 1; olives 13 mm external diameter L 23...31 32...44 Bath opening B x L mm 350 x 200 350 x 350 Bath depth / usable depth mm 250 / 230 Height to top of bath mm 905 Overall dims. B x L mm 600 x 700 Overall dim. H mm 1160 Weight kg 155 Power consumption 400 V kW 5.0 Power consumption 208 V kW 5.0 Power consumption 200 V kW 5.0 Ingress protection rating IP Code accord. to IEC 60529 Protection class EC Directives IP 2 1 Protection class 1 according to DIN EN 61140 VDE 0140-1 The units are conformable to directives of the European Parliament and of the council: 2004/108/EC electromagnetic compatibility and 2006/95/EC electrical equipment designed for use within certain voltage limits. The units carry the CE mark. Class to EMC-standard DIN EN 61326-1 VDE 0843-201:2006-10 notice only valid for EUcountries) Class B ( 1.1) for Canada and the USA Class A ( 1.1) 114 Technical data YAUE0007 / 3/7/2013 Proline Kryomats Catalogue numbers and mains connection data Proline Kryomats air-cooled Catalogue number RP 3050 C RP 4050 C RP 3090 C RP 4090 C 400 V; 3/N/PE~50 Hz LUK 239 LUK 241 LUK 245 LUK 247 208 V; 3/PE~60 Hz --- --- LUK 345 LUK 347 200 V; 3/PE~50/60 Hz --- LUK 441 LUK 445 LUK 447 RP 3050 CW RP 4050 CW RP 3090 CW RP 4090 CW 400 V; 3/N/PE~50 Hz LUK 240 LUK 242 LUK 246 LUK 248 208 V; 3/PE~60 Hz --- --- LUK 346 LUK 348 200 V; 3/PE~50/60 Hz --- --- --- --- Mains connection data Proline Kryomats water-cooled Catalogue number Mains connection data Technical modifications reserved. YAUE0007 / 3/7/2013 Technical data 115 Proline Kryomats Pump characteristics measured with water internal pump PL 4 Pressure bar Flow Rate L/mm optional external pump EMP 081; Catalogue number: LWZ 086 Pressure bar Flow Rate L/mm 116 Technical data YAUE0007 / 3/7/2013 Proline Kryomats optional external pump EMP 174; Catalogue number: LWZ 080 Pressure bar Flow Rate L/mm Cooling curves YAUE0007 / 3/7/2013 Technical data 117 Proline Kryomats Cooling curves; Bath closed; Heat transfer liquid: Ethanol; Time in minutes; Temperature in °C. Influence of ambient temperature at air-cooled Kryomats 118 Technical data YAUE0007 / 3/7/2013 Proline Kryomats 12 Index A Accessories ..............................110 Acoustic signals ...........................57 Activate standby...........................46 Activating external control ............48 Alarms ..........................................81 alternating mode ..........................99 Analog module .............................19 Analogue module .........................98 Auto start .....................................53 B Basic window .....................................39 Bath liquid Viscosity ...................................18 Bath temperature display .............35 bL0C Pump blocked......................85 Brightness ....................................38 Bypass valve ................................17 C Calibration, temperature probe.....57 Changing window.........................40 Cleaning the condenser .............105 Cleaning the surface ..................102 Clock ...................................... 51, 73 Compressor..................................20 Con control ..................................48 Condenser....................................20 Connection, pump ........................17 Contact module ................ 19, 20, 99 Contrast........................................38 Control parameter set ..................77 Control parameters ......................75 Control Variable ...........................49 Cooling capacity...........................27 Cooling water quality....................31 Cooling water specification..... 29, 31 Correction limitation ............... 75, 76 Create a program .........................66 Current consumption ....................50 Current Consumption ...................50 Cursor keys ..................................38 D Decalcifying................................106 Decimal-point key.........................38 Delete...........................................67 YAUE0007 / 3/7/2013 Device data................................ 101 Device status ............................. 101 Dewing......................................... 20 Dirt trap ...................................... 105 Display data ................................. 40 Display resolution......................... 52 Disposal ....................................... 28 Disposal information .................. 108 Draining ....................................... 28 Duo key, Command ..................... 38 E EA analog module control source .......................... 49 Edit .............................................. 66 EMC standard EN 61326-1 Enter key Command ................................ 38 Master ...................................... 37 EP external probe control source .......................... 49 Error list ....................................... 81 error store .................................. 102 Errors ........................................... 81 ES serial module control source .......................... 49 Escape key .................................. 38 EXT external temperature probe.. 46 External temperature ................... 45 F Fault list "Alarms and Warnings".. 87 Filling ........................................... 28 Flammable liquids ........................ 28 Format of date ............................. 51 Free space ................................... 27 G Graph..................................... 60, 70 Graph recorder............................. 60 Graphical display ......................... 60 Graphical measurement display... 39 H Hazard sources.............................. 7 Hazards ......................................... 7 Heat transfer liquid Selection .................................. 30 Setpoint.................................... 43 testing .................................... 104 Index Heat transfer oils ......................... 28 Heater rating................................ 20 High-level settings ....................... 83 High-level warning/ alarm ............ 84 Hoses .......................................... 32 I Info............................................... 71 Instructed specialist personnel ...... 7 Interface modules ........................ 19 Internal probe control source ....... 49 Interrogating device type ........... 101 K Key for arithmetic sign ................. 38 Key functions ............................... 37 L LABVIEW..................................... 95 Language .................................... 35 LED signals ................................. 37 LEUEL Low-level alarm................. 83 Liquid level................................... 28 Liquids, flammable....................... 28 Load At higher position ..................... 33 External ................................... 45 Locking the keyboard................... 41 Locking, keyboard ....................... 41 Loops........................................... 70 Low-level alarm ........................... 82 M Main fuse switch .......................... 34 Mains connection......................... 34 Maintenance .............................. 101 Modules install ....................................... 96 Modules ....................................... 19 N Nameplate ........................... 34, 109 O Offset source ............................... 55 Offset, temperature probe............ 57 Out 1 (Program)........................... 69 Nozzles........................................ 17 Overtemperature cut-off............... 82 119 Proline Kryomats Overtemperature protection ..........81 P Pause program .............................65 Power level, pump ........................18 Profibus Modules ..........................20 Program sequence .......................70 Programmer ...........................62, 64 Pu pump power levels...................46 Pump ............................................17 Connector .................................17 Low level ..................................86 Program setting ........................69 Unused connectors...................33 Pump Level ..................................47 Pump-motor supervision Dry running ...............................85 Overload ...................................85 R Ramp ............................................62 Ramp function ..............................72 Refrigerant ..................................108 Refrigerating machine ..................20 Refrigerating unit ..........................20 Remedying faults .....................107 Repair information ......................106 RS 232/ RS 485 Interface.............90 RS232 / 485 Interface module ......19 S SAFE keyboard locking ..................41 Safety functions ............................81 Safety information ..........................7 Safety notes ...................................3 Safety system ...............................18 120 Screen displays ............................ 38 Screen Graph recorder ................ 60 Sealing caps................................. 27 Segment ....................................... 62 Segment "Start" ............................ 63 Segment time ............................... 68 Select program ............................. 64 Self Adaption ................................ 79 SelfCheck Assistant ............... 18, 81 Self-test ........................................ 35 Serial interfaces RS232/ 485........ 98 Serial number ............................. 109 Serial numbers ........................... 101 Service contact........................... 109 Service intervals ......................... 104 Servicing .................................... 103 Set date ....................................... 51 SEt setpoint setting ...................... 43 Set time ........................................ 51 Setpoint offset .............................. 55 Setting of numerical values .......... 37 Setting pump power ..................... 46 Signs in this manual ....................... 6 SmartCool technology .................. 20 Socket 10S ................................... 45 Soft keys ...................................... 38 Software version ........................ 101 Sounds......................................... 57 Spare parts................................. 109 Standard window.......................... 39 Standby ........................................ 36 Standby activation ........................ 38 Starting up .................................... 34 Status..................................... 64, 65 Super window............................... 39 Switching off ................................. 36 Index T T end °C ....................................... 67 Technical data............................ 111 tEMNP Overtemperature alarm ..... 82 Temperature ................................ 52 display resolution ..................... 52 External probe.......................... 45 Gradient ................................... 45 Limits ....................................... 54 Setpoint setting ........................ 43 Temperature Limits ...................... 54 Text external temperature .............. 46 Tfix Default setpoint temp. ........... 44 Time ............................................. 68 Timer ........................................... 73 Timer function .............................. 73 Tolerance (Program) .................... 68 Tolerance range ........................... 63 Tset Setpoint temperature setting . 44 Tv manual/auto ............................ 76 Type designation.......................... 17 Type of start mode ....................... 53 U Unlocking ..................................... 41 V VarioFlex pump ............................ 17 Version of the software .............. 101 W Warnings ...................................... 81 Weekplan .................................... 73 Works settings ............................. 56 WXArn Warning ............................ 84 WXArn103 High-level warning ....... 84 YAUE0007 / 3/7/2013 BESTÄTIGUNG / CONFIRMATION / CONFIRMATION An / To / A: LAUDA Dr. R. Wobser • LAUDA Service Center • Fax: +49 (0) 9343 - 503-222 Von / From / De : Firma / Company / Entreprise: Straße / Street / Rue: Ort / City / Ville: Tel.: Fax: Betreiber / Responsible person / Personne responsable: Hiermit bestätigen wir, daß nachfolgend aufgeführtes LAUDA-Gerät (Daten vom Typenschild): We herewith confirm that the following LAUDA-equipment (see label): Par la présente nous confirmons que l’appareil LAUDA (voir plaque signalétique): Typ / Type / Type : Serien-Nr. / Serial no. / No. de série: mit folgendem Medium betrieben wurde was used with the below mentioned media a été utilisé avec le liquide suivant Darüber hinaus bestätigen wir, daß das oben aufgeführte Gerät sorgfältig gereinigt wurde, die Anschlüsse verschlossen sind, und sich weder giftige, aggressive, radioaktive noch andere gefährliche Medien in dem Gerät befinden. Additionally we confirm that the above mentioned equipment has been cleaned, that all connectors are closed and that there are no poisonous, aggressive, radioactive or other dangerous media inside the equipment. D’autre part, nous confirmons que l’appareil mentionné ci-dessus a été nettoyé correctement, que les tubulures sont fermées et qu’il n’y a aucun produit toxique, agressif, radioactif ou autre produit nocif ou dangeureux dans la cuve. Stempel Datum Betreiber Seal / Cachet. Date / Date Responsible person / Personne responsable Formblatt / Form / Formulaire: Erstellt / published / établi: Änd.-Stand / config-level / Version: Datum / date: UNBEDENK.DOC Unbedenk.doc LSC 0.1 30.10.1998 LAUDA DR. R. WOBSER GmbH & Co. KG Pfarrstraße 41/43 Tel: D - 97922 Lauda-Königshofen Fax: Internet: http://www.lauda.de E-mail: +49 (0)9343 / 503-0 +49 (0)9343 / 503-222 [email protected]