1
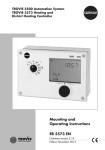
Automation System TROVIS 5500
Programmable Logic Controller (PLC)
TROVIS 5571
Mounting and
Operating Instructions
EB 5571 EN
®
Electronics from SAMSON
Firmware version 1.24
Edition January 2012
Safety instructions
Safety instructions
4 The device may only be assembled, started up or operated by trained and
experienced personnel familiar with the product. Proper shipping and
appropriate storage are assumed.
4 The device has been designed for use in electrical power systems. For wiring
and maintenance, you are required to observe the relevant safety
regulations.
Modifications of the PLC firmware compared to the previous version
1.10 (old)
1.11 (new)
New default setting for parameter Gateway = Off
Expansion of the data logging function (see section 5.5)
1.11 (old)
1.21 and lower (new)
Internal modifications
2
EB 5571 EN
Contents
Contents
Page
1
1.1
1.1.1
1.2
1.2.1
1.3
1.4
Operation . . . . . . . . . . . .
Operating elements . . . . . . . .
Operating keys . . . . . . . . . .
Display . . . . . . . . . . . . . .
Adjusting the contrast of the display
Displaying data . . . . . . . . . .
Setting the system time . . . . . .
2
2.1
2.2
2.3
2.4
Start-up . . . . . . . . . .
Programming . . . . . . .
Changing PLC settings . . .
Configuring universal inputs
Resetting to default values .
3
Manual operation . . . . . . . . . . . . . . . . . . . . . . . . . . . 16
4
Operational faults . . . . . . . . . . . . . . . . . . . . . . . . . . . 17
5
5.1
5.2
5.3
5.4
5.4.1
5.5
5.5.1
5.5.2
Communication . . . . . . . . . . . . . . . . . . . .
Modbus slave interface . . . . . . . . . . . . . . . .
Modbus master interface . . . . . . . . . . . . . . . .
Description of communication parameters to be adjusted
Meter bus interface . . . . . . . . . . . . . . . . . .
Activating the meter bus . . . . . . . . . . . . . . . .
Data logging module . . . . . . . . . . . . . . . . .
Data logging . . . . . . . . . . . . . . . . . . . . .
Saving and loading firmware and applications . . . . .
6
Installation . . . . . . . . . . . . . . . . . . . . . . . . . . . . . . 27
7
Electrical connection . . . . . . . . . . . . . . . . . . . . . . . . . . 29
8
8.1
8.2
8.3
8.4
8.4.1
8.4.2
8.4.3
8.5
8.6
Appendix . . . . . . . . . . . . . .
Settings level . . . . . . . . . . . .
Technical data. . . . . . . . . . . .
Special key codes . . . . . . . . . .
Modbus I/O modules . . . . . . . .
Technical data. . . . . . . . . . . .
Terminal assignment . . . . . . . . .
Integrating the Modbus I/O modules .
Sensor resistance tables . . . . . . .
Customer data. . . . . . . . . . . .
.
.
.
.
.
.
.
.
.
.
.
.
.
.
.
.
.
.
.
.
.
.
.
.
.
.
.
.
.
.
.
.
.
.
.
.
.
.
.
.
.
.
.
.
.
.
.
.
.
.
.
.
.
.
.
.
.
.
.
.
.
.
.
.
.
.
.
.
.
.
.
.
.
.
.
.
.
.
.
.
.
.
.
.
.
.
.
.
.
.
.
.
.
.
.
.
.
.
.
.
.
.
.
.
.
.
.
.
.
.
.
.
.
.
.
.
.
.
.
.
.
.
.
.
.
.
.
.
.
.
.
.
.
.
.
.
.
.
.
.
.
.
.
.
.
.
.
.
.
.
.
.
.
.
.
.
.
.
.
.
.
.
.
.
.
.
.
.
.
.
.
.
.
.
.
.
.
.
.
.
.
.
.
.
.
.
.
.
.
.
.
.
.
.
.
.
.
.
.
.
.
.
.
.
.
.
.
.
.
.
.
.
.
.
.
.
.
.
.
.
.
.
.
.
.
.
.
.
.
.
.
.
.
.
.
.
.
.
.
.
.
.
.
.
.
.
.
.
.
.
.
.
.
.
.
.
.
.
.
.
.
.
.
.
.
.
.
.
.
.
.
.
.
.
.
.
.
.
.
.
.
.
.
.
.
.
.
.
.
.
.
.
.
.
.
.
.
.
.
.
.
.
.
.
.
.
.
.
.
.
.
.
.
.
.
.
.
.
.
.
.
.
.
.
.
.
.
.
.
.
.
.
.
.
.
.
.
.
.
.
.
.
.
.
.
.
.
.
.
.
.
.
.
.
.
.
.
.
.
.
.
.
.
.
.
.
.
.
.
.
.
.
.
.
.
.
.
.
.
.
.
.
.
.
.
.
.
.
.
.
.
.
.
.
.
.
.
.
.
.
.
.
.
.
.
.
.
.
.
.
.
.
.
.
.
.
.
.
.
.
.
.
.
.
.
.
.
.
.
.
.
.
.
.
.
.
.
.
.
.
.
.
.
.
.
.
.
.
.
.
.
.
.
.
.
.
.
.
.
.
.
.
.
.
.
.
.
.
EB 5571 EN
.
.
.
.
.
.
.
.
.
.
.
.
.
.
.
.
.
4
4
4
5
6
7
8
10
10
11
13
15
18
18
20
21
23
23
25
25
26
32
32
34
35
35
35
36
37
38
39
3
Operation
1
Operation
The programmable logic controller (PLC) is freely programmable. The controller is delivered
without an executable application in the memory. The application must be developed separately for the desired purpose on a personal computer using ISaGRAF® (programming as in
IEC 61131-1) and then transferred to the controller.
On start-up, after transferring the generated application, the current time and date must be set
in the controller (–> section 1.4).
1.1
Operating elements
1.1.1 Operating keys
The keys are located in the front panel of the PLC and protected by a Plexiglas door.
Changeover key
(press with pen or other pointed item)
Switch between levels (after entering the key code)
Reset key
(press with pen or other pointed item)
Reset freely accessible parameters and function blocks to their default values
(factory settings)
Cursor key(s)
Pressing both keys together:
– Switch to information level
Pressing one of the keys separately:
– Navigate in levels (also in the application developed with ISaGRAF®)
– Set data points
Enter key
– Open levels (also in the application developed with ISaGRAF®)
– Activate editing mode for parameters and function blocks
– Confirm entered settings
4
EB 5571 EN
Operation
1.2
Display
The programmable logic controller has a plain text display.
The display is automatically illuminated when entering or setting the controller.
After connecting the controller to the power supply, “System is being initialized…“ appears
briefly on the display.
Should the display not be illuminated or the contrast is too strong/weak, you can adapt the display illumination. Refer to section 1.2.1.
28.11.2005
Application:
Version:
Date:
CRC:
Size:
Cycle time:
10:00:05 V1.1xx
…
…
…
…
… kB
… ms
If an application is not saved on the PLC, the normal display
(left) contains the date, time and current firmware version.
If an application is saved on the PLC, the normal display
contains application-related information.
The current status of the three communication interfaces “RS-232/Slave“, “RS-485/Master“
and “RS-232/Prog“ appears at the bottom of the display:
RS-232/Slave (left)
RS-485/Master (middle)
Interface inactive
Direct connection
to control station
active
GLT
Modem inactive
blinking
))
)
GLT
blinking
GLT
RS-232/Prog (right)
Interface inactive
BUS
Modbus master
active
Interface inactive
ISA
Connection to
ISaGRAF® Workbench active
Data logging
active
Modem initialization active
RING,
calling active
Connection established/canceled
Connection to control station active
Error
SMS
SMS sending
active
EB 5571 EN
5
Operation
Note: If no key is pressed for two minutes, the PLC returns to the normal display. The background illumination of the display is switched off automatically.
Any settings that have not been confirmed are not saved and must be re-entered.
1.2.1 Adjusting the contrast of the display
Entering the key code
0000
Activate the editing mode.
Display: Entering the key code
0000 blinks
Confirm the 0000 reading.
Set the contrast.
Confirm the changed setting.
Display: Normal display (depending on the
application)
6
EB 5571 EN
Operation
1.3
Displaying data
The states of the inputs and outputs as well as information on the connected meter bus instruments can be retrieved in the information level. In addition, the analog and binary outputs can
be changed (refer to section 3 on manual operation).
The information level is divided into individual menu items:
Analog inputs · Measured data from connected sensors
Analog outputs · Output data from four analog outputs *)
Binary inputs · States of the binary sensors (on/off)
Binary outputs · States of the binary outputs (on/off) *)
Meter bus · Output data of the meters connected over meter bus
4
4
4
4
4
*) The analog and binary output settings can be changed after entering the key code.
Proceed as follows:
Information level
Analog inputs
Analog outputs
Binary inputs
Binary outputs
Meter bus
System info
Back
Binary outputs
BA07=OFF
BA08=OFF
BA09=OFF
BA10=OFF
BA11=OFF
BA12=OFF
Switch to the information level.
Display: Information level
The menu item “Analog inputs“ is highlighted.
Select required menu item, e.g. binary outputs.
Activate the menu item.
Select required data point.
Returning to the information level
Select Back to return to the information level.
Exit the menu item.
Display: Information level
Back
Information level
Analog inputs
Analog outputs
Binary inputs
Binary outputs
Meter bus
System info
Exiting the information level
Select Back.
Exit the information level.
Display: Normal display (depending on the
application)
Back
Note: If no key is pressed for two minutes, the PLC automatically returns to the normal display.
EB 5571 EN
7
Operation
1.4
Setting the system time
The current time and date need to be set immediately after start-up and after a power failure
lasting more than 24 hours.
Set the system time in the settings level under the menu item “Date / time”. The Automatic summer time function can also be activated or deactivated in this menu item.
4 System time: Time-dependent functions of the saved application are based on the system
time set in the PLC.
4 Automatic summer time: The summer time is automatically set on the last Sunday in
March at 02:00 h and the winter time on the last Sunday in October at 03:00 h.
Proceed as follows:
Entering the key code
0000
Activate the editing mode.
Display: Entering the key code
0000 blinks
Enter the key code.
Settings level
Date / time
RS-232/Slave
RS-485/Master
RS-232/Prog
Meter bus
Universal input type
Confirm the key code entered.
Display: Settings level
The “Date / time“ menu item is highlighted.
Back
Settings level
28.11.2005 10:00
RS-232/Slave
RS-485/Master
RS-232/Prog
Meter bus
Universal input type
Back
8
EB 5571 EN
Activate the menu item “Date / time“.
Display: System time (DD.MM.YYYY HH:MM)
Activate the editing mode for the system time.
Display: Date (DD) blinks.
Enter date.
Confirm date entered.
Display: Month (MM) blinks.
Operation
Enter month.
Confirm month entered.
Display: Year (YYYY) blinks.
Enter year.
Confirm year entered.
Display: Time (HH) blinks.
Enter hour.
Confirm hour entered.
Display: Minutes (MM) blink.
Enter minutes.
Settings level
Automatic summer time? On
RS-232/Slave
RS-485/Master
RS-232/Prog
Meter bus
Universal input type
Back
Settings level
28.11.2005 10:00
RS-232/Slave
RS-485/Master
RS-232/Prog
Meter bus
Universal input type
Confirm minutes entered.
Display: “Automatic summer time? __“ blinks
If required, change the current setting (on/off) of the
Automatic summer time function.
Activate function: Automatic summer time? On
Deactivate function: Automatic summer time? Off
Exit the menu item “Date / time“.
Display: Settings level
Back
Settings level
Date / time
RS-232/Slave
RS-485/Master
RS-232/Prog
Meter bus
Universal input type
Back
Exiting the settings level
Select Back.
Exit the settings level.
Display: Normal display (depending on the
application)
Note: If no key is pressed for two minutes, the PLC automatically returns to the normal display.
EB 5571 EN
9
Start-up
2
Start-up
2.1
Programming
Programming the PLC requires a PC with ISaGRAF® software.
The ISaGRAF® software enables you to program a control system that is tailored to the specific
needs of your plant (ISaGRAF® development environment 1400-7621). Programming must follow the structures and rules stipulated in IEC 61131-3. The PLC may be programmed with the
languages defined in the standard: Sequential Function Chart (SFC), Instruction List (IL), Flow
Chart (FC), Function Block Diagram (FBD), Ladder Diagram (LD), and Structured Text (ST).
There are 128 KB of memory available in the PLC for the ISaGRAF® application.
The application is complied to machine code in the PC environment. This code is then transferred to the PLC over the front RJ-45 jack (connecting cable 1400-7620).
Programming languages:
Sequential Function Chart
(SFC):
Used to describe operations of a sequential process with a simple graphic representation
Instruction List (IL):
Low-level textual language for logic and arithmetic operations
Flow Chart (FC):
High-level language used to visualize the data flow
Function Block Diagram
(FBD):
Graphics-based language for building and combining complex functions
(logical, arithmetic)
Ladder Diagram (LD):
Simple graphics-based language for logical operations (boolean)
Structured Text (ST):
High level language similar to PASCAL and C especially designed for
control applications
For operation and application of the ISaGRAF® environment, refer to the documentation included in the software package. To enable simple and clear programming, ready-made functions and function blocks, e.g. for boiler systems, heat exchanger sequence control, ventilation
systems, heating circuits or domestic hot water systems, are available from SAMSON.
Parameters*
WE
Settings level / Range of values
Station address
255
RS-232/Prog / 1 to 247, 255
Baud rate
9600
RS-232/Prog / 9600, 19200
* –> Section 5.3 (Description of communication parameters to be adjusted)
10
EB 5571 EN
Start-up
Note: In ISaGRAF®, internal variables can be assigned (integer or bool) network addresses.
The status or value of the internal variable is written to the associated holding or coil register
and can be read or written over Modbus.
NOTICE
The PLC application must be reloaded after a cold start.
2.2
Changing PLC settings
PLC settings can only be changed after entering the valid key code.
The valid key code can be found on page 42. To avoid unauthorized use, remove the page or
make the key code unreadable.
Change PLC settings in the settings level, which contains the following menu items:
4 Date / time, refer to section 1.4
4 RS-232/Slave, refer to section 5.1
4 RS-485/Master, refer to section 5.2
4 RS-232/Prog, refer to section 2.1
4 Meter bus, refer to section 5.4
4 Universal input type, refer to section 2.3
Proceed as follows:
Entering the key code
0000
Activate the editing mode.
Display: Entering the key code
0000 blinks
Enter the valid key code.
EB 5571 EN
11
Start-up
Settings level
Date / time
RS-232/Slave
RS-485/Master
RS-232/Prog
Meter bus
Universal input type
Back
Confirm the key code.
Display: Settings level
The menu item “Date / time“ is highlighted.
Select the menu item in which the settings are to be
changed, e.g. “RS-232/Slave“.
Activate the selected menu item.
Select the data point which you want to change.
Activate the editing mode of the data point.
Display: Data point blinks.
Set the data point.
Confirm the setting.
RS-232/Slave
Modbus Slave
Modem
Baud rate
Back
Settings level
Date / time
RS-232/Slave
RS-485/Master
RS-232/Prog
Meter bus
Universal input type
Back
Returning to the settings level
Select Back to return to the settings level.
Exit the menu item.
Display: Settings level
Exiting the settings level
Select Back to return.
Exit the settings level.
Display: Normal display (depending on the
application)
Note: If no key is pressed for two minutes, the PLC automatically returns to the normal display.
12
EB 5571 EN
Start-up
2.3
Configuring universal inputs
There are 17 universal inputs, which may be used as binary inputs, analog inputs (0 to 10 V,
0/4 to 20 mA) or as sensor inputs. The hardware must be configured accordingly (sensor initialization).
Refer to page 38 for the resistance values of the PTC, Pt 100 and Pt 1000 sensors.
You can also configure each universal input separately.
The following configurations are available: Pt 100/500/1000/2000, Ni 200/1000/2000,
PTC, NTC, 1–2 kW, BE, 0/4 to 20 mA (with 50 W parallel resistor) and 0 to 10 V.
Proceed as follows:
Entering the key code
0000
Activate the editing mode.
Display: Entering the key code
0000 blinks
Enter the valid key code.
Settings level
Date / time
RS-232/Slave
RS-485/Master
RS-232/Prog
Meter bus
Universal input type
Confirm the key code.
Display: Settings level
The “Date / time“ menu item is highlighted.
Back
Universal input type
UE01=PT100«PT1000
UE02=PT100«PT1000
UE03=PT100«PT1000
UE04=PT100«PT1000
UE05=PT100«PT1000
UE06=PT100«PT1000
Back
Select the menu item “Universal input type“.
Activate this selected menu item.
The first universal input UE01is highlighted.
Select the universal input.
Activate the universal input.
Display: UE__ blinks.
EB 5571 EN
13
Manual operation
Select the type of universal input.
The inputs are available in the following order:
PT100«PT1000, PT100«PTC, NI2000, PT2000,
PT500, 0 – 10V, BE, 1000 – 2000W, PT100,
PT1000, NTC, PTC, NI1000, NI200, 4 – 20mA,
0 – 20mA
Note:
On selecting the universal input types PT100«PT1000 or
PT100«PTC, this configuration applies then to all 17 universal inputs. Any inputs that have a different type need to
be configured separately afterwards.
Binary inputs with terminal 10 functioning as GND are slow
(delay of approx. 3 s).
Binary inputs with terminal 9 functioning as GND are fast
(ms).
If a resistance input has been selected:
(PT100«PT1000, PT100«PTC, NI2000, PT2000,
PT500, PT100, PT1000, NTC, PTC, NI1000 or NI200)
Universal input type
Calibrate? No
UE02=PT100«PT1000
UE03=PT100«PT1000
UE04=PT100«PT1000
UE05=PT100«PT1000
UE06=PT100«PT1000
Back
Confirm the type of universal input.
Display: ”Calibrate? No“ blinks.
If the temperature sensor connected at the input is not to be
calibrated:
Exit the universal input.
If the temperature sensor connected at the input is to be
calibrated:
Set to “Calibrate? Yes“.
Confirm calibration.
Display: Temperature measured by the sensor blinks.
Compare the temperature measured by the sensor
with the temperature measured by a reference thermometer installed directly at the point of measurement.
14
EB 5571 EN
Appendix
If both temperatures are not the same:
Correct the sensor temperature.
Confirm corrected temperature.
Universal input type
UE12=PT100«PT1000
UE13=PT100«PT1000
UE14=PT100«PT1000
UE15=PT100«PT1000
UE16=PT100«PT1000
UE17=PT100«PT1000
If another type of universal input is selected:
Confirm the universal input type.
Returning to the settings level
Select Back to return to the settings level.
Back
Exit the menu item.
Display: Settings level
Settings level
Exiting the settings level
Date / time
RS-232/Slave
RS-485/Master
RS-232/Prog
Meter bus
Universal input type
Back
2.4
Select Back to return.
Exit the settings level.
Display: Normal display (depending on the
application)
Resetting to default values
The values in the settings level can be reset to their default values.
NOTICE
Resetting to default values causes a application saved in the PLC to be deleted.
Proceed as follows:
1. Cut the power supply to the PLC.
2. Restart the PLC, while pressing down the reset key
with a pointed object.
“System is being initialized… Cold start values loaded!“ appears briefly on the display
before the normal display with the current firmware version (displays on page 5) appears.
The values of the setting level are the same as the default values (see section 8.1).
EB 5571 EN
15
Manual operation
3
Manual operation
All outputs configured in manual operating mode. Refer to the wiring plan (–> section 7).
Note: If the analog and binary output menus are activated without entering the key code beforehand, the key icon
appears at the top of the display when you press the enter key to
confirm the setting. This setting is locked.
You can only change this setting after entering the key code first.
Proceed as follows:
Entering the key code
0000
Activate the editing mode.
Display: Entering the key code
0000 blinks
Enter the valid key code.
Confirm the key code.
Display: Settings level
The “Date / time“ menu item is highlighted.
Select Back to return.
Exit the editing mode.
Display: Normal display (depending on application )
Information level
Analog inputs
Analog outputs
Binary inputs
Binary outputs
Meter bus
System info
Back
Switch to the information level.
Display: Information level
“Analog inputs“ menu item is highlighted.
Select required menu item “Analog outputs” or
“Binary outputs”.
Activate the menu item.
Select the required output.
Activate the selected output.
Display: AA... or BA... blinks.
16
EB 5571 EN
Operational faults
Analog output setting: 0 to 10 V
Increase the value.
Reduce the value.
Setting with binary outputs: on/off
Binary input = on
Binary input = off
Exit the output.
Display:
indicates manual intervention.
Information level
Analog inputs
Analog outputs
Binary inputs
Binary outputs
Meter bus
System info
Exiting the information level
Select Back to return.
Exit the information level.
Display: Normal display (depending on application)
Back
4
Operational faults
Displaying errors in the error status register and sending fault alarms to a mobile phone over
the SMS function or to a fax machine can be configured in ISaGRAF® to match the application.
The corresponding function blocks exist for this purpose.
EB 5571 EN
17
Communication
5
Communication
5.1
Modbus slave interface
The PLC can communicate with a control system using the RS-232 Modbus slave interface. Together with the suitable process visualization software and communication software, a complete control system can be implemented.
The following interface settings are possible:
– Operation with a dial-up modem on the RS-232 Modbus slave interface
Basically, communication is only established automatically when the application has been configured to dial when a fault occurs. The controller works autonomously. Nevertheless, the modem can dial up to the controller at any time to read data from it or change settings, if necessary. The use of the modem connecting cable (1400-7139) is recommended.
– Operation with a leased line modem on the RS-232 Modbus slave interface
Communication is established over a permanent connection between two leased line modems.
This setup is applied for long-distance transmissions or when different signal level converters
are used. The connection between the controller and the modem can also be established over
the modem connecting cable (1400-7139).
– Operation on a four-wire bus
To link the controller and the bus line, the signal level needs to be converted by an appropriate
converter (SAMSON cable converter 1400-7308).
GLT
RS 232C
RS 232C
RS232
RS485
RS 485
TROVIS 5571
Fig. 1 · Network structure
18
EB 5571 EN
TROVIS 5571
Communication
GND TD DTR DCD RD RTS
Fig. 2 · Pin assignment, RJ-12 system bus interface
Modbus slave interface RS-232
The Modbus connection is located on the rear panel of the controller housing (RJ 12 jack). The
controller can be connected either directly to the serial interface of a PC (point-to-point connection) or to a (dial-up) modem. A dial-up modem is required if the controller is to be connected to
the telecommunications network. In this case, the controller operates autonomously and issues
an alarm to the building control station (GLT) when faults occur. In addition, the building control
station can dial up to the controller and read data from it.
Parameters*
WE
Settings level / Range of values
Station address
16-bit addressing?
Control system
monitoring
255
No
30 min
RS-232/Slave > Modbus Slave / 1 to 247, 255
Modem
Off
RS-232/Slave
Modem = On: PLC connected to telecommunications network
Modem = Off: PLC directly connected to a computer
Cyclical initialization
30 min
RS-232/Slave > Modem = On / 1 to 300 min
5 min
RS-232/Slave > Modem = On / 1 to 300 min
Automatic
disconnection
Baud rate
9600
RS-232/Slave > Modbus Slave > Station address / Yes, No
RS-232/Slave > Modbus Slave / 1 to 300 min
RS-232/Slave / 9600, 19200
* –> Section 5.3 (Description of communication parameters to be adjusted)
EB 5571 EN
19
Communication
Modbus slave interface
in combination with RS-232/RS-485 cable converters (for four-wire bus)
Operating the PLC in combination with cable converters requires a permanent bus connection (data cable). The bus line links the devices/control units in an open ring. At the end of
the bus line, the data cable is connected to the control station using an RS-485/RS-232 converter (e.g. TROVIS 5484). The maximum extension (cable length) of the bus line is 1,200 m.
A maximum of 32 devices can be connected to such a segment. If you wish to use more than
32 devices or need to bridge greater distances, make sure repeaters (e.g. TROVIS 5482) are
installed to replicate the signal. In all, a maximum of 246 devices can be connected to a bus
line.
! CAUTION!
Make sure that the relevant standards and regulations concerning lightning and overvoltage
protection are observed upon installation.
Parameters*
WE
Settings level / Range of values
Station address
16-bit addressing?
Control system
monitoring
255
No
30 min
RS-232/Slave > Modbus Slave / 1 to 247, 255
RS-232/Slave > Modbus Master > Station address / Yes, No
RS-232/Slave > Modbus Slave / 1 to 300 min
Modem
Off
RS-232/Slave / Modem = Off
Baud rate
9600
RS-232/Slave / 9600, 19200
* –> Section 5.3 (Description of communication parameters to be adjusted)
5.2
Modbus master interface
Modbus instruments can be connected to the PLC using the RS-485 Modbus master interface.
The maximum bus line is 1,200 m. If you need to bridge greater distances, make sure repeaters
(e.g. TROVIS 5482) are installed to replicate the signal.
Terminals 1 and 2 are used for connection (see Fig. 4). Up to four Modbus I/O modules can
also be connected in parallel to these terminals. Refer to section 8.4.3 for more details.
! CAUTION!
Make sure that the relevant standards and regulations concerning lightning and overvoltage
protection are observed upon installation.
20
EB 5571 EN
Communication
Parameters*
WE
Settings level / Range of values
Gateway
Off
RS-485/Master / On, Off
Addressing
8 bit
RS-485/Master / 8-bit, 16-bit
Baud rate
9600
RS-485/Master / 9600, 19200
Frame
Off
RS-485/Master / On, Off
Bias voltage
Off
RS-485/Master / On, Off
Validity
600 s
RS-485/Master / 0 to 600 s
Pause
0 ms
RS-485/Master / 0 to 100 ms
Timeout
100 ms
RS-485/Master / 100 to 10000 ms
Expansion module
Broadcast
RS-485/Master > Station address / 0 to 255, broadcast
* –> Section 5.3 (Description of communication parameters to be adjusted)
5.3
Description of communication parameters to be adjusted
Station address
This address is used to identify the PLC in bus or modem operation. In a system, each controller
needs to be assigned a unique address.
Addressing/16-bit addressing
Selection between 16-bit addressing or 8-bit addressing
Select RS-232/Slave menu item (under Station address):
4 16-bit addressing? Yes
4 16-bit addressing? No
– 16-bit addressing
– 8-bit addressing
Baud rate
The baud rate setting refers to the transfer speed between the Modbus instruments.
Control system monitoring
Any intervention made by the control system on dynamic processes are restricted in time, provided that communication between the control system and the controller is not established. The
controller resets the time monitoring after every valid retrieval of the station address. After the
defined maximum time has elapsed, all even bits are reset to “autonomous“.
EB 5571 EN
21
Communication
Modem
4 Modem = On:
4
PLC connected to telecommunications network over a modem (RS-232 Modbus slave interface)
Modem = Off:
PLC directly connected to a computer (RS-232 Modbus slave interface) and on operating
the PLC in combination with cable converters (RS-232/RS-485)
Cyclical initialization
This parameter defines the period of time for a cyclical issue of the initialization command
“ATZ“. The command is not issued during dial-up or when connected.
Automatic disconnection
When the controller connects to the building control station but without addressing a Modbus
data point, the PLC closes the connection after the time specified for Automatic disconnection
has elapsed.
Gateway
4 Gateway = On:
4
Any polling by the building control station to the Modbus instruments connected to the
PLC is passed directly on to the slaves.
Gateway = Off:
Any polling by the building control station to the Modbus instruments connected to the
PLC is not passed directly on to the slaves.
Frame
4 Frame = On:
4 Frame = Off:
Framing function activated
Framing function deactivated
Bias voltage
We recommend applying a bias voltage on the bus to keep the signal level stable. This bias voltage is usually applied to the bus by the Modbus master.
4 Bias voltage = On:
4 Bias voltage = Off:
22
EB 5571 EN
Bias voltage on the bus
No bias voltage on the bus
Communication
Validity
The values saved in the PLC, which have been sent by the slaves, have a time-dependent
Validity.
If the building control station polls the saved data within the valid period of time, the PLC sends
the saved data directly to the building control station. However, if the polling to the PLC is
outside of this valid time period, the PLC first polls the slaves and then sends these updated data
to the building control station.
Pause
The time entered in Pause is the time that elapses before the PLC polls a slave after it has
responded to the last polling by the PLC.
Timeout
If the slave does not respond to a PLC polling after the time in Timeout has elapsed, an alarm is
generated.
Modbus I/O module (1402-0328)
Modbus I/O modules are connected by specifying their station address. This station address
can be entered in default state (reset over the jumpers) using the last two figures of the serial
numbers.
Example:
The serial number 600116 means that the station address is 16.
This can only be dialed by the broadcast function when one Modbus I/O module is connected.
5.4
Meter bus interface
Thanks to the meter bus interface, the PLC can communicate with up to 3 heat and water meters
according to EN 1434-3.
Details on the use of the different heat and water meters can be found in the technical documentation TV-SK 6311.
5.4.1 Activating the meter bus
To successfully transfer data from the heat meter (WMZ) to the PLC, the heat meter must use a
standardized protocol in accordance with EN 1434-3. It is impossible to make a general statement about which specific data can be accessed in each meter. For details on the different meter
makes, refer to the technical documentation TV-SK 6311.
EB 5571 EN
23
Communication
Meter bus
WMZ#1: EN1434/Cont. 250
WMZ#2: None
WMZ#3: None
Back
All settings that are made for communication with heat or
water meters are stored in Settings level > Meter bus >
WMZ#_.
Set the parameters in the following sequence:
– Model code
– Reading mode
– Meter bus address
4 Model code [None, P15, PS2, EN1434, CAL3, APAto, SLS]
4
The model code, which needs to be set for the respective heat meter, can be found in
TV-SK 6311. In general, the default setting of 1434 can be used for most devices.
Reading mode [Coil, Cont, 24h]
The meters can be read either automatically approx. every 24 hours (24h), continuously
(con) or when the coils (= Modbus data points) assigned to the heat meters WMZ1 to
WMZ3 are overwritten with the value 1 over the system bus interface (Coil).
Note: With reading mode “24h“, the displayed values are not updated by reading the
status information again; the values read during the last cycle remain unchanged.
With reading mode “con“, the values in the levels are not continuously updated. Reopen
the specific level to get current values.
4 Meter bus address (Addr?) [0 to 255]
A meter bus address must be unique and correspond with the address preset in the
WMZ. If the preset meter bus address is unknown, a single heat meter connected to the
controller can be assigned meter bus address 254. Address 255 deactivates communication with the respective heat meter.
Parameters
WE
Settings level / Range of values
Model code
None
Meter bus > WMZ#_ /
None, P15, PS2, EN1434, CAL3, APAto, SLS
Reading mode
Meter bus > WMZ#_ / Coil, Cont, 24h
Meter bus address
Meter bus > WMZ#_ / 0 to 255
24
EB 5571 EN
Communication
In the information level, “EN1434“ is displayed when the meter bus is activated. Press the enter
key to get to the display referring to the meter bus. The following information is displayed about
the selected heat meter:
WMZ#1 (EN1434)
ID no.:
Flow rate:
Total capacity:
Capacity:
Energy:
Flow pipe:
FFFFFFFF
_.___ l/h
–.––– m3
–.––– kW
–.––– Mwh
– °C
Back
4 ID no.
4 Flow rate [l/h]
4 Total capacity [m3]
4 Capacity [kW]
4 Energy [Mwh]
4 Flow pipe [°C]
4 Return flow pipe [°C]
4 Meter bus address
4 Status
Note: A blinking icon at the end of the header “WMZ#_ (EN1434)“ indicates an operational fault.
Check the heat/water meter connection to the meter bus interface and check the parameters
set in the Settings level > Meter bus > WMZ#_.
5.5
Data logging module
Data logging module inserted
L: Data logging
A: wtf_a02 (V90)
!
A: kesf_a01 (V20)
F: Firmware (V1.11)
F: Firmware (V1.12)
Back
*)
A data logging module (order no. 1400-9378) allows the
firmware versions and applications to be saved and loaded
in addition to data logging.
The data logging module is connected to the RJ-45 jack at the
front of the controller. The menu shown here *) appears on
the display as soon as the data logging module is inserted.
The menu items A: … (application) and F: … (firmware) depend on the current firmware and
application of the PLC as well as on the firmware and application saved in the data logging module.
5.5.1 Data logging
The data logging module allows controller data to be saved. Without any additional programming, the controller saves the physical inputs 1 to 7 every minute. When the memory of the data
logging module is full, the controller starts to write over the oldest data.
After connecting the data logging module, the “Data logging” menu item must be selected for
this function.
EB 5571 EN
25
Communication
NOTICE
The Data logging function causes all the data previously saved in the module to be deleted.
The data logging viewer software allows the data to be viewed in graph format. The USB-Converter 3 (order no. 1400-9377) is required to connect the data logging module to a computer.
The data logging viewer software is supplied with the USB-Converter 3.
5.5.2 Saving and loading firmware and applications
On loading (represented by ) a firmware or application, data are downloaded from the data
logging module onto the PLC.
Note: An application or firmware can only be loaded after the key code has been entered.
4
4
A: …
F: …
Downloading an application onto the PLC.
The application in the PLC is overwritten.
Downloading a firmware onto the PLC.
The firmware in the PLC is overwritten.
On saving
(represented by
TROVIS
the data logging
5571 module.
PLC
4
ule.
4 Terminals
26
EB 5571 EN
A: …
) a firmware or application, data are uploaded from the PLC onto
Uploading a current application onto the data logging mod-
F: … Uploading the firmware onto the data logging module.
Installation
6
Installation
The controller consists of the housing with the electronics and the back panel with the terminals.
It is suitable for panel, wall, and top hat rail mounting (Fig. 3).
Panel mounting
1.
2.
3.
4.
5.
Remove both screws (1).
Pull apart the controller housing and back panel.
Make a cut-out of 138 x 92 mm (width x height) in the control panel.
Insert the controller housing through the panel cut-out.
Insert one mounting clamp (2) each at the top and bottom or at the sides. Screw the
threaded rod towards the panel with a screwdriver such that the housing is clamped
against the control panel.
6. Install the electrical connections at the back of the housing as described in section 7.
7. Fit the controller housing.
8. Fasten both screws (1).
Wall mounting
1. Remove both screws (1).
2. Pull apart the controller housing and back panel.
3. If necessary, bore holes with the specified dimensions in the appropriate places. Fasten
the back panel with four screws.
4. Install the electrical connections at the back of the housing as described in section 7.
5. Fit the controller housing.
6. Fasten both screws (1).
Top hat rail mounting
1.
2.
3.
4.
5.
6.
7.
Remove both screws (1).
Pull apart the controller housing and the back panel.
Fasten the spring-loaded hook (4) at the bottom of the top hat rail (3).
Slightly push the controller upwards and pull the upper hook (5) over the top hat rail.
Install the electrical connections at the base as described in section 7.
Remount the controller housing.
Fasten both screws (1).
EB 5571 EN
27
Installation
2
Panel mounting
1
2
62
Back panel of the
controller
5 housing
Controller
15
Wall mounting
57
42
5
4
3
Top hat rail mounting
Dimensions in mm
W x H x D = 144 x 96 x 111
Fig. 3 · Installation
28
EB 5571 EN
Electrical connection
7
Electrical connection
CAUTION!
For electrical connection of the PLC, you are required to observe the relevant electrotechnical
regulations of the country of use as well as the regulations of the local power supplier. Make
sure all electrical connections are installed by trained and qualified personnel!
!
Notes on installing the electrical connections
4 Install the 230 V power supply lines and the signal lines separately! To increase noise im4
4
4
4
munity, observe a minimum distance of 10 cm between the lines. Make sure the minimum
distance is also observed when the lines are installed in a cabinet.
The lines for digital signals (bus lines) and analog signals (sensor lines, analog outputs)
must also be installed separately.
In plants with a high electromagnetic noise level, we recommend to use shielded cables
for the analog signal lines. Ground the shield at one side, either at the control cabinet inlet or outlet, using the largest possible cross-section. Connect the central grounding point
and the PE grounding conductor with a cable ³ 10 mm² using the shortest route.
Inductances in the control cabinet, e.g. contactor coils, are to be equipped with suitable
interference suppressors (RC elements).
Control cabinet elements with high field strength, e.g. transformers or frequency converters, should be shielded with separators providing a good ground connection.
Overvoltage protection
4 If signal lines are installed outside buildings or over large distances, make sure appro4
4
priate surge or overvoltage protection measures are taken. Such measures are indispensable for bus lines!
The shield of signal lines installed outside buildings must have current conducting capacity
and be grounded on both sides.
Surge diverters must be installed at the control cabinet inlet.
Noise suppression
The TROVIS 5571 Controller with SAMSON actuator is interference suppressed according to
VDE 0875. If different actuator makes are used, or moreover, further actuators with interference
sources are used in a plant, the operator/supplier of a custom-made plant must make sure that
the entire plant complies with VDE 0875 regulations due to the legal obligation of ensuring interference suppression.
EB 5571 EN
29
30
EB 5571 EN
3
BA2
2
4
6
8
10
12
14
16
18
20
22
24
26
28
30
RS485-A
RS485-B
BA2
N
Supply + 15 V
N
+
Legend
AA
AE
BA
BE
GND
BA6
BA10
BA11
BA12
46
47
BA11
45
BA9
43
44
BA12
BA10
BA9
BA8
41
BA8
42
BA7
40
BA7
39
BA5
37
38
BA4
BA3
BA6
36
35
34
33
32
31
BA5
BA4
BA3
L1
Analog output
Analog input
Binary output
Binary input
Ground
Note!
If the universal inputs are used as
current or voltage inputs, terminal
13 instead of terminal 10 must be
used as ground.
Do not connect terminals 9, 10
and 13!
RS 232
MODBUS
Meter bus
50 49 48
UE1
UE2
UE3
UE4
UE5
UE6
UE7
UE8
UE9
UE10
UE11
UE12
UE13
UE14
UE15
UE16
UE17
0...10V COM
AA4 (0...10 V)
AA3 (0...10 V)
Sensor COM
AA_GND
AA1 (0...10 V)
AA2 (0...10 V)
BA1
Fig. 4 · Wiring plan of TROVIS 5571
1
5
BA1
7
9
11
13
15
17
19
21
23
25
27
29
Electrical connection
Electrical connection
Connecting the PLC
Open the housing to connect the cables. Make holes in the marked locations at the top, bottom
or back of the housing’s back panel and fit suitable grommets or screw joints.
Observe the diagram (Fig. 4) for connection. The connection diagram contains all possible inputs and outputs. The assignment of the corresponding inputs and outputs is determined by the
respective application.
Inputs
When wiring the universal inputs (BE1/AE1 to BE17/AE17), make sure to use terminal 13 as
ground in case of active inputs (current and voltage inputs). If the universal inputs are used as
passive inputs (sensors or binary inputs), terminal 10 must be used as ground.
Binary inputs with terminal 10 functioning as ground (GND) are slow (a delay of approx. 3 seconds).
Binary inputs with terminal 9 functioning as ground (GND) are fast (ms).
Outputs
The binary low-voltage outputs (BA1 and BA2) are used for signaling. As a result, only a minimal load can be applied to these outputs (50 V DC, max. 100 mA ohmic load). If greater loads
are to be applied, it is recommended to control relays over the outputs which then switch the elevated load.
The 10 binary outputs (BA3 to BA12) can be loaded with max. 250 V AC, 2 A.
Modbus
The control station is connected over a serial RS-232 interface at the back of the controller.
Further Modbus instruments (slaves) are connected to the PLC over the RS-485 interface
(terminals 1 and 2).
Connecting the sensors
Cables with a minimum cross-section of 2 x 0.5 mm² can be connected to the terminals at the
back panel of the housing.
EB 5571 EN
31
Appendix
8
Appendix
8.1
Settings level
Menu item
Functions/parameters
Date/time
System time (date and time) freely configurable
Automatic summer time
RS-232/Slave
*)
Only with
modem = On
RS-485/Master
RS-232/Prog
32
EB 5571 EN
Setting range
On / Off
WE
On
Modbus slave
5.1
Station address
1 to 247, 255
255
16-bit addressing
Yes / No
No
Control system
monitoring
1 to 300 min
30 min
Auto. disconnection *)
On / Off
1 to 300 min
1 to 300 min
Off
30 min
5 min
Baud rate
9600, 19200
9600
Gateway
On / Off
Off
Addressing
8 bit, 16 bit
8 bit
Baud rate
9600, 19200
9600
Frame
On / Off
Off
Bias voltage
On / Off
Off
Validity
0 to 600 s
Pause
0 to 100 ms
Timeout
100 to 10000 ms
Expansion module
Station address
0 to 255
Station address
1 to 247, 255
255
Baud rate
9600, 19200
9600
Modem
Cyclical initialization *)
See
section
5.2
0s
0 ms
100 ms
0
2.1
Appendix
Menu item
Functions/parameters
Meter bus
WMZ#1 to WMZ#3
Model code
Reading mode
Meter bus address
Universal input type UE01 to UE17
Setting range
WE
See
section
5.4
None, P15, PS2, EN1434,
CAL3, APAto, SLS
None
Coil, Cont, 24h
0 to 255
PT100«PT1000 1) 2),
PT100«
PT100«PTC 1) 2), NI2000 2), PT1000
PT2000 2), PT500 2),
0–10V, BE, 1000–2000W,
PT100 2), NTC 2), PTC 2),
NI1000 2), NI200 2),
4–20mA, 0–20mA
1)
2)
2.3
Settling valid for all UE
Calibration? Yes / No
EB 5571 EN
33
Appendix
8.2
Technical data
TROVIS 5571 Programmable Logic Controller (PLC)
Universal inputs
17 universal inputs, separately configurable as:
– Resistance input
Pt 100/500/1000, Ni 200/1000/2000, PTC/NTC, 1–2 kW
– Current input
0/4 to 20 mA (50 W parallel resistor)
– Voltage input 0–10 V
– Binary input, floating
Outputs
10 binary relay outputs,
non-floating in pairs, 2 A/250 V AC
2 low-voltage binary outputs, 100 mA/50 V DC
4 analog outputs (0 to 10 V),
non-floating in pairs (max. load > 4.7 kW)
Interfaces
Modbus slave interface
Optional:
RS-232 for modem or point-to-point communication with PC
(RJ-12 jack at the back)
Modbus interface RS-485 over cable converter 1400-7308
Modbus master interface
RS-485 for communication with other Modbus instruments (connected
over terminals 1/2)
Meter bus
Connected over terminals 48/49/50
Programming interface
For installing an application created in IsaGRAF ® (front RJ-45 jack)
and data logging
Voltage supply
230 V AC, 48 to 62 Hz
Power consumption
Approx. 8 VA
Ambient temperature
0 to 40 °C
Storage temperature
–20 to 60 °C
Degree of protection
IP 40
Class of protection
II
Degree of contamination
2
Overvoltage category
II
Humidity rating
F
Noise emission
According to EN 61000-6-3
Noise immunity
According to EN 61000-6-1
Noise suppression
According to DIN VDE 0875
Weight
Approx. 0.6 kg
34
EB 5571 EN
Appendix
8.3
Special key codes
Description
Key codes
Test watchdog
10
Delete application
10
Plug-ins
10
RS-232/RS-485 diagnostics
10
Task list
10
Reset diagnostics
10
DTR test
10
8.4
Modbus I/O modules
8.4.1 Technical data
Extension of the inputs and outputs at the programmable logic controller (PLC)
Inputs
Binary inputs
6 · Optionally can be used as:
– 0 to 10 V input (inputs 1, 2, 5, 6)
– Pt 1000 input (inputs 3, 4)
– 0 to 1000 W input (inputs 3, 4)
– Counter inputs, max. 1 kHz (inputs 1, 2, 5, 6)
– 0 to 10 V outputs (inputs 5, 6)
Outputs
Binary outputs
4 · 230 V/2 A (relay)
Interfaces
Modbus RS-485
Operating voltage
230 V AC
Dimensions [mm]
Width
94
Height
96
Depth
60
EB 5571 EN
35
Appendix
8.4.2 Terminal assignment
Terminal assigment
1
BA1
Binary output 1
2
BA2
Binary output 2
3
COM1/2
COM binary output 1/2
4
BA3
Binary output 3
5
BA4
Binary output 4
6
COM3/4
COM binary output 3/4
7
AC1
8
AC2
Power supply
85 to 250 V AC
9
BE1
ZE1
AE1
Binary input 1 or
counter input 1 or
0 to 10 V input
10
BE2
ZE2
AE2
Binary input 2 or
counter input 2 or
0 to 10 V input
11
GND
GND input 1/2
12
BE3
AE3
Binary input 3 or
Pt 1000 or 0 to 1000 W
13
BE4
AE4
Binary input 4 or
Pt 1000 or 0 to 1000 W
14
GND
GND input 3/4
15
BE5
ZE3
AE5
AA1
Binary input 5 or
counter input 3 or
0 to 10 V input
0 to 10 V output
AE5 and AA1:
max. 2.5 mA
BE6
ZE4
AE6
AA2
Binary input 6 or
counter input 4 or
0 to 10 V input
0 to 10 V output
AE6 and AA2:
max. 2.5 mA
17
GND
GND input/output 5/6
18
A1
19
B1
20
A2
21
B2
16
36
EB 5571 EN
Max. 250 V AC, 2 A
100 V DC, 2 A
Max. 250 V AC, 2 A
100 V DC, 2 A
AC 1
AC 2 has GND reference
Temperature measurement with Pt 1000:
–40 to 160 °C
or
resistance measurement: 0 to 1000 W
RS-485/Modbus (slave)
Connection to
TROVIS 5571/5572/Modbus I/O
RS-485/Modbus
Intended as extension
Appendix
8.4.3 Integrating the Modbus I/O modules
A maximum of four Modbus I/O modules (1402-0328) can be integrated over the Modbus
master interface (Fig. 5)
SPS
TROVIS
5571
ModBus I/O
1
ModBus I/O
2
ModBus I/O
3
Klemmen
RS-485 1
RS-485 1
RS-485 1
RS-485 1
RS-485 2
2
A
A
A
A
A
1
B
B
B
ModBus I/O
4
B
B
RS-485
RS-232
TROVIS
5576
Fig. 5 · Integration of Modbus I/O modules
The Modbus I/O modules are integrated in the Settings level under the menu item RS-485/Master -> Expansion module.
The following menu appears when a Modbus I/O module has been found:
Expansion module
Serial no.: 116
Station address: – –– –
E1 = BE
E2 = BE
E3 = BE
E4 = BE
The station address can be assigned (to match the ISaGRAF®
project) in this menu and the inputs or outputs (0 to 10 V) E1 to
E6 of the Modbus I/O modules can be configured.
Back
EB 5571 EN
37
Appendix
8.5
Sensor resistance tables
Resistance values with PTC resistors
Type 5224 Outdoor Temperature Sensors, Types 5264 and 5265 Flow and Return Flow Temperature Sensors, Type 5264 Storage Tank Temperature Sensors
°C –20 –10
0
10
20
25
30
40
50
60
70
80
90
100
110
120
W 694 757 825 896 971 1010 1050 1132 1219 1309 1402 1500 1601 1706 1815 1925
Resistance values with Pt 1000 resistors
Type 5227-2 Outdoor Temperature Sensors, Type 5277-2 (thermowell required) and
Type 5267-2 (contact sensor) Flow, Return Flow and Storage Tank Temperature Sensors.
Type 5257-1, Type 5257-5 (room panel) Room Temperature Sensors.
°C
–35
–30
–25
–20
–15
–10
–5
0
5
10
W
862.5
882.2
901.9
921.6
941.2
960.9
980.4
1000.0
1019.5
1039.0
°C
15
20
25
30
35
40
45
50
55
60
1077.9
1097.3
1116.7
1136.1
1155.4
1174.7
1194.0
1213.2
1232.4
70
75
80
85
90
95
100
105
110
1270.7
1289.8
1308.9
1328.0
1347.0
1366.0
1385.0
1403.9
1422.9
120
125
130
135
140
145
150
1460.6
1479.4
1498.2
1517.0
1535.8
1554.5
1573.1
W 1058.5
°C
65
W 1251.6
°C
115
W 1441.7
Resistance values with Pt 100 resistors
Refer to the table for Pt 1000 resistors and divide the specified values by 10.
Type 5225 Outdoor Temperature Sensors, Types 5204, 5205-46 to -48 Flow and Return Flow
Temperature Sensors, Types 5205-46 to -48 Storage Tank Temperature Sensors, Type 5255
Room Temperature Sensors.
38
EB 5571 EN
Appendix
8.6
Customer data
Station
Operator
Relevant SAMSON office
Settings
Functions/parameters
Setting range
Setting
Date/time
System time (date and time) freely configurable
Automatic summer time On/Off
RS-232/slave
Station address
1 to 247, 255
16-bit addressing
Yes/No
Control system
monitoring
1 to 300 min
Modem
On/Off
Cyclical initialization
1 to 300 min
Auto. disconnection
1 to 300 min
Baud rate
9600, 19200
RS-485/master
Gateway
On/Off
Addressing
8 bit, 16 bit
Baud rate
9600, 19200
Frame
On/Off
Bias voltage
On/Off
Validity
0 to 600 s
Pause
0 to 100 ms
Timeout
100 to 10000 ms
Expansion module
Station address
0 to 255, broadcast
EB 5571 EN
39
Appendix
Meter bus
WMZ#1
Model code
None, P15, PS2, EN1434,
CAL3, APAto, SLS
Reading mode
Coil, cont, 24h
Meter bus address
0 to 255
Universal input UE
1
PT100«PT1000
PT100«PTC
NI2000
PT2000
PT500
0–10V
BE
1000–2000W
PT100
NTC
PTC
NI1000
NI200
4–20mA
0–20mA
40
EB 5571 EN
2
3
4
5
6
7
8
9
WMZ#2
WMZ#3
10 11 12 13 14 15 16 17
Index
Index
F
Firmware version . . . . . . . . . . . . . . . . . . . 5
saving/loading. . . . . . . . . . . . . . . . . 26
16-bit addressing . . . . . . . . . . . . . . . . . . 21
Flow Chart . . . . . . . . . . . . . . . . . . . . . . . 10
8-bit addressing . . . . . . . . . . . . . . . . . . . 21
Frame . . . . . . . . . . . . . . . . . . . . . . . . . . 22
A
Function Block Diagram . . . . . . . . . . . . . 10
Addressing . . . . . . . . . . . . . . . . . . . . . . 21 G
Application
Gateway . . . . . . . . . . . . . . . . . . . . . . . . 22
saving/loading. . . . . . . . . . . . . . . . . 26
Automatic disconnection . . . . . . . . . . . . . 22 I
B
Baud rate. . . . . . . . . . . . . . . . . . . . . . . . 21
Bias voltage . . . . . . . . . . . . . . . . . . . . . . 22
C
Changeover key . . . . . . . . . . . . . . . . . . . . 4
Communication parameters. . . . . . . . . . . 21
Configuring inputs . . . . . . . . . . . . . . . . . 13
Connection
PLC . . . . . . . . . . . . . . . . . . . . . . . . . 31
Sensors . . . . . . . . . . . . . . . . . . . . . . 31
Slaves . . . . . . . . . . . . . . . . . . . . . . . 31
Contrast (display) . . . . . . . . . . . . . . . . . . . 6
Control system monitoring. . . . . . . . . . . . 21
Controller time . . . . . . . . . . . . . . . . . . . . . 8
Cursor key(s) . . . . . . . . . . . . . . . . . . . . . . 4
Customer data . . . . . . . . . . . . . . . . . . . . 39
Cyclical initialization. . . . . . . . . . . . . . . . 22
D
Data logging module . . . . . . . . . . . . . . . 25
data logging. . . . . . . . . . . . . . . . . . . 25
saving/loading applications . . . . . . . 26
saving/loading firmware versions . . . 26
Display . . . . . . . . . . . . . . . . . . . . . . . . . . 5
E
Enter key . . . . . . . . . . . . . . . . . . . . . . . . . 4
Information level. . . . . . . . . . . . . . . . . . . . 7
Installation
Panel mounting. . . . . . . . . . . . . . . . . 27
Top hat rail mounting . . . . . . . . . . . . 27
Wall mounting . . . . . . . . . . . . . . . . . 27
Instruction List. . . . . . . . . . . . . . . . . . . . . 10
Interface
RS-232 (Modbus slave) . . . . . . . 18 - 19
RS-232/RS-485 (Modbus slave) . . . . 20
RS-485 (Modbus master). . . . . . . . . . 20
Internal variable . . . . . . . . . . . . . . . . . . . 11
ISaGRAF . . . . . . . . . . . . . . . . . . . . . . . . 10
L
Ladder Diagram . . . . . . . . . . . . . . . . . . . 10
M
Manual operation . . . . . . . . . . . . . . . 14,16
Meter bus . . . . . . . . . . . . . . . . . . . . . . . 23
Modbus I/O module. . . . . . . . . . . . . . . . 23
integrating. . . . . . . . . . . . . . . . . . 20,37
technical data . . . . . . . . . . . . . . . . . . 35
Modbus master interface. . . . . . . . . . . . . 20
Modbus slave interface . . . . . . . . . . . . . . 18
Modem
Dial-up modem. . . . . . . . . . . . . . . . . 18
Leased line . . . . . . . . . . . . . . . . . . . . 18
Modem on/off . . . . . . . . . . . . . . . . . . . . 22
EB 5571 EN
41
Index
N
S
Noise suppression . . . . . . . . . . . . . . . . . 29 Sensor resistance values . . . . . . . . . . . . . 38
Sequential Function Chart . . . . . . . . . . . . 10
O
Station address . . . . . . . . . . . . . . . . . . . 21
Operating elements . . . . . . . . . . . . . . . . . 4 Structured Text . . . . . . . . . . . . . . . . . . . . 10
Operational faults. . . . . . . . . . . . . . . . . . 17
Overvoltage protection . . . . . . . . . . . . . . 29 T
Technical data . . . . . . . . . . . . . . . . . . . . 34
Timeout . . . . . . . . . . . . . . . . . . . . . . . . . 23
P
Pause . . . . . . . . . . . . . . . . . . . . . . . . . . 23
Plain text display . . . . . . . . . . . . . . . . . . . 5 V
Programming . . . . . . . . . . . . . . . . . . . . . 10 Validity . . . . . . . . . . . . . . . . . . . . . . . . . 23
R
W
Reset key . . . . . . . . . . . . . . . . . . . . . . . . . 4 Wiring plan . . . . . . . . . . . . . . . . . . . . . . 30
Resistance input
Calibration . . . . . . . . . . . . . . . . . . . . 14
Key code
42
EB 5571 EN
1732
EB 5571 EN
43
Operating level
(created application)
Entering the key code
0000
0000
Information level
XXXX
Contrast
Analog inputs
Analog outputs
Binary inputs
Binary outputs
Meter bus
System info
Back
Back
Back
Back
Settings level
Date / time
RS-232/Slave
RS-485/Master
RS-232/Prog
Meter bus
Universal input type
Back
Back
SAMSON AG · MESS- UND REGELTECHNIK
Weismüllerstraße 3 · 60314 Frankfurt am Main · Germany
Phone: +49 69 4009-0 · Fax: +49 69 4009-1507
Internet: http://www.samson.de
EB 5571 EN
2012-09
Normal display
(depending on application)