1
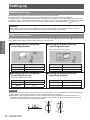
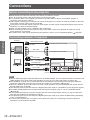
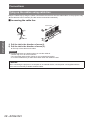
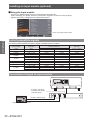
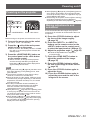
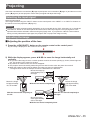
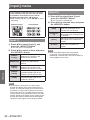
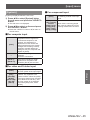
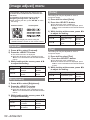
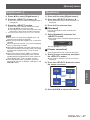
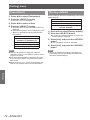
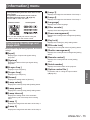
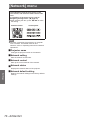
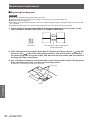
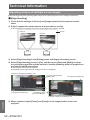
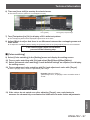
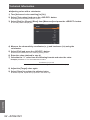
Technical
Information
Technical Information
Adjusting screens of multiple screen images
[Edge blending] and [Color matching] allow images from multiple projectors to be overlapped seamlessly.
■■[Edge blending]
1) Check that the settings of [Screen] and [Image adjust] of each projector are the
same.
2) Project images from each projector that you want to overlap.
zzThe following is an example of how to overlap images from projector A and B.
Image A
Screen
Image B
Projector A
Projector B
3) Select [Edge blending] in the [Setting] menu and display the setting screen.
4) Select [Edge blending] to turn it [On], and then press [Start] and [Width] to adjust
the overlapping position and the amount of overlap (blending width) of images from
projectors A and B respectively.
zzThe following values are an example.
zzSet [Width] to the same value for all projectors to be overlapped.
Projector A: Set [Right] in [Width] to 100
Edge blending
On
Line (red): Moves with the
[Width] value
Frame (green): Projected image
Start
Left
Width
Start
Right
Width
Start
Top
Width
Start
Bottom
Width
All
All
Black level
Edge blending
On
Left
Start
Width
Start
Right
On
Test pattern
Menu off
Reset
Exit
Back
Move
Back
Width
Start
Top
Width
Bottom
Start
Next
Width
All
All
Black level
On
Test pattern
Menu off
Reset
Frame (green): Projected image
Overlapping areas
(shown with shadow)
Exit
Back
Move
Back
Next
Projector B: Set [Left] in [Width] to 100
Appendix
5) Where required, adjust [Focus] and [Zoom] for the image position from each
projector.
90 - ENGLISH