Transcript
VZ-ROCK-C100 OPERATING INSTRUCTIONS
-DO NOT PLUG THE UNIT INTO ANY PANASONIC CAMERA OR DAMAGE MAY RESULT!!!
-NEVER EXPOSE THE UNIT TO WATER OR LIQUIDS, AND NEVER EXPOSE IT TO EXCESSIVE HEAT,
PRESSURE OR SHOCK – DOING SO MAY RESULT IN DAMAGE NOT COVERED BY THE FACTORY
WARRANTY (2 YEARS)
-DO NOT ATTEMPT TO OPEN THE UNIT. DOING SO MAY VOID YOUR FACTORY WARRANTY.
-DO NOT SUBJECT THE VARIABLE ZOOM ROCKER OR THE LANC CABLE TO UNNECESSARY STRESS.
ABUSE OF THE ZOOM ROCKER OR LANC CABLE MAY RESULT IN DAMAGE NOT COVERED BY YOUR
WARRANTY!
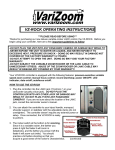
Your VZ-ROCK-C100 controller is equipped with the following features: pressure-sensitive variable speed focus
control “Rocker”; record start/stop “R”; “Push Auto” Iris control, power standby on/off “ON”; iris open “F“; iris close “F+”; LED record status indicator.
1. Plug the controller into the “Remote” jack on your camcorder.If you are not sure about the
location of the Remote jack, consult the camcorder owner’s manual.
2. You can attach the controller to your tripod handle, monopod, shoulder support, or stabilizer
with the adjustable clamp (do not overtighten). The controller doesn’t require any external
power or setup. Once connected, the VZ-ROCK-C100 is ready to perform.
3. The rocker switch at the bottom is for variable-speed focus. Depending on the version
and lens combination, you may need to go into the C100 menu and change the AF
mode to “One Shot” to get the focus control to work properly. Since it is a variable
rocker, the farther you press it right the faster it will focus far, and the farther you press it left
the faster it will focus near. You should practice a bit before shooting so that you acquire a
good sense of the rocker’s characteristics.
4. The small button marked with a red “R” is the record start/stop button. The button marked
ON will put the camera into standby mode by holding it for 2 seconds and wake the camera
up from standby pushing it once.
5. You can also control the push auto iris using the camera’s onboard metering by pushing
the A button and holding it down until the exposure is set. This feature remotely accesses
the ‘push auto iris’ feature on the camera.
6. You also have the ability to control iris manually – use the F-/F+ buttons to adjust the iris up
or down/
7. Finally, the LED indicator light will turn red when you are recording.
Troubleshooting: 1) Focus Creeping (unwanted focus): Recalibrating the focus center is easy. With the controller
connected to your camera, loosen the set screw on the underside of the rocker with a 5/64” hex key (alan wrench),
holding the rocker firmly in place. On the backside of the rocker is a hole with a slotted shaft, and this is where you
adjust the focus center with a flat screwdriver. Turn it slightly left and right and you’ll see the camera focus near
and far – find the centermost point between the near/far start positions, then tighten the set screw (don’t overcrank
it). To make sure the focus center is set, here’s a quick test based on the fact that the LANC protocol can only send
one command at a time - press “R” record button and if the camera responds, you’re all set. If it doesn’t respond,
adjust further until the “R” button works. 2) Controller not responding: Unplug the unit and plug it back in after a few
seconds. 512-219-7722 / www.varizoom.com
