1
Shorty Headers
For 2000-2002 Camaro/Firebird
5.7L LS1 V8, Auto/Manual Transmission
Catalog #65732 & #65733
INSTALLATION INSTRUCTIONS
®
Please study these instructions carefully before installing your new Tubular Exhaust System. If you have any questions, please contact
our Technical Hotline at : 1-800-416-8628 from 7 am – 5 pm, Monday through Friday, Pacific Standard Time or e-mail us at
[email protected].
DESCRIPTION: These shorty headers are designed to improve the exhaust efficiency of the GM 5.7 Liter LS1 V8 engine. This system
does not require welding for installation and retains all O.E.M. emissions equipment.
IMPORTANT NOTE:
Proper installation is the responsibility of the installer. Improper installation will void warranty and may result in
poor performance and engine or vehicle damage.
Suggested tools needed for installation: This vehicle has some metric fasteners.
❑ 1/4” ratchet and socket set
❑ 3/8” ratchet socket set with extensions and universal 13mm and 15mm swivel sockets
❑ Combination of open-end wrenches
❑ Jackstands, screwdrivers, pliers, crescent wrench, etc.
❑ Liquid penetrant (GM #1052627 or equivalent); anti-seize compound (GM #5613695 or equivalent)
SPECIAL NOTICE: This Edelbrock part has received an Executive Order number (E.O. #) from the California Air Resources Board
(C.A.R.B.) making it legal for street use on pollution-controlled motor vehicles in all 50 states. To assist you with emissions equipment
certification, we have included a silver fan shroud decal to help testing personnel verify that this part is a legal replacement part on
the vehicle for which it is cataloged. The adhesive-backed decal should be affixed to your fan shroud next to the existing emission
and engine specification decal. Do not cover your original equipment specification decal with the Edelbrock fan shroud decal.
WARNING: The use of “Thermal Wrap” or any aftermarket coating process will void the warranty on your Tubular Exhaust System.
Those products can cause excessive heat and moisture build up resulting in corrosion and early failure of the system.
INSTALLATION INSTRUCTIONS
DISASSEMBLY:
1. Disconnect negative battery cable.
2. Raise vehicle and unplug all 02 sensors and carefully
remove.
3. Starting with the driver’s side, remove the three bolts
on the inlet flange of the catalytic converter.
4. At mid-section of left side exhaust pipe is a two-bolt
flange; unbolt and set catalytic converter aside.
5. On passenger’s side, remove the three bolts on the
inlet flange of the catalytic converter.
6. At mid-section of exhaust pipe is a two-bolt flange,
unbolt and set catalytic converter assembly aside.
©2006 Edelbrock Corporation
Catalog #65732 & #65733
LEFT SIDE
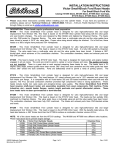
1. Disconnect and remove spark plug wires.
2. Disconnect A.I.R. assembly from stock manifold.
3. Remove manifold bolts.
4. Remove manifold from below.
5. Install flange gasket and one 8mm bolt, lock washer,
and flat washer at rear most bolthole (leave bolt
loose enough to accept header).
6. Place header into position from below. Start all bolts
and washers, then tighten evenly starting with
centermost bolts.
Note: Use flat washers and lock washers on all bolts.
Page 1 of 2
Brochure #63-0405
Rev. 7/06
DISASSEMBLY - LEF SIDE (Continuation):
9. Install all manifold bolts and tighten.
10. Re-attach EGR tube (if equipped) using supplied
gasket and 5/16” bolts and lock washers.
11. Re-attach spark plug wires.
12. Re-install dip stick tube.
13. Re-attach A.I.R. assembly.
7. Install 02 sensor on new manifold. Use anti-seize
compound on threads.
8. Replace spark plug wires.
9. Replace A.I.R. assembly using supplied gasket.
RIGHT SIDE
1. Disconnect and remove spark plug wires.
2. Disconnect A.I.R. assembly from manifold.
3. Remove bolts from EGR flange, if equipped.
4. Remove dip stick.
5. Remove bolts from manifold.
6. Remove stock manifold from below.
7. Install flange gasket and one 8mm bolt, lock washer,
and flat washer at rearmost bolthole (leave bolt loose
enough to accept header).
Note: If your vehicle does not have an EGR, install
supplied block off plate with gasket and two 5/16”
bolts and lock washers (kit items) to header before
installation.
8. Place header into position from below car and start
one bolt at front. Note: Use flat washers and lock
washers on all bolts.
FINAL ASSEMBLY
1. Using supplied 3/8-16 x 1 1/2” bolts, lock washers,
flat washers, nut and catalytic converter flange
gaskets, re-install catalytic converter assemblies.
2. Re-install all 02 sensors (use anti-seize compound).
FINAL INSPECTION
1. Check all hydraulic, vacuum, and fuel lines to ensure
there is adequate clearance to TES components.
2. Re-connect battery.
3. At this point, it is a good idea to look everything over
and make sure that nothing was missed in assembly.
4. Start vehicle and bring up to normal operating
temperature. Check for possible leaks.
5. Turn engine off and let cool. Tighten all bolts again.
PARTS LIST
#65732 & 65733
Qty.
❑1
❑1
❑1
❑1
❑ 12
❑2
❑1
❑1
❑2
Part #
25-9265
25-9266
25-9245
25-9246
-
Description
Manifold left side (Ceramic-Coated)
Manifold right side (Ceramic-Coated)
Manifold left side (Ti-Tech Coated)
Manifold right side (Ti-Tech Coated)
Hex header bolts: 8mm x
1.25” x 30mm
LS-2 V8 port gaskets
Catalytic converter gasket (left)
Catalytic converter gasket (right)
5/16” x 1” Hex bolts
Qty.
❑6
❑6
❑6
❑ 14
❑ 12
Part #
-
❑1
❑2
❑6
❑1
-
Description
3/8”-16 Hex nuts
3/8”-16 x 1-1/2” Hex bolts
Flat washers
5/16” Lock washers
5/16” I.D. x 1/8” thick Hardened
washers
EGR gasket
A.I.R. gasket
3/8” Lock washers
EGR Block-off plate
®
Edelbrock Corporation, 2700 California Street, Torrance, CA 90503
Toll-Free Tech Line: 1-800-416-8628
Tech E-Mail: [email protected]
©2006 Edelbrock Corporation
Catalog #65732 & #65733
Page 2 of 2
Brochure #63-0405
Rev. 7/06