1
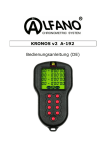
KRONOS v2 A-192 Operating Instructions (EN) Index 1. 2. 3. 12. 13. 14. 15. 16. ALFANO presents the KRONOS v2 (chart) Introduction Switching on the chronometer in the desired mode option 3.1. Basic switching on 3.2. Switching on with choice of option mode Functioning of Option Mode 1 4.1. Display 4.2. Switching on the KRONOS v2 4.3. Displaying the best lap « BEST » of each competitor during the timing 4.4. Capturing the split times 4.5. Resetting during the timing 4.6. Stopping the chronometer « STOP » 4.7. Displaying the best lap « b » (BEST) for every chronometer in the «STOP» mode 4.8. Visualising the memorised information in the « RECALL » mode 4.9. Resetting every chronometer in the «STOP» mode 4.10. Switching off the KRONOS v2 Functioning of Option Mode 2 Functioning of Option Mode 3 6.1. Description of the display 6.2. Reference chronometer 6.2.1. Starting up/switching off the reference chronometer 6.2.2. Resetting the reference chronometer 6.3. Functionalities Functioning of Option Mode 4 Functioning of Option Mode 5 8.1. Display 8.2. Functionalities Functioning of Option Mode 6 Functioning of Option Mode 7 10.1. Display 10.2. Functionalities Functioning of Option Mode 8 11.1. Display 11.2. Starting-up 11.3. Capturing the split times 11.4. Visualising the memorised information in the « RECALL » mode 11.5. Resetting each lap in the « STOP » mode 11.6. Switching off Battery replacement: type CR2450 Warranty conditions Product modifications Damages and liability Disposal 2 Copyright 2005 Alfano, S.A. All rights reserved. 4. 5. 6. 7. 8. 9. 10. 11. 1. ALFANO presents the KRONOS v2 It concerns the most basic and practical chronometer in the world! The KRONOS v2 has enriched a wide array of data recording products manufactured by the worldwide leader: ALFANO. « Menu » Icones «B» Buttons «C» Buttons « A » Button Menu Copyright 2005 Alfano, S.A. All rights reserved. 3 2. Introduction KRONOS v2 is a device that counts 8 different timing modes; the timing modes have 1 to 4 individual chronometers entirely independent from one another, allowing to memorise 99 laps of 9’59”99 for each one with a maximum of 9 split times per chronometer. You will succeed in effortlessly timing up to 4 competitors without even looking at the chronometer. The display is very clear and equipped with exceptional contrast, which is typical for all ALFANO-systems. While the KRONOS v2 is sturdy, it is also completely waterproof «IP56 » and, in other words, adapted to any situation. 3. Switching on the chronometer in the desired option mode 3.1 Basic switching on: - The Kronos is switched on by pressing button 9 (for 1 second). - The Kronos will be switched on in the mode option of the last use. - The option mode is indicated for a period of 3 seconds before it is being launched. 3.2 Switching on with choice of option mode: In order to switch on the chronometer in one of the suggested 8 option modes, it suffices to simultaneously press the buttons 1 to 8, which will specify the selected option mode, and button 9. Button 1+9 switches on the chronometer in option mode 1 Button 2+9 switches on the chronometer in option mode 2 4 Copyright 2005 Alfano, S.A. All rights reserved. Button Button Button Button Button Button 3+9 4+9 5+9 6+9 7+9 8+9 switches switches switches switches switches switches on on on on on on the the the the the the chronometer chronometer chronometer chronometer chronometer chronometer in in in in in in option option option option option option mode mode mode mode mode mode 3 4 5 6 7 8 The option mode is indicated for 5 seconds before it is being launched. Attention: when you press on one of the buttons 1 to 8 prior to switching on the chronometer to select the option mode, the chronometer will be reset (erasing the memory). If you wish to maintain data of a previous chronometer, you must imperatively proceed with a basic ignition (3.1) When you wish to change the option mode, you will need to switch off the chronometer and reignite it as explained above. 4. Functioning of Option Mode 1 4.1 Display: - N° of split time - « b » = Best - « L » = Lap Times Laps/Split times Number of Laps 4.2 Switching on the KRONOS v2: When you switch on the Kronos v2 in option mode 1, the system will be activated and positions itself in the « STOP » mode, (the « START » icon blinks) to indicate that the chronometers are ready to start up. Note: you will encounter the registered information if it has not been erased before the device was switched off last. Copyright 2005 Alfano, S.A. All rights reserved. 5 Starting up the chronometers: The KRONOS v2 must be in the « STOP » position and the « START » icon must be blinking. Subsequently, press button B1 B2 B3 B4 to to to to start start start start up up up up chronometer chronometer chronometer chronometer 1, 2, 3, 4, The « START » icon freezes and the « STOP » icon disappears to announce that at least one chronometer has started up and 2 small dots appear for every chronometer that has started up. Activate button « B1..B4 » again to capture and display the time of lap no. 1 by continuing to time the following lap. Continue while repeating the action on the same button to capture and display the times of the following laps. 4.3 Displaying the « BEST » lap of each competitor during the timing: While capturing the time, press button « A », KRONOS v2 will position itself at « STARTBEST » and the best executed lap « b » (BEST) of each competitor will appear for about 2 seconds, to be followed with a return to the timing display. 6 Copyright 2005 Alfano, S.A. All rights reserved. Pressing button « A » for one second prior to the expiration of the 2 seconds, makes the time of the last lap executed by the competitors appear for 2 seconds, to be followed with a return to the timing display. Pressing button « A » a third time before the 2 seconds hae passed, makes the total time of the laps executed appear in hour, minute, seconds and 1/100 second for about 2 seconds, to then return to the timing display. Pressing button « A » a fourth time will allow you to return to the « START » position to continue the timing before 2 seconds have passed. 4.4 Capturing split times: Press button « C1..C4 » while the chronometer is in the « START » mode, and the KRONOS v2 will display the number of the split time between the 2 small dots and the time of this split time will appear on the right side. You can capture up to 9 split times for each lap. From the last split time to the second to last split time (maximum 8), press button « C1..C4 ». In order to capture the last split time and close off the time of the lap, press button « B1..B4 », so that KRONOS v2 will display the number and time of the last split time for about 2 seconds and, subsequently, the time of the complete lap. Copyright 2005 Alfano, S.A. All rights reserved. 7 4.5 Resetting during the timing: While capturing the time you wish to stop and reset among one of the chronometers to replace for instance one competitor with another. In order to do this, it suffices to press button « B1..B4 » or « C1..C4 » of the selected chronometer for about 1 second. 4.6 Stopping all chronometers in the « STOP » mode: Press button « A » for 1 second, the « STOP » icon will appear and the «START» icon starts blinking again. The small dots will disappear to announce that the chronometers have stopped. 4.7 Displaying the best lap « b » (BEST) for every chronometer in the « STOP » mode: Starting from the « STOP » mode (while « START » is blinking), pressing button « A » once will position the KRONOS v2 into the « STOP-BEST » mode. 4.8 Visualising all memorised information in the « RECALL » mode: Starting from the « STOP » mode (while « START » is blinking), pressing button « A » twice will position the KRONOS in the « STOP-RECALL » mode. At first, the KRONOS will display the following: • The total time of the laps in hours, minutes, seconds and 1/100 second (first display) Subsequently, with the buttons « B4 » and « C4 »: • The time of each lap accompanied by the letter «L» (LAP) or letter « b » (BEST) for the best ones. • The times of each split time for each lap accompanied by their respective number. Button « B4 » allows you to go back in the memory and button « C4 » allows you to go forward in the memory of the four chronometers simultaneously. 8 Copyright 2005 Alfano, S.A. All rights reserved. 4.9 Resetting each chronometer in the « STOP » mode: Starting from the « STOP » mode (while « START » is blinking), pressing button « A » three times will position the KRONOS v2 in the « STOP-RESET » mode. Subsequently, pressing button « B1..B4 » or « C1..C4 » once of the chronometer you wish to reset. 4.10 Switching off the KRONOS v2: Starting from the « STOP » mode (while « START » is blinking), pressing button « A » four times will position the KRONOS v2 in the « STOP-OFF » mode. Subsequently, wait 2 seconds for the Kronos v2 to be switched off, or after minutes of not using the chronometer. 5. Functioning of Option 2 Option mode 2 differs from option mode 1 by the capacity of allowing the visualisation of the projection of the chronometer counter during the timing. In fact, after capturing the time or a split time, the KRONOS displays the time of this lap for about 5 seconds and the chronometer will then show you the projection of the chronometer, a projection in minutes and seconds concerning the laps in progress. All other functions available in option mode 1 are present here as well. In other words, the functionalities resumed in points 4.2 – 4.3 – 4.4 – 4.5 – 4.6 – 4.7 – 4.8 – 4.9 – 4.10. 6. Functioning of Option 3 6.1 Description of the display - N° of split time - « b » = Best - « L » = Lap Times Laps/Split times 3 chronometer timings Number of Laps 1 reference chronometer Copyright 2005 Alfano, S.A. All rights reserved. 9 6.2 Reference chronometer: The reference chronometer is an autonomous chronometer which allows you to visualise the time you have left to execute your tests. 6.2.1 Starting up/switching off the reference chronometer: While you are in the « STOP » position, (the « START » icon is blinking), or in the « START » position Or Pressing button « B4 » once starts up the reference chronometer. Two small stripes appear on the left side while the reference chronometer is functioning. Pressing button « B4 » for a longer time (2 sec) will stop the chronometer and the two small stripes on the left side will disappear. 6.2.2 Resetting the reference chronometer: While you are in the « STOP » position, (the« START » is blinking) or in the « START » position Or Pressing button C4 for a longer time (2 sec) allows you to reset the reference chronometer. This is the case whether or not you are in the timing mode, but MAKE SURE that this action resets and stops the chronometer. Attention: The reference chronometer must be switched off in order to switch off the Kronos v2 6.3 Functionalities: The present functions in option mode 1 concerning the timing are applicable. In other words, the functionalities resumed in 4.2 – 4.3 – 4.4 – 4.5 – 4.6 – 4.7 – 4.8 – 4.9 – 4.10. The only difference lies in the fact that you do not have more than 3 timing chronometers (3 competitors) at your disposal, which is due to the presence of the reference chronometer. 10 Copyright 2005 Alfano, S.A. All rights reserved. 7. Functioning of Option 4 Option mode 4 differs from option mode 3 by the capacity of allowing the visualisation of the projection of the chronometer counter during the timing. In fact, after capturing the time or a split time, the KRONOS displays the time of this lap for about 5 seconds and the chronometer will then show you the projection of the chronometer, a projection in minutes and seconds concerning the laps in progress. All other functions available in option mode 3 are present here as well. In other words, the functionalities resumed in points 4.2 – 4.3 – 4.4 – 4.5 – 4.6 – 4.7 – 4.8 – 4.9 – 4.10. 8. Functioning of Option 5 8.1 Display: - N° of split time - « b » = Best - « L » = Lap Times Laps/Split times Number of Laps 8.2 Functionalities: Option mode 5 is identical to option mode 1 except for the start-up of the timing. In fact, this mode starts up all chronometers simultaneously by pressing « B1 » just once. Copyright 2005 Alfano, S.A. All rights reserved. 11 The remainder of the functionalities is identical. In other words, the functionalities resumed in 4.2 (except for the start-up of the chronometers) – 4.3 – 4.4 – 4.5 – 4.6 – 4.7 – 4.8 – 4.9 – 4.10. 9. Functioning of Option 6 Option mode 6 differs from option mode 5 by the capacity of allowing the visualisation of the projection of the chronometer counter during the timing. In fact, after capturing the time or a split time, the KRONOS displays the time of this lap for about 5 seconds and the chronometer will then show you the projection of the chronometer, a projection in minutes and seconds concerning the laps in progress. All other functions available in option mode 5 are present here as well. In other words, the functionalities resumed in points – 4.3 – 4.4 – 4.5 – 4.6 – 4.7 – 4.8 – 4.9 – 4.10. 10. Functioning of Option 7 10.1 Display: - N° of split time - « b » = Best - « L » = Lap Times Laps/Split times Number of Laps Projection of the Lap progress (reference chronometer) 12 Copyright 2005 Alfano, S.A. All rights reserved. 10.2 Functionalities: The functionalities concerning the timing of option mode 7 are identical to the functionalities of option mode 1, but it must be noted that this function does only apply to the buttons « B1 », « B3 », « C1 », « C3 », which is due to the presence of the projection of the time of the lap in progress at the level of the buttons « B2 », « C4 ». The projection of the time of the lap in progress evidently is reset and starts up again each time when you close and restart a lap. 11. Functioning of Option 8 11.1 Display: N° of the split time of Lap : 1, 2, 3, 4 (of the same competitor) Times Laps/Split times (Lap 1, 2, 3, 4) Laps Comment: Option mode 8 only takes the time of one single competitor whereby the 4 display lines represent each lap (and its split times) of laps 1 to 4. Option mode 8 for KRONOS R1 (revision 1) allows you to memorize laps up to 20’00"00 and the times are recorded in tenths of second 1/10S. Option mode 8 for KRONOS R2 (revision 2) allows you to memorize laps up to 10’55"00 and the times are recorded in hundredths of second 1/100S. 11.2 Starting up: When you switch on the Kronos option mode 8, the system is activated and positions itself in the « STOP » mode, (the « START » icon blinks). The chronometer is ready to start up. Copyright 2005 Alfano, S.A. All rights reserved. 13 In order to start up the timing from the first lap, you need to press button « B1 ». The menu is positioned in the fixed « START » mode and the display of the time of the lap in progress appears. In order to stop the first lap (lap 1) and start the following one (lap 2), press button « B2 » To stop lap (2) and start lap (3), press button « B3 » To stop lap (3) and start lap (4), press button « B4 » To stop lap (4), press button « B4 » a second time. Comment: when you have closed a lap, buttons corresponding to the timing of this lap will become inactive. ATTENTION: if you press « A » for longer than one second, the time in progress will not be memorised. This is to allow you not having to memorise the 4 laps systematically. Example: if you wish to register two laps only, you start off with button « B1 » followed by « B2 » and then « B3 », which will stop the timing of the second lap and will start the third one, as you are timing only two laps, press button « A » for longer than one second and lap 3 will not be taken into account. 11.3 Capturing the split times: Press button « C1..C4 » corresponding to the lap in progress and the KRONOS v2 will display the number of the split time on the left side. 14 Copyright 2005 Alfano, S.A. All rights reserved. You can capture up to 9 split times for each lap. From the first split time to the second to last split time (maximum 8), press « C1..C4 » in function of the lap in progress. In order to capture the last split time and close the time of the lap, press « B2..B4 » (in the function of the lap in progress), so that the KRONOS will display the number and time of the last split time or about 5 seconds and will afterwards return to the lap in progress by displaying the projection of the time. Important: when you register a split time, the split times of the same figure of the previous laps reappear to allow you to compare them. Attention: pressing one of the « B » buttons for a longer time results in the chronometer to be reset (all laps) and the lap in progress starts over again. Pressing the « C » buttons for a longer time results in the chronometer to be reset and stopped. 11.4 Visualising all memorised information in the « RECALL » mode: Starting from « STOP » mode (while « START » is blinking), pressing button « A » once will position the KRONOS v2 in the « STOP-RECALL » mode. Button « B4 » lets you go back in the memory and button « C4 » allows you to go forward in the memory of the four laps with its split times simultaneously. 11.5 Resetting each lap in the « STOP » mode: Starting from the « STOP » mode (while « START » is blinking), pressing button « A » twice will position the KRONOS v2 in the « STOP-RESET » mode. Pressing one of the buttons 1 to 8 for about 2 seconds will initiate the resetting of all laps and previously captured split times. 11.6 Switching off: Please see point 4.10. Copyright 2005 Alfano, S.A. All rights reserved. 15 12. Battery replacement of the type CR2450: (1) Remove the lid from the KRONOS v2 by putting of the 7 screws (2) Remove the battery by shifting the black ejector upwards (3) Insert the new battery by respecting the polarity (4) Place the lid of the KRONOS v2 back with the 7 screws ATTENTION: While placing back the lid, make sure you do not tighten the screws too much. Stop screwing as soon as the lid touches the. box. Every time you tighten beyond that point, it might damage the KRONOS v2 and cause water and dust to infiltrate. 16 Copyright 2005 Alfano, S.A. All rights reserved. 13. Warranty conditions All our devices have been subjected to thorough inspections in the factory and are covered by a warranty of 24 months against manufacturing errors. The warranty takes effect as of the date of purchase. The date of purchase is the date indicated on the invoice/receipt that was delivered at the time of the purchase by the retailer. The manufacturer is committed to freely repair and replace the pieces containing manufacturing errors during the period of the warranty. The defects that cannot be attributed to the material or manufacturing will be examined by one of our customer services or by our central office, and are also invoiced in function of the results. The warranty does not apply when opening the device, accidental damage as a result of negligence or inapplicable use, in case of an incorrect, erroneous installation not in accordance with the indications that are demonstrated in the manual, and in case of independent phenomena of the use and functioning standards of the device. The warranty is cancelled in case of repairs or manipulation applied by unapproved third parties. The intervention under the warranty does not entitle to replacement of the device or the extension of the warranty. The intervention under the warranty and implemented by one of our centers of the customer service or by our office. In the latter case, this piece must be sent to us free of freight from our company, in other words, the transport fees are at the expense of the user. The manufacturer denies all responsibility in case of damage inflicted upon people or goods as a result of a bad installation or incorrect use of the device. 14. Product modifications Alfano S.A. applies a continuous development method. Consequently, Alfano S.A. reserves itself the right to make changes and improvements to any product described in this document without any prior notice. 15. Damages and liability While the products are used under the single leadership and responsibility of the Client, the latter will support the damage that the products can undergo or cause. No damages are provided for deprivation of enjoyment. ALFANO cannot be held responsible for the direct or indirect consequences of their exploitation or of their insurability. The obligations of ALFANO are obligations in kind and not in result. 16. Disposal The disposal of the machine must take place with respect for the environment. The chronometer and its accessories contain a lot of plastic pieces. If the chronometer or one of its accessories does not function, these must be treated in accordance with the legislation of the country. Everything, including the old batteries must be disposed of according to the regulations in effect in your country. Copyright 2005 Alfano, S.A. All rights reserved. 17 ALFANO S.A. Rue de l’Industrie, 3b – 1400 NIVELLES (BELGIUM) www.alfano.com 18 Copyright 2005 Alfano, S.A. All rights reserved.