1
WE PRODUCE QUALITY OF LIFE!
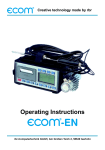
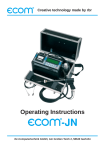
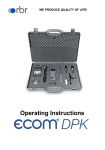
Operating Instructions
Index
Page
1. Design ecom-DPH
2. Installation
2.1. Power supply
2.2. Accumulator charging
2.3. Clock set
3. Numerical indication
3.1. Zeroing pressure sensor
3.2. Display damping
4. Check programs
4.1. Heating check
4.1.1. Gas losses
4.1.2. Surface losses
4.1.3. Ventilation losses
4.2. 4-Pa Test (Option)
4.3. Differential pressure
4.4. Pitot tube
4.5. Temperature
5. Adjustments
5.1. DPH Adjustments
5.2. Parameters for measurements
5.3. Adjustments 4-Pa Test
6. Technical data ecom-DPH
7. Maintenance Tips
Page 2
3
4
4
4
6
6
7
8
9
10
11
11
11
12
13
13
14
15
ecom-DPH
1. Design ecom-DPH
IR interface
(for IR printer)
Pressure
connection „+“
Temperature
connection „T2“
Pressure
connection „-“
Temperature
connection „T1“
Graphic display
Function keys
(current function is
shown on display)
Cursor keys
Connection
loading unit
OK key
ON/OFF key
ecom-DPH
Page 3
2. Initialisation
2.1. Power supply
The ecom-DPH is powered by 3 batteries or 3 accumulators. The following types
can be used to operate the instrument:
- Battery
1,5 V AA (Mignon)
- Accumulator 1,2 V AA NiCd (nickel cadmium)
- Accumulator 1,2 V AA NiMh (metal hydride)
If you are using a loading unit, please adjust the function „Batt.charg“ to YES.
Open the battery compartment and insert the batteries. Be careful to ensure
proper polarity. If using the rechargeable battery type, it will be necessary to fully
charge the batteries prior to initial use (approx. 4 hours). The voltage of the batteries is monitored by the DPH and will indicate a low battery condition by approx.
3.3 V by beeping and flashing a signal on the LCD display. If the voltage sinks
(approx. 3 V) so the ecom-DPH will automatically switch off.
2.2. Accumulator charging
The accumulator charging procedure is monitored by the ecom-DPH. Once connected to AC power, the instrument switches on. During the charging procedure,
a BATTERY indicator will be shown on the LCD display. Once the battery is fully
charged, the BATTERY indicator on the display will blink. It is possible to operate
the ecom-DPH on AC power during the charging procedure by pressing the <ON>
button.
2.3. Setting clock
The internal clock and the internal RAM memory of the ecom-DPH are buffered
via a capacitor. If the instrument is without current supply during more than approx. 10 minutes, the recorded information gets lost. Before using the ecom-DPH
for the first time, adjust the internal clock.
Page 4
ecom-DPH
Date and time can be set as follows:
1. Select with the cursor keys <RIGHT/LEFT> the position to be changed (corresponding field blinks).
2. Adjust the correct numbers with the cursor keys
<UP/DOWN>.
ecom-DPH
Set clock
12:00:08
01.01.09
DPH adjustments
Page 5
Menu
3. Numerical indication
The internal pressure sensor should be flown with pressure
after the switch-on of the instrument, as it is
zeroed during switch-on procedure!
After switch-on, the measurement values T1 and Pressure will be displayed. Use the cursor key <up> to select the measured parameter for the upper value (cursor
key <down> for the lower value). As measured parameters the temperatures T1 and T2 and the differential
pressure in hPa or Pa are available. Are for T1 or T2 no
temperature sensor connected, dashes will appear in
the measured value display.
20.8
0.00
∆P->0 Int=0
T1
°C
Press
Pa
Menu
1. Before making measurements, the instrument must have
adapted the ambient temperature!
2. Make sure, that the ambient temperature remains constant
during measurement!
3.1. Zeroing pressure sensor
As the difference pressure sensor can drift because of
its sensitivity in the zero point, it is possible to reset the
zero point. Press <F1> to zero the value of the pressure
sensor.
∆P->0 Int=0
3.2. Display damping
The display damping can be adjusted with <F2> from 0
to 9 (0 = no damping; 9 = high damping; default = 1). In
the menu “Adjustments/Param.f.measurement“ you
can adjust, if the damping should be progressively (for
large pressure changes the display reacts faster than by
small pressure changes; default = No).
Page 6
20.8
0.00
20.8
0.00
∆P->0 Int=0
ecom-DPH
T1
°C
Press
Pa
Menu
T1
°C
Press
Pa
Menu
4. Check programs
After pressing <F4> (Menu / measured value display)
the main menu with pre-programmed measurement
programs is displayed.
4.1. Heating check
The heating check is a simple, expressive process to
evaluate a complete heating plant (heat production,
distribution and transfer) from the energetic point of
view.
Hereby the single plant components get inspected by
the heating engineer in a combination of measurements
and visual assessment and valued in regards of their
energetic quality acc. to a negative point system of maximum 100 points.
The higher the score, the farer the current plant is away
from the desirable energetic stand and the higher the
energy saving potential would be if modernization
measures are conducted. In combination with the special probes required hereto, the ecom-DPH is able to
perform the measurement of the heating check parameters: gas losses, ventilation losses and surface losses.
Out of the main menu select the sub-menu "Heating
check" and confirm with <OK>.
Heating-Check
4-Pa Test
Diff.pressure
Pitot tube
Temperature
Main menu
4.1.1. Gas losses
The menu point "Gas losses" is used to convert from
already determined flue gas loss values (in %) in negative points. The value can be set as follows:
1. Use the cursor keys <right/left> (corresponding field
blinks) to select the position you want to change.
Gas losses
Surface losses
Ventilation losses
Show Analysis
New Heating-Check
Heating-Check
2. Set the correct numerical value with the cursor keys
<up/down>.
After entering, the result is calculated and stored for
analysis ("Show Analysis") by pressing <OK>.
ecom-DPH
Page 7
4.1.2. Surface losses
The surface losses measurement is performed by a
temperature sensor specific for surfaces. The temperature difference between boiler surface and room temperature (air temperature sensor) is determined and the
percentage loss is calculated. Once the menu point is
called up, the room temperature must be determined.
Connect the air temperature sensor to T1. After sufficient measurement time (approx. 10 s) press <F1> or
<F2>. The value is stored and used to calculate the
temperature difference. Then the boiler performance
needs to be entered. To easy the measurement width,
depth and height of the boiler can also be entered (dimensions will be memorized for surface calculation).
Please proceed as follows:
Gas losses
Surface losses
Ventilation losses
Show Analysis
New Heating-Check
Heating-Check
Air temperature
sensor
-activate respective input window with <OK>
-select the position with the cursor keys <right/left>
(corresponding field blinks)
-set the correct value with the cursor keys
<up/down>
-confirm input with <OK>
If the boiler dimensions are not entered, the measurement recording must be started with <F3> (Next) . Here
the dimensions must be entered for all surfaces. You
can start with measurement after pressing the <F1> or
<F2>. Proceed as follows:
-Connect surface probe at T2
-select surface with cursor keys <right/left>
-position surface probe
-take temperature difference with <F1> per surface 9 measurements can be taken (they get
averaged automatically)
-if necessary clear measurements with <F2>
-repeat process for each surface
Page 8
Temperature sensor
for surfaces
ecom-DPH
Are all surface temperatures determined, you can leave the menu with <F3>
(Analys) or <F4> (Menu). The surface losses are calculated automatically. The
result and the conversion of the surface losses in penalty points is available with
<F3> (Analys) or at the menu point "Show Analysis".
4.1.2. Ventilation losses
The ventilation losses measurement is performed by a
flow probe 30 sec. after burner switch-off. This measurement can be performed at the earliest 5 min. after
instrument´s switch-on as the pressure sensor requires
this period of time for stabilization. Once the menu point
is called up, the room temperature must be determined.
Connect the air temperature sensor to T1. After sufficient measurement time (approx. 10 s) press <F1> or
<F2>. The value is stored and used to calculate the
temperature difference. Then the values for air pressure, external temperature, boiler performance and flue
gas pipe diameter must be inputted. Hereto proceed as
follows:
Gas losses
Surface losses
Ventilation losses
Show Analysis
New Heating-Check
Heating-Check
Air temperature
sensor
-activate respective input window with <OK>
-select the position with the cursor keys <right/left>
(corresponding field blinks)
-set the correct value with the cursor keys
<up/down>
-confirm input with <OK>
You can start the measurement with <F3> (Next). Proceed as follows:
-connect temperature sensor of flow probe with T2
-disconnect hoses of flow probe from instrument
-zero the pressure sensor with <F1>
-connect hoses of flow probe to instrument
-put flow probe into the flue gas pipe
(take care to marking for flow direction)
-switch off burner and press simultaneously <F2>
or:
-press <F3> to activate timer (3 sec.) and switch off burner
by second beep
-after approx. 30 sec. the measurement value and the converted
result (negative points) are available
Flow probe
ecom-DPH
Page 9
An overview of the measurements is available under
“Show Analysis“. Press <F1> (Print) to print them out
(only with option IR printer). Please care for a frictionless (direct sight) connection between the sending diode
on the front of the instrument and the receiving diode on
the printer. The maximal distance between both units
should not exceed ca. 40 cm otherwise a trouble free
transfer is no more ascertained in any case.
With "New Heating-Check" it is possible to clear all
partial results are for a new measurement (<F1> (yes)).
You can leave the submenu "Heating-Check" with the
cursor key <left>.
Gas losses
Surface losses
Ventilation losses
Show Analysis
New Heating-Check
Heating-Check
4.2. 4-Pa Test (Option)
The simultaneous operation of room-dependent firing
place and air evacuation system can lead to dangerous
low pressure conditions. With the ecom-DPH it is possible to check the low pressure limit value of 4 Pa and to
document in a diagram the time course of the low pressure value. Once the menu point is called up, the
measurement is to be performed as follows:
Heating-Check
4-Pa Test
Diff.pressure
Pitot tube
Temperature
Main menu
-connect capillary hose for room where burner is installed to „+“
-connect capillary hose for reference place (staircase or outside air) to „-“
-operate firing and evacuation systems with maximal performance
-open window resp. connection door to burner room and check
the correct evacuation of the exhaust gases
-zero pressure sensor with <F1>
-position capillary hose for reference location
-start record pressure value course with <F2> (Start)
(an acoustical signal is issued every 30 sec.)
-record pressure by opened window resp. connection door
-close window resp. connection door after approx. 30 sec. and
check low pressure
-after approx. 30 sec. open window resp. connection door and
check zero point
-close window resp. connection door after approx. 30 sec. and
check low pressure
-after approx. 30 sec. open window resp. connection door and
check zero point
-close window resp. connection door after approx. 30 sec. and
check low pressure
Page 10
ecom-DPH
Once the measurement time is completed, the diagram
can be viewed on the display. Use cursor keys
<up/down> to emphasize illustration 1x, 2x, 4x, 8x
times. With the cursor keys <right/left> the time axis
can be adjusted. Press <F1> (Print) to start a print out
(only with option IR printer).
4.3. Differential pressure
After calling up the menu point “Differential pressure”
it is possible to make pressure measurements. The
measured values can be displayed in hPa or Pa (switch
with <F3>).
4.4. Pitot tube
After calling up the menu point “Pitot tube” it is possible to make flow measurements with the flow probe.
Connect the temperature plug of the flow probe to T2.
Please take care to marking for flow direction.
4.5. Temperature
After calling up the menu point “Temperature” it is
possible to make differential temperature measurements. Connect temperature sensor for surfaces and air
temperature sensor to T1 and T2. The temperature
difference between the two sensors is calculated. With
<F1> (Mode) the temperature difference of the two sensors to the internal temperature sensor can be calculated.
ecom-DPH
+ press Diff.press.measurem.
0.00
Press
Pa
∆P->0 Int=0 hPa/Pa Menu
T2
+ press Pitot measurem.
Temperatur
Flow
23.4 0.95
°C
m
s
∆P->0 Int=0
Menu
T1: 22.4 °C
T2: 20.4 °C
∆T: 2.0 °C
Mode
Page 11
Menu
5. Adjustments
5.1. DPH Adjustments
Additionally to those ecom-DPH functions described
previously, various adjustments can be made in the
instrument. From the main menu, select the sub-menu
"Adjustments" and confirm with <OK>. Under "DPH
settings" you will get a selection of modifiable parameters that can be adjusted depending on the application.
Place the cursor on the desired line and call up the
setting with <OK>. The modifiable parameters are:
DPH Adjustments
Param. f.measurement
4Pa-Test
Adjustments
Set clock (press <OK> to access setting menu):
-correction of internal clock with cursor keys
LCD lighting (press <OK> to access setting menu):
-setting the display backlight with cursor keys <up/down>:
-ON = Lighting is always on
-OFF = Lighting is always off
-1, 5, 10 minutes = Lighting on for 1, 5, 10 minutes,
if no key is pressed
LCD contrast (press <OK> to access setting menu):
-setting the display contrast with cursor keys <up/down> in 4 steps:
-Low, Middle, High, Very High
Key beep (press <OK> to access setting menu):
-setting an acoustic signal by key pressing with cursor keys <up/down>
Batt.charg (press <OK> to access setting menu):
-setting if a loading unit is used or not with cursor keys <up/down>
Page 12
ecom-DPH
5.2. Parameters for measurements
Under "Param.f.measurement" you will get a selection of modifiable parameters that can be adjusted depending on the measurement. Place the cursor on the
desired line and call up the setting with <OK>. The
modifiable parameters are:
DPH Adjustments
Param. f.measurement
4Pa-Test
Adjustments
Atm.press (press <OK> to access setting menu):
-input of barometric air pressure for velocity calculation
(default = 1013 hPa)
Factor f. Pitot t. (press <OK> to access setting menu):
-input of pitot factor for velocity calculation
(default = 0.93 for flow probe)
Progressive damping (press <OK> to access setting menu):
-setting if the damping should be progressively (for large pressure changes the
display reacts faster than by small pressure changes; default = No).
5.3. Adjustments 4-Pa Test
Under "4Pa-Test" you can adjust the measuring time
for the 4-Pa-Test (settings 3, 4, 5, 6 minutes are possible; default = 4 minutes). You can leave the submenu
"Adjustments" with the cursor key <left>.
DPH Adjustments
Param. f.measurement
4Pa-Test
Adjustments
ecom-DPH
Page 13
6. Technical data ecom-DPH
Power supply:
- Battery: 3 x 1,5 V AA (Mignon)
- or
3 x 1,2 V AA NiCd (nickel cadmium)
- or
3 x 1,2 V AA NiMh (metal hydride)
Power consumption:
- With backlit approx. 90 mA
- Without backlit approx. 45 mA
Display:
- Graphic display
- Resolution 128 x 64 pixel
- Window approx. 43 x 28 mm
Operation:
(menu-monitored)
- 4 cursor keys
- 1 confirmation key
- 4 function keys
- 1 ON/OFF key
Differential pressure
measurement:
- Pressure range +/- 10 hPa (mbar)
Resolution:
-0,01 hPa (mbar) or 0,01 Pa
Accuracy:
-< 3% of measured value
-<0,3 Pa from 0 to 10 Pa
Internal clock:
- Adjustment via menu and keyboard
- Buffer for battery change only (approx. 1 minute)
Dimensions (LxWxH):
- Approx. 170 x 75 x 35 mm
Weight:
- Complete approx. 300 g
Ambient temperature: - 0 bis 50 °C
Page 14
ecom-DPH
7. Maintenance Tips
To secure the accuracy of your measuring instrument we recommend the annual
check by an authorized ecom partner. In the case of strong demand (e.g. permanent several hours of measurement per day, rough conditions etc.) shorter intervals between checks should be selected - please contact your ecom partner. All
ecom partners are listed under www.rbr.de.
Subject to technical changes
V1.8 03.2014
rbr Messtechnik GmbH
Am Großen Teich 2
D-58640 Iserlohn
Phone: +49 (0) 2371 - 945-5
Fax: +49 (0) 2371 - 40305
Internet: http://www.rbr.de
eMail: [email protected]
ecom-DPH
Page 15