1
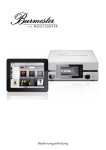
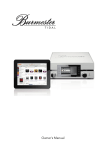
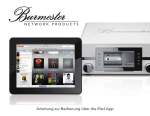
Operating Instructions
Dear Audiophile,
Congratulations on your excellent choice. We sincerely appreciate your trust in us.
You have selected an audio component which excels in musical fidelity and combines
uncompromising manufacturing quality with technical innovation and the highest degree of
operating flexibility.
We urge you to read this owner’s manual in its entirety at least once so you will be able to make full
use of all capabilities of this outstanding audiophile instrument.
However, should you have additional questions, please contact your dealer or call us directly.
You will be the judge of our uncompromising commitment to manufacture true high-end stereo
components and to offer a service that is commensurate with the highest quality standards.
Please, talk to us about customization – even if it seems a little far-fetched to you. We gladly accept
any technically reasonable challenge.
Enjoy the music.
Your Burmester team
iPad is a registered trademark of Apple Inc., registered in the U.S.A. and other countries.
HIGHRESAUDIO is a registered trademark.
The usability of third-party services (Internet radio, music streaming services) with the
111 Musiccenter is subject to any terms of use of third-party suppliers, as well as the technical
requirements of the user and third parties (Internet access, service availability) on which Burmester
Audiosysteme GmbH has no influence.
Software version 2.30

Contents
What options Does the Music Center Offer Me?
5
How Do I Use these Instructions?
6
Symbols and text labels used
Meaning of warning symbols and words
6
7
Important Safety Information
7
Opening the device
7
Power supply
7
Set-up8
Operating during thunderstorms
8
Backup8
What Do I Have to Observe During Unpacking and Setup?
8
Packaging8
Supplied items
9
Setting up the device
9
How Do I Connect the Device?
9
Installing the storage battery
Connecting analog signal sources
Connecting digital signal sources
Connecting a power amplifier
Connecting a tape recorder, headphones, and digital output
Connecting a network cable and USB components
Connecting the remote control components
Connecting the Wi-Fi antennas
Connecting the power cord
10
11
11
12
12
13
14
15
16
What Operating and Display Elements Are There?
17
What Functions Does the Remote Control Offer?
18
How Do I Switch the Device on?
19
What Options Do I Have for Operating the Musiccenter?
20
Operating the music center using the buttons on the device panel or the remote control
Operating the Musiccenter via the iPad app
Operating the Musiccenter via a web browser
20
20
20
111 Musiccenter
3

How do I connect the music center to my home network?
21
How Do I Operate the Musiccenter Without a Network?
21
How Do I Establish a Wi-Fi Connection?
22
How Do I Change the Network Mode?
22
How Do I Play a CD?
24
How Do I Play Content from a USB Stick?
25
How Can I Copy (rip) a CD to the Internal Memory?
26
How Do I Play an Analog or Digital Signal Source on the Device?
28
How do I Play Content from the Hard Disk (Player)?
29
How Do I Play Content from the Internet (Internet Radio)?
30
How Do I Operate the Musiccenter as a Pure Data Server (Server Mode)?31
How Do I Query the Serial Number and Device Versions?
32
How Do I Perform a Software Update?
33
Performing a software update via the Internet
Performing a software update using a USB stick
33
34
Maintenance, Repair and Care
35
Disposal36
Warranty36
Appendix37
The back side of the device at a glance
Remote control of the device via BURLINK
37
38
Glossary40
Technical Data
42
Connectors42
Components42
General data
42
4
What Options Does the Musiccenter Offer Me?
What Options Does the Musiccenter Offer Me?
The Musiccenter combines multiple premium components into one device, providing
different options to play music in the highest quality:
Preamplifier
Connect your analog and digital signal sources on the reference preamplifier and
choose designations for the connected devices.
CD drive
Play CDs directly or copy them to the internal hard disk drive (ripping).
Internal hard disk drive
Save tracks on the 3 terabyte hard disk drive and optimize the sound quality during the
saving process.
If a connection to the Internet exists, the CD cover and information on the album and
artist are automatically downloaded and saved.
Play the saved music. Convenient options for selecting tracks by name, artist, album,
and genre are at your disposal. You can also take advantage of the search function.
Home network
Connect the Musiccenter to your home network. Thanks to the DLNA/UPnP standard,
the Musiccenter can make music saved on the hard disk available to other network
devices.
Music download and Internet radio1
Via an established Internet connection, you can download high-resolution music from
providers such as HIGHRESAUDIO and access a variety of Internet radio stations.
Operation via the iPad app
You can conveniently operate the Musiccenter on an Apple iPad using the
BurmesterMC app:
• Select the connected signal source.
• Start ripping a CD to the internal memory.
• Scroll through the covers of saved albums or display information on the albums and
artists.
• Create and play playlists.
Note:
Please see the separate document “Instructions for Operation via the iPad App” for
more information on installing and operating the iPad app.
Operation via a web browser
You can access the Musiccenter using any standard web browser, even without an iPad.
In addition to playback of albums, tracks, and playlists, the web browser interface offers
a variety of further functions:
• Import audio files in the formats flac, m4a, aif, wav, mp3, aac, and ogg.
• Edit album and track information.
• Export audio files to a USB stick.
• Call up device-specific information.
• Change device settings.
Note:
1
Please see the separate document “Instructions for Operation via a Web Browser” for
more information on how to operate the Musiccenter via a web browser.
The Internet connection and music downloads result in use-dependent costs.
111 Musiccenter
5
How Do I Use These Instructions?
How Do I Use These Instructions?
These operating instructions describe the set-up, connection, and operation of your
111 Musiccenter, hereinafter referred to as the “Musiccenter”. Please refer to the
enclosed quick guide operating instructions for information on a quick start-up and
descriptions of some basic functions.
To be able to use all the functions of the Musiccenter, you need the supplied Apple
iPad, which is described in separate operating instructions. After connecting and
starting up the Musiccenter, you will generally only use the iPad and occasionally the
remote control. The convenient format of the iPad instructions helps facilitate
operation.
Please note the following:
►► Read and follow the information given, in particular the safety information and
warnings.
►► Save these operating instructions.
Symbols and text labels used
33
Requirement
Designates a requirement which must be fulfilled before a subsequent action
can be taken.
►►
Action step
Designates an individual action step.
1.
2.
3.
Sequence of actions
Designates a sequence of action steps which have to be performed in the given
order.
ªª
Result
Designates the outcome of an action.
Meaning of warning symbols and words
This document uses the following warning symbols and words:
The general danger symbol, in conjunction with the warning words
CAUTION, WARNING, and DANGER, serves to warn against the risk
of severe injuries. Follow all subsequent
instructions to prevent serious or fatal injuries.
The lightning symbol, in conjunction with the warning word
DANGER, serves to warn against a lethal electrical voltage.
NOTICE
6
The warning word NOTICE indicates a danger that can lead to
damage to or destruction of the device.
CAUTION
The warning word CAUTION indicates a danger that poses a low or
medium risk of injury.
Warning
The warning word WARNING indicates a danger that can lead to
death or severe injuries.
Danger
The warning word DANGER indicates a danger which can directly
lead to death or severe injury.
Important Safety Information
Important Safety Information
Opening the device
Do not open the device. The device does not contain any parts that can be maintained
by the user. Fuses inside the device may only be replaced by authorized staff, such as
your specialist dealer.
Power supply
Use the supplied 3-wire power cord for power supply. The protective earth contact
must not be rendered ineffective. Furthermore, the device may only be connected to
an outlet with a functioning protective conductor connection.
The device has a power supply unit that automatically adjusts to the power supply. As a
result, the device can be operated with all common power supplies.
Lay the power cord in a way that prevents it from being damaged. Do not use a
damaged power cord. Instead, switch the device off and contact your specialist dealer.
Set-up
When selecting an installation location, please note the following:
• Avoid direct sunlight, excessive heat, cold, moisture, and dust.
• Ensure sufficient ventilation. Do not place the device in a closed rack.
• Do not cover the slots and openings on the device. They serve as a means of
ventilation.
• Do not expose the device to dripping water or spray water and do not place any
containers holding liquids on your device. Do not place any open ignition sources,
such as burning candles, on the device.
Operating during thunderstorms
During thunder and lightning storms, disconnect the device from the power supply by
unplugging the power cord from the unit or from the power socket. Switching off the
mains switch on the back side of the device is not sufficient. For good measure, also
disconnect all connected components from the power supply.
Backup
Burmester recommends backing up audio data saved in the Musiccenter to USB drives
via the web interface. Backups should be performed every six months or after ripping a
certain number of CDs. Please see the separate document “Instructions for Operation
via a Web Browser” for more information on creating a backup.
111 Musiccenter
7
What Do I Have to Observe During Unpacking and Setup?
What Do I Have to Observe During Unpacking
and Setup?
Caution
Heavy device
The device is very heavy and may cause injury if it falls.
►► Allow a second person to help you during unpacking and set-up if need be.
►► Pay attention to any possible sharp edges.
►► Place the box on the floor and remove all accessories and the device.
►► An operating temperature that is too low or too high may lead to errors in the
device. For this reason, after unpacking the device, leave it standing for some time
before connecting it and turning it on.
Packaging
The packaging is designed for re-use as long as it has not been damaged during
previous transportation. For this reason, do not throw the packaging away and use the
original packaging for any further transportation.
Supplied items
►► Make sure the package contents are complete:
— 111 Musiccenter
— RCA to XLR adapter (4 in total – 2 pairs)
— 005 remote control
— Power cord
— Network cable
— Battery
— Allen wrench
— Operating instructions (OI): Quick Guide OI, OI for the Musiccenter, Instructions
for Operation via the iPad App, Instructions for Operation via a Web Browser
— Wi-Fi antennas (2)
— Wi-Fi antenna block
— iPad
— Warranty documents
►► Please contact your specialist dealer if anything is missing or the supplied content is
damaged.
8
How Do I Connect the Device?
Setting up the device
NOTICE
Heat or moisture
The device can be damaged if exposed to excessive heat or moisture.
►► Protect the device from direct sunlight.
►► Avoid setting the system up near sources of heat, such as heaters, ovens, or above
devices that generate a large amount of heat (such as power amplifiers).
►► Avoid moisture and dust.
►► Ensure sufficient ventilation.
1. Place the device on a stable, level surface.
CAUTION! In particular, note the weightiness of the Musiccenter.
2. Connect the device as described in the following.
How Do I Connect the Device?
This chapter describes all options for connection. Please see the appendix at the end
of these operating instructions for an overview of the connections on the rear side of
the device.
Caution
Connecting devices that are on
Connecting devices that are on can lead to damage.
►► Before connection, shut off the Musiccenter and all other components belonging
to your system.
►► Do no switch the components back on until they have been connected completely
and correctly.
Installing the storage battery
The Musiccenter is equipped with a rechargeable battery that allows the system to shut
off safely in the event of a power failure. The battery is enclosed separately and has to
be installed before initial device start-up.
If the battery has already been installed by your specialist dealer, you can skip the
following installation instructions.
NOTICE
Operation without a storage battery
The device is also fully functional without the battery inserted, but cannot safely shut
off in the event of a power failure. Possible consequences include data loss or even
damage to the operating system.
►► Insert the storage battery or ask your specialist dealer to do so for you.
Note:
In the event of a power failure, the display shuts off immediately, even if a storage
battery is inserted. The system is still shut off safely in the background.
111 Musiccenter
9
How Do I Connect the Device?
To install the storage battery:
1. Unscrew the four screws and remove the service plate.
2. Connect the battery cable to the connection cable in the UPS BATTERY slot.
3. Insert the battery into the compartment until it clicks into place.
4. Position the service plate and tighten the four screws (finger tight).
Connecting analog signal sources
►► Connect analog signal sources to the INPUT 1/2/3 inputs using a balanced LF cable.
►► Connect unbalanced cables to the enclosed XLR to RCA adapters.
10
How Do I Connect the Device?
Connecting digital signal sources
►► Connect electrical digital signal sources, such as a CD player, to RCA inputs
INPUT 4/6/8.
►► Connect optical digital sources, such as a DAB tuner, to TOSLINK inputs
INPUT 5/7/9.
Connecting a power amplifier
►► For the best sound, connect the BALANCED sockets to the inputs on your amplifier
using a balanced LF line.
►► Use the UNBAL outputs and a cinch line if your amplifier only features unbalanced
cinch inputs.
111 Musiccenter
11
How Do I Connect the Device?
Connecting a tape recorder, headphones, and digital output
1
2
3 4
1 Tape recorder (TAPE)
For connecting an analog recording device, for example.
2 Headphones (PHONES)
For connecting headphones.
3 Optical digital output (DIGITAL OUT)
For connecting e.g. a preamplifier via an optical digital cable (TOSLINK).
4 Electrical digital output (DIGITAL OUT)
For connecting e.g. a preamplifier via an electrical digital cable (RCA).
Tape recorder (TAPE)
This connection outputs an analog signal with a fixed level.
►► Here, you can connect an analog recording device, for example.
NOTICE!
Do not connect any devices that could be damaged by the fixed level (such as a power
amplifier).
Headphones (PHONES)
This connection outputs an analog signal with an adjustable level.
►► Connect headphones here.
Digital output (DIGITAL OUT)
These connections are for digital output signals.
►► Use an electrical or optical digital cable.
12
How Do I Connect the Device?
Connecting a network cable and USB components
ETHERNET
►► Here, you can plug in an Ethernet network cable and connect it to your home
network router.
Please see the section “How Do I Operate the Musiccenter as a Pure Data Server
(Server Mode)?” on page 31 and the “Instructions for Operation via the iPad App” for
more information on operation on a network.
USB 1 − 4
The USB slots allow you to connect USB components, such as
• An external hard disk to create a backup
(see “Instructions for Operation via a Web Browser”)
• A USB stick to install an update
(see “Performing a software update using a USB stick” on page 34)
• A USB stick to play music
(see “How Do I Play Content from a USB Stick?” on page 25)
►► Insert the USB component.
ªªIt should be detected automatically and ready for operation after a brief
configuration phase. Please see the corresponding sections for more detailed
information.
111 Musiccenter
13
How Do I Connect the Device?
Connecting the remote control components
BURLINK
BURLINK (BURmester LINK) is an interface to control Burmester components via a set of
remote control commands developed by Burmester.
►► Connect the Musiccenter and control system using an RS-232 cable.
Note:
Please see the section “Symbols and text labels used” on page 6 for more
information on using BURLINK.
REMOTE
Connecting the DC OUT socket on a separate device to the DC IN socket on a
Burmester device switches this device on and off along with the Musiccenter.
Correspondingly, connecting the DC IN socket to the DC-OUT socket on a Burmester
device switches the Musiccenter on and off whenever the connected device is turned
on or off.
►► Connect the Musiccenter and a second Burmester device using a remote cable.
Burmester power amplifiers include an appropriate remote cable, which can also be
purchased from your specialist dealer.
IR IN
IR IN allows you to connect an additional infrared receiver. This infrared receiver can,
for example, be set up in a different room, enabling remote control of the Musiccenter
without direct visual contact with the device itself.
Connecting an external infrared receiver deactivates the internal receiver.
►► Connect the infrared receiver’s connection cable to the IR IN socket.
Note:
14
You can get additional infrared receivers directly from Burmester. There, the connection
cable is made based on your desired length.
How Do I Connect the Device?
Connecting the Wi-Fi antennas
The connection between the iPad and Musiccenter is established via the Wi-Fi
antennas. You can either mount the two antennas directly to the connections on the
device or connect them via the antenna block. The antenna block and connecting cable
allow you to position the antennas higher, enabling a larger range.
To mount the antennas directly to the device:
1. Straighten the antenna hinges and screw the antennas onto the connection threads.
Make sure that the antennas do not tilt and the threads are not damaged.
2. The antennas feature a rotary, hinged base. After attachment, move the antennas
into the desired position and fold them upward.
Connecting the antennas via the antenna block:
1. Screw the two plugs onto the connection thread on the device. Make sure that the
plugs do not tilt and the threads are not damaged.
2. Straighten the antenna hinges and screw the antennas onto the connection threads
on the antenna block. Make sure that the antennas do not tilt and the threads are
not damaged.
3. Place the antenna block in a slightly elevated position above the Musiccenter.
111 Musiccenter
15
How Do I Connect the Device?
Connecting the power cord
Danger
Improper network cables or sockets
Network cables without a protective earth contact or sockets without a functional
protective earth connection can result in a life-threatening electric shock.
►► Use only the supplied 3-wire power cord for power supply. The protective earth
contact must not be rendered ineffective.
►► Connect the device only to an outlet with a functioning protective conductor
connection.
Connecting the power cord:
33 The MAINS switch is set to OFF.
1. Plug in the supplied power cord and connect it to the power socket.
2. Switch the MAINS switch to ON.
ªªNow, the POWER LED on the front of the device (see “What Operating and
Display Elements Are There?” on page 17, point 8) will light up in green for
about 2 seconds. At this moment, the device measures and adjusts to the power
supply. After this process is completed successfully, the POWER LED goes out.
Note:
16
The device is disconnected from the power supply via the MAINS power switch. For this
reason, only switch MAINS to OFF when the device is in stand-by mode (POWER LED is
lit in orange) or if the POWER switch has been turned off (LED is not lit).
What Operating and Display Elements Are There?
What Operating and Display Elements Are There?
1
2
3
4
5
6
7
8
1 Rotary knob for selecting menu functions
• Turn to mark a menu item
• Press to select a menu item
2 Left bank of buttons for selecting functions
The respective button function is shown on the display.
3 CD drive
4 Infrared receiver
The IR receiver receives the remote control signals.
Do not place objects in front of the receiver.
5 Right bank of buttons for selecting functions
The respective button function is shown on the display.
6 Volume control
• Turn to change the volume
• Press to mute playback of the analog outputs
7 ON/OFF switch (POWER)
• OFF: The device is switched off. It cannot be switched on with the remote control. The LED is
not lit.
• STBY: The device is in stand-by mode and can be switched on using the remote control. The
LED lights up in orange.
• ON: Briefly pushing the switch upward switches on the device. The switch returns to the
center position. The LED lights up in red. Pushing the switch upward again returns the device
to standby mode.
• SERVER MODE: When the LED is lit in green, the Musiccenter is in server mode. For more
details, please see “How Do I Operate the Musiccenter as a Pure Data Server (Server Mode)?”
on page 31.
8 LED
• LED not lit: The device is switched off.
• LED lights up in orange: The device is in stand-by mode and can be switched on using the
remote control.
• LED lights up in red: the device is in operation.
• LED lights up in green: The device is in server mode. For more details, please see “How Do I
Operate the Musiccenter as a Pure Data Server (Server Mode)?” on page 31.
111 Musiccenter
17
What Functions Does the Remote Control Offer?
What Functions Does the Remote Control
Offer?
The remote control allows you to quickly access some frequently used functions, such
as device power on/off, volume control, as well as CD drive control. All additional
functions, however, are only available using the iPad.
The available functions:
POWER
Switch the device on or into standby mode.
STOP
Stop CD playback.
Start or pause CD playback.
Skip to the beginning of the track/previous/next CD track
18
MODE
Gradually turn on the screen backlight
DIM
Gradually dim or switch off the screen completely
VOLUME − / +
Lower/increase the volume
How Do I Switch the Device on?
How Do I Switch the Device on?
1. Move the POWER switch on the front side of
the device to the center position.
ªªThe LED lights up in orange and the device
is in stand-by mode.
2. Briefly push the POWER switch upward or
press the POWER button on the remote
control.
ªªThe LED lights up in red and the system
initiates. This process takes about one
minute.
The first time the system has been started, the
Setup Wizard opens and guides you through the
basic settings.
3. Press the Start button.
You can now choose whether to operate the
device with or without a network connection.
4. To operate the device without a network
connection: Disconnect the network cable and
press the Stand-alone button.
To operate the device with a network
connection: Press the Standard button.
5. Press the Next button.
Note:
You can change these settings at a later point in time.
Please see the section “How Do I Operate the Musiccenter as a Pure Data Server
(Server Mode)?” on page 31 and the iPad operating instructions for more information
on operation on a network.
To switch the device into stand-by mode:
►► Briefly push the POWER switch on the device upward or press the POWER button
on the remote control.
ªªAfter the system is shut down, the device switches to standby mode.
Switching the device off completely:
►► Press the POWER switch downward into the OFF position.
ªªAfter the system is shut down, the device switches off. It can no longer be
switched on with the remote control.
Note:
The device is disconnected from the power supply via the MAINS power switch on the
back side of the device. Only switch MAINS to OFF when the device is in stand-by
mode (STBY, LED is lit in orange) or if the POWER switch has been turned off (OFF, LED
is not lit).
111 Musiccenter
19
What Options Do I Have for Operating the Musiccenter?
What Options Do I Have for Operating the
Musiccenter?
The different options for operating the Musiccenter are described below.
Operating the Musiccenter using the buttons on the device
panel or the remote control
The easiest way to operate the Musiccenter is using the buttons on the device panel or
the remote control. You do not need a Wi-Fi connection to the Musiccenter or a
connection between the Musiccenter and your home network. However, only the basic
functions are available. Please see sections “What Operating and Display Elements Are
There?” on page 17 and “What Functions Does the Remote Control Offer?” on
page 18 for a more precise description of the buttons and functions.
Operating the Musiccenter via the iPad app
Using the Apple iPad and the BurmesterMC app, you can conveniently operate the
Musiccenter and use all its functions:
• Select the connected signal source.
• Start ripping a CD to the internal memory.
• Scroll through the covers of saved albums or display information on the albums and
artists.
• Create and play playlists.
• Listen to Internet radio or download high-resolution music from a provider (results in
use-dependent costs),
Note:
Operating the system using the iPad app requires a Wi-Fi connection between the iPad
and the Musiccenter. Please see chapter “How Do I Establish a Wi-Fi Connection?” on
page 22 for more information on how to establish a Wi-Fi connection.
Please see the separate document “Instructions for Operation via the iPad App” for
more information on installing and operating the iPad app.
Operating the Musiccenter via a web browser
You can also operate the Musiccenter without the app using a standard web browser
on any computer (tablet, PC, Mac). This is possible thanks to a graphic web interface
saved on the Musiccenter that can be started on the computer used. Operation offers
interested users advanced options for managing music and device settings.
Operation via a web browser requires the following:
• A computer (tablet, PC, Mac) with a web browser installed
• A LAN or Wi-Fi connection between the computer and the Musiccenter
Note:
20
Please see chapter “How do I connect the music center to my home network?” on
page 21 for more information on how to establish a LAN connection.
Please see the separate document “Instructions for Operation via a Web Browser” for
more information on how to operate the Musiccenter via a web browser.
How do I connect the music center to my home network?
How do I connect the music center to my home
network?
A network connection is required to network the Musiccenter with other devices and
for Internet access. With an Internet connection, you can use the following additional
functions:
• Calling up album information from the Internet during ripping.
• Selecting from a variety of radio stations on the Internet.
• Downloading music from providers such as HIGHRESAUDIO (subject to a charge).
• Receiving messages, e.g. on software updates.
• Performing a software update via the Internet.
Please see the operating instructions “Instructions for Operation via the iPad App” and
“Instructions for Operation via a Web Browser” for detailed information on these
functions.
Note:
You can also operate the Musiccenter without a network. For more information, see
chapter “How Do I Operate the Musiccenter Without a Network?” on page 21.
Establishing a connection to the network
NOTICE!
Upon delivery, the Musiccenter is set to network operation (= standard mode). In this
case, you do not have to do anything. However, if you operate the Musiccenter without
a network connection in stand-alone mode, you have to switch the network mode back
to standard mode before plugging in the network cable. Note the information in
section “How Do I Change the Network Mode?” on page 22 to this regard.
►► Connect the Musiccenter to your router using an Ethernet cable.
ªªGenerally, the Musiccenter is automatically assigned a network address (when
using DHCP).
Note:
If you have issues with the network connection, you can also contact your Burmester
dealer, who would be happy to help you during installation.
How Do I Operate the Musiccenter Without a
Network?
You can also operate the Musiccenter without a connection to your network and via
Wi-Fi using a computer (tablet, PC, Mac). In this case, however, you cannot connect the
Musiccenter to other network devices or take advantage of the benefits of an Internet
connection.
►► To operate the Musiccenter without network, the network mode has to be switched
from the factory-default standard mode to stand-alone mode. Please see chapter
“How Do I Change the Network Mode?” on page 22 for more information on
switching the network mode.
The music center itself then functions as an access point. To operate the system via a
computer (tablet, PC, Mac), you can now establish a direct Wi-Fi connection between
the Musiccenter and the computer (see the following section).
111 Musiccenter
21
How Do I Establish a Wi-Fi Connection?
How Do I Establish a Wi-Fi Connection?
To be able to operate the Musiccenter with a computer (tablet, PC, Mac), the two
devices have to be connected via Wi-Fi.
Here, there are two options:
• A direct Wi-Fi connection to the Musiccenter
With this option, the connection is established directly between the computer and
the Musiccenter. As you will generally be located near your Musiccenter, this is the
more usual connection method. It is also the only possible connection method when
the Musiccenter is not connected to a network (stand-alone mode).
• A connection with a Wi-Fi router
In this case, the Wi-Fi connection is established between your computer and the
router. This connection method is only possible when the Musiccenter is connected
to a network and can be useful, for example, if you do not have Wi-Fi reception
because you are too far away from the Musiccenter.
Establishing a Wi-Fi connection between the iPad and the Musiccenter:
►► Please see the separate document “Instructions for Operation via the iPad App,”
chapter “How Do I Connect the iPad to the Musiccenter?”, for a description on how
to connect the Musiccenter to an iPad via Wi-Fi.
Establishing a Wi-Fi connection between a different computer and the Musiccenter:
When using a different computer, the process depends on the operating system
installed. Please refer to the help information for your operating system for more
information.
►► For a direct Wi-Fi connection to the Musiccenter, use the following specifications:
— Name of the network (SSID): Musiccenter111
— Password: Burmester111
►► For a Wi-Fi connection via a router, use the following specifications:
— Name of the network (SSID): name of the router
— Password: Wi-Fi password for the router
How Do I Change the Network Mode?
In the network settings, you can determine whether the Musiccenter is operated on a
network (standard mode) or without a network (stand-alone mode). Upon delivery, the
Musiccenter is set to standard mode.
NOTICE!
In stand-alone mode, the Musiccenter itself functions as a DHCP server, meaning it
automatically assigns an IP address to the device connected via Wi-Fi. When connecting
the Musiccenter to a router (which is a DHCP server itself) using a network cable in this
mode, operating two DHCP servers could cause issues in your network. This is why the
operating mode has to be switched to standard mode before plugging in the network
cable.
NOTICE!
Changing the network mode reverts to factory settings. Any former network settings
are lost.
22
How Do I Change the Network Mode?
To change the network mode:
1. Press the Home button on the bottom right edge of the screen.
ªªThis button leads you back to the main menu.
2. Press the Settings button.
ªªThe Settings menu opens.
3. Press the Network Mode button.
ªªThe Network Mode menu opens.
4. Select the desired operating mode:
— Standard: Operation with network
— Stand-alone: Operation without network
5. Press the Execute button.
ªªThe system reverts to factory settings.
The factory settings for operation on a network
are:
• Host name/computer name: Musiccenter111
• SSID: Musiccenter111
• Wi-Fi password: Burmester111
(Note capitalization).
Note:
If you have selected Standard but the device is not connected to the network, a
corresponding message appears on the display. In this case, issues in operation via the
iPad may result. For this reason, use the Stand-alone setting if the device is not
connected to the network.
111 Musiccenter
23
How Do I Play a CD?
How Do I Play a CD?
You do not have to select the CD Player operating mode before playing a CD.
1. Insert a CD directly into the CD drive under
the display.
ªªAfter you have inserted the CD up to the
noticeable resistance, it is automatically
drawn in.
Note:
If you select the operating mode CD Player and
no CD is inserted, a corresponding message
appears on the display.
ªªThe CD is read and played back
immediately. The screen shows information
on the track playing.
Note:
Only audio CDs can be played.
2. Use the left bank of buttons on the screen or the corresponding buttons on the
remote control to operate the CD player.
On the
device
On the
remote
Function
PAUSE: Pauses playback at the current position. (Only shown
on the screen during playback.)
PLAY: Begins playback.
(Only shown on the screen during STOP or PAUSE.)
FORWARD: Playback skips to the next title.
BACKWARD: Playback skips to the beginning of the track
playing. Pressing twice skips to the previous track.
STOP: Stops playback and returns to track 1. (Only shown on
the screen during playback.)
No
function
24
EJECT: Ejects the CD.
(Only shown on the screen during STOP.)
How Do I Play Content from a USB Stick?
How Do I Play Content from a USB Stick?
To be able to play music from a USB stick, the music has to have been saved on the
stick first. It does not matter how the contents are transferred (e.g. from a computer or
via download from the Musiccenter memory), how the titles are organized (all in one
folder or in subfolders), or in which compatible format they are available (e.g. MP3,
AAC, FLAC).
Playing back contents from a USB stick:
1. Insert the USB stick into one of the four USB slots on the back side of the
Musiccenter.
ªªPlayback starts automatically.
2. Use the left bank of buttons on the screen or the corresponding buttons on the
remote control to control playback.
On the
device
On the
remote
Function
PAUSE: Pauses playback at the current position. (Only shown
on the screen during playback.)
PLAY: Begins playback.
(Only shown on the screen during STOP or PAUSE.)
FORWARD: Playback skips to the next title.
BACKWARD: Playback skips to the beginning of the track
playing. Pressing twice skips to the previous track.
STOP: Stops playback and returns to track 1. (Only shown on
the screen during playback.)
111 Musiccenter
25
How Can I Copy (rip) a CD to the Internal Memory?
How Can I Copy (rip) a CD to the Internal
Memory?
Copying music or videos from a data source to a computer’s hard disk is referred to as
ripping. After the CD is analyzed, the data is imported, supplemented with information
on the album and artist, and saved on the device in the audio format flac in a database.
Ripping a CD requires you to operate the Musiccenter via the iPad app or web
interface. Both variants are virtually identical and are therefore described together
below. Differences are indicated in the text. The screenshots show the iPad variant.
Please see the separate documents “Instructions for Operation via the iPad App” and
“Instructions for Operation via a Web Browser” for detailed information on operation
using the iPad app and web browser.
Note:
Creating a copy for private purposes is permitted in most countries. However, creating
copies for commercial purposes, as well as bypassing valid copy protection measures,
is not permitted. When copying audio content, please observe the national copyright
regulations in your country.
Ripping a CD:
►► Start the iPad app or call up the Musiccenter web interface.
1. Insert a CD into the CD drive.
ªªAfter you have inserted the CD up to
the noticeable resistance, it is
automatically drawn in. The CD is read
and then played back immediately.
2. iPad app: In the main menu, tap Audio
CD.
Web interface: Click the arrow next to the
drop-down menu and select Audio CD.
ªªThe tracks are displayed (but not the
album and track names).
icon.
3. Select the
ªªAnalysis begins.
ªªIf the proper album information is
found, a prompt asks you to confirm
the associated album. In some
circumstances, multiple albums are
offered for selection.
Note:
26
Album information can only be downloaded
if an Internet connection exists. If there is no
connection, the album information (without
cover) is obtained from the local database.
How Can I Copy (rip) a CD to the Internal Memory?
4. After selecting an album, the album and
all tracks are displayed. You now have the
following editing options:
a.Albumcover: Click the i icon to the
right below the cover and make a
selection in the selection window. Via
Extended Search, you can search for
additional hits on the Internet,
including changed artists or albums.
b.Album, Artist, Year: Click the respective input field and change the information.
Activate the function Match to all Tracks if you want to allocate the artist’s name to
all tracks.
c. Genre: Click the field and select a genre from the list.
d.Orchestra Information: Tap ...more orchestra tags (web interface: ...orchestra
tags) and fill out fields as necessary.
e.Tracks: You can edit the title and artist for each track separately (iPad app: if you
have activated Match to all Tracks, you cannot change artist information). Tap one
of the fields to change the information manually.
f. Excluding tracks from ripping: To exclude a track from ripping, tap the switch
(web interface: click the checkmark).
5. Click Start Ripping.
ªªA window opens where you can select
the rip quality.
FAST: Use FAST for CDs that have no or
only a few scratches. The CD is imported
without any quality improvement
measures.
ACCURATE: Use ACCURATE for heavily
scratched CDs.
The imported data is checked based on
defined criteria and any error sources are
already eliminated during the ripping
process. Ripping with ACCURATE takes nearly twice as long as ripping with FAST.
The approximate times for each type are indicated respectively.
6. Click the desired variant.
ªªRipping starts. The progress for each track is displayed via a bar. If ACCURATE
was selected, after ripping, rating stars denote the quality of the original data:
5 stars indicate maximum quality.
To cancel ripping,
►► Click Cancel.
ªªA selection window opens:
Stop: Tracks that have already been ripped remain.
Abort: Tracks that have already been ripped are deleted.
Continue: Ripping continues.
After finalization, the process is completed and the album is available on the device
permanently. You can then play the album via the player.
111 Musiccenter
27
How Do I Play an Analog or Digital Signal Source on the Device?
How Do I Play an Analog or Digital Signal
Source on the Device?
1. Press the Home button on the bottom right edge of the screen.
ªªThis button leads you back to the main
menu.
2. Turn the left rotary knob to select
Analog Inputs or Digital Inputs and press the
rotary knob to reach the selection menu.
3. Turn the left rotary knob to select the desired
input and press the rotary knob.
The input is now selected. In addition, you can
change the phase using the button on the right
edge of the screen (above the home button).
4. Select the setting that sounds better by
switching back and forth between the two
settings.
When selecting a digital source, you can also set
the sampling rate. Press the button at the right
edge of the screen to select 96 kHz or 192 kHz.
With digital sources, volume control is only
possible for input signals.
Note:
28
You have the option to name the analog and digital inputs as you like. For more
information, see the operating instructions for your iPad.
How do I Play Content from the Hard Disk (Player)?
How do I Play Content from the Hard Disk
(Player)?
You can also play content from the hard disk without an iPad. However, the options are
limited. Only the most recently played playlist can be displayed. Within this playlist,
operation is the same as that for a CD: start, pause, next track, and previous track.
To play content from the hard disk:
1. Press the Home button on the bottom right edge of the screen.
ªªThis button leads you back to the main menu.
2. Select the Player operating mode by turning
and pressing the left rotary knob.
ªªThe Player menu opens and the first track of
the most recently played playlist is
displayed.
3. Start playback by pressing the corresponding
button in the left bank of buttons on the
device or on the remote control.
111 Musiccenter
29
How Do I Play Content from the Internet (Internet Radio)?
How Do I Play Content from the Internet
(Internet Radio)?
In the Internet Radio operating mode, you can listen to radio stations made available
online. The following requirements must be met first:
• The Musiccenter is connected to the Internet via a network.
• At least one radio station has been added to the playlist.
Stations can be added to the playlist using the iPad or the web interface. Please see the
separate documents “Instructions for Operation via the iPad App” and “Instructions for
Operation via a Web Browser” for further information.
To listen to a radio station:
1. Press the Home button on the bottom right edge of the screen.
ªªThis button leads you back to the main menu.
2. Select the Internet Radio operating mode by
turning and pressing the left rotary knob.
ªªThe Internet Radio opens and the most
recently played radio station plays.
3. To listen to a different radio station: Press the
Change Station button.
ªªThe menu opens and displays the stations
saved in the playlist.
4. Select a station by turning and pressing the
left rotary knob.
ªªThe selected station plays.
Note:
30
The usability of third-party services (Internet radio, music streaming services) with the
Musiccenter is subject to any terms of use of third-party suppliers, as well as the
technical requirements of the user and third parties (Internet access, service availability)
on which Burmester Audiosysteme GmbH has no influence.
How Do I Operate the Musiccenter as a Pure Data Server (Server Mode)?
How Do I Operate the Musiccenter as a Pure
Data Server (Server Mode)?
The Musiccenter can be operated as a pure data server. The preamplifier area is
deactivated, while access to the hard disk drives and streaming of data, for example for
multiroom playback, is still possible. This operating mode uses much less electricity
than operation with a preamplifier.
To switch to server mode:
1. Press the Home button on the bottom right edge of the screen.
ªªThis button leads you back to the main menu.
2. Press the Settings button.
ªªThe Settings menu opens.
3. Press the Server Mode button.
ªªThe Server Mode menu opens.
4. Press the Execute button.
ªªThe preamplifier and screen are switched
off.
ªªThe POWER LED on the front of the device
lights up in green.
To end server mode:
►► Briefly push the POWER switch on the device upward
or
►► press the POWER button on the remote control.
You can also switch off or end server mode using the iPad or web interface, of course.
Please see the separate documents “Instructions for Operation via the iPad App” and
“Instructions for Operation via a Web Browser” for further information.
111 Musiccenter
31
How Do I Query the Serial Number and Device Versions?
How Do I Query the Serial Number and Device
Versions?
Certain information on the Musiccenter can be queried in the Info menu.
Note:
For more information on the system, please see the menu System > Information via
web server access.
To query device information:
1. Press the Home button on the bottom right
edge of the screen.
ªªThis button leads you back to the main
menu.
2. Press the Settings button.
ªªThe Settings menu opens.
3. Press the Info button.
ªªThe Info view opens.
Turn the left rotary knob to scroll through the
information:
• System information: Operating system, kernel
version, system temperature
• HDD (information on the SSD, RAID hard
disks): Status, model, temperature, total and
free memory
• RAM (RAM status): Total and free memory,
buffer and cache size
• Database: Status, current uptime, number of
artists, albums, tracks, and playlists
• Network: IP address, MAC address, network
mask
• WLAN (Wi-Fi): Status, channel, SSID (name)
32
How Do I Perform a Software Update?
How Do I Perform a Software Update?
Software updates allow you access new or improved functions with your Musiccenter.
When a software update is available, it is shown on the device’s display (as well as on
the iPad and web interface). The update can be downloaded via the Internet and
installed on the Musiccenter.
►► Alternatively, your dealer would be happy to perform the update for you. In this
case, simply contact your dealer.
Note:
A software update can also be performed via the web interface (see “Instructions for
Operation via a Web Browser”).
Performing a software update via the Internet
Notice!
The Musiccenter requires approximately 10 minutes for an update. During an update,
the Musiccenter must not be disconnected from the power supply.
Note:
You can end the update process at any time with the Cancel button.
33 The display shows when a software update is available.
1. Press the Home button on the bottom right edge of the screen.
ªªThis button leads you back to the main menu.
2. Press the Settings button, then the Update button.
ªªThe Download menu opens.
►► Press the Download button.
ªªThe download begins: The bar shows the
progress, while Estimated time indicates
the remaining time.
Note:
During the download, you can use the
Musiccenter with all its functions as usual.
33 The update has been downloaded completely.
►► Press the Install Update button.
ªªThe update is now being installed.
Note:
You cannot use the Musiccenter during
installation.
After the update has been installed successfully,
the Musiccenter restarts.
111 Musiccenter
33
How Do I Perform a Software Update?
Performing a software update using a USB stick
1. Insert the USB stick with the update software into one of the four USB slots on the
back side of the device.
2. Press the Home button on the bottom right edge of the screen.
ªªThis button leads you back to the main menu.
3. Press the Settings button.
ªªThe Settings menu opens.
4. Press the Update button.
ªªThe Update menu opens.
Note:
If no USB stick is inserted, an alert message
appears. In this case, insert the USB stick.
5. Press the Install Update button.
ªªThe update process begins. The bar
indicates that the process is in progress.
6. Remove the USB stick once the update has
been completed.
Note:
34
After an update has been installed, the
Musiccenter restarts.
Maintenance, Repair, and Care
Maintenance, Repair, and Care
Maintenance
The device itself does not have to be maintained.
UPS battery
The Musiccenter is equipped with a battery to safely shut down the system in the event
of a power failure. The service life of this UPS battery is limited. Depending on the
ambient temperature and the operating time of the Musiccenter, the UPS battery must
be replaced after one to a maximum of two years.
►► Please contact your specialist dealer, who will work with you to arrange the optimal
solution for testing and exchanging the battery.
Internal hard disks
The RAID hard disks in the Musiccenter used for saving ripped audio files, like all hard
disks, have a limited service life. Depending on the frequency of use, the hard disks
have to be replaced after a certain period of time.
Note:
Only hard disks prepared specifically by Burmester can be used.
►► Please contact your specialist dealer, who will work with you to arrange the optimal
solution for exchanging the hard disks.
Repairs
Repairs may only be performed by authorized professionals.
►► In the event of a repair, please contact your specialist dealer.
Care
NOTICE
Liquids and abrasive cleaners
Liquids penetrating the housing can destroy the device. Rough cleaning supplies
(cleaning agents, sponges, brushes, etc.) can also damage the device’s surface.
►► Do not use liquids or wet cloths to clean the device.
►► Do not use any abrasive cleaners or sponges, brushes, etc. with a hard or rough
surface.
►► Only rub the device with a slightly damp cloth. For the screen, you can use a glass
cleaner.
111 Musiccenter
35
Disposal
Disposal
Legislation (German electric and electronic device law – ElektroG) prohibits the
disposal of electric and electronic devices by means of normal household waste. The
111 Musiccenter falls into this category.
To dispose of the device:
Bring the device to a communal collection point or a voluntary take-back system.
Contact your communal waste management for addresses.
Warranty
We provide a warranty of 3 years for this device. This requires proper connection
without overload, as well as mechanical integrity and submission of the warranty
certificate and warranty extension.
The warranty is void if the device has been tampered with by unauthorized persons or
parts of the housing, connections, or terminals have been disassembled.
36
Appendix
Appendix
The back side of the device at a glance
1
2
3
4
10
5
9
6
8
1 Power supply
IEC socket C14 acc. to IEC 60320-1
Power switch
2 BURLINK
RS-232
USB 2.0, type B
3 Remote control
DC IN: 5.2/2.2 mm coaxial power connectors
DC OUT: 5.2/2.2 mm coaxial power connectors
Infrared
IR IN: Mini jack
4 Analog inputs
3x stereo XLR
5 Analog outputs
BALANCED: 1x stereo XLR
UNBAL: 1x stereo, cinch (RCA)
TAPE: 1x stereo, cinch (RCA), fixed (TAPE)
PHONES: 1x jack socket, 6.35 mm, stereo
6 Digital outputs
RCA: 1x electrical, cinch (RCA)
TOTX: 1x optical, TOSLINK
7 Digital inputs
INPUT 4, 6, 8: 3x electrical, cinch (RCA)
INPUT 5, 7, 9: 3x optical, TOSLINK
8 Ethernet
USB
1x RJ-45
4x USB 2.0, type B
9 Wi-Fi antennas
2x coax connectors
10 Service plate
111 Musiccenter
7
Hard disks
Battery
37
Appendix
Remote control of the device via BURLINK
All control systems (such as PC, CRESTRON, AMX, etc.) can be connected to the
BURLINK connector. They enable convenient control of your entire system, e.g. via a
touch panel which you can program individually. The LEDs located next to these
connectors labeled T and R (for transmit and receive) serve to monitor data exchange.
Connection
The BURLINK interface can be operated using the 9-pin D-SUB socket (RS-232): RS-232
configuration: 9600 baud, 8 bit, parity: none, 1 stop bit, no hardware handshake.
Commands
The commands for operating the Musiccenter are listed below. They must be sent in
upper-case letters and each command must be concluded with a carriage return (\r).
38
Command
Meaning
POWON\r
Switches the device on
POWOFF\r
Switches the device into stand-by mode
INP+\r
Switches through the inputs successively
INP-\r
Switches through the inputs successively
INP1\r
Activates INPUT 1
INP2\r
Activates INPUT 2
INP3\r
Activates INPUT 3
INP4\r
Activates INPUT 4
INP5\r
Activates INPUT 5
INP6\r
Activates INPUT 6
INP7\r
Activates INPUT 7
INP8\r
Activates INPUT 8
INP9\r
Activates INPUT 9
INP10\r
Activates the (internal) 111 player
VOLUP\r
Increases the volume by one level
VOLDN\r
Reduces the volume by one level
VOLxx\r
Sets the playback volume to the value xx (from 00 to 63)
PHASE\r
Switches the active input between 0° and 180° phase
PHASE180\r
Switches the active input to 180° phase
PHASE0\r
Switches the active input to 0° phase
AUDIO\r
Switches the A/D converter between
96 kHz and 192 kHz sampling rate
AUDIO96\r
Switches the A/D converter module to 96 kHz sampling rate
AUDIO192\r
Switches the A/D converter module to 192 kHz sampling rate
DIM\r
Increases the brightness by one level for each command
DIM0\r
Switches to the maximum brightness
Appendix
Command
Meaning
DIM1\r
Switches to medium brightness
DIM2\r
Switches to the lowest brightness
DIM3\r
Turns off the display
TYPE\r
Indicates the device type
VERSION\r
Indicates the software version
SNR\r
Indicates the series number of the device
111 Musiccenter
39
Glossary
Glossary
AAC/.aac
Advanced Audio Coding
AAC is a lossy process for compressing audio data.
AIFF/.aiff
Audio Interchange File Format
AIFF is a file format for saving LPCM audio data. Compared with other audio data
formats, such as MP3, LPCM (linear pulse-code modulation) does not feature data
compression.
ALAC/.alac
Apple Lossless Audio Codec
ALAC is a free process developed by Apple for lossless audio data compression. The
compressed audio data is saved in MP4 files with the file ending .m4a or .mp4.
Cinch
Cinch is the designation for a connector for unbalanced transmission of electrical
signals (e.g. audio signals) used primarily in Germany.
The international designation is RCA.
CPU
Central processing unit
The CPU is a computer’s central processing unit.
DLNA
Digital Living Network Alliance
DLNA is a standard developed in collaboration between over 250 companies to be
able to transfer audio and video data across manufacturers and devices.
FLAC/.flac
Free Lossless Audio Codec
FLAC is a free process for lossless audio data compression. Unlike lossy processes,
such as MP3, no quality losses result.
LAN
Local area network
A LAN is a computer network that is limited to a range of 500 meters (without
additional measures). It is generally used in home networks or small companies.
.m4a
The file ending .m4a designates MP4 files containing only audio (see also MP4 and
ALAC).
MP3/.mp3
mp3 is a patented process for lossy compression of audio data. Saving only signal
portions that are audible to humans enables a considerable reduction of the quantity
of data without decreasing the audio quality (at least as can be heard).
MP4/.mp4
mp4 is a video container format for MPEG-4 contents based on the Apple QuickTime
file format. Multimedia contents can be saved in MP4 files in the form of multiple
audio and video tracks, as well as subtitles, 2D and 3D graphics. These contents can
be played locally with suitable software or streamed via a network.
Ogg/ogg
Ogg is a freely available file format for multimedia files that can contain audio, video,
and text data simultaneously. The most well known program for encrypting and
decrypting (Codec) is Vorbis, which is often simplified to (or incorrectly referred to) as
Ogg.
RAID
Redundant array of independent disks
RAID can be used to organize multiple (physical) hard disks of one computer as one
single (logical) hard drive. This enables a higher degree of data security in case of
failure of individual hard disks.
RCA
Radio Corporation of America
RCA is the international designation for connectors for unbalanced transmission of
electrical signals (e.g. audio signals).
The term Cinch is also used, primarily in Germany.
RJ-45
RJ-45 is a connector in the networking area standardized by the American Federal
Communications Commission (FCC).
RS-232
RS-232 is a standard for a serial interface commonly found in computers.
40
Server
A server is a computer program for accessing a central resource or service in a
network. A computer on which one or more servers run is also designated a server.
SSID
Service set identifier
The SSID is a freely selectable name within a Wi-Fi connection
TOSLINK
TOSLINK is a standardized connection system for optical signal transmission via fiberoptic cables originally developed by Toshiba (TOShiba-LINK). It is common in
consumer goods for digital transmission of audio signals (e.g. CD and DVD players,
audio amplifiers, A/D converters).
UPnP
Universal Plug and Play
UPnP was originally launched by Microsoft and allows for cross-manufacturer control
of devices (such as audio devices, routers, printers, or home controls) via an IP-based
network (IP = Internet Protocol). Today, the UPnP Forum specifies the UPnP standard
and certifies devices complying with the standard.
WAV/.wav
WAVE
The WAVE file format is a container format for digital storage of audio data that is
based on the Resource Interchange File Format (RIFF) defined for Windows by
Microsoft.
WLAN
Wireless local area network
WLAN is the term for a local radio network. It is frequently referred to as Wi-Fi.
XLR
The XLR (also referred to as Cannon connector) is an industrial standard for electrical
connectors. The three-pin XLR plug establishes the standard connection for analog
audio lines in professional audio technology as well as in high-quality hi-fi/high-end
components, in particular with balanced signal transmission.
111 Musiccenter
41
Technical Data
Connectors
Analog inputs
3x stereo XLR
Analog outputs
1x stereo XLR
1x stereo cinch (RCA)
1x stereo cinch (RCA), fixed (TAPE)
1x jack socket, 6.35 mm, stereo (PHONES)
Digital inputs
3x electrical
3x optical (TOSLINK)
Digital outputs
1x electrical
1x optical (TOSLINK)
BURLINK remote control
1x RS-232
1x USB 2.0, type B
REMOTE remote control
2x coaxial power connectors, 5.5/2.5 mm (DC OUT,
DC IN)
Infrared
1x mini jack socket
Ethernet
1x RJ-45
USB
4x USB 2.0, type A
Power supply
IEC socket C14 acc. to IEC 60320-1,
with mains switch
Wi-Fi antennas
2x coax connectors
Components
CD drive
CD-DA
Hard disk
2x 3 terabytes (RAID)
Display
7" LED, backlit, brightness adjustable in 3 levels,
resolution: 800 x 480 pixels
Uninterruptible power
supply
Lead-acid battery, 12 V, 0.8 Ah for controlled
shutdown, bridgeable time: approx. 2 minutes
General data
42
Dimensions (W x H x D)
455 mm x 215 mm x 405 mm
The lengths of the plugs to be connected are not
taken into consideration in the dimensions.
Weight
Approx. 28 kg
Power supply
100 V — 120 V, 50 Hz/60 Hz
200 V — 240 V, 50 Hz/60 Hz
Fuses
F1, F4, F5: T 1A E
F2, F3: T 500mA E
F6: T 50mA E
Power consumption
ON: max. 110 W
Server mode: max. 55 W
STBY: <1 W
OFF: <1 W
BURMESTER AUDIOSYSTEME GMBH
Wilhelm-Kabus-Strasse 47
D-10829 Berlin
Tel. +49 (0) 30 787968 – 0
Fax +49 (0) 30 787968 – 68
E-mail: [email protected]
www.burmester.de
Version 1.5/1502