1
Carrington™
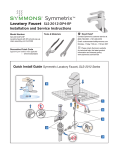
Widespread Lavatory Faucet SLW-4412
Installation and Service Instructions
Caution: Be sure to turn off hot and cold water supplies
before installing or servicing faucet.
Installation Procedure
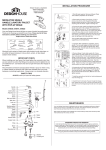
1.
e ) Insert pop-up plug and pivot rod into body and
tighten retaining nut until the ball is seated on the
ball washer.
Push valve bodies through holes in sink from
underneath. Make sure mounting nuts (RT-103N) are
on underside of sink. Valve marked Hot is on the left
and Cold is on the right. Put gasket (LN-129) over valve
body. Thread escutcheon (LN-128) onto valve bodies.
The top of the valve spindle should measure 1-7/8” from
mounting surface (See rough in drawing).
2.
Thread collar (LN-112) on to valve body until it reaches
the escutcheon (LN-128). Tighten mounting nuts from
underneath sink.
3.
CRP handle installation: Place lever part of handle on
valve spindle and thread screw (LN-121A) into valve.
4.
Install spout (LN-254A) and centerbody (LN-188)
through center in sink hole from above sink. Secure
spout to sink with washer (LN-138A) and nut (SPF-26).
Washer (LN-138A) flat should face back of the sink.
Thread tee (LN-189) to bottom of centerbody (LN-188).
5.
Thread flex hoses (LN-157) into tee (LN-189) using pipe
dope or teflon tape on the pipe threads. Thread other
end on to valve bodies.
6.
Connect hot supply to left tube and cold supply to right
tube using appropriate connectors.
7.
Pop-up drain installation:
a ) Remove pop-up plug, tail piece and flange from
the drain body. Make sure that locknut is threaded
all the way down onto the body with flat friction
washer in middle and beveled washer on top.
b ) Apply plumbers putty or sealant to bottom of
flange.
c ) Install drain body through drain opening in
lavatory and screw flange onto the drain body
making sure that the threads are completely
engaged for proper sealing and strength of the
connection. Apply joint compound to all threaded
parts to insure
proper seal.
d ) Tighten locknut to compress the beveled flange
evenly across the bottom of the drain opening taking
care not to over tighten the locknut, causing damage
to the lavatory. Apply teflon tape (clockwise) on tail
piece and thread into outlet of body.
Note: The pop-up plug can be installed either in the
removable or non-removable position, depending
on the location of the hole located in the guide at
the bottom of the plug.
f ) Slide the pivot rod through one side of the spring
clip, then the appropriate adjustment hole and then
other side of the spring clip.
g ) Insert lift rod through faucet housing and the top of
the lift strap and secure it in place by tightening the
screw.
Note: To insure proper operation of lift rod and
pop-up, some adjustment of the linkage may be
required.
There are two possible adjustment points:
1) lift strap to lift rod
2) lift strap to pivot rod.
8.
It is very important to thoroughly flush the supply lines
to prevent foreign matter, i.e. copper chips, sand, stones,
etc. from damaging the sealing surfaces of cartridge.
Remove aerator and open hot and cold to full open then
open both supplies. Let water run through hot and cold
long enough to flush supply lines thoroughly. Shut off
faucet and replace aerator. Check for leaks.
Replacing cartridge (KN-113 or KN-114):
1.
Remove plug button (LN-243H or LN-243C), loosen
Philip head screw (LN-121A) and remove handle (LN177).
2.
Remove collar (LN-112) by turning counter clockwise.
Caution: Do not use wrench as this may damage the
surface finish.
3.
Place wrench on cartridge hex nut (KN-113, KN-114).
Turn wrench counter clockwise until cartridge is
removed.
4.
Install new cartridge. Turn cartridge with wrench until
cartridge does not turn easily then turn 1/4 to 1/2 turn
further. Reassemble handle in reverse fashion.
Dimensions Carrington Widespread Lavatory Faucet, SLW-4412
1-9/16" 40mm
4"
102mm min
2-1/4"
57mm
7-1/8"
181mm
1-1/8"
29mm
1"
25mm
13/16"
21mm
7-1/4"
184mm
4-5/32"
105mm
2-5/16"
59mm
1-3/8" 35mm max deck
1-7/8"
47mm
5-13/16"
148mm
Note: Dimensions subject
to change without notice.
Flexible
connectors
Parts Assembly Carrington Widespread Lavatory Faucet, SLW-4412
KN-113
Valve cartridge, cold
LN-243H (1)
KN-114
Valve cartridge, hot
L-26
O-ring (2) (plug button)
L-42
Nut (2)
LN-112*
Collar (2)
LN-121A
Handle screw, M4x10, SS, panhead (2)
LN-128*
Escutcheon, widespread (2)
Handle kit
LN-129
Gasket, Escutcheon (2)
(2 handles)
LN-138
Washer
LN-142
Valve body (2)
hot & cold
LN-150
O-ring (2)
KN-114
LN-157
Flex hose (2)
LN-177*
Cross handle (2)
LN-254A
LN-185
Gasket, spout
LN-188
Centerbody
Aerator insert
LN-189
Centerbody tee
2.2 gpm
LN-243C
Plug button, porcelain (cold)
LN-243H
Plug button, porcelain (hot)
LN-188
LN-254A*
Spout
P-108CL12*
Lift rod (for pop-up drain assembly)
(red label on hot valve)
RT-103N
Nut flanged (2)
SPF-26
Nut, Hex (centerbody)
LN-142
WSF-CRP-KIT
Handle kit (qty 2 handles)
L-42
*For Decorative Finish Faucets add suffix to parts marked with
LN-189
an asterisk as follows:
Suffix -STN Radiance® satin finish
LN-157
Aerator
(flow regulator)
Part Number
Standard Aerator
2.2 gpm (8.3L/min)
1.5 gpm (5.7L/min)
1.0 gpm (3.8L/min
---LN-741*
----
P-26*
Grid drain
(optional)
LN-243C
L-26
LN-121A
LN-177
LN-112
LN-128
LN-129
(1)
(2)
(2)
(2)
(2)
(2)
(2)
P108CL12
KN-113
RT-103N
LN-185
LN-138
SPF-26
LN-150
LN-142
P-25LR*
Pop-up drain assembly
(without lift rod)
4/30/09
Symmons Industries, Inc. ■ 31 Brooks Drive ■ Braintree, MA 02184
(800) 796-6667, (781) 848-2250 ■ Fax (800) 961-9621, (781) 664-1300
Website: www.symmons.com ■ Email: c u s t o m e rservi ce@ symmons.com
©2007, 2008 Symmons Industries, Inc. Printed in U.S.A.
■
ZV- 577
■
043009